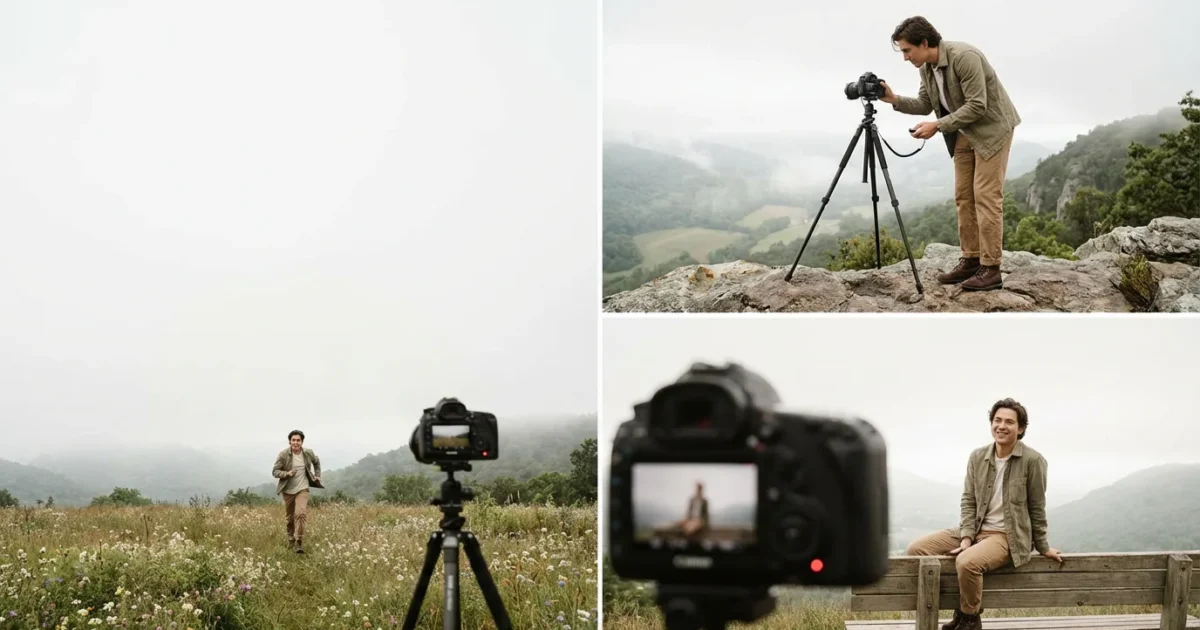
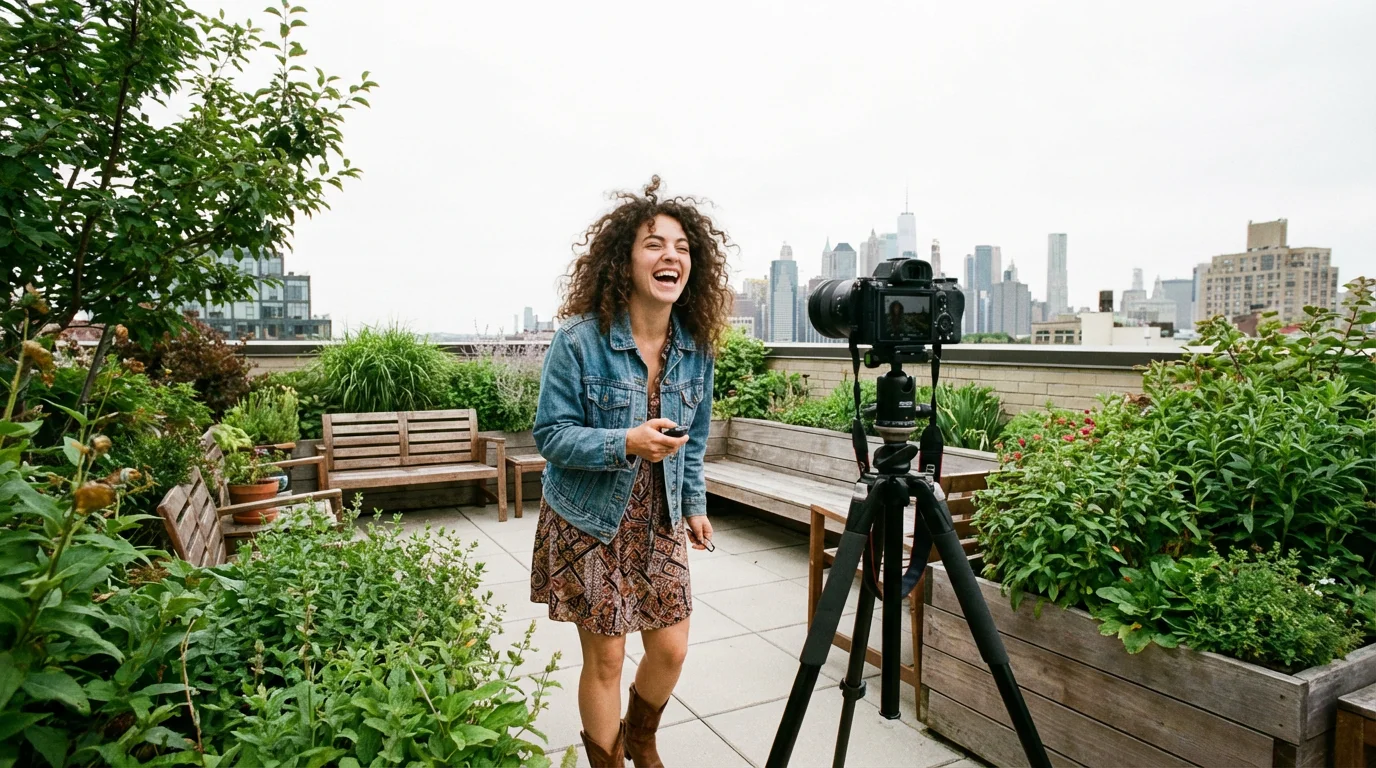
Capturing your own image can feel daunting, whether you aim for a casual snapshot or a carefully composed artistic statement. Many people struggle with awkward arm extensions, blurry photos, or simply not being in the frame. The solution often lies within a simple, underutilized feature of your camera: the timer. Mastering your camera’s timer opens up a world of creative possibilities, allowing you to step away from the lens, compose yourself, and capture stunning self-portraits with ease and precision. This guide provides actionable steps to elevate your self-portrait game, moving beyond quick selfies to create lasting photographic memories.

Why Use a Camera Timer for Better Self-Portraits?
You want to be present in your family’s photo albums and capture your unique perspective, but holding the camera often limits your creativity and freedom. A camera timer eliminates the need to awkwardly hold your camera at arm’s length, which often results in unflattering angles, distorted features, and poor composition. Utilizing the camera timer allows you to step into the scene, relax, and focus on your pose and expression, transforming your self portraits from hurried snapshots into thoughtfully crafted images. This method provides the control necessary for high-quality photographs, ensuring you achieve sharp focus and ideal framing every time.
These timer techniques are also vital when learning how to take great group photos so you can finally be included in the family shot.
Consider the benefits: you gain complete control over your framing and composition. Rather than relying on someone else or struggling to fit everything into a small frame, you can set your camera on a stable surface, or ideally, a best tripod for self portrait photography, and meticulously arrange your scene. This precision is invaluable for capturing flattering angles and ensuring every element in your photograph serves a purpose. Furthermore, the timer empowers you to capture more natural and authentic expressions. You have time to adjust your posture, compose your thoughts, and genuinely react to the moment without the pressure of immediately pressing the shutter button. This pause often results in more genuine smiles, thoughtful gazes, and overall more compelling images that truly reflect your personality.
Using your camera’s timer fundamentally shifts your approach to self-photography. It transforms a spontaneous click into a deliberate act of creation, giving you the space to envision and execute your desired outcome with greater control and artistic intent.
Essential Gear for Timer Self-Portraits
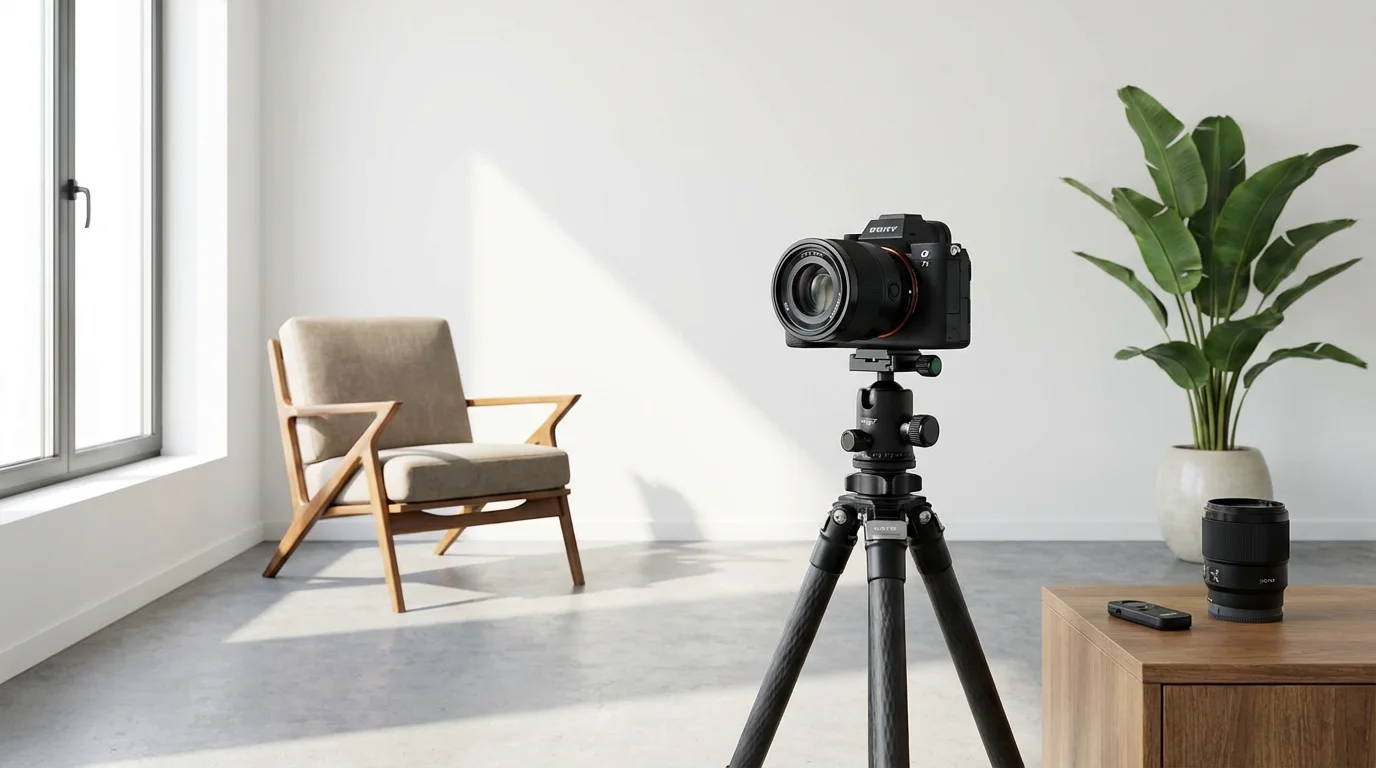
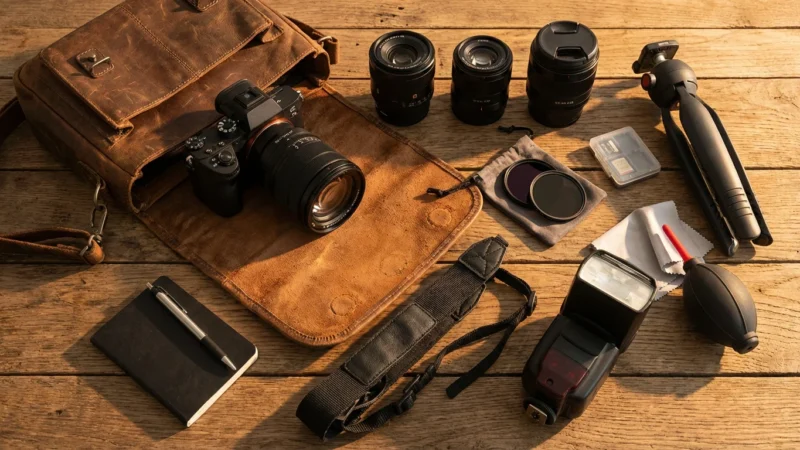
Successful self portraits using your camera timer depend heavily on having the right equipment. You do not need professional studio gear, but a few key items significantly enhance your results and ease the process. Investing in these tools ensures stability, flexibility, and overall better photographic outcomes.
If you are looking to upgrade your setup, exploring the best cameras for beginners can help you find a device with user-friendly timer features.
While a tripod is vital, there are several other essential camera accessories that can streamline your self-portrait workflow.
- A Sturdy Tripod: This is arguably the most critical piece of equipment. A good tripod keeps your camera perfectly still, preventing blur and allowing you to maintain consistent framing between shots. Look for a tripod that is stable enough to support your camera’s weight and extends to a comfortable height for your desired angles. Consider portability if you plan to shoot outdoors frequently. For serious self portrait photography, a robust tripod provides the foundation for sharp, well-composed images.
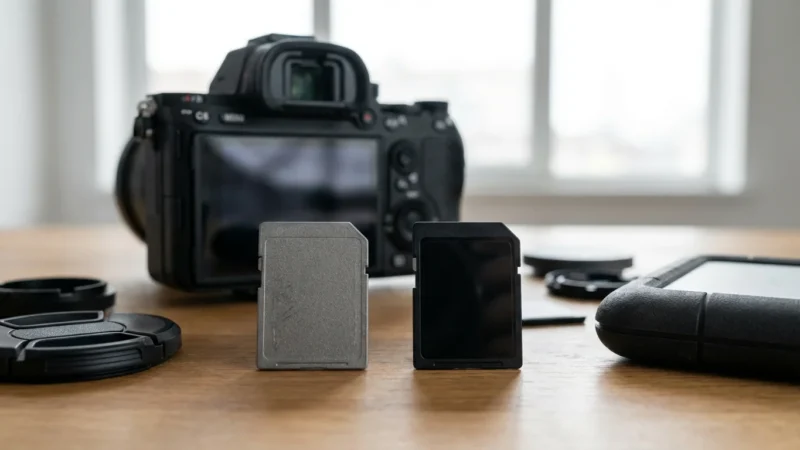
- Your Camera (DSLR, Mirrorless, or Smartphone): While this guide focuses on traditional cameras, modern smartphones also offer timer functions and can produce excellent results with the right setup. The principles discussed here apply broadly across devices. DSLRs and mirrorless cameras offer more control over settings like aperture, shutter speed, and ISO, which are crucial for advanced self-portraits.
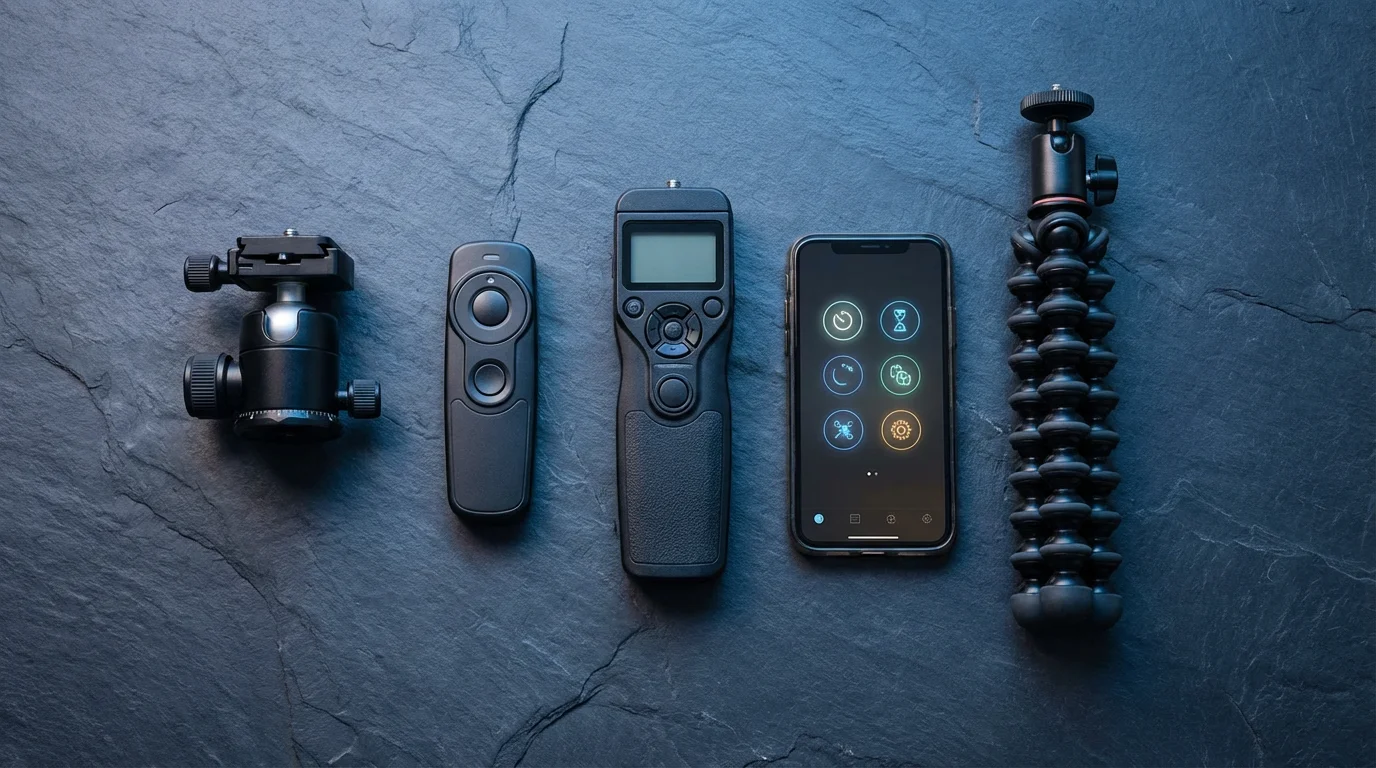
- Remote Shutter Release (Optional, but Recommended): While the timer is central to this guide, a remote shutter release (wired or wireless) offers even greater flexibility. It lets you trigger the camera without touching it, eliminating any chance of camera shake, and allows you to take multiple shots without returning to the camera each time. This is especially useful for dynamic poses or when you need many takes to get the perfect expression.
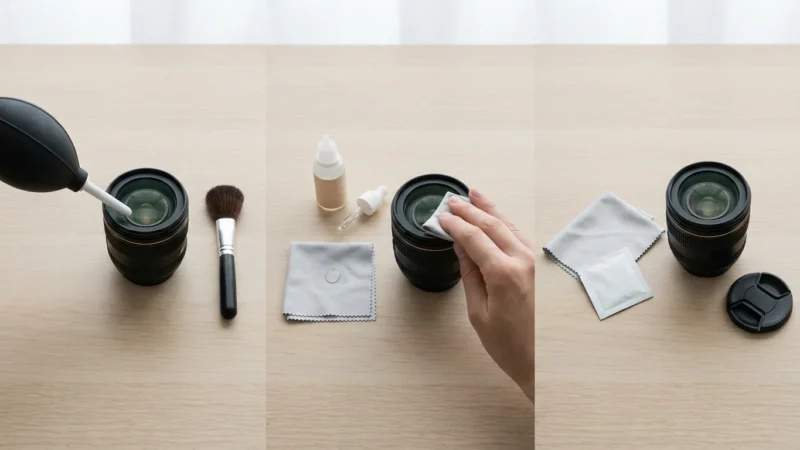
- Good Lighting: Natural light is often the easiest and most flattering. Position yourself near a window during the day, or shoot outdoors in open shade for soft, even illumination. If natural light is insufficient, consider a simple continuous light source or a speedlight with a diffuser. Proper lighting defines your features and adds dimension to your portrait.
- Props and Backgrounds (Optional): Think about what you want your photograph to convey. Simple props, like a book, a favorite mug, or even a piece of furniture, can add context and interest. A clean, uncluttered background ensures you remain the focal point.
Equipping yourself with these items prepares you to take full advantage of your camera’s timer for impressive tripod photos, giving you control and confidence.
Setting Your Camera’s Timer Function
Activating your camera’s timer is a straightforward process, though the exact steps vary slightly depending on your camera brand and model. Regardless of your equipment, the core function remains the same: a delay between pressing the shutter and the actual capture of the image. This delay is precisely what allows you to move into position and compose yourself for the perfect shot.
Before you begin your session, consider whether you should shoot in RAW vs JPEG to maximize your flexibility during the editing process.
Step-by-Step Guide to Activating Your Timer:
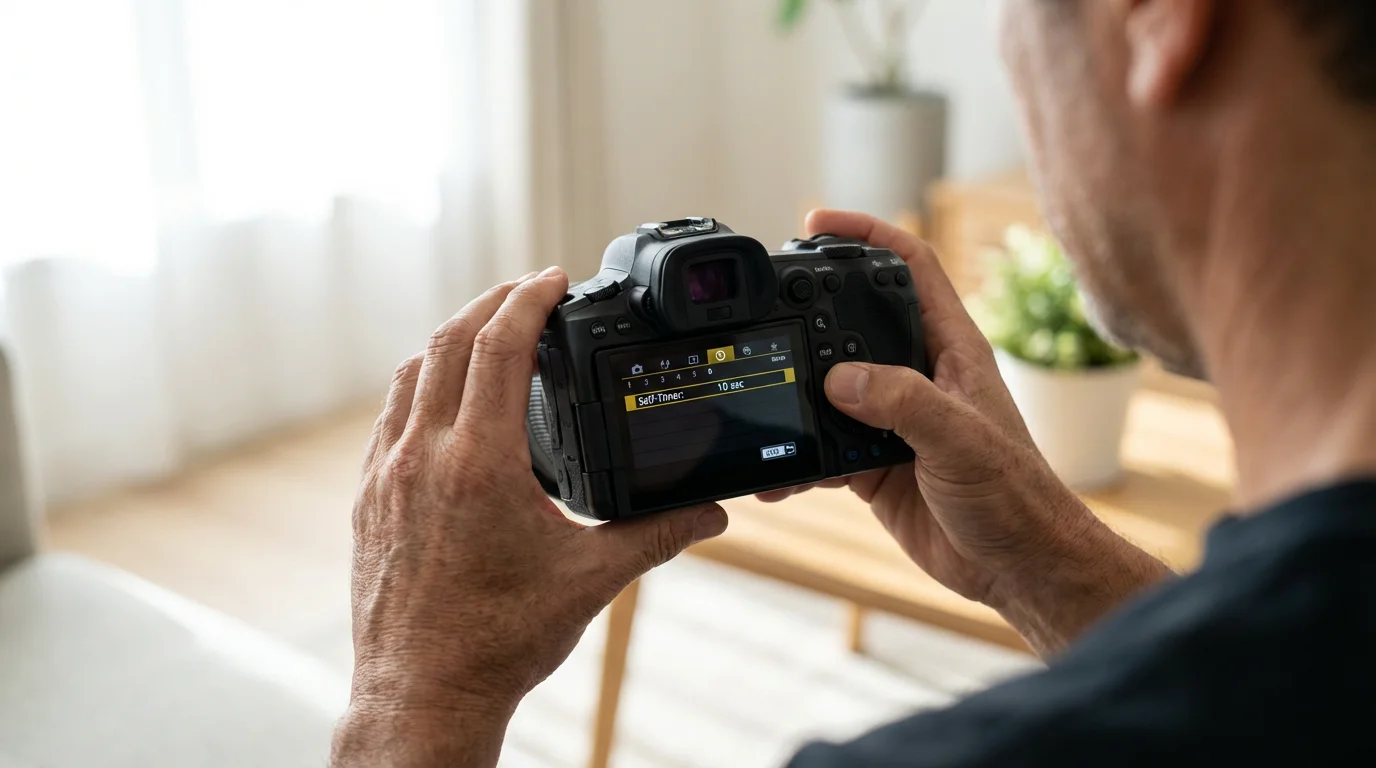
- Locate the Timer Setting: On most DSLR and mirrorless cameras, look for a button or menu option typically labeled with an icon resembling a clock or a clock face with an arrow. This is often grouped with drive modes (single shot, continuous shooting). For smartphones, the timer icon usually appears in the camera app’s settings bar at the top or side of the screen.
- Select Your Delay Time: Standard timer options usually include a 2-second and a 10-second delay.
- 2-second timer: Ideal when you are very close to the camera or making minor adjustments. It helps mitigate camera shake if you are hand-holding, but for self-portraits, the 10-second option is generally preferred.
- 10-second timer: This is your go-to for how to take self portraits with camera timer. It provides ample time to press the shutter, walk into your predetermined position, and adjust your pose and expression before the camera captures the image.
Some advanced cameras offer custom delays or even multiple shots after a single timer trigger. Consult your camera’s manual for specific instructions.
- Enable Continuous Shooting (Optional): Many cameras allow you to combine the timer with continuous shooting mode. This means after the 10-second delay, the camera will take a burst of photos (e.g., 3, 5, or more shots) instead of just one. This dramatically increases your chances of getting a usable shot, especially if you are experimenting with expressions or slight movements.
- Focus Precisely: Before you activate the timer, set your focus. If you plan to stand in a specific spot, place an object (a chair, a bag, or even a willing friend) in that exact location and focus on it. Lock your focus if your camera allows, or switch to manual focus. This ensures you remain sharp when you step into the frame. For general self-portraits, setting your focus to a wider depth of field (larger aperture number, like f/8 or f/11) can help ensure you are in focus even if you move slightly.
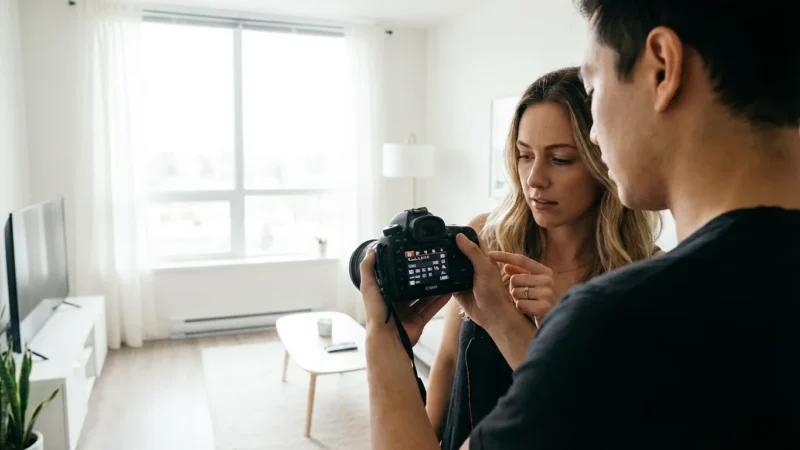
- Take a Test Shot: Always take a few test shots without yourself in the frame to confirm your settings, lighting, and composition are correct. Adjust exposure, white balance, and framing as needed. This preliminary check saves you significant time and effort.
Once you successfully set up your camera’s timer, you unlock a powerful tool for crafting deliberate and striking self portraits. This process transforms your photography, giving you the freedom to move from behind the lens and become part of the narrative.
Compose Your Shot for Impact
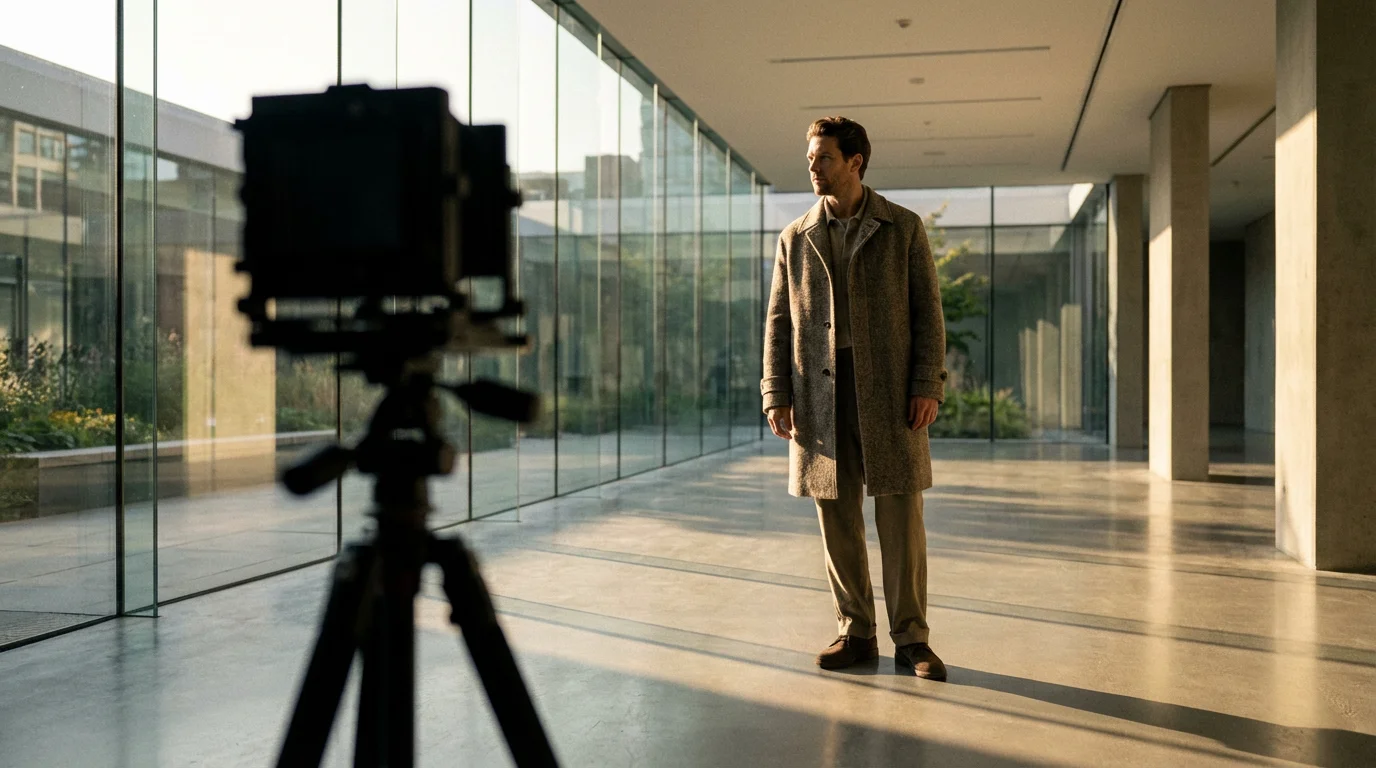
Great self-portraits require more than just a timer; they demand thoughtful composition. Before you step in front of the lens, envision the final image. Consider every element within your frame and how it contributes to your story. Proper composition draws the viewer’s eye and adds professionalism to your tripod photos.
- Choose Your Location Wisely: Your environment sets the mood. A minimalist background emphasizes your expression, while a textured wall or a natural landscape can add context. Look for areas with good natural light, perhaps near a large window indoors or in open shade outdoors to avoid harsh shadows. Avoid cluttered backgrounds that distract from your subject, which is you.
- Utilize the Rule of Thirds: Imagine your frame divided into nine equal sections by two horizontal and two vertical lines. Position yourself or key elements of your pose along these lines or at their intersections. This often creates a more balanced and visually interesting composition than placing yourself dead center. For example, if you are sitting, you might place your eyes along the top horizontal line.
- Mind Your Background: Even if you are the main subject, your background plays a crucial supporting role. Look for distractions: power outlets, stray objects, or cluttered areas. A clean background helps you stand out. You can also use a wide aperture (smaller f-number, like f/2.8 or f/4) to blur the background, creating beautiful bokeh and isolating yourself from your surroundings.
- Consider Angles and Perspectives: Experiment with your camera’s height and angle. Shooting from slightly above can be flattering, while shooting from below can create a sense of power or drama. Try different tripod heights to discover what works best for your setting and desired mood. A slightly elevated camera can help slim the jawline, for instance.
- Leave Room for Cropping: It is always better to capture a slightly wider frame than too tight. This gives you flexibility in post-processing to crop and refine your composition without losing important details. However, avoid so much empty space that you become a tiny speck in the frame.
- Focus Point Placement: As mentioned in the timer setup, ensure your camera focuses on the exact spot you will occupy. Use a stand-in object, mark your spot on the floor, or utilize your camera’s live view with face detection if available, then switch to manual focus to lock it in for consistent results.
By thoughtfully composing your shot, you transform a simple timer photo into a deliberate piece of art. This attention to detail elevates your self portraits and ensures they reflect your artistic vision.
Mastering Posing and Expression
Once your camera is set and your composition planned, the final piece of the puzzle is your performance in front of the lens. Posing and expression dictate the mood and message of your self portraits. Remember, the goal is to look natural and confident, not stiff or uncomfortable.
Understanding the nuances of candid vs posed photos can help you decide if you want a formal look or a more natural, lifestyle feel.
- Practice in a Mirror: Before the camera timer starts, practice your poses and expressions in a mirror. Notice how subtle shifts in your head tilt, shoulder position, or hand placement change your appearance. This helps you find your most flattering angles and authentic smiles.
- Relax Your Body: Tension shows in photographs. Consciously relax your shoulders, jaw, and hands. Take a deep breath before the timer countdown begins. A relaxed posture communicates confidence and ease.
- Engage Your Eyes: Your eyes are powerful tools for conveying emotion. Look directly into the lens as if it is a person you are connecting with. Avoid a blank stare; instead, try to convey warmth, curiosity, joy, or thoughtfulness through your gaze.
- Experiment with Hand Placement: Awkward hands can ruin an otherwise great photo. Try placing your hands gently on your lap, resting them on a prop, or crossing your arms loosely. Avoid clenching your fists or letting your hands hang limp. Soft, natural hand gestures add to the overall composition.
- Slight Movements and Shifts: Instead of holding one static pose, make slight, subtle adjustments between shots. Shift your weight, change your head tilt, or alter your expression slightly. This provides a variety of options to choose from and makes your photos look less posed. If your camera takes multiple shots with the timer, this strategy is even more effective.
- Tell a Story with Your Pose: Think about the message you want to convey. Are you contemplative, joyful, powerful, or serene? Your pose should support this narrative. For example, leaning slightly forward can convey engagement, while looking away can suggest introspection.
- Authentic Smiles: A genuine smile involves your eyes. Instead of forcing a grin, think of something truly amusing or heartwarming. A true smile reaches your eyes, creating a natural and inviting expression. Alternatively, a subtle, thoughtful expression can be equally powerful.
Remember, it takes practice. Do not get discouraged if your first few attempts are not perfect. The beauty of digital photography and the camera timer is that you can experiment endlessly until you capture the precise look and feel you desire for your self portraits.
Advanced Timer Techniques and Accessories
Once you master the basic camera timer function, explore more sophisticated techniques and accessories to further enhance your self portraits. These methods offer greater control and creative possibilities, taking your photography to the next level.
- Utilizing an Intervalometer: An intervalometer is a device that triggers your camera to take photos at set intervals. While often used for time-lapse photography, it is incredibly useful for self-portraits. You can set it to take a photo every 5 or 10 seconds, allowing you to move through a series of poses and expressions without continually returning to the camera. This is excellent for capturing subtle movements or creating dynamic sequences. Many modern mirrorless and DSLR cameras have built-in intervalometer functions; check your camera’s manual.
- Remote Shutter Releases (Beyond the Timer): As mentioned earlier, a remote shutter release offers immediate control.
- Wired Remotes: Connect directly to your camera, providing a reliable trigger with no battery concerns (for the remote itself). Ideal for studio or controlled environments.
- Wireless Remotes: Use infrared, radio frequency, or Bluetooth. These allow you to trigger the shutter from a distance, even if you are out of the camera’s line of sight. Some camera apps also offer remote control functions via Wi-Fi, allowing you to see a live view on your smartphone and trigger the shutter directly. This gives you full control from within the frame, bypassing the need for a timer countdown.
A remote release is particularly advantageous for dynamic tripod photos where you need precise timing.
- Off-Camera Flash or Lighting: Moving beyond natural light, using an off-camera flash or continuous light source can dramatically shape your self-portraits. Triggering a flash remotely in conjunction with your camera timer allows for sophisticated lighting setups. You can use diffusers, reflectors, or even colored gels to create specific moods and highlight your features in ways natural light alone cannot achieve.
- Focus Peaking and Magnification (Mirrorless Cameras): If you use a mirrorless camera, take advantage of features like focus peaking and magnification in live view. These tools help you achieve incredibly precise focus, even when you are not behind the camera. Set your camera on its tripod, activate live view, then use focus peaking to ensure the precise spot where you will stand is in sharp focus before you engage the timer or remote.
- Burst Mode with Timer: Combine your camera’s timer with its continuous shooting (burst) mode. After the delay, the camera takes several shots in rapid succession. This is invaluable for capturing fleeting expressions or slight variations in pose, significantly increasing your chances of getting a truly captivating image for your self portraits. Many photographers find this indispensable for children or pets as well.
Experiment with these advanced techniques to push the boundaries of your self-portrait photography. You gain greater command over your creative process and the ability to produce truly unique and professional-looking images. This further refines how to take self portraits with camera timer, enabling more complex artistic endeavors.
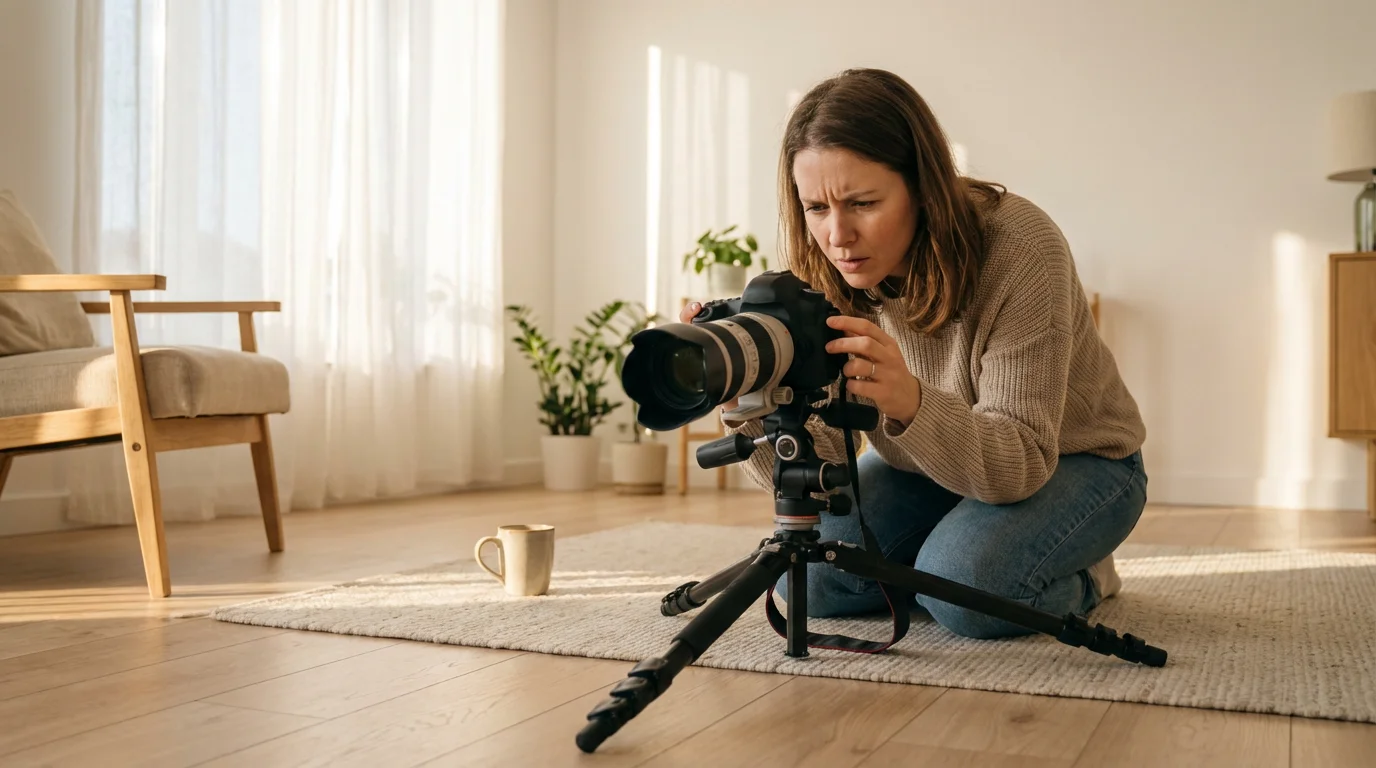
Troubleshooting Common Timer Issues
Even with the best preparation, you might encounter issues when using your camera timer for self portraits. Knowing how to diagnose and fix these common problems saves frustration and ensures you get the shots you want.
- Blurry Photos:
- Problem: Your images lack sharpness.
- Solution: Check your focus. Did you pre-focus on the exact spot you would occupy? If using autofocus, ensure it locks onto your intended spot. Consider switching to manual focus after setting it, preventing the camera from re-focusing when you step into the frame. Increase your depth of field by using a wider aperture (higher f-number, e.g., f/8 or f/11) to create more tolerance for slight movement. Ensure your tripod is stable and not wobbly.
- Missing the Shot (Out of Frame):
- Problem: You press the shutter, but you are not in the picture, or only partially.
- Solution: Give yourself enough time. The 10-second timer is usually sufficient for most setups. Mark your standing or sitting spot with tape on the floor. Take several test shots without you in the frame to confirm your composition. If your camera has a live view, use it to frame your shot accurately before stepping away. A remote shutter release eliminates this problem entirely, allowing you to trigger the shot when ready.
- Incorrect Exposure (Too Dark or Too Bright):
- Problem: Your photos are overexposed or underexposed.
- Solution: Use your camera’s histogram or live view exposure meter during test shots. Adjust your aperture, shutter speed, and ISO settings accordingly. If shooting in manual mode, make small adjustments until the exposure looks correct. If using an automatic mode, compensate using exposure compensation (+/- buttons). Ensure your white balance setting matches your lighting conditions (e.g., “Daylight,” “Cloudy,” “Tungsten”).
- Awkward Posing or Expression:
- Problem: You look stiff, uncomfortable, or your expression seems forced.
- Solution: Practice in a mirror. Take a few deep breaths before the timer counts down. Try to think of something genuinely amusing or relaxing. Use burst mode with your timer to capture a sequence of expressions, increasing the chance of getting a natural one. Experiment with subtle movements between shots rather than holding a rigid pose.
- Battery Drain:
- Problem: Your camera battery dies quickly during a session.
- Solution: Always start with a fully charged battery, especially if you plan an extended session with many test shots and timer activations. Keep a spare charged battery on hand. Features like live view and continuous shooting consume more power, so use them judiciously.
Addressing these common issues systematically helps you refine your workflow and produce high-quality tripod photos consistently. Patience and persistence are key to mastering how to take self portraits with camera timer.

Editing Your Self-Portraits for Refinement
Post-processing is a critical step in transforming good self portraits into exceptional ones. Editing software allows you to fine-tune exposure, color, and composition, enhancing the overall impact of your images. You do not need complex tools; even basic adjustments make a significant difference.
In cases where a slight movement during the timer delay causes softness, you can learn how to sharpen blurry photos to rescue your favorite shots.
- Basic Adjustments (Exposure, Contrast, Highlights/Shadows): Start by ensuring your image has proper exposure. Adjust brightness and contrast to give your photo depth. Recover details in overexposed highlights and underexposed shadows. This foundational step brings balance to your photograph.
- Color Correction and White Balance: Ensure your colors look natural. If your white balance was slightly off during shooting, adjust it in editing to remove any unwanted color casts. Correct skin tones so they appear healthy and realistic.
- Cropping and Straightening: Refine your composition by cropping. Eliminate distracting elements, adjust the aspect ratio, and straighten horizons or vertical lines to create a more polished look. Remember the rule of thirds when cropping to enhance visual interest.
- Sharpening and Noise Reduction: Apply a subtle amount of sharpening to bring out details, especially in your eyes. If you shot in low light, you might notice digital noise (grainy appearance). Use noise reduction tools sparingly, as overuse can make images look overly smooth or plastic.
- Retouching (Subtle and Purposeful): Use retouching tools to address minor blemishes, stray hairs, or dark circles under your eyes. The goal is to enhance your natural beauty, not to create an unrealistic image. Less is often more with retouching. Avoid excessive smoothing or dramatic alterations.
- Vignetting and Color Grading (Creative Touches):
- Vignetting: A subtle darkening of the image corners can draw the viewer’s eye towards the center, emphasizing your subject.
- Color Grading: Apply a consistent color palette or a specific look (e.g., warm, cool, vintage) to your series of self-portraits. This creates a cohesive aesthetic and adds a personal artistic touch.
Editing is your final opportunity to express your creative vision and bring your tripod photos to their full potential. Approach it with an eye for enhancement rather than drastic alteration, preserving the authenticity of your original capture while elevating its aesthetic appeal.

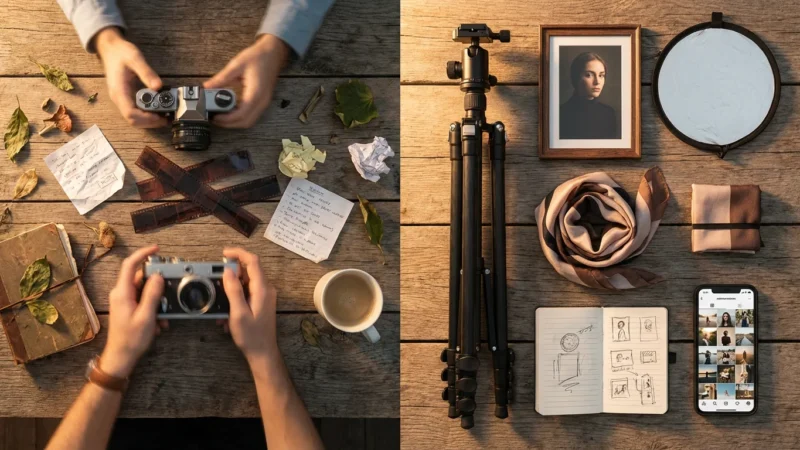
Displaying Your Self-Portraits Creatively
After investing time and effort in capturing and editing your self portraits, showcase them in ways that celebrate your unique story and contribute to your family’s photographic heritage. Displaying your work transforms digital files into tangible memories, connecting generations and sharing your personal narrative.
High-quality self-portraits also make wonderful personal touches for DIY photo gifts for your family and friends.
After capturing your favorite images, consider these creative photo wall ideas to turn your self-portraits into a gallery-worthy home display.
- Print and Frame Them: The most classic way to display photographs. Choose high-quality archival prints to ensure longevity. Select frames that complement your home decor and the style of your portraits. Create a gallery wall with a series of self-portraits over time, showcasing your growth and changes.
- Photo Books and Albums: Compile your best self-portraits into a beautifully designed photo book. These make wonderful personal keepsakes or gifts. Organize them chronologically or thematically, adding captions to narrate your journey. Photo books are excellent for preserving digital images in a tactile, engaging format.
- Digital Displays: Use digital photo frames to cycle through a collection of your self-portraits. This offers a dynamic way to enjoy many images without taking up wall space. Share your favorites on personal websites or social media platforms, but always remember privacy settings and content ownership.
- Creative Projects: Integrate your self-portraits into other creative endeavors.
- Memory Boxes: Print smaller versions of your portraits and include them in a memory box alongside other cherished items.
- Scrapbooking: Use your prints in scrapbooks, adding journal entries and embellishments that tell a richer story.
- Personalized Gifts: Turn your favorite self-portrait into a personalized mug, calendar, or canvas print for a thoughtful gift.
- Archival Storage for Prints: If you print your self-portraits, store any unframed prints in archival-safe boxes or sleeves. This protects them from environmental damage, ensuring their preservation for future generations. The Library of Congress provides excellent resources on proper photographic storage. Explore their preservation guides for best practices.
Your self portraits are more than just pictures; they are visual diary entries, reflections of your identity, and vital components of your personal history. Ensure they receive the care and display they deserve, becoming treasured elements of your family’s collective memory.
Frequently Asked Questions
What is the best camera timer setting for self-portraits?
The 10-second timer setting is generally the best choice for self-portraits. This duration gives you ample time to press the shutter, walk into your desired position, and compose yourself with a natural pose and expression before the camera captures the image. A 2-second timer is usually too short unless you are very close to the camera or using a remote release.
Do I need a tripod to take self-portraits with a camera timer?
While not strictly mandatory, a tripod is highly recommended and almost essential for high-quality self-portraits using a camera timer. A tripod ensures your camera remains perfectly stable, preventing blur and maintaining consistent framing between shots. Without it, you risk shaky images and inconsistent composition. For optimal results in self portrait photography, invest in a sturdy tripod.
How do I make sure I am in focus when using a camera timer?
To ensure you are in focus, place an object (like a chair, a bag, or a willing friend) in the exact spot where you plan to stand or sit. Focus your camera on this object, then either switch to manual focus to lock it in or use your camera’s focus lock feature if available. Another strategy is to use a wider depth of field (a higher f-number like f/8 or f/11) which gives you a larger zone of acceptable sharpness, making it more forgiving if you move slightly.
Can I use my smartphone for timer self-portraits?
Yes, absolutely. Modern smartphones often include a built-in timer function within their camera app, typically offering 3-second or 10-second delays. For best results, mount your smartphone on a small tripod or prop it against a stable surface. The principles of composition, lighting, and posing discussed in this guide apply equally well to smartphone self-portraits.
How can I get natural expressions in my self-portraits?
Achieving natural expressions involves relaxation and practice. Think of something genuinely amusing or heartwarming just before the timer counts down. Avoid forcing a smile; instead, let your expression come naturally. Experiment with subtle shifts in your head tilt, gaze, and body language. Using your camera’s continuous shooting mode with the timer can also help, as it captures multiple expressions in quick succession, increasing your chances of getting a natural-looking shot.
Disclaimer: This article is for informational purposes only. When handling valuable or irreplaceable photographs, consider consulting a professional conservator. Always test preservation methods on non-valuable items first.
If you are shooting inside, mastering camera settings for better indoor photos ensures your exposures are perfect before the timer clicks.
Leave a Reply