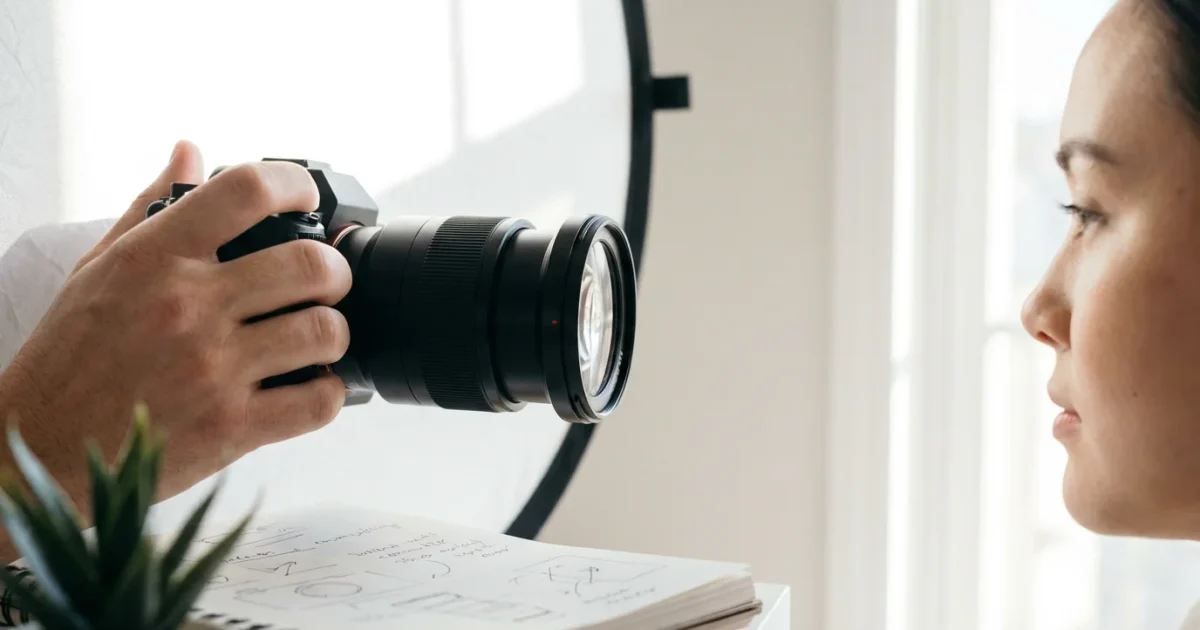
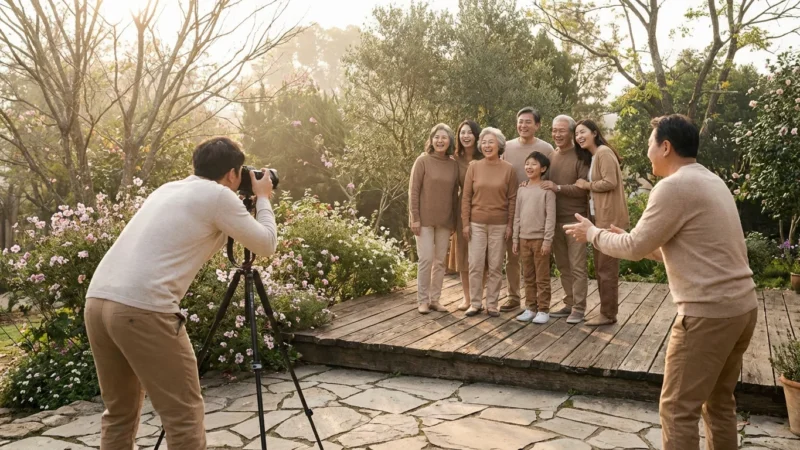
Capturing beautiful portraits requires more than just a camera; it demands an understanding of light. Natural light, readily available and free, offers an incredible tool for creating stunning, emotionally resonant photographs. Mastering its nuances transforms your images from simple snapshots into captivating works of art. This guide empowers you to harness the sun, clouds, and open sky, helping you take portraits using natural light effectively and consistently.
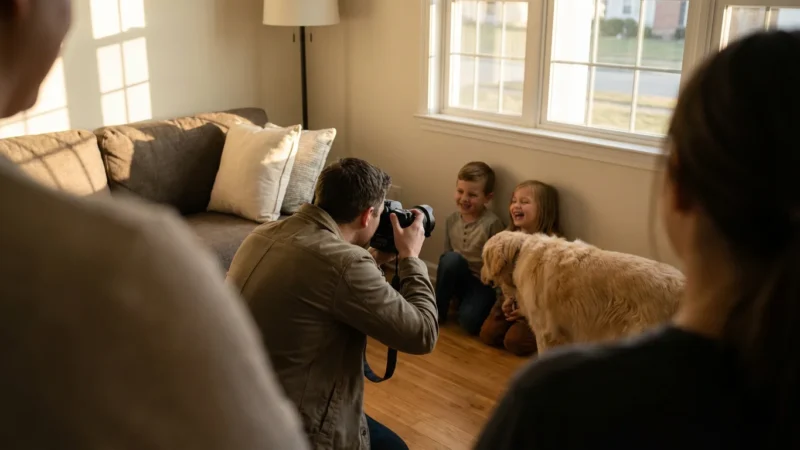
For those looking to capture specific subjects, knowing how to photograph children and pets in natural settings can be incredibly helpful.
Combining perfect lighting with strong composition techniques will help ensure your subjects truly stand out in every frame.
Whether you photograph family members, friends, or even yourself, learning to read and use natural light elevates your portrait photography. You will discover how different times of day and weather conditions present unique opportunities, allowing you to create a range of moods and styles in your outdoor portraits. We explore the secrets to making natural light work for you, ensuring every portrait radiates warmth, depth, and clarity.

Understanding Natural Light: Your Primary Tool
Natural light is the light source available from the sun, sky, or atmosphere. It provides endless variations, each impacting your subject’s appearance. Understanding its qualities empowers you to select the best location and time of day for your portrait photography. We analyze light based on its direction, intensity, and color temperature.
While utilizing the sun is your goal during a shoot, you must also understand how to protect photos from light damage once they are printed.
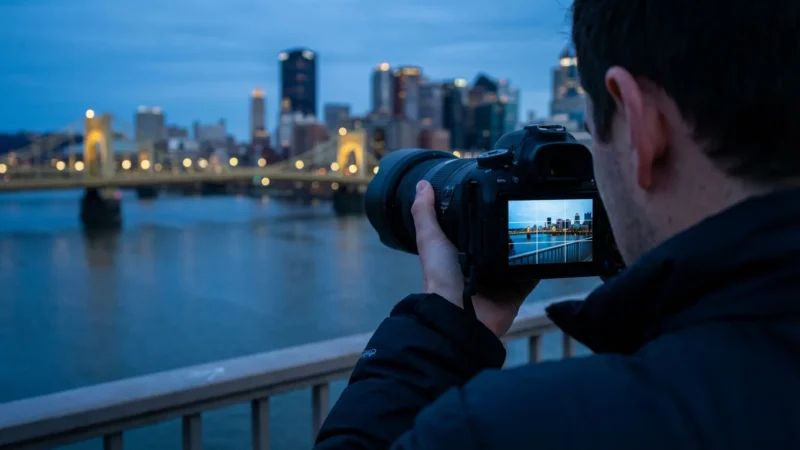
Having the right equipment is a great starting point, and you can explore the best cameras for beginners in 2025 to find a device that handles natural light beautifully.
Direction of Light: Shaping Your Subject
- Front Lighting: When the sun shines directly onto your subject’s face, it illuminates them evenly but can flatten features and cause squinting. This light source works well for bright, airy portraits, especially if you position your subject slightly off-axis to avoid direct glare.
- Side Lighting: Light hitting your subject from the side creates shadows and highlights, adding depth and dimension to their face. This technique sculpts features, making it excellent for dramatic and artistic portraits. Experiment with a 45-degree angle for a classic, flattering look.
- Backlighting: Positioning your subject between you and the light source creates a beautiful rim light around their hair and shoulders, separating them from the background. This technique can lead to silhouetted subjects if not managed correctly, but it also produces dreamy, ethereal images. Use a reflector or a touch of fill flash to illuminate their face.
- Top Lighting: The sun directly overhead, common around midday, creates harsh shadows under the eyes and nose, often unflattering for portraits. We discuss strategies to mitigate this challenging light later in this guide.
Quality of Light: Soft Versus Hard
Light quality refers to how diffused or direct the light appears. This characteristic significantly influences the mood and detail in your outdoor portraits.
- Hard Light: Direct sunlight, particularly from a clear sky, produces sharp, defined shadows. While it can add drama, it often accentuates skin imperfections and creates strong contrasts that can be difficult to manage.
- Soft Light: Diffused light, such as that found on an overcast day or in open shade, creates gradual transitions between light and shadow. It flatters skin, minimizes imperfections, and produces a gentle, ethereal glow. This quality of light is often preferred for natural light portraits due to its forgiving nature.
Color Temperature: Setting the Mood
Light has a color, measured in Kelvin (K), ranging from cool blues to warm oranges. Different times of day produce distinct color temperatures:
- Cool Light (High Kelvin): Blueish light appears in deep shade, on overcast days, or shortly after sunrise and before sunset. It evokes a calm or moody feeling.
- Warm Light (Low Kelvin): Golden light, prevalent during sunrise and sunset, creates a cozy, inviting, and nostalgic atmosphere. This period, known as the golden hour, is a favorite for many photographers.
- Neutral Light: Bright, clear daylight around late morning or early afternoon can be relatively neutral, though it often leans slightly cool. Your camera’s white balance setting helps you accurately render these colors or intentionally shift them for creative effect.

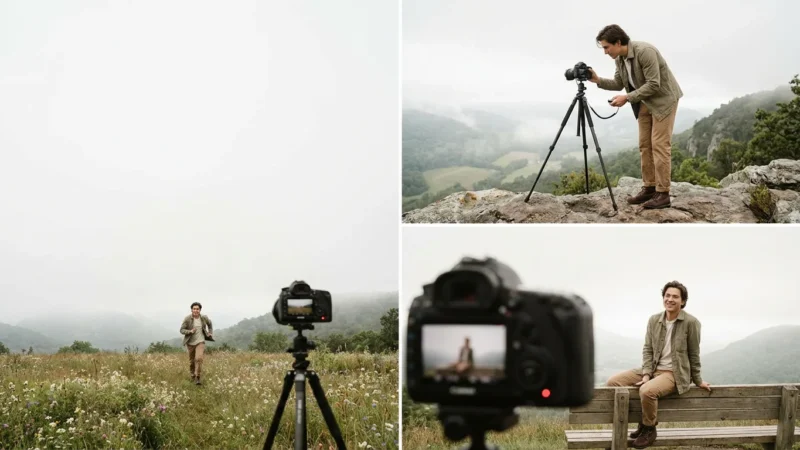
The Magic of Golden Hour: Best Time for Outdoor Portraits
The golden hour, the period shortly after sunrise or before sunset, truly earns its name. During this time, the sun sits low in the sky, casting a soft, warm, and highly directional light that bathes everything in a beautiful golden hue. This makes it the best time of day for outdoor portraits, offering unparalleled photographic opportunities.
While the light is forgiving during this time, learning how to take sharp photos will ensure your golden hour shots are crisp and professional.
When the sun dips below the horizon, you can continue shooting by applying low light photography techniques to capture moody images without a flash.
Why Golden Hour Excels for Portrait Photography
- Soft, Diffused Light: The low angle of the sun means its rays travel through more of the Earth’s atmosphere, scattering blue light and leaving behind warm reds, oranges, and yellows. This natural diffusion creates incredibly soft, flattering light, minimizing harsh shadows and blemishes.
- Warm Color Temperature: The characteristic golden tones add a magical, ethereal quality to your images, evoking feelings of warmth, romance, and nostalgia. This natural color palette often requires minimal post-processing to achieve stunning results.
- Long Shadows: The low sun angle produces elongated shadows, adding depth and interest to your compositions. You can use these shadows creatively to frame your subject or add an artistic element.
- Versatile Lighting: You can utilize golden hour light in multiple ways. Position the sun behind your subject for a dramatic backlight and beautiful rim light. Place your subject with the sun to their side for sculpting shadows and highlights. Or, let the soft, low sun illuminate them directly for a warm, even glow.
Maximizing Golden Hour Opportunities
- Plan Your Shot: Golden hour lasts only about 20-60 minutes, depending on your location and the season. Arrive at your chosen location early to scout for backgrounds, identify potential posing spots, and position your subject before the light becomes perfect.
- Use a Reflector: While the light is soft, you might still want to add a touch of fill light to your subject’s face when backlighting. A simple collapsible reflector bounces some of that beautiful golden light back onto your subject, brightening their eyes and filling in shadows.
- Experiment with Angles: Do not stick to just one approach. Try shooting directly into the sun for sun flares, positioning the sun behind your subject for a glow, or using it as a soft, directional main light.
- Shoot Fast: The light changes rapidly during golden hour. Be prepared to adjust your settings and move your subject quickly to capture the fleeting magic.
“The golden hour transforms ordinary scenes into extraordinary moments. Its warm, forgiving light is a gift to portrait photographers, allowing them to create images imbued with natural beauty and emotional depth.”
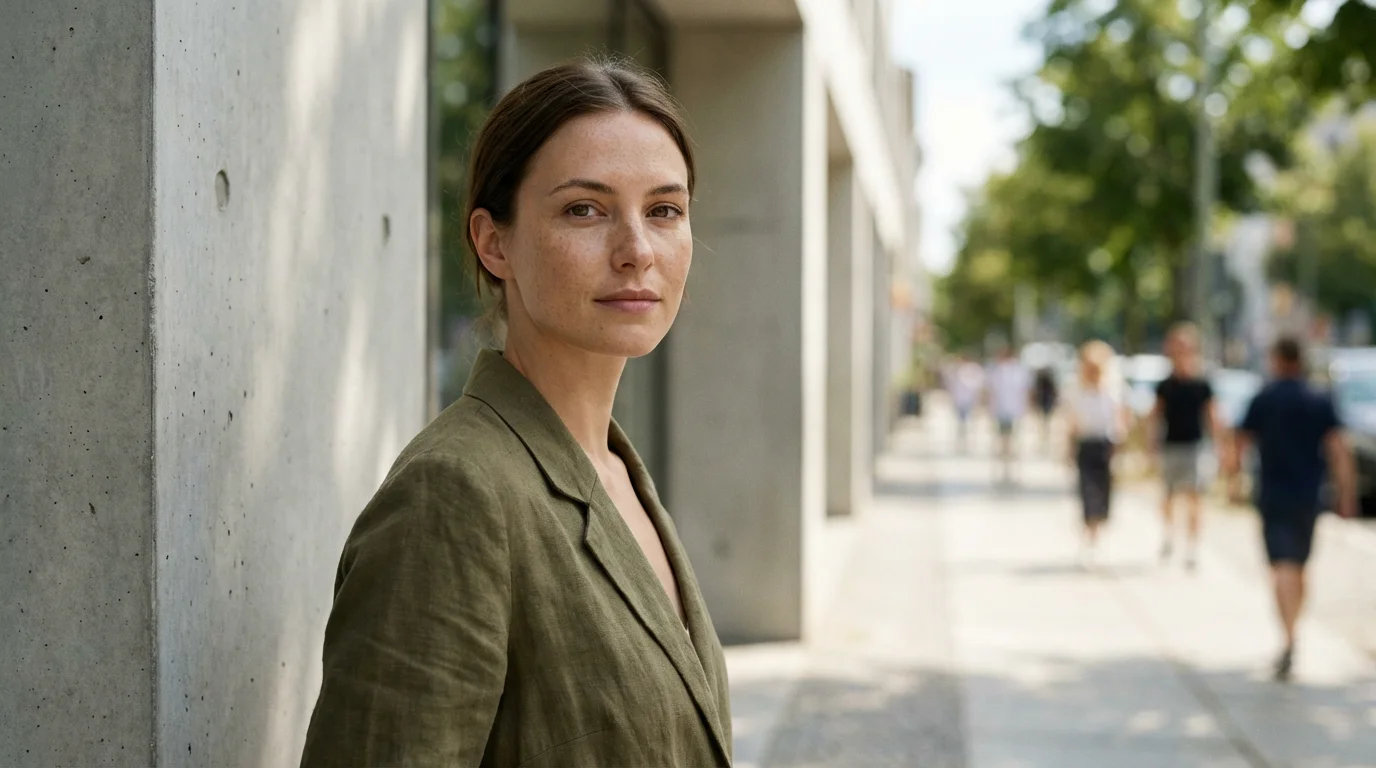
Harnessing Open Shade: Consistent Softness
Open shade provides a remarkably consistent and flattering light source, making it an excellent choice for portrait photography, especially when the golden hour is not an option. It is a fantastic answer to how to take portraits using natural light without direct sunlight.
If you are shooting on the go, these smartphone photography tips can help you achieve stunning natural light results with just your mobile device.
What is Open Shade?
Open shade refers to an area shaded from direct sunlight, such as under a large tree, on the north side of a building, or beneath an awning. Crucially, this shaded area still receives ambient light from the open sky, which acts as a massive, natural softbox. This ambient light illuminates your subject softly and evenly, wrapping around their features without harsh shadows.
Benefits of Open Shade for Portraits
- Soft, Even Lighting: The primary benefit is the incredibly soft and diffuse light. This quality minimizes skin imperfections, reduces harsh shadows, and creates a flattering, gentle illumination.
- Consistent Light: Unlike direct sunlight, which changes rapidly with the sun’s movement, open shade offers more stable lighting conditions for a longer period. This consistency allows you more time to focus on posing, composition, and interaction with your subject.
- Avoids Squinting: Direct sunlight often causes subjects to squint, ruining an otherwise perfect shot. Open shade eliminates this problem, allowing your subjects to relax their eyes and express themselves naturally.
- Rich Colors: The absence of direct, intense sunlight allows colors in the scene and on your subject to appear richer and more saturated, as they are not “washed out” by glare.
Finding and Using Open Shade Effectively
- Look for Large, Overhead Obstructions: Big trees, tall buildings, and covered walkways are prime locations for open shade. Ensure the shaded area is large enough to encompass your subject and any background elements you wish to include.
- Ensure an Open Sky Above: The “open” in open shade is critical. Avoid deep, enclosed shade, which can appear dull and flat. You want the overhead sky to illuminate the shaded area, providing that beautiful, soft glow.
- Watch for Patches of Sun: Be vigilant for dappled sunlight filtering through leaves or gaps in structures. These can create distracting hot spots on your subject. Position your subject to avoid these light patches.
- Use the “Edge of Shade”: Sometimes, the transition point between direct sun and full shade, known as the “edge of shade,” offers a delightful effect. The subject receives a gentle, soft light from the sky while a bright background remains, creating separation.
- Adjust White Balance: Open shade can sometimes produce slightly cooler, bluer light. Adjust your camera’s white balance setting to “shade” or manually set a warmer Kelvin value (e.g., 6500K-7500K) to counteract this coolness and achieve natural skin tones.
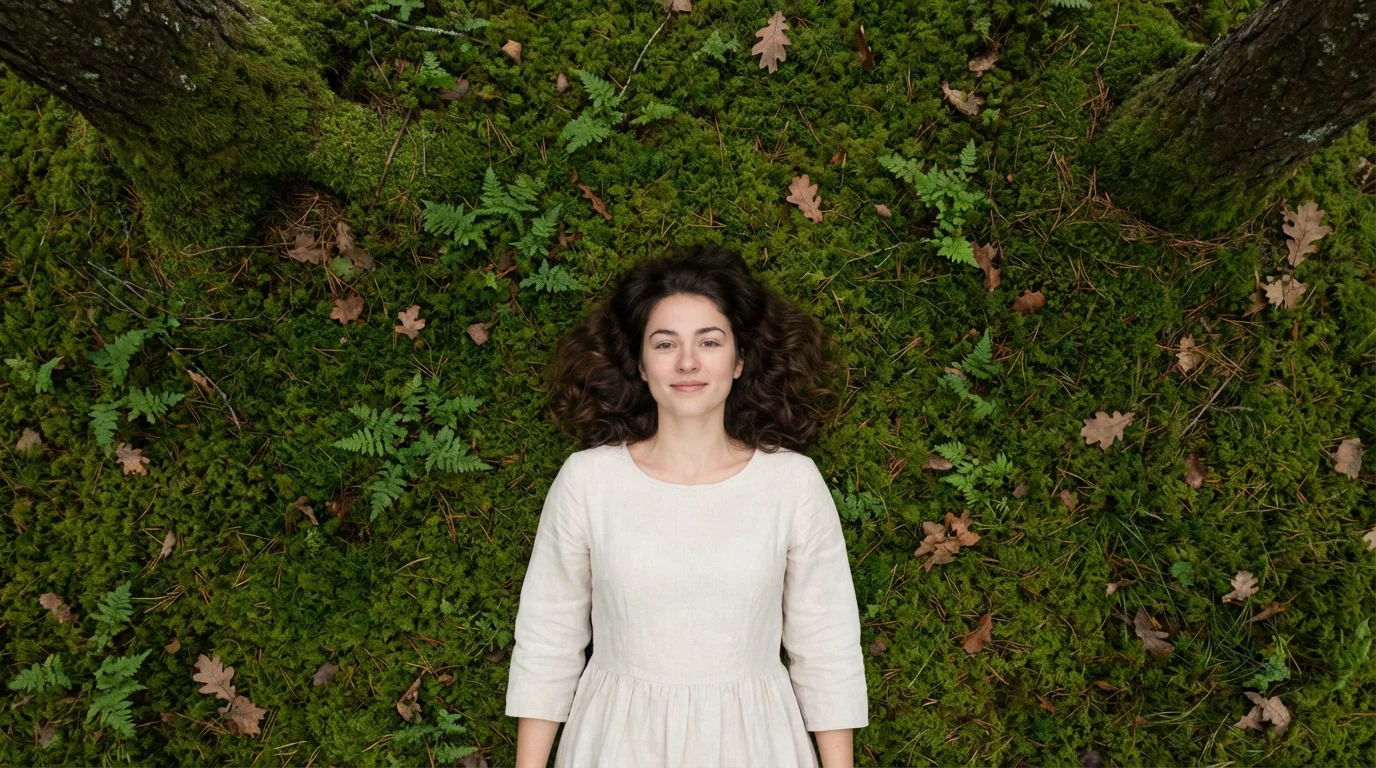
Embracing Overcast Days: Nature’s Giant Softbox
Many photographers shy away from overcast days, perceiving them as dull or lacking photographic potential. In reality, a thick cloud cover acts as nature’s most magnificent softbox, diffusing the sun’s light into an incredibly even, soft, and flattering illumination. This makes overcast days an exceptional environment for natural light portrait photography.
Once you have captured your favorite soft-lit portraits, you can learn how to create a beautiful photo book to preserve and display your work.
To maintain clarity in the soft lighting of a cloudy day, remember to clean your camera lens to avoid any haze or smudges.
If your overcast shots look a bit flat, basic photo editing can help restore the depth and contrast needed for a professional finish.
The Advantages of Overcast Skies for Portraits
- Ultimate Soft Light: A uniformly cloudy sky eliminates direct sunlight entirely, creating an expansive, shadowless light source. This light wraps gently around your subject, minimizing harsh lines, wrinkles, and blemishes. It is the purest form of soft light you can get naturally.
- Even Illumination: With no harsh shadows, you achieve consistent lighting across your subject’s face and body. This evenness provides a clean canvas for portraiture, making it easier to capture detail and true skin tones.
- Rich, Saturated Colors: Just like open shade, overcast light prevents colors from being bleached out by intense direct sun. Landscapes, clothing, and skin tones appear vibrant and true to life, often requiring less saturation adjustment in post-processing.
- No Squinting: The absence of direct glare allows your subjects to relax their eyes, resulting in more natural and comfortable expressions. This is particularly beneficial for children and those sensitive to bright light.
- Shoot Anytime, Anywhere: Overcast light offers incredible flexibility. You are not bound by the golden hour or the need to find specific shaded areas. You can shoot at any time of day and in virtually any outdoor location, knowing the light will remain consistent.
Tips for Maximizing Overcast Light
- Mind the Direction of Light (Even on Overcast Days): While the light is soft, it still has a dominant direction. Pay attention to where the brightest part of the sky is. Position your subject to face this brightest area for the most flattering illumination, ensuring their eyes catch some of that gentle light.
- Look for Contrast: Overcast days can sometimes result in flatter images due to the lack of strong shadows. Introduce contrast through your composition:
- Use darker backgrounds to make your subject stand out.
- Incorporate textures like brick walls, foliage, or weathered wood.
- Look for pops of color to add visual interest.
- Boost Exposure Slightly: Your camera’s light meter might underexpose slightly on very gray days to compensate for the overall brightness. Consider adding +0.3 to +0.7 stops of exposure compensation to ensure your subject is properly illuminated and skin tones are bright.
- Warm Up White Balance: Overcast light tends to be cooler, producing a bluish cast. Adjust your camera’s white balance to the “cloudy” or “shade” preset, or manually set a warmer Kelvin temperature (around 6000K-7000K) to achieve more natural and pleasing skin tones.
- Embrace the Mood: Overcast days naturally lend themselves to a more contemplative, quiet, or even dramatic mood. Let this natural ambiance influence your posing and composition to create compelling, emotive portraits.
Taming Midday Sun: Overcoming Harsh Light
Midday sun, roughly from 10 AM to 3 PM, often presents the most challenging conditions for natural light portrait photography. The sun is high overhead, creating strong, direct, and harsh light that produces deep shadows, causes squinting, and often washes out colors. While it is generally advisable to avoid midday sun for outdoor portraits, sometimes you lack a choice. With strategic approaches, you can still achieve beautiful results.
Challenges of Midday Sun
- Harsh Shadows: The most significant problem is the creation of dark, unflattering shadows under the eyes, nose, and chin. These shadows obscure facial features and can make your subject look tired or severe.
- Squinting: Intense direct light causes subjects to squint, resulting in uncomfortable expressions.
- Washed-Out Colors: Bright, direct light can overexpose highlights and wash out the vibrant colors in your scene and on your subject.
- Hot Spots: Reflective surfaces or skin can develop intensely bright, overexposed areas that lose detail.
Strategies for Shooting in Midday Sun
- Seek Open Shade: This is your primary defense against midday sun. Position your subject entirely within a large area of open shade. Look for the north side of buildings, under deep overhangs, or beneath dense tree canopies. This provides the soft, even light we discussed earlier.
- Use a Diffuser: If open shade is unavailable, create your own. A large, translucent diffuser held between the sun and your subject acts like a portable cloud, softening the harsh direct light. This dramatically reduces harsh shadows and glare.
- Find a Natural Diffuser: Consider locations with natural overhead diffusion, such as a gazebo with a white ceiling or a large, light-colored patio umbrella. These can mimic the effect of a large diffuser.
- Backlight Your Subject: While usually done during golden hour, you can use backlighting at midday. Position your subject with the sun directly behind them. This creates a powerful rim light. To avoid a silhouette, use a reflector to bounce light back onto their face or use a subtle fill flash. Be mindful of lens flare.
- Utilize Reflectors for Fill Light: Even in shade, you might need to lift shadows. A silver or white reflector can bounce ambient light onto your subject, brightening their face and eyes. A silver reflector provides more punch, while a white one gives a softer fill.
- Look for Reflective Surfaces: White walls, light-colored pavement, or even water can act as natural reflectors, bouncing soft light back onto your subject’s face.
- Change Your Angle: Instead of shooting from a standing position, try lowering your camera. Shooting slightly upward can reduce the harsh overhead shadows by placing them behind your subject’s head or shoulders rather than directly on their face.
- Focus on Details or Silhouettes: If all else fails, pivot your creative approach. The dramatic contrast of midday sun can be excellent for creating high-contrast silhouettes or for focusing on details where the strong light can highlight textures effectively.

Posing and Composition: Guiding Your Subjects
Once you master natural light, the next step in creating beautiful portrait photography involves guiding your subjects and arranging elements within your frame. Effective posing and thoughtful composition transform a well-lit image into a captivating one.
Posing for Natural Light Portraits
Posing should feel natural and comfortable for your subject, enhancing their features and interaction with the light.
- Start with the Eyes: Always ensure your subject’s eyes are well-lit and in focus. The eyes are the windows to the soul, and catching a sparkle of light in them (a “catchlight”) adds life to the portrait. Position them to face the primary light source or angled slightly toward it.
- Turn the Body, Turn the Head: To add depth, have your subject turn their body slightly away from the camera, then turn their head back towards you. This creates flattering angles and a more dynamic pose.
- Lean and Relax: Encourage leaning against a wall, railing, or even sitting down. This helps subjects relax and avoid stiff, unnatural postures.
- Hands and Arms: Avoid letting hands hang awkwardly or appear “chopped off” at the edges of the frame. Give them something to do: holding a prop, lightly touching their face, or resting naturally. Ensure arms have space and are not pressed flat against the body, which can make them appear larger.
- Consider the Jawline: Have your subject gently push their head forward and slightly down. This creates a stronger jawline and reduces the appearance of a double chin. Practice it yourself in a mirror to see the subtle but significant difference.
Composing with Natural Light
Composition guides the viewer’s eye and adds aesthetic appeal to your outdoor portraits.
- Rule of Thirds: Imagine your frame divided into nine equal sections by two horizontal and two vertical lines. Place your subject or key elements along these lines or at their intersections for a more balanced and engaging composition than simply centering them.
- Leading Lines: Use natural elements in your environment, such as fences, paths, or architectural features, to create lines that draw the viewer’s eye towards your subject.
- Framing: Look for natural frames, like doorways, tree branches, or windows, to enclose your subject. This adds context and draws attention to them.
- Depth of Field: Use a wide aperture (smaller f-number, e.g., f/1.8-f/2.8) to create a shallow depth of field, blurring the background (bokeh) and making your subject pop. This is particularly effective in natural light portrait photography.
- Negative Space: Do not fill every inch of your frame. Empty space around your subject, known as negative space, helps them stand out and creates a sense of calm and simplicity.
- Background Awareness: Always check your background for distractions. A bright light source, a busy pattern, or an intrusive object can detract from your subject. Reposition yourself or your subject to simplify the background.

Simple Tools to Enhance Natural Light
While natural light itself is a powerful tool, a few inexpensive accessories can significantly enhance its quality and your ability to control it, especially when learning how to take portraits using natural light in diverse conditions.
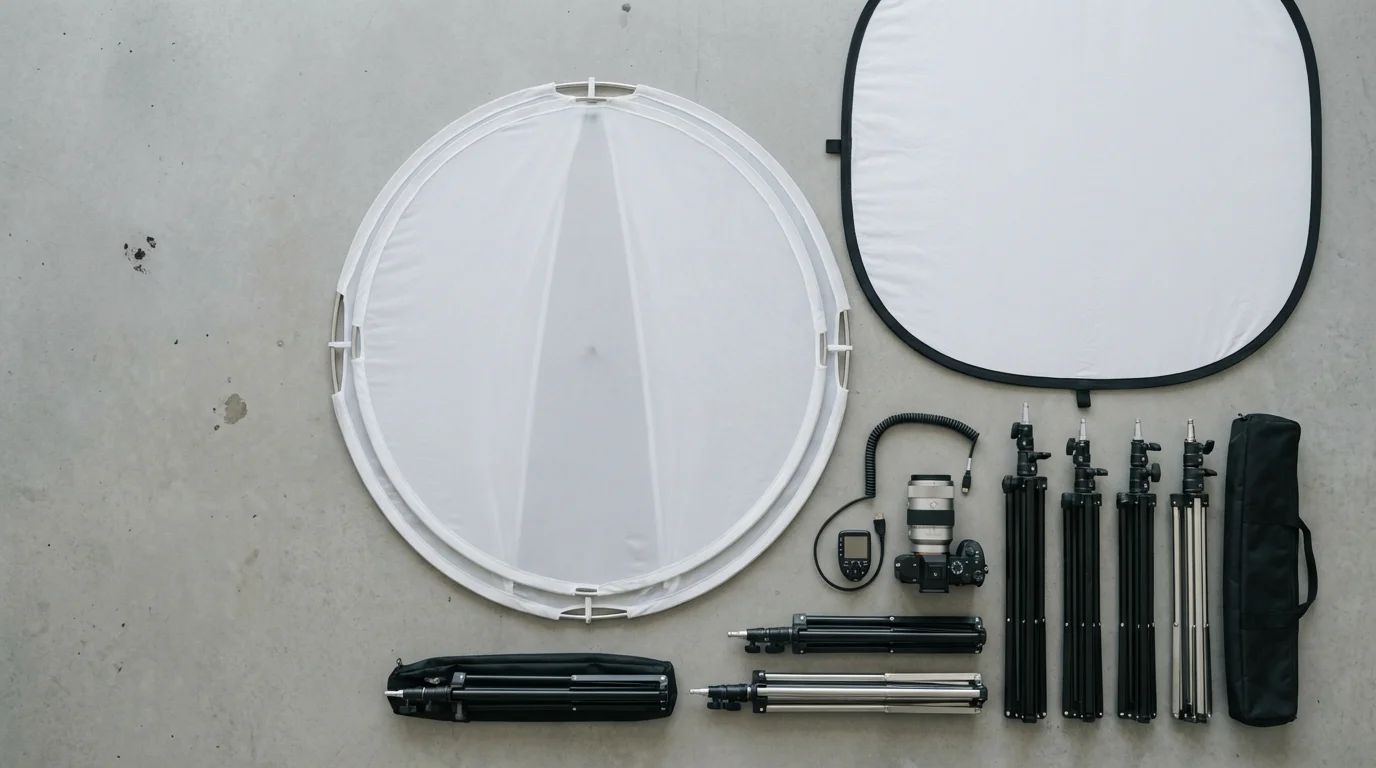
Reflectors: Bouncing and Shaping Light
A collapsible 5-in-1 reflector is an indispensable tool for any natural light photographer. It typically includes:
- White: Provides a very soft, subtle fill light, ideal for delicate skin tones.
- Silver: Offers a brighter, more specular fill light, adding more punch and sparkle to eyes.
- Gold: Imparts a warm, golden glow, perfect for enhancing golden hour light or warming up cooler light.
- Black: Acts as a flag to block light or absorb reflections, creating more dramatic shadows or reducing unwanted glare.
- Translucent Diffuser: Used to soften harsh direct sunlight, transforming it into a larger, more diffuse light source.
How to use: Position the reflector opposite your main light source (usually the sun) to bounce light back onto your subject’s face, filling in shadows and adding sparkle to their eyes. A helper makes this much easier, but you can also use light stands or clamps to hold it in place.
Diffusers: Softening Harshness
Even without a full 5-in-1 kit, a simple translucent diffuser is invaluable. It is essentially a large, white translucent screen you hold between your light source (the sun) and your subject. This scatters the direct, harsh light, turning it into a much softer, more flattering light source. This technique is highly effective when shooting in midday sun.
Scrims: Larger-Scale Diffusion
Similar to diffusers but often much larger, scrims are fabrics stretched over a frame. These are fantastic for providing a large area of soft light, especially for full-body outdoor portraits or group shots. They require stands and can be more cumbersome to transport, but the results in harsh light are undeniable.
Using Your Surroundings as Reflectors and Diffusers
Always look around you for natural ways to manipulate light:
- White Walls: A light-colored building or wall can act as a giant softbox, bouncing ambient light onto your subject.
- Pavement/Ground: Light-colored concrete or even dry sand can reflect some light upwards, subtly filling shadows.
- Trees/Foliage: Dense tree canopies provide excellent open shade, acting as natural diffusers.
By understanding and utilizing these simple tools, you gain greater control over natural light, allowing you to create stunning portrait photography regardless of the sun’s position or intensity.

Editing for Impact: Refining Your Natural Light Portraits
Even with perfect natural light, editing offers an opportunity to refine your portrait photography, enhance colors, and bring out the best in your subjects. Post-processing should complement, not compensate for, good natural light technique.
Essential Editing Steps for Natural Light Portraits
- Adjust Exposure and Contrast:
- Exposure: Ensure your subject’s face is properly exposed. If you shot in open shade or on an overcast day, you might need to subtly increase the overall exposure. If backlighting caused underexposure on the face, selectively brighten that area.
- Contrast: Natural light portraits, especially those taken in soft light, can sometimes appear a little flat. Increase contrast slightly to add depth and “pop” to your images. Use a subtle S-curve adjustment in your tone curve for a more nuanced approach.
- White Balance and Color Correction:
- White Balance: Correct any color casts. Overcast days can introduce a cool blue cast, while golden hour might appear excessively warm. Adjust the temperature and tint sliders until skin tones look natural. Aim for pleasing, accurate colors.
- Vibrance and Saturation: Boost vibrance slightly to make colors pop without overdoing it. Vibrance selectively enhances less saturated colors, while saturation applies to all colors equally.
- Shadows and Highlights:
- Shadows: Lift shadows slightly to reveal detail in darker areas, particularly under eyes or in hair. Be careful not to make them too bright, which can create an artificial look.
- Highlights: Recover any blown-out highlights, especially in skies or on reflective surfaces. Reducing highlights helps retain detail and prevent distracting bright spots.
- Sharpening and Noise Reduction:
- Sharpening: Apply a small amount of sharpening to bring out fine details, especially in the eyes and facial features. Do not overdo it, as excessive sharpening can make an image look gritty.
- Noise Reduction: If you shot in lower light (e.g., deeper shade) and had to increase your ISO, apply noise reduction to smooth out grain. Balance this with sharpening to avoid losing too much detail.
- Local Adjustments for Facial Enhancements:
- Eye Enhancement: Subtly brighten and sharpen eyes. You can use a local adjustment brush to increase exposure, clarity, or sharpness specifically on the iris and pupil.
- Skin Smoothing (Subtle): If desired, a very light touch of skin smoothing can reduce minor blemishes. Focus on maintaining natural skin texture, avoiding an overly plastic appearance. Tools like a healing brush or clone stamp are excellent for removing temporary blemishes.
- Cropping and Straightening:
- Cropping: Refine your composition. Crop out distracting elements or use it to reframe your subject, adhering to principles like the rule of thirds.
- Straightening: Ensure horizons are level and vertical lines are straight, contributing to a polished final image.
Remember, the goal of editing is to enhance, not to transform. Good natural light provides a solid foundation, and thoughtful editing brings out its full potential.
“Editing empowers you to refine the story your natural light portraits tell. It is where you polish the gem you captured, enhancing its facets without changing its inherent brilliance.” Cambridge in Colour provides valuable insights into post-processing techniques, complementing your understanding of light.
Frequently Asked Questions
What is the best time of day for outdoor portraits using natural light?
The best time of day is generally the “golden hour,” which occurs about an hour after sunrise and an hour before sunset. During these times, the sun is low in the sky, producing soft, warm, and flattering light that minimizes harsh shadows and creates beautiful colors. You can also achieve excellent results in open shade or on overcast days.
How do I avoid harsh shadows on faces when shooting in bright sun?
To avoid harsh shadows, seek out open shade, such as under a large tree or on the north side of a building. Alternatively, use a translucent diffuser between the sun and your subject to soften the light. You can also backlight your subject and use a reflector to bounce light onto their face, or strategically pose them to hide shadows.
What equipment do I need for natural light portrait photography?
You can start with just your camera and a lens. However, a collapsible 5-in-1 reflector is highly recommended. It allows you to bounce light into shadows, diffuse harsh light, and add warmth or sparkle. You might also consider a simple tripod for stability or a light stand to hold a reflector if you do not have an assistant.
Can I take good portraits using natural light on a cloudy day?
Absolutely, cloudy days are fantastic for natural light portrait photography. The clouds act as a giant softbox, diffusing the sunlight and creating incredibly even, soft, and flattering light. This minimizes shadows, avoids squinting, and allows for vibrant, saturated colors. You can shoot at any time of day under overcast skies.
How does the direction of natural light affect my portraits?
The direction of natural light profoundly impacts your portraits. Front lighting illuminates evenly but can flatten features. Side lighting adds dimension and drama with shadows and highlights. Backlighting creates a beautiful rim light, separating your subject from the background. Top lighting (midday sun) generally produces harsh, unflattering shadows under the eyes and nose, which you should try to avoid or mitigate.
Disclaimer: This article is for informational purposes only. When handling valuable or irreplaceable photographs, consider consulting a professional conservator. Always test preservation methods on non-valuable items first.
Even in soft, flat lighting, it is essential to know how to take sharp photos every time to ensure your subject’s eyes remain in focus.


Leave a Reply