
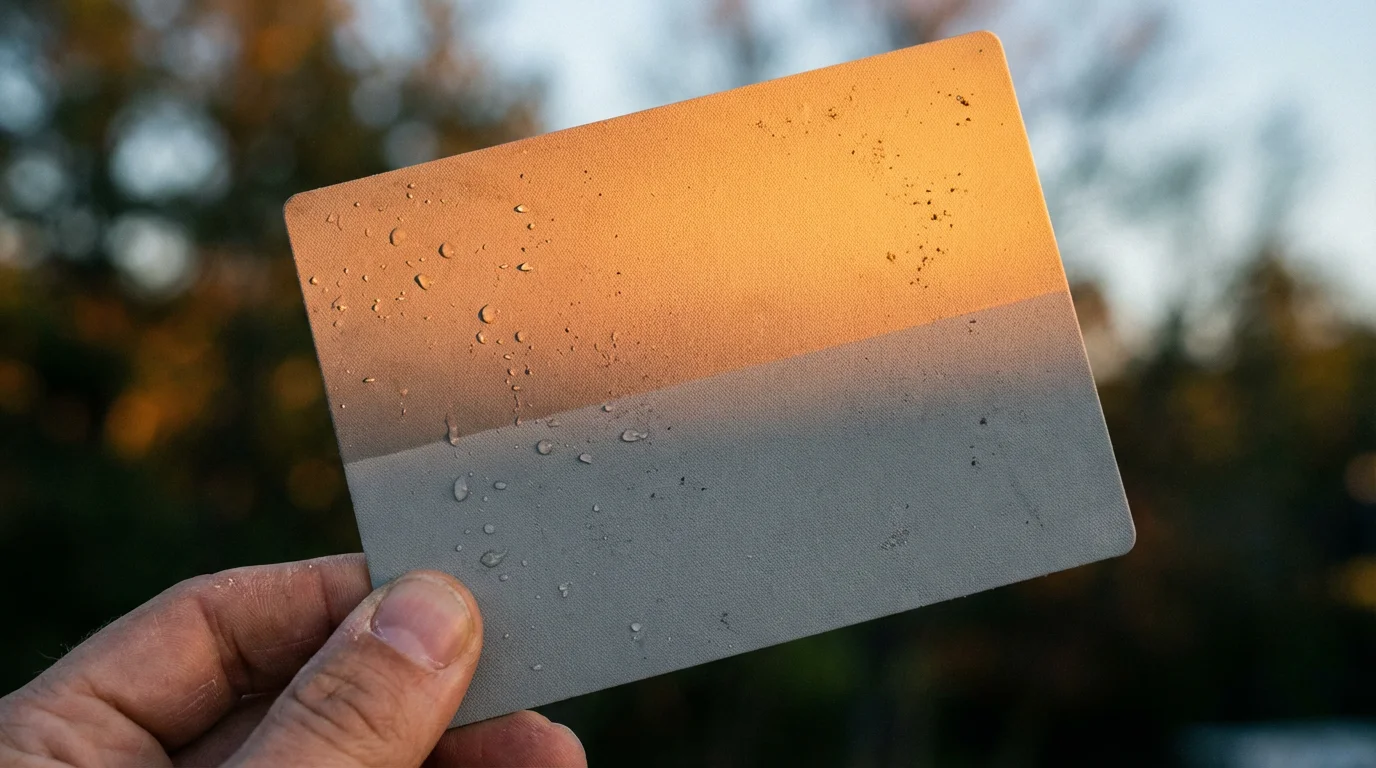
Your family photographs capture more than just faces or places. They encapsulate moments, emotions, and the very essence of your shared history. Think about a cherished snapshot from a golden hour picnic, or a vibrant portrait from a festive gathering. The colors in these images are not merely decorative, they are fundamental to how you remember and connect with those experiences. When colors appear distorted, perhaps a beloved wedding dress looks yellow instead of white, or skin tones carry an unnatural blue tint, the authenticity of that memory diminishes. This color distortion often stems from a lack of understanding of white balance. Mastering white balance empowers you to capture the true hues of your world, ensuring your photographs accurately reflect the beauty and emotion of the original scene. You preserve not just an image, but the genuine visual story for generations to come.
What is White Balance?
White balance is a camera setting that adjusts colors to appear more natural under different lighting conditions. Imagine taking a photograph indoors under warm incandescent bulbs and then immediately stepping outside into bright midday sun. Without proper white balance, the indoor photo might have an orange cast, and the outdoor photo could look overly blue. Your brain automatically compensates for these color shifts, making a white shirt appear white regardless of the light source. A camera, however, does not possess this innate ability. It records the light exactly as it falls on the sensor.
Proper white balance is just the beginning; understanding basic brightness and exposure is also key to a high-quality final image.
The primary goal of white balance is to neutralize color casts introduced by various light sources, ensuring that objects you know to be white in reality appear white in your photographs. Achieving accurate `white balance` means your reds look red, your blues look blue, and all other colors maintain their true vibrancy. This fundamental `camera setting` is crucial for realistic and pleasing images.
“Accurate white balance is the bedrock of true-to-life color photography. It ensures that the color of light does not dictate the color of your subjects, preserving the visual integrity of your captured moments.”

Why Color Accuracy Matters for Your Memories
The colors in your photographs are deeply intertwined with memory and emotion. A vibrant family reunion photo loses some of its warmth if everyone’s skin tones appear sallow or green. The pristine white of a wedding dress, meticulously chosen, tells a different story if it renders as a sickly yellow in your images. `Color accuracy` is not a mere technical detail, it is a vital component of preserving the authenticity and emotional resonance of your precious moments.
If you are working with digital copies of old prints, applying specific color correction tips for scanned photos can help revive those muted tones.
Beyond color, ensuring your focus is crisp is just as vital, so learning how to take sharp photos will complement your mastery of white balance.
When you look back at a photo, you want to recall the scene as it truly was, not as the camera inadvertently distorted it. Inaccurate colors can confuse your perception of an event, even subtly altering your memory over time. For example, old family photos passed down through generations often carry a yellowish or reddish cast due to the aging of photographic paper or printing processes. While some might find this charmingly nostalgic, it is still a deviation from the original scene’s colors. As you digitize these physical heirlooms, you strive to restore their original vibrancy, connecting more directly with the past. Modern digital photography offers the power to capture colors with unparalleled precision from the start. Prioritizing correct white balance from the moment you click the shutter ensures your visual heritage remains as true and compelling as possible, preventing your cherished photos from appearing `too orange or blue`.

How Your Camera Sees Color: The Kelvin Scale
Understanding how your camera “sees” color begins with the concept of color temperature, measured on the Kelvin scale. This scale quantifies the warmth or coolness of a light source, ranging from lower numbers representing warmer (more orange/red) light to higher numbers representing cooler (more blue) light.
Here is a simplified overview of how different light sources fall on the Kelvin scale:
- 1,000-2,000K: Candlelight, very warm, orange-red.
- 2,500-3,500K: Tungsten/Incandescent bulbs, warm, yellowish.
- 3,500-4,500K: Fluorescent lights, often with a green cast, cool.
- 5,000-5,500K: Midday sun, neutral white light, standard for daylight balance.
- 5,500-6,500K: Flash, slightly cool.
- 6,500-8,000K: Cloudy skies, cooler, bluer.
- 9,000-10,000K: Deep shade, very cool, distinctly blue.
Understanding the sun’s specific Kelvin temperature is particularly helpful when applying natural light photography tips for outdoor family portraits.
Your camera’s `white balance` setting works by applying an opposing color correction to the light it detects. If the light source is warm (low Kelvin), your camera applies a cooler adjustment. If the light source is cool (high Kelvin), your camera adds warmth. This counter-balancing act is how your camera neutralizes color casts and achieves `color accuracy`. Recognizing the approximate Kelvin temperature of your shooting environment empowers you to make informed decisions about your `camera settings`.

Common White Balance Presets and When to Use Them
Most digital cameras offer a range of pre-programmed `white balance` settings, often referred to as presets. These presets are designed to compensate for the most common types of light sources you will encounter. Familiarizing yourself with these options is the first step toward achieving better `color accuracy` in your images.
Mastering these presets is particularly helpful when learning how to take great group photos in varied lighting conditions.
If you aren’t using a professional camera, many of these color principles apply to smartphone photography for better casual family shots.
Here is a breakdown of typical white balance presets and their ideal uses:
- Auto White Balance (AWB): Your camera attempts to detect the light source and set the white balance automatically. AWB performs well in many situations, especially with mixed lighting or when the light source is unknown. However, AWB can struggle in complex or unusual lighting, sometimes producing images that are `too orange or blue`.
- Daylight/Sunny: This setting assumes bright, direct sunlight (around 5,200K). Use it for outdoor shooting on clear days.
- Cloudy: Cloudy days produce cooler, bluer light (around 6,000K-7,000K). This preset adds warmth to compensate, restoring natural tones.
- Shade: Areas in deep shade are even cooler and bluer than cloudy conditions (around 7,000K-8,000K). The Shade preset adds significant warmth to correct this.
- Tungsten/Incandescent: Designed for indoor lighting from traditional incandescent light bulbs, which are very warm (around 2,700K-3,200K). This preset applies a strong blue correction to neutralize the orange cast.
- Fluorescent: Fluorescent lights often have a green cast and varying color temperatures (around 3,500K-4,500K). This preset aims to remove the green tint and balance the color. Many cameras offer multiple fluorescent options (e.g., Warm White Fluorescent, Cool White Fluorescent) for greater precision.
- Flash: When using your camera’s built-in flash or an external flash, this preset helps achieve a balanced look (around 5,500K-6,000K), similar to daylight.
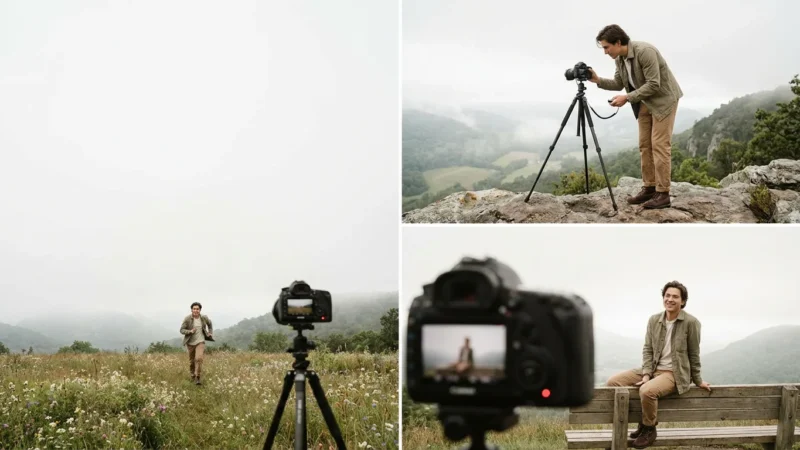
To adjust these `camera settings`, look for a dedicated “WB” button on your camera body or access the white balance menu through your camera’s LCD screen. Changing the setting is quick, and observing the results on your camera’s display helps you learn which preset works best in different environments.

Mastering Custom White Balance: Precision for Critical Moments
While presets offer convenience, they are generalized solutions. For paramount `color accuracy`, especially in professional contexts like product photography, art reproduction, or important events where skin tones must be perfect, you need Custom White Balance (CWB). CWB allows your camera to read the exact color temperature of the light in your specific shooting environment, providing the most precise `white balance` setting possible. This avoids photos being `too orange or blue` due to complex or mixed lighting.
Before starting a session using custom settings, ensure you have plenty of space on your high-quality memory cards for those reference shots.
Learning `how to set white balance on your camera` using the custom method provides an invaluable tool for maximum control.
Follow these steps to set a Custom White Balance:
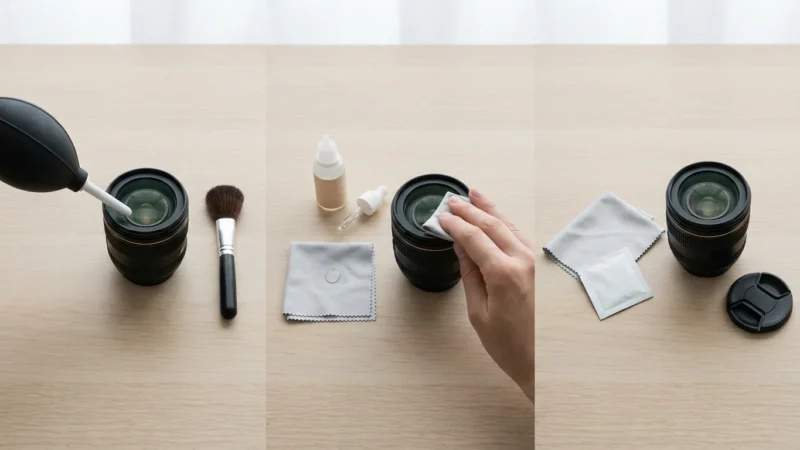
- Acquire a White or Gray Card: Use a neutral gray card (often 18% gray) or a plain white object that fills the frame. Gray cards are preferred because they reflect all colors of light equally, giving your camera a true neutral reference. Many photographic supply stores sell affordable gray cards.
- Place the Card in the Scene: Position the gray card or white object where your subject will be, ensuring it receives the same light that falls on your subject. This is critical.
- Take a Reference Shot: Fill your camera’s frame with the gray card or white object. Make sure it is in focus, and take a picture. This shot doesn’t need to be perfectly exposed, but it serves as the color reference.
- Navigate to Custom White Balance: Access your camera’s menu system and locate the “Custom White Balance” or “Preset Manual White Balance” option.
- Select the Reference Image: Your camera will prompt you to select the image of the gray card you just took. Confirm your selection.
- Activate Custom White Balance: Once confirmed, the camera processes the reference image and stores that specific `white balance` value. Now, select this newly stored custom setting as your active white balance mode.
Your camera is now precisely calibrated for the light in that environment. If the lighting conditions change significantly, repeat the process. This method gives you unwavering `color accuracy` in challenging situations.

Correcting White Balance in Post-Processing
Even with careful attention to `white balance` in camera, sometimes you might find your photos are `too orange or blue`. Perhaps you forgot to change a setting, or the lighting was simply too complex for even the best custom white balance. Fortunately, modern photo editing software offers powerful tools to correct white balance during post-processing. This is especially effective if you shoot in RAW format, which preserves more color data than JPEG.
If you are working on a budget, you can use free photo editing software to fix color casts during your post-production workflow.
To make the correction process easier, remember that shooting in RAW provides significantly more flexibility for white balance adjustments than JPEG.
Once you have corrected the color cast, you can further enhance your images by adjusting brightness, contrast, and exposure to make them truly pop.
Here is how you can approach white balance correction in editing software like Adobe Lightroom, Photoshop, or GIMP:
- The Eyedropper Tool: Most editing software includes a white balance eyedropper tool. Locate an area in your image that should be neutral gray or pure white. Click the eyedropper on this area. The software then analyzes the color cast in that point and adjusts the overall image to neutralize it, bringing your colors closer to accuracy. This is often the quickest and most effective starting point.
- Temperature and Tint Sliders: For more nuanced adjustments, use the Temperature and Tint sliders. The Temperature slider moves between warm (orange) and cool (blue), allowing you to counteract unwanted color casts. If your image is too yellow, move the slider towards blue. If it is too blue, move it towards yellow. The Tint slider addresses green and magenta casts, which are common with fluorescent lighting or certain LED sources. Move it towards magenta to remove green, or towards green to remove magenta.
- Preset Corrections: Many software programs also offer white balance presets similar to those in your camera (Daylight, Cloudy, Tungsten, etc.). These can be a good starting point if you know the original lighting condition.
While post-processing provides a safety net, remember that correcting `white balance` in software is always better when you begin with a RAW file. RAW files contain significantly more color information, allowing for greater flexibility and finer adjustments without introducing artifacts or color banding. Getting the `camera settings` right in the first place reduces editing time and generally yields superior results, but knowing how to fix issues is a valuable skill. For more in-depth guidance on post-processing techniques, you can explore resources like Digital Photography Review’s extensive articles on image editing.
Practical Tips for Achieving Perfect White Balance Every Time
Mastering `white balance` is a journey that involves practice and mindful attention to your shooting environment. Implement these actionable tips to improve your `color accuracy` consistently:
- Shoot in RAW: This is arguably the most important tip. RAW files capture all the data from your camera’s sensor, including a much broader spectrum of color information than JPEGs. This means you have maximum flexibility to adjust `white balance` in post-processing without degradation, giving you an excellent safety net if your initial `camera settings` are off.
- Use a Gray Card: As discussed, a neutral gray card provides the most reliable reference for custom white balance. Carry one in your camera bag and use it for critical shots or when lighting conditions are tricky. For casual shooting, a white piece of paper can serve as an emergency reference, though it is less accurate than a dedicated gray card.
- Observe the Light: Before you even lift your camera, take a moment to assess the light source. Is it direct sunlight, open shade, indoor incandescent, or fluorescent? This quick assessment helps you select an appropriate preset or decide if a custom white balance is necessary.
- Monitor Your LCD/Electronic Viewfinder: After taking a shot, review it on your camera’s screen. While LCDs can sometimes be misleading, a blatant orange or blue cast will be evident. Use this immediate feedback to make adjustments.
- Experiment and Learn: Deliberately try different `white balance` settings in the same lighting condition. Observe how each changes the colors. This hands-on experimentation builds your intuition and helps you understand the impact of each `camera setting`.
- Avoid Mixed Lighting if Possible: Mixed light sources (e.g., window light combined with warm indoor lamps) are notoriously difficult for achieving perfect white balance. Your camera can only choose one white balance setting. If you cannot eliminate one of the light sources, prioritize balancing for the dominant light on your subject. This is where custom white balance truly shines.
In addition to mastering color, ensure your images are crisp and clear by learning how to take sharp photos in every environment.
By consistently applying these practices, you gain confidence in your ability to capture the world with true `color accuracy`, ensuring your photographs are visually authentic and timeless.
Frequently Asked Questions
What is the biggest mistake people make with white balance?
Many photographers primarily rely on Auto White Balance (AWB), assuming the camera always gets it right. While AWB has improved significantly, it frequently struggles with complex lighting, scenes with a dominant color, or very warm/cool conditions, leading to photos that are `too orange or blue`. The biggest mistake is not proactively choosing a specific white balance setting or using custom white balance when necessary.
Can I always rely on Auto White Balance (AWB)?
You can rely on AWB for casual shooting in straightforward, balanced lighting. However, for critical situations where `color accuracy` is paramount, such as portraits, product photography, or documenting important events, AWB often falls short. It is always better to manually select a preset or, for optimal results, set a custom white balance.
Is white balance important for black and white photos?
Yes, white balance still holds importance for black and white photography, even though you remove color. The white balance setting affects how the camera converts color into different shades of gray. A warmer white balance setting might create slightly different tonal transitions than a cooler one, particularly in areas that were originally colored. Shooting in RAW and setting a good white balance allows for maximum control over these tonal interpretations during conversion to monochrome in post-processing.
What if my photos still look off even with correct white balance?
If your photos still appear off despite setting `white balance` correctly, consider other factors influencing color. Exposure significantly impacts how colors render. Underexposed photos can look dull, while overexposed ones can appear washed out. Lens filters, external flashes, or even the color of surrounding objects reflecting light can also subtly alter hues. Review your exposure settings and consider the overall light quality.
How does white balance affect skin tones?
White balance profoundly impacts skin tones. Human skin tones are very sensitive to color casts. If your `white balance` is too warm, skin might appear unnaturally red or orange. If it is too cool, skin can look sickly blue or green. Achieving correct white balance is crucial for rendering natural, healthy-looking skin tones in portraits and group photos, which directly contributes to `color accuracy` and the pleasing aesthetic of your images.
Disclaimer: This article is for informational purposes only. When handling valuable or irreplaceable photographs, consider consulting a professional conservator. Always test preservation methods on non-valuable items first.
While professional cameras offer extensive manual control, you can also apply these color principles when using smartphone photography tips to preserve your daily family memories.

Leave a Reply