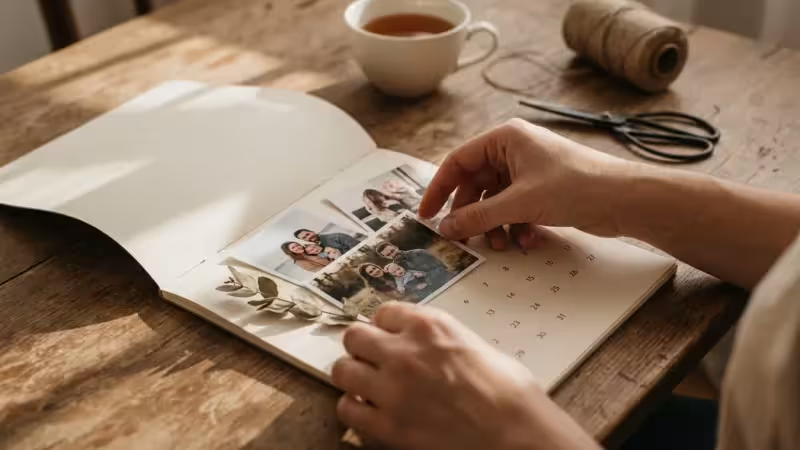
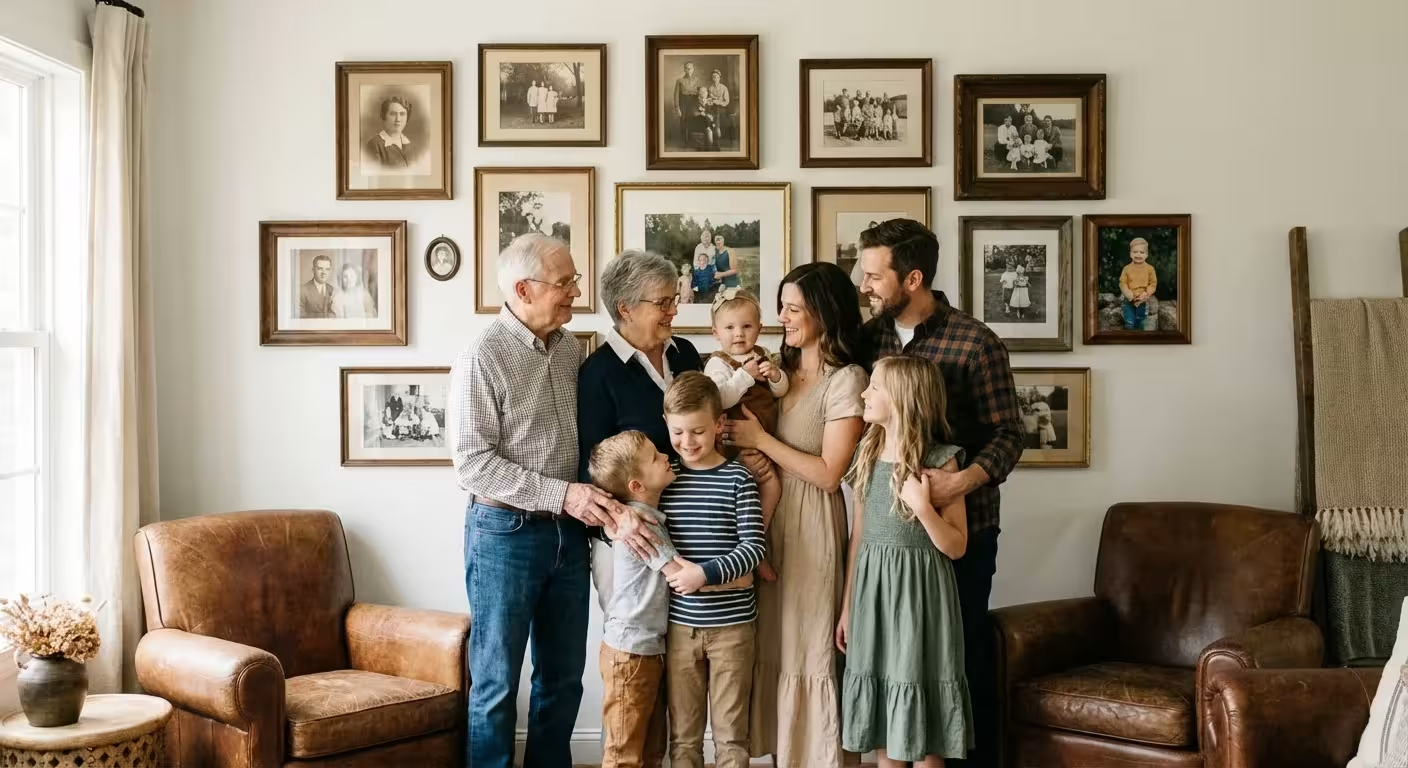
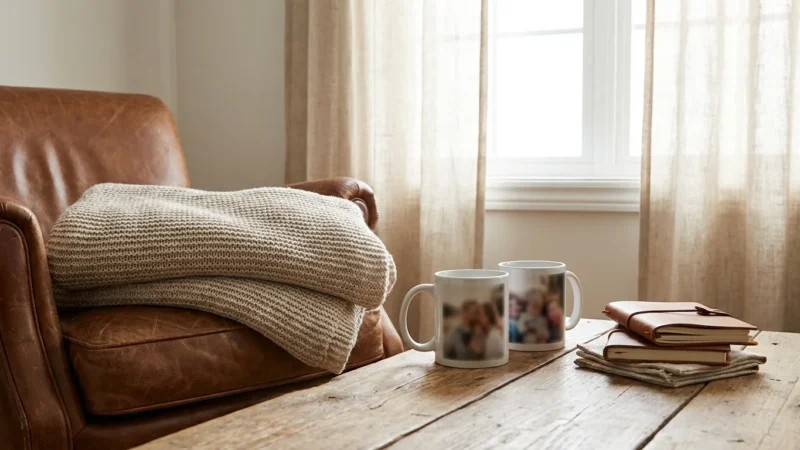
Every holiday season, you unpack boxes of decorations that tell the story of your life. While glittery baubles and store-bought stars have their place, the most meaningful items on any tree are the ones that spark a specific memory. Your family heritage deserves more than just a spot in a dusty album; it deserves a place in your celebrations. Transforming your favorite snapshots into beautiful, handmade ornaments is one of the most rewarding ways to honor your history while creating new traditions.
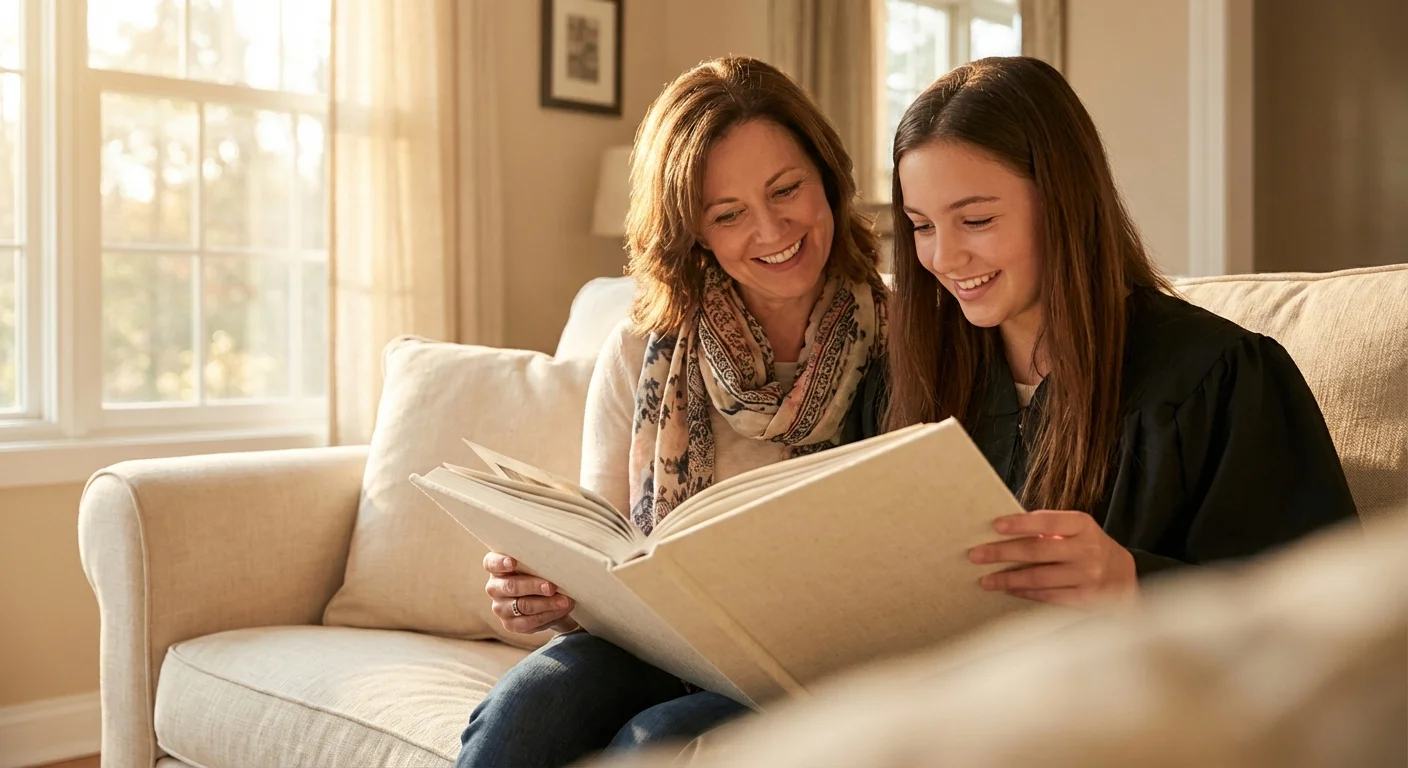
You might have a box of inherited polaroids or a smartphone overflowing with thousands of digital images from the past year. These moments are the heartbeat of your home. By turning them into physical ornaments, you bridge the gap between the past and the present. This guide provides five practical, step-by-step methods to create professional-looking photo ornaments that will last for generations. Whether you prefer a rustic aesthetic or a sleek, modern look, you can master these techniques with just a few supplies and a bit of creativity.

Preparing Your Images for Preservation and Display
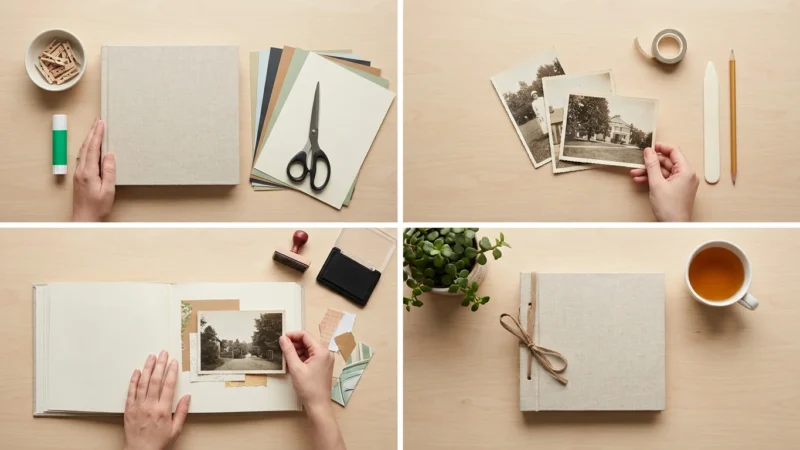
Before you pick up a pair of scissors or a bottle of glue, you must address the most critical rule of photo crafting: preserve the original. You should never cut, glue, or laminate an original vintage photograph. These items are irreplaceable, and the chemicals found in modern adhesives can cause rapid deterioration. Instead, you will work with high-quality reproductions.
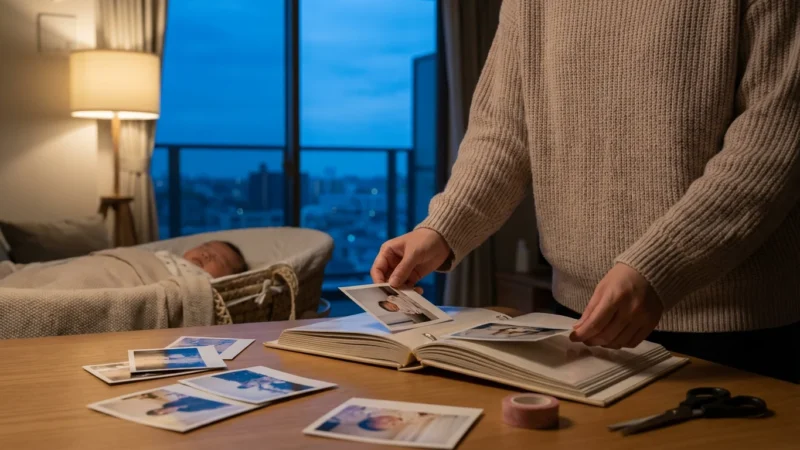
Start by scanning your chosen images at a high resolution. For an ornament-sized print, a scan of at least 300 DPI (dots per inch) is standard, but 600 DPI is better if you plan to crop a small detail out of a larger group shot. Once you have the digital file, use basic editing software to adjust the brightness and contrast. Photos often look darker once printed on matte paper or transferred to wood, so slightly increasing the exposure can help the details pop under your Christmas tree lights.
When printing, consider the longevity of your materials. The Image Permanence Institute provides extensive research on how different inks and papers hold up over time. For the best results, use a printer with pigment-based inks rather than dye-based inks, as pigment inks offer superior resistance to fading and moisture. If you do not have a high-end printer at home, your local photo lab can provide archival-quality prints on various paper types that will serve as the perfect foundation for your DIY projects.
Physical photographs are susceptible to environmental damage; creating digital backups and using prints for crafting ensures the survival of the original memory.
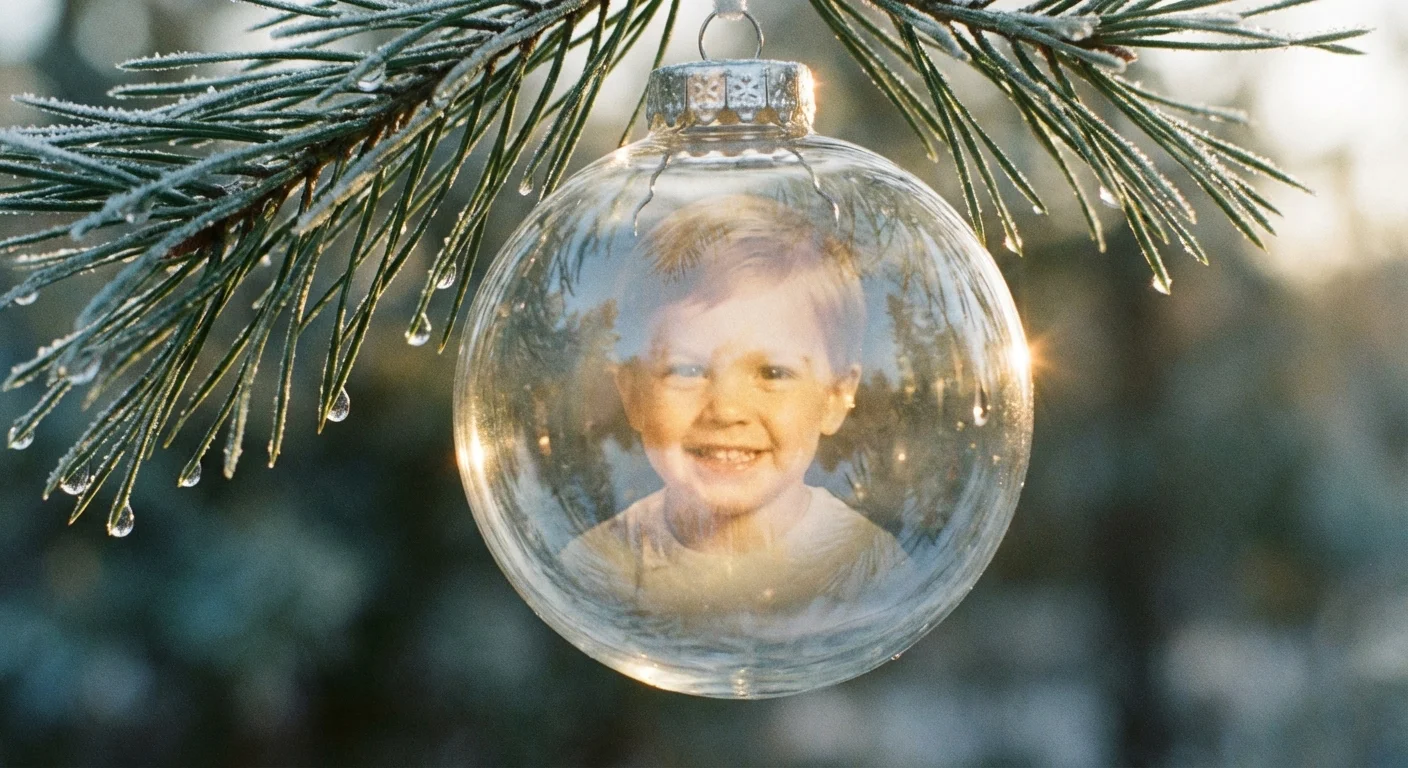
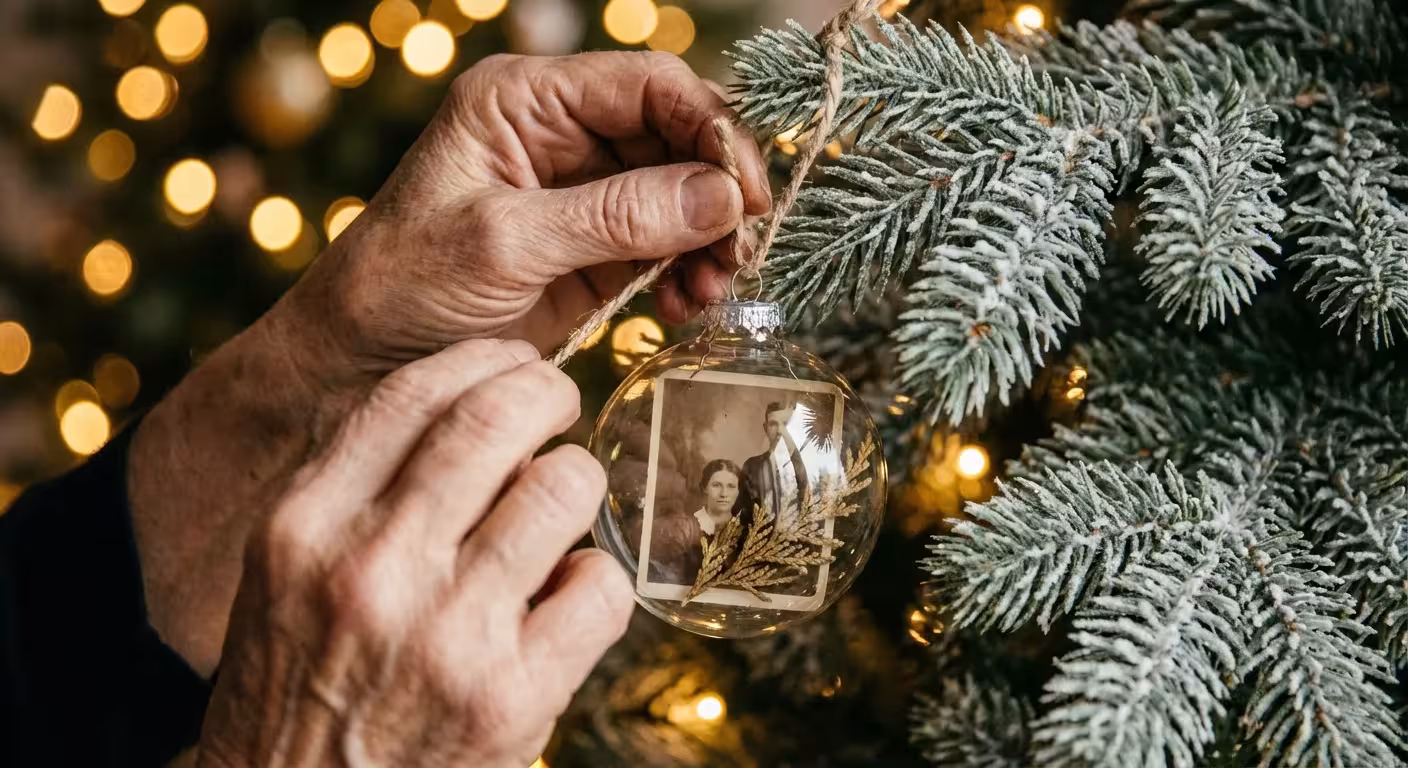
Idea 1: The Elegant Floating Photo Bauble
The floating photo ornament is a crowd favorite because it looks sophisticated yet requires minimal specialized equipment. The photo appears to be suspended inside a clear glass or plastic globe, catching the light from every angle. This style works exceptionally well for portraits of children, pets, or wedding photos.
To begin, you will need clear, fillable ornaments, which are available at most craft stores in both glass and shatterproof plastic. You also need transparency film (the kind used for overhead projectors) or a high-quality heavyweight cardstock. If you use transparency film, the background of the photo will be slightly translucent, giving it a magical, ethereal quality. If you use cardstock, the photo will be bold and opaque.
- Measure and Size: Measure the diameter of your ornament. Use photo editing software to create a circle that is about 1/8th of an inch smaller than that diameter. Place your photo inside this circle.
- Print and Cut: Print your image onto your chosen medium. Carefully cut out the circle. If you want the ornament to be double-sided, print two copies and glue them back-to-back with a thin layer of dry adhesive.
- The Roll Technique: Gently roll the photo into a tight cylinder—small enough to fit through the neck of the ornament. Do not crease the paper; you want a smooth curve.
- Insertion: Slide the rolled photo into the ornament. Once inside, use a pair of long tweezers or a thin dowel to nudge the photo open. It will naturally unfurl and press against the sides of the globe, holding itself in place.
- Decorative Flourish: Before replacing the cap, add a pinch of artificial snow, small sequins, or a sprig of dried greenery behind the photo. This adds depth and hides the back of the paper if you chose a single-sided design.
For an extra touch of class, tie a velvet ribbon around the top. This method is completely reversible if you don’t use glue inside the bulb, making it a safe and versatile choice for your holiday decor.
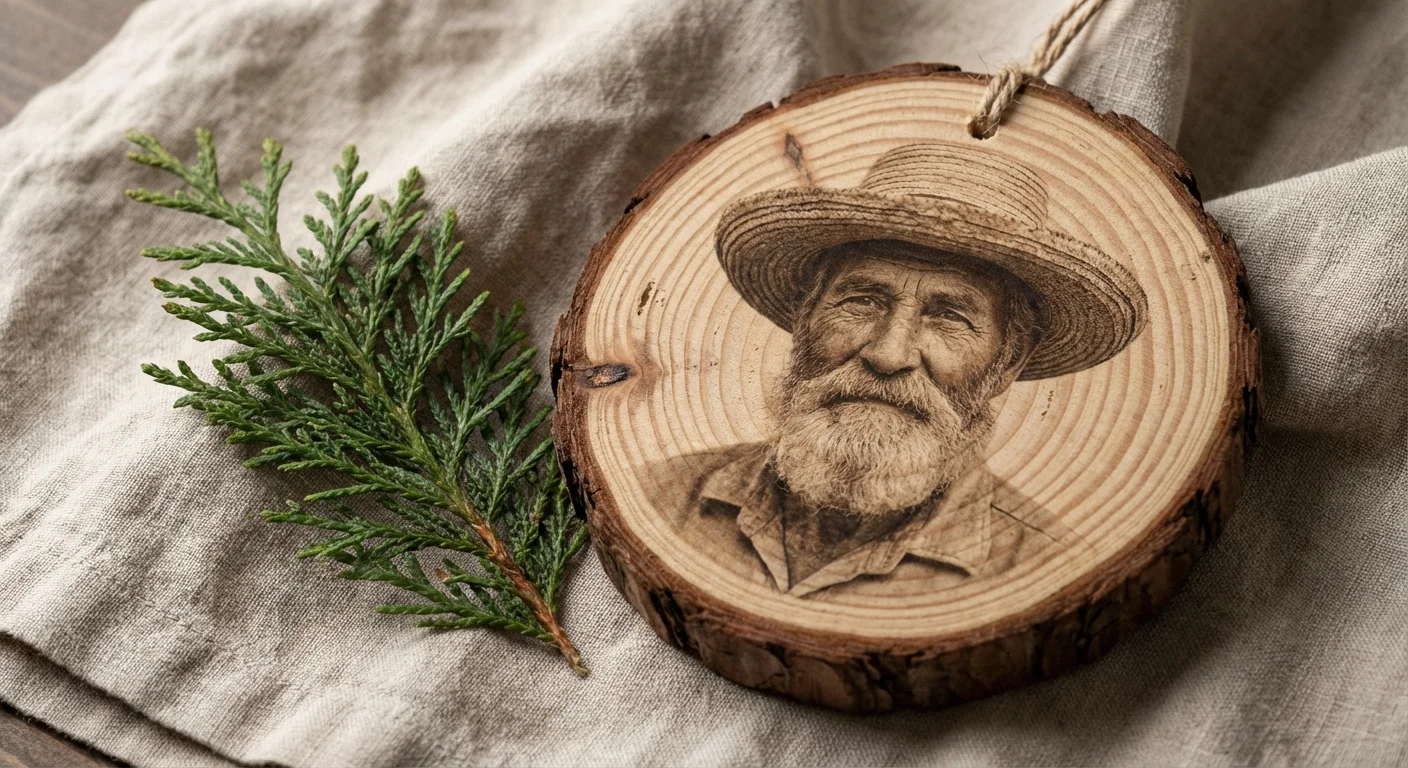
Idea 2: Rustic Wood Slice Photo Transfers
If your holiday style leans toward farmhouse or rustic, wood slice ornaments provide a natural, warm texture. Unlike simply gluing a photo onto wood, a gel transfer melds the image into the grain of the wood, creating a vintage, hand-painted look. This technique works best with black and white or sepia-toned photos, as the wood grain will show through the lighter areas of the image.
You will need unfinished wood slices (with the bark still attached for the best look), a matte gel medium, and a laser-printed copy of your photo. Note that inkjet prints will not work for this specific transfer method because the ink will bleed and smudge when it hits the wet gel.
- Mirror Your Image: Before printing, use your computer to “flip” or mirror the image horizontally. This is crucial because you will be placing the photo face-down; if there is any text in the photo, mirroring ensures it reads correctly on the finished ornament.
- Apply the Gel: Coat the surface of the wood slice with a generous, even layer of matte gel medium. Avoid leaving large globs, but ensure every millimeter is covered.
- The Transfer: Press the photo face-down into the wet gel. Use the edge of a credit card to smooth out any air bubbles, working from the center toward the edges. Let this dry completely—usually at least 8 to 12 hours. Do not rush this step.
- The Reveal: Once dry, lightly dampen the back of the paper with a wet sponge. Wait a minute for the water to soak in, then use your fingertip to gently rub away the paper fibers. The image will remain embedded in the gel on the wood.
- Seal: After removing all the paper, the image might look a bit dull. Apply a thin layer of clear varnish or more gel medium to bring back the vibrancy and protect the surface.
This method produces a unique, slightly weathered finish. No two ornaments will look exactly the same, which adds to the handmade charm of your collection.
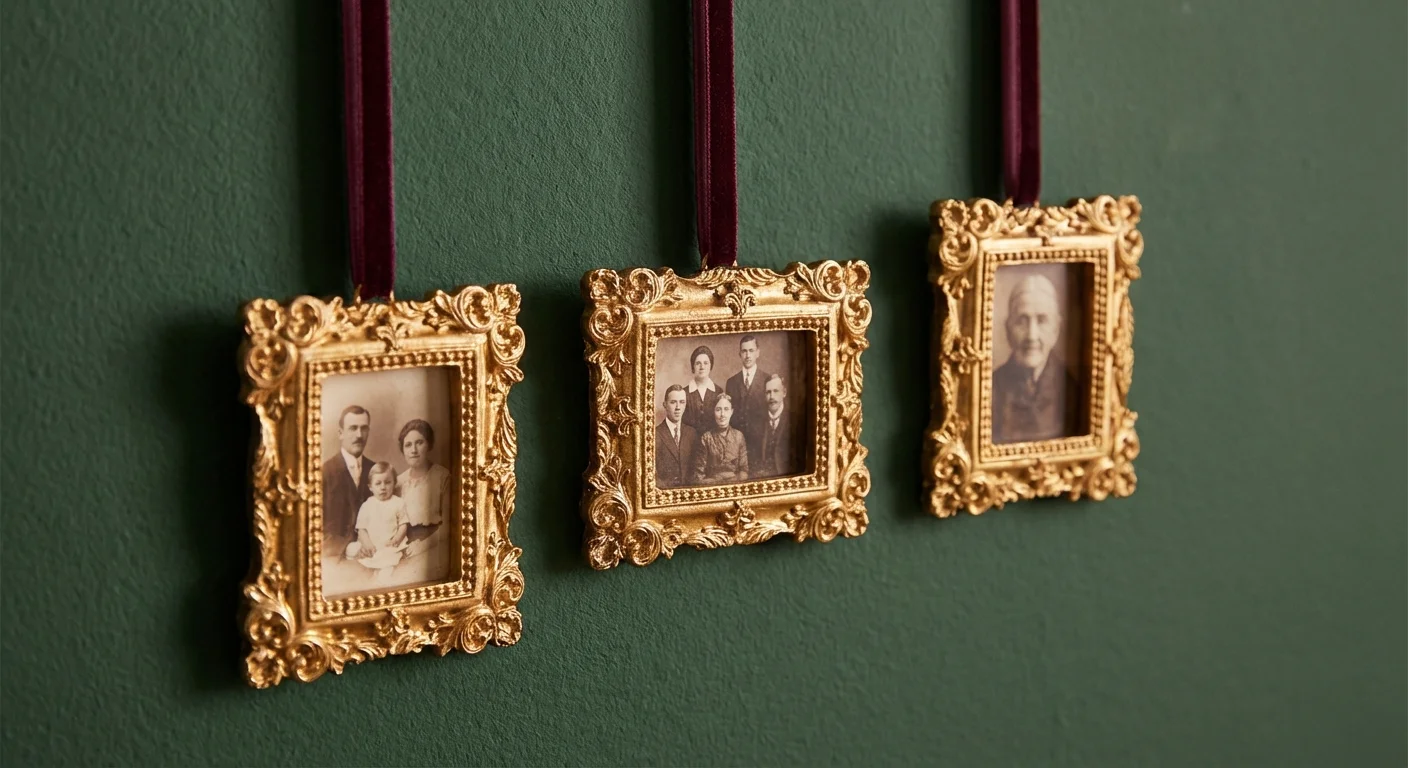
Idea 3: Miniature Framed Gallery Ornaments
Think of your Christmas tree as a vertical gallery. Miniature frames are a classic way to display photos, and they provide a structured, formal look that complements traditional decor. You can find tiny metal or resin frames designed specifically for ornaments, or you can upcycle small jewelry boxes and dollhouse frames.
To create a cohesive look, choose a consistent frame color, such as antique gold or brushed silver. This allows the photos themselves—which might have different colors and lighting—to feel like a unified set. When selecting photos for mini frames, look for “tight” shots where the subject’s face is prominent. Busy backgrounds tend to get lost at this small scale.
| Material | Benefit | Best For |
|---|---|---|
| Metal Frames | Durable and heavy; feels like jewelry. | Black and white portraits. |
| Resin/Plastic | Lightweight; won’t weigh down branches. | Large trees with many ornaments. |
| Upcycled Cardboard | Eco-friendly and customizable with paint. | Kid-friendly crafting sessions. |
| Glass-Fronted | Protects the photo from dust and oils. | High-detail color photos. |
To assemble, simply trim your photo to fit the frame’s opening. If the frame doesn’t have a glass insert, you can create one by cutting a small piece of clear plastic from clean food packaging. This adds a professional “finished” look and protects the print. Secure the back with a piece of archival-safe tape, and attach a decorative hook or twine for hanging. If you are using very old family photos, consider adding the date and the person’s name to the back of the frame using a fine-tip permanent marker so future generations will know who they are looking at.
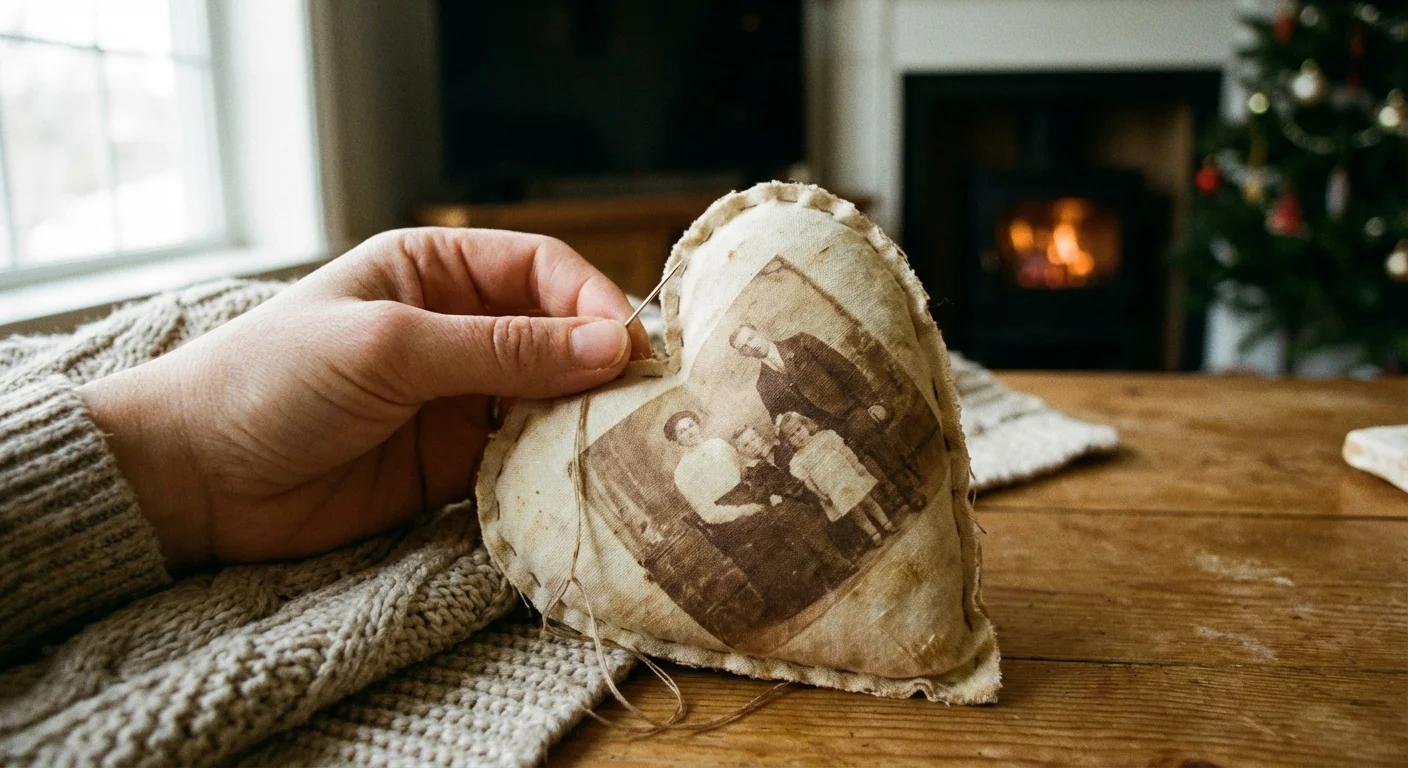
Idea 4: Heirloom Fabric Photo Softies
Fabric ornaments, often called “softies,” bring a cozy, tactile element to your tree. They are shatterproof, making them the perfect choice for households with curious toddlers or energetic pets. By printing your photos onto fabric, you create a soft heirloom that feels more like a small pillow than a traditional decoration.
You can purchase “inkjet fabric sheets” that go right through your home printer. These sheets have a paper backing that you peel off after printing, leaving you with a piece of fabric that holds a crisp, clear image. Alternatively, you can use iron-on transfer paper to move an image onto a piece of cotton muslin or linen.
- Print and Prep: Print your photo onto the fabric sheet. Allow the ink to set for at least 30 minutes to prevent smudging.
- Shape and Cut: Cut out your photo, leaving a half-inch border of extra fabric around the edges. Cut a second piece of matching fabric (velvet, flannel, or patterned cotton) for the back of the ornament.
- Sewing: Place the two pieces of fabric “right sides” together and sew around the perimeter, leaving a one-inch gap. If you aren’t comfortable with a sewing machine, a simple hand-stitched running stitch works beautifully.
- Turn and Stuff: Turn the ornament right-side out through the gap. Use a chopstick to push out the corners. Lightly stuff the ornament with polyester fiberfill or dried lavender for a scented touch.
- Finish: Hand-stitch the opening closed and sew a loop of embroidery floss or ribbon to the top for hanging.
These softies are incredibly charming and can be customized with embroidery or small bells. They are also easy to mail, making them wonderful “handmade photo gifts” for relatives who live far away.
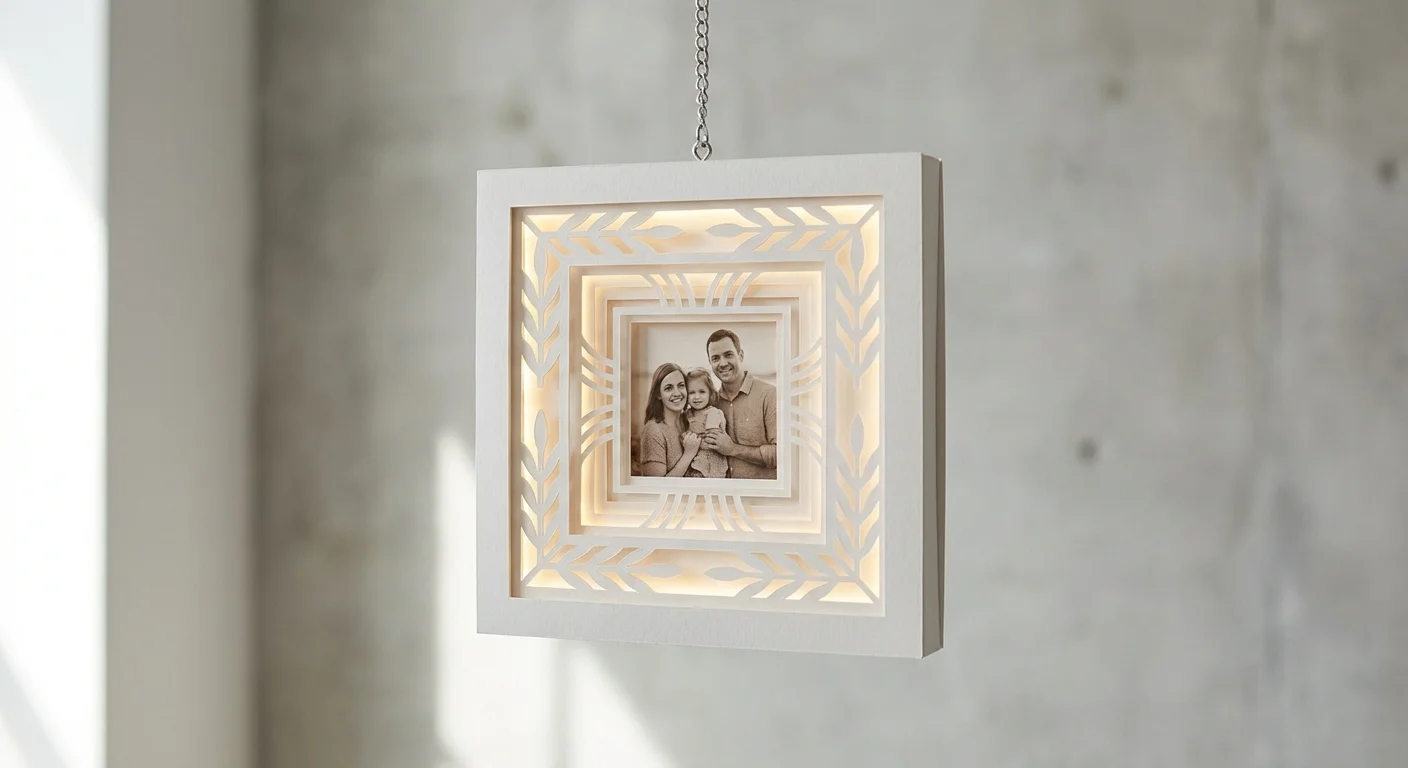
Idea 5: Layered Cardstock Shadowbox Ornaments
For those who love a 3D effect, layered cardstock ornaments create a miniature “stage” for your photos. This technique uses depth and shadow to make the image stand out. It is particularly effective for photos of houses (like your childhood home) or scenic vacation shots.
You will need thick, acid-free cardstock in various colors, foam adhesive dots (to create the “lift” between layers), and your printed photo. The goal is to create a frame that has multiple levels of depth.
- Base Layer: Cut a solid shape, like a circle or a classic ornament silhouette, from your heaviest cardstock. This provides the structural support.
- The Photo: Trim your photo slightly smaller than the base. Adhere it to the center of the base using flat adhesive or glue.
- Decorative Frames: Cut two or three “hollow” frames from contrasting cardstock. For example, use a forest green frame and a smaller gold frame.
- The 3D Effect: Instead of gluing the frames flat, use small foam dots on the back of each frame. Place the first frame over the photo, then the second frame on top of the first. This creates a physical gap between the layers.
- Embellish: Add small die-cut stars, snowflakes, or the year of the photo to the top layer.
The resulting ornament has a professional, “boutique” feel. The shadows cast by the layers add a sense of drama and importance to the photo nestled in the center. Because you are using cardstock, you have endless options for colors and patterns to match your specific holiday theme.
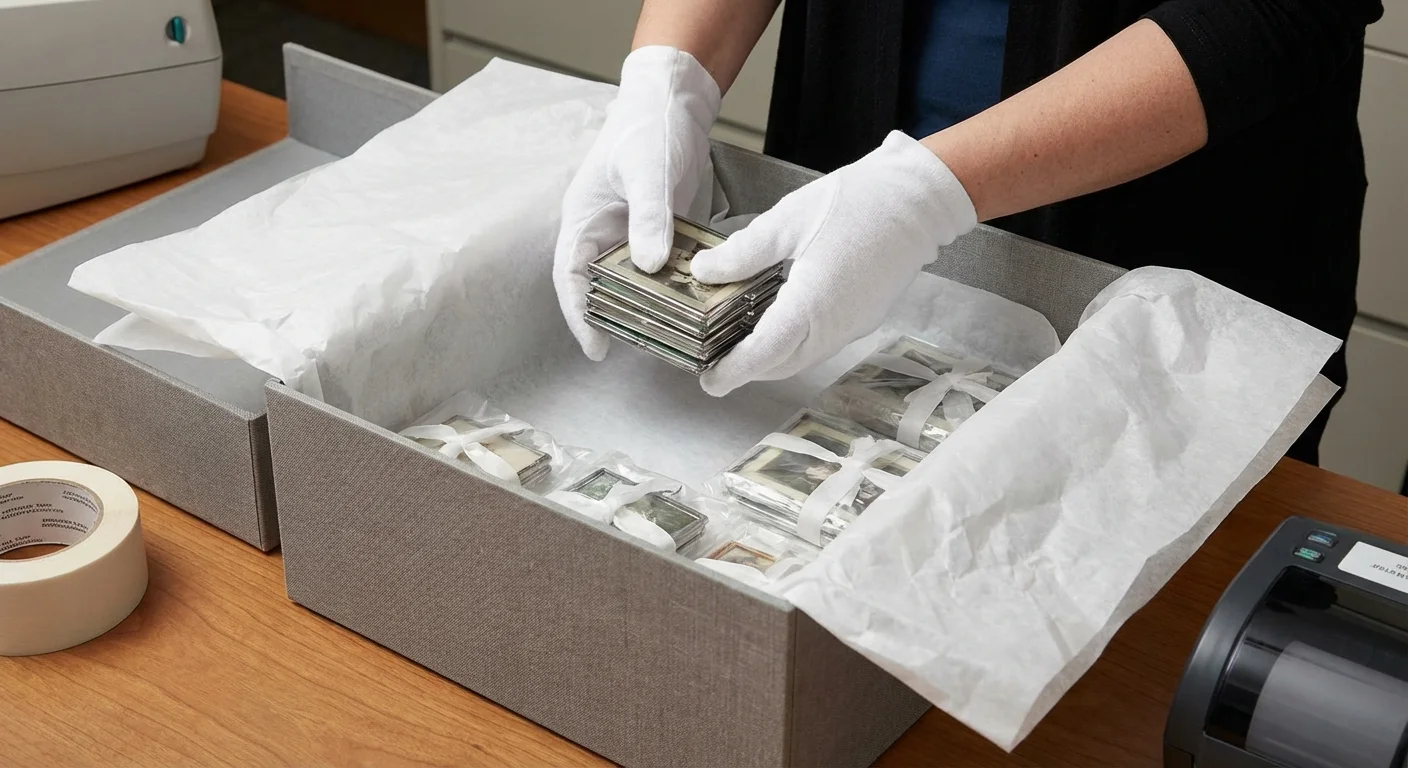
Caring for Your Ornaments After the Holidays
The work you put into these ornaments is an investment in your family’s history. To ensure they stay vibrant for years, you must store them correctly. When the holiday season ends, don’t just toss your handmade creations into a plastic bin with the tangled lights. Environmental factors like heat, humidity, and light are the primary enemies of photograph longevity.
The Library of Congress recommends keeping important documents and photos in a “cool, dry, and stable” environment. For your ornaments, this means avoiding the attic or the garage, where temperatures fluctuate wildly. Instead, find a spot in a closet or under a bed within the main living area of your home.
Wrap each ornament individually in acid-free tissue paper. This prevents the “bleeding” of colors between ornaments and protects delicate surfaces from scratches. If you used wood slices, the tissue paper will help regulate moisture and prevent the wood from cracking. For the floating baubles, a dedicated ornament storage box with cardboard dividers is ideal to prevent breakage. By taking these few extra minutes each January, you ensure that when you open your holiday boxes next year, your memories will be just as bright as the day you captured them.
Frequently Asked Questions
Should I use original vintage photos for my DIY ornaments?
You should never use original, irreplaceable photographs for craft projects. The glue, heat, and light exposure involved in making ornaments can cause permanent damage. Always scan your originals at a high resolution and use high-quality prints for your DIY projects to keep the primary copies safe in archival storage.
What type of paper is best for photo ornaments?
For most projects, a heavyweight matte photo paper or a high-quality cardstock works best. Matte finishes reduce glare from holiday lights. If you are doing a wood transfer, you must use a laser printer and standard thin printer paper, as inkjet ink and thick photo paper do not transfer correctly with gel mediums.
How can I prevent my photo ornaments from fading over time?
To prevent fading, use archival-quality inks and acid-free papers. You can also apply a UV-resistant clear coat spray to the finished ornament. When the holidays are over, store your ornaments in a cool, dry, dark place in acid-free tissue paper to protect them from light and moisture.
Can I make these ornaments if I only have digital photos?
Absolutely. Digital photos are ideal for these projects because you can easily resize, crop, and brighten them before printing. Simply select your favorite digital files, adjust them to the size of your ornament base, and print them on your home printer or at a local photo lab.
Disclaimer: This article is for informational purposes only. When handling valuable or irreplaceable photographs, consider consulting a professional conservator. Always test preservation methods on non-valuable items first.


Leave a Reply