
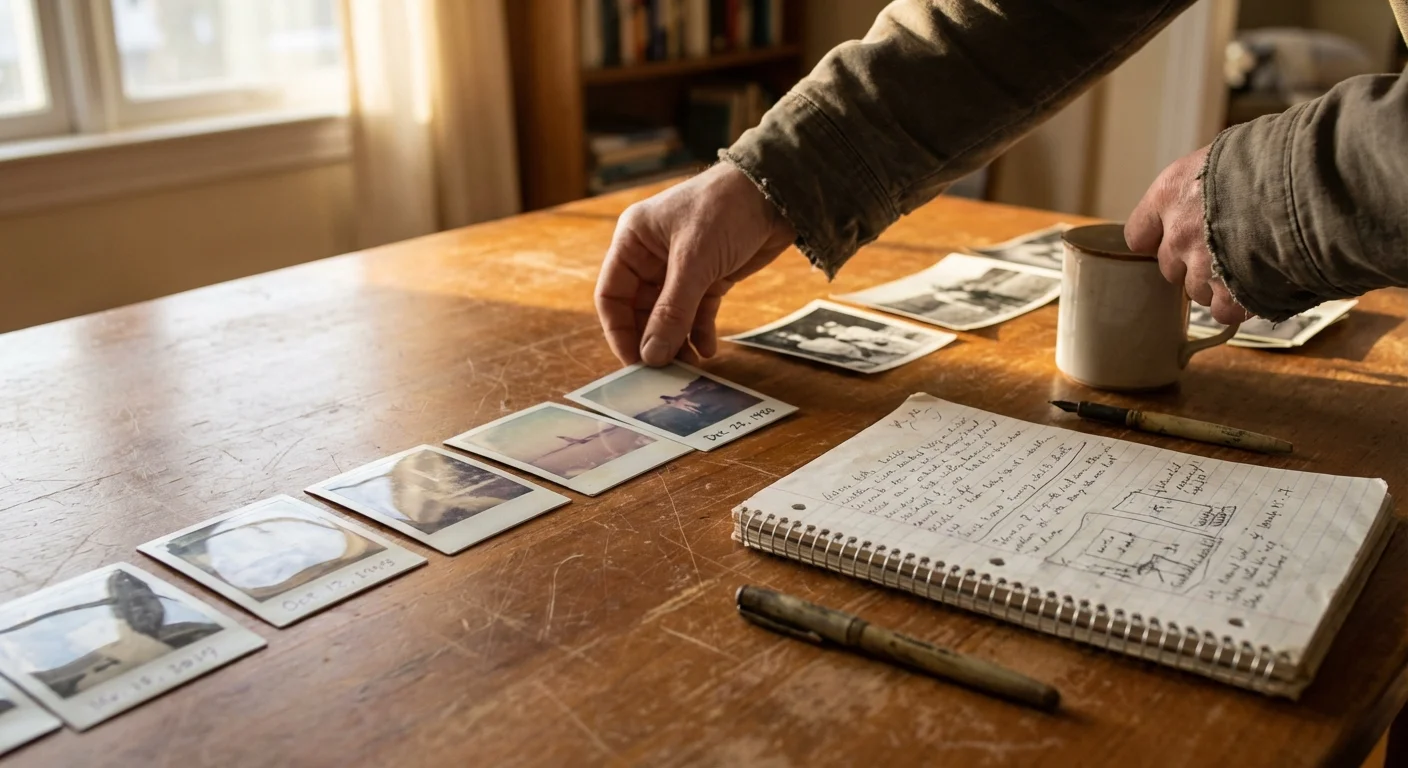
A cardboard box sits in the attic, filled with curled Polaroids, black-and-white studio portraits, and faded snapshots from the 1970s. These aren’t just pieces of paper; they are the visual receipts of a life well-lived. For many of us, our parents’ memories are the foundation of our own identities. Yet, as time passes, those stories risk fading along with the silver halides on the paper. You have the power to stop that erosion by creating a legacy book—a professionally printed, curated volume that weaves together photographs and oral history into a permanent narrative.
Creating a life-story gift is more than a creative project; it is a profound act of honor. It tells your aging parents that their experiences matter and that their legacy will remain intact for future generations. This guide provides a systematic, expert-led approach to gathering materials, digitizing memories, and designing a book that your family will cherish for decades. By following these steps, you will transform a chaotic collection of images into a structured, moving tribute.
Defining the Narrative Structure
Before you scan a single photo, you must decide how to tell the story. A book without a structure is simply an album; a legacy book requires a narrative arc. Most successful life-story books follow one of three primary structures: chronological, thematic, or the “milestone” approach.
The chronological approach is the most intuitive for readers. You begin with your parents’ ancestors or their own birth and move forward through childhood, marriage, career, and the present day. This method highlights the passage of time and makes it easy for the reader to follow the person’s development. It is particularly effective for parents who enjoy history and want to see the “long view” of their lives.
The thematic approach ignores the calendar and focuses on the pillars of their life. You might dedicate chapters to “The Great Outdoors,” “The Joy of Teaching,” or “Holiday Traditions.” This works exceptionally well for parents who have a lifelong passion or a specific hobby that defines them. It allows you to group photos from different decades together, creating a vibrant collage of a specific interest.
The milestone approach focuses on the 10 or 15 most significant moments. This is ideal if you have a limited number of photos or if you want to create a shorter, high-impact book. You might focus on their graduation, the day they bought their first house, or the birth of their first grandchild. Whichever path you choose, stick to it consistently to avoid confusing the reader.
“The best legacy books don’t just show what happened; they explain why those moments mattered to the person living them.”
Curating and Selecting the Right Images
You likely face one of two problems: too many photos or too few. Curating is the process of choosing the best “storytellers” from the pile. A common mistake is including five nearly identical photos of your father sitting on a porch. Instead, select the single sharpest, most expressive image that captures the essence of that moment. You want variety in composition—some wide shots showing the environment, and some tight portraits showing emotion.
When selecting images, prioritize those that include other people. While a photo of your mother’s first car is interesting, a photo of her in the car with her best friend is a story. Look for candid shots. While formal portraits are beautiful, the “in-between” moments—the messy kitchen during a holiday or a laugh shared at a picnic—often hold the most emotional weight. Aim for a total of 50 to 100 images for a standard 40-page book. This ensures each photo has room to “breathe” on the page without cluttering the layout.
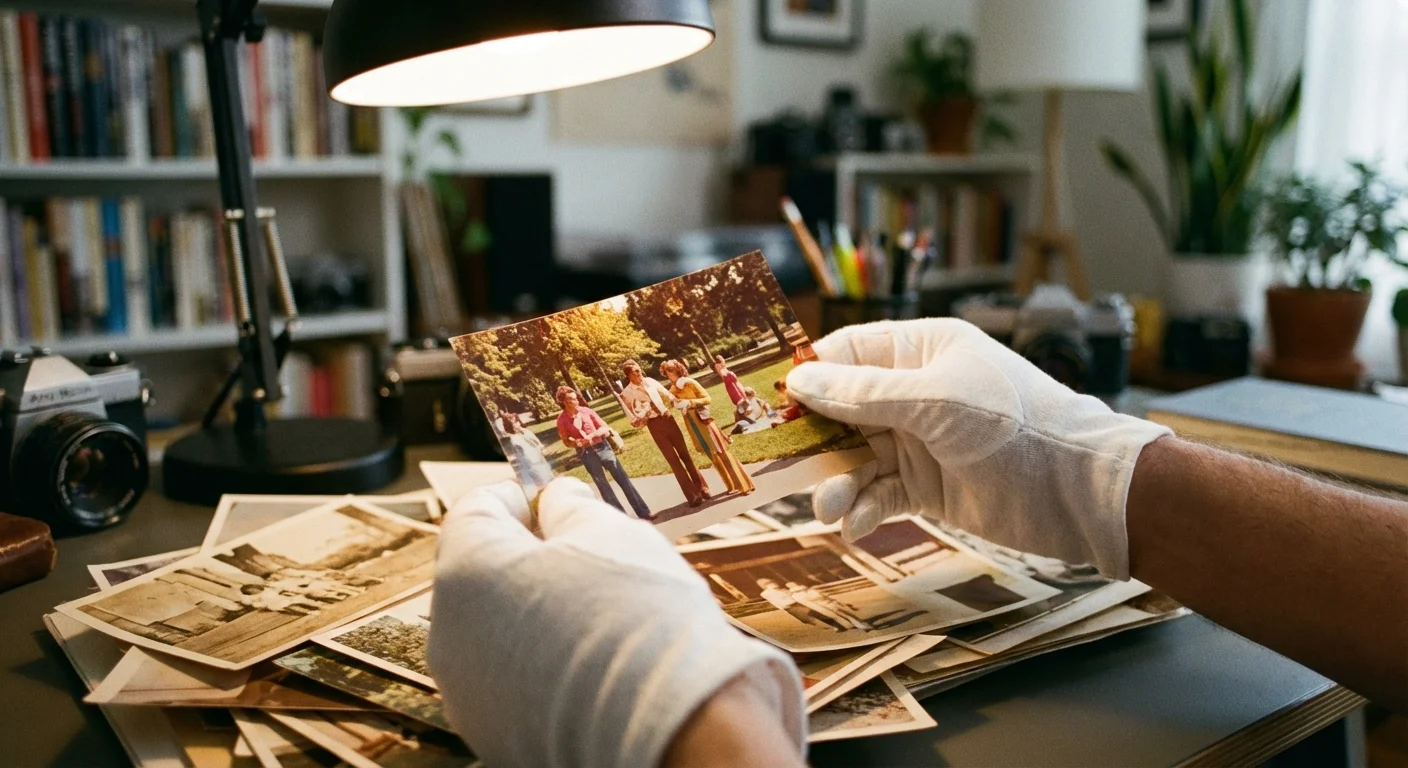
Check the physical condition of the photos. If a photo is stuck to glass or severely torn, do not attempt to peel it off or tape it. These require professional intervention. However, for most faded or slightly scratched photos, modern digital restoration can work wonders later in the process. For now, focus on the emotional value of the image rather than its technical perfection.
Gathering the Stories: The Interview Process
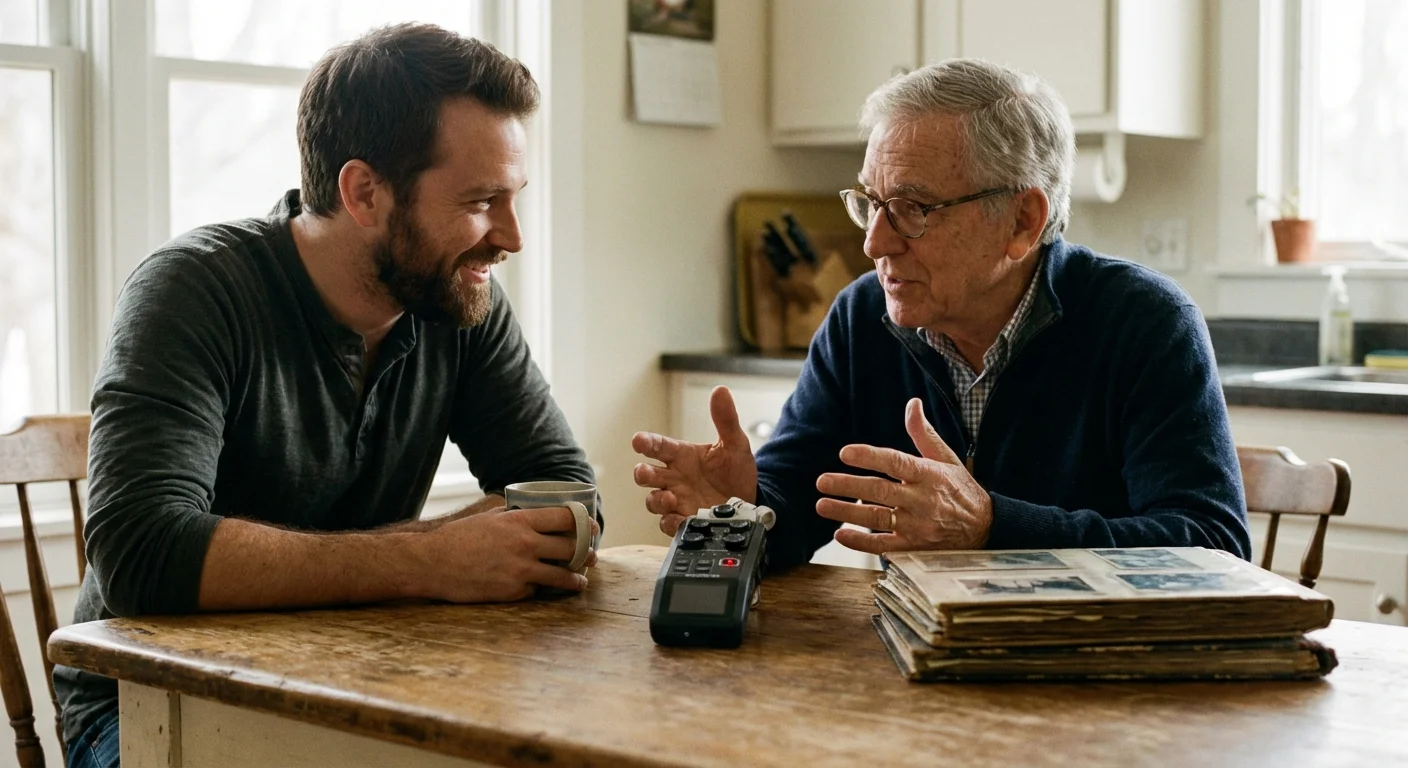
A photo of a man standing in front of a barn is just a picture. A photo of a man standing in front of the barn he built with his own hands to save the family farm is a legacy. To bridge this gap, you must interview your parents. Do not rely on your own memory or assumptions; go straight to the source. This is often the most rewarding part of the project for both you and your parents.
Set up a comfortable, quiet space and bring a digital voice recorder or use a recording app on your phone. Spread a few photos on the table to spark their memory. Use open-ended questions to encourage storytelling. Instead of asking “Is this your graduation?”, try “Tell me about the day you graduated. How did you feel about the future then?”
Consider using these prompts to elicit deeper stories:
- What is the earliest memory you have of your childhood home?
- Who was the person who influenced your career path the most?
- What was the most challenging year of your life, and how did you get through it?
- Tell me the story of how you and [Spouse’s Name] met—what was your first impression?
- What is one piece of advice you want your great-grandchildren to know?
Transcribe these recordings into short paragraphs. You don’t need to include every word; edit for clarity and flow while keeping their unique “voice” intact. These captions and short stories will provide the context that makes the book a true life-story gift.
Digitizing and Restoring Analog Assets
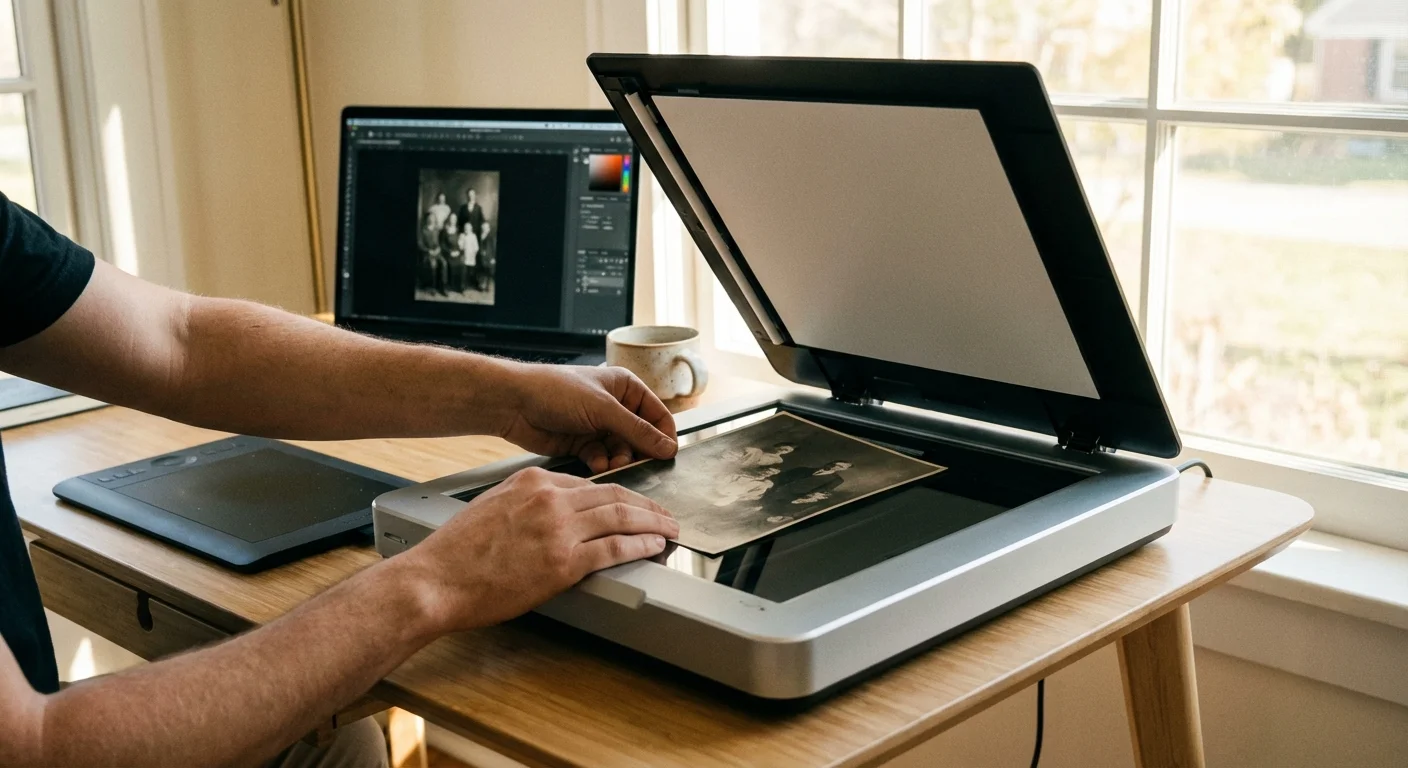
To create a high-quality printed book, you must convert physical photos into high-resolution digital files. While it is tempting to use your phone to snap a picture of a picture, this rarely produces professional results due to glare and perspective distortion. For the best results, use a flatbed scanner or a dedicated photo scanning service.
When scanning at home, set your resolution to at least 600 DPI (dots per inch). This allows you to enlarge the photo in the layout without losing quality. If you plan to blow up a small 2×3 inch photo to a full page, scan at 1200 DPI. Always save your files as TIFFs for archival purposes, though high-quality JPEGs are sufficient for most photo book printing platforms. For detailed preservation standards, you can refer to the National Archives Preservation guidelines.
| Scanning Method | Pros | Cons | Best For |
|---|---|---|---|
| Flatbed Scanner | High control, highest resolution, cost-effective. | Time-consuming for large collections. | DIYers with high-quality needs. |
| Mobile Scanning App | Fast, convenient, direct to cloud. | Glare issues, lower resolution, lens distortion. | Quick social sharing or reference. |
| Professional Service | Expert color correction, handles delicate items. | Expensive, requires shipping originals. | Irreplaceable or damaged collections. |
Once scanned, you can use software like Adobe Lightroom or simplified AI restoration tools to fix common issues. Adjust the “Blacks” and “Whites” to restore contrast to faded images. Use the “Spot Removal” tool to click away dust specks and small scratches. Be careful not to over-edit; the goal is to make the photo look like a well-preserved version of itself, not a plastic, filtered modern image.

Designing for Readability and Accessibility
When designing a book for aging parents, you must prioritize function over “trendy” design. Visual clarity is paramount. As we age, our eyes require more light and higher contrast to distinguish shapes and text. Avoid using small, light-gray text on a white background. Instead, use a bold, dark font on a clean, neutral background.
Choose a font size of at least 12 or 14 points for body text and 18 to 24 points for headers. Stick to classic fonts like Georgia (a serif font designed for readability) or Arial (a clean sans-serif). Avoid script or “handwritten” fonts for long blocks of text, as these are notoriously difficult to read for those with declining vision. Keep your layouts simple. One or two photos per page is usually better than a “scrapbook” style with ten overlapping images. Give the photos room to shine.
White space—the empty area around photos and text—is your friend. It prevents the reader from feeling overwhelmed and helps them focus on the narrative. If you are using a digital photo book platform, look for “Clean” or “Modern” templates rather than “Decorative” ones. The stars of the book are the photos and the stories, not the digital clipart around them.
Choosing the Right Printing and Binding Options
The physical quality of the book determines whether it will last for five years or fifty. For a legacy project, skip the basic “softcover” options. You want a hardcover book, ideally with “lay-flat” binding. Lay-flat binding uses a specialized technique that allows the book to open completely flat without a visible “gutter” or curve in the middle. This is perfect for large panoramic family photos and makes the book easier to handle for elderly hands.
Paper choice is equally important. There are three common finishes:
- Glossy: Vibrant colors and high contrast, but prone to fingerprints and glare.
- Matte: Zero glare and a sophisticated feel, but colors can look slightly “flat.”
- Lustre/Semi-Gloss: The “goldilocks” choice. It offers the color punch of glossy with the fingerprint resistance of matte.
For a legacy book, archival-quality paper is a must. Look for acid-free papers that meet the standards of the Image Permanence Institute. These papers will not yellow or become brittle over time. If the printing company offers “Silver Halide” printing (real photographic paper) versus “Press” printing (inkjet or toner), choose Silver Halide for the best longevity and color depth.

Preserving the Physical Legacy Book
Once the book arrives, your job isn’t quite finished. You must protect this new heirloom from the environmental factors that destroyed the original photos. Light, heat, and humidity are the primary enemies of printed materials. Store the book in a “cool, dry, and dark” location—this means avoiding damp basements or hot attics. The Library of Congress Preservation department recommends maintaining a consistent temperature and avoiding direct sunlight, which can cause rapid fading of the inks.
Consider ordering more than one copy. If you have siblings, each should have a copy. This ensures that even if one book is lost in a fire or flood, the family history remains intact. Many people also choose to print a “workhorse” copy and a “display” copy. The workhorse copy is for children and grandchildren to flip through frequently, while the display copy is kept in an archival slipcase for special occasions.
Finally, keep your digital files. The high-resolution scans and the final PDF of the book should be stored in at least two locations: one on a physical external hard drive and one in a secure cloud storage service. Technology changes, but having these source files ensures you can always reprint the book if the original physical copy is damaged.
Frequently Asked Questions
How many photos should I include in a legacy life-story book?
For a standard legacy book, aim for 50 to 100 high-quality images. While it is tempting to include every photo you find, curating the collection ensures the narrative remains focused and engaging. Focus on “milestone” images that represent specific eras, major life events, and significant relationships.
What font size is best for elderly readers?
To ensure your parents can easily read their legacy book, use a font size of at least 12 or 14 points for body text. For headers, 18 to 24 points works well. Choose clean, sans-serif fonts like Arial or Helvetica, or highly legible serif fonts like Georgia, and maintain high contrast between the text and the background.
Can I use phone photos in a printed legacy book?
Yes, modern smartphone photos are generally high enough resolution for print. However, ensure you use the original file rather than a screenshot or a photo sent via a messaging app, which often compresses the image. Aim for a resolution of 300 DPI (dots per inch) for the best print results.
How do I identify people in old photos if my parents can’t remember?
If your parents struggle to identify subjects, look for clues on the back of the photo or in surrounding images in the same batch. You can also share digital copies with extended family members or use genealogical sites. If the person remains a mystery, describe the setting or the era instead of providing a name.
Disclaimer: This article is for informational purposes only. When handling valuable or irreplaceable photographs, consider consulting a professional conservator. Always test preservation methods on non-valuable items first.


Leave a Reply