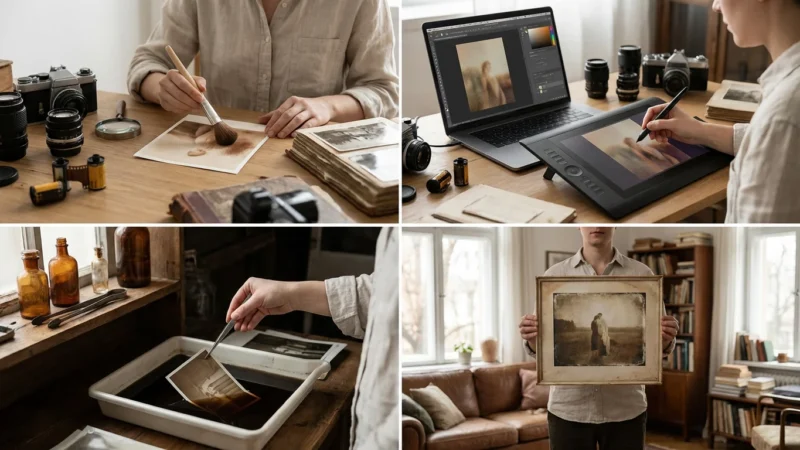
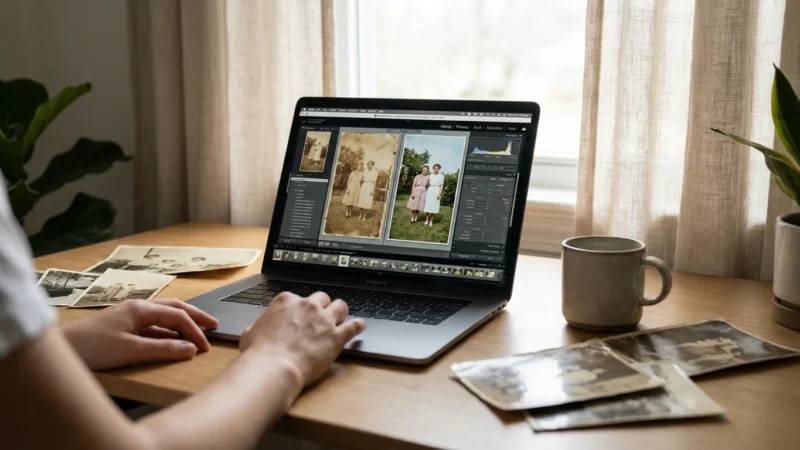
You have boxes of cherished family photos, perhaps inherited, or thousands of digital images on your hard drive. As you embark on the rewarding journey of preserving these memories, you inevitably encounter the need to enhance, correct, or standardize your images. Manually editing each photograph can feel like a monumental, even impossible, task. This is where batch editing photos becomes your most powerful ally.
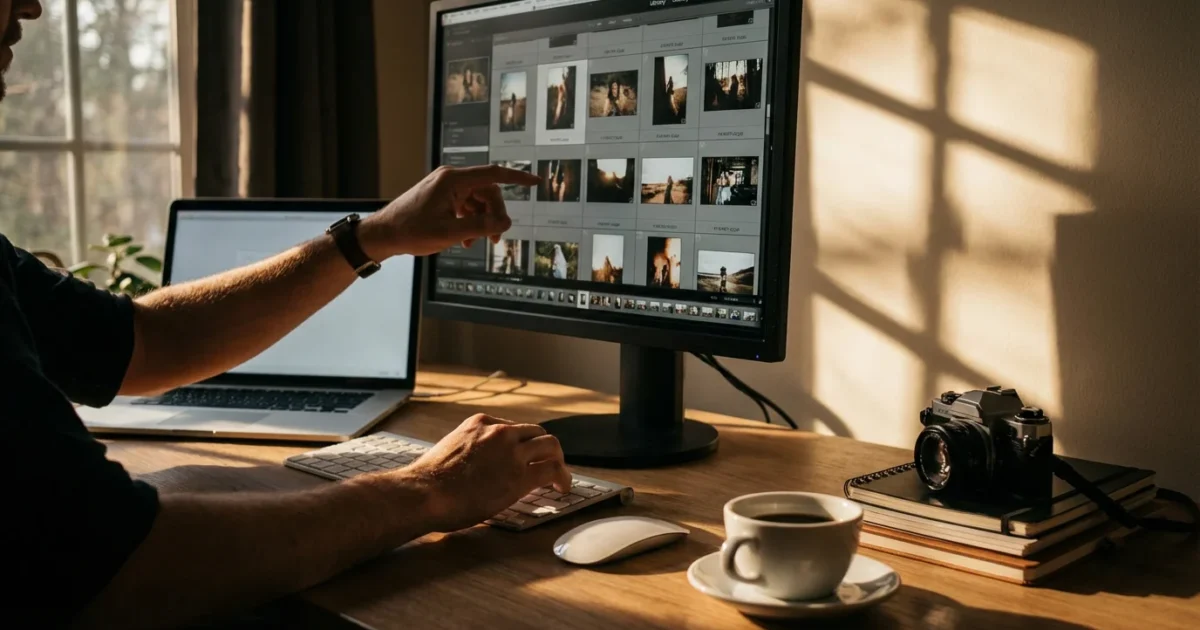
Batch editing, also known as bulk photo processing or automated editing, lets you apply the same adjustments or actions to multiple images simultaneously. Imagine applying a consistent color correction to hundreds of scans of your grandmother’s photographs, or quickly cropping and resizing an entire folder of vacation snapshots. This technique significantly reduces the time you spend on repetitive tasks, allowing you to focus on the unique characteristics of individual images when necessary, and, more importantly, freeing you to enjoy your preserved memories sooner.
Understanding Batch Editing: Why It Matters for Your Collection
Batch editing is a fundamental concept in digital photo management. It refers to the process of applying a series of adjustments or commands to a group of images, rather than to each image individually. Think of it as a macro for your photos. You define a set of operations, like adjusting exposure, color balance, or sharpness, and then tell your software to apply those same operations to every selected image. This approach offers significant advantages for anyone managing a large collection of photographs:
Before starting your edits, it is helpful to find and remove duplicate photos to ensure you are only working with the best versions of your files.
- Unprecedented Time Savings: This is the primary benefit. If you need to resize 500 photos for an online gallery, manual processing takes hours. Batch processing does it in minutes. For instance, converting 200 high-resolution JPEG files to web-optimized versions, a common task, could take you upwards of 3-4 hours manually, while a batch process completes it in under 15 minutes.
- Achieve Consistent Aesthetics: When you scan a box of old prints, varying light conditions, film types, and even scanner settings can lead to inconsistent results. Batch editing allows you to apply a uniform look. You can correct white balance across an entire set of photos taken under similar artificial lighting, ensuring your digital archive has a cohesive appearance.
- Streamline Workflow: Integrating automated editing into your routine simplifies your entire preservation process. After digitizing old family slides, you might routinely crop them to a standard aspect ratio and apply a dust removal preset. Batch processing makes these repetitive tasks effortless, freeing you to evaluate individual images for more complex restorative work.
- Enhance Organization: Beyond visual consistency, batch processing tools often include features for renaming files. You can rename a hundred images from “IMG_1234.jpg” to “FamilyVacation_2005_001.jpg,” making your digital files far easier to search and manage. This systematic approach is crucial for long-term digital preservation.
- Boost Productivity: Whether you are preparing images for a physical photo album, an online slideshow, or simply for archival storage, the ability to process many photos at once dramatically increases your productivity. You move from a reactive, image-by-image editing approach to a proactive, collection-wide strategy.
For someone with thousands of inherited photographs or years of digital camera captures, learning how to edit multiple photos at once transitions photo management from an overwhelming chore into a manageable, rewarding project. It’s a game-changer for digital archivists and memory keepers alike.

Identifying Your Editing Needs: What to Batch Process
Before you dive into bulk photo processing, understand what specific tasks lend themselves well to this method. Not every photo needs the exact same edits, but many common issues and desired outcomes are perfectly suited for batch operations. Consider these key areas:
Before applying mass changes, it’s often helpful to declutter your photo collection to ensure you aren’t wasting time on images you don’t intend to keep.
For heavily aged prints, you can also learn how to restore old faded photos by creating custom presets that fix color loss across multiple scans at once.
Common Batch Editing Tasks
- Basic Adjustments:
- Exposure Correction: If an entire set of photos is slightly underexposed or overexposed, you can adjust the exposure for all of them by a consistent amount.
- White Balance/Color Cast Removal: Scans of old photos often have a color cast, perhaps yellowish from age or blueish from fluorescent lights. Correcting the white balance on one photo and applying it to others taken or scanned under similar conditions creates uniformity.
- Contrast and Saturation: You can give a slight boost to contrast or saturation to an entire set of images that appear flat or dull.
- Sharpening and Noise Reduction: Apply a general sharpening or noise reduction algorithm to combat slight blurriness or grain common in older photos or high-ISO digital shots.
- Structural Edits:
- Cropping: If you scanned multiple photos on a flatbed scanner, you likely have borders around each image. Batch cropping can quickly remove these. You can also crop an entire series to a specific aspect ratio, like 4×6 or 16×9.
- Resizing: Preparing photos for web galleries, email, or specific print sizes often requires resizing. Batch resizing maintains consistent dimensions and file sizes.
- Straightening: Minor horizon straightening can be applied across a selection if photos were consistently tilted.
- Enhancements and Metadata:
- Watermarking: If you share photos online and want to protect them or brand them, batch watermarking is essential.
- Adding Metadata: You can embed copyright information, your name, or keywords into an entire selection of images. This is crucial for long-term searchability and intellectual property.
- Applying Presets/Filters: Many programs offer one-click presets or filters that can be applied in bulk for creative effects or quick corrections.
- File Management:
- Renaming: Transform generic camera file names into descriptive, sequential names. For example, “DSC_0001.JPG” becomes “GrandCanyon_2023_001.JPG”. This alone dramatically improves organization.
- Format Conversion: Convert files from one format to another, such as RAW to JPEG, TIFF to JPEG, or large JPEGs to web-optimized versions.
Factors to Consider When Planning Batch Edits
- Image Similarity: The more similar your photos are in terms of lighting, subject, and original capture quality, the more effective batch editing will be. A batch of outdoor photos taken on a sunny day is ideal. A mix of indoor, outdoor, flash, and non-flash photos will require more selective application or smaller batches.
- Original File Type: RAW files offer more flexibility for adjustments than JPEGs because they contain more image data. While you can batch edit both, RAW files provide greater leeway for corrections before visual degradation occurs.
- Your End Goal: Are you preparing for a small photo book, an online gallery, or high-resolution archiving? Your goal dictates the type and intensity of your batch edits.
“When tackling a large photo collection, identify the most common visual issues that span multiple images. Addressing these systemic problems through batch editing frees you to dedicate focused attention to the truly unique and challenging individual photos, ensuring a more efficient and less daunting preservation process.”

Choosing the Right Batch Photo Editing Software
The market offers a wide array of tools capable of bulk photo processing, ranging from free, simple utilities to professional-grade suites. Your choice depends on your budget, your technical comfort level, and the specific types of edits you plan to perform. Here’s an overview of popular options for batch photo editing software:
| Software | Strengths for Batch Editing | Ideal User | Considerations |
|---|---|---|---|
| Adobe Lightroom Classic | Powerful non-destructive editing, comprehensive cataloging, excellent syncing of adjustments, presets, and export options. Integrates well with Photoshop. | Serious hobbyists, professionals, those with very large RAW collections. | Subscription based. Can have a learning curve if new to image management software. |
| Adobe Photoshop | Unparalleled power for complex edits, robust “Actions” feature for recording and batch applying complex sequences, including composites and specific adjustments. | Advanced users, those needing highly specific, multi-step batch operations, graphic designers. | Subscription based. Primarily an image manipulation tool, not a dedicated photo manager. Actions can be complex to set up. |
| Exposure X7/X7+ | Excellent RAW editor, powerful presets and film simulations, strong batch processing capabilities with intuitive interface. Non-subscription option. | Photographers seeking a Lightroom alternative, strong creative control. | Paid software. May not have as extensive a cataloging system as Lightroom. |
| Affinity Photo | Affordable one-time purchase, powerful pixel editing, includes a “Batch Job” processor for common tasks like resizing, renaming, format conversion. | Users seeking a Photoshop alternative without subscription, good for detailed edits. | Batch job processor is robust for simple tasks, but creating complex batch actions requires some scripting knowledge. |
| Darktable / RawTherapee | Free, open-source RAW editors with powerful non-destructive editing and good batch processing features. | Budget-conscious users, Linux users, those comfortable with open-source software. | Steeper learning curve than commercial alternatives. Interface may feel less refined. |
| IrfanView (Windows) | Extremely fast, lightweight, free. Excellent for basic batch operations: resizing, cropping, format conversion, simple adjustments, renaming. | Casual users, quick one-off tasks, efficient file management. | Basic editing capabilities. Interface is functional but not modern. |
| XnConvert (Cross-platform) | Free, versatile, supports over 500 image formats. Offers a wide range of batch operations: resizing, watermarking, filters, metadata editing, conversions. | Users needing a powerful, free, cross-platform batch converter/editor. | Interface can seem overwhelming initially due to the sheer number of options. |
| Built-in OS Tools (e.g., Apple Photos, Windows Photos) | Basic batch renaming, simple adjustments applied to multiple photos (though less sophisticated than dedicated tools). | Beginners, casual users with minimal needs. | Limited functionality, not designed for complex bulk photo processing. |
For most users embarking on organizing and preserving a large personal photo collection, a robust cataloging tool like Adobe Lightroom Classic or a powerful free alternative like Darktable or RawTherapee offers the best balance of editing power and organizational features. If your needs are simpler, focused on resizing and renaming, a lightweight tool like IrfanView or XnConvert provides incredible efficiency.

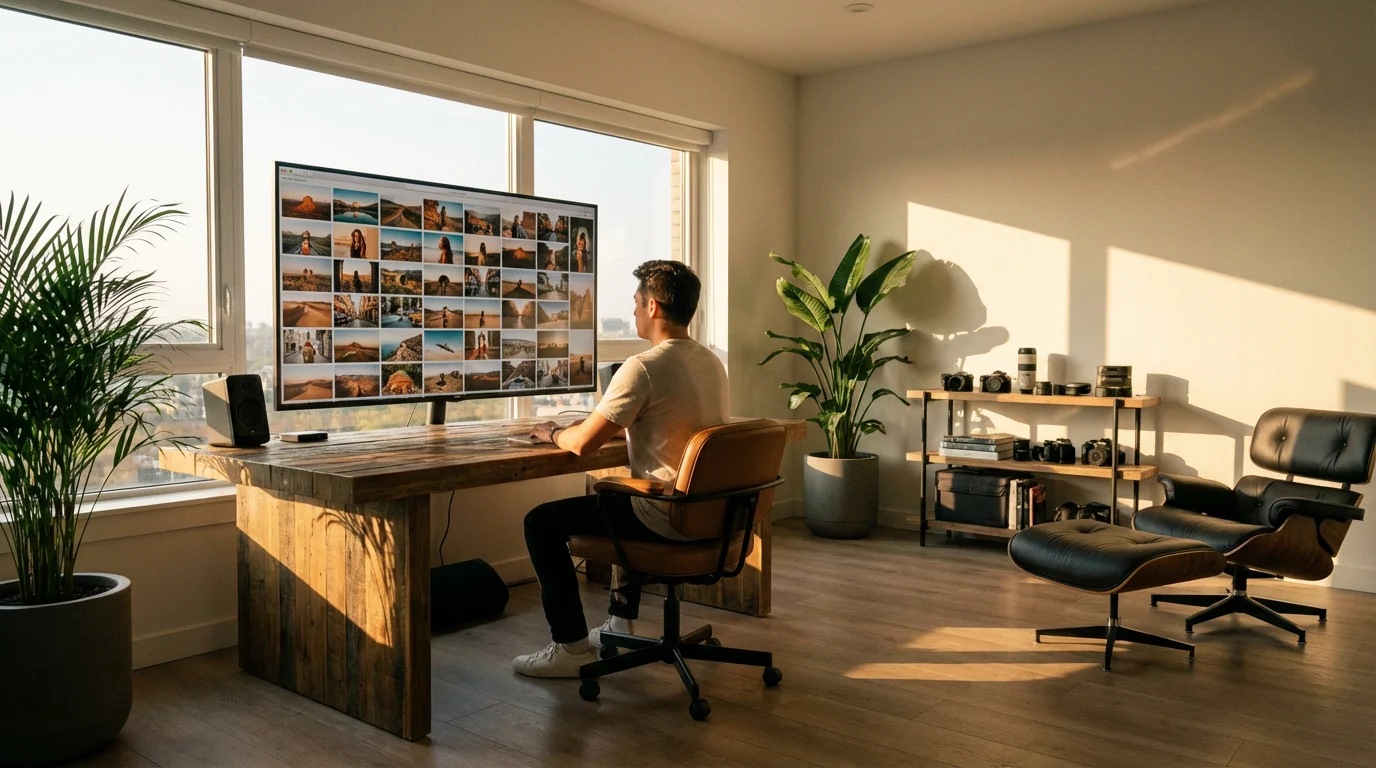
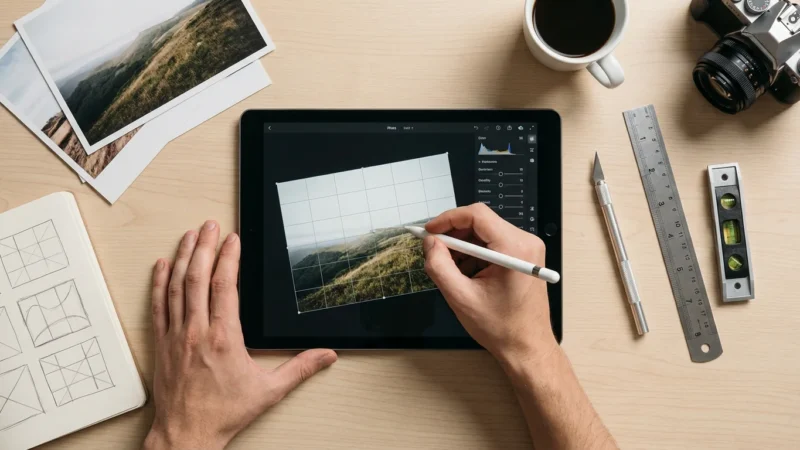
Step-by-Step Guide to Batch Editing Multiple Photos
While specific menu options vary between software, the underlying principles of how to edit multiple photos at once remain consistent. This guide outlines a general workflow you can adapt to your chosen batch photo editing software.
Step 1: Prepare Your Photos and Create a Backup
Before making any changes, especially to irreplaceable family photos, always create a backup. Copy the entire folder of images you plan to edit to a separate location, such as an external hard drive or cloud storage. This ensures you can revert to the original state if anything goes wrong.
- Organize: Group photos that share similar characteristics, like lighting conditions, camera settings, or scanner output. This makes batch editing more effective.
- Select: Identify the specific photos you intend to batch edit. Many programs let you select photos by holding down Ctrl/Cmd and clicking, or Shift-clicking to select a range.
Step 2: Open Your Selected Photos in Your Batch Editing Software
Import the selected images into your chosen software. For applications like Lightroom, this means importing them into its catalog. For simpler tools like IrfanView or XnConvert, you typically open the batch processing dialog and add the files there.
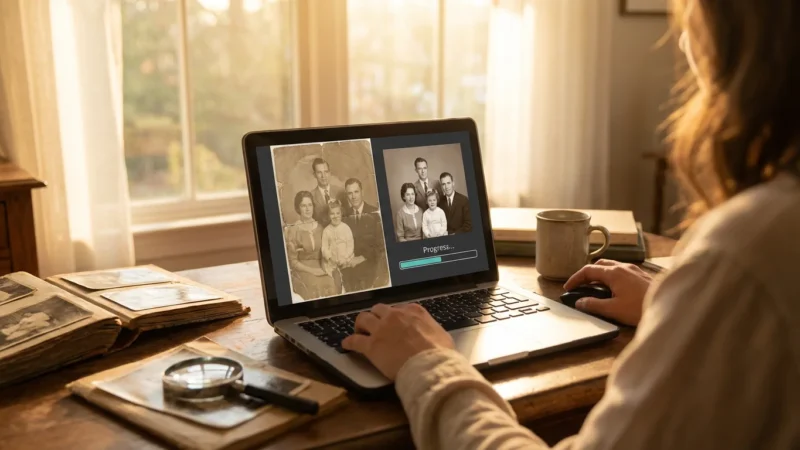
Step 3: Edit a “Master” or Reference Photo
This is the most critical step. Choose one image from your batch that is representative of the entire group. This “master” photo should ideally have an average exposure and color balance for the set. Apply all your desired adjustments to this single image:
- Basic Corrections: Adjust exposure, contrast, highlights, shadows, white balance, and clarity. For example, if your scanned photos look faded, boost the contrast and blacks slightly. If they have a yellow cast, adjust the white balance to a cooler temperature.
- Cropping/Straightening: If necessary, apply a consistent crop or straighten the horizon.
- Sharpening/Noise Reduction: Apply a general sharpening or noise reduction to improve image clarity.
- Creative Presets (Optional): If you want a specific look, such as a black and white conversion or a vintage tone, apply a preset.
As you edit, pay close attention to the numerical values of your adjustments, as these will be applied to the rest of the batch.
Step 4: Sync or Apply Settings to the Batch
Once your master photo looks perfect, you will apply those exact settings to the rest of your selected images. This process varies by software:
- In Adobe Lightroom Classic:
- Ensure your edited “master” photo is selected and active.
- Select all other photos in your batch (Ctrl+A or Cmd+A, or Shift-click).
- Click the “Sync Settings” button (usually at the bottom right of the Develop module) or go to Settings > Sync Settings.
- A dialog box will appear. Select the specific adjustments you want to sync. Generally, you will select all the adjustments you just made. Click “Synchronize.”
- In Adobe Photoshop (using Actions):
- Record an “Action” while editing your master photo. This records every step you take.
- Go to File > Automate > Batch.
- Choose your recorded Action, specify the source folder (your selected photos), and select an output folder.
- In XnConvert / IrfanView:
- These programs often have a dedicated “Batch Conversion/Rename” dialog.
- You add all your selected files to the input list.
- You then define the operations (resizing, cropping, color adjustments, watermarking) in a separate panel.
- The software then processes all files based on these defined operations.
Step 5: Review and Refine
After syncing, quickly review your entire batch. While batch editing is efficient, not every photo will respond identically to the same settings due to variations in original capture. Look for:
- Over- or Underexposure: Some images might now be too bright or too dark.
- Color Shifts: A few photos might still have an incorrect color cast.
- Cropping Issues: An automatic crop might cut off an important part of a particular image.
For any problematic images, make individual, fine-tuned adjustments. The goal is efficiency, not absolute perfection on every single image through batch alone.
Step 6: Export Your Edited Photos
Once satisfied, export your batch. This step often includes options for:
- File Format: JPEG for sharing or web, TIFF for archival quality, DNG for a universal RAW format.
- Quality/Compression: Choose appropriate compression for JPEGs.
- Resizing: Output at specific dimensions for different uses.
- Renaming: Apply sequential or descriptive renaming schemes.
- Output Folder: Save the processed images to a new, clearly named folder to keep them separate from your original files.
This systematic approach helps ensure consistency and saves immense amounts of time, particularly when working with hundreds or thousands of images.

Advanced Techniques for Efficient Bulk Photo Processing
Once you master the basics, you can leverage more advanced capabilities of batch photo editing software to further refine your workflow and automate even more complex tasks.
Utilizing Presets and Develop Modules
Most advanced photo editors allow you to create and save presets. A preset is a collection of saved adjustments that you can apply with a single click. For example, you might create:
- A “Scanned Photo Restore” preset that applies a slight contrast boost, color correction, and sharpening.
- A “Web Resize & Watermark” preset that simultaneously resizes images to 1920 pixels on the long edge, adds your custom watermark, and saves them as JPEGs.
- A “Black and White Conversion” preset that applies a specific monochromatic look with nuanced tone adjustments.
Once created, you can apply these presets during import, after initial edits, or as part of your export process, streamlining tasks that you perform repeatedly. Many photography resources, like Cambridge in Colour, offer extensive tutorials on understanding and utilizing these creative adjustments effectively.
Custom Actions and Automations
Software like Adobe Photoshop uses “Actions” to record a sequence of steps. You can record almost any operation, from complex layering and blending modes to simple resizing and saving. Once recorded, you can apply this action to an entire folder of images using the “Batch” command. This is incredibly powerful for highly customized, multi-step batch operations.
- Example: Record an action that converts a color photo to black and white, adds a specific textured border, and then saves it in a new folder. Then run this action on 50 photos.
Conditional Processing and Smart Collections
Some advanced tools allow for conditional batch processing. This means applying edits only if certain criteria are met. For instance, you could process all photos taken with a specific camera model, or all photos with a certain keyword, or all images whose exposure is below a certain threshold. Smart collections in programs like Lightroom automatically group photos based on criteria you define, making it easy to target specific subsets for batch edits.
Metadata Templates
You can create metadata templates that automatically embed copyright information, contact details, keywords, and captions into your photos upon import or export. This ensures that every image in your collection carries essential information, invaluable for organization and intellectual property rights.
- Example: A template that adds “© [Your Name], [Year]” to all exported images, along with keywords like “Family,” “Personal,” and “Archival.”
Implementing these advanced techniques takes your bulk photo processing capabilities to a new level, transforming how you manage and preserve your photographic heritage.
Best Practices for Maintaining Consistency and Organization
Efficient batch editing goes hand-in-hand with robust organizational strategies. Adopting these best practices ensures your efforts in bulk photo processing yield a well-organized, consistent, and easily accessible photo archive.
Consistency is Key
- Group Similar Photos: Always batch edit photos that share similar characteristics. Trying to apply the same exposure correction to a dimly lit indoor photo and a bright outdoor photo will lead to poor results for at least one. Create smaller, more homogenous batches.
- Develop Standard Operating Procedures: For recurring tasks, such as scanning family documents or digitizing slides, establish a standard set of batch edits. For example, always crop to the same aspect ratio, apply a specific white balance adjustment, and rename files consistently. This ensures uniformity across your entire collection over time.
- Use Presets Judiciously: While presets save time, avoid over-reliance. Always review the results, as a preset that looks good on one photo might look terrible on another, even within the same batch.
Naming and Metadata Strategies
- Descriptive File Naming: Implement a consistent file naming convention that incorporates date, event, and sequential numbering.
- Bad:
IMG_0001.jpg - Better:
20230715_GrandCanyon_001.jpg - Even Better:
19850612_SmithFamilyReunion_001_Scan.tif
Batch renaming tools are invaluable here.
- Bad:
- Comprehensive Metadata: Embed keywords, captions, dates, and copyright information into your image files using batch processing tools. Metadata makes your photos searchable years down the line, even if they are separated from their original folder structure. Consider tools like Adobe Bridge or Lightroom, or the ExifTool for advanced metadata management. Digital Photography Review offers excellent insights into the importance of metadata for digital photography.
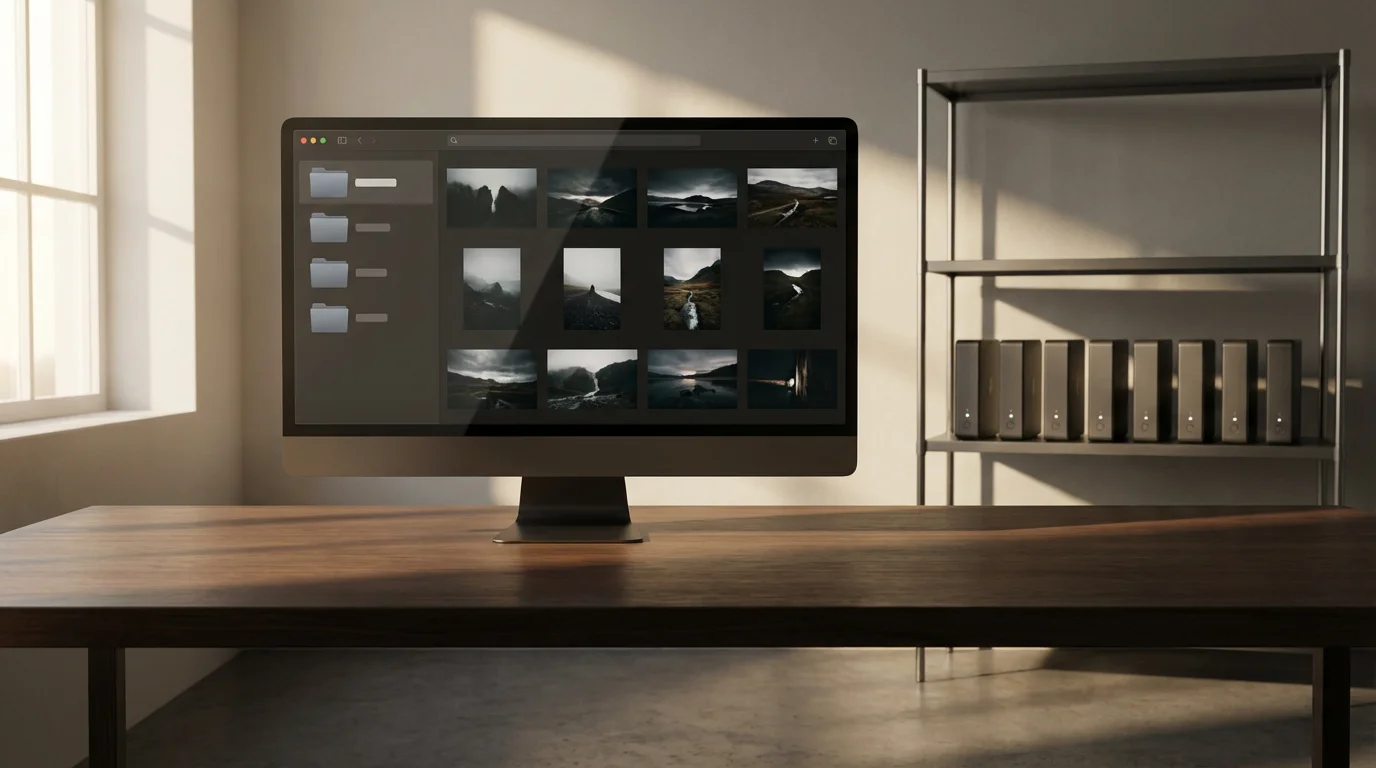
File Management and Backups
- Non-Destructive Editing: Whenever possible, use non-destructive editing software like Lightroom or Darktable. These programs do not alter your original files directly. Instead, they store your adjustments in a catalog or sidecar files, preserving your precious originals.
- Organized Folder Structure: Create a logical, hierarchical folder structure (e.g.,
Photos > Year > Event > Sub-Batch). This makes it easier to locate images and apply batch edits to specific groups. - Regular Backups: Maintain a robust backup strategy. Store your original, unedited scans/photos, your edited versions, and your catalog files on at least two separate devices, with at least one off-site or in the cloud. This safeguards against data loss, ensuring your preserved memories remain safe.
- Version Control: For particularly important images, consider keeping different versions. For example, store the original scan, a general batch-edited version, and a meticulously retouched version.
By integrating these best practices into your batch editing workflow, you not only save time but also create a robust, organized, and truly preserved photographic legacy.
Overcoming Common Batch Editing Challenges
While batch editing offers incredible efficiency, you may encounter a few common hurdles. Knowing how to address them helps you maximize the benefits and avoid frustration.
Challenge 1: Inconsistent Results Across a Batch
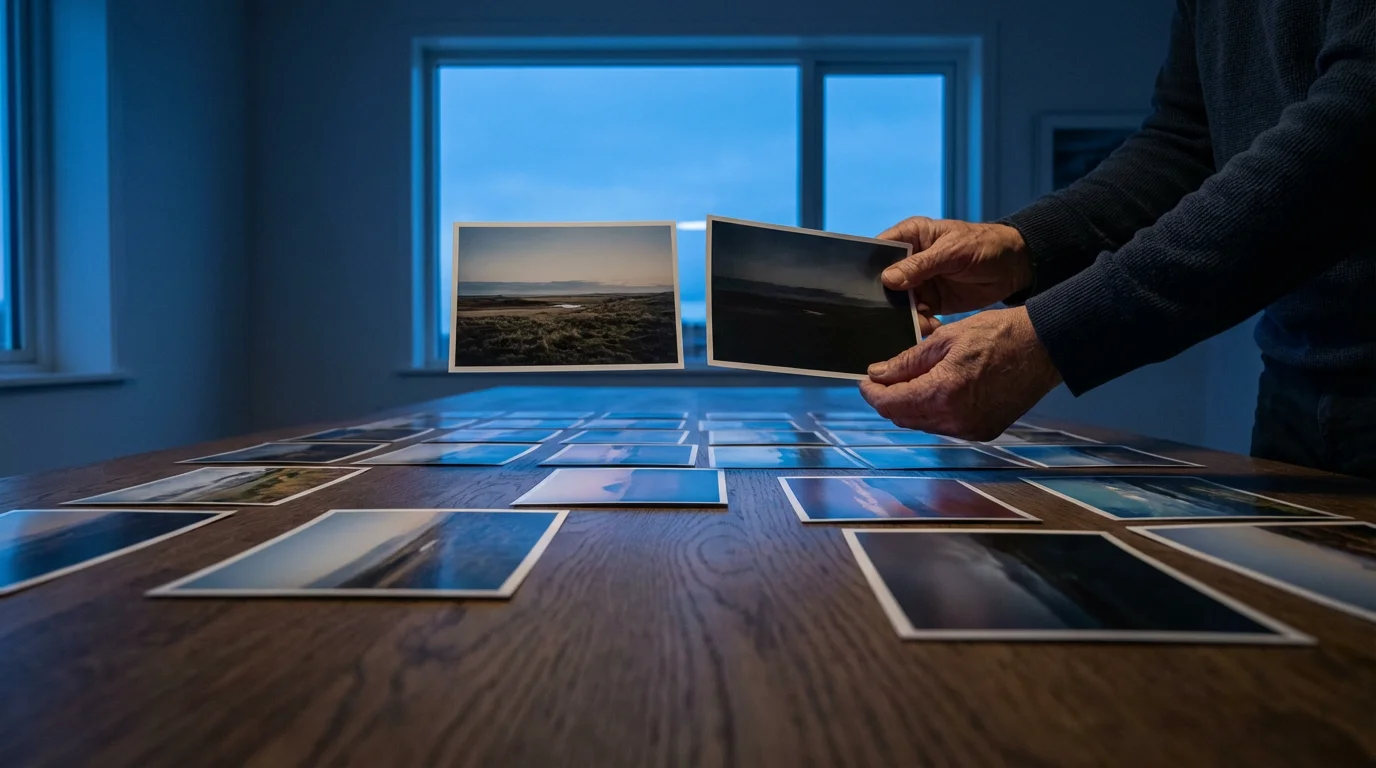
Problem: You apply a batch adjustment, and while some photos look great, others are now too dark, too bright, or have incorrect colors. This happens because even within a “batch,” individual images can have wide variations in their original capture or scan quality.
Solution:
- Smaller, More Homogeneous Batches: The most effective solution is to create smaller batches of truly similar photos. Group photos by lighting conditions (e.g., “sunny outdoor,” “indoor with flash,” “scanned faded prints”).
- Selective Adjustments: Rather than syncing “all” settings, be selective. You might batch adjust exposure and white balance, but then individually fine-tune highlights, shadows, or vibrance on problematic images.
- Use Local Adjustments: For a few outliers within a mostly good batch, use local adjustment tools (like brushes or graduated filters in Lightroom) to correct specific areas without affecting the entire image.
Challenge 2: Accidental Overwriting or Unwanted Changes
Problem: You accidentally apply the wrong settings, or you overwrite your original files with edited versions, losing your untouched source material.
Solution:
- Always Work Non-Destructively: Prioritize software that uses non-destructive editing (e.g., Lightroom, Darktable). Your original files remain untouched.
- Backup Originals: Before starting any batch editing, always, always create a separate backup of your original, unedited photos. Store them on a different drive.
- Export to a New Folder: When exporting your batch-edited images, always save them to a new, clearly labeled folder (e.g., “Edited_Vacation_2023”). Never export them back into the folder containing your originals.
- Understand the “Sync” Dialog: When syncing settings, carefully review the options. Deselect any settings you do not want to apply to the entire batch, especially if you made unique, individual edits to your master photo.
Challenge 3: Slow Processing Times
Problem: Your computer takes a very long time to process large batches of high-resolution images, especially RAW files.
Solution:
- Optimize Your Hardware: Ensure your computer has sufficient RAM (16GB or more is ideal for photo editing), a fast processor, and preferably an SSD (Solid State Drive) for your operating system and photo editing software.
- Work with Smart Previews (Lightroom): Lightroom’s Smart Previews allow you to edit photos even when the original RAW files are offline. This can speed up editing performance considerably.
- Process in Smaller Batches: If your computer struggles with hundreds of images at once, break the task into smaller batches of 50-100 photos.
- Close Other Applications: Free up system resources by closing unnecessary programs while batch processing.
Challenge 4: File Naming Conflicts or Confusion
Problem: After renaming a batch, you end up with duplicate file names, or the naming convention becomes confusing.
Solution:
- Preview Renaming: Most batch renaming tools offer a preview of how the new file names will appear. Always review this preview before committing.
- Use Sequential Numbering: Incorporate sequential numbering (e.g.,
001, 002, 003) in your naming scheme to avoid duplicates. - Clear Folder Structure: Keep your originals separate from your renamed, edited versions in a clear folder structure.
By anticipating these challenges and applying these solutions, you maintain control over your batch editing process and achieve superior results with less stress.
Frequently Asked Questions
Can I batch edit RAW files and JPEGs together?
Yes, most capable batch editing software handles both RAW and JPEG formats. However, be aware that RAW files offer more dynamic range and color depth, allowing for more aggressive adjustments before quality degrades. JPEG files, being compressed, have less flexibility. When editing both together, the adjustments you apply to the JPEG may reach their limit before the RAW file does, so you might need to make separate batches or fine-tune individual JPEGs after the batch process.
What is non-destructive editing and why is it important for batch processing?
Non-destructive editing means your original image file is never altered. Instead, the software saves your adjustments as a set of instructions (metadata) alongside the original file, or within its catalog. This is crucial for batch processing because if you make a mistake or change your mind, you can easily revert to the original image or modify the adjustments without any loss of quality. It ensures the integrity of your precious original photographs.
How do I make sure my batch-edited photos have the correct resolution for printing or sharing?
When you export your batch-edited photos, your software will provide options for resolution, dimensions, and file size. For printing, check the recommended DPI (dots per inch) for your desired print size and ensure your exported images meet or exceed it (e.g., 300 DPI for high-quality prints). For sharing online, reduce the dimensions (e.g., 1920 pixels on the long edge) and select a lower JPEG quality setting to create smaller file sizes that load quickly without significant visual loss.
Can I use batch editing to add watermarks or copyright information to my photos?
Absolutely. Most batch photo editing software includes functionality to add watermarks, text overlays, or embed copyright and other metadata directly into your image files during the export process. You can design a custom watermark, specify its position and opacity, and then apply it to hundreds of photos in a single operation, protecting your images when you share them online.
Is it possible to undo a batch edit if I make a mistake?
Yes, if you use non-destructive editing software like Adobe Lightroom Classic. Because your original files are untouched, you can simply reset the adjustments on all selected photos, or revert to an earlier state in the history panel. If you used destructive software or exported to overwrite your originals without a backup, undoing can be difficult or impossible, which reinforces the critical importance of backing up your original files before any batch editing begins.

Take Control of Your Photo Legacy with Batch Editing
Batch editing photos empowers you to manage vast collections with efficiency and confidence. It transforms the daunting task of organizing and enhancing thousands of images into a manageable, even enjoyable, process. By understanding your needs, choosing the right tools, and following a systematic approach, you ensure your cherished memories are not just preserved, but also presented in their best possible light, consistently and beautifully.
Take these actionable steps, experiment with the software, and discover how bulk photo processing saves you invaluable time. You are not just editing photos; you are actively shaping your family’s visual history, making it accessible, organized, and vibrant for generations to come. Embrace the power of automated editing, and reclaim your time for what truly matters: reliving and sharing those precious moments.
Disclaimer: This article is for informational purposes only. When handling valuable or irreplaceable photographs, consider consulting a professional conservator. Always test preservation methods on non-valuable items first.


Leave a Reply