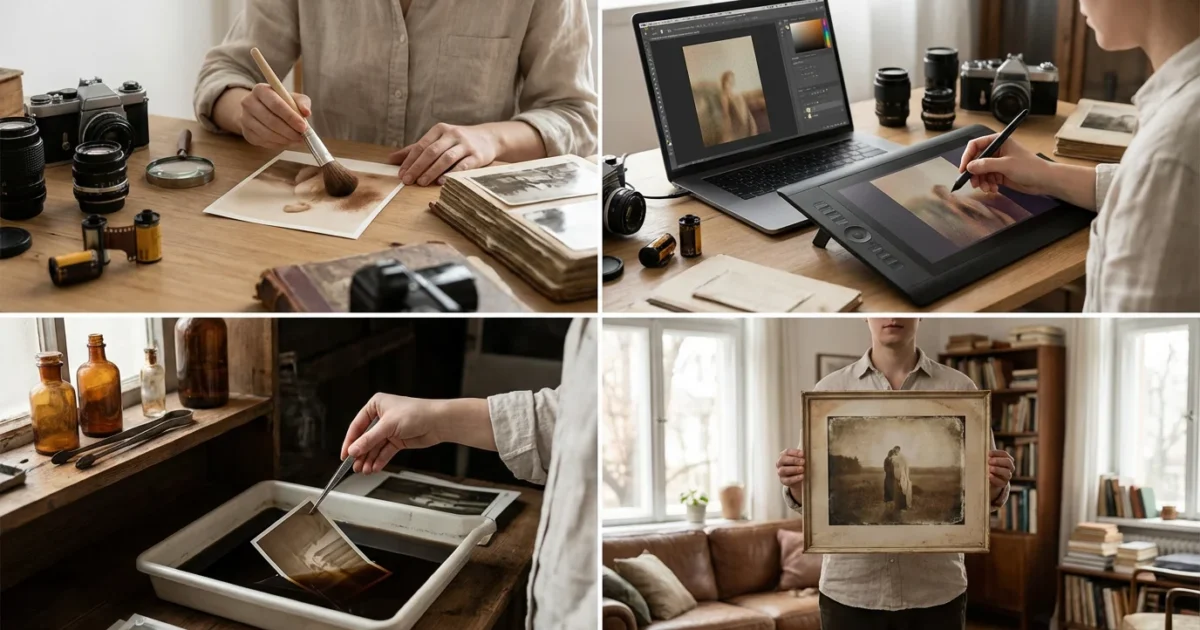
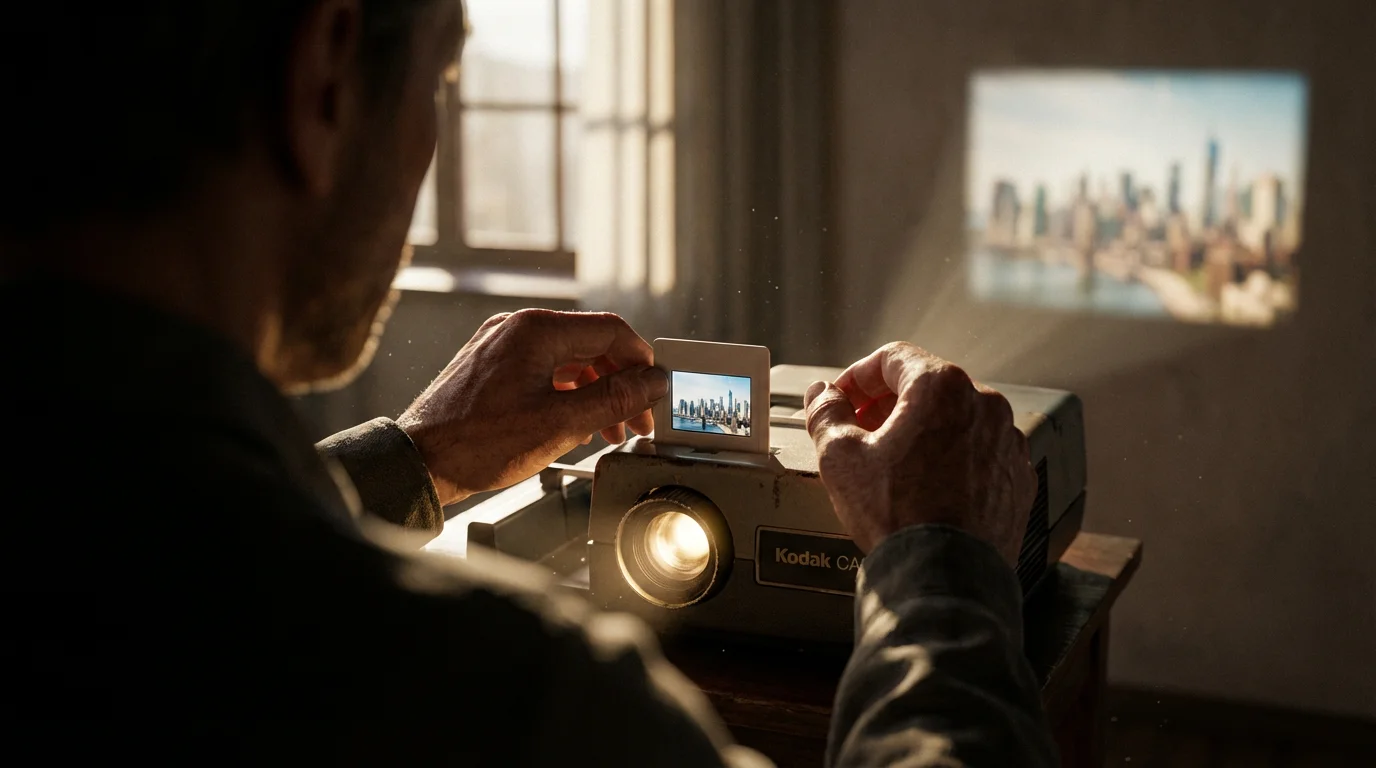
Old photographs hold stories, memories, and a unique aesthetic that modern digital images often lack. The soft, faded colors, subtle grain, and light leaks transport us to another era. You can recreate this classic look, applying it to your contemporary digital photos or enhancing existing vintage images. This guide provides practical steps and insights, helping you master vintage photo effects and give your images an aged photo look, preserving their narrative charm for generations.
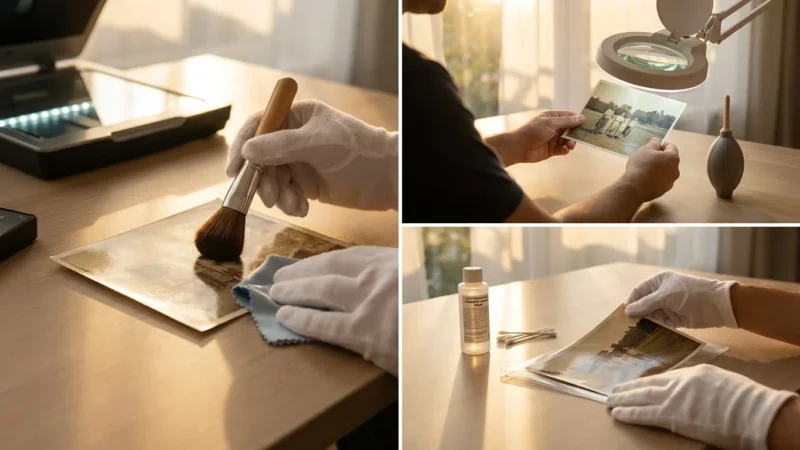
Before you begin your digital transformation, ensure you know how to scan old photos at home to get the highest quality digital starting point.
While recreating these looks is a creative joy, it’s equally important to know how to store old photographs to keep the original family treasures safe from further aging.
Disclaimer: This article is for informational purposes only. When handling valuable or irreplaceable photographs, consider consulting a professional conservator. Always test preservation methods on non-valuable items first.
Understanding Vintage and Retro Styles
The terms “vintage” and “retro” often get used interchangeably, but they represent distinct periods and aesthetics. Understanding these differences helps you tailor your editing for a specific historical feel.
If your project involves a multi-page collection, it helps to learn how to scan and preserve old photo albums efficiently before you start applying creative effects.
- Vintage: This refers to an item from the past, typically at least 20 years old, but not old enough to be an antique. In photography, vintage effects emulate the characteristics of actual old photographs taken between the early 20th century and the 1970s. This includes characteristics like desaturated colors, sepia tones, light leaks from imperfect cameras, and film grain. The imperfections often define the look, mirroring limitations of old photographic processes.
- Retro: Retro refers to styles that imitate or are consciously derived from styles or trends of the recent past. It often evokes a nostalgic feel for specific decades, such as the vibrant, sometimes gaudy, colors of the 1980s, the psychedelic patterns of the 1970s, or the atomic age futurism of the 1950s. Retro effects are deliberate throwbacks, often exaggerating specific elements for a stylized, fashionable appearance. You want to capture a general “old-timey” feel with vintage, while retro aims for a specific decade’s vibe.
When you approach your editing, consider if you want a timeless, gently aged look, or a specific, decade-defining aesthetic. Your choice directs the filters, color adjustments, and textures you apply, making your final image resonate with the desired historical context.
Essential Elements of an Aged Photo Look
Creating an authentic aged photo look involves more than just slapping on a filter. You need to understand the components that define this aesthetic. Mastering these elements allows you to fine-tune your edits and achieve a convincing result.
Applying stylized aging works best when you first master color correction for scanned photos to fix unintended color casts from the scanning process.
If you are starting with a physical scan that has too much real-world wear, you may want to remove scratches and dust before applying your artistic effects.
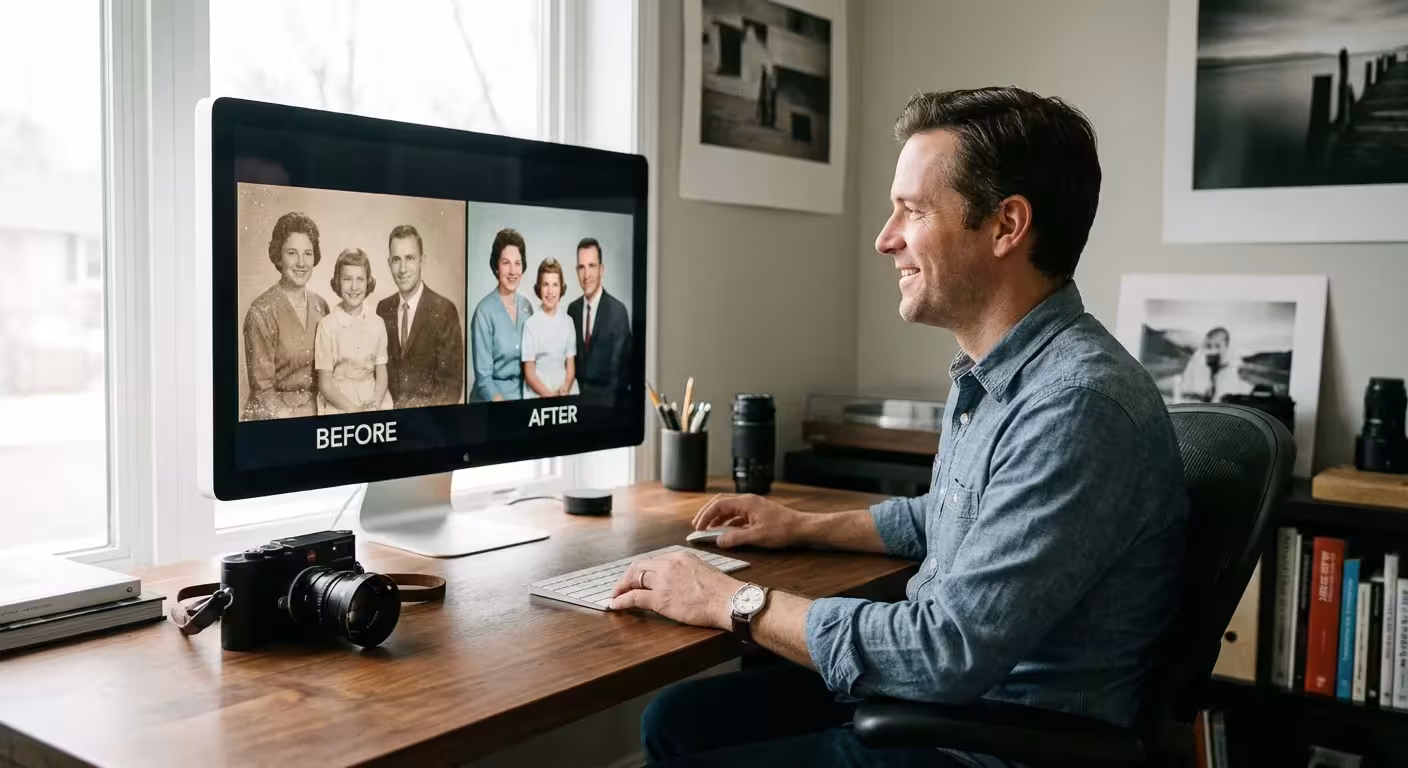
While we are focusing on creating these effects, you can also use these principles to restore old faded photos that have lost their original luster.
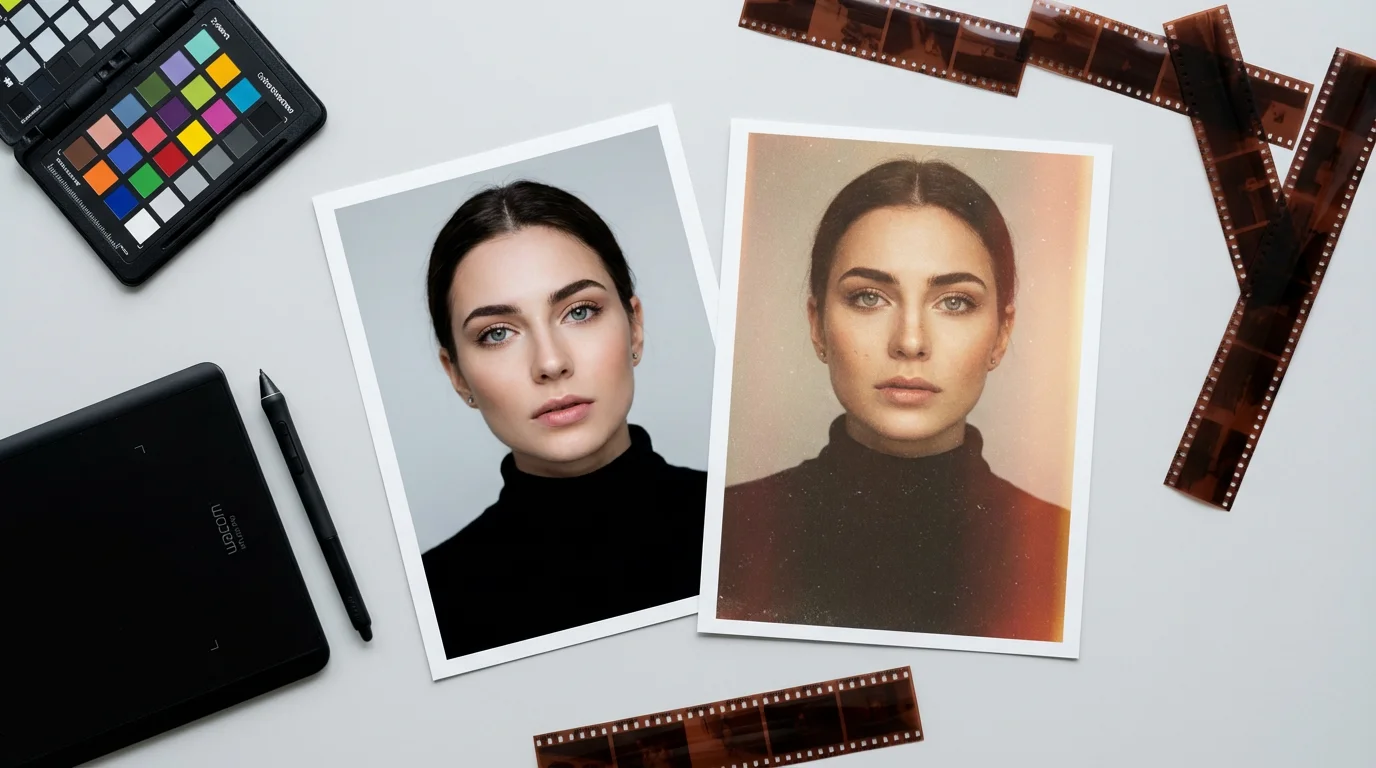
- Color Shift and Desaturation: Old photographs often exhibit a shift in color balance, moving away from true-to-life vibrancy. You see desaturation, meaning colors appear less intense. Common shifts include a yellowish tint from paper aging, a cool blue cast, or a dominant green hue. Sepia tones, a brownish monochrome effect, were a popular chemical process for preserving prints in the early days of photography, contributing significantly to the vintage look. Understanding color theory assists in achieving these subtle shifts effectively.
- Contrast Reduction: Over time, the contrast in old prints can diminish, leading to less distinct shadows and highlights. A good vintage effect often includes slightly flattened contrast, where the brightest whites are not pure white and the darkest blacks are not pure black. This softness contributes to the nostalgic, dreamlike quality.
- Vignetting: Many vintage lenses and camera imperfections caused a natural darkening of the image edges, a phenomenon known as vignetting. Adding a subtle, soft vignette can effectively frame your subject and draw the eye inward, mimicking this old-world optical effect.
- Film Grain and Texture: Before digital sensors, film’s light-sensitive chemicals produced a granular texture. Different film stocks had varying degrees of grain. Replicating this film grain, rather than digital noise, adds an authentic analog feel. Dust, scratches, and slight creases also tell a story of a photo’s journey through time, adding a tangible aged quality.
- Light Leaks: Imperfect cameras or film handling could result in light inadvertently exposing parts of the film, creating streaks or splotches of color, often red or orange. These “light leaks” add an element of unpredictability and charm to vintage photos, suggesting a genuine artifact.
- Borders and Frames: The way old photos were printed often included white borders or specific aspect ratios. Adding a subtle, distressed border can enhance the illusion of a physical, aged print.
By manipulating these elements, you move beyond a simple filter and create a truly custom vintage or retro appearance for your images.
“The true art of photo preservation lies not only in safeguarding the physical print but also in understanding and appreciating the aesthetic nuances that time imparts. Recreating these vintage characteristics on modern photos connects us to the history of photography itself.”
Software and Apps for Vintage Photo Effects
A wide array of tools exists to help you achieve the perfect vintage or retro look, ranging from sophisticated desktop software to user-friendly mobile applications. Your choice depends on your skill level, desired control, and budget.
If you are starting with heavily damaged originals, using AI photo restoration tools can quickly repair tears and blemishes before you add your retro textures.
If you don’t have access to paid tools, you can explore free photo editing software for beginners that still offers robust vintage filtering options.
Desktop Software
- Adobe Photoshop and Lightroom: These industry-standard tools offer unparalleled control. You can manually adjust every aspect of your vintage effect, from curves and color grading to custom grain overlays and light leak brushes. They provide the most flexibility for creating unique looks or perfectly mimicking specific historical styles. Both programs operate on a subscription model, offering powerful editing capabilities for professionals and serious enthusiasts.
- GIMP (GNU Image Manipulation Program): As a free, open-source alternative to Photoshop, GIMP offers a robust set of features for creating vintage effects. While it has a steeper learning curve, you can achieve professional results with patience, including complex layering, custom brushes, and color adjustments.
- Affinity Photo: This is a powerful, one-time purchase alternative to Photoshop, offering many similar features and a user-friendly interface. It provides excellent tools for color manipulation, texture overlays, and non-destructive editing, making it suitable for intricate vintage effects.
- Nik Collection by DxO: This suite of plugins, which integrates with Photoshop, Lightroom, and Affinity Photo, includes “Color Efex Pro” and “Silver Efex Pro.” These plugins specialize in creative color effects, film simulations, and black and white conversions, offering many presets and controls specifically designed for vintage and retro looks.
Mobile Apps
For quick edits and on-the-go vintage styling, mobile apps provide convenience and a wealth of pre-made filters.
- VSCO: Known for its film-like filters, VSCO offers a wide range of presets that emulate classic film stocks, producing beautiful vintage photo effects with subtle shifts in color and tone. You can further customize these filters with exposure, contrast, and grain adjustments.
- Tezza App: Popular for its trendy, retro aesthetics, Tezza offers a collection of filters and editing tools designed to give photos a stylish, nostalgic feel, often with a warm, desaturated palette and subtle grain.
- Huji Cam: This app specifically mimics the look of disposable cameras from the late 90s, complete with date stamps, light leaks, and a distinct color cast. It’s perfect for achieving a spontaneous, lo-fi retro aesthetic.
- Afterlight: Afterlight provides a comprehensive set of filters, textures, light leaks, and dust overlays. It gives you good control over individual elements, allowing you to build your vintage effect layer by layer on your phone.
- Snapseed: Google’s free photo editor offers powerful tools for selective adjustments, curves, and a variety of filters, including vintage and grunge options. Its intuitive interface makes it easy to fine-tune your retro effects.
Many of these apps offer a selection of free filters, with additional premium options available through in-app purchases or subscriptions. Explore different apps to find the ones that best match your desired aesthetic and workflow.
Step-by-Step Guide: Achieving a Vintage Look in Desktop Software
Creating a compelling vintage look in desktop software like Adobe Photoshop or Lightroom gives you precise control over every element. This step-by-step guide walks you through the process, allowing you to craft a unique aged photo look.
To ensure your vintage look has the right foundation, you may want to sharpen blurry photos to reclaim lost detail before layering on film grain.
In addition to adding years to a photo, you can also use similar tools for colorizing black and white photos to bring a different kind of life to your images.
For this guide, we will use general terms applicable to most advanced photo editing software, with specific examples referencing Photoshop or Lightroom where helpful.
- Start with a Well-Exposed Image: Begin with a photograph that has good exposure and composition. Applying vintage effects works best on an image that is already visually strong. A clean base allows the vintage elements to enhance, not detract.
- Convert to Black and White (Optional, but Recommended for Classic Vintage):
- In Photoshop: Go to Image > Adjustments > Black & White. Use the sliders to control how different colors convert to tones, allowing you to fine-tune the monochrome effect.
- In Lightroom: In the Develop module, click “B&W” in the Basic panel. Adjust the B&W Mix sliders for nuanced control over luminance of original colors.
- Consider a sepia tone by adding a warm color overlay or using the split toning feature after converting to black and white.
- Adjust Color Tones and Desaturation:
- Color Grading/Split Toning: This is crucial for adding specific color casts. In Lightroom, use the Split Toning panel to add different color hues to highlights and shadows. A common vintage approach involves adding warm yellows/oranges to highlights and cool blues/greens to shadows.
- Hue/Saturation Adjustment Layer (Photoshop): Create a Hue/Saturation adjustment layer. Reduce the overall Saturation slider to desaturate the image. You can also select individual color channels (e.g., Reds, Yellows) and adjust their hue and saturation independently to achieve specific color shifts, like muting vibrant blues or greens.
- Color Balance Adjustment Layer (Photoshop): Use Color Balance to shift the overall color. Add magenta to midtones, yellow to shadows, or blue to highlights to mimic common aging effects.
- Reduce Contrast:
- Curves Adjustment Layer: This is the most powerful tool. Create a subtle “S-curve” to gently lift the black point and lower the white point, effectively flattening the contrast. Avoid harsh curves for a natural aged look.
- Levels Adjustment Layer: Drag the black and white output sliders inward slightly to reduce the dynamic range and soften contrast.
- Clarity Slider (Lightroom): Reducing the Clarity slider can create a softer, almost hazy look often associated with older lenses and less sharp optics.
- Add Vignetting:
- Lens Correction (Lightroom/Photoshop Camera Raw Filter): In the Manual tab, adjust the Vignetting Amount slider to darken edges and the Midpoint slider to control how far the vignette extends.
- Vignette Filter (Photoshop): Go to Filter > Lens Correction > Custom tab, then adjust Vignette amount.
- Manual Vignette (Photoshop): Create a new layer, fill it with black, apply a large Gaussian blur, change the layer blend mode to Soft Light or Overlay, and then mask out the center, adjusting opacity.
- Introduce Film Grain/Noise:
- Grain Panel (Lightroom): In the Effects panel, adjust Amount, Size, and Roughness to add realistic film grain. Aim for subtle, not overwhelming, grain.
- Add Noise Filter (Photoshop): Go to Filter > Noise > Add Noise. Choose Gaussian distribution and Monochromatic for a more natural film grain effect. Apply it to a separate layer set to a blending mode like Soft Light or Overlay and adjust opacity.
- Texture Overlays: Many online resources offer free or paid texture overlays of dust, scratches, and light leaks. Place these images as new layers over your photo, experiment with blending modes (e.g., Screen, Overlay, Soft Light), and adjust opacity to integrate them seamlessly. Mask out areas where the texture is too strong.
- Apply Light Leaks (Optional):
- Light Leak Overlays: Similar to texture overlays, apply light leak images as new layers with blending modes like Screen or Add. Rotate and resize them to place the leaks naturally.
- Manual Light Leaks (Photoshop): Use a soft, large brush with a low flow and opacity on a new layer. Sample colors from existing light leak references (red, orange, yellow), and paint subtle streaks along the edges or corners. Set the layer to Screen or Overlay blend mode.
- Fine-Tune and Review: Step back and review your image. Does it look authentic? Is the effect too strong or too subtle? Make small adjustments to each layer’s opacity or settings until you achieve the desired aged photo look. Save your favorite combinations as presets for future use.
This detailed approach ensures your vintage photo effects are nuanced and convincing, reflecting a genuine understanding of classic photographic aesthetics.
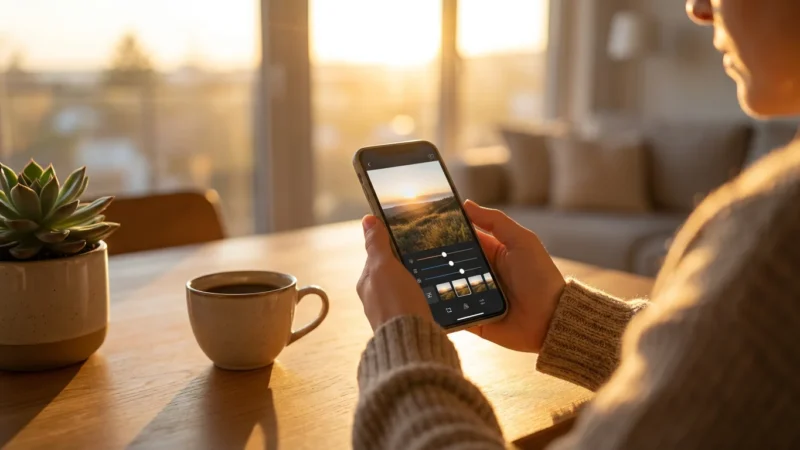
Step-by-Step Guide: Using Mobile Apps for Retro Filters
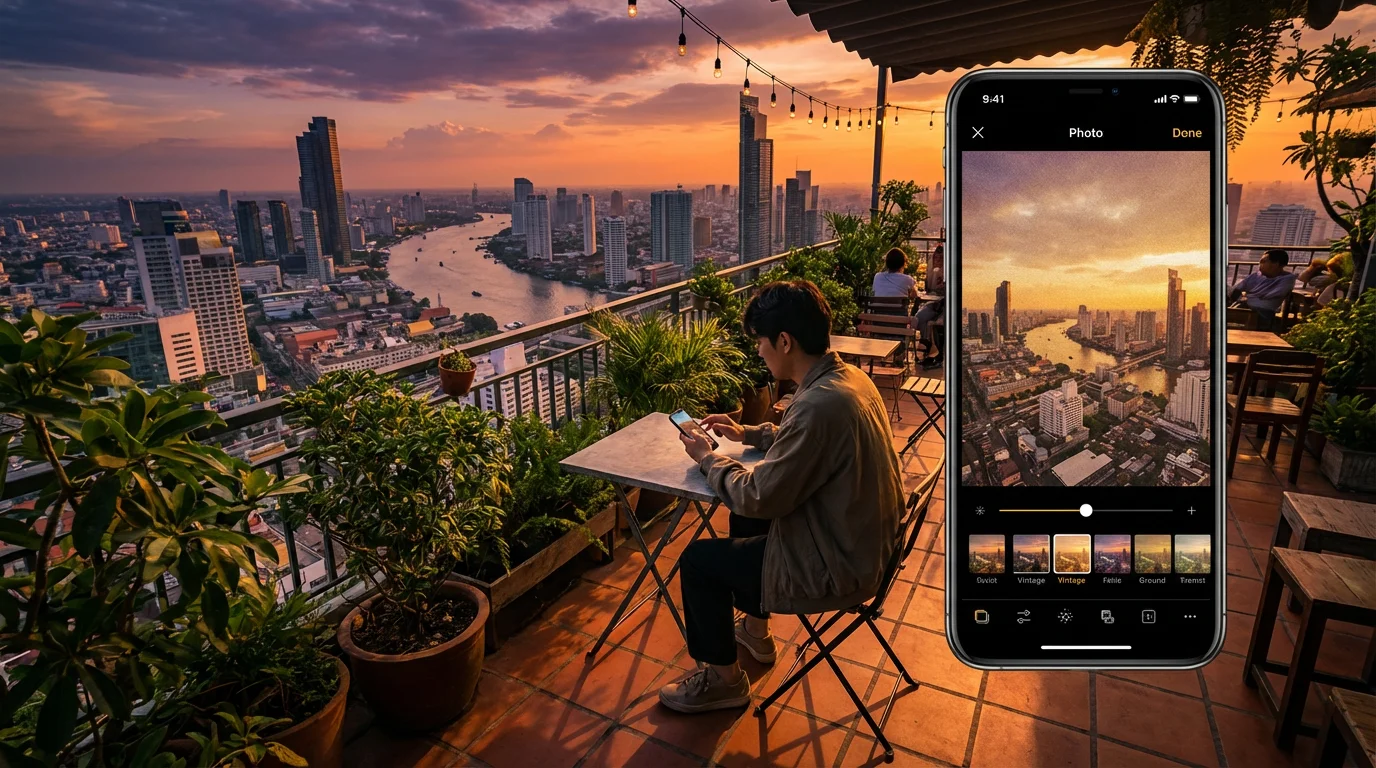
Mobile apps offer a streamlined way to apply retro filters and vintage photo effects, making it easy to transform your images on the go. While you have less granular control than with desktop software, these apps provide excellent results with minimal effort.
If you have an entire album to process, batch editing photos can save you significant time by applying the same retro aesthetic to multiple images at once.
Here’s a general guide applicable to most popular photo editing apps like VSCO, Tezza, or Snapseed.
- Choose Your Image: Select a photo from your camera roll. Images with good natural light and relatively simple compositions often work best for showcasing retro effects.
- Select a Retro/Vintage Filter:
- Browse the app’s filter library. Look for categories like “Vintage,” “Retro,” “Film,” or “Aesthetic.”
- Most apps provide previews. Tap through different filters to see how they affect your image’s color, contrast, and overall mood.
- Pay attention to the specific characteristics of each filter: Does it add sepia, desaturation, or a specific color cast like teal and orange? Some filters mimic specific film stocks or eras.
- Adjust Filter Intensity:
- After applying a filter, almost every app offers a slider to adjust its intensity. Reduce the intensity if the effect feels too strong or artificial. Often, a subtle application yields a more believable vintage photo effect.
- Fine-Tune Basic Adjustments: Even with a filter, you can usually make further adjustments to enhance the effect or correct minor issues.
- Exposure: Brighten or darken the image if needed.
- Contrast: Slightly reduce contrast for a softer, aged look.
- Saturation/Vibrance: Further desaturate if the filter didn’t go far enough, or subtly boost certain colors for a retro pop.
- Highlights/Shadows: Lift shadows or reduce highlights to mimic faded prints.
- White Balance: Adjust the temperature slider to add warmth (yellow/orange) or coolness (blue) to achieve a specific vintage tint.
- Add Textures and Effects (Optional):
- Many apps include separate sections for “Tools” or “Effects.” Look for options like:
- Grain: Add fine or coarse grain to simulate film.
- Vignette: Darken the edges to draw attention to the center.
- Light Leaks: Overlay colorful streaks or flares to mimic accidental film exposure.
- Dust and Scratches: Apply overlays that simulate wear and tear on an old print.
- Adjust the intensity and placement of these effects to achieve a natural, convincing aged photo look.
- Many apps include separate sections for “Tools” or “Effects.” Look for options like:
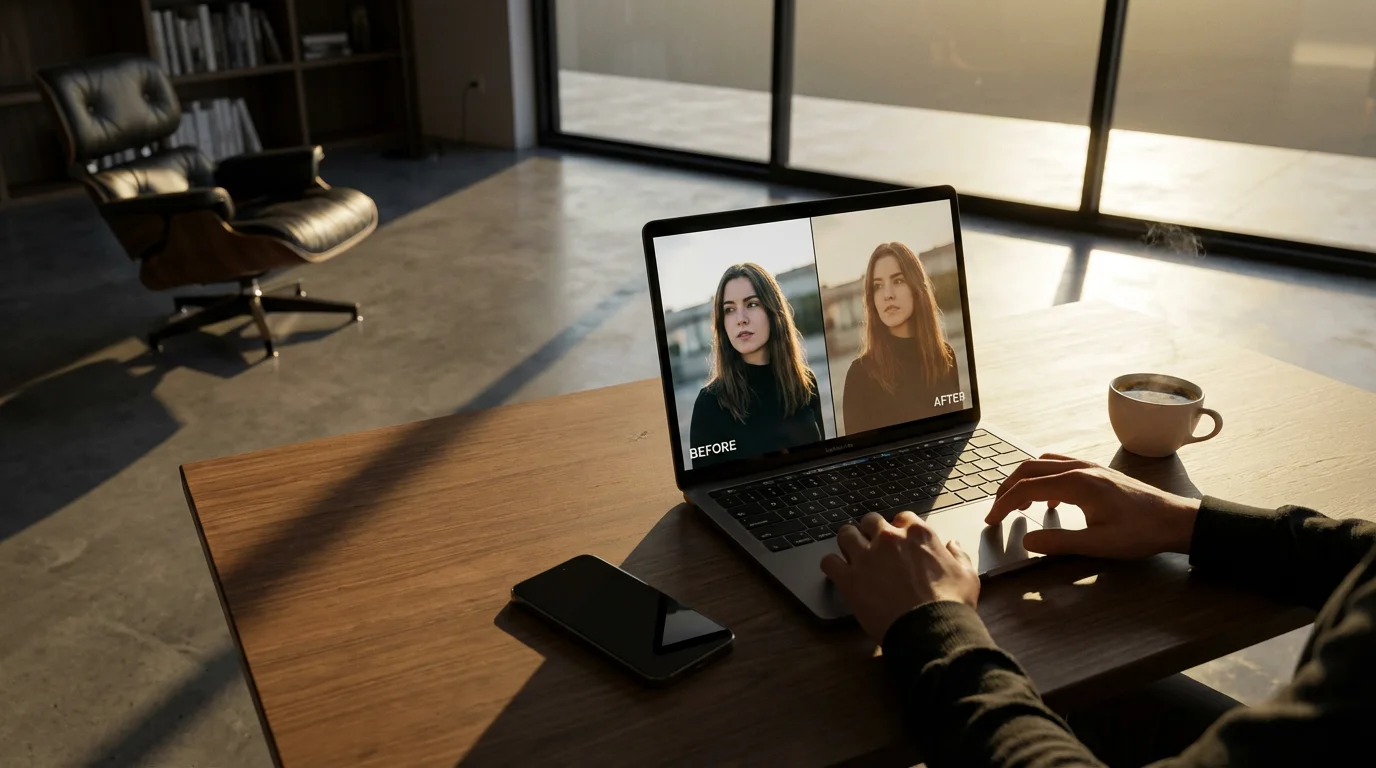
- Review and Save: Compare your edited image to the original. If you are satisfied with the retro filters and adjustments, save your image to your device or share it directly from the app. Most apps save a copy, preserving your original.
Mobile apps excel at providing quick, stylish transformations. Experiment with different apps and their unique filter sets to discover your favorite approach to making photos look vintage and old.
Beyond Filters: Creative Ways to Enhance Your Vintage Aesthetic
While filters and editing tools are powerful for creating vintage photo effects, you can enhance the overall aesthetic through other creative approaches. These methods connect your digital images to the tangible past, enriching their narrative.
- Incorporate Vintage Props and Settings: Think about the environment where you take your photos. Using vintage clothing, antique furniture, classic cars, or period-appropriate architecture in your composition immediately imbues the image with a sense of history. The context supports the visual effects you apply later, creating a more cohesive story.
- Print on Specialty Paper: After editing your digital photos with vintage effects, consider printing them on matte, fine art, or even slightly textured paper. Some printers offer “cotton rag” or “baryta” papers that emulate the look and feel of traditional photographic prints. This tactile quality significantly enhances the vintage experience, making the digital image feel more like a physical artifact.
- Mount and Frame Traditionally: Display your vintage-style prints in classic frames. Look for frames made from natural wood, distressed finishes, or even ornate styles that complement the era you are emulating. Matting your prints with archival, acid-free mats also adds a traditional touch and protects the photograph.
- Create a “Photo Album” Experience: Design a digital or physical album that tells a story. Arrange your vintage-style photos chronologically or thematically. For a physical album, use archival photo corners or acid-free adhesive to mount prints, and consider adding handwritten captions with a fountain pen for an authentic touch. This method transforms individual photos into a cohesive historical narrative.
- Combine with Handwritten Elements: Add handwritten notes, dates, or small illustrations directly onto the print (if you are comfortable with non-digital methods and use archival pens) or create digital overlays that mimic handwriting. This personal touch mirrors the way people used to annotate their physical photo albums.
These creative strategies help you go beyond mere visual effects. They immerse your photographs in a narrative context, making them feel genuinely part of a past era. You create a multi-sensory experience that enhances the sentimental value of your images.
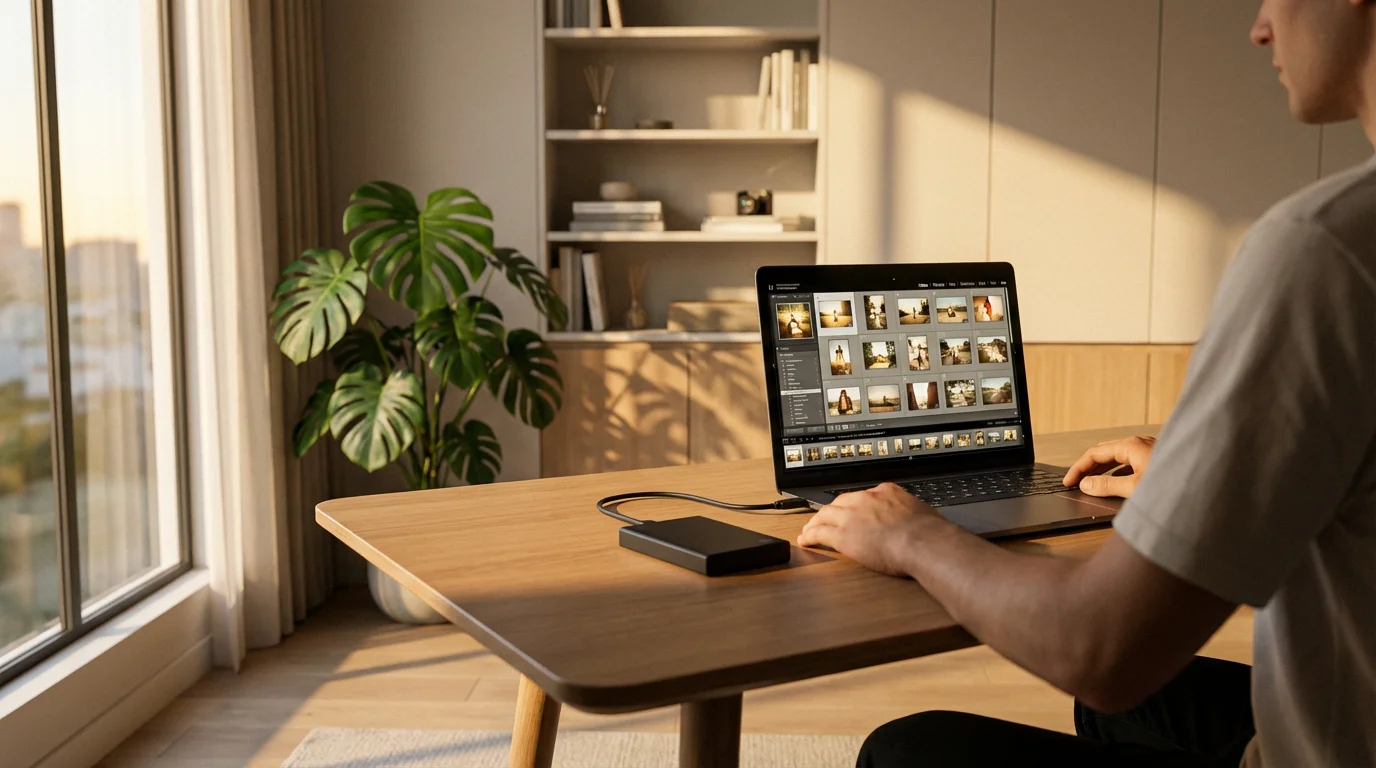
Preserving Your Digitized Vintage Creations
You have dedicated time and effort to create beautiful vintage and retro photo effects for your images. Now, protecting these digital masterpieces ensures their longevity. Preservation safeguards your creative work and the memories they represent.
Once you have finished your edits, consider creating a home photo archive to keep your new digital creations organized and backed up for years to come.
To ensure your starting files are of the highest quality, follow a proper guide on how to scan old photos at home before beginning the editing process.
- Use Archival File Formats: Save your final edited images in stable, widely supported formats. TIFF (Tagged Image File Format) is an excellent choice for archival purposes because it is lossless and preserves all image data. JPEG is suitable for sharing and web use, but remember it uses compression, which can degrade image quality over multiple saves. Always keep a high-quality TIFF or PNG master copy.
- Implement a Robust Backup Strategy: Digital files are vulnerable to hardware failure, accidental deletion, and cyber threats. Implement the “3-2-1 backup rule”:
- 3 Copies: Keep three copies of your data.
- 2 Different Media Types: Store copies on at least two different types of storage media (e.g., internal hard drive, external hard drive, USB stick).
- 1 Offsite: Keep one copy in an offsite location (e.g., cloud storage, a family member’s home, a bank safety deposit box).
Regularly test your backups to ensure data integrity.
- Organize and Metadata Tag Your Files: Effective organization helps you find your images and understand their context years later.
- Consistent Naming Conventions: Use descriptive file names (e.g., “Family-Picnic-1950s-VintageEffect.tif”).
- Folder Structure: Create a logical folder hierarchy (e.g., “Edited Photos” > “Vintage Effects” > “Year”).
- Metadata: Embed metadata like keywords (e.g., “vintage photo effects,” “retro filters,” “aged photo look”), descriptions, dates, and copyright information directly into your image files. This makes them searchable and provides essential context. The Image Permanence Institute offers valuable insights into digital preservation standards.
- Periodically Migrate and Update: Technology evolves. Storage media can become obsolete, and file formats may lose compatibility. Periodically migrate your files to newer storage solutions and ensure they remain accessible on current software. Review your collection every few years to ensure everything is in good order.
- Consider Professional Digital Archiving Services: For extremely valuable or extensive collections, professional digital archiving services offer specialized expertise in long-term preservation, ensuring your vintage photo effects endure for future generations.
By following these preservation steps, you ensure your beautifully crafted vintage and retro images remain accessible, vibrant, and ready to share for decades to come, honoring the memories they hold.
Frequently Asked Questions
How do I make photos look vintage and old without specific software?
You can use many free mobile apps like VSCO, Huji Cam, or Snapseed. These apps offer a range of pre-set retro filters, grain overlays, and light leaks. You apply these with a few taps, achieving a convincing aged photo look quickly and easily.
What are the best vintage photo filter apps for beginners?
For beginners, VSCO and Huji Cam are excellent choices. VSCO provides a variety of film-inspired filters and easy adjustments, allowing you to experiment with different vintage photo effects. Huji Cam automatically applies a distinct 90s disposable camera look, making it incredibly simple to use.
Can I apply vintage effects to black and white photos?
Absolutely. Many vintage effects, such as sepia toning, film grain, and subtle contrast reduction, significantly enhance black and white photos. These additions give monochrome images a classic, timeless feel, making them look even more like aged historical prints. Experiment with split toning to add color casts to shadows and highlights.
Are there any free tools to create vintage photo effects on a desktop?
Yes, GIMP (GNU Image Manipulation Program) is a powerful, free, open-source desktop software that offers extensive tools for creating vintage photo effects. You can manually adjust colors, add grain, and apply textures, giving you full creative control without any cost.
How can I make my photos look like they were taken in a specific decade?
To achieve a decade-specific retro look, research the common photographic characteristics of that era. For example, the 70s often feature warm, muted tones with lens flare, while the 80s might include vibrant, saturated colors. Use apps or software that offer specific decade-inspired retro filters, and pay attention to elements like color palette, film grain, and overall contrast to match the period accurately.
If you are working with original family archives, you may first need to remove scratches and dust from your scans before adding your own stylized textures.
Leave a Reply