Old photographs hold irreplaceable memories, capturing moments in time that connect us to our past and loved ones. However, sometimes these cherished images suffer from a common photographic flaw: red eye. This unwanted effect can distract from the emotion and authenticity of a portrait, particularly in vintage prints that you might want to restore or digitize. Red eye occurs when a camera’s flash illuminates the blood vessels in the subject’s retina, causing a bright red reflection that appears in the photograph. While modern digital cameras often have built-in red eye removal features, old photos require a more thoughtful approach.
Fortunately, you have several effective strategies at your disposal to perform photo correction and eliminate red eye, revitalizing your images without damaging the original. This guide walks you through understanding red eye, digitizing your photos, selecting the right tools, and applying precise editing techniques. By following these steps, you can confidently undertake an eye fix for your family’s photographic heritage, bringing clarity and focus back to those precious eyes and preserving them for generations to come.
Understanding Red Eye: Why It Appears in Your Photos
To effectively address red eye, you must first understand its cause. This phenomenon is a direct result of light from a camera’s flash reflecting off the subject’s retina and back into the camera lens. The human retina is rich in blood vessels, which appear red when illuminated. When a camera’s flash is fired in low-light conditions, the subject’s pupils are often wide open, allowing a significant amount of light to enter and reflect off the choroid, the vascular layer behind the retina. This reflected light, which is naturally red from the blood vessels, then registers on the film or digital sensor as a prominent red glow in the eyes.
While red eye is unique to color photography, those working with monochrome family archives may be interested in colorizing black and white photos once the digital cleanup is complete.
Several factors increase the likelihood of red eye appearing in your photographs:
- Direct Flash: Cameras with built-in flashes located very close to the lens are particularly prone to causing red eye. The light travels in a straight line, directly into and out of the eye.
- Low Light Conditions: In dim environments, pupils dilate to let in more ambient light. A wider pupil offers a larger “window” for the flash to enter the eye and reflect back, amplifying the red eye effect.
- Close Proximity to Subject: The closer the subject is to the camera, the more intense the flash appears to their eyes, and the more likely you are to see red eye.
- Age and Eye Color: Children and individuals with lighter eyes sometimes exhibit red eye more frequently or intensely. Their retinas might be more reflective, or their pupils might dilate faster.
- Lack of Pre-flash: Some cameras use a pre-flash designed to constrict the subject’s pupils before the main flash fires for the actual exposure. Older cameras, especially those taking the photos you are now restoring, often lacked this feature, making red eye more common in their output.
Recognizing these contributing factors helps you appreciate why certain old photos consistently feature red eye. The goal of red eye removal is not just to paint over the red, but to restore a natural, lifelike appearance to the eyes, which often requires a nuanced approach.
Gathering Your Tools for Red Eye Removal
Before you begin the photo correction process, assemble the necessary tools. The right equipment and software make a significant difference in the quality and ease of your eye fix efforts.
Be sure to inspect your physical prints for mold or warping before scanning, as restoring water-damaged photos requires specialized handling.
Before addressing specific eye corrections, you may first need to remove scratches and dust from scanned photos to clean up the overall image.
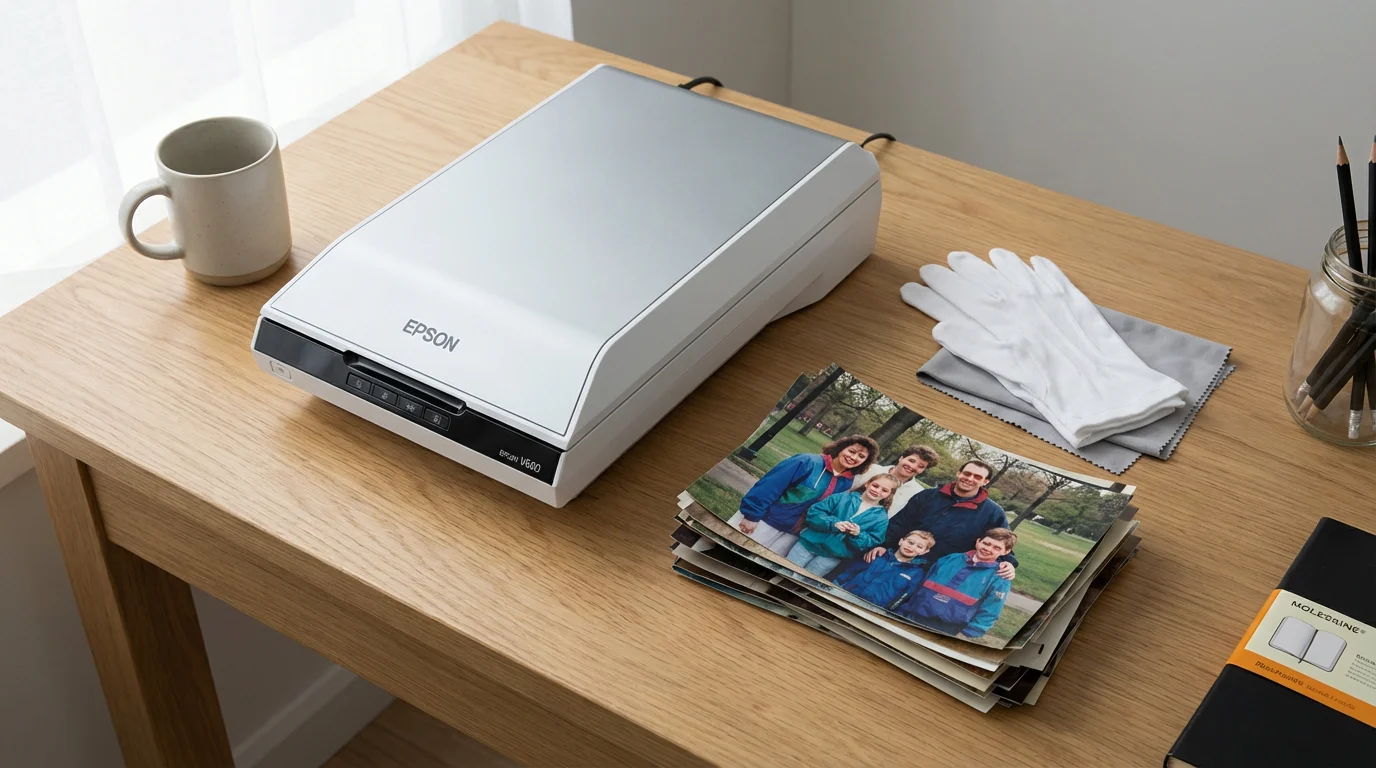
Essential Hardware: A Quality Scanner
Since you are working with old, physical photographs, the first critical step involves digitizing them. A high-quality scanner is your most important hardware tool. Do not simply snap a picture of your old photo with your smartphone camera; this introduces distortions, glare, and low resolution that compromise restoration efforts.
- Flatbed Scanner: For individual prints, a flatbed scanner is ideal. Look for one that offers at least 600 dots per inch (DPI) optical resolution, though 1200 DPI or higher is preferable for maximum detail capture, especially if you plan to print enlargements. Features like Digital ICE (Image Correction and Enhancement) can automatically remove dust and scratches from film, though it is less common for prints.
- Dedicated Photo Scanner: Some scanners are specifically designed for photos, offering features such as automatic color correction or batch scanning for multiple prints.
Always clean your scanner bed meticulously before each scan to prevent dust and smudges from being embedded in your digital file, adding unnecessary cleanup work later.
Software Options: From Basic to Advanced
Once your photos are digital, you need software for red eye removal. Options range from simple, free tools to professional-grade editors.
- Basic/Free Photo Editors: Many operating systems include basic photo editing tools. Google Photos, Apple Photos, and Windows Photos offer rudimentary red eye correction features. These are often one-click solutions, effective for straightforward cases.
- Mid-range Photo Editors: Programs like GIMP (free, open-source), Paint.NET (free for Windows), or Affinity Photo (paid, one-time purchase) provide more control with dedicated red eye tools and layers for non-destructive editing.
- Professional Photo Editors: Adobe Photoshop and Lightroom are industry standards, offering the most precise control over red eye removal, color correction, and other advanced restoration techniques. They come with a subscription model.
- Mobile Apps: For quick edits on the go, apps like Snapseed (free) or Adobe Lightroom Mobile (freemium) include red eye correction. While convenient, they offer less precision than desktop software.
Your choice of software depends on your comfort level with editing, the complexity of the red eye issue, and your budget. Most users find a mid-range editor offers the best red eye removal tool balance of features and ease of use.
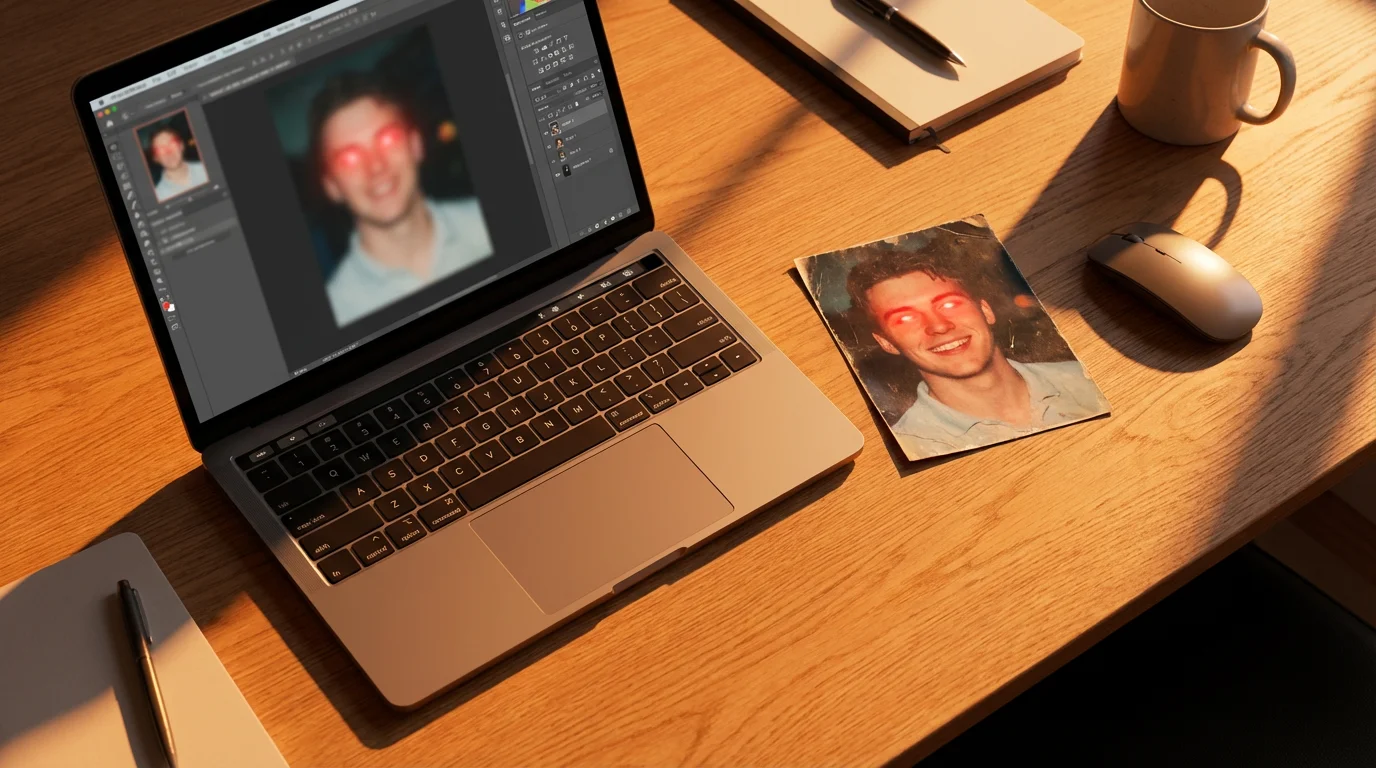
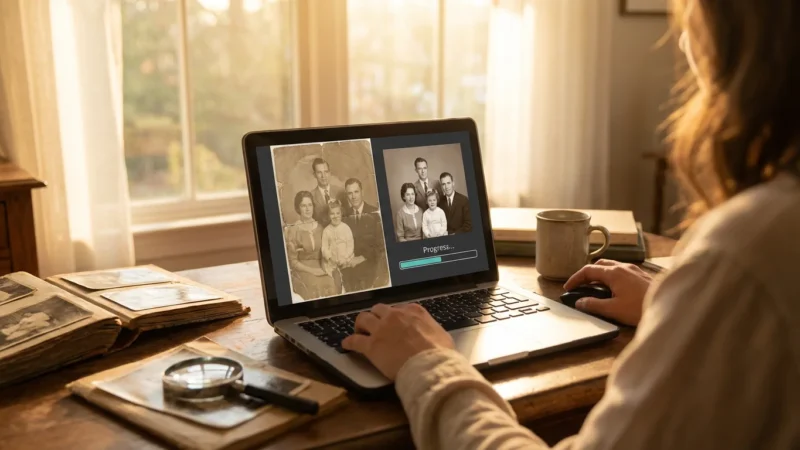
Digitizing Your Old Photos: The Essential First Step
The success of any red eye removal or photo correction project hinges on the quality of your initial digital scan. A poor scan introduces noise, artifacts, and low resolution, making subsequent editing difficult or impossible to achieve a professional result. Treat this step with care, as it forms the foundation for all your restoration work.
Once your image is digitized, you can move beyond simple red eye fixes to learn how to restore old faded photos to their former glory.
“Digitizing old photos preserves not just the image, but the historical context and emotional resonance of family heritage. A high-resolution scan captures the fine details necessary for successful restoration.”
Step-by-Step Scanning Process:
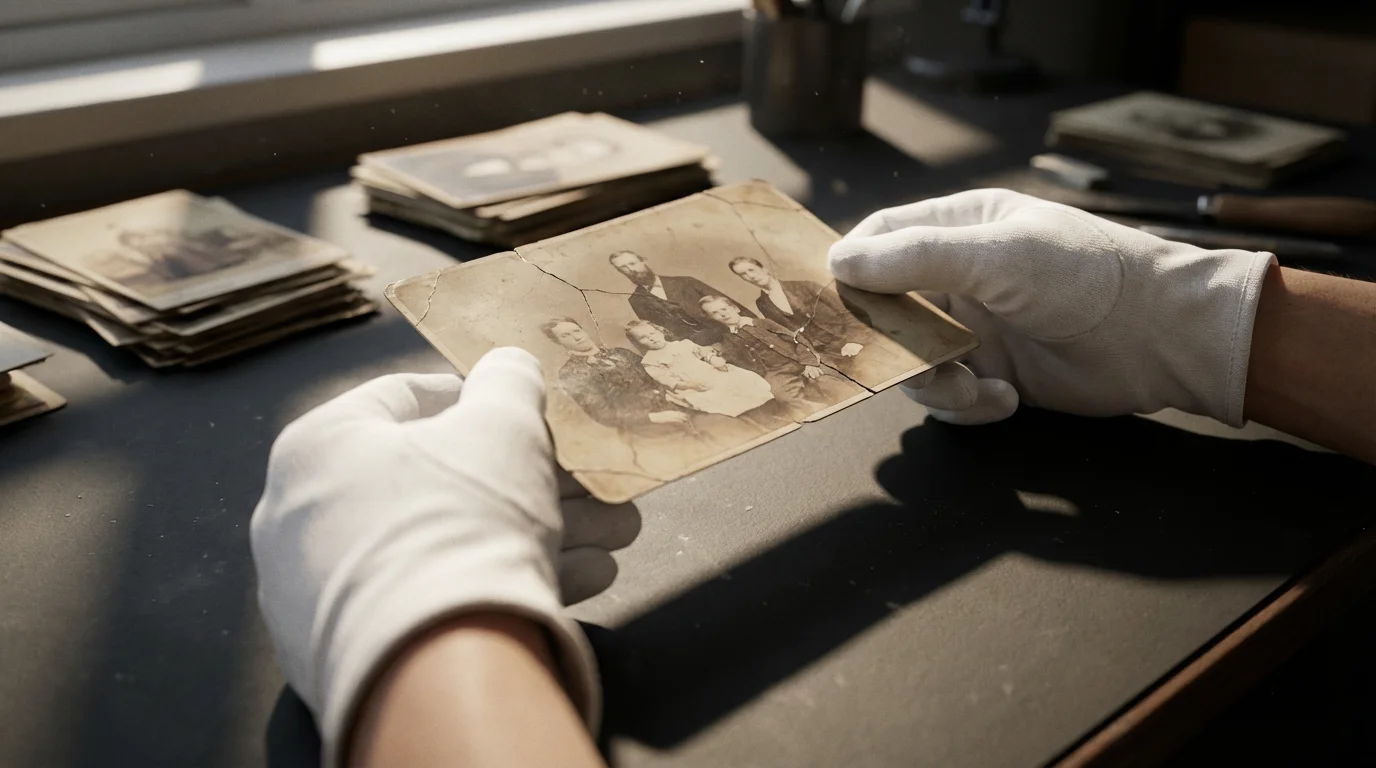
- Clean Your Photos: Gently wipe each photo with a soft, lint-free cloth, such as a microfiber cloth. Use archival cotton gloves to avoid transferring oils from your fingers. For stubborn dust, a can of compressed air can help, but hold it upright and avoid tilting to prevent propellant discharge. Never use liquid cleaners on old prints.
- Clean Your Scanner Bed: Dust and smudges on the scanner glass will appear in your scan. Use a glass cleaner and a lint-free cloth to ensure the surface is spotless.
- Choose the Right Resolution:
- For general archiving and web sharing: Scan at 300 DPI (dots per inch). This resolution is sufficient for viewing on screens and printing at the original size.
- For potential enlargements and serious restoration: Scan at 600 DPI or 1200 DPI. This captures more detail, providing greater flexibility for cropping, resizing, and precise editing like eye fix procedures. Always scan at the highest optical resolution your scanner offers for maximum flexibility, as you cannot add detail later.
- Color Depth: Scan in 24-bit color (standard for most scanners). If your scanner offers 48-bit color, use it for maximum color information, especially if you anticipate extensive color correction.
- File Format:
- TIFF (Tagged Image File Format): This is the preferred archival format. TIFF files are uncompressed and retain all image data, making them ideal for preservation and editing. They are larger files, but crucial for quality.
- JPEG (Joint Photographic Experts Group): Acceptable for everyday use and sharing, but use the highest quality setting to minimize compression artifacts. JPEG is a “lossy” format, meaning some data is discarded during compression.
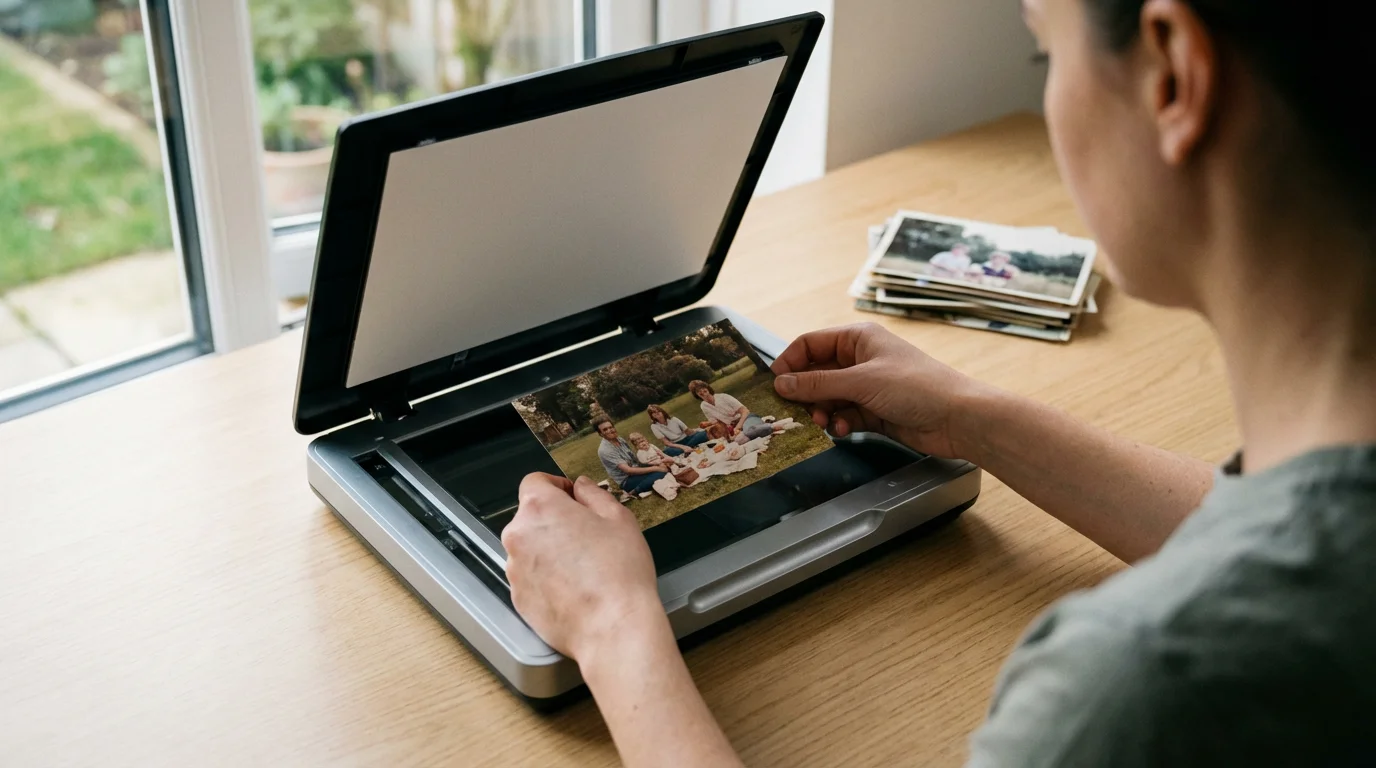
- Perform the Scan:
- Place the photo face down on the scanner bed, aligning it carefully.
- Preview the scan if your software allows. Adjust cropping and rotation before the final scan to save editing time.
- Execute the scan and save the file to a clearly named folder on your computer.
Once you have digitized your photos at an appropriate resolution and in a high-quality format, you create a digital “negative” from which you can perform all your photo correction and red eye removal edits without altering the original physical print. Always work on a copy of your scanned file, never the original, to ensure you can revert to the pristine scan if needed.
Software Solutions for Red Eye Removal
The market offers numerous software options, each with its strengths. Choosing the best red eye removal tool depends on your needs, skill level, and budget. Here, we compare some popular choices.
If your images have physical damage alongside red eye, consider using AI photo restoration tools for automated repairs of tears and textures.
Once your digital edits are complete, it is equally important to store your old photographs in a way that protects them from further environmental damage.
| Software | Key Features for Red Eye | Pros | Cons | Best For |
|---|---|---|---|---|
| Adobe Photoshop | Dedicated Red Eye Tool, layers, advanced selection tools, blending modes. | Ultimate precision, non-destructive editing, professional results. | Subscription cost, steep learning curve. | Professionals, complex cases, archival restoration. |
| Adobe Lightroom | Red Eye Correction tool in Develop module, batch processing. | Excellent for batch processing, integrated with cloud, good for general edits. | Less precise than Photoshop for specific eye fixes, subscription. | Photographers with large collections, general enhancements. |
| GIMP (GNU Image Manipulation Program) | Dedicated Red Eye Removal filter, layers, selection tools. | Free, open-source, powerful, cross-platform. | Interface can be less intuitive for beginners. | Budget-conscious users, advanced amateurs. |
| Affinity Photo | Red Eye Tool, Inpainting Brush for general blemishes, layers. | One-time purchase, powerful feature set, good Photoshop alternative. | Slight learning curve, not free. | Users wanting professional features without subscription. |
| Windows Photos / Apple Photos | Basic red eye correction (often automatic or one-click). | Built into OS, very simple to use, free. | Limited control, less precise, can look unnatural. | Quick fixes, casual users, very minor red eye. |
| Snapseed (Mobile App) | Red Eye tool, selective adjustments, user-friendly touch interface. | Free, powerful for mobile, quick edits on the go. | Less precision than desktop, dependent on screen size. | Mobile photographers, quick on-the-go edits. |
For restoring old photos, investing time in a tool that offers precision, like GIMP or Affinity Photo, provides more satisfying and natural-looking results than a basic, one-click solution. These tools allow you to adjust the intensity of the correction and ensure the eye retains its natural sparkle, rather than looking flat or artificially dark.
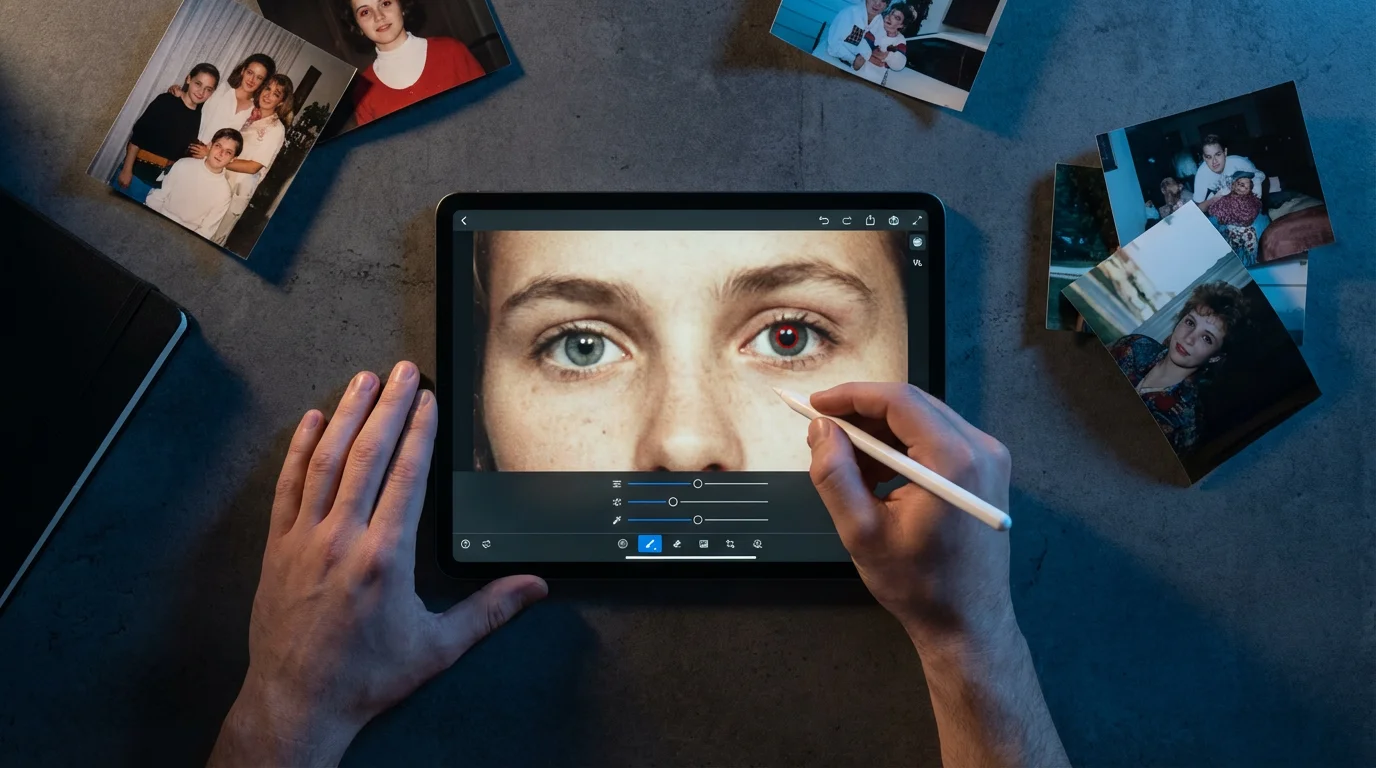
Step-by-Step Guide to Removing Red Eye with Software
Let’s walk through the general process of performing red eye removal using a capable photo editor. While specific menu names might vary, the underlying principles apply across most software, especially those with dedicated red eye tools or manual correction capabilities. For this guide, we will consider a workflow applicable to programs like GIMP, Affinity Photo, or Adobe Photoshop.
Preparatory Steps:
- Open Your Digitized Photo: Launch your chosen photo editing software and open the high-resolution TIFF or JPEG file you scanned earlier.
- Create a Duplicate Layer (Non-Destructive Editing): Always work on a duplicate layer or make a copy of your file. This preserves the original image data and allows you to easily undo changes or compare before-and-after versions. In most software, you can right-click the image layer and select “Duplicate Layer” or “Copy Layer.”
- Zoom In: Magnify the image sufficiently so you can clearly see the red eye. A zoom level between 200% and 400% is usually appropriate for precise work.
Using a Dedicated Red Eye Removal Tool:
Many programs offer a specific “Red Eye Tool” designed to simplify this eye fix.
- Select the Red Eye Tool: Look for an icon typically resembling an eye with a diagonal line through it, or an eye with a red pupil. It often resides in the same toolbar as healing brushes or clone stamps.
- Adjust Tool Settings (if available): Some tools let you adjust parameters such as “Darken Amount” or “Pupil Size.” Start with default settings and adjust as needed.
- Click or Drag on the Red Area:
- Click Method: With the tool selected, simply click directly on the red pupil. The software automatically detects the red area and attempts to neutralize it.
- Drag Method: In some programs, you click and drag a small box around the red pupil. This allows you to define the exact area for correction.
- Evaluate and Refine: After the initial application, zoom out to check the result. Does the eye look natural? If the correction is too strong or too weak, use the undo function and try adjusting the tool’s settings or refining your click/drag area. Repeat for the other eye.
Dedicated tools are excellent for quick, automatic corrections, especially when the red eye is clearly defined.
Manual Red Eye Correction (for more control):
Sometimes, the dedicated tool does not achieve a natural result, or the red eye is irregularly shaped. Manual photo correction provides superior control.
- Select the Eye Area: Use a precise selection tool (e.g., Elliptical Marquee Tool, Lasso Tool, or Quick Selection Tool) to carefully select only the red portion of the pupil. Be precise; avoid selecting the iris or surrounding skin. You can refine your selection using “Add to Selection” or “Subtract from Selection” options.
- Desaturate the Red:
- Go to the “Image” menu, then “Adjustments,” and find “Hue/Saturation” or “Color Balance.”
- Select the “Reds” channel in the dropdown menu.
- Drag the “Saturation” slider down, often to -100, to remove all red color.
- You might also slightly darken the area by dragging the “Lightness” slider down a small amount (-5 to -15 usually works).
- Click “OK” or “Apply.”
- Darken the Pupil: The pupil should appear dark, almost black. If it still looks too light or gray:
- Keep your selection active or re-select the pupil area.
- Go to “Image,” then “Adjustments,” and choose “Levels” or “Curves.”
- Adjust the midtone slider to darken the area, or pull down the curve in the middle to darken.
- Alternatively, you can use a “Burn Tool” (set to a low exposure, 5-10%) and gently paint over the pupil to darken it.
- Feather the Selection (Crucial Step): After making adjustments, “feather” your selection. This softens the edges of the correction, preventing a harsh, unnatural line around the pupil. Typically, you can find a “Feather” option under the “Select” menu. A feather radius of 1-3 pixels is often sufficient, depending on your image resolution.
- Deselect and Review: Deselect the area (Ctrl+D or Cmd+D) and zoom out to assess the overall look. Compare it with the unedited layer if you duplicated it. Ensure the eyes look natural and match each other.
Manual methods, while taking more time, offer the most control and yield the most realistic photo correction for stubborn or unusually shaped red eye issues.

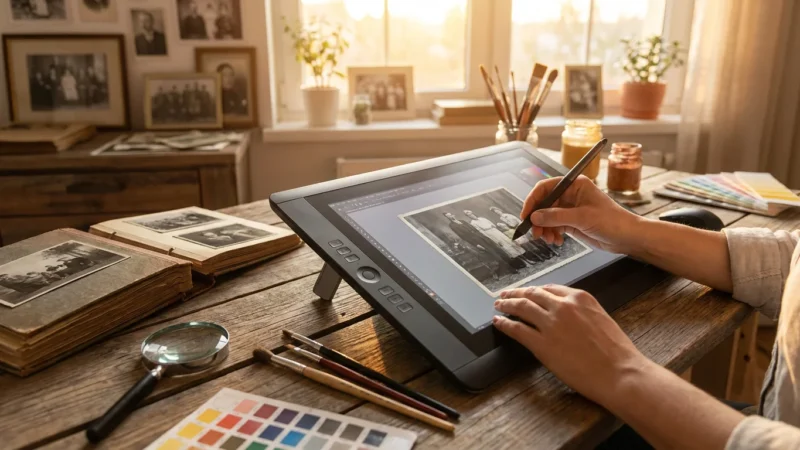
Advanced Techniques and Considerations for Eye Fixes
While the basic red eye removal steps address most common issues, certain situations demand more advanced techniques to achieve a truly natural and seamless eye fix in your old photos. These methods offer greater control and subtlety, especially when dealing with challenging cases or striving for professional-level restoration.
Maintaining Natural Eye Sparkle (Catchlights)
A common pitfall of aggressive red eye correction is a dull, lifeless pupil. Natural eyes have “catchlights”—small reflections of light sources that add sparkle and depth. If your red eye removal process removes these, you need to restore them.
- Preserve Existing Catchlights: When making your selection for the red area, meticulously avoid any catchlights.
- Recreate Catchlights: If catchlights were lost or non-existent, you can carefully add them:
- Create a new, empty layer above your edited eye layer.
- Select a small, soft-edged brush (size 1-3 pixels) and set its color to white or a very light gray.
- Carefully dab a tiny dot or short line in the upper portion of the pupil, mimicking the light source in the original scene.
- Lower the opacity of this layer if the catchlight appears too bright, or use a blending mode like “Overlay” for a more subtle effect.
This small detail significantly enhances the realism of your photo correction.
Addressing Residual Color Casts
Sometimes, after removing the bright red, a subtle maroon or brown cast might remain around the pupil. This is often more noticeable in very old or faded prints.
- Targeted Color Adjustments: Use a precise selection of the affected area. Instead of just desaturating, experiment with “Selective Color” (in Photoshop/GIMP) or “Color Mixer” (in Lightroom) to target specific hues. You can often reduce the yellow or magenta components in the red channel to further neutralize the discoloration.
- Adjustment Layers: For non-destructive adjustments, use adjustment layers (e.g., Hue/Saturation, Color Balance) masked to the eye area. This allows you to fine-tune the color and opacity without permanently altering the pixel data.
Dealing with Different Eye Colors
While the pupil should generally be dark, you need to consider the surrounding iris. An eye fix should complement the subject’s natural eye color.
- Isolate the Pupil: Ensure your selection for red eye is strictly limited to the pupil and does not spill into the iris.
- Enhance Iris Color (Optional): If the iris looks dull after red eye removal, you can slightly enhance its saturation or contrast on a separate layer, masked only to the iris, to bring back its vibrancy without making it look artificial.
Using Blending Modes
In advanced software, blending modes offer creative ways to integrate your photo correction more seamlessly. For instance, after applying a darkened layer over the red pupil, experimenting with blending modes like “Multiply” or “Color Burn” (at low opacities) can help the corrected area blend more naturally with the surrounding eye and skin tones.
Remember, the goal is not just to eliminate the red, but to make the eyes appear as they would have naturally at the time the photo was taken. Practice and patience lead to the most convincing results for how to remove red eye from photos.

Preventing Red Eye in Future Photos
While you now know how to remove red eye from photos, prevention is always the best red eye removal tool. Understanding how to avoid red eye in your contemporary photography saves you significant editing time down the road. Apply these strategies to capture natural-looking eyes from the start.
Addressing lighting flaws is just one part of preservation; saving yellowed and discolored photographs is also vital for keeping your family history vibrant.
Use Your Camera’s Red Eye Reduction Feature
Many digital cameras, including smartphone cameras, offer a red eye reduction mode. This typically works by firing a series of pre-flashes before the main flash. These brief flashes cause the subject’s pupils to constrict, reducing the amount of light that can enter the eye and reflect back as red eye. Always enable this setting when shooting in low light with flash.
Avoid Direct Flash
Direct flash is the primary culprit for red eye. When the flash is close to the lens and points directly at the subject, light reflects straight back into the camera.
- Bounce the Flash: If your camera has an external flash unit, bounce the flash off a ceiling or wall. This diffuses the light, making it softer and larger, which reduces harsh reflections and the red eye effect. The indirect light illuminates the scene more naturally.
- Use an Off-Camera Flash: Position your flash away from the camera’s lens axis. Even moving the flash a few inches to the side or above your camera can significantly reduce the chances of red eye.
- Use a Diffuser: Attach a diffuser to your flash unit. This spreads the light out, creating a broader, softer light source that is less likely to cause a harsh red reflection.
Increase Ambient Lighting
The darker the room, the more dilated the pupils, making red eye more probable. Brighten your shooting environment:
- Turn on More Lights: Simple room lights can help constrict pupils.
- Open Curtains/Blinds: Utilize available natural light whenever possible.
Increase Distance from Subject
The closer you are to your subject, the more intense the flash appears and the more likely red eye will occur. Step back if possible. If you need to be close, consider other preventative measures.
Have Subjects Look Away from the Lens
Ask your subjects to slightly shift their gaze away from the camera lens. Even a small angle change can alter the reflection path of the flash, making it less likely to bounce directly back into the lens. This is particularly effective in group photos where some individuals might look directly at the flash.
Avoid “Deer in Headlights” Effect
A trick sometimes used is to have subjects look at a bright light source (not the flash itself) just before the photo is taken. This helps constrict their pupils naturally. Be careful not to make them squint or look uncomfortable.
By implementing these preventive measures, you can dramatically reduce the occurrence of red eye in your new photos, saving you time on future photo correction and ensuring your images capture the true essence of the moment.
When to Seek Professional Help for Photo Restoration
While this guide equips you with powerful tools and techniques for red eye removal and general photo correction, some old photographs present challenges that extend beyond what DIY methods can effectively address. Knowing when to consult a professional photo restorer or conservator is crucial for the long-term preservation of truly precious or damaged heirlooms.
Signs You Might Need Professional Assistance:
- Severe Physical Damage: If the original print is torn, creased, water-damaged, moldy, stained, or has significant portions missing, a professional restorer possesses specialized techniques and archival materials to handle such delicate repairs. They can often reconstruct missing areas and stabilize the physical print.
- Extensive Fading or Discoloration: Photos that have severely faded, yellowed, or developed a strong color cast over time require advanced color correction and tonal reconstruction. Professionals use sophisticated software and color management systems to bring back accurate colors and dynamic range that might be difficult to achieve with standard home software.
- Complex Digital Restoration Beyond Red Eye: Beyond simple red eye, if your photo has extensive cracks, scratches, dust spots, or significant noise, a professional can meticulously repair these imperfections without making the image look over-processed or artificial. This often involves detailed cloning, healing, and painting techniques.
- Irreplaceable and High-Value Photos: For photographs with significant historical, monetary, or sentimental value—such as rare family portraits, historical documents, or images of deceased loved ones—the risk of accidental damage during DIY efforts is too high. A professional provides expertise and insurance against mishap.
- Poor Original Quality: If the original photograph was poorly exposed, out of focus, or printed on very low-quality paper, a professional might be able to extract more detail or improve clarity using advanced sharpening and noise reduction algorithms than you can at home.
- Time Constraints or Lack of Expertise: Photo restoration can be a time-consuming and meticulous process. If you lack the time, patience, or the desire to learn complex editing software, a professional can deliver high-quality results efficiently.
What a Professional Can Offer:
- Archival Scanning: Professionals use drum scanners or high-end flatbeds that capture far greater detail and dynamic range than consumer-grade equipment.
- Specialized Software and Skills: They often use industry-standard software like Photoshop with extensive experience in advanced manipulation, masking, and color theory.
- Physical Preservation: For physical prints, conservators can stabilize degradation, perform repairs with reversible, archival-grade materials, and advise on proper storage to prevent future damage. You can find accredited conservators through organizations like the American Institute for Conservation.
- High-Quality Output: Professionals deliver perfectly color-managed, high-resolution digital files and offer archival printing options that ensure your restored images last.
Before entrusting your photos to anyone, research reputable restorers, ask for portfolios, and ensure they follow ethical preservation guidelines. While DIY red eye removal is empowering, knowing your limits protects your most cherished memories.
Frequently Asked Questions
Can I remove red eye from a very old, faded black and white photo?
Yes, you can often remove red eye from old black and white photos. While red eye is typically a color phenomenon, sometimes the effect can appear as a stark, bright white or grayish glow in black and white prints, especially if the original image was color and later converted. The process involves digitizing the photo at high resolution and then using selection tools to darken and desaturate the affected area, much like with color photos, aiming for a natural, dark pupil appearance.
Is there a completely automatic red eye removal tool that always works?
While many photo editing applications, including modern cameras and smartphones, offer automatic red eye removal, no tool is 100% foolproof for every situation. Automatic tools work best with clearly defined, classic red eye. For older photos, or cases where the red eye is irregularly shaped, too light, or has a strong color cast, manual or semi-manual techniques provide more control and often yield more natural-looking results. Automation can be a good starting point, but be prepared to refine it manually.
Will removing red eye degrade the quality of my old scanned photo?
No, if you follow best practices for digital photo editing, removing red eye should not degrade the quality of your scanned photo. The key is to work on a duplicate layer or a copy of your scanned file, using non-destructive editing techniques. This ensures your original high-resolution scan remains untouched. When applying adjustments, be precise in your selections and use feathering to blend corrections seamlessly. This preserves the overall quality while effectively performing the eye fix.
What is the best file format to save my photos after red eye removal?
After performing red eye removal and any other photo corrections, save your edited images in a high-quality format. For archival purposes, TIFF (Tagged Image File Format) is highly recommended. It is an uncompressed, lossless format that preserves all image data. For everyday sharing or web use, save a copy as a JPEG, but ensure you select the highest quality setting to minimize compression artifacts. Never overwrite your original high-resolution scan with an edited JPEG to maintain maximum quality.
Disclaimer: This article is for informational purposes only. When handling valuable or irreplaceable photographs, consider consulting a professional conservator. Always test preservation methods on non-valuable items first.
If you are working on a budget, exploring the best free photo editing software for beginners can provide powerful tools for red eye correction without a high price tag.


Leave a Reply