Old family photographs hold more than just images. They capture moments, emotions, and the stories of generations. When you take the important step of digitizing these treasures, you often encounter a common challenge: scratches, dust, and other imperfections that obscure their original beauty. These blemishes, accumulated over decades, can diminish the clarity and impact of your scanned images.
Before committing to a DIY project, you may want to evaluate if professional photo scanning services are a better fit for your timeline and budget.
Before you begin the editing process, ensure you have followed a comprehensive guide to scanning old photos at home to capture the best possible raw image.
Fortunately, you possess the power to restore these digital heirlooms. You can bring your precious memories back to life, clearer and more vibrant than ever before. This comprehensive guide provides actionable, step-by-step instructions for effective dust removal and scratch repair, transforming your scanned photos into pristine digital assets. You will learn the specific tools and techniques professionals use, allowing you to confidently clean up scanned photo imperfections, remove scratches photos, and perform general scan cleanup with remarkable results.

Why Scanned Photos Need Cleanup
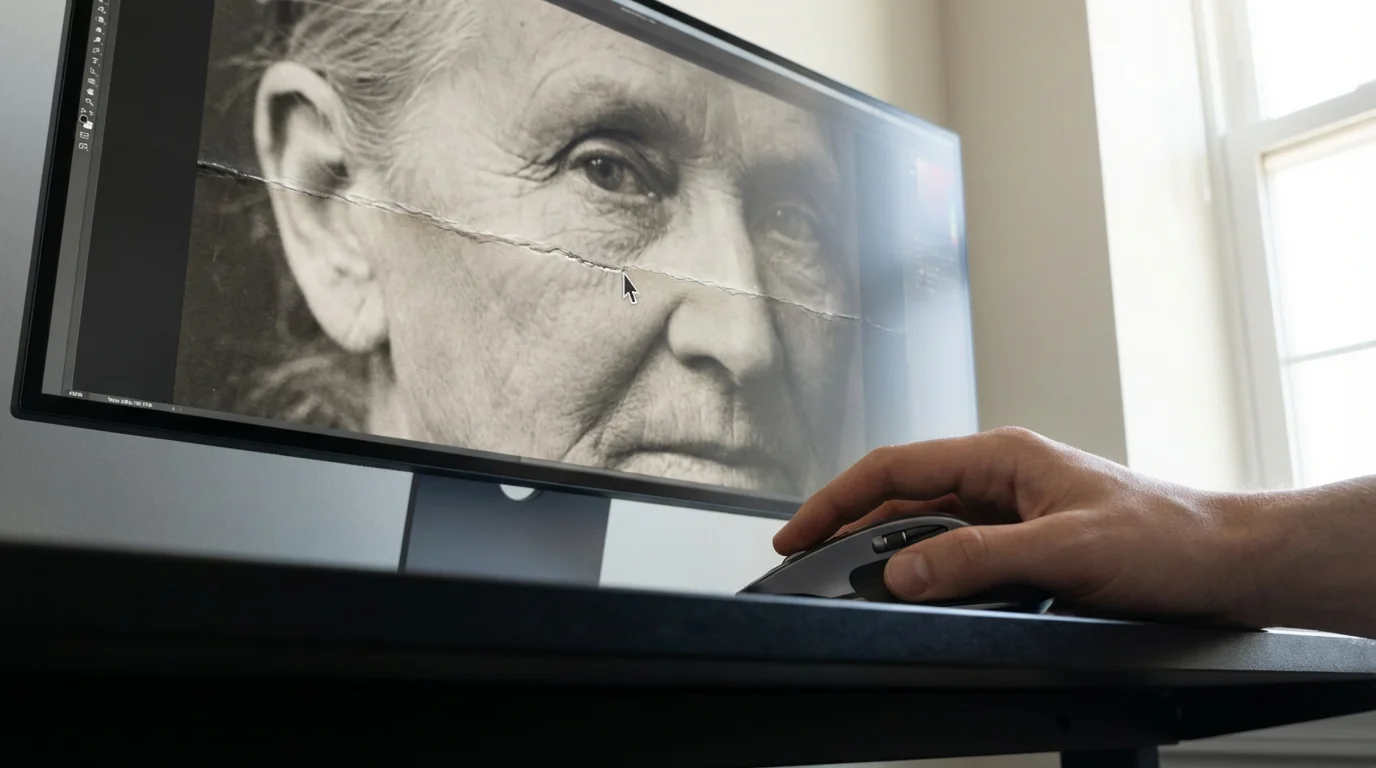
Your physical photographs face many environmental threats throughout their lifespan. Over time, dust settles on their surfaces, scratches accumulate from handling, and even minor creases can appear. When you scan these photos, the scanner faithfully captures these imperfections, often exaggerating them due to the high resolution of digital capture. What might look like a tiny fleck of dust on a physical print can become a prominent, distracting spot in a digital image.
If the damage to your originals is extensive, professional photo restoration services can often perform miracles on deeply compromised images.
Beyond surface damage, you may also need to learn how to sharpen blurry photos if the original scans lack the crispness of the physical prints.
Common imperfections you encounter include:
- Dust specks: Microscopic particles that appear as dark or light spots.
- Fibers and hairs: Longer, thread-like strands.
- Fingerprints: Smudges that obscure details.
- Scratches: Linear marks, often white or dark depending on their depth.
- Creases and folds: Visible lines where the photo bent.
- Stains and discoloration: Chemical or environmental damage.
Addressing these issues enhances the aesthetic appeal of your images and ensures the digital version faithfully represents the original memory, free from modern distractions. A clean, restored image allows viewers to focus on the people and moments captured, not the damage.
Gathering Your Digital Restoration Toolkit
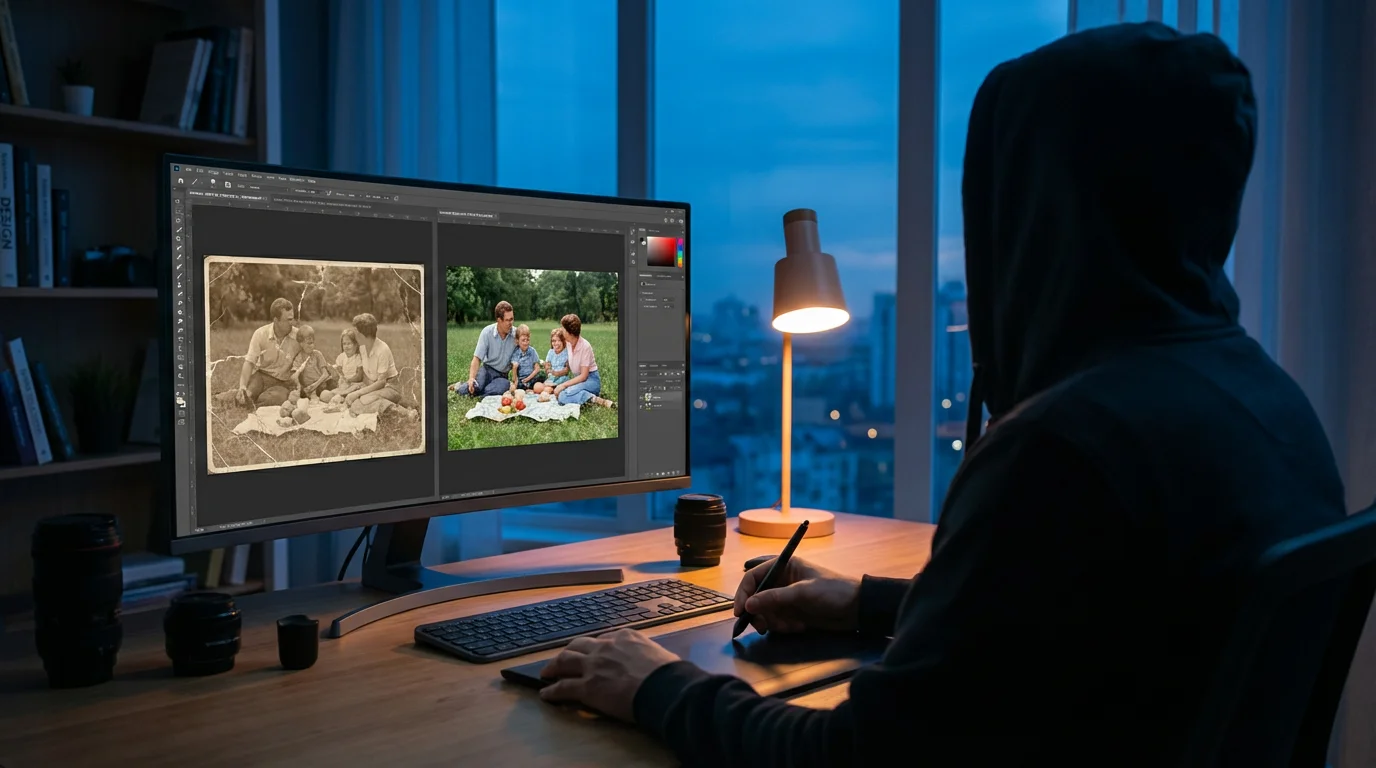
Effective photo restoration relies on the right software tools. While many programs offer basic editing, a robust image editor provides the precision and control you need for detailed dust removal and scratch repair.
If manual editing feels overwhelming, you can also explore using AI photo restoration tools to automate many of these complex repairs.
Essential Software for Photo Restoration
Consider these industry-standard and highly capable options:
- Adobe Photoshop: This professional-grade software offers the most comprehensive suite of tools for photo manipulation. Its layers, selection tools, and dedicated healing brushes make it incredibly powerful for intricate restoration tasks.
- GIMP (GNU Image Manipulation Program): A free, open-source alternative, GIMP provides many of Photoshop’s core functionalities. It includes cloning, healing, and selection tools that are highly effective for scan cleanup.
- Affinity Photo: A popular choice for its one-time purchase model, Affinity Photo delivers a professional feature set comparable to Photoshop, including excellent retouching brushes and non-destructive editing capabilities.
- Lightroom/Photo RAW: While primarily for photo organization and general enhancements, these programs can handle basic dust spot removal through their spot healing features. For deeper scratch repair, you will likely need a pixel-level editor like Photoshop or GIMP.
Key Tools within Your Software
Regardless of your chosen software, familiarize yourself with these crucial tools:
- Zoom Tool: Essential for precise work on small imperfections. You cannot fix what you cannot clearly see.
- Hand Tool: Allows you to navigate around a zoomed-in image.
- Spot Healing Brush Tool: Automatically samples surrounding pixels to seamlessly remove small blemishes. This is your go-to for dust removal.
- Healing Brush Tool: Provides more control than the Spot Healing Brush, requiring you to define a source area for cloning. It is excellent for textured areas.
- Clone Stamp Tool: Copies exact pixels from one area to another. Use it for replicating textures or removing larger, more complex scratches where content-aware fills might falter.
- Patch Tool: Selects a problematic area and replaces it with sampled content from another part of the image, blending seamlessly. It works well for irregularly shaped imperfections.
- Lasso/Selection Tools: Useful for isolating areas for specific adjustments or repairs.
- Layers and Masks: Non-destructive editing is paramount. Layers allow you to make changes without altering the original image data, and masks let you selectively apply or hide edits.
Mastering these tools empowers you to meticulously clean up scanned photo imperfections, ensuring a high-quality restoration.
Proactive Pre-Scan Cleaning for Better Results
The best way to remove scratches photos and perform dust removal is to prevent them from appearing in your scan in the first place. A few minutes of physical cleaning before you scan saves you hours of digital editing later. Remember, you handle irreplaceable artifacts, so always exercise extreme care.
To save time during the digitization phase, consider implementing batch scanning strategies for your larger collections.
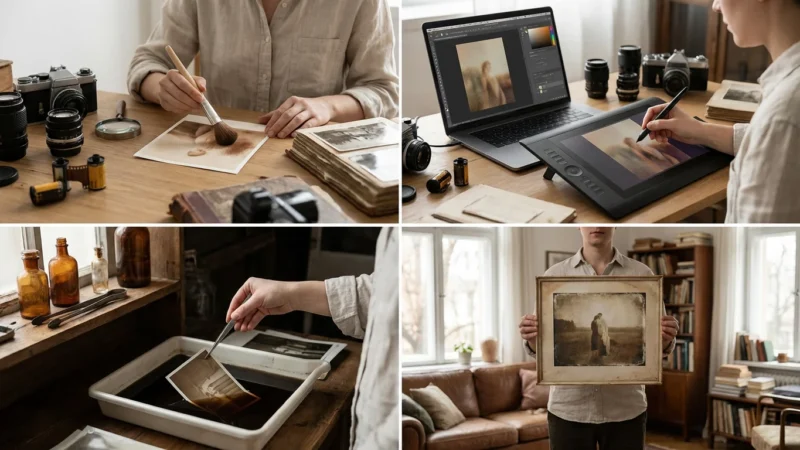
Cleaning Your Physical Photos
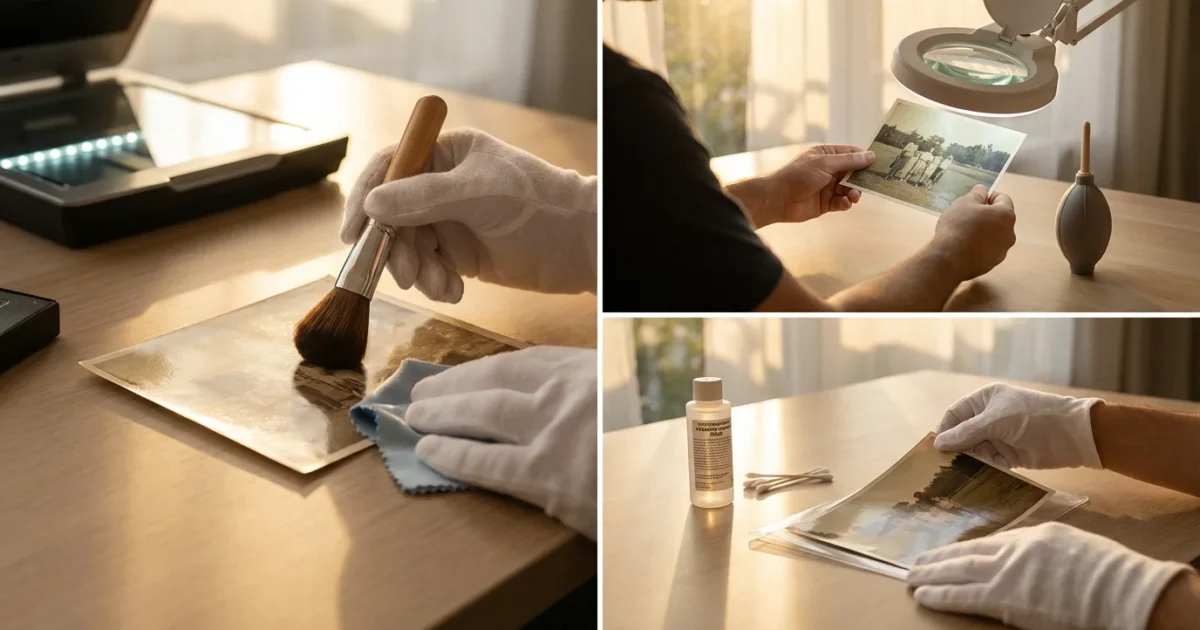
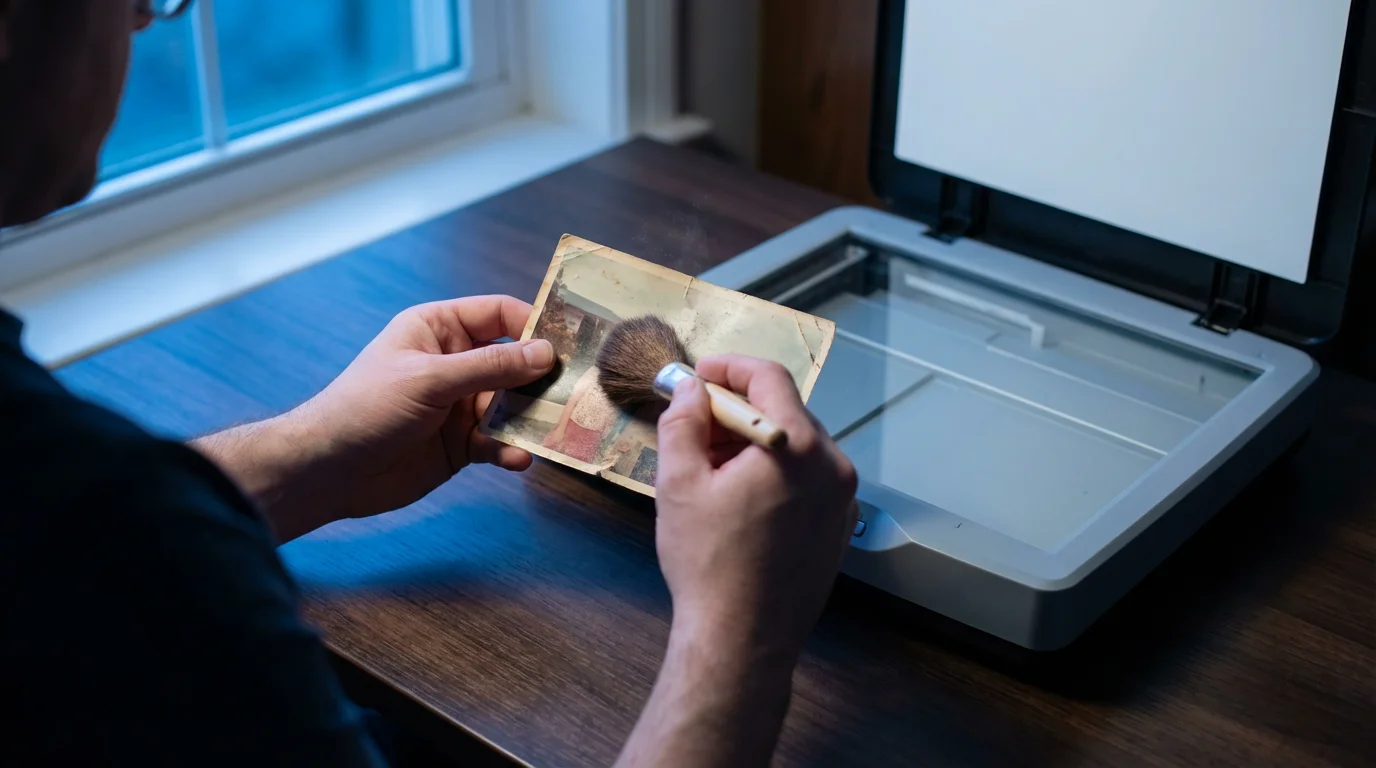
- Dust the Photograph: Use a soft, lint-free microfiber cloth or a dedicated photographic brush to gently brush away surface dust. Always brush away from the image center. For stubborn dust, use a can of compressed air. Hold the can upright and spray in short bursts, keeping a safe distance to avoid damaging the photo with excessive pressure or propellant. Never touch the photo surface with the compressed air nozzle.
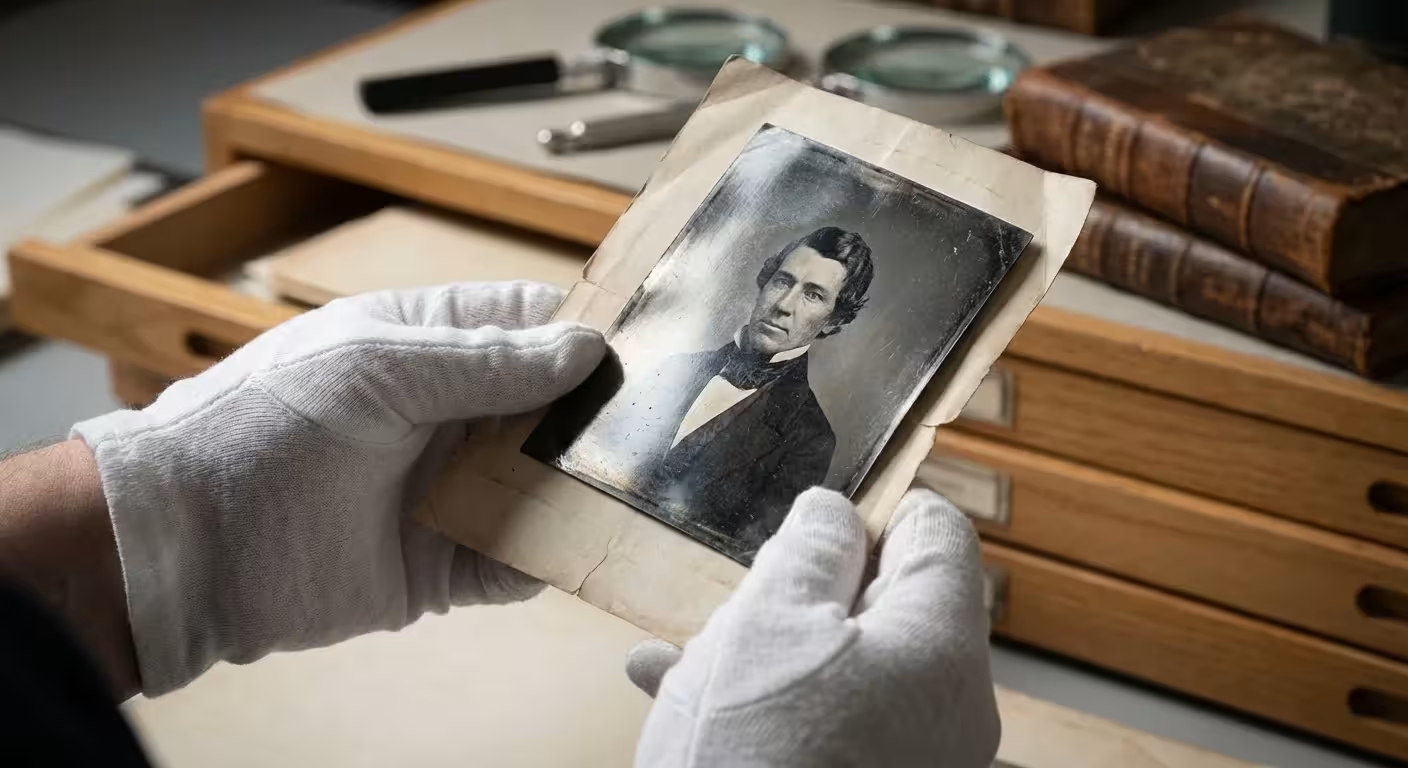
- Handle with Gloves: Wear clean, lint-free cotton or nitrile gloves when handling old photographs. Your skin oils can leave fingerprints, which are difficult to remove and can degrade the photo over time.
- Inspect for Residue: Carefully examine the photo for any sticky residue or smudges. For very minor, non-valuable items, you might attempt a gentle wipe with a specific photo cleaning solution on a microfiber cloth, but only if you have confirmed its safety on similar, non-precious materials. For valuable or antique photos, consult a professional conservator instead of risking damage. Reversible methods are always preferred.
Cleaning Your Scanner Glass
The scanner’s glass plate is another common source of dust and smudges. Even a tiny particle on the glass projects a shadow onto your scan.
- Turn Off and Unplug: Always ensure your scanner is off and unplugged before cleaning.
- Wipe with Microfiber: Use a clean, lint-free microfiber cloth.
- Use Glass Cleaner: Apply a small amount of ammonia-free glass cleaner onto the microfiber cloth, not directly onto the scanner glass. Wipe the glass surface thoroughly.
- Dry Completely: Ensure the glass is completely dry before scanning.
This pre-scan preparation drastically reduces the amount of digital clean-up required, giving you a much better starting point for your restoration efforts.

Optimizing Your Scan Settings for Restoration
Your scanner settings play a critical role in the quality of your digital images and the ease of subsequent restoration. High-quality scans capture more detail, making dust and scratch removal more effective and precise.
Once you have completed your restorations, it is essential to find and remove duplicate photos to keep your digital library organized.
If you are working with older media types, specialized equipment is often required to digitize 35mm film negatives properly at home.
Once you have secured a high-quality scan, you might consider colorizing black and white photos to see your family history in a whole new light.
Key Scan Settings to Maximize Detail
- Resolution (DPI): This is arguably the most crucial setting.
- For standard prints (4×6, 5×7 inches), scan at a minimum of 300 DPI (dots per inch) for general viewing and printing at the same size.
- For archival purposes or if you plan to enlarge the photo, scan at 600 DPI or even 1200 DPI. Higher DPI captures finer details, making subtle scratches and dust easier to identify and remove, and provides more flexibility for future use.
- For negatives or slides, aim for 2400 DPI to 4000 DPI. These small formats contain immense detail.
Higher resolution means larger file sizes, but it provides the necessary pixel data for successful restoration.
- Color Depth: Scan in 24-bit color (standard JPEG) or, preferably, 48-bit color (TIFF). 48-bit color captures a wider range of tones and colors, providing more data for accurate color correction and ensuring smooth transitions after you clean up scanned photo imperfections.
- File Format:
- TIFF (.tif): This is the recommended archival format. TIFF files are uncompressed or use lossless compression, preserving all image data. They are ideal for master copies that you will edit.
- JPEG (.jpg): Use JPEG for sharing or web display. It uses lossy compression, meaning some image data is permanently discarded to reduce file size. Avoid using JPEG for your initial scan or master restoration files. Save JPEGs as copies of your TIFF masters after editing.
The Image Permanence Institute provides excellent resources on choosing appropriate file formats for long-term digital preservation, emphasizing the importance of non-destructive formats for your master files. You can find more information on their website: https://www.imagepermanenceinstitute.org
- Digital ICE (Image Correction and Enhancement): Many modern film and photo scanners feature Digital ICE technology or similar infrared dust and scratch removal. This hardware-based solution works by using an infrared channel to detect physical imperfections on film or prints and then automatically removing them during the scan. While effective for dust and minor scratches, it can sometimes soften image details or struggle with complex patterns, so always review the results. Use it as a first line of defense, knowing you might still need manual digital cleanup.
By optimizing these settings, you give yourself the best possible foundation for detailed and successful digital restoration. You will find it much easier to remove scratches photos and perform dust removal on a high-quality scan.
Step-by-Step Dust Removal Techniques
Now that you have a clean, high-resolution scan, you can begin the digital cleanup process. Dust specks are typically the easiest imperfections to address. This section focuses on using common tools found in Photoshop, GIMP, or Affinity Photo.
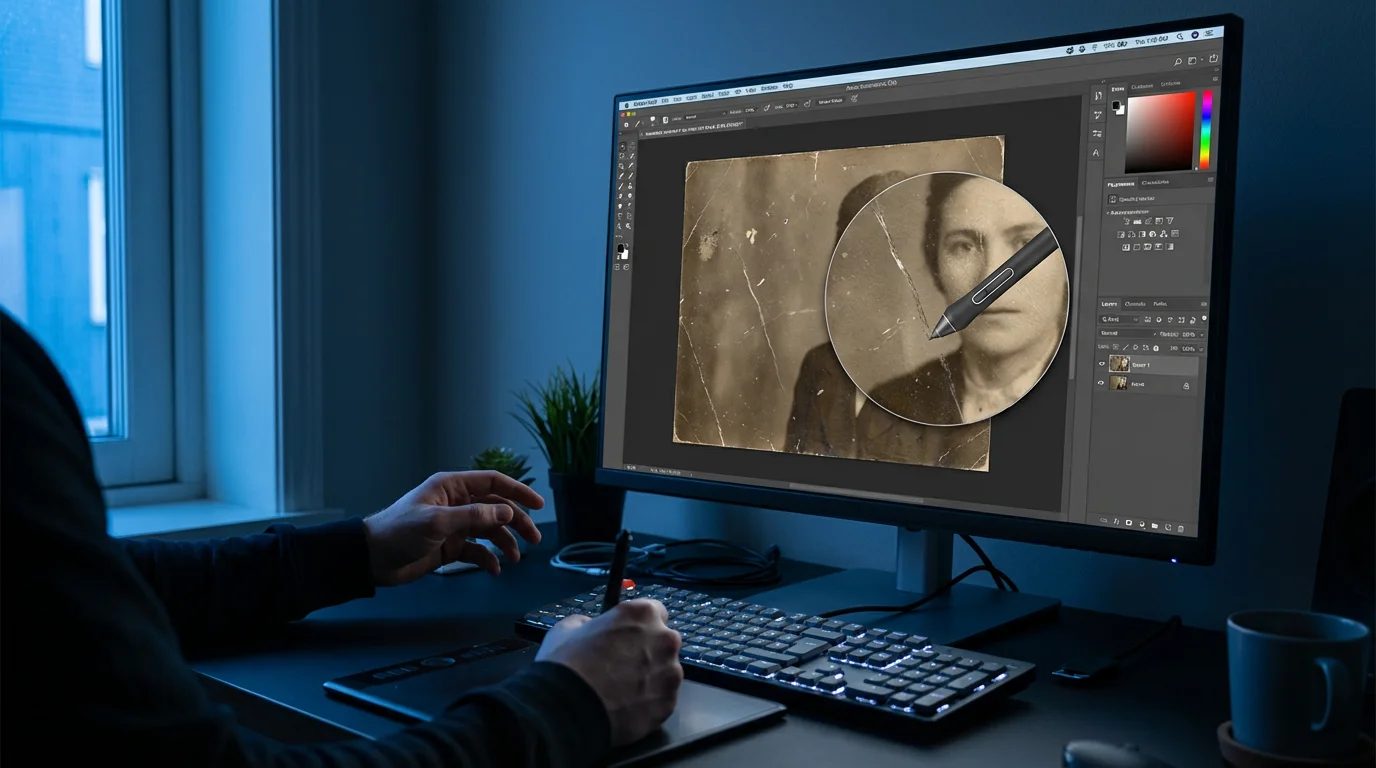
1. Assess Your Image and Zoom In
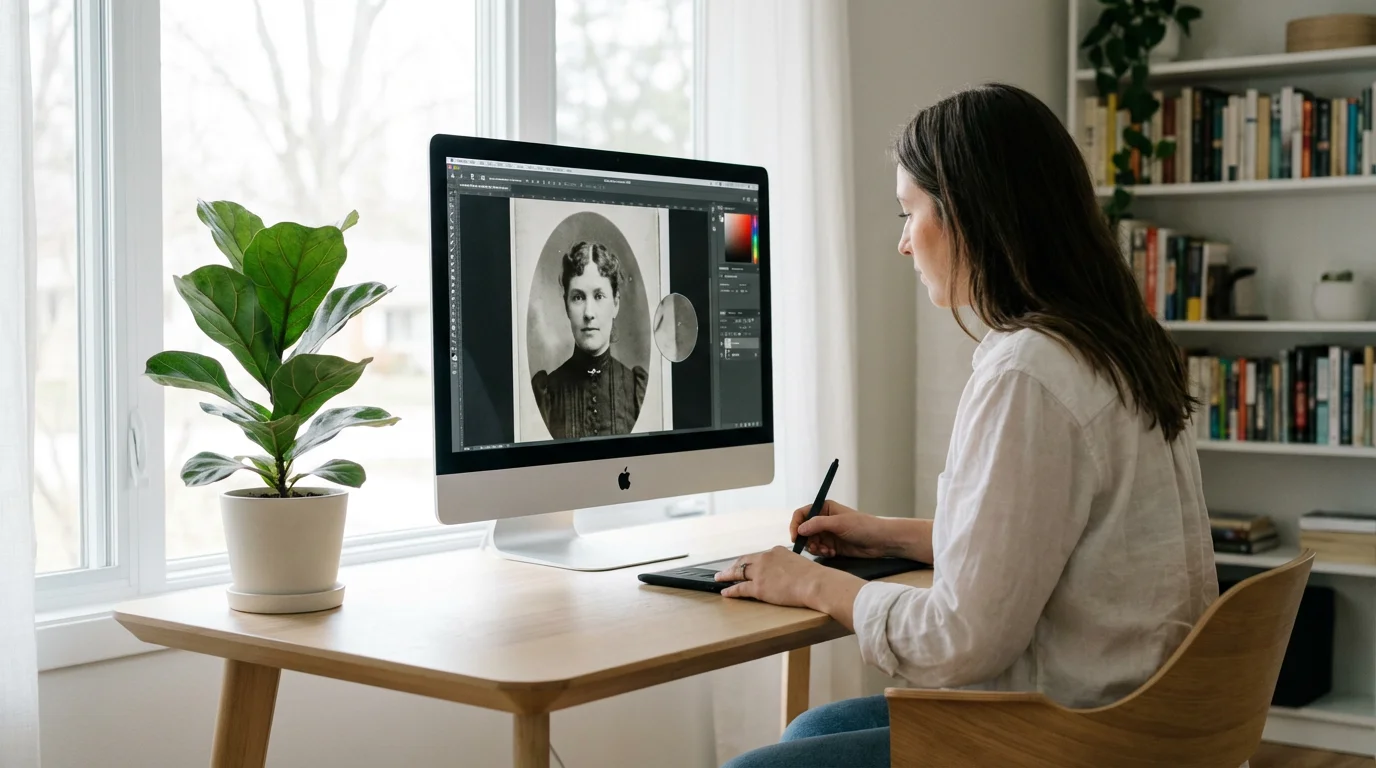
- Open Your Scan: Open your TIFF master file in your chosen photo editing software.
- Create a Duplicate Layer: Always work on a duplicate layer (or adjustment layer) to preserve your original scan. In Photoshop, press Ctrl+J (Cmd+J on Mac) to duplicate the background layer. This ensures a non-destructive workflow.
- Zoom to 100-200%: Use the Zoom tool to inspect the image closely. Dust specks often become obvious at these magnifications. Avoid zooming excessively, as you might start seeing image grain, which is not dust.
- Use a “Dust Finder” Adjustment (Optional): For very faint dust, some professionals use a temporary adjustment layer to make dust more visible. Apply a Levels or Curves adjustment layer, crush the blacks, and boost the whites dramatically. This exaggerates imperfections. Remember to delete or hide this adjustment layer after you finish dust removal.
2. Employ the Spot Healing Brush (Your Primary Tool)
The Spot Healing Brush is ideal for small, isolated dust specks and minor blemishes. It automatically samples surrounding pixels and blends them seamlessly over the imperfection.
- Select the Spot Healing Brush: Find this tool in your software’s toolbar.
- Adjust Brush Size: Make the brush slightly larger than the dust speck you want to remove. A brush that is too large might blur details, while one that is too small requires multiple clicks.
- Click on Dust Specks: Simply click once on each dust speck. The software intelligently replaces the imperfection with surrounding texture. Work systematically across the image.
- Evaluate and Refine: After clicking, zoom out occasionally to see if your edits look natural. If an area appears blurry or unnatural, undo the last action (Ctrl+Z or Cmd+Z) and try a slightly different brush size or use the Healing Brush for more control.
Working non-destructively by using duplicate layers or adjustment layers is a fundamental principle of professional photo restoration. It safeguards your original data and allows you to experiment freely, reversing changes if needed.
3. Utilize the Healing Brush for More Control
For dust on textured areas or slightly larger specks where the Spot Healing Brush might struggle, the Healing Brush offers more precise control.
- Select the Healing Brush: Choose this tool from your toolbar.
- Define a Source Point: Hold down the Alt key (Option on Mac) and click on a clean area of the image that has similar texture and tone to the area you want to fix. This samples the source.
- Paint Over the Dust Speck: Release Alt and paint over the dust speck. The tool copies the texture from your source point while blending the color and luminosity of the target area, creating a natural-looking repair.
- Re-sample as Needed: Continuously re-sample clean areas as you move across the image to ensure consistent texture and tone.
4. Advanced Dust and Noise Reduction Filters (Use with Caution)
Some software offers automated filters like “Dust & Scratches” or “Noise Reduction.” These can be tempting, but use them sparingly and with careful settings, as they can easily soften or destroy fine details in your image.
- Duplicate Layer Again: Apply these filters to a new duplicate layer.
- Apply Filter: Go to Filter > Noise > Dust & Scratches (Photoshop) or similar in GIMP/Affinity Photo.
- Adjust Radius and Threshold: These sliders control how aggressively the filter works. Start with very low values (e.g., Radius 1-2, Threshold 0-5). Increase them minimally until dust is reduced without significant loss of detail.
- Masking (Crucial): Apply a layer mask to this filtered layer. Fill the mask with black to hide the entire effect, then paint with a soft white brush only over areas where you want the dust reduction applied. This preserves sharp details like eyes, hair, and clothing patterns.
Automated filters are a last resort for very noisy or dusty images where manual cleaning would be impractical, and even then, precise masking is essential to maintain image quality.
Tackling Scratches and Creases
Scratches and creases present a greater challenge than dust because they are linear and often disrupt larger areas of texture and color. You need more sophisticated tools and a more methodical approach to remove scratches photos effectively.
For more severe damage that manual tools can’t easily fix, using AI photo restoration tools can provide an efficient way to reconstruct missing parts of an image.
1. Using the Clone Stamp Tool for Linear Imperfections
The Clone Stamp tool copies exact pixel information from a source area to a target area. It is excellent for rebuilding damaged textures and patterns.
- Select the Clone Stamp Tool: Choose this tool from your toolbar.
- Adjust Brush Settings:
- Hardness: Use a soft-edged brush (0-20% hardness) for most areas to ensure seamless blending. A harder brush might leave noticeable edges.
- Opacity: Start with 100% opacity for direct replacement, but reduce it (e.g., 30-70%) when subtly blending or fixing minor imperfections.
- Flow: Controls how quickly paint is applied. Lower flow allows for more gradual build-up.
- Sample a Clean Area: Hold Alt (Option on Mac) and click on a clean, undamaged area *adjacent* to the scratch. Choose an area with similar texture and tone.
- Paint Over the Scratch: Release Alt and carefully paint along the scratch. The tool copies pixels from your sampled source.
- Continuously Re-sample: This is critical. As you move along a scratch, you must constantly re-sample clean areas. If you sample once and drag, you will simply clone a repeating pattern of the original sampled area, which looks unnatural. For a long scratch, you might re-sample every few millimeters.
- Match Direction and Texture: Pay close attention to the direction of textures, such as fabric weaves or skin tones. Clone in the same direction to maintain realism.
2. The Patch Tool for Larger Scratches and Irregular Shapes
The Patch Tool excels at replacing larger, irregular sections of an image with content from another area, blending it automatically.
- Select the Patch Tool: Find it grouped with the Healing Brush tools.
- Select the Damaged Area: Use the Lasso selection method (default for Patch Tool) to draw a selection around the scratch or damaged area. Include a small margin of good pixels around the imperfection.
- Drag to a Clean Area: Click and drag the selection to a clean, undamaged area of the image that has suitable texture and color to replace the selected damage.
- Release and Review: Release the mouse button. The software will blend the sampled content into the selected area. Deselect (Ctrl+D or Cmd+D) and review the result.
- Refine if Necessary: If the blend is not perfect, try dragging to a slightly different source area or refine edges with the Healing Brush or Clone Stamp.
3. Addressing Creases and Folds
Creases often involve a line of missing detail and surrounding distortion. You combine techniques for these.
- Clone Stamp and Healing Brush: Use these tools to meticulously rebuild the texture across the crease, sampling from adjacent, undamaged areas. This is often a slow, painstaking process.
- Frequency Separation (Advanced): For significant creases, frequency separation can be a game-changer. This technique separates the image into high-frequency (detail, texture) and low-frequency (color, tone) layers. You can then smooth out color variations on the low-frequency layer without losing texture, and use the Clone Stamp on the high-frequency layer to replicate fine details, making repairs virtually invisible. This technique requires practice but yields exceptional results for deep damage. Many online tutorials exist if you want to explore this advanced method.
Remember that patience and a keen eye for detail are your most valuable assets when tackling scratches and creases. The goal is to make the repair undetectable.
Refining and Reviewing Your Restorations
After you complete the primary dust and scratch removal, a critical phase involves refining your edits and ensuring the overall image integrity. Your objective is not just to fix imperfections but to make the image look natural and authentic.
1. Check for Consistency and Seamless Blending
- Zoom Out Regularly: Continuously zoom out to 50-100% view to see the whole image. What looks perfect at 200% might appear as an obvious patch at a normal viewing size.
- Examine Edges: Pay close attention to the edges of your repaired areas. Look for unnatural transitions, repeating patterns from the Clone Stamp, or overly blurred spots from the Healing Brush.
- Use a “Blind Spot” Check: Take a break from the image, then return with fresh eyes. Alternatively, flip the image horizontally (Image > Image Rotation > Flip Canvas Horizontal in Photoshop). This tricks your brain into seeing it anew, often revealing overlooked imperfections.
2. Address Contrast, Tone, and Color (Post-Restoration)
While the primary focus is dust removal and scratch repair, your restoration is incomplete without addressing overall image quality. Old photos often suffer from fading, color shifts, or poor contrast.
- Adjust Levels and Curves: Use adjustment layers for Levels or Curves to correct exposure and contrast. Levels helps set the black point, white point, and mid-tones, while Curves offers finer, more nuanced control over tonal range.
- Color Correction: If the photo has a color cast (e.g., yellowed or magenta), use a Color Balance or Hue/Saturation adjustment layer to subtly shift the colors back to a neutral state. Often, finding a neutral gray or white area in the photo and using the Eyedropper tool in Curves or Levels can help neutralize the color cast.
- Sharpening (Carefully): Apply sharpening sparingly, usually as one of the last steps, and always on a separate layer or using smart filters. Sharpening can exaggerate noise and artifacts. Use an Unsharp Mask filter with a low Radius and high Amount, and then refine with a mask to apply sharpening only where needed (e.g., eyes, fabric textures, not smooth skin).
The goal is to enhance the image without making it look overly processed or artificial. Subtle adjustments often yield the most satisfying results.

Preserving Your Digitally Restored Memories
Your hard work in digitizing and restoring these precious photographs deserves proper long-term preservation. A robust preservation strategy ensures your cleaned-up digital masterpieces remain safe and accessible for future generations.
1. Saving Your Master Files
- Use Lossless Formats: Always save your primary, fully restored images in a lossless format. TIFF (.tif) is the industry standard for archival quality. It retains all pixel data and supports layers, allowing you to go back and make further edits if needed.
- Maintain Layered Files: If your software allows, save a version of your restored image with all its layers intact (e.g., .psd for Photoshop, .xcf for GIMP, .afphoto for Affinity Photo). This provides maximum flexibility for future adjustments without impacting the flattened master TIFF.
- Naming Conventions: Implement a clear, consistent naming convention for your files. For example: “YYYYMMDD_FamilyName_Event_OriginalScan.tif” and “YYYYMMDD_FamilyName_Event_Restored.tif”. This helps you quickly locate and identify specific images.
2. Implementing a Robust Backup Strategy
Digital files are vulnerable to hardware failure, accidental deletion, and cyber threats. A comprehensive backup plan is non-negotiable.
- The 3-2-1 Rule: This widely recommended strategy ensures data safety:
- 3 Copies: Keep at least three copies of your data.
- 2 Different Media Types: Store copies on at least two different types of storage media (e.g., external hard drive, cloud storage, network-attached storage).
- 1 Off-Site: Keep at least one copy in an off-site location (e.g., cloud backup, a relative’s house, a safety deposit box).
This redundancy protects against various disasters, from local hardware failure to fire or theft.
- External Hard Drives: Store copies on high-quality external hard drives. Ensure you use drives from reputable manufacturers and replace them every 3-5 years, as mechanical drives can fail over time.
- Cloud Storage: Services like Google Drive, Dropbox, OneDrive, or specialized photo backup services offer convenient off-site storage. Choose a reputable provider with strong security and data redundancy policies.
- Regular Backups: Schedule and perform backups regularly. For active projects, back up daily. For completed archives, weekly or monthly backups are often sufficient. Automated backup solutions simplify this process.
By diligently preserving your digitally restored memories, you ensure your family’s photographic heritage endures, beautiful and accessible, for generations to come. You have not just performed dust removal or learned how to remove scratches from scanned photos; you have safeguarded a piece of history.
Frequently Asked Questions
Can I really remove all scratches and dust from a scanned photo?
While you can achieve remarkable results, especially with dust removal and minor scratches, severely damaged photos with deep scratches, extensive cracks, or missing information might not be fully restorable to a ‘perfect’ state without professional intervention or some degree of artistic interpretation. The goal is to bring the image to its best possible condition while maintaining its authenticity.
What if my photo has lost a lot of color and looks faded?
Color fading and loss are common issues with old photographs. You can significantly improve these with digital color correction techniques. Use adjustment layers for Levels, Curves, Color Balance, and Hue/Saturation in your photo editing software. These tools allow you to restore contrast, neutralize color casts, and bring back faded colors. Always work non-destructively on separate layers to protect your original scan.
Is it better to use automatic dust and scratch removal features or manual editing?
Manual editing with tools like the Spot Healing Brush, Healing Brush, and Clone Stamp generally yields superior results for critical images. Automated features, such as Digital ICE during scanning or “Dust & Scratches” filters in software, can be quick and effective for minor imperfections or large batches. However, they can also soften details or introduce artifacts if overused. For your most cherished or detailed photos, a manual, precise approach offers the best outcome.
How can I prevent future damage to my physical photos before scanning?
Store your physical photographs in archival-safe, acid-free enclosures, such as sleeves made from polypropylene, polyester, or polyethylene. Keep them in a cool, dry, stable environment away from direct sunlight, extreme temperatures, and humidity. Avoid storing them in basements or attics. Always handle photos with clean, lint-free gloves to prevent transferring oils and dirt.
Disclaimer: This article is for informational purposes only. When handling valuable or irreplaceable photographs, consider consulting a professional conservator. Always test preservation methods on non-valuable items first.
Understanding these tools is also helpful when removing unwanted objects from photos, such as photobombers or modern distractions in old background scenes.


Leave a Reply