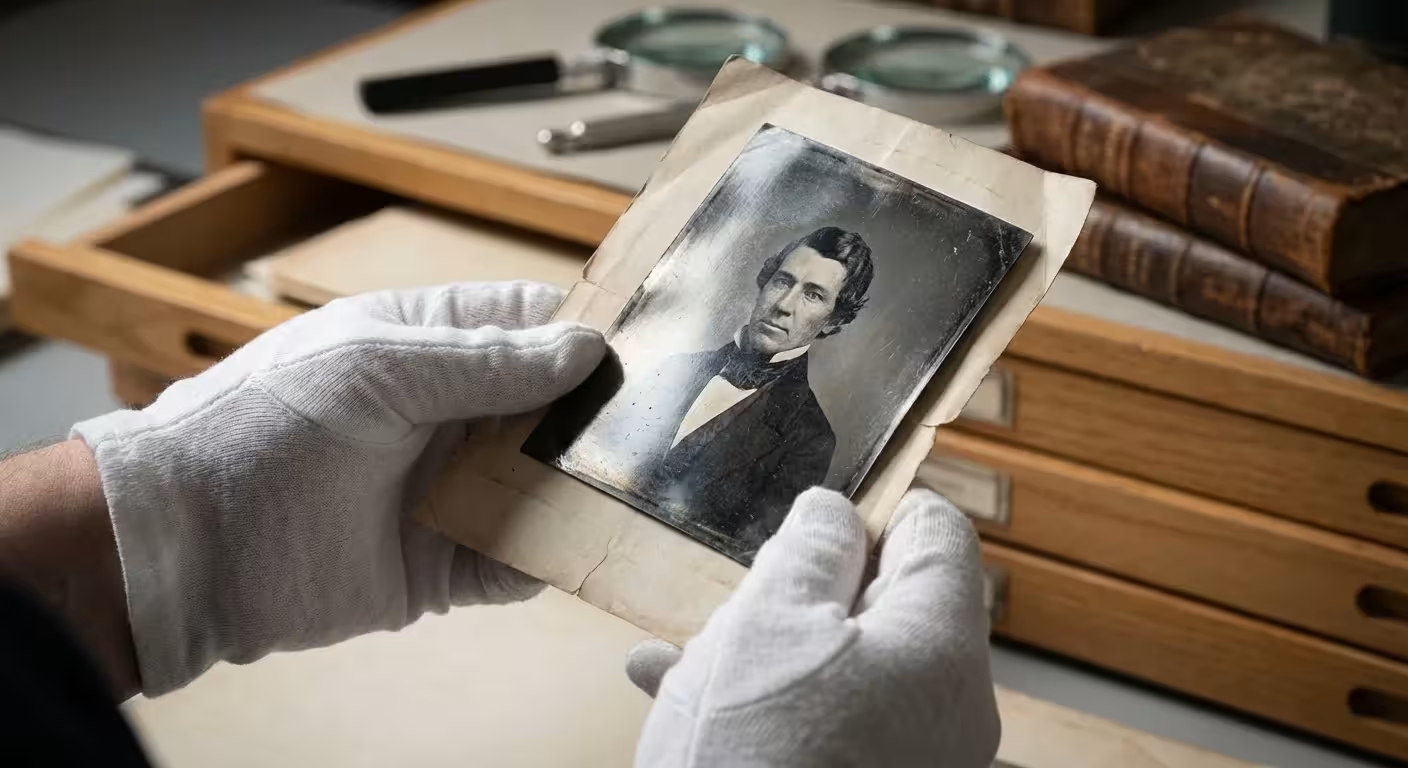
When you open an old family album or a box of inherited heirlooms, you might notice a strange, metallic sheen creeping across the darkest areas of your black and white photographs. This bluish-gray or silver mirror-like effect, often called “silvering” or “silver mirroring,” can make a cherished portrait look like it is disappearing behind a foggy window. You aren’t imagining things; the photo is undergoing a chemical transformation. While this sight can be distressing, you can manage, reduce, and digitally “remove” this mirroring to restore the clarity of your family history.
Understanding the Chemistry of Silver Mirroring
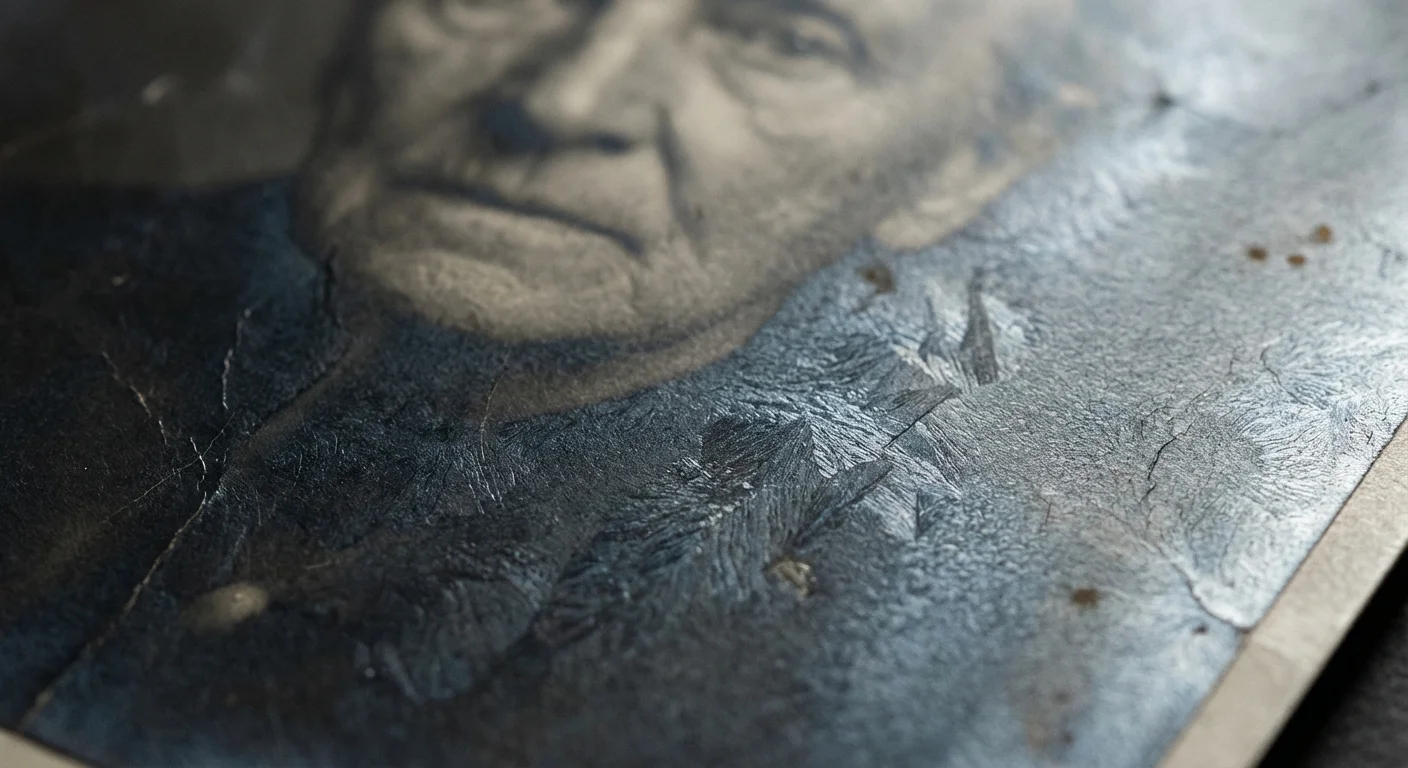
To fix silvering, you must first understand what it is. In a traditional silver gelatin print—the most common type of black and white photograph from the late 19th century through the 20th century—the image consists of tiny particles of metallic silver suspended in a gelatin layer. Over time, environmental factors cause these silver ions to migrate. They move from the depths of the gelatin layer up to the surface. When these ions reach the surface and react with the air, they “re-deposit” as metallic silver, creating that distracting mirror-like reflection.
This process usually targets the “densest” parts of the photo—the shadows and dark mid-tones. Because these areas contain the highest concentration of silver particles, they have more material available to migrate to the surface. You will often see the effect most prominently along the edges of a print or in the dark suit of a great-grandfather in a formal portrait. It is important to remember that the silvering is not “dirt” sitting on top of the photo; it is actually the image material itself moving out of place.
Data from the Image Permanence Institute suggests that silvering is one of the most common forms of chemical deterioration in silver-based photographic materials. While it looks like the image is being erased, the original detail often still exists beneath that metallic veil. Your goal is to find a way to see through that veil without destroying the fragile emulsion of the print.
The Environmental Triggers of Photo Degradation
You might wonder why some of your photos look pristine while others are heavily mirrored. The answer lies in the storage environment. Silvering is essentially an oxidation-reduction reaction, much like the tarnishing of silver spoons or the rusting of iron. Several specific culprits accelerate this process:
- High Humidity: Moisture acts as a catalyst for chemical reactions. When relative humidity rises above 50 or 60 percent, the gelatin emulsion softens, making it easier for silver ions to migrate to the surface.
- Atmospheric Pollutants: Sulfur dioxide, nitrogen oxides, and ozone—common in urban environments or homes with gas heating—react with the silver. Even the “new car smell” from certain plastics can contain volatile organic compounds (VOCs) that trigger mirroring.
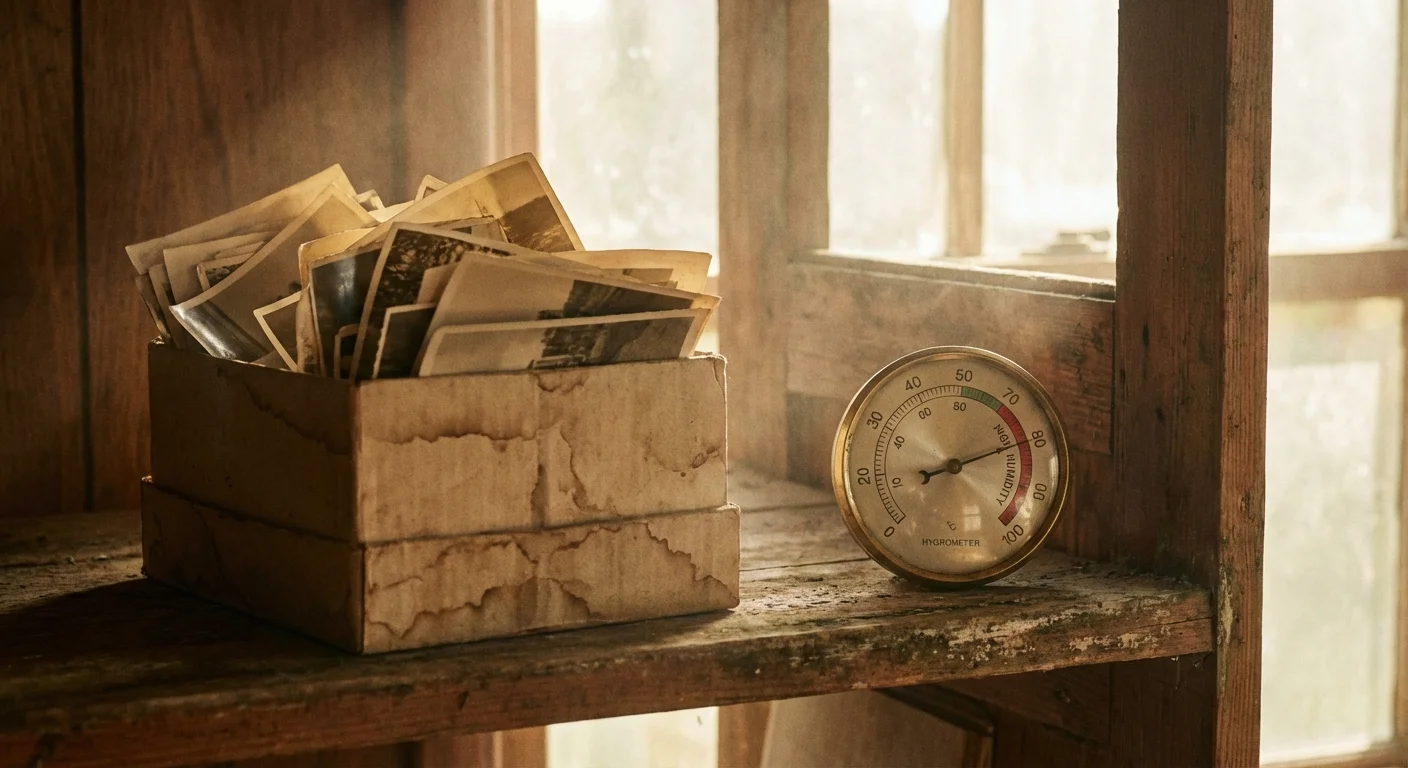
- Poor Quality Enclosures: Many older “magnetic” photo albums or acidic cardboard boxes release gases as they age. If you keep your photos in these environments, you are essentially bathing them in a slow-acting chemical solvent.
If you notice mirroring, you should immediately evaluate where you store your collection. Basements and attics are the worst offenders due to their extreme temperature and humidity fluctuations. Moving your collection to a climate-controlled room is the first and most vital step in stopping the “silver ghost” from spreading further.
The Dangers of Physical Cleaning Methods
Your first instinct might be to grab a soft cloth and try to buff away the silver sheen. You must resist this urge. Because the silvering is composed of the actual silver that forms the image, physical abrasion can be catastrophic. If you rub the surface of a silvered print, you risk several permanent forms of damage.
First, you can easily scratch the gelatin emulsion. Once a scratch occurs, it is nearly impossible to repair physically. Second, you might actually remove the silver that forms the darker details of the image. By “cleaning” the mirror, you might leave behind a faded, ghost-like version of the original photograph. Finally, using liquids like water or household cleaners can cause the gelatin to swell or peel away from the paper base entirely.
“The most important rule of photo preservation is reversibility; if a treatment cannot be undone or risks the original material, it should be avoided by non-professionals.”
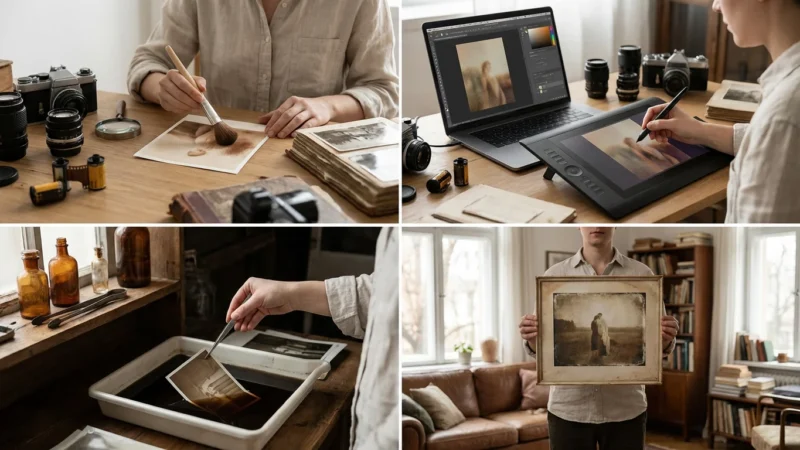
You should treat every antique print as a one-of-a-kind artifact. If the photo is a rare family heirloom, the safest way to “remove” the silvering is through digital restoration. This preserves the original physical object exactly as it is while giving you a clean, beautiful image to print and share.
Digital Restoration: The Safest Way to Remove Silvering
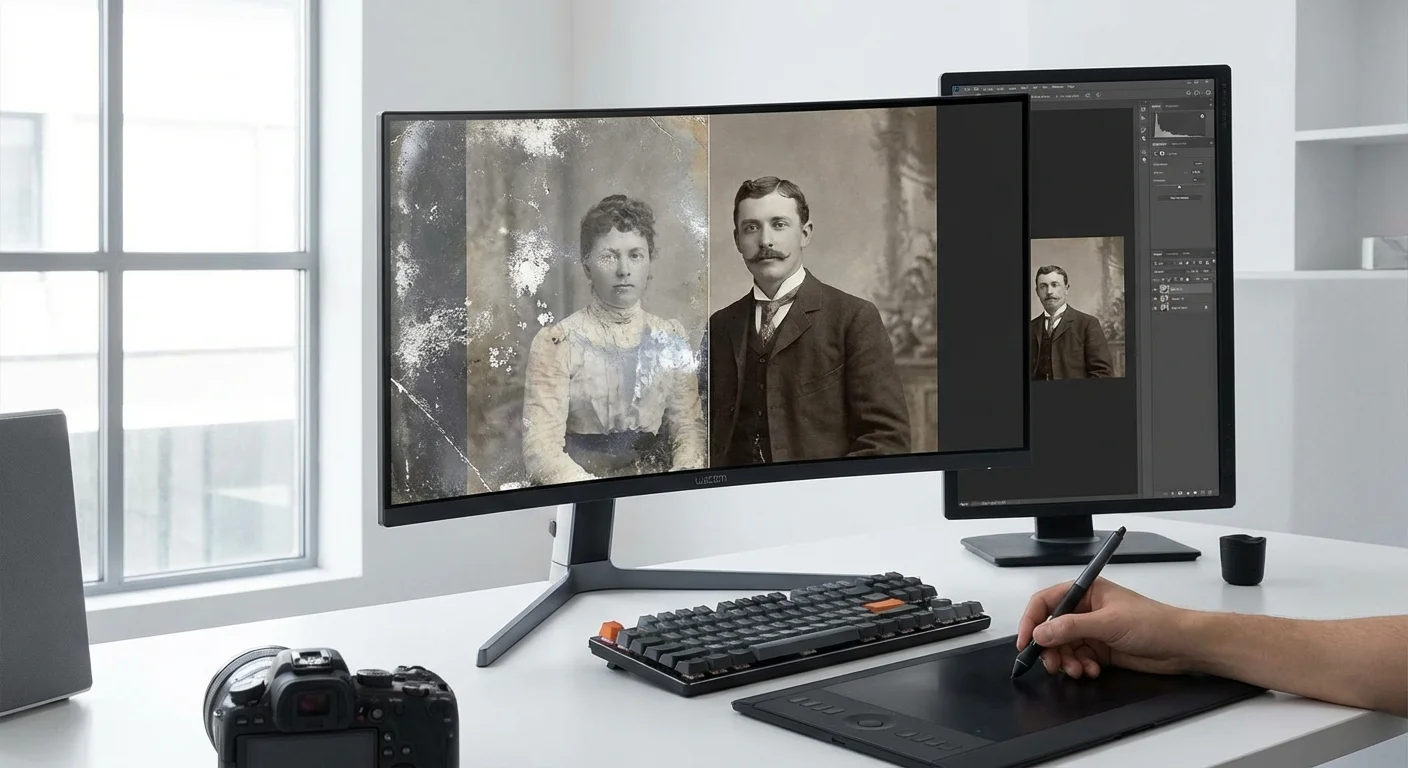
Digital restoration is your most powerful tool in the fight against silvering. By scanning the photo properly, you can often “see through” the metallic reflection. However, a standard scan often emphasizes the silvering because the scanner’s light hits the metallic particles and reflects directly back into the sensor.
To begin your digital restoration, use a flatbed scanner capable of at least 600 DPI (dots per inch), though 1200 DPI is better for smaller prints. Save your files in a “lossless” format like TIFF rather than JPEG. This ensures you have all the data necessary for the following steps:
- Adjust the Histogram: When you bring your scan into software like Adobe Photoshop or Affinity Photo, look at the histogram. Silvering often “clips” the blacks, making them look gray. Pull the black point slider toward the center to re-establish true blacks in the image.
- Targeted Curves Adjustments: Use a Curves adjustment layer to increase contrast specifically in the shadow areas. By creating an “S” curve that dips in the shadows, you can often darken the silvered areas without affecting the highlights.
- Channel Mixing: Because silvering often has a distinct bluish or cool metallic tint, look at the individual color channels (Red, Green, and Blue). Often, the Red channel will show less of the mirroring than the Blue channel. You can use a Black and White adjustment layer to prioritize the channel that shows the most detail and the least glare.
- Healing and Cloning: For areas where the silvering has caused physical “pitting” or spotting, use the Content-Aware Fill or Healing Brush tools. Zoom in to 200% and work in small sections to maintain the natural grain of the paper.
By using these digital tools, you are not touching the original print, but you are effectively stripping away decades of chemical damage in the digital file.
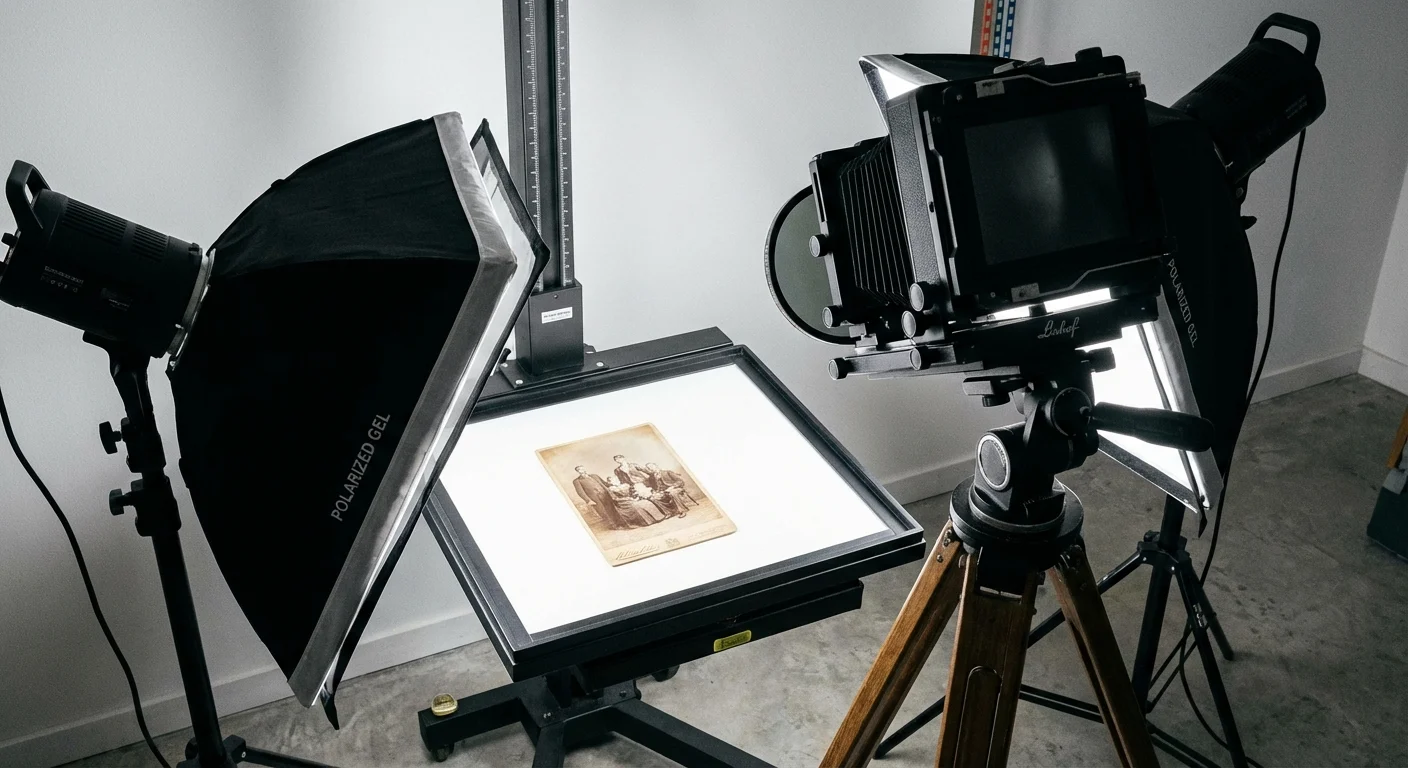
Using Cross-Polarization to Eliminate Glare
If a standard scan still shows too much metallic reflection, you need to use a technique called cross-polarization. This is the secret weapon used by professional conservators and high-end archival photographers. This method physically blocks the reflected glare from the silvering before the light ever reaches your camera sensor.
To do this, you will need a digital camera on a tripod (a copy stand) rather than a flatbed scanner. You also need two specific items: polarizing film for your lights and a circular polarizing filter for your camera lens.
Place two lights at 45-degree angles to the photograph. Cover both lights with sheets of linear polarizing film, ensuring the polarization orientation is the same for both. Then, attach the circular polarizer to your camera lens. As you look through the viewfinder or use “Live View,” slowly rotate the filter on your lens. You will reach a point where the metallic “mirroring” on the photo suddenly vanishes, revealing the deep blacks and hidden details underneath.
This works because the polarizing film on the lights “organizes” the light waves. When that light hits the metallic silvering, it maintains that organization as it reflects. The filter on your lens is set at a 90-degree angle to those waves, effectively “canceling” the reflection. This technique is so effective that it can make a heavily silvered, unviewable photo look brand new in a single shot. For more on the physics of light behavior, Cambridge in Colour offers excellent tutorials on how polarization affects surface reflections.
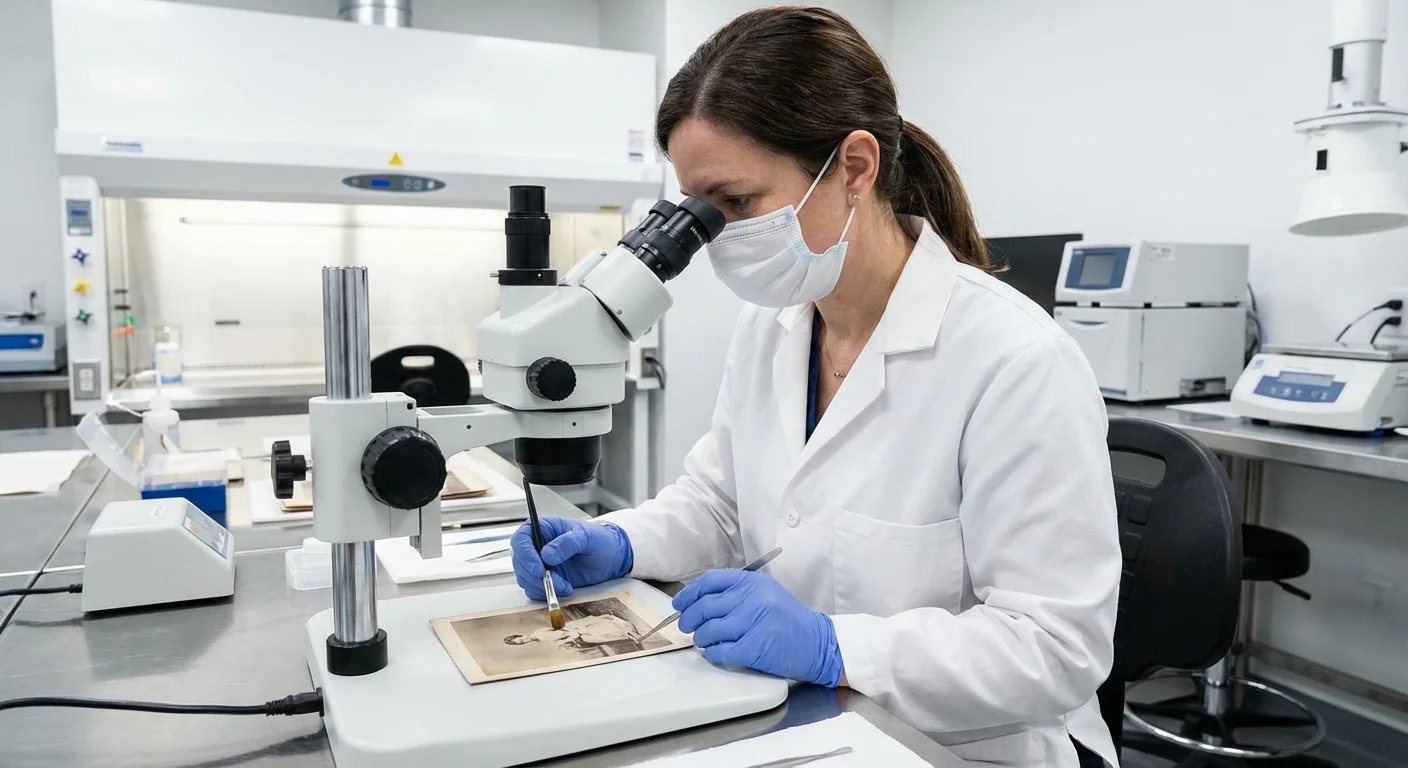
Advanced Surface Cleaning and Professional Conservation
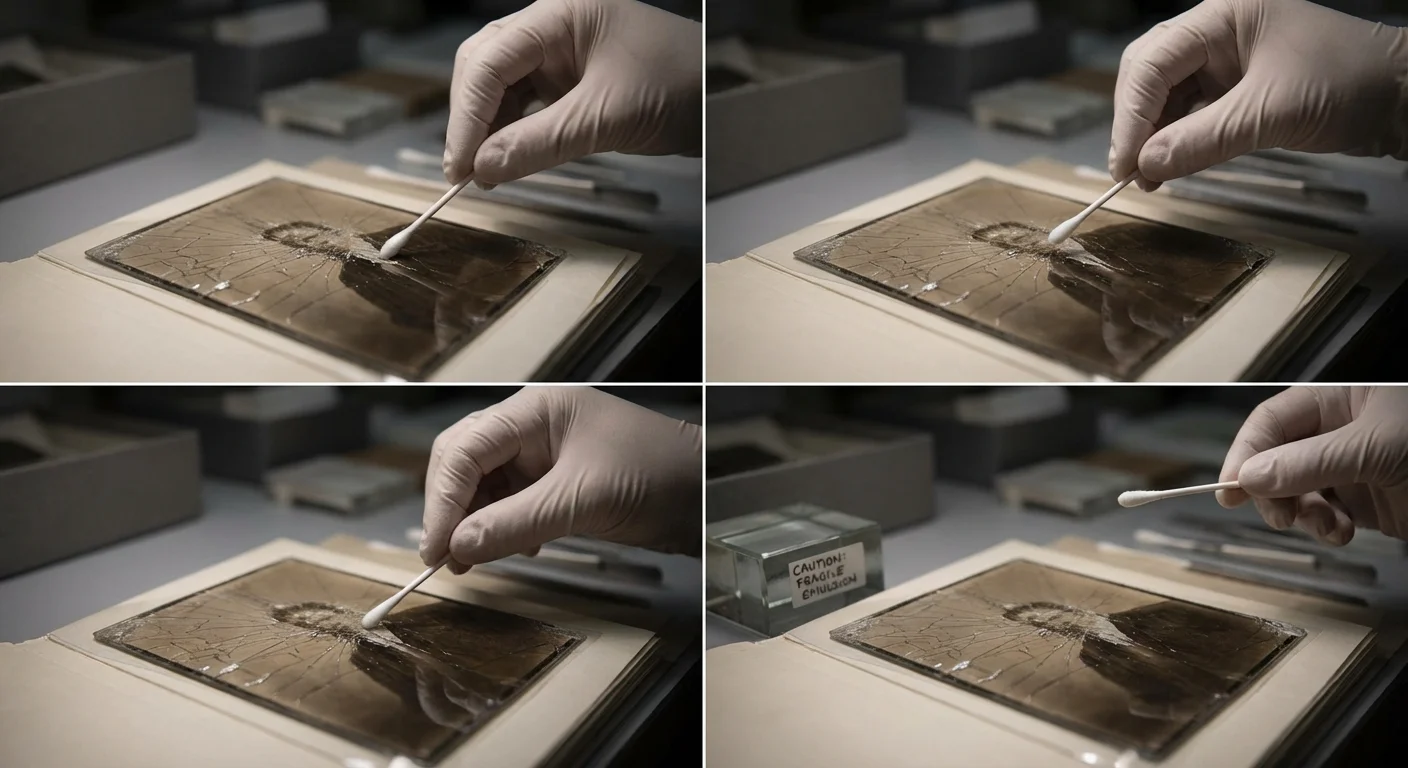
While digital restoration is the primary recommendation for home users, you may encounter situations where a print is covered in surface soot or grime that exacerbates the appearance of silvering. If you feel confident and the photo is not extremely fragile, you can perform a very basic surface cleaning using archival materials.
Start with a soft, clean hake brush or a dedicated photographic anti-static brush. Lightly brush the surface to remove loose dust. If the print is a silver gelatin glossy or semi-glossy print, some experts use a product called PEC-12. This is a non-aqueous solvent designed specifically for photographic emulsions. It does not contain water, so it won’t swell the gelatin. However, it should be used with extreme caution. Apply a tiny amount to a PEC-PAD (a non-abrasive wipe) and test a small, unimportant corner of the photo first.
PEC-12 can sometimes reduce the visual “haze” of silvering, but it will not “remove” the silver ions that have migrated. For true chemical “re-development” of a silvered print—a process that involves bleaching and re-developing the silver—you must hire a professional conservator. This is a high-risk procedure that should never be attempted at home, as one wrong move can dissolve the image entirely. You can find qualified professionals through the American Institute for Conservation.
Long-Term Preservation Strategies for Your Collection
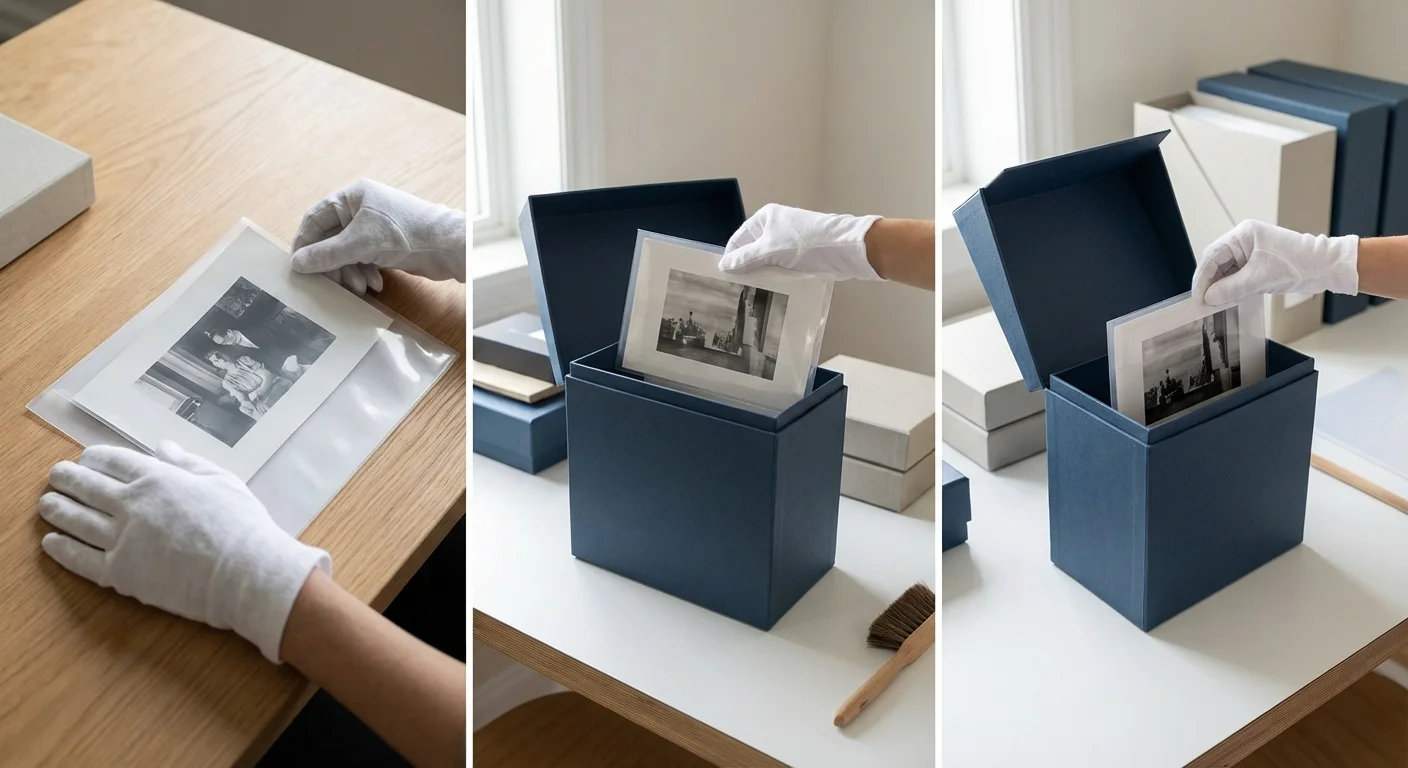
Once you have addressed the silvering in your collection, you must take steps to ensure it doesn’t return or worsen. Preservation is about stabilization. You cannot “cure” an old photo of its chemical history, but you can put it into a “deep sleep” where further changes happen so slowly they are unnoticeable for generations.
First, upgrade your storage materials. Look for envelopes, folders, and boxes that have passed the Photographic Activity Test (PAT). This is an international standard (ISO 18916) that ensures the material will not react chemically with your photos. Avoid PVC plastic sleeves at all costs; use polyester (Mylar), polypropylene, or acid-free, unbuffered paper instead.
Second, control your climate. The “Rule of Ten” in preservation states that for every 10-degree Fahrenheit drop in temperature, the rate of chemical decay in a photograph is roughly halved. If you can keep your collection in a cool, dry place—ideally around 65°F (18°C) with a stable relative humidity of 30-40%—you will significantly extend the life of your prints.
Finally, handle your photos as little as possible. The oils and salts on your skin are highly reactive. When you must handle original prints, wear clean, lint-free cotton gloves or nitrile gloves. By treating these objects with the respect they deserve as historical artifacts, you ensure that your descendants will be able to look into the eyes of their ancestors without a silver mirror standing in the way.
Frequently Asked Questions
Can I use a magic eraser to get rid of the silver sheen?
No. Never use a magic eraser or any abrasive sponge on a photograph. These products are essentially extremely fine sandpaper. They will strip the emulsion right off the paper, leaving you with a ruined white or gray spot where your image used to be.
Is silvering only found on really old photos?
Silvering is most common on silver gelatin prints made between 1890 and 1950. However, it can happen to any silver-based print if it is stored in a poor environment. It is rarely seen on modern inkjet prints or “chromogenic” color prints, which use dyes rather than metallic silver.
Should I take my silvered photos out of their original frames?
If the photo is touching the glass, yes. Humidity can cause the gelatin to stick to the glass, and the trapped air between the glass and the print can accelerate silvering. Carefully remove the photo and place it in an archival mat or folder to provide “breathing room.”
How much does professional restoration cost?
Digital restoration by a professional can range from $50 to $250 depending on the damage. Physical conservation (chemical treatment) is much more expensive, often starting at several hundred dollars per print, and is usually reserved for museum-quality pieces or high-value heirlooms.
Disclaimer: This article is for informational purposes only. When handling valuable or irreplaceable photographs, consider consulting a professional conservator. Always test preservation methods on non-valuable items first.


Leave a Reply