
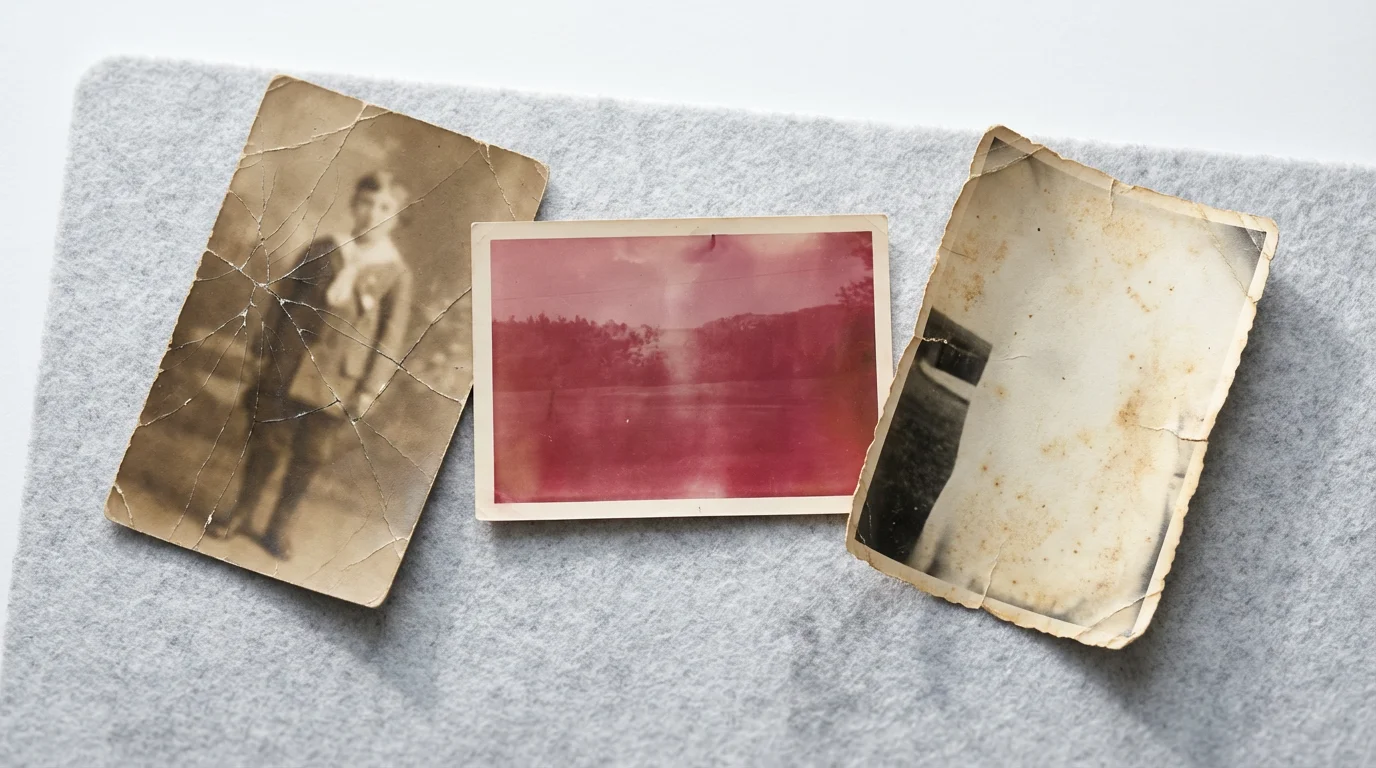
Your family photographs hold priceless memories, capturing moments, faces, and stories that define your heritage. Over time, however, these tangible pieces of history can suffer from fading, color shifts, and physical damage. Sunlight, moisture, and even the natural aging of photographic chemicals contribute to deterioration, leaving you with blurry, discolored images that barely hint at their original vibrancy. The good news is that you possess the tools and knowledge to bring these precious memories back to life. With modern photo editing software, you can learn how to restore faded photos digitally, preserving them for future generations.
Digitization is a vital part of long-term preservation, highlighting the importance of backing up physical photos to ensure they are never lost.
This guide provides a practical, step-by-step approach to digital photo restoration editing. You will learn actionable techniques to correct color, enhance contrast, remove imperfections, and recapture the essence of your old photographs. By following these steps, you empower yourself to tackle even severely damaged images, transforming them from fading relics into clear, vibrant keepsakes.
Understanding Why Your Old Photos Fade
Before you embark on the journey of photo restoration, grasp why photographs degrade. This knowledge helps you identify specific issues and apply the most effective restoration techniques. The primary culprits behind fading and damage include light exposure, improper storage, and chemical degradation.
If you find your original prints are missing or too damaged to scan, you may still be able to save the image by creating digital copies of photo negatives or slides.
Light, especially ultraviolet (UV) light, acts as a destroyer of dyes and pigments in photographic prints. Think of a photograph left in direct sunlight for weeks; the colors bleach out, leaving a yellowed or magenta tint. Humidity and fluctuating temperatures also play a significant role. High humidity can cause prints to stick together, encourage mold growth, and accelerate chemical reactions that lead to fading. Conversely, very dry conditions make old prints brittle and susceptible to cracking.
The chemistry of the photographic process itself contributes to fading. Older prints, particularly those from the mid-20th century, often suffer from “chromogenic degradation.” The dyes used in these prints were not as stable as modern ones, leading to uneven fading where one color layer degrades faster than others. This commonly results in a pronounced magenta or yellow cast in faded color photographs. Black and white photographs, while generally more stable, can also suffer from yellowing or silver mirroring due to residual processing chemicals or environmental pollutants. Understanding these causes informs your digital strategy for color restoration and overall image repair.
Preparing Your Faded Photos for Digital Restoration
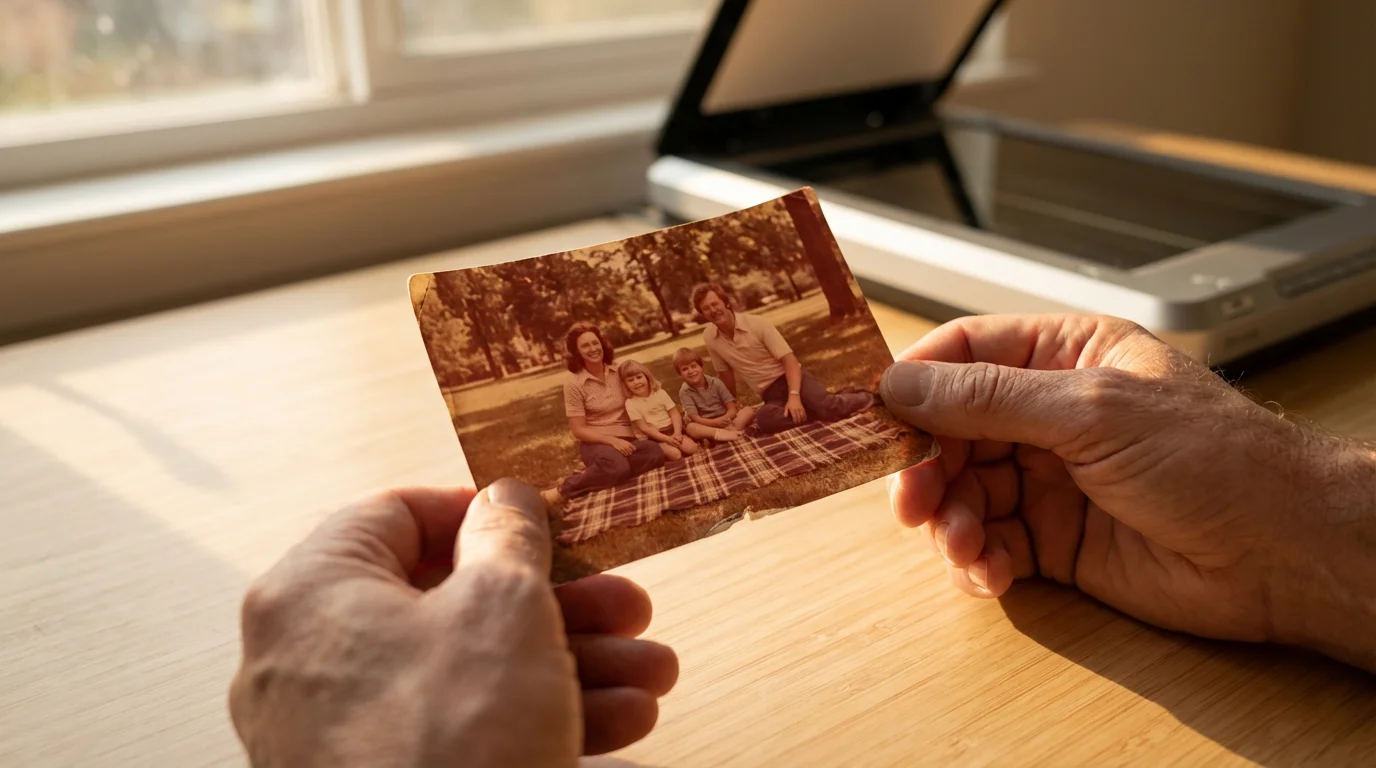
Successful digital restoration begins with an excellent digital copy of your physical photograph. You cannot fix what you cannot see clearly, so prioritize a high-quality scan or capture.
If you are scanning from home, following a complete photo scanning guide will ensure you capture the maximum detail needed for restoration.
Cleaning the Physical Photograph
Before scanning, gently clean the surface of your photograph. Dust, dirt, and minor surface grime can be mistaken for damage in your digital file, making restoration more complex than necessary.
- Use compressed air: Blow away loose dust particles. Hold the can upright to prevent propellant discharge.
- Employ a soft, lint-free cloth or micro-fiber cloth: Gently wipe the surface to remove smudges or fingerprints. Avoid abrasive materials that could scratch the emulsion.
- Consider a soft photographic brush: These brushes are specifically designed to safely sweep away dust.
Do not use any liquids or chemicals unless you are a trained conservator. These can cause irreversible damage to old prints.
Scanning Your Photographs
A high-resolution scanner is your most important tool for digitizing old prints. Invest in a dedicated flatbed photo scanner for the best results.
- Resolution: Scan at a minimum of 600 dots per inch (DPI) for standard-sized photos. For very small photos, consider 1200 DPI or higher. Higher DPI captures more detail, which is crucial for restoration.
- Color Depth: Scan in 24-bit or 48-bit color. 48-bit color captures a wider range of tones, providing more flexibility for color correction during photo restoration editing.
- Format: Save your initial scans as TIFF files. TIFF is a lossless format, meaning it retains all image data without compression artifacts, unlike JPEGs. You can convert to JPEG later for sharing, but always keep the original TIFF.
- Scanning Best Practices: Place the photo flat against the scanner bed. Use the scanner’s preview function to ensure correct cropping and orientation. Avoid auto-correction features during scanning; you want the raw image data to work with in your editing software.
For more insights on digitizing your memories, consider resources like the Image Permanence Institute, which offers valuable information on the care and handling of photographic materials.
Photographing Your Photographs (Alternative Method)
If a scanner is unavailable, you can photograph your old prints using a digital camera. This method requires careful execution to avoid reflections, glare, and distortion.
- Lighting: Use even, diffused lighting. Natural light from a window on an overcast day works well, or use two softbox lights placed at 45-degree angles to the photo to minimize glare. Avoid direct flash.
- Tripod: Mount your camera on a tripod to ensure sharpness and consistent positioning.
- Positioning: Place the photograph flat. Position the camera directly above it, ensuring the lens is parallel to the photograph’s surface to prevent keystone distortion.
- Focus and Exposure: Focus precisely on the photograph. Use manual exposure settings to ensure a balanced exposure that captures the full tonal range without blowing out highlights or clipping shadows.
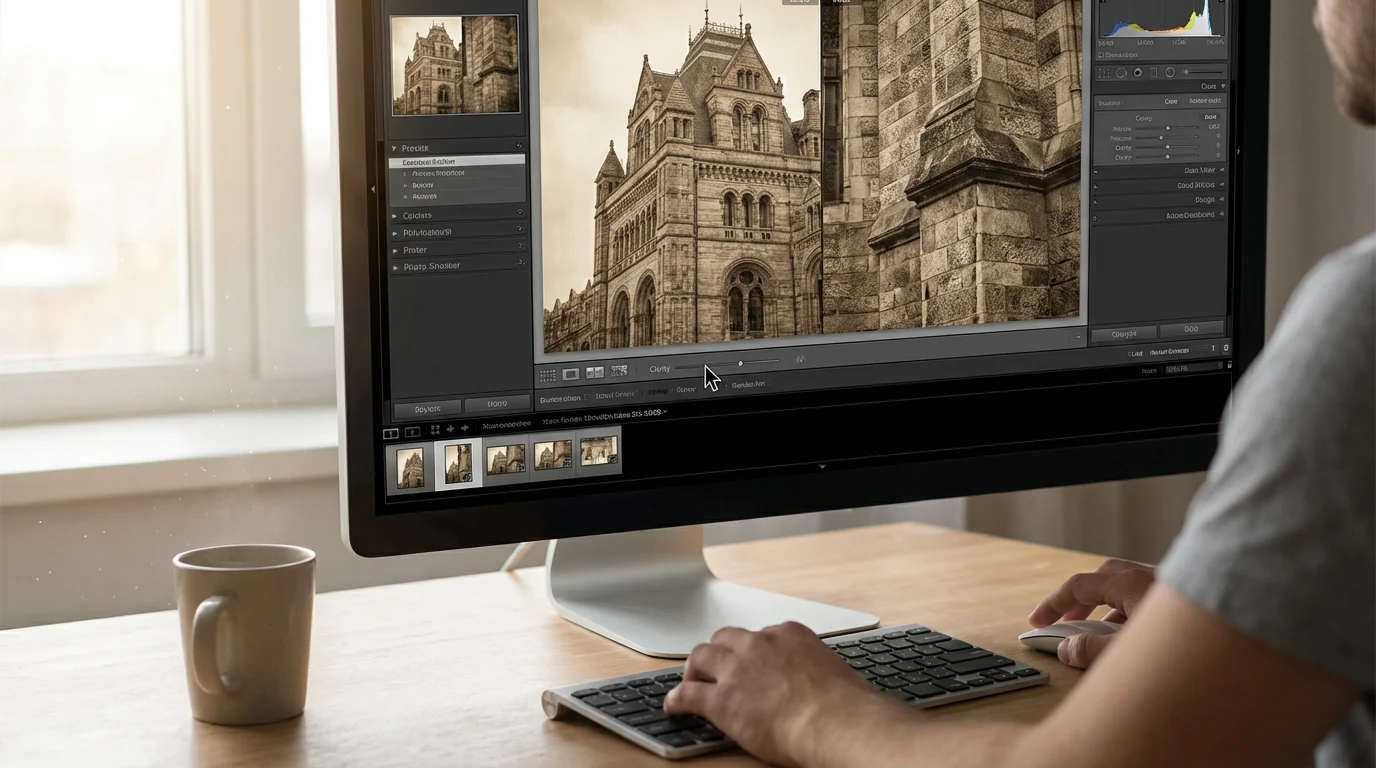
Choosing the Best Software for Restoring Old Photos
The success of your digital restoration hinges on the capabilities of your photo editing software. A variety of tools exist, ranging from professional-grade applications to user-friendly consumer programs. Your choice depends on your budget, skill level, and the complexity of the damage you need to address.
Professional-Grade Software
These programs offer the most comprehensive toolsets for photo restoration editing. They provide precise control over every aspect of an image.
- Adobe Photoshop: This industry standard offers unparalleled power for complex restoration tasks. Its layers, masks, adjustment layers, healing brushes, and content-aware tools are essential for intricate work like scratch removal, major tear repair, and advanced color restoration.
- Affinity Photo: A strong, more affordable alternative to Photoshop, Affinity Photo provides a robust set of features, including non-destructive editing, live filters, and advanced selection tools suitable for detailed restoration.
- GIMP (GNU Image Manipulation Program): A powerful, free, open-source option. While it has a steeper learning curve than paid alternatives, GIMP offers many of the same core functionalities for color correction, cloning, and layer-based editing.
Consumer-Friendly and AI-Powered Options
If you are new to photo editing or have simpler restoration needs, these options offer more automated solutions.
- Adobe Photoshop Elements: A scaled-down version of Photoshop, designed for hobbyists. It offers guided edits specifically for photo repair and color correction, making it easier to learn how to restore faded photographs digitally.
- Luminar Neo: Known for its AI-powered tools, Luminar Neo can quickly enhance images, correct colors, and even upscale resolutions with minimal manual effort. Its “Accent AI” and “Color Harmony” tools are particularly useful for initial adjustments.
- Online AI Restoration Tools: Websites and apps using artificial intelligence are emerging that can automatically colorize black and white photos, de-noise images, and even “unfade” photos. While impressive for quick fixes, they offer less manual control than desktop software. Examples include VanceAI Photo Restorer or MyHeritage Photo Enhancer.
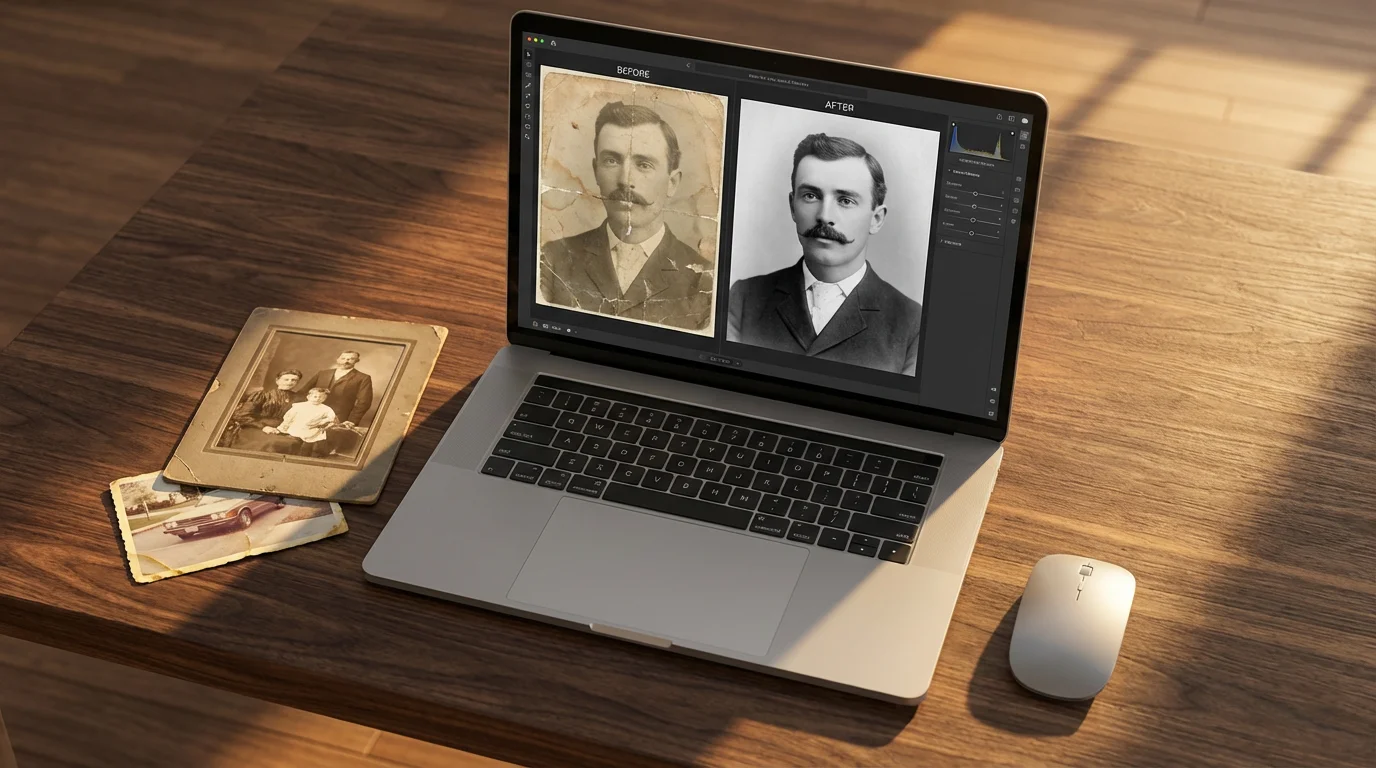
For serious restoration, a program like Photoshop or Affinity Photo provides the necessary precision. These applications allow for non-destructive editing, meaning you make changes on separate layers without altering your original scanned image data. This flexibility is crucial for experimentation and allows you to revert changes at any point.

Step-by-Step: Basic Color and Contrast Correction
Most faded photos suffer from a lack of contrast and a color shift. Addressing these issues forms the foundation of any successful restoration. This section assumes you are using a layer-based editor like Photoshop or Affinity Photo.
1. Duplicate Your Image Layer
Always work non-destructively. Duplicate your background layer (Cmd+J on Mac, Ctrl+J on Windows). This preserves your original scan. Create subsequent adjustments on new adjustment layers.
2. Correct Overall Exposure and Contrast
Faded photos often appear flat, lacking true blacks and whites.
- Levels Adjustment Layer: Open a Levels adjustment layer. Drag the black input slider (left) inward to deepen shadows and the white input slider (right) inward to brighten highlights. Watch the histogram; aim to bring the extremes to the edges without clipping.
- Curves Adjustment Layer: A Curves adjustment layer offers even finer control. Create an “S” curve: drag the bottom-left point slightly down to darken shadows and the top-right point slightly up to brighten highlights. This increases contrast in a pleasing way.
Monitor your image closely. Small adjustments yield significant results.
3. Address Color Casts (Color Restoration)
Faded color photos frequently develop a dominant color cast, often yellow, magenta, or blue.
- Color Balance Adjustment Layer: Use this layer to shift colors away from the dominant cast. If your photo has a yellow cast, add blue. If it has a magenta cast, add green. Adjust the sliders for shadows, midtones, and highlights independently.
- Photo Filter Adjustment Layer: Apply a cooling filter (e.g., Cyan or Blue) to counteract warm casts, or a warming filter (e.g., Sepia or Warming Filter 85) for cool casts. Adjust the density to control the intensity.
- Neutralizing with White Balance: Many programs have a white balance tool (often an eyedropper). Click on an area of the image that should be neutral gray or white. This helps to balance the color.
4. Fine-Tune Saturation and Vibrance
Old photos often lose their color intensity.
- Vibrance Adjustment Layer: Vibrance intelligently increases the intensity of muted colors without over-saturating already vibrant ones. This is generally preferred over global saturation.
- Saturation Adjustment Layer: If specific colors still appear dull, you can use a Saturation layer, but apply it carefully. Often, subtle increases in vibrance or individual color adjustments are more effective for color restoration.
You have now established a strong foundation. Your photo should look much clearer and more color-accurate. Save your work regularly.
Advanced Techniques: Removing Scratches, Dust, and Tears
Physical damage such as scratches, dust, tears, and creases present a more significant challenge than color correction. These require patience and precise manipulation.
For a deeper dive into cleaning up physical blemishes, follow these specific steps to remove scratches and dust from scanned photos.
1. Removing Dust and Small Scratches
For minor imperfections, utilize spot-healing tools.
- Spot Healing Brush Tool: In Photoshop, this tool intelligently samples pixels around the blemish and blends them in. It works well for small dust spots and minor scratches. Work on a new, empty layer set to “Sample All Layers” for non-destructive editing.
- Clone Stamp Tool: For more control, the Clone Stamp tool allows you to manually sample a clean area of the image and paint over the damaged area. Adjust brush size and hardness for seamless blending. Always sample from an area that closely matches the texture and tone of the damaged region.
2. Repairing Larger Scratches and Creases
Larger imperfections require more deliberate effort.
- Healing Brush Tool: Similar to the Spot Healing Brush but allows you to define the source point for cloning. This is highly effective for longer, more defined scratches.
- Patch Tool: Select a damaged area with the Patch tool, then drag the selection to a clean, similar-textured area. The tool blends the textures and tones. This works particularly well for areas with uniform textures, such as skies or plain backgrounds.
- Content-Aware Fill: For removing larger, isolated objects or repairing significant tears in areas with predictable backgrounds (like a clear sky), Photoshop’s Content-Aware Fill can be remarkably effective. Select the damaged area, then go to Edit > Content-Aware Fill. Review the generated fill and refine as needed.
When repairing, zoom in sufficiently to see individual pixels, but also zoom out frequently to assess the overall impact of your work. The goal is to make the repairs invisible.
Restoring Lost Detail and Sharpening Images
Faded photographs often appear soft, blurry, or lack fine detail due to the aging process or imperfections in the original capture. Digitally restoring detail involves careful sharpening and texture enhancement.
If your scan lacks crispness, learning how to sharpen blurry photos can help bring back lost definition in faces and scenery.
1. Noise Reduction
Scanned images, especially older ones, can exhibit digital noise or film grain that becomes more prominent during restoration.
- Reduce Noise Filter: Many editing programs offer a “Reduce Noise” filter. Apply it subtly. Excessive noise reduction can make an image look plasticky or overly smooth, sacrificing important detail. Adjust separate sliders for luminance noise and color noise.
- Targeted Noise Reduction: If noise is more prevalent in certain areas, apply noise reduction to a duplicated layer, then use a layer mask to selectively reveal the noise-reduced effect only where needed.
2. Sharpening Techniques
Sharpening enhances edge contrast, making details appear clearer. Apply sharpening as one of the final steps in your workflow.
- Unsharp Mask: This is the most common sharpening filter. It works by increasing the contrast along edges. Adjust three main parameters:
- Amount: Controls the intensity of the sharpening. Start low and increase gradually.
- Radius: Defines the width of the edges affected by sharpening. A smaller radius (1-2 pixels) is often best for photographic detail.
- Threshold: Prevents sharpening in areas of smooth tone (where you do not want to enhance noise), only affecting areas with significant tonal differences.
- Smart Sharpen: In Photoshop, Smart Sharpen offers more advanced controls, including options to reduce halo effects and specific algorithms for different types of blur.
- High Pass Filter Sharpening: For a non-destructive and highly controlled sharpening, duplicate your image layer, apply a “High Pass” filter (typically with a radius of 1-3 pixels), set the blending mode of this layer to “Overlay” or “Soft Light,” and then adjust the layer’s opacity. This method sharpens edges without affecting color or tone significantly.
Avoid over-sharpening, which creates unnatural halos around edges and exaggerates noise. Always apply sharpening to a duplicated layer or via smart filters for flexibility.
“The true artistry in photo restoration lies not in making an old photograph look new, but in carefully revealing its original beauty while respecting its history. Every brushstroke, every color adjustment, should serve to honor the memory it holds.”

Mastering Color Restoration and Colorization
Color restoration is often the most impactful aspect of digitally restoring old faded photos. Beyond simply correcting a color cast, you might need to recover lost color information or even colorize a black and white image.
If you are working with monochromatic prints, you can explore colorizing black and white photos to give them a modern look.
Advanced Color Correction
When basic color adjustments are not enough, delve deeper.
- Selective Color Adjustment Layer: This powerful tool allows you to adjust the amount of Cyan, Magenta, Yellow, and Black in specific color ranges (Reds, Yellows, Greens, Cyans, Blues, Magentas, Whites, Neutrals, Blacks). If, for example, a skin tone has too much magenta, you can target the “Reds” and reduce magenta there without affecting other reds in the image.
- Hue/Saturation Adjustment Layer: Use this layer to target and adjust specific color ranges. Select “Reds” or “Blues” from the dropdown menu and then adjust their hue, saturation, and lightness independently. This is excellent for correcting specific color shifts without impacting the entire image.
- Match Color (Photoshop): If you have a reference photo with accurate colors, you can use the “Match Color” command (Image > Adjustments > Match Color) to transfer color information. This is an advanced technique requiring careful application.
Colorizing Black and White Photos
Colorizing adds a new dimension to historical black and white images. While AI tools offer automated solutions, manual colorization provides the most realistic and nuanced results.
- Research Colors: Before starting, research historical clothing colors, architectural details, and natural landscapes from the period the photo was taken. Accuracy enhances realism.
- Create New Layers for Each Color: Create a new, empty layer for each color you intend to apply. Set the blending mode of these layers to “Color” (or “Soft Light” for more subtle effects).
- Paint with Soft Brushes: Using a soft-edged brush, carefully paint the appropriate color onto its respective layer. Zoom in to accurately paint within the lines.
- Adjust Opacity and Blending: Adjust the opacity of each color layer to control its intensity. Experiment with different blending modes to achieve the most natural look.
- Use Masks for Precision: Add layer masks to your color layers. This allows you to refine your painting, making sure colors stay within their boundaries and blend smoothly.
Manual colorization is a time-consuming but rewarding process. It demands patience and attention to detail.
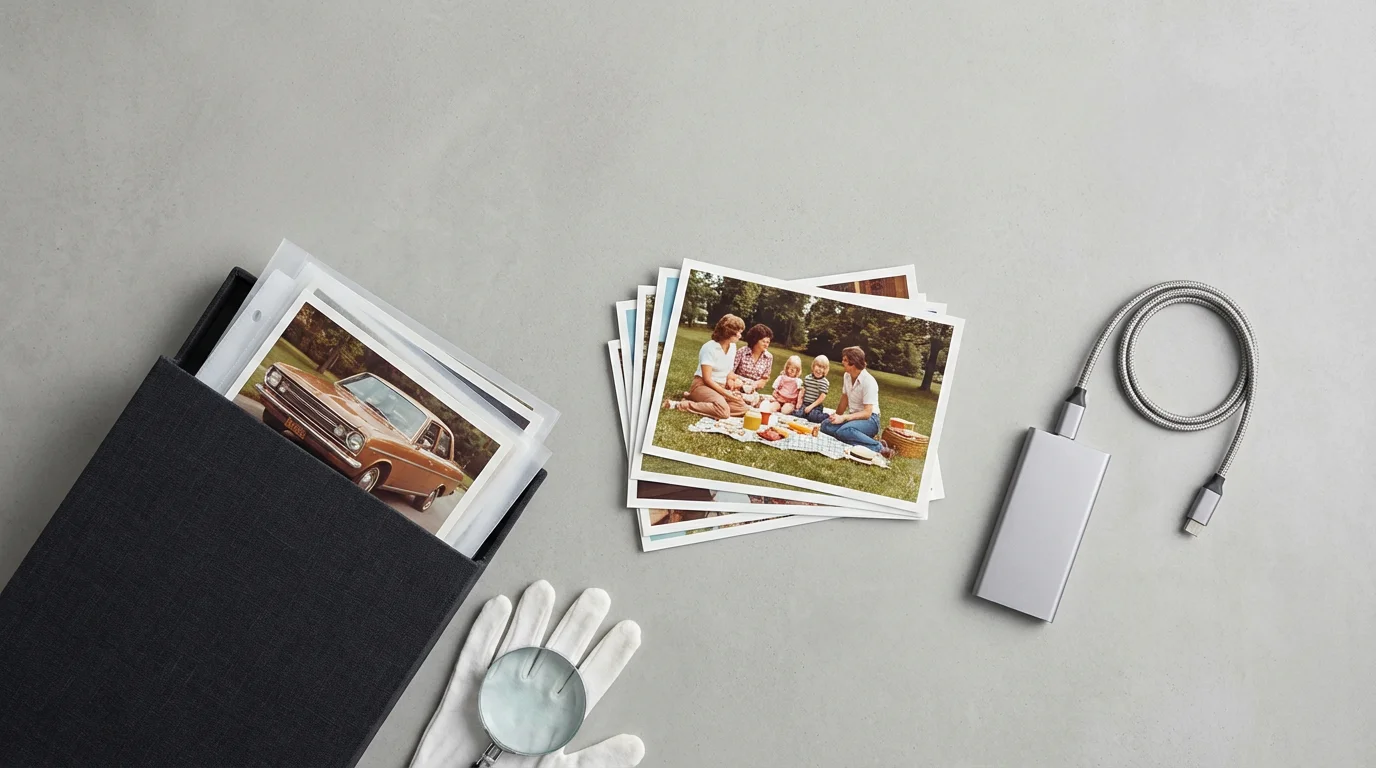
Saving and Archiving Your Restored Images
Completing the restoration is only half the battle; proper saving and archiving ensure your hard work endures.
Once your images are restored, follow established standards for creating a home photo archive to keep your digital files organized and safe.
File Formats for Saving
Choose file formats that balance quality with accessibility.
- Master File (TIFF): Save your final restored image as a TIFF file. This preserves all the detail and quality without any compression artifacts. Consider saving a version with all layers intact (PSD for Photoshop) as your working master file, and a flattened TIFF as your primary archive.
- High-Quality JPEG for Sharing: For sharing online, emailing, or creating prints, save a high-quality JPEG copy (quality setting 8-10 out of 12). JPEGs offer a good balance of file size and image quality.
- PNG for Web or Transparency: If your image requires transparency (e.g., you removed a background), save it as a PNG.
Organizing Your Digital Collection
A well-organized digital collection prevents future frustration.
- Consistent Naming Convention: Implement a clear naming structure (e.g., `YYYY-MM-DD_Subject_Event_OriginalID.tiff`). This makes files searchable and understandable.
- Folder Structure: Create logical folders. You might organize by year, event, family branch, or original physical photo box.
- Metadata: Embed descriptive metadata into your image files. Most photo editing software allows you to add information like dates, locations, subjects, keywords, and copyright details. This crucial step makes your photos searchable for decades to come.
Backup Strategies
Data loss is a real threat. Implement a robust 3-2-1 backup strategy:
- 3 Copies: Maintain at least three copies of your data.
- 2 Different Media Types: Store copies on two different types of storage media (e.g., external hard drive and cloud storage).
- 1 Offsite: Keep at least one copy in an offsite location (e.g., cloud backup service like Backblaze, Google Drive, or OneDrive).
Regularly test your backups to ensure they are accessible and uncorrupted. Digital asset management is just as important as the restoration itself for preserving your photographic heritage.
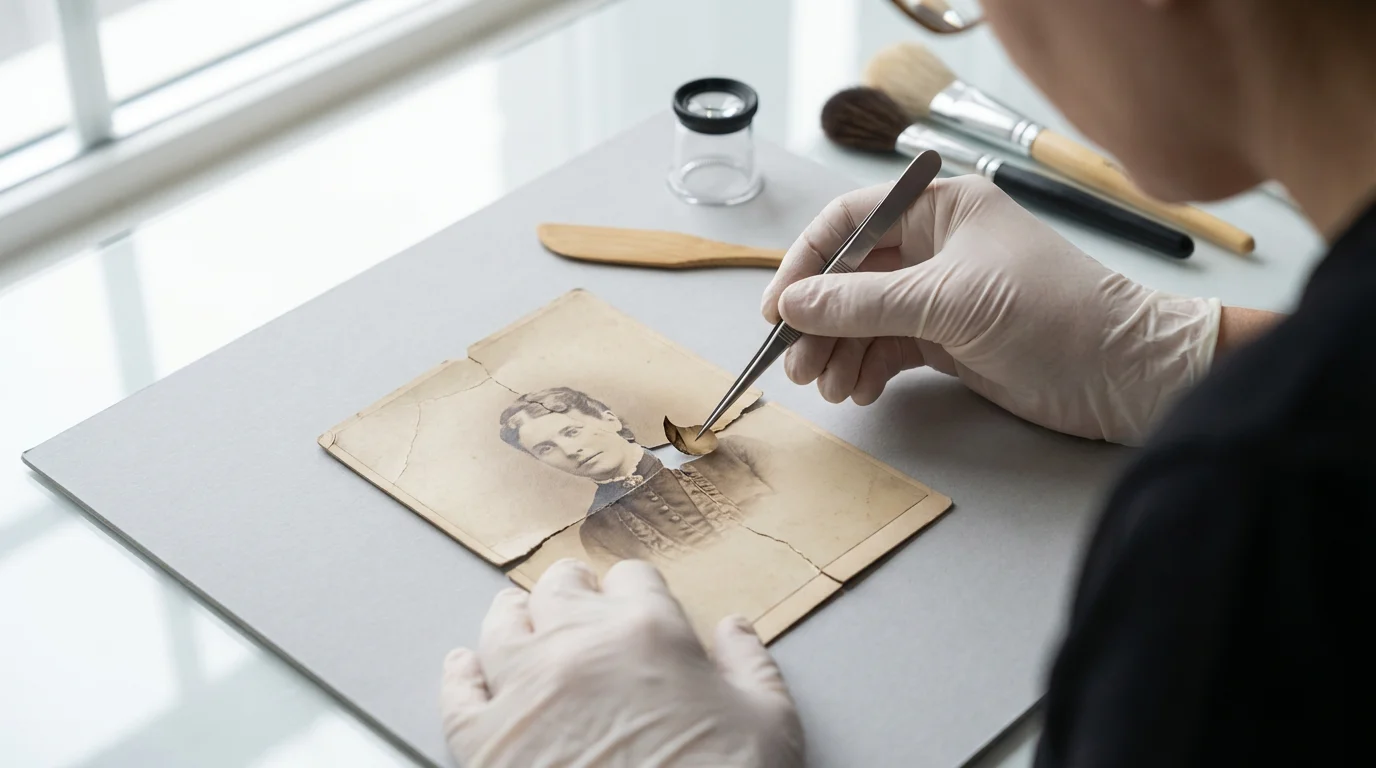
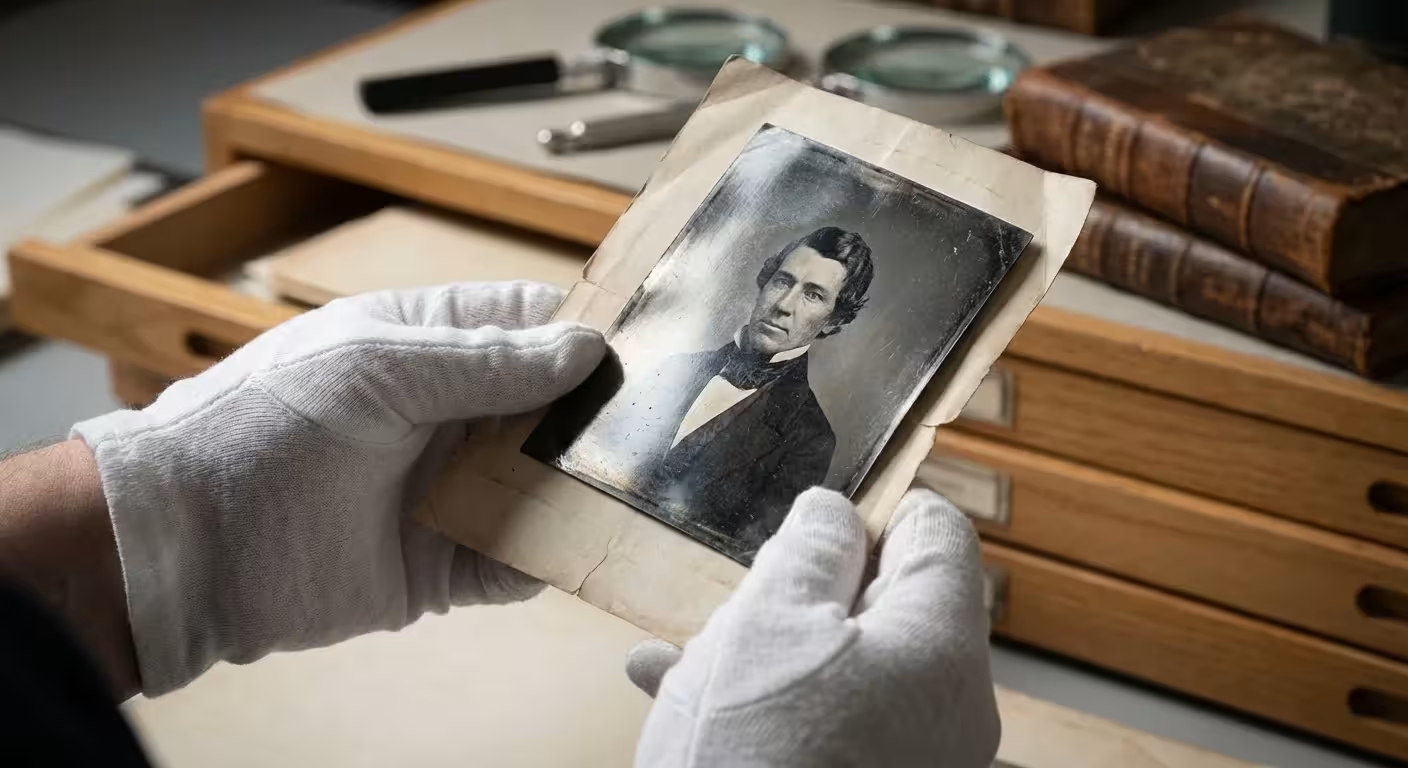
When to Seek Professional Help
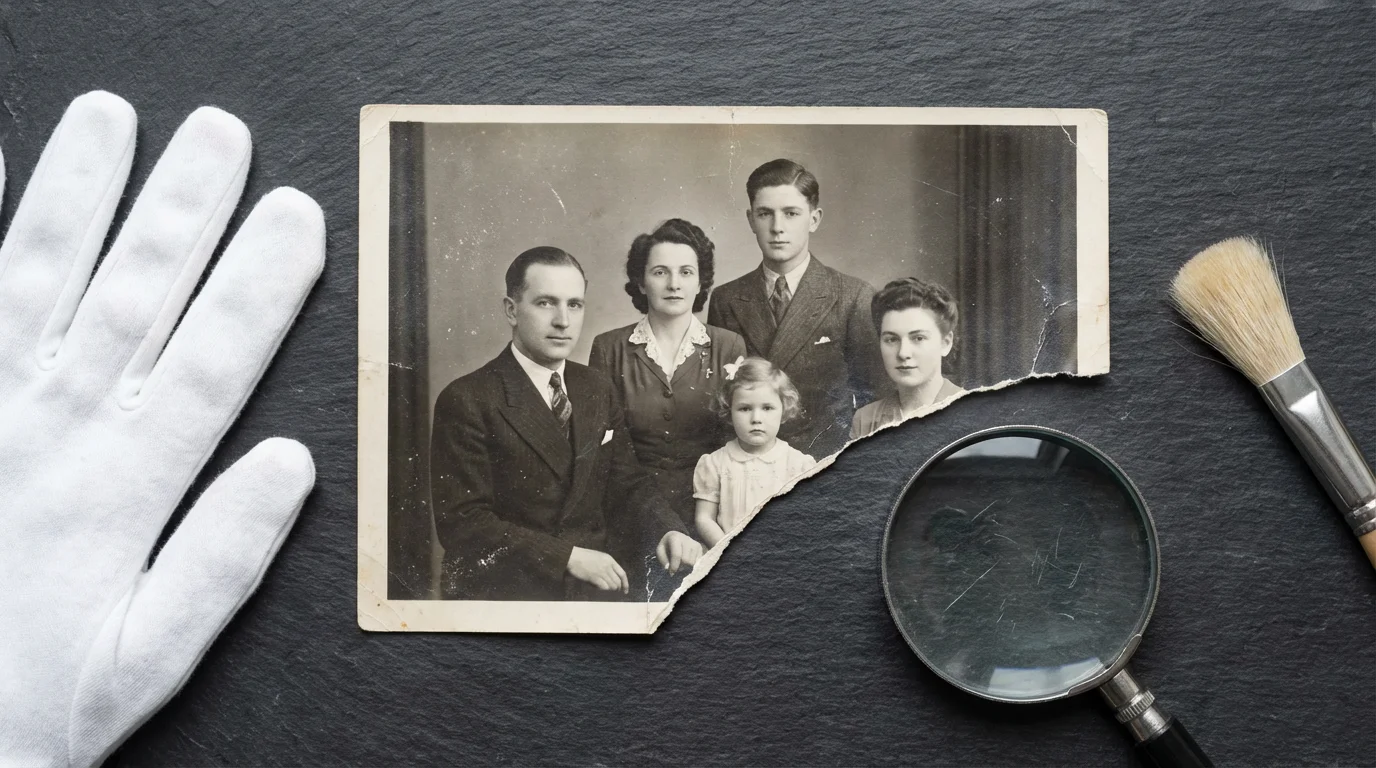
While digital tools empower you to achieve remarkable results, some photographs present challenges beyond the average enthusiast’s capabilities. Knowing when to consult a professional conservator or photo restorer saves you time, prevents potential damage to irreplaceable originals, and ensures the best possible outcome.
Understanding the options for professional photo restoration services is vital when dealing with family heirlooms that are too fragile for DIY attempts.
Consider professional assistance if:
- Severe Physical Damage: The original photograph has extensive tears, missing pieces, significant water damage, or delicate emulsion issues. A professional conservator can physically stabilize and repair the print before it is scanned or photographed.
- Chemical Degradation: The photo exhibits complex chemical damage, such as silver mirroring in black and white prints or severe, uneven color shifts that defy standard digital correction.
- Historical Significance: The photograph holds extreme historical or monetary value. You want to ensure the highest standard of preservation and restoration.
- Time Constraints: You lack the time or patience required for intricate manual digital restoration work. Professionals possess specialized skills and efficient workflows.
- Beyond Your Skill Level: You have attempted basic restoration, but the results are unsatisfactory, or the complexity of the damage overwhelms your current skill set.
A professional photo restorer often employs advanced software, custom techniques, and years of experience to tackle challenging projects. A conservator, particularly, focuses on the physical preservation of the original object, using reversible methods and archival materials. For advice on finding a professional, resources like the American Institute for Conservation can help locate qualified experts. Investing in professional services for your most treasured or damaged heirlooms guarantees their longevity and quality.
Frequently Asked Questions
What causes old photos to fade and turn yellow or red?
Over time, several factors contribute to photo fading. Light exposure, particularly from ultraviolet rays, degrades the dyes and pigments in prints. Chemical instability from the original photographic processing and improper storage conditions, such as high humidity or fluctuating temperatures, accelerate this deterioration. Color photos often fade unevenly because different color dyes degrade at different rates, leading to pronounced yellow, magenta, or blue casts. Black and white photos can yellow due to residual chemicals or environmental pollutants.
Can I restore a severely damaged photo with missing pieces?
Yes, you can often restore severely damaged photos, even those with missing pieces, using photo editing software. Techniques like the Clone Stamp tool, Healing Brush, Patch tool, and Content-Aware Fill allow you to reconstruct missing sections by sampling existing parts of the image or intelligently generating new pixels based on surrounding content. This process requires significant patience and skill, especially for complex textures or faces. For very large missing areas, you might need to combine multiple photos or draw upon reference images.
Is it better to use free or paid software for photo restoration?
The “best” software choice depends on the extent of damage and your budget. Free options like GIMP offer powerful tools capable of complex photo restoration editing, but they often have a steeper learning curve. Paid professional software, such as Adobe Photoshop or Affinity Photo, provides more refined tools, a smoother workflow, and extensive resources, making intricate color restoration and damage repair more efficient. For simpler fading or minor repairs, free online AI tools or consumer-friendly programs like Photoshop Elements can provide good results with less effort. If you plan to do extensive restoration work regularly, investing in paid software proves beneficial in the long run.
Disclaimer: This article is for informational purposes only. When handling valuable or irreplaceable photographs, consider consulting a professional conservator. Always test preservation methods on non-valuable items first.
Many editors first compare Lightroom vs Photoshop to decide which platform offers the best balance of organization and deep restoration tools.


Leave a Reply