
Your family photographs hold invaluable stories, capturing moments across generations. You know the feeling: you find an old photo, perhaps faded, creased, or stained, and wish you could bring it back to life. In the past, restoring such images required professional expertise, often at a high cost. Today, artificial intelligence AI offers powerful, accessible solutions, allowing you to breathe new life into your cherished photographic heritage. This guide empowers you to understand, choose, and effectively use AI photo restoration tools to fix your damaged images, preserving those precious memories for years to come.
Restoring these images is often the first step when you organize photos for a family history project to share with relatives.

The Promise of AI Photo Restoration
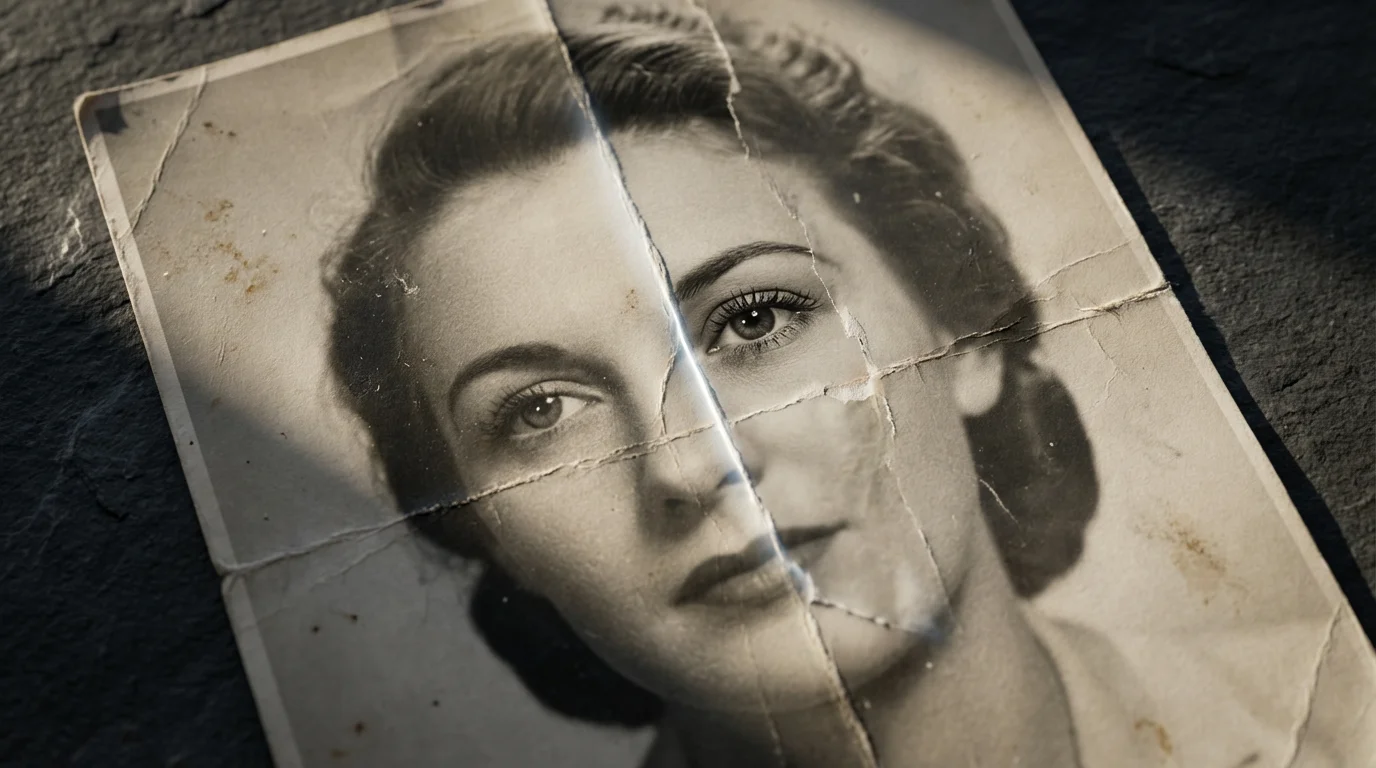
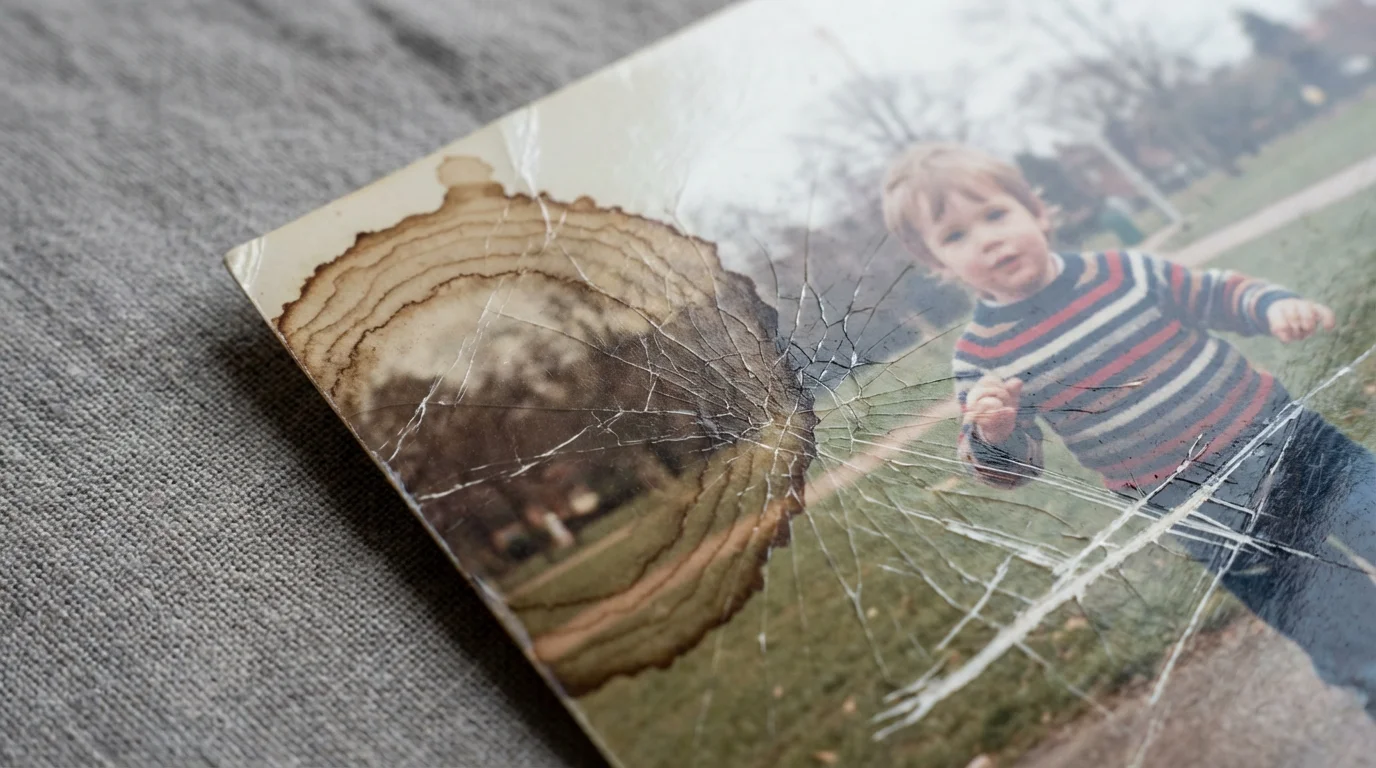
You probably have a box of old photographs sitting somewhere, a treasure trove of family history waiting to be rediscovered. Over time, these physical prints face countless threats: fading from sunlight, creases from improper storage, stains from accidental spills, and the inevitable yellowing of age. These imperfections often make it difficult to appreciate the faces and scenes within them. Digital scans capture these damages, yet editing them manually requires significant skill in photo editing software and a considerable time commitment.
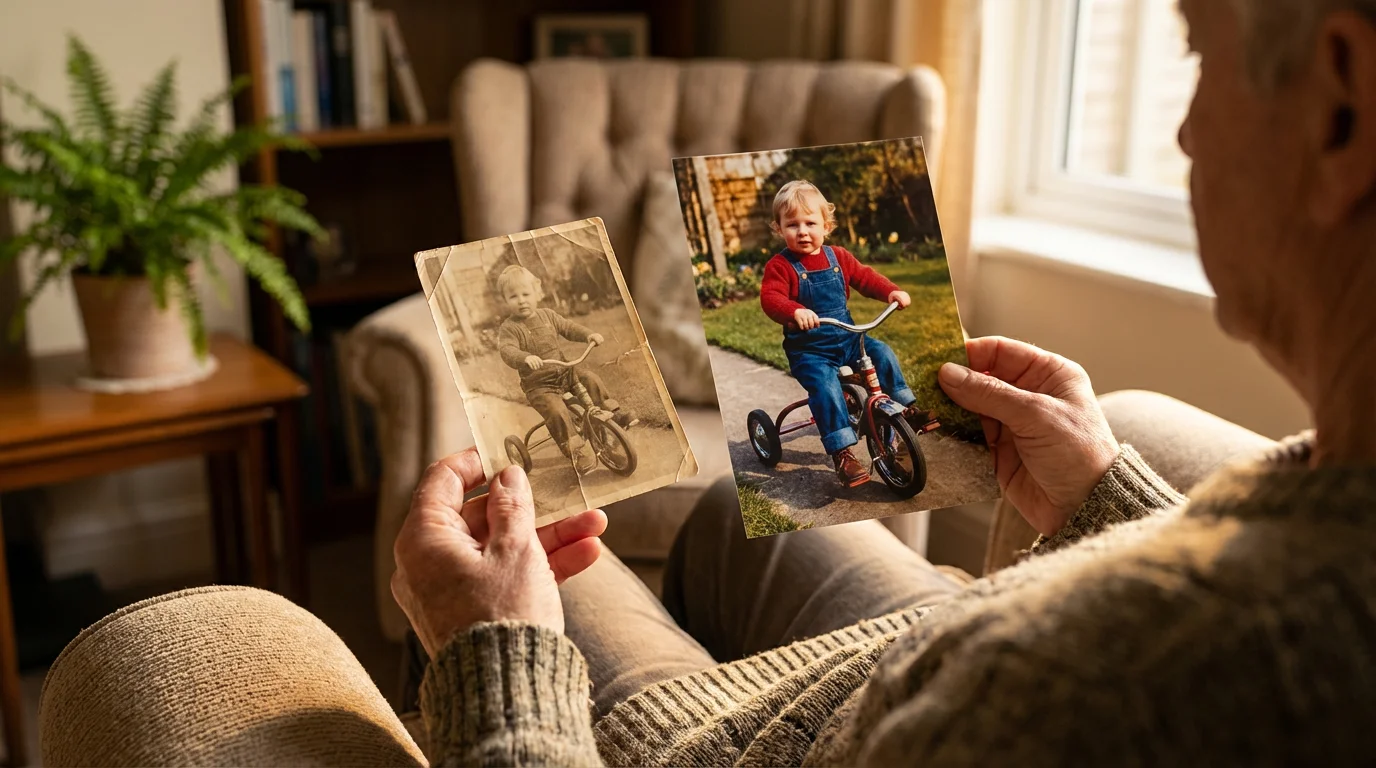
Here is where AI photo restoration changes the game. AI tools leverage advanced algorithms to analyze and repair common photo defects automatically. You do not need to be a Photoshop expert to achieve impressive results. Instead, you upload your scanned image, select the desired enhancements, and the AI works its magic, often delivering a dramatically improved version in seconds. This technology makes high-quality photo preservation accessible to everyone, ensuring your family’s visual legacy endures.
“Artificial intelligence is democratizing advanced image editing. Tools that once required years of training are now available to anyone with a computer or smartphone, empowering individuals to reclaim their family’s visual heritage effortlessly.”
How AI Photo Restoration Works
Understanding how AI photo restoration works helps you appreciate its capabilities and limitations. These tools rely on complex machine learning models, specifically neural networks, trained on vast datasets of both pristine and damaged images. Think of it this way: the AI learns what a perfect face, a clear sky, or a sharp edge looks like by analyzing millions of examples. It also learns how various types of damage, such as scratches, tears, or color shifts, appear.
When you feed a damaged image into an AI restoration tool, the AI performs several key steps:
- Damage Detection: The AI identifies areas of damage, distinguishing between genuine image content and imperfections like scratches, dust spots, or excessive noise.
- Feature Recognition: It recognizes features like faces, textures, and backgrounds, understanding the context of the image. This allows it to make more intelligent repair decisions.
- Reconstruction: Based on its training, the AI ‘fills in’ missing or damaged information. For instance, if a scratch runs across a face, the AI uses its knowledge of human faces to intelligently reconstruct the missing pixels, rather than simply blurring the area.
- Enhancement: Beyond repair, many tools apply intelligent enhancements. This includes color correction for faded images, contrast adjustments for dull photos, and sharpening to bring back lost detail. Some even offer colorization for black and white photos, inferring natural colors with impressive accuracy.
This process moves beyond simple filters. It is an intelligent reconstruction, allowing AI to perform complex tasks that would take hours for a human editor. It leverages deep learning algorithms to achieve results that mimic, and sometimes surpass, traditional manual restoration techniques, especially for repetitive damage patterns. For deeper dives into image processing and color science, you can explore resources like Cambridge in Colour.
Common Types of Photo Damage AI Can Repair
AI photo restoration excels at addressing a wide array of common photographic issues. Knowing what types of damage AI can effectively tackle helps you prioritize your restoration projects. You will find these tools particularly useful for:
While AI is excellent for general repairs, some physical issues require a specialized approach; learn about restoring water-damaged photos for delicate physical preservation steps.
For those who want more manual control over the process, you can also learn how to restore old faded photos with photo editing software to achieve custom results.
- Scratches and Creases: AI identifies these linear imperfections and intelligently reconstructs the underlying image information, making them disappear.
- Dust and Spots: Tiny specks of dust or mold often plague old prints. AI automatically detects and removes these distracting blemishes.
- Fading and Discoloration: Over time, photo dyes degrade, causing colors to fade or shift to yellowish or reddish tones. AI can correct color balance, restore vibrancy, and improve contrast, bringing back the original richness of the scene.
- Tears and Missing Sections: For minor tears or small missing portions, AI can often ‘heal’ the image by intelligently inferring what the missing area should look like based on surrounding pixels and its learned understanding of common objects.
- Image Noise and Grain: Old cameras, low-light conditions, or poor scans can introduce digital noise or excessive film grain. AI algorithms effectively reduce this noise while preserving important details.
- Blur and Softness: While AI cannot always fix severely out-of-focus images, many tools offer sharpening features that can improve the clarity of slightly soft photos or restore lost detail caused by degradation.
- Face Enhancement: Many AI tools specialize in facial recognition and enhancement. They can sharpen blurry faces, reduce noise specifically on skin tones, and even subtly “beautify” without making subjects look artificial.
AI’s ability to handle these diverse issues makes it an incredibly versatile tool for anyone looking to revitalize their old photo collection.

Key Features to Look for in AI Restoration Tools
When you evaluate AI photo restoration tools, consider specific features that align with your needs. Not all tools offer the same capabilities, and understanding these distinctions helps you make an informed choice:
If you don’t need AI-specific features, you can also look into the best free photo editing software for beginners for manual adjustments.
Once you have restored your collection, you can further streamline your workflow and use AI to automatically sort and tag your photos for better organization.
- Targeted Damage Repair: Does the tool focus on specific types of damage, such as scratch removal, color correction, or facial enhancement? Some tools are generalists, while others excel in particular areas.
- Ease of Use: Look for an intuitive interface. Can you upload an image and get results with minimal clicks? Beginners benefit from simpler, automated workflows.
- Output Quality and Resolution: Evaluate the final image quality. Does it retain detail? Does it introduce artifacts or a “painted” look? Some tools offer upscaling features, increasing the resolution of older, smaller images without pixelation.
- Batch Processing: If you have hundreds of photos to restore, batch processing saves significant time. This feature allows you to apply the same restoration settings to multiple images simultaneously.
- Control and Customization: While AI automates much of the process, advanced users might prefer tools that offer some manual controls or sliders to fine-tune the AI’s output, such as adjusting the intensity of sharpening or color correction.
- Pricing Model: Tools vary widely in cost. Some offer free trials or a limited number of free restorations, while others use subscription models or pay-per-credit systems. Consider your budget and the volume of photos you plan to restore.
- Platform Availability: Are you looking for a desktop application, a web-based tool, or a mobile app? Choose a tool that fits your preferred workflow and devices.
- Privacy and Data Handling: If you upload sensitive family photos, investigate the tool provider’s privacy policy. Ensure they handle your data securely and do not use your images for training without consent.
By assessing these features, you can narrow down the options and find an AI restoration tool that truly serves your specific restoration goals.

Top AI Photo Restoration Tools for Different Needs
The market for AI photo restoration tools continues to grow, offering diverse options for various users and specific needs. Here, you find a comparison of some popular and effective tools, highlighting their strengths and ideal use cases:
| Tool Name | Strengths | Ideal User | Pricing Model |
|---|---|---|---|
| Remini | Exceptional for facial clarity, sharpens blurry faces, enhances overall detail. User-friendly mobile app. | Mobile users, those prioritizing facial enhancement, quick restorations. | Freemium (limited free, then subscription). |
| VanceAI Photo Restorer | Comprehensive damage repair (scratches, tears, fading), colorization, unblurring, upscaling. Web-based. | Users needing broad restoration capabilities, those with a variety of damage types. | Freemium (limited free, then credits/subscription). |
| MyHeritage Photo Enhancer/InColor | Specialized in enhancing old family photos, strong facial recognition, effective colorization for black and white images. Integrated with family trees. | Genealogy enthusiasts, anyone restoring very old family photos, B&W photo colorization. | Subscription (often integrated with MyHeritage membership). |
| Adobe Photoshop (Neural Filters) | Deep integration with professional editing workflows, powerful AI-driven filters for skin smoothing, style transfer, and some restoration tasks. Requires existing Photoshop knowledge. | Professional photographers, advanced hobbyists, those already using Adobe products. | Adobe Creative Cloud subscription. |
| Hotpot.ai AI Photo Restorer | Good for general restoration, scratch repair, and colorization. Offers a simple, web-based interface. | Casual users, those needing basic restoration quickly, budget-conscious users. | Freemium (some free, then pay-per-use or subscription). |
| GFP-GAN / CodeFormer (Open Source) | State-of-the-art research models for realistic face restoration, available through various online demos or for tech-savvy users to run locally. | Developers, tech enthusiasts, users seeking the absolute best in facial restoration quality without commercial branding. | Free (open source, but may require technical setup or use via third-party wrappers). |
When selecting a tool, consider starting with a free trial or a limited free version. This allows you to test it on your specific damaged photos and assess the quality before committing financially. For instance, if you have many old photos with faded colors and scratched surfaces, a tool like VanceAI or MyHeritage might be more suitable. If your primary goal involves bringing clarity to blurry faces, Remini often delivers excellent results. You always want to match the tool’s strength to your photo’s specific needs.

Preparing Your Images for AI Restoration
The success of AI photo restoration often hinges on the quality of your input image. Think of it as giving the AI the best possible foundation to work with. Before you upload your photos to an AI tool, take these crucial steps:
- Scan Your Physical Photos at High Resolution: This is arguably the most critical step. You cannot restore detail that is not captured in the scan. Aim for at least 600 DPI (dots per inch), and for very important photos, consider 1200 DPI. Save your scans in a lossless format like TIFF to preserve all image data. Avoid JPEG for the initial scan if possible, as it compresses data and can introduce artifacts. The National Archives provides excellent guidelines for digitizing materials, including photographs, emphasizing resolution and file formats for long-term preservation.
- Clean Your Physical Photos (Carefully): Before scanning, gently clean dust or debris from your physical prints using a soft, lint-free cloth or a bulb blower. Never use harsh chemicals or abrasive materials, as you risk further damage.
- Ensure Proper Lighting During Scanning: Even lighting helps the scanner capture accurate colors and tones without shadows or glare that the AI might misinterpret as damage.
- Initial Cropping and Rotation: Perform basic crops to remove unnecessary borders and rotate the image to the correct orientation. This presents the AI with a clean, properly aligned subject.
- Back Up Your Original Scan: Always keep an untouched digital copy of your initial high-resolution scan. This serves as your master file, and you can always revert to it if you are not happy with the AI’s results. This non-destructive approach is fundamental to good preservation practice.
By diligently preparing your images, you give the AI the clearest possible picture to analyze, leading to superior restoration outcomes.
Best Practices for Using AI Restoration Tools
Maximizing the benefits of AI photo restoration involves more than just uploading an image. Adopt these best practices to ensure you get the best results and protect your precious memories:
- Start with a Copy, Not the Original: Always work on a copy of your scanned image. Never overwrite your original high-resolution scan with an AI-restored version. This protects your primary digital asset.
- Experiment with Different Tools: Do not settle for the first tool you try. Different AI algorithms excel at different types of damage. If one tool struggles with severe fading, another might handle it beautifully.
- Understand Limitations: While powerful, AI is not magic. It struggles with severely out-of-focus images, heavily pixelated low-resolution inputs, or sections where too much information is missing. For extreme damage, you may still need professional intervention.
- Evaluate Results Critically: After restoration, scrutinize the image. Does it look natural? Has the AI introduced any unwanted artifacts, such as a “plastic” skin texture or odd patterns? Sometimes, less is more.
- Consider Manual Touch-ups: AI provides an excellent starting point. For truly pristine results, you might combine AI restoration with minor manual touch-ups using traditional photo editing software (like GIMP, Photoshop Elements, or even mobile editors) to refine specific areas the AI missed or overprocessed.
- Save Multiple Versions: After restoration, save your AI-enhanced image with a clear naming convention (e.g., “Original_Scan.tif,” “Photo_Restored_AI_ToolX.jpg”). You might even save intermediate versions if a tool offers different levels of enhancement.
- Think About Ethical Considerations: While enhancing, avoid altering photos in ways that misrepresent historical context or people. For instance, do not add or remove significant elements. When colorizing black and white photos, acknowledge that the colors are an interpretation. Transparency is key when sharing altered historical images.
- Back Up Your Restored Images: Just like your original scans, ensure you back up your newly restored digital photos to multiple locations: an external hard drive, cloud storage, and perhaps a second physical drive.
By following these practices, you harness the power of AI responsibly, ensuring your restorations are both effective and respectful of your memories.

Integrating Restored Photos into Your Memory Projects
Restoring your photographs is a monumental achievement, but the journey does not end there. The true joy comes from sharing and integrating these revitalized images into meaningful memory projects. You can transform your efforts into tangible tributes to your family’s legacy:
- Create Digital Photo Albums: Organize your restored images into digital albums on your computer or cloud platforms. Categorize them by family, event, or year. This makes them easily accessible for viewing and sharing.
- Print High-Quality Reproductions: Give your restored digital images new life as physical prints. Use archival-quality paper and inks to ensure these new prints last for generations. You can even create new family photo albums with these fresh reproductions.
- Design Family History Books: Combine your restored photographs with written narratives, anecdotes, and genealogical research. Photo books offer a beautiful way to tell your family’s story, bringing images and text together.
- Develop Multimedia Presentations: Use your restored photos in slideshows or short videos, perhaps with accompanying music and voiceovers, to share at family gatherings or online.
- Share with Family Members: Send digital copies of restored photos to relatives. They will appreciate seeing these improved images and might even contribute more photos or stories to your collection.
- Digitally Display on Smart Frames: Load your favorite restored family photos onto a digital photo frame, creating a dynamic and rotating display of your heritage in your home.
Your restored photos are not merely images; they are portals to the past. By thoughtfully integrating them into these projects, you ensure their stories continue to be told and cherished.
Frequently Asked Questions
Is AI restoration truly better than manual editing for damaged photos?
AI restoration often surpasses manual editing for common, repetitive damage like scratches, dust, or overall fading, particularly for beginners or those without advanced photo editing skills. AI processes these defects faster and more consistently. However, for unique or severe damage, such as large missing sections or complex color issues, a skilled human editor using traditional tools may achieve more nuanced and precise results. AI excels as a first pass, providing an excellent foundation for any subsequent manual refinements.
Can AI fix severely damaged photos, like those with large tears or significant missing parts?
AI tools can perform surprisingly well on minor tears or small missing parts by intelligently inferring the missing information. However, for severely damaged photos with large tears, significant chunks missing, or extensive water damage that obliterates detail, even the best AI tools struggle. They might produce unnatural-looking interpolations or simply cannot reconstruct what is not there. In such cases, professional photo conservators or highly skilled manual retouchers remain the best option.
What about privacy when uploading photos to online AI tools?
Privacy is a significant concern when you upload personal photos to any online service. Always review the tool provider’s privacy policy carefully. Look for assurances that they do not store your images indefinitely, do not use them for training their AI models without your explicit consent, and employ robust data security measures. Many reputable services delete uploaded images after a short processing period. For maximum privacy, consider desktop-based AI software that processes images locally on your computer, though these are less common or require more technical setup.
Are free AI restoration tools good enough for my needs?
Many free AI restoration tools or freemium versions offer impressive results for basic damage like sharpening faces, removing minor scratches, or correcting slight fading. They are an excellent starting point to test the technology and see what is possible. However, free tools often come with limitations: lower output resolution, watermarks, slower processing, fewer features, or a daily usage cap. For extensive restoration projects or the highest quality output, you will likely need to invest in a paid version or a professional-grade tool.
How do I choose the best AI tool for my specific restoration needs?
Identify the primary types of damage in your photos: Are faces blurry? Are colors faded? Do you have many scratches? Then, research tools known for excelling in those specific areas. Use free trials or freemium versions to test several options on your actual photos. Compare the quality, ease of use, and pricing model. For mass restoration, prioritize batch processing. For nuanced results, look for some degree of user control. Your “best” tool matches your photo damage, your technical comfort level, and your budget.
Disclaimer: This article is for informational purposes only. When handling valuable or irreplaceable photographs, consider consulting a professional conservator. Always test preservation methods on non-valuable items first.


Leave a Reply