
Do you feel overwhelmed by a mountain of old photo albums, shoe boxes bursting with prints, or a digital camera roll stretching into the tens of thousands? You are not alone. Many individuals and families face the daunting task of managing vast photo collections. These images represent your precious memories, your family’s history, and moments you never want to forget. However, an unorganized collection can feel like a burden, preventing you from truly enjoying the stories within. This guide provides a clear, actionable roadmap to navigate the process of photo decluttering, helping you identify what to keep and what to confidently let go of, paving the way for a more organized, accessible, and cherished photographic heritage.

Why Decluttering Your Photo Collection Matters
A cluttered photo collection, whether physical or digital, creates numerous challenges. Imagine trying to find a specific photograph from a family vacation years ago, only to scroll endlessly or rummage through countless boxes. This frustration often leads to neglecting your photos entirely, leaving valuable memories unseen and unappreciated.
The benefits of effective photo decluttering extend far beyond simple neatness. When you streamline your collection, you gain:
- Clarity and Accessibility: You can quickly locate specific memories, share them with loved ones, and relive significant moments. An organized system allows you to find photos from your child’s first birthday or your parents’ anniversary with ease.
- Enhanced Preservation: For physical photos, decluttering reduces the volume, making it easier to store remaining prints in archival-safe conditions. Less clutter means less physical strain on each photo, mitigating risks like creasing or fading from improper storage. When you properly store fewer items, you protect them better.
- Reduced Digital Clutter and Storage Costs: Duplicate and unnecessary digital images consume valuable storage space on your hard drives, cloud services, and devices. Deleting these extraneous files frees up space, potentially reducing subscription costs for cloud storage and improving device performance.
- Emotional Peace and Enjoyment: The weight of an unmanaged collection can be heavy. Clearing out the excess brings a sense of accomplishment and allows you to focus on the truly meaningful images, fostering a deeper connection to your personal history. You move from feeling overwhelmed to feeling empowered.
- Legacy Building: A curated collection simplifies the process of sharing your family’s story with future generations. It ensures that the most impactful and significant images are easily identifiable and ready for sharing, creating a lasting legacy.
Beginning the process of photo decluttering empowers you to reclaim your memories and transform them from an overwhelming task into a source of joy and connection. You take control of your visual history.

The Emotional Aspect of Photo Cleanup: Overcoming the Fear of Deleting
For many, the biggest hurdle in photo decluttering is not the physical effort, but the emotional one. Each photograph represents a moment, a person, or a feeling. The thought of deleting anything can trigger anxiety, guilt, or the “what if” fear: “What if I delete something important?” or “What if I regret letting this go?” This emotional attachment often leads to paralysis, leaving collections untouched for years.
Understand that your emotional connection to your photos is valid. It signifies their value. However, recognize that keeping everything does not necessarily honor those memories. Instead, it often buries them. Overcoming this fear requires a shift in perspective:
- Focus on the Joy, Not the Guilt: Instead of focusing on what you might lose by deleting, consider what you gain by keeping only the best. Imagine the joy of easily browsing a collection of truly meaningful images, rather than sifting through hundreds of blurry or redundant shots.
- Quality Over Quantity: One impactful photograph often tells a story more powerfully than ten mediocre ones of the same event. Your goal is to curate your memories, not to hoard every single pixel or print.
- The “Good Enough” vs. “Great” Principle: Apply a critical eye. Do you have multiple shots of the same subject or scene? Keep the one that best captures the moment, the emotion, or the technical quality. The other shots are often redundant, not essential.
- Permission to Let Go: Give yourself permission to release the images that do not serve your memory-keeping goals. This is not disrespecting the past; it is honoring the most potent parts of it.
- Start Small: Do not attempt to declutter your entire collection in one sitting. Choose a small, manageable batch, perhaps photos from a single event or a specific year. This builds confidence and momentum.
“Every photograph holds a story, but not every story needs to be told by multiple identical images. Curating your collection is an act of love for your memories, allowing the most cherished ones to shine brightly without being overshadowed by the mundane.”
Remember, the purpose of this process is not to erase your past, but to make your past more accessible and enjoyable for your present and future self. You are creating a more meaningful archive.

Developing Your “Keeper” Criteria: How to Decide Which Photos to Delete
A successful photo decluttering project hinges on having clear criteria for what you keep. Without these guidelines, you risk arbitrary decisions or falling back into the trap of keeping everything. Establish your “keeper” framework before you begin, and apply it consistently to both physical and digital images.
Establishing these rules is the first step in learning how to create a photo organization system that sticks.
Core Principles for Deciding What to Keep:
- Storytelling Power: Does the photo tell a compelling story? Does it evoke a strong memory or emotion? Images that capture a significant event, a milestone, or a candid expression often have high storytelling value.
- Emotional Resonance: Does the photo make you smile, laugh, feel nostalgic, or bring tears to your eyes? Prioritize images that connect with you on an emotional level. These are the heart of your collection.
- Historical Significance: Does the photo document an important family member, a key event, a historical place, or a significant era? Old photos of ancestors, family homes, or community gatherings hold immense historical weight. Consider who is in the photo, what they are doing, and where they are.
- Technical Quality (within reason): While not the sole factor, a well-exposed, in-focus, and properly composed photograph generally offers a better viewing experience. For similar shots, keep the one with the best technical quality. However, do not discard a unique, emotionally powerful photo simply because of minor technical imperfections. An iconic photo of your great-grandparents, even if slightly blurry, remains priceless.
- Uniqueness: Is this photo unique? Do you have multiple versions of the same image? Delete duplicate photos, near-duplicates, or very similar shots where one clearly stands out as superior.
Practical Categories for Culling:
- Eliminate Obvious Deletes First:
- Blurry, out-of-focus photos: Unless it is the only existing image of something irreplaceable, let it go.
- Poorly exposed (too dark, too bright) photos: If editing cannot save it, delete it.
- Redundant duplicates: This applies heavily to digital collections where burst mode or multiple attempts often result in many identical or near-identical images. Keep the absolute best one.
- Accidental shots: Photos of your pocket, the floor, or random objects you did not intend to photograph.
- Test shots: Images taken to check lighting or settings that serve no memory purpose.
- Evaluate Similar Shots:
- For a series of photos from an event, choose the 1-3 strongest images that best represent the moment. Do you need five photos of the same person blowing out birthday candles if one perfectly captures the joy?
- Consider facial expressions. Often, one shot captures a genuine smile or laugh better than others.
- Look for the best composition, lighting, and focus among similar options.
- Contextual Relevance:
- Is the photo still relevant to your current life or family narrative? This is a highly personal decision. For instance, photos of former acquaintances or places no longer meaningful may be candidates for deletion.
- For old family photos, consider if the person or event is part of your family’s direct history. Distant relatives you never knew, or events with no direct family connection, might be less critical keepers for *your* personal archive.
By applying these criteria, you empower yourself to make informed decisions about what truly belongs in your curated collection. You move from hoarding memories to cherishing them.

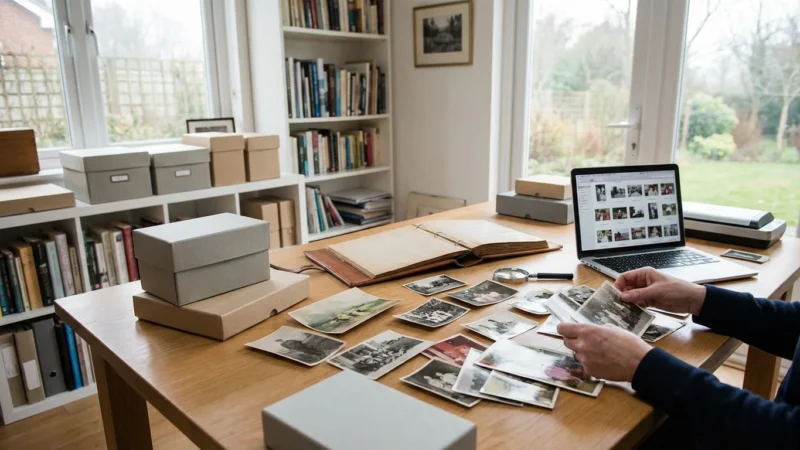
Strategies for Decluttering Physical Photo Collections
Physical photos often present a more tangible challenge. They take up physical space and carry the dust of decades. Approaching a large collection of prints, negatives, and slides requires a systematic method.
For those with an overwhelming amount of physical media, it’s worth considering if professional photo scanning services are the right choice for your preservation journey.
When dealing with high volumes, employing batch scanning techniques will make digitizing your curated prints much more efficient.
Once you have sorted your physical prints, you can learn how to scan old photos at home to create a permanent digital backup of your curated collection.
If you find the task of gathering your prints daunting, consider organizing physical photo prints using a room-by-room approach.
Step-by-Step Physical Photo Cleanup:
- Gather and Survey:
- Collect all your physical photos from every conceivable location: albums, shoeboxes, dresser drawers, attics, and basements. Bring them to a single, clean, dry workspace.
- Before touching anything, get a rough idea of the volume and types of photos you have. This helps manage expectations.
- Prepare Your Workspace and Tools:
- Ensure you have a large, clean, flat surface.
- Wear clean cotton gloves to prevent transferring oils from your hands to the photos, especially older, more delicate prints.
- Have archival-safe pencils, sticky notes (placed on the back of protective sleeves, not directly on photos), and temporary sorting boxes or folders ready.
- Prepare three main sorting piles or boxes: KEEP, SCAN (and then decide), and DISCARD.
- Initial Pass: The Obvious Deletes:
- Go through your photos quickly, pulling out any obvious candidates for the DISCARD pile: extreme blur, severe damage beyond recognition, completely accidental shots, or true duplicates. Do not overthink this initial pass.
- The Detailed Sorting Process:
- Working in manageable batches (e.g., one album, one box, or photos from a specific decade), apply your “keeper” criteria.
- Identify Duplicates: Carefully compare similar photos. Keep only the best version. If you have two identical prints, but one is in pristine condition and the other is faded, keep the better one. If both are equally good, consider giving the duplicate to another family member.
- Evaluate Quality vs. Content: A technically poor photo might be historically invaluable if it is the only record of a significant person or event. A perfectly sharp photo of an irrelevant subject is not a keeper.
- Temporary Categories: As you sort, you might create temporary categories like “Family Events,” “Vacations,” “Portraits,” or “Landscapes” to help organize.
- Handling Negatives and Slides:
- Negatives and slides are the original source material for many older prints. If you have them, keep them. They often hold more detail than the prints themselves and are crucial for future high-quality digitization. Store them in archival sleeves.
- Only discard negatives or slides if you are absolutely certain you no longer need the images, or if they are clearly blank or damaged beyond recovery.
- The “Scan” Decision:
- Some photos might be worth keeping digitally but not necessarily as a physical print (e.g., a photo that is historically interesting but not a key family photo). Place these in your SCAN pile.
- High-resolution scanning is crucial for preserving your physical heritage. Aim for at least 600 DPI for prints and 2400-4000 DPI for negatives and slides if you plan to enlarge them.
- Once scanned, you can re-evaluate the physical print. If the digital copy is sufficient and archival, you might choose to discard the physical print, especially if space is a concern. For truly precious originals, store them in archival sleeves and boxes even after scanning. You can find excellent resources on proper physical photo preservation techniques from institutions like the Library of Congress Preservation or the National Archives Preservation.
- Archival Storage for Keepers:
- Once you decide what to keep, transfer these photos into archival-safe storage solutions. Use acid-free, lignin-free photo albums, boxes, or sleeves.
- Label everything clearly with dates, names, and events. This ensures future accessibility and understanding.
This methodical approach transforms a daunting pile into a manageable, cherished collection, safeguarding your most important physical memories for generations.

Mastering Your Digital Photo Cleanup: Decluttering Digital Photo Collection Tips
The sheer volume of digital photos often dwarfs physical collections. Smartphones, digital cameras, and social media make it easy to accumulate thousands of images quickly. Tackling this digital deluge requires a strategic approach to effectively decluttering your digital photo collection.
If you are tackling a massive archive, learning how to organize 20 years of digital photos can help you systematically manage decades of files.
If your library has grown over decades, you might need a specific strategy to organize 20 years of digital photos effectively.
Key Steps for Digital Photo Cleanup:
- Backup Everything First:
- Before you delete a single file, ensure you have a complete backup of your entire digital photo collection. This is non-negotiable. Use an external hard drive, a reliable cloud service, or both. This provides a safety net if you accidentally delete something you later regret.
- Consolidate Your Collection:
- Gather all your digital photos into one central location. This means pulling images from your phone, old hard drives, memory cards, cloud services, social media downloads, and computers. Do not start decluttering until everything is in a single, accessible folder.
- Utilize Duplicate Photo Finder Software:
- This is a crucial step to delete duplicate photos efficiently. Numerous software tools exist for both Mac and PC (e.g., Duplicate Photo Cleaner, PhotoSweeper, VisiPics, Gemini 2). These programs scan your drives and identify identical or very similar images.
- Review the suggestions carefully. While software is smart, it is not infallible. You usually have the option to review clusters of duplicates and select the one you want to keep. Often, these tools can identify photos taken in burst mode that are almost identical.
- Cull in Manageable Batches (Date or Event Based):
- Do not try to clean up 50,000 photos at once. Focus on one folder, one month, or one event at a time.
- A common strategy is to work chronologically, tackling the oldest photos first.
- Apply Your “Keeper” Criteria Digitally:
- Go through each batch and apply the same criteria you used for physical photos: storytelling, emotional resonance, historical significance, and technical quality.
- For Burst Shots: You likely took 10 shots to get one perfect one. Identify the best 1-2 images and delete the rest. Do you need five nearly identical photos of someone mid-blink?
- Screenshots and “Ephemeral” Photos: Delete screenshots you no longer need, photos of shopping lists, or temporary images that served their purpose.
- Poor Quality Photos: Remove blurry, out-of-focus, or severely underexposed/overexposed images that cannot be salvaged with editing.
Organizing as You Cull:
- Consistent Naming Conventions: Rename files with a consistent system, such as
YYYY-MM-DD_Event_Subject.jpg(e.g.,2023-07-15_SmithFamilyReunion_GroupPhoto.jpg). - Logical Folder Structure: Create a hierarchy that makes sense to you. A common structure is
Years > Months > Events(e.g.,2023 > 2023-07 July > 2023-07-15 Smith Family Reunion). - Metadata and Tagging: Beyond file names, utilize your photo management software (e.g., Adobe Lightroom, Apple Photos, Google Photos) to add keywords, tags, ratings, and facial recognition information. This allows for powerful searching later. You can tag photos with “Grandma,” “Vacation,” “Christmas,” or specific locations.
By implementing these decluttering digital photo collection tips, you transform an unruly digital mess into a well-ordered, easily navigable archive of your most important memories.

Organizing Your Kept Photos for Long-Term Access
Decluttering is only half the battle; proper organization ensures your efforts pay off for years to come. A robust organization system makes your photos accessible, enjoyable, and safe for the long term.
When you start the rebuilding process, choosing an organizational method that suits your lifestyle—whether by date, event, or person—is crucial.
To ensure you can always find what you need, take the time to tag and label your photos with descriptive metadata.
When deciding how to arrange your curated files, explore whether organizing photos by event, date, or people is the best fit for your workflow.
Physical Photo Organization:
- Archival Materials are Key:
- Store your treasured physical prints, negatives, and slides in materials certified as archival-safe. This means they are acid-free, lignin-free, and PVC-free.
- Avoid common office supplies like rubber bands, paper clips, or regular plastic sleeves, which can degrade photos over time.
- Photo Albums:
- Choose archival-quality albums with acid-free pages and sleeves. Slide-in pockets are generally safer than adhesive pages that can damage prints.
- Arrange photos chronologically or by event. Add captions with names, dates, and locations using an archival pen.
- Archival Boxes:
- For larger collections or loose prints, use archival photo storage boxes. These sturdy boxes protect photos from light, dust, and environmental fluctuations.
- Use acid-free dividers within the boxes to separate events or time periods. Label the outside of the boxes clearly.
- Climate Control:
- Store physical photos in a cool, dry, stable environment. Avoid attics, basements, or garages where temperature and humidity fluctuate wildly. These environments can lead to fading, mold, and brittleness.
Digital Photo Organization:
- Consistent Folder Structure:
- Stick to the structure you established during the decluttering phase (e.g., Year > Month > Event). Consistency is vital for easy navigation.
- File Naming Convention:
- Maintain your chosen naming convention (e.g.,
YYYY-MM-DD_Event_Subject.jpg). This makes files searchable even outside of photo management software.
- Maintain your chosen naming convention (e.g.,
- Metadata and Tagging:
- This is where digital organization truly shines. Take the time to add keywords, captions, and ratings within your photo management software. Tagging photos with specific names, places, and events allows you to instantly find “all photos of Aunt Susan at Christmas in Hawaii.”
- Assign star ratings (e.g., 5 stars for the absolute best, 3 stars for good keepers) to quickly filter your collection.
- The 3-2-1 Backup Rule:
- This widely recommended strategy ensures your digital photos are safe:
- 3 copies of your data: Your primary working copy and two backups.
- 2 different types of media: For example, your computer’s hard drive and an external hard drive, or an external hard drive and cloud storage.
- 1 offsite copy: Keep one backup copy geographically separate (e.g., cloud storage, or an external drive stored at a friend’s house). This protects against local disasters like fire or flood.
- Regularly check your backups to ensure they are functional and up-to-date.
- This widely recommended strategy ensures your digital photos are safe:
Implementing these organizational practices ensures your curated collection remains accessible and protected, ready to be enjoyed and shared whenever you wish. The Image Permanence Institute provides valuable scientific research and practical information on the preservation of photographic materials.

Creative Ways to Enjoy Your Curated Collection
You have dedicated time and effort to photo decluttering and organizing. Now, the reward: truly enjoying your beautiful, curated collection. Photos are meant to be seen, shared, and celebrated, not hidden away in boxes or digital folders.
Transforming Photos into Tangible Memories:
- Photo Books and Albums:
- Digital photo books are a fantastic way to tell a story. Group photos by year, event, or theme (e.g., “Our Family Vacations,” “Grandma’s Life Story”). Many online services offer intuitive design tools.
- For physical prints, create traditional scrapbooks or photo albums, adding journal entries and memorabilia to enhance the narrative.
- Wall Art and Displays:
- Print your favorite photos and display them. Create a gallery wall with framed prints, design custom canvas prints, or use digital frames that rotate through your favorite images.
- Consider gifting framed prints to family members.
- Digital Slideshows:
- Compile your best digital photos into slideshows with accompanying music. These are perfect for family gatherings, anniversaries, or simply enjoying on your TV.
- Many photo management programs and even operating systems include built-in slideshow creation tools.
- Personalized Gifts:
- Use your photos to create unique gifts: custom calendars, mugs, blankets, phone cases, or puzzles. These items allow cherished images to become part of daily life.
Sharing and Preserving Your Legacy:
- Family History Projects: Use your photos as the foundation for a family history book or website. Combine images with written narratives, oral histories, and genealogical research to create a comprehensive record.
- Share with Loved Ones: Easily share digital albums with family members, allowing them to download copies or simply enjoy the memories. Encourage conversations around old photos.
- Backup to the Cloud for Sharing: Many cloud services allow you to create shared albums, providing a convenient way for family members to view and contribute to collections.
Your curated collection is a treasure trove. Do not let it gather digital dust. Actively engage with your memories, share them, and ensure they continue to bring joy and connect generations. The effort you put into decluttering and organizing amplifies the joy and value you derive from these precious images.

Maintaining Your Decluttered Collection: A Continuous Process
Photo decluttering is not a one-time event. It is an ongoing practice, especially in the age of constant digital capture. Establishing good habits for managing new photos prevents your collection from becoming overwhelming again.
Success lies in consistency; adopting a 10-minute daily photo organization routine prevents future clutter from accumulating.
To prevent future piles from forming, consider implementing a 10-minute daily photo organization routine to stay on top of new memories as they happen.
Strategies for Ongoing Maintenance:
- The “Ingest” Routine:
- Establish a regular schedule for importing new photos from your camera and phone to your main collection. This could be weekly, bi-weekly, or monthly.
- Immediately after importing, perform a quick culling pass. Delete obvious duplicates, blurry shots, and unnecessary images while the memory is fresh. This is the ideal time to delete duplicate photos before they accumulate.
- Process as You Go:
- Do not let new photos pile up. As you take new images, consider what you want to keep. If you are taking burst shots of an event, review them within a day or two and select your favorites.
- When you finish a vacation or a significant event, set aside time to import, cull, and organize those specific photos.
- Utilize Smart Albums and AI:
- Many photo management applications offer “smart albums” that automatically group photos based on criteria like date, keyword, or face.
- Leverage AI features that suggest duplicates or highlight “best shots.” While not perfect, these tools can significantly speed up your review process.
- Regular Review:
- Schedule an annual or semi-annual review of your entire collection. This helps catch anything you missed, allows you to re-evaluate past decisions, and ensures your organizational system remains robust.
- During this review, check your backups to confirm they are current and functional.
- Be Realistic and Forgiving:
- You will not achieve perfection overnight, and you might occasionally keep a photo you later decide to delete, or delete one you wish you had kept. That is part of the process.
- The goal is progress, not perfection. Celebrate small victories and be kind to yourself as you work through your photographic journey.
By integrating these practices into your routine, you can keep your photo collection streamlined and enjoyable, ensuring your memories remain a source of joy, not stress. This continuous effort in photo decluttering and organization safeguards your visual history for the long run.
Frequently Asked Questions
What is the most effective first step for someone overwhelmed by thousands of photos?
Start with a small, manageable batch, like photos from a single vacation, a specific year, or even just your most recent month’s camera roll. This allows you to practice your decision-making without feeling overwhelmed by the entire collection. Once you gain confidence, gradually expand your efforts.
How do I decide which photos to delete if I have many similar ones from a single event?
Apply the “good enough versus great” principle. Review all similar shots and select the one that best captures the moment, emotion, or technical quality. Look for the sharpest focus, best expressions, and most compelling composition. Keep only that one, or perhaps two if they show significantly different but equally valuable perspectives. The goal is to keep the most impactful images, not every single variation.
Should I delete digital photos immediately after taking them, or wait?
A quick initial cull immediately after taking photos, especially burst shots or obvious misfires, is highly recommended. Your memory of the event is fresh, making decisions easier. For a more detailed review and deeper decluttering, set aside dedicated time later, perhaps a day or two after an event, to make more thoughtful selections. Always ensure you have a backup before performing any significant deletions.
What is the best way to handle old, damaged physical photos during decluttering?
For severely damaged photos, prioritize scanning them at high resolution before making any decisions about the physical print. Scanning captures the image as it is, preserving it digitally. Once scanned, you can decide whether the physical print holds enough sentimental value to keep, or if the digital copy is sufficient. For valuable or unique damaged photos, consider consulting a professional photo conservator.
How often should I back up my digital photo collection?
Implement a consistent backup schedule. For highly active photographers, daily or weekly backups are ideal. For most individuals, backing up monthly or after any major photo-taking event (like a vacation) is a good practice. Always adhere to the 3-2-1 backup rule to ensure robust protection for your digital memories.
Disclaimer: This article is for informational purposes only. When handling valuable or irreplaceable photographs, consider consulting a professional conservator. Always test preservation methods on non-valuable items first.
If you are focusing on heritage, you may find our guide on how to organize photos for a family history project particularly helpful.
To ensure your future photos are always protected, look into setting up automatic photo backup from your phone as part of your cleanup workflow.


Leave a Reply