
Disclaimer: This article is for informational purposes only. When handling valuable or irreplaceable photographs, consider consulting a professional conservator. Always test preservation methods on non-valuable items first.
You have a treasure trove of memories, whether stored in dusty shoeboxes or scattered across countless digital folders. The idea of tackling this photographic legacy can feel overwhelming. Many people start with good intentions only to find their efforts fade, leaving them with an even larger, more chaotic collection. This guide empowers you to build a robust photo organization system, creating sustainable habits that ensure your precious memories remain protected, accessible, and enjoyable for years to come. You can move beyond the frustration of lost images and forgotten moments, establishing a lasting photo management routine that truly works.

Understanding Your Current Photo Chaos
Before you build an effective photo organization system, you need to understand the scale and nature of your current photo collection. Think of this step as an inventory. You cannot solve a problem effectively until you understand its full scope. Your current photo chaos might involve multiple sources and formats.
Assess Your Collection’s Scope
Begin by identifying all the places you store photos. This often includes:
- Physical Prints: Shoeboxes, old albums, framed photos, slides, negatives. Are they color or black and white? What condition are they in?
- Digital Files: Your computer’s hard drive, external hard drives, old phones, memory cards, cloud services (Google Photos, iCloud, Dropbox), social media platforms, email attachments. You might have duplicates scattered across several devices.
- Video Files: Camcorder tapes, digital video files from phones or cameras. While this article focuses on photos, recognize that videos often intertwine with your photo collection.
Quantify what you can. Do you have hundreds of prints or thousands? Do your digital folders contain gigabytes or terabytes of images? This initial assessment helps you set realistic expectations for the project. For instance, digitizing 100 prints requires a different time commitment than processing 10,000.
Identify Pain Points and Motivations
What specific issues prompt you to seek a better photo management routine? Do you:
- Struggle to find specific photos when you want to share them?
- Worry about losing precious memories due to device failure or decay?
- Feel overwhelmed by the sheer volume of unsorted images?
- Want to create a photo album or slideshow but cannot locate the necessary pictures?
Understanding these pain points clarifies your motivation. For example, if you worry about losing irreplaceable family history, your primary goal might be robust backup and preservation. If you want to easily share vacation photos with friends, your focus shifts to accessibility and quick retrieval. A clear purpose strengthens your commitment to establishing photo organization habits that work.

Define Your Photo Organization Goals
With an understanding of your current photo landscape, define what “organized” truly means for you. Your personal goals drive the design of your photo organization system. Without clear objectives, your efforts might lack direction, making it harder to maintain sustainable habits.
What Does “Organized” Mean for You?
Consider these questions to shape your vision:
- Accessibility: How quickly do you want to find a specific photo? Do you need to locate a picture from a specific year, event, or person within seconds?
- Preservation: Is your priority safeguarding photos against loss, damage, or decay? Do you want to ensure your family history lasts for future generations?
- Sharing: How often do you share photos with family and friends? Do you prefer digital sharing, physical prints, or photo books?
- Enjoyment: Do you want to regularly revisit your memories through digital frames, slideshows, or curated albums?
Your answer helps you prioritize. If instant access and sharing are paramount, you might lean towards cloud-based solutions and comprehensive tagging. If long-term preservation takes precedence, you will focus on archival storage and redundant backups.
Set SMART Goals for Photo Organization
Apply the SMART framework (Specific, Measurable, Achievable, Relevant, Time-bound) to your photo organization project:
- Specific: Instead of “organize my photos,” try “digitize all physical prints from my childhood, arrange them by year, and back them up.”
- Measurable: “Reduce digital photo duplicates by 50%,” or “scan 50 photos per week.”
- Achievable: Set realistic targets. Do not aim to organize 20 years of photos in a weekend. Break down large tasks into smaller, manageable steps.
- Relevant: Ensure your goals align with your overall desire to preserve and enjoy your memories.
- Time-bound: Give yourself deadlines. “By the end of this quarter, all 1980s family photos will be scanned and cataloged.”
Establishing these clear, actionable goals transforms a daunting task into a series of conquerable projects. This approach reinforces photo organization habits that work by providing clear milestones.

The Foundation: Digitize and Centralize Physical Photos
Physical photographs are vulnerable to damage from light, moisture, pests, and simply the passage of time. Digitization offers a critical layer of protection, creating a digital copy that you can back up and share widely. This step forms a cornerstone of any effective photo organization system.
Selecting the best archival boxes for long-term storage is a vital final step in protecting your original prints after they have been scanned.
The Importance of Digitization
Digitizing your physical prints and negatives serves several key purposes:
- Preservation: It creates a digital duplicate, safeguarding memories even if the original print fades or gets damaged.
- Accessibility: Digital files are easier to find, view, and share across devices. You can carry thousands of photos in your pocket.
- Restoration: Digital copies allow for non-destructive editing and restoration of damaged or faded images, without altering the original.
- Organization: Once digital, you can apply consistent naming, tagging, and folder structures, which is much harder with physical items alone.
Choosing Scanning Methods
You have options for digitizing your collection:
- Professional Scanning Services: For large collections, slides, negatives, or delicate originals, a professional service offers high quality and saves you considerable time. They use specialized equipment to produce high-resolution, color-corrected scans. Research services carefully, checking reviews and output specifications.
- DIY Scanning with a Flatbed Scanner: If you have fewer items or want more control, a good quality flatbed scanner with a transparency adapter (for slides and negatives) works well. Take your time, clean both the scanner bed and your photos, and scan at an appropriate resolution. For general prints, 300-600 DPI (dots per inch) is often sufficient, but for archiving and potential enlargement, 600-1200 DPI is better, especially for smaller items like negatives.
- Mobile Scanning Apps: For quick, casual scans of prints, mobile apps like Google Photoscan offer decent results by stitching multiple images to reduce glare. However, they generally lack the quality and resolution for archival purposes compared to a dedicated scanner or professional service.
Scanning Best Practices
- Resolution and File Formats: Scan at a minimum of 300 DPI for prints, preferably 600 DPI or higher for future flexibility. Save images as uncompressed TIFF files for archival quality, and then create JPEG copies for everyday use and sharing. TIFFs retain maximum image data, preventing quality loss during editing or re-saving.
- Cleanliness: Dust and debris on prints or scanner glass will appear in your scans. Use a lint-free cloth or an air blower to clean both.
- Metadata Entry: As you scan, or immediately after, record any details written on the back of the photo. Include dates, names, locations, and any anecdotes. This metadata is invaluable for your digital photo organization system.
Physical Storage of Originals Post-Digitization
Digitization protects against loss, but the original prints still hold sentimental and often historical value. Proper physical preservation remains crucial:
- Archival Materials: Store prints, slides, and negatives in acid-free, lignin-free enclosures. This includes sleeves, folders, and boxes. These materials prevent chemical reactions that cause yellowing and degradation over time. You can find many suitable products from reputable archival suppliers. The Image Permanence Institute offers excellent resources on materials and conditions for long-term storage, providing science-based information to help you choose the right products and environment.
- Environmental Control: Store photos in a cool, dry, stable environment. Avoid attics, basements, or garages where temperature and humidity fluctuate wildly. Optimal conditions are generally around 68°F (20°C) and 30-50% relative humidity.
- Handling: Always handle photos by the edges, preferably with cotton gloves, to avoid transferring oils and dirt from your hands.
By digitizing carefully and preserving your originals thoughtfully, you create a robust foundation for your entire photo organization system.
Building Your Digital Photo Hub
Once your physical photos become digital, and you capture new digital images, you need a central, accessible home for them. A well-structured digital photo hub forms the backbone of your photo management routine, making retrieval and long-term organization effortless.
Before you start moving files, decide if organizing photos by event, date, or people is the best approach for your specific collection.
Choosing a Central Storage Location
Your central storage should be reliable, spacious, and accessible:
- External Hard Drive: An affordable and widely used option. Opt for a reliable brand and consider an SSD (Solid State Drive) for speed and durability. You control the physical storage.
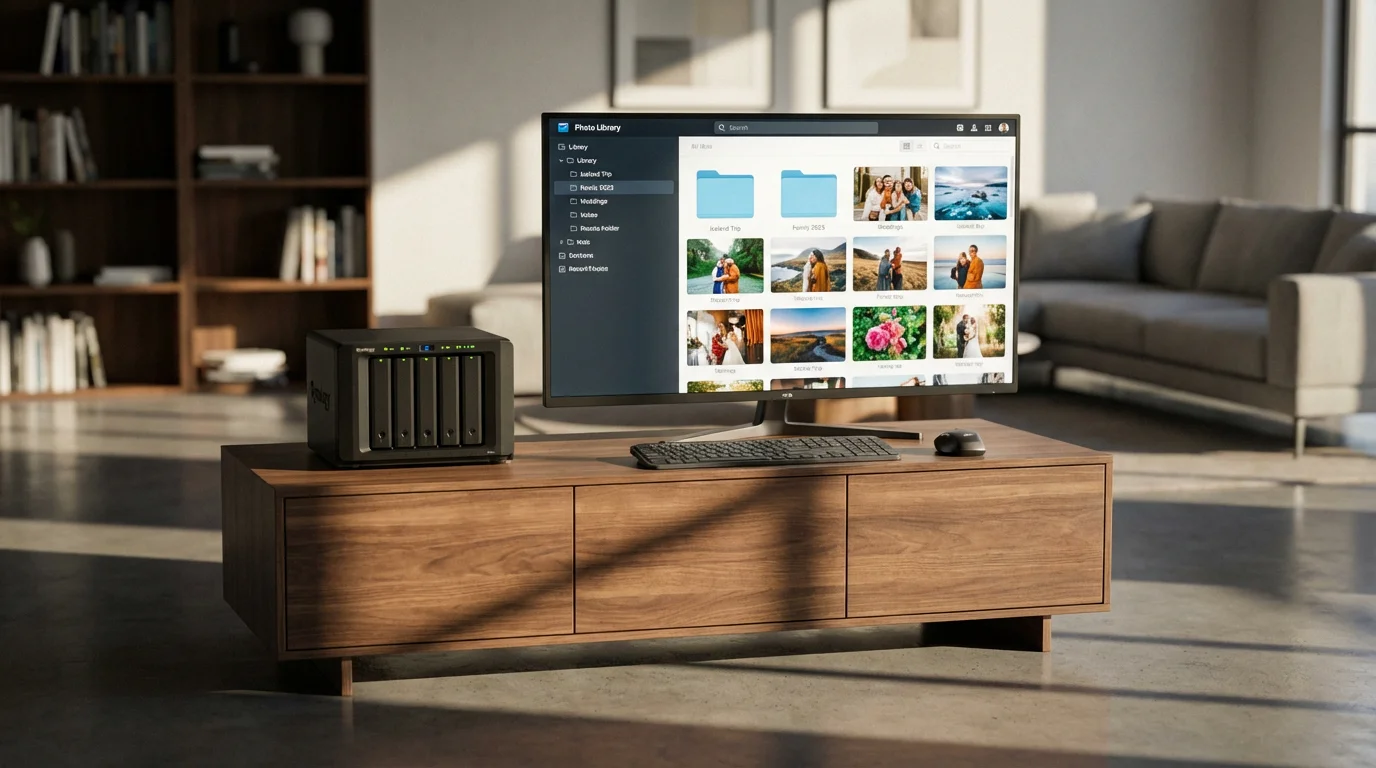
- Network Attached Storage (NAS): A mini-server for your home network. A NAS offers centralized storage accessible from all your devices, often with built-in redundancy (RAID) for data protection. This solution provides excellent control and scalability but requires a higher initial investment and some technical setup.
- Cloud Storage: Services like Google Photos, iCloud, Dropbox, or OneDrive offer convenience, automatic syncing, and accessibility from anywhere. They often include some level of photo management features. However, be mindful of privacy, terms of service, and potential subscription costs for large volumes of data. Consider cloud storage as an excellent backup solution and for sharing, but a local drive often serves best as your primary working hub due to speed and cost.
The best strategy often combines a local storage solution (external drive or NAS) for your primary working copy with cloud storage for off-site backup and easy sharing.
Folder Structure Strategies
Consistency is key for your digital photo organization system. A logical folder structure makes finding photos intuitive. Here is a widely recommended structure:
Year > Event/Location > Sub-event/Specific Description
- Top Level: Year (e.g., 2023, 2024)
This provides an immediate temporal context. Many photos naturally align with the year they were taken.
- Second Level: Event/Location (e.g., Family Vacation, Christmas, Smith Wedding, Grand Canyon Trip)
Within each year, create folders for major events or locations. Use descriptive names that are easy to remember. Avoid overly generic names like “Photos.”
- Third Level (Optional): Sub-event/Specific Description (e.g., Day 1 Hike, Dinner Party, Ceremony)
For very large events, break them down further. For instance, “Family Vacation” might have subfolders for “Day 1 Beach,” “Day 2 City Tour.”
For example:
Photos/
├── 2023/
│ ├── 2023-01_NewYearsParty/
│ ├── 2023-05_SarahGraduation/
│ ├── 2023-07_SummerVacation_CapeCod/
│ │ ├── Day1_Arrival/
│ │ └── Day3_BeachDay/
│ └── 2023-10_HalloweenParty/
└── 2024/
├── 2024-02_SkiTrip/
└── 2024-04_EasterCelebration/
This hierarchical structure provides both chronological and thematic organization, significantly improving your ability to retrieve specific images. It is a fundamental part of establishing a robust photo management routine.
Naming Conventions for Consistency
File naming consistency further enhances your photo organization system. A standard naming convention helps you sort and locate files, especially when browsing outside of a dedicated photo management application. A common and effective format includes the date, event, and a brief description:
YYYY-MM-DD_Event_Description.ext
Examples:
2023-07-15_CapeCod_LighthouseSunset.jpg2024-02-10_SkiTrip_GroupPhotoSummit.CR21985-06-22_SmithWedding_CoupleDancing.tiff(for digitized older photos, estimate date if exact is unknown)
Use leading zeros for months and days (01, 02) to ensure proper alphabetical sorting. Keep descriptions concise but informative. Many photo management applications and operating systems allow batch renaming, simplifying this process for large groups of photos. This simple habit dramatically improves your how to stay organized with photos long term.

Streamlining Your Digital Workflow: Import, Cull, Tag
A sustainable photo management routine requires an efficient workflow for new photos. Establishing a consistent process for importing, culling, and tagging new images prevents clutter from accumulating and ensures your photo organization system remains effective over time.
The culling phase is essential for decluttering your photo collection so you only spend time tagging the images that truly matter.
Mastering how to tag and label photos ensures your images remain searchable as your collection grows.
The “Import and Process” Habit
Integrate photo management into your regular routine. This means scheduling time to process new images shortly after you take them. Instead of letting photos pile up on your camera or phone, transfer them to your central digital hub promptly. For example, if you typically take many photos on weekends, dedicate 30 minutes on Monday morning to import and sort. This prevents the backlog that often leads to organizational paralysis.
Your import process should include:
- Transfer: Copy photos from your camera, phone, or memory card to a temporary “Inbox” or “New Photos” folder within your central digital hub. Do not delete them from the source until you confirm they are safely transferred and backed up.
- Initial Sort: As you transfer, roughly group photos by event or date.
Making this a regular habit, perhaps weekly, reinforces your commitment to staying organized with photos long term.
Culling Effectively: Deleting Duplicates and Unwanted Photos
Culling, also known as editing or selecting, involves reviewing your newly imported photos and removing unnecessary ones. This is a crucial step for maintaining a lean, efficient photo organization system. Be ruthless but not reckless:
- Delete Duplicates: Many cameras take burst shots, resulting in multiple identical or near-identical images. Keep only the sharpest, best-exposed version.
- Remove Blurry or Underexposed Shots: If a photo is clearly out of focus or too dark to salvage, delete it.
- Discard Test Shots or Accidental Captures: These photos serve no purpose in your curated collection.
- Limit Near-Identical Photos: Even if technically sound, you usually do not need ten photos of the exact same subject from the exact same angle. Select the strongest one or two.
Culling reduces clutter, saves storage space, and makes it easier to find truly valuable images later. It requires a critical eye, but practicing it regularly makes you more efficient. Aim to delete at least 20-30% of your initial captures.
Metadata and Tagging: Why It Matters
Metadata—data about data—provides context and searchability far beyond what folder structures offer. Tagging involves adding keywords, dates, names, locations, and other descriptive information to your digital image files. This is where your photo organization system truly becomes powerful.
- Keywords: Assign relevant keywords to your photos. Think about what you would search for: “Grandma,” “birthday,” “beach,” “winter,” “camping,” “dog,” “New York City.”
- People Tags: Use facial recognition features in your photo software or manually tag individuals. This allows you to find all photos of a specific person instantly.
- Location Data: Many modern cameras and phones embed GPS data. If not, you can manually add location information.
- Date Taken: Most digital photos automatically include this, but for scanned physical photos, manually enter the date (or an estimated date range).
Why is this so important? Imagine searching for “Sarah’s 5th birthday party at the zoo in 2018.” Without tags, you might manually browse dozens of folders. With robust metadata, a simple search yields immediate results. This proactive tagging establishes powerful photo organization habits that work, ensuring your memories are discoverable.
Software Tools for Management
Various software applications can assist with importing, culling, and tagging. These tools offer features like batch renaming, facial recognition, keyword management, and duplicate detection. Examples include Adobe Lightroom, Apple Photos, Google Photos, digiKam, and various commercial options. Experiment to find a tool that aligns with your workflow and budget. The key is to use it consistently as part of your photo management routine.

Implementing Sustainable Habits for Ongoing Organization
Building a robust photo organization system is a significant undertaking, but its long-term success hinges on establishing sustainable habits. You must integrate photo management into your life so it becomes a natural, rather than a dreaded, task. This proactive approach ensures you stay organized with photos long term.
To keep your library manageable, try establishing a 10-minute daily photo organization routine to handle new uploads immediately.
For those with a busy schedule, adopting a 10-minute daily photo organization routine can prevent new images from piling up.
Regular Scheduled Sessions
The biggest enemy of organization is procrastination. Combat this by scheduling regular, dedicated time for photo management. Treat these sessions like any other important appointment:
- Weekly Check-in (15-30 minutes): Dedicate a short period each week to import new photos from your phone or camera, quickly cull obvious duds, and place them in their correct year/event folders. Add basic tags to important images. This quick check-in prevents small tasks from snowballing.
- Monthly Review (1-2 hours): Once a month, take a deeper dive. Review all photos from the past month, refine tags, add more detailed metadata, and ensure they are properly backed up. This is also a good time to revisit older folders for further culling or tagging.
- Quarterly or Annually (Half-day or full-day): Conduct a comprehensive review of your entire collection. Check backup integrity, look for new duplicate files (perhaps from different sources), update software, and review your folder structure for any necessary adjustments. This larger session is crucial for maintaining the health of your overall photo organization system.
By breaking down the task into smaller, predictable chunks, you avoid the overwhelm that often leads to abandonment. These scheduled sessions are the backbone of a sustainable photo management routine.
“Process as You Go” for New Photos
Beyond scheduled sessions, adopt a “process as you go” mindset. For instance, after a quick phone photo session, take a moment to delete clear duds before you even put your phone away. If you upload photos to social media, make sure they are also properly filed and tagged in your central system first. This immediate processing significantly reduces future workload and reinforces excellent photo organization habits that work.
Consider the “one touch” rule: when you interact with a photo (import it, view it), try to do something productive with it (cull, tag, file) rather than just moving it without action. This principle minimizes repeated effort.
Backup Strategies: The 3-2-1 Rule
No photo organization system is complete without a robust backup strategy. Data loss is a question of “when,” not “if.” The 3-2-1 backup rule is an industry standard and offers excellent protection:
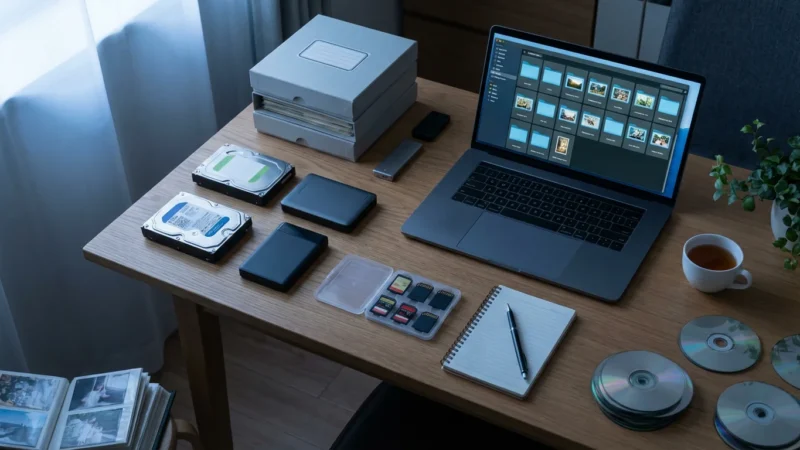
- 3 Copies of Your Data: Keep your original photos and two backup copies.
- 2 Different Media Types: Store your copies on at least two different types of storage media. For example, your primary copy on an external hard drive, a second copy on a different external drive, and a third in the cloud.
- 1 Off-site Copy: At least one copy should be stored in a different physical location than the others. This protects against catastrophic events like fire, flood, or theft at your primary location. Cloud storage is ideal for this.
For example, you might have your primary photos on your computer/NAS, a clone on an external hard drive, and a third copy synchronized to a cloud service. Regularly test your backups to ensure they are functioning correctly and that you can restore files when needed. The National Archives provides valuable guidance on managing and preserving digital information, emphasizing the importance of redundant copies for long-term access and stability. Understanding these principles ensures your precious memories are not lost to unforeseen events.
“Consistency is the most powerful tool in maintaining any organizational system. Small, regular efforts prevent large, overwhelming tasks later. You build momentum and confidence through these routine actions.”
Review and Refine Your System Periodically
Your life, technology, and photo-taking habits evolve, so your photo organization system should too. Periodically review its effectiveness. Ask yourself:
- Is my current folder structure still intuitive?
- Am I consistently applying my naming conventions?
- Are my tagging efforts yielding the results I expect?
- Is my backup strategy still adequate for my collection size and importance?
- Are there new tools or techniques that could improve my workflow?
Be willing to adapt. Perhaps you initially organized by event, but now find a chronological system more useful. Refine your system as needed, but avoid wholesale changes unless absolutely necessary, as this can undo previous efforts. Small, incremental improvements are often more effective for long-term adherence.

Preserving Your Originals: Beyond Digitization
While digitization is crucial for safeguarding your photo memories, your original physical photographs hold irreplaceable value. Their unique textures, historical context, and tactile presence make them cherished objects. Proper physical preservation extends their life and ensures your family heritage enduring.
Archival Quality Storage Solutions
The materials you use to store your physical photos directly impact their longevity. Standard photo albums, cardboard boxes, and plastic sleeves often contain acids or chemicals that degrade photographs over time. You should invest in archival quality solutions:
- Acid-Free, Lignin-Free Boxes: Store loose prints and small albums in sturdy, inert boxes. “Acid-free” means the pH level is neutral, preventing acidic migration that causes yellowing and brittleness. “Lignin-free” ensures the material does not contain lignin, a wood pulp component that breaks down and releases acids.
- Polyester, Polypropylene, or Polyethylene Sleeves: These plastic sleeves provide individual protection for prints and negatives against dust, fingerprints, and environmental pollutants. Choose types that are chemically stable (e.g., uncoated polyester like Mylar D, or archival grade polypropylene). Avoid PVC (polyvinyl chloride) sleeves, which off-gas chemicals harmful to photos.
- Acid-Free Albums and Mounts: If creating new physical albums, ensure all components—pages, adhesives, corners—are archival quality. You can use photo-safe corners or reversible adhesive options.
Always prioritize reversible methods. Any material or adhesive you apply to a photograph should be removable without causing damage. The Library of Congress Preservation Directorate offers extensive guidelines on caring for collections, including valuable information on suitable archival materials and methods for photographic prints and negatives. Referring to such expert resources ensures you apply best practices for preserving your unique originals.
Environmental Control
The environment where you store your photos dramatically affects their condition:
- Temperature and Humidity: Store photos in a cool, dry, and stable environment. Ideal conditions are typically between 65-70°F (18-21°C) and 30-50% relative humidity. Fluctuations in temperature and humidity are particularly damaging, leading to expansion, contraction, and chemical degradation.
- Avoid Extremes: Never store precious photos in attics, basements, or garages. These areas are prone to extreme temperature swings, high humidity, water leaks, and pests.
- Light Exposure: Store photos away from direct sunlight and strong artificial light. UV light accelerates fading and degradation of photographic dyes and papers. Keep them in closed boxes or albums when not being viewed.
Handling Precautions
Your hands can transfer oils, dirt, and acids to photographs, causing irreparable damage. Adopt simple handling precautions:
- Wear Cotton or Nitrile Gloves: Especially when handling negatives, slides, or particularly valuable prints.
- Handle by the Edges: Avoid touching the image surface.
- Clean Hands: If not wearing gloves, ensure your hands are clean and dry before handling photos.
By treating your original photographs as the precious objects they are, you extend their life and ensure they remain a tangible link to your past, complementing your digital photo organization system.

Creative Ways to Enjoy Your Organized Photos
The ultimate goal of a robust photo organization system is not just to have neatly stored files, but to enjoy your memories. An organized collection empowers you to rediscover, share, and creatively utilize your photographs. This is where your sustainable habits truly pay off.
Rediscovering and Sharing Memories
With your photos finally organized, you can easily:
- Create Physical Photo Albums: Curate prints from different years or events into thematic albums. Imagine a “Family Vacations” album or a “Grandchildren Growing Up” album, filled with images you can now effortlessly locate.
- Design Photo Books: Online services allow you to design professional-quality photo books. Use your best, most meaningful images to tell a story. This makes a wonderful gift and a tangible way to share your memories.
- Digital Photo Frames: Load a selection of your favorite organized photos onto a digital frame for a rotating display in your home or office. This provides daily enjoyment of your memories without consuming wall space.
- Share with Family and Friends: Easily create curated digital albums to share specific events or time periods with loved ones. Your organized collection means you can pull together a “Best of 2023” album in minutes, rather than hours.
Your photo management routine makes these activities simple and enjoyable. You move from the frustration of searching to the joy of instant recall.
Creating Legacy Projects
An organized photo collection is a foundation for creating lasting family legacies:
- Family History Books: Combine photos with family stories, genealogical information, and historical documents. Your ability to quickly find relevant photos by person, date, or event makes this project feasible.
- Oral History Projects: Use photos as prompts when interviewing family elders. The images can trigger memories and stories that might otherwise be lost. Record these narratives and pair them with the corresponding photos.
- Digitized Scrapbooks: If you have old physical scrapbooks that are deteriorating, you can digitize them page by page, preserving their unique layouts and handwritten notes.
- Custom Calendars and Gifts: Easily design personalized calendars, mugs, or other gifts using your favorite, readily accessible photos.
Your commitment to photo organization habits that work not only protects your past but also enriches your present and provides a meaningful legacy for your future generations. This sustainable photo organization system transforms your collection from a burden into a celebrated heritage.
Frequently Asked Questions
How often should I back up my photos?
You should back up your photos regularly and consistently. For active photographers, a daily or weekly backup is ideal. For general users, a monthly backup schedule, combined with processing new photos as you go, ensures minimal data loss. Remember the 3-2-1 rule: three copies, two different media types, one off-site.
What is the best way to handle duplicates?
First, implement a consistent import workflow to minimize new duplicates. For existing duplicates, use photo management software with duplicate detection features. Manually review potential duplicates to ensure you are not deleting unique images. Prioritize keeping the highest resolution and best quality version, and then delete the others. Regularly culling helps maintain an efficient photo organization system.
Should I use a cloud service or an external hard drive for storage?
The best approach often combines both. Use an external hard drive or a Network Attached Storage (NAS) device as your primary local hub for speed, control, and storage capacity. Then, use a reputable cloud service as an off-site backup for critical files and for convenient sharing. This hybrid strategy provides robust protection and accessibility, which are key components of a photo management routine that keeps you organized with photos long term.
How do I organize old physical photos without dates?
When digitizing old physical photos without dates, try to estimate the year or decade based on clothing, hairstyles, known events, or people’s ages. Group them into “circa” folders (e.g., “1970s_Circa”) and add descriptive keywords like “Childhood_Sarah” or “FamilyReunion_UnknownDate.” Over time, as you gather more information, you can refine these dates and placements within your photo organization system.
If you are starting with a large physical collection, consider organizing physical photo prints using a room-by-room approach to stay manageable.


Leave a Reply