Twenty years of digital photos represent a lifetime of memories, moments, and milestones. From the early days of digital cameras and flip phones to today’s smartphone saturation, your collection likely holds thousands, if not tens of thousands, of images. The sheer volume can feel overwhelming, preventing you from enjoying or sharing your photographic heritage. Imagine quickly finding that photo of your child’s first steps, a cherished family vacation from a decade ago, or a poignant portrait from your early photography experiments. This guide provides a practical, step-by-step approach to help you organize digital photos, transforming your vast collection into a well-managed, easily accessible archive. You will learn the best way to sort years of photos, ensuring your memories are protected and ready for enjoyment.
Once you have sorted your historical backlog, staying organized is easy if you follow a 10-minute daily photo organization routine.

Understanding Your Digital Photo Challenge
Before you dive into the practical steps, recognize the scope of your project. Organizing a large photo collection built over two decades requires patience and a systematic approach. Your collection likely spans various devices: old digital cameras, multiple smartphones, external hard drives, cloud services, and perhaps even social media platforms. Each source adds to the complexity, often duplicating images and scattering them across different storage locations. Understanding this dispersed nature is the first step toward reclaiming control.
Many individuals find themselves paralyzed by the sheer volume of files. A typical person can accumulate thousands of photos annually, meaning 20 years could easily mean 50,000 to 100,000 images, or even more. This accumulation often results in:
- Duplication: The same photo saved multiple times from different devices or backup attempts.
- Disorganization: Photos scattered across various folders with inconsistent naming conventions.
- Loss of Context: Forgetting when or where a photo was taken, making it difficult to find specific memories.
- Storage Overload: Consuming vast amounts of hard drive space and slowing down systems.
- Backup Vulnerability: Important memories existing in only one location, risking permanent loss.
You are not alone in facing this challenge. Most people struggle with digital photo management at some point. The key is to break down this monumental task into manageable stages, focusing on building a robust system that serves you now and in the future. This comprehensive guide provides the framework you need to approach this task with confidence and achieve lasting order.

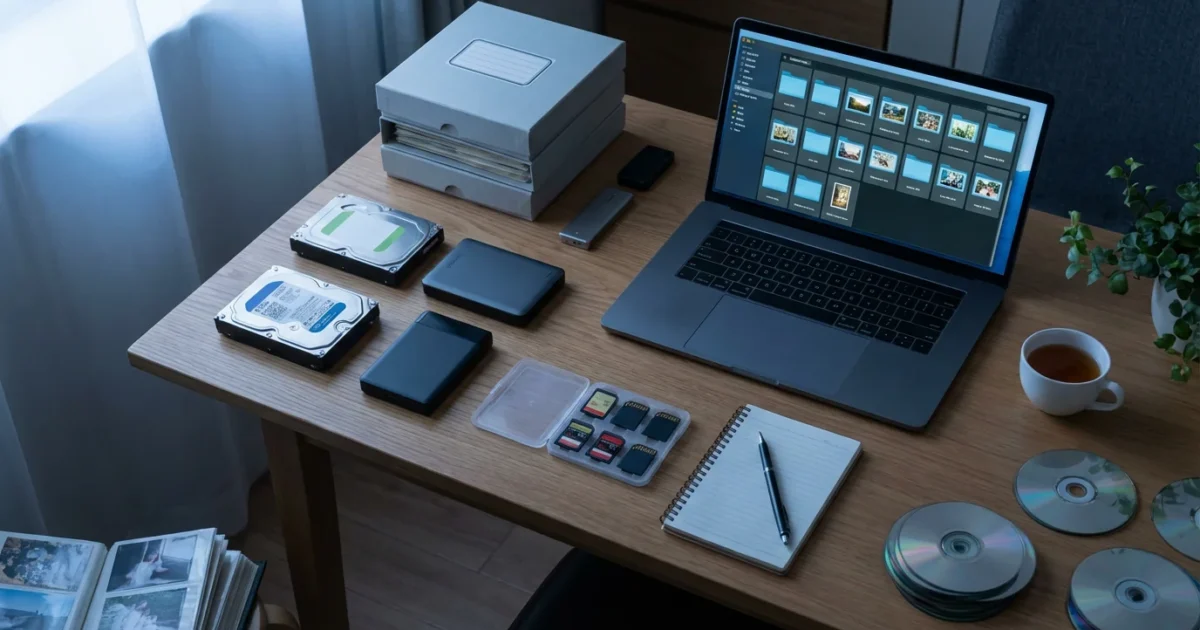
The Foundation: Consolidating Your Photo Sources
The first concrete step in organizing 20 years of digital photos is to gather every single image file into one central location. Think of this as collecting all the pieces of a puzzle before you start assembling it. This consolidation prevents omissions and sets the stage for efficient processing.
If your images are scattered across several computers and accounts, you may first need to learn how to merge multiple photo libraries into one safely.
Identify All Photo Sources:
Make a comprehensive list of every place your photos might reside:
- Computers: Your current desktop or laptop, and any old computers you still have access to. Look in default “Pictures” folders, “Downloads,” “Documents,” and even your desktop.
- External Hard Drives: Every external drive you have used for backups or extra storage.
- Smartphones/Tablets: Your current devices and any old ones you might still possess.
- Cloud Services: Google Photos, iCloud, Dropbox, OneDrive, Amazon Photos, Flickr, SmugMug, etc. Log in to each service and download your entire archive.
- Memory Cards: Old SD cards, CompactFlash cards, or USB drives from digital cameras.
- Social Media: While not ideal for archival quality, you might have unique photos uploaded to platforms like Facebook or Instagram. Many platforms offer a “Download Your Data” option.
- CDs/DVDs: If you burned photo backups in the early 2000s, retrieve these discs.
Create a Temporary Holding Area:
Establish a single, large folder on a primary computer drive or a dedicated external hard drive. Name it something clear, like “ALL_PHOTOS_TO_PROCESS.” As you identify sources, systematically copy, not move, all photo and video files into this temporary holding area. Copying ensures you retain the original files on their source until you verify the consolidation is complete. This redundancy provides a safety net during the initial collection phase.
When transferring, maintain the original folder structures from your source devices if they provide any chronological context. For example, if an old phone backed up photos into folders like “2012_01_01” or “Camera Roll,” keep those folders intact within your temporary holding area. This preserves initial metadata that might otherwise be lost.
“Effective digital photo preservation begins with a strong foundation of organization. Consolidating all your images into a single, accessible repository is not just about tidiness; it’s about establishing control over your entire visual history, making future access and enjoyment possible.”

Decluttering Your Digital Archive: The First Purge
With all your images in one place, the next crucial step is to reduce the noise. A large photo collection inevitably contains duplicates, blurry shots, test photos, and images you no longer want or need. Eliminating these unnecessary files streamlines your collection and frees up valuable storage space.
Understanding the criteria for what to keep and delete is essential for reducing the size of your archive without losing precious moments.
Identify and Remove Duplicates:
Duplicate files are notorious space-wasters. Manually finding them in a collection of thousands is impractical. Utilize specialized software designed for this task. Programs like Duplicate Photo Cleaner, VisiPics, or even features within photo management software (e.g., Adobe Lightroom, Mylio Photos) can scan your temporary holding area and identify identical or near-identical images. Review the proposed duplicates carefully. Often, these tools allow you to keep one copy and delete the others. Be cautious and always back up your original consolidated folder before running a duplicate finder for the first time.
Delete Low-Quality and Unwanted Photos:
This is where you make critical decisions about what genuinely belongs in your archive. Dedicate focused sessions to reviewing your photos. Work chronologically or in batches of 500-1000 images at a time to avoid fatigue.
- Blurry or Out-of-Focus Shots: Immediately delete these. A blurry photo rarely improves with age.
- Poorly Exposed Images: Overexposed or underexposed photos that cannot be reasonably salvaged.
- Multiple Near-Identical Shots: Keep only the best one or two from a burst sequence. Delete the rest.
- Accidental Shots: Photos of your pocket, the floor, or random unidentifiable objects.
- Unwanted Screenshots or Downloads: Separate these into a “non-photo” folder or delete them if they hold no lasting value.
- Photos with No Emotional or Practical Value: Be ruthless. If a photo does not evoke a memory, isn’t aesthetically pleasing, or serves no practical purpose (like a receipt you no longer need), consider deleting it.
This decluttering phase is the most labor-intensive but yields the greatest rewards. It transforms a daunting mass of data into a curated collection of meaningful memories. Studies show that people often keep 5-10 duplicate or unnecessary photos for every truly unique and valuable image. This purge could reduce your collection size by 30-50%, making the subsequent organization much more manageable.

Structuring Your System: A Folder and Naming Strategy
With duplicates removed and unwanted photos purged, you now have a leaner, more meaningful collection. The next step is to impose order through a consistent folder structure and file naming convention. This is the best way to sort years of photos and ensure long-term retrievability.
Beyond folders, you can make your collection truly searchable by learning how to tag and label photos with descriptive keywords.
Once you have chosen a layout, focusing on how to create a photo organization system that sticks will prevent your library from becoming cluttered again.
Establish a Logical Folder Hierarchy:
Consistency is paramount. A commonly recommended and highly effective structure is chronological, as it naturally groups your memories by when they occurred. You can nest folders to create a clear path.
    Photos/
    ├── 2004/
    │   ├── 2004-03_SpringBreakHawaii/
    │   ├── 2004-07_SmithWedding/
    │   └── 2004-12_Christmas/
    ├── 2005/
    │   ├── 2005-01_NewYearsParty/
    │   └── 2005-08_FamilyVacation/
    └── 2006/
        ├── 2006-05_BirthdayParty/
        └── 2006-11_Thanksgiving/
Here is a breakdown of this structure:
- Top Level: “Photos” (or “My Photo Archive”): This is your main repository.
- Second Level: Year (YYYY): Create a folder for each year (e.g., “2004”). This gives you an immediate chronological anchor.
- Third Level: Event/Month (YYYY-MM_EventName): Within each year, create folders for specific events or months. Using a “YYYY-MM” prefix ensures chronological sorting within the year. For example, “2004-03_SpringBreakHawaii” or “2005-08_FamilyVacation.” This naming convention helps you quickly identify the content. If you have many photos from a single month but no specific event, you could simply use “2004-03_March” or “2004-03_EverydayMoments.”
This structure helps you navigate your large photo collections easily. It provides a natural framework for organizing thousands of digital photos without relying solely on software.
Develop a Consistent File Naming Convention:
Beyond folders, consistently naming individual files adds another layer of organization. While modern photo management software often relies on metadata, a descriptive file name remains valuable, especially if you ever need to access files outside of dedicated software. A simple, yet effective convention includes the date and a brief description.
    YYYY-MM-DD_Description_Sequence.jpg
    Example: 2023-10-26_HalloweenParty_001.jpg
    Example: 2018-07-15_GrandCanyonHike_002.jpg
- Date (YYYY-MM-DD): Start with the full date. This ensures natural chronological sorting within a folder.
- Description: A concise, descriptive phrase about the photo’s content (e.g., “FamilyBeachTrip,” “SarahsBirthday”).
- Sequence (Optional, but Recommended): A three-digit sequence number (001, 002, 003) helps when you have multiple photos from the same moment or event on the same day.
Many photo management applications offer batch renaming features, allowing you to apply these conventions quickly to large sets of images. Leveraging the original capture date metadata is crucial here, as it automatically populates the date portion of your new file names.
For more specific tips on file naming, you can explore resources like the Image Permanence Institute’s guidelines on file naming, which emphasize consistency for long-term digital preservation.

Enhancing Discoverability: Tagging and Metadata Mastery
Folder structures and file names provide a foundational layer of organization. However, to truly master photo management for your large photo collections, you need to leverage metadata and tagging. Metadata is information about your photo, such as the date taken, camera model, and exposure settings. Tagging adds custom keywords that make your photos searchable in powerful ways.
Mastering how to tag and label photos ensures that you can find specific family members or locations in seconds regardless of which folder they are in.
Developing a standard for how to tag and label photos ensures that you can find specific family members or events in seconds.
Understand Metadata:
Every digital photo contains embedded metadata. This includes:
- EXIF (Exchangeable Image File Format): Automatically recorded by your camera or phone. Contains capture date and time, camera model, lens, aperture, shutter speed, ISO, and often GPS coordinates.
- IPTC (International Press Telecommunications Council): Used by professional photographers, but accessible to you. It allows adding copyright information, captions, keywords, and location details.
- XMP (Extensible Metadata Platform): A more flexible standard that allows embedding metadata in a wider range of file types and is commonly used by photo editing software.
When you organize digital photos, avoid altering the original EXIF data, especially the capture date, as this is crucial for chronological sorting. Most photo management software respects this data and uses it for automatic sorting.
Implement Keyword Tagging:
Keywords are words or phrases you associate with your photos that describe their content. This is where you unlock the ability to find photos based on people, places, events, or objects, regardless of their file name or folder location. Think about the types of searches you might want to perform years from now:
- People: Names of family members, friends, pets (e.g., “Sarah,” “Grandma,” “Buddy_dog”).
- Places: Cities, countries, specific landmarks (e.g., “Paris,” “Eiffel Tower,” “Grand Canyon,” “Home”).
- Events: Holidays, celebrations, milestones (e.g., “Christmas2023,” “Birthday,” “Graduation,” “Wedding”).
- Objects/Themes: Specific items, activities, or general categories (e.g., “Snow,” “Beach,” “Mountains,” “Food,” “Sunset,” “Hiking”).
Many photo management applications provide robust tagging features. You can often apply tags to multiple photos at once, saving significant time. For instance, after importing all photos from your “2010-07_SummerVacation” folder, select them all and apply the tags “Vacation,” “Summer,” “2010,” and the specific location names. Then, go through and tag individual photos with specific people’s names.
Add Captions and Descriptions:
For particularly important photos, add a brief caption or description. This text is embedded as metadata and can provide invaluable context. For example, a caption might read: “Grandma’s 80th birthday party at Lake Tahoe, July 2015. This was the last time all three generations were together.” This narrative detail transforms a simple image into a rich memory, especially when viewing the photo years later.
Consistency in your tagging strategy is crucial for long-term effectiveness. Create a list of core keywords you will use (e.g., always use “Christmas” instead of sometimes “Xmas”). Over time, this meticulous approach will make finding any specific photo in your vast archive effortless.

The Imperative of Backup: Protecting Your Memories
Organizing your digital photos is only half the battle. Without a robust backup strategy, all your hard work and precious memories remain vulnerable to hardware failure, accidental deletion, theft, or disaster. Think of your photo collection as irreplaceable; it is not a matter of if a drive will fail, but when. Implementing a “3-2-1” backup rule is the industry standard for ensuring digital preservation.
To ensure your archive is truly safe, it is important to understand the pros and cons of external hard drives vs cloud storage for long-term preservation.
The 3-2-1 Backup Rule:
This rule states you should have:
- Three copies of your data: Your original copy (on your computer/main drive) plus two backups.
- Two different types of media: For example, an external hard drive and a cloud service.
- One copy offsite: One of your backups should be stored physically away from your home or office, protecting against local disasters like fire or flood.
Practical Backup Solutions:
Here are practical ways to implement the 3-2-1 rule for your large photo collections:
- Primary Working Drive: Your main computer’s hard drive or a large, fast external drive where your organized “Photos” folder resides. This is copy #1.
- External Hard Drive Backup: Invest in at least one large-capacity external hard drive (or two, for redundancy). Use backup software (e.g., Mac’s Time Machine, Windows File History, or third-party options like Carbon Copy Cloner, Acronis True Image) to regularly synchronize your organized photo folder to this drive. Store this drive securely near your computer. This is copy #2, on a different media type.
- Cloud Backup Service: Sign up for a reliable cloud storage provider. Services like Backblaze, CrashPlan, Google Drive, Dropbox, or Microsoft OneDrive offer automated backups for your entire computer or specific folders. This provides your offsite copy (#3) and is on a different media type (the cloud). You can set it to continuously back up new additions, ensuring your latest memories are always protected.
- Network Attached Storage (NAS): For more advanced users with very large collections (terabytes of data) or multi-user households, a NAS device offers a private cloud solution. It is essentially a small computer with multiple hard drives that you connect to your home network, providing centralized storage and often supporting RAID (Redundant Array of Independent Disks) for hardware redundancy. This can serve as your second local copy and even sync to an offsite cloud.
Regularly test your backups. Try restoring a few files periodically to ensure your backup process is working correctly. A backup you cannot restore is not a backup at all. The National Archives Preservation website offers valuable insights into the importance of digital record keeping and protection.

Choosing the Right Photo Management Software
While a good folder structure is foundational, dedicated photo management software significantly enhances your ability to manage, search, and enjoy your large photo collections. These tools integrate organizing, editing, and sharing, offering powerful features that simplify handling thousands of digital photos.
Key Features to Look For:
- Importing and Duplication Detection: Efficiently import from various sources and identify duplicates.
- Metadata Editing: Robust tools to view, edit, and add EXIF, IPTC, and XMP metadata.
- Keyword Tagging: Easy application and management of keywords, often with auto-suggestion.
- Facial Recognition: Automates tagging of people in your photos.
- Geotagging: Displays photos on a map based on embedded GPS data or allows manual addition.
- Search and Filtering: Powerful search capabilities based on dates, tags, camera data, ratings, etc.
- Non-Destructive Editing: Allows you to make edits without altering the original file.
- Cloud Syncing/Mobile Access: Ability to access your collection across devices and sync with cloud services.
- Sharing Options: Easy ways to share photos or albums with others.
Popular Software Options:
The best way to sort years of photos often involves leveraging these tools:
- Adobe Lightroom Classic: A powerful, professional-grade tool excellent for managing large photo collections, editing, and comprehensive metadata handling. It uses a catalog system that points to your files, leaving them in your chosen folder structure. It requires a subscription.
- Mylio Photos: Designed from the ground up for managing large, distributed photo libraries. It creates a “smart copy” of your entire library on all your devices, allowing offline access and syncing. It offers robust organization, facial recognition, and editing. It has a free tier and paid subscriptions.
- Apple Photos (macOS/iOS): A good option for Apple users, offering tight integration with iCloud Photos, facial recognition, and basic editing. It manages its own internal library structure but allows for keyword tagging.
- Google Photos: Primarily a cloud-based solution, excellent for basic organization, search (with powerful AI recognition of objects, places, and people), and sharing. Be aware of its storage policies, which may require a paid subscription for large libraries.
- DigiKam (Open Source): A free, open-source solution for Windows, macOS, and Linux. It offers powerful organization features, including tagging, face detection, and metadata editing, making it an excellent choice for those seeking a no-cost option.
- ACDSee Photo Studio (Windows/Mac): A comprehensive suite offering fast browsing, robust organization, editing, and raw file processing. It is a one-time purchase.
When selecting software, consider your operating system, budget, and the specific features most important to your workflow. Many offer free trials, allowing you to test their capabilities before committing. Using photo management software effectively is key to how to organize thousands of digital photos with efficiency.

Maintaining Your Organized Collection: Ongoing Habits
Organizing 20 years of digital photos is a significant undertaking, but it is not a one-time event. To prevent your meticulously organized system from descending back into chaos, you need to establish consistent habits. Think of it as digital housekeeping.
Implementing a daily photo organization routine is the most effective way to prevent a new backlog of thousands of images from forming.
Implement an “Inbox” Strategy:
Create a temporary “Inbox” folder on your computer. Whenever you import new photos from your phone, camera, or downloads, place them directly into this inbox. Do not let them sit scattered in your downloads folder or camera roll.
Process New Photos Regularly:
Schedule regular times each week or month to process your “Inbox.” This involves:
- Import: Transfer photos from your device to the “Inbox.”
- Cull: Immediately delete blurry, duplicate, or unwanted shots. Be decisive.
- Organize: Move the keepers into their appropriate chronological and event-based folders within your main “Photos” archive.
- Tag: Apply relevant keywords, people tags, and location data. Add captions for important images.
- Backup: Ensure your backup system runs and includes these newly added and organized photos.
Consistency is key. It is far easier to process 50 new photos than to face a backlog of 5,000. Many professional photographers adhere to a strict workflow of culling and tagging images immediately after a shoot, a practice that scales effectively to personal photo management.
Review and Refine Annually:
Once a year, perhaps around the new year, dedicate time to a “photo review.”
- Check Folder Structure: Ensure all photos are in the correct places.
- Update Tags: Add new tags, standardize existing ones, or correct any errors.
- Delete Redundancies: Over time, you might find more duplicates or photos you now deem unnecessary.
- Verify Backups: Confirm all your backup systems are operational and contain your latest data.
- Migrate Old Formats (if necessary): As technology evolves, ensure older file types (e.g., very old RAW formats) are still accessible or convert them to more common, open formats like DNG or JPG. The American Institute for Conservation offers guidance on digital preservation, emphasizing migration when necessary.
This annual checkup acts as a preventative measure, preventing minor organizational issues from snowballing into a major clean-up project down the line. It reinforces your chosen photo management system and keeps your large photo collections in top shape.

Beyond Organization: Enjoying Your Photos
The ultimate goal of organizing 20 years of digital photos is not just to have a tidy digital archive, but to genuinely enjoy your memories. Once your system is in place, you can explore creative ways to bring your photos to life.
Create Photo Books and Albums:
Digital photo books are a fantastic way to compile memories from specific years, events, or trips. Services like Shutterfly, Mixbook, or Blurb allow you to design professional-looking books. This takes your best photos offline and into a tangible format you can share and revisit easily.
Build Digital Slideshows:
Use your organized collection to create engaging digital slideshows. Most operating systems and photo management software have built-in slideshow features. Add music and share these with family during gatherings or holidays.
Curate Online Galleries:
Share selected photos with friends and family through private online galleries. Platforms like Flickr, SmugMug, or even private albums on Google Photos or Apple Photos offer excellent ways to share your curated collections without overwhelming people with your entire archive.
Print and Display Your Favorites:
Do not let your best photos live only on a screen. Print high-quality versions of your most cherished images. Frame them for your walls, create a gallery wall, or use them in digital photo frames that cycle through your favorite shots. Seeing your photos displayed brings joy and reminds you of the effort you invested in preserving them.
Digital Storytelling:
Combine photos with text, audio, or video clips to create more immersive digital stories. Tools like Adobe Spark or even basic video editors can help you weave narratives around your photographic journey. This transforms a collection of images into a rich, multimedia experience.
Your journey to organize digital photos will culminate in a collection that is not just well-structured but also a source of constant inspiration and joy. You have taken control of your large photo collections, making it possible to revisit any moment with ease and share your life’s visual story for generations to come.
Frequently Asked Questions
How long will it take to organize 20 years of digital photos?
The time required varies significantly based on the size of your collection, your current level of disorganization, and the consistency of your efforts. For a typical collection of thousands of images over two decades, expect to dedicate anywhere from 40 to 100 hours of focused work. Break it down into smaller, manageable sessions of 1-2 hours at a time to avoid burnout. Remember, consistency is more important than speed.
What is the most critical step in organizing a large photo collection?
Consolidation, followed by ruthless decluttering, is arguably the most critical initial step. Bringing all your scattered photos into one central location, and then eliminating duplicates and low-quality images, significantly reduces the scope of the project and lays a clean foundation for all subsequent organization, tagging, and backup efforts. Without this, you are simply organizing chaos.
Should I delete original images after editing them?
No, always keep your original, unedited image files. Photo management software typically uses non-destructive editing, meaning your edits are stored as instructions rather than directly altering the original file. This allows you to revert to the original at any time or apply different edits. If you export an edited version, that becomes a new file, and your original should remain untouched in your archive.
How often should I back up my digital photos?
You should back up your digital photos continuously or at least immediately after any new photos are added or significant organization occurs. For most people, setting up an automated cloud backup service that runs in the background is the easiest solution, providing continuous protection. For local backups on external hard drives, a weekly or bi-weekly sync is a good practice to ensure all recent changes are saved.
What if I have photos without date information?
For photos missing date metadata, you will need to estimate the date as best you can. Look for clues within the photo itself, such as clothing styles, recognizable events, or backgrounds. Place these photos into a “YYYY_Unknown” or “YYYY-MM_Unknown” folder. Some photo management software allows you to manually adjust the capture date. While not perfect, an estimated date is better than no date, allowing them to fit into your chronological structure.
Disclaimer: This article is for informational purposes only. When handling valuable or irreplaceable photographs, consider consulting a professional conservator. Always test preservation methods on non-valuable items first.


Leave a Reply