Boxes of old photographs hold cherished memories, family history, and irreplaceable moments. Yet, these treasures often reside in cluttered corners, forgotten attics, or dusty closets, vulnerable to damage and disarray. Facing a vast collection of unorganized prints can feel daunting, leading many to postpone the essential task of preservation. You possess the power to transform this chaos into an organized, accessible, and protected legacy.
Before you begin handling your collection, it is helpful to understand how to create a photo organization system that sticks to ensure your hard work lasts for years.
This comprehensive guide delivers a practical, step-by-step room-by-room strategy to organize your physical photo prints, ensuring their longevity and making them enjoyable for generations to come. You will learn how to systematically gather, sort, digitize, and store your photographic heritage using archival best practices. Our goal is to empower you to preserve your memories confidently, one manageable step at a time.

Why a Room-by-Room Approach Works for Photo Organization
The sheer volume of photographs accumulated over decades can overwhelm anyone attempting to organize a family archive. An “all at once” approach often leads to frustration and an unfinished project. The room-by-room method offers a manageable, less intimidating pathway to success. You break the monumental task into smaller, actionable segments, allowing you to celebrate small victories as you clear each area.
Consider the psychological benefit: by focusing on one room, or even one shelf, you limit the scope of your immediate work. This focused effort prevents you from pulling out every box simultaneously, creating a bigger mess, and becoming disheartened. You complete a segment, secure its contents, and then move to the next. This systematic process builds momentum and makes the entire project feel achievable, ultimately streamlining how to organize boxes of old photos spread throughout your home.

Essential Tools and Archival Supplies
Before you embark on your organizing journey, gather the necessary tools and archival-quality supplies. Investing in the right materials protects your prints from further degradation and ensures your efforts contribute to their long-term preservation. You want materials free of acid and lignin, which can yellow, fade, and brittle photographs over time.
For those living in areas prone to natural disasters, you may also want to research how to preserve photos in a fireproof safe for added security.
Your Essential Toolkit:
- White Cotton Gloves: These prevent oils and dirt from your hands from transferring to photos, minimizing fingerprints and smudges.
- Soft-Bristled Brush: A clean, soft brush (like a camel hair brush) gently removes dust and debris from prints without scratching them.
- Archival Sleeves or Envelopes: Made from polypropylene, polyester, or acid-free paper, these protect individual prints from environmental contaminants and physical damage. Choose sleeves that are appropriately sized for your photos.
- Archival Photo Boxes: Sturdy, acid-free, lignin-free boxes provide a safe, dark, and stable environment for bulk storage. Look for boxes with a buffered pH (around 8.5) to neutralize any migrating acids.
- Archival Pens or Pencils: Use photo-safe pens (pigment-based, acid-free) or a soft lead pencil to write identifying information on the back of prints or on archival labels. Never use ballpoint pens or markers directly on photos.
- Labels and Index Cards: For clear identification and indexing of `photo boxes`, categories, and events.
- Flatbed Scanner or Photo Scanner: For digitizing your physical prints, providing a crucial backup and enhanced accessibility.
- Temporary Storage Bins: Non-archival plastic bins or cardboard boxes for collecting prints during the initial sweep, before proper sorting.
Research reputable archival supply companies. Organizations like the American Institute for Conservation (AIC) provide excellent resources for finding suppliers of museum-quality materials that ensure best way to store physical photographs.
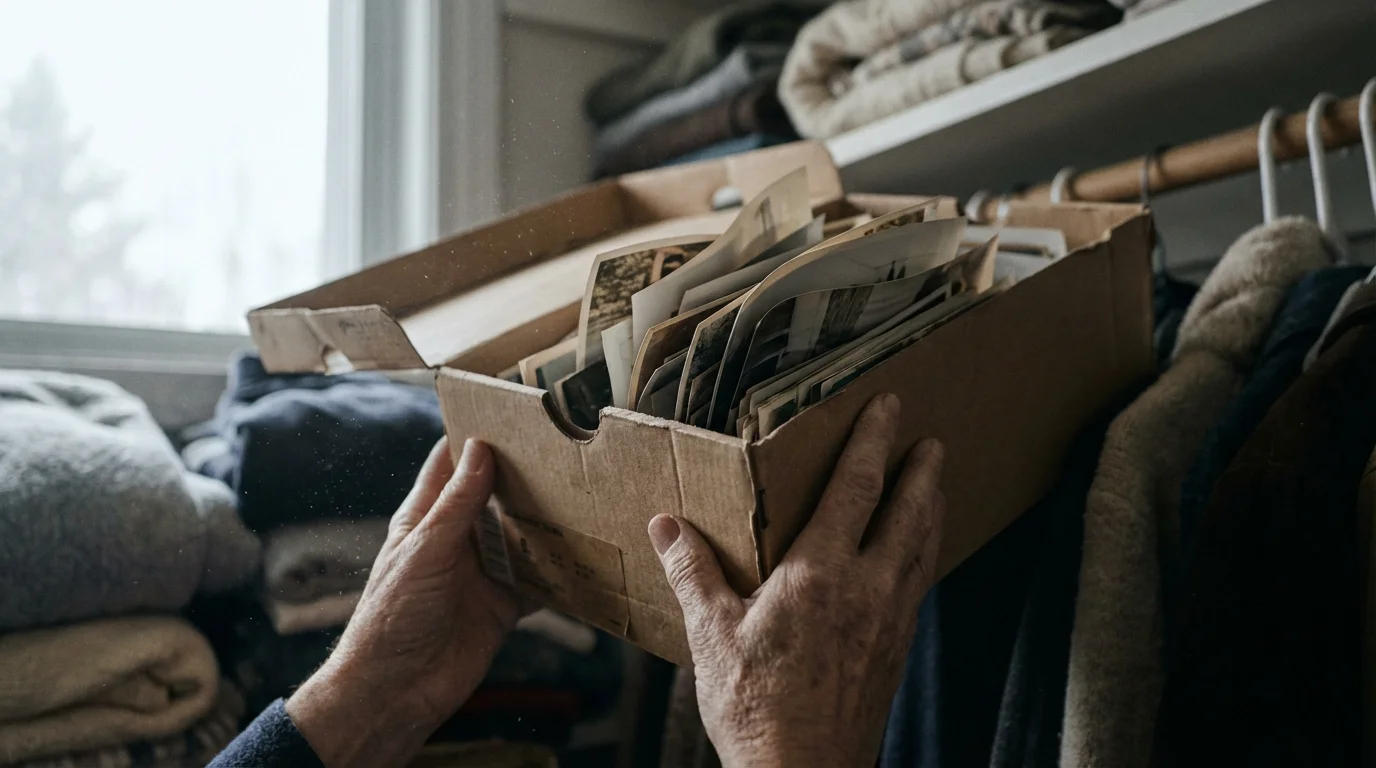
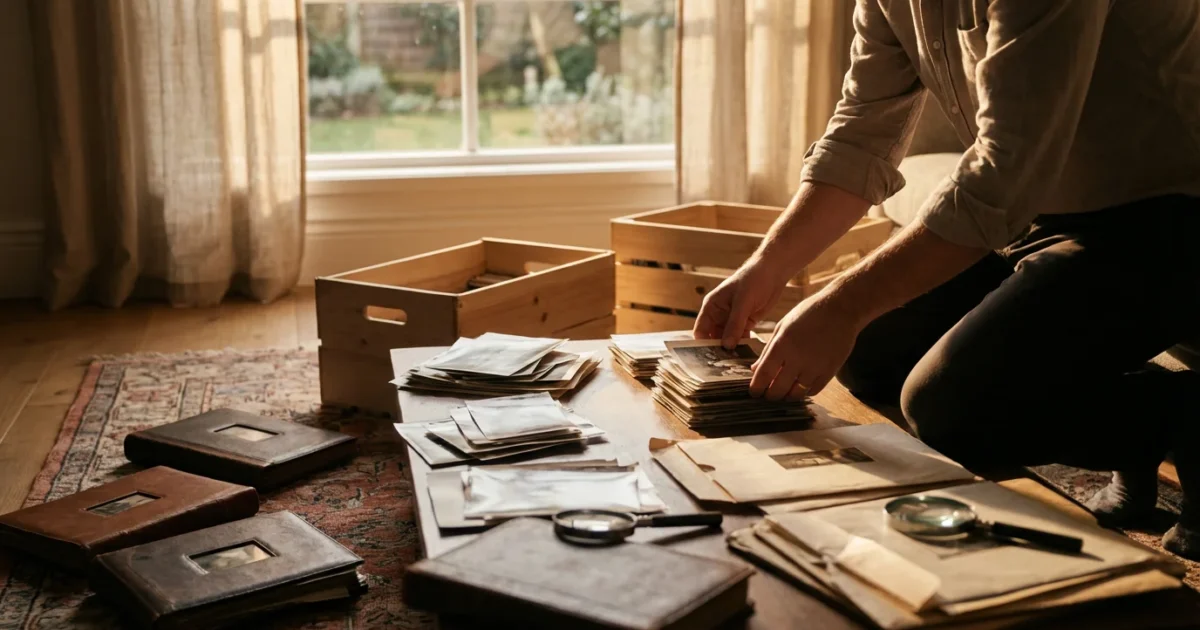
Phase 1: The Initial Sweep and Collection
The first step in your room-by-room journey involves systematically locating and collecting all your physical photo prints. This phase is about gathering, not sorting. Avoid the temptation to delve into memories or start categorizing here; you will have a dedicated phase for that.
If your primary goal is genealogy, you may want to follow specific steps for organizing photos for a family history project during the collection phase.
How to Execute the Initial Sweep:
- Designate a Central Staging Area: Choose a clean, dry space in your home, like a spare room or a large table, where you will bring all collected photos. This area will become your sorting hub.
- Tackle One Room at a Time: Start with an obvious room, perhaps the living room, and systematically search every drawer, shelf, box, and album. Look in unexpected places too, like under beds or in old suitcases.
- Collect All Photo-Related Items: Gather loose prints, photo albums, negatives, slides, and even photo-laden scrapbooks. Place them in your temporary storage bins, clearly labeling each bin with the room it came from (e.g., “Living Room Closet,” “Attic Box 3”). This helps you track their origin.
- Handle with Care: Wear white cotton gloves when handling loose prints. If prints are stuck together, do not force them apart; note their condition for later assessment by a professional conservator if necessary.
- Move Methodically: Once you complete one room, move to the next. Continue until you have systematically searched every area of your home where photos might reside. This diligent approach ensures you capture everything.
This phase is foundational. By centralizing all your photo assets, you gain a clear picture of the full scope of your project and prepare for the detailed work ahead.
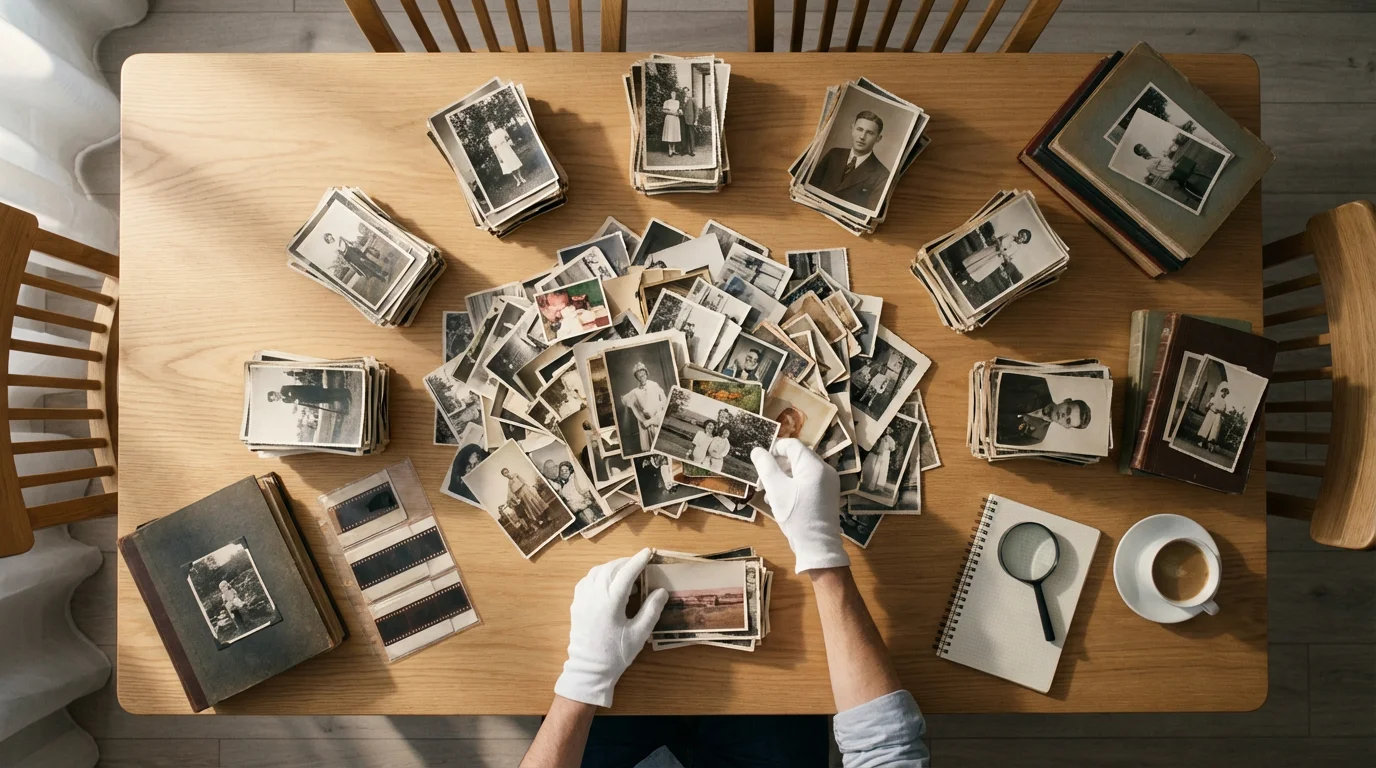
Phase 2: Sorting and Categorization at the Central Hub
With all your photos gathered in your central staging area, you are ready for the crucial sorting phase. This is where you begin to impose order on the collection and lay the groundwork for effective physical photo storage. This phase requires focused attention and a clear strategy.
Before you begin, consider the most effective sorting method for how you will use and search for these images in the future.
The Sorting Process:
- Prepare Your Workspace: Ensure your central hub is clean, well-lit, and has ample surface area. Lay down clean, lint-free cloths to protect your photos during handling. Have your archival gloves, soft brush, and temporary labels ready.
- First Pass – Culling the Unnecessary:
- Duplicates: Identify and remove exact duplicates. Keep only the best-quality print.
- Blurry or Poor Quality: Discard photos that are out of focus, poorly exposed, or otherwise unsalvageable.
- Unidentifiable: If a photo holds no meaning and cannot be identified by anyone in the family, consider discarding it. Be thoughtful here, as context can sometimes emerge later.
“Preservation is about making conscious decisions. You don’t need to keep every single snapshot. Focus on the images that tell a story, evoke emotion, or document significant events. Quality over quantity ensures your most precious memories receive the attention they deserve.”
- Create Core Categories: Establish broad categories for initial grouping. Common categories include:
- Chronological: Group photos by year or decade. This is often the easiest and most logical starting point for how to organize boxes of old photos, especially if dates are present.
- Events: Birthdays, holidays, weddings, graduations, vacations, family reunions.
- People/Families: Group photos centered around specific individuals or branches of the family tree.
- Places: Homes, cities, travel destinations.
- Themes: Pets, hobbies, landscapes.
You can combine categories, such as “Smith Family – 1970s” or “Summer Vacation – 1998.”
- Sort by Category: Start going through your temporary bins, one at a time. As you pick up each photo, assign it to a preliminary category. Use temporary labels or small slips of paper to mark piles. For instance, create separate piles for “1980s Family,” “Grandparents,” “Vacation 2005.”
- Refine and Detail: Once broad categories are established, subdivide them further. If you have a “1980s Family” pile, you might break it down into “1980,” “1981,” “1982,” etc., or by specific events within that decade.
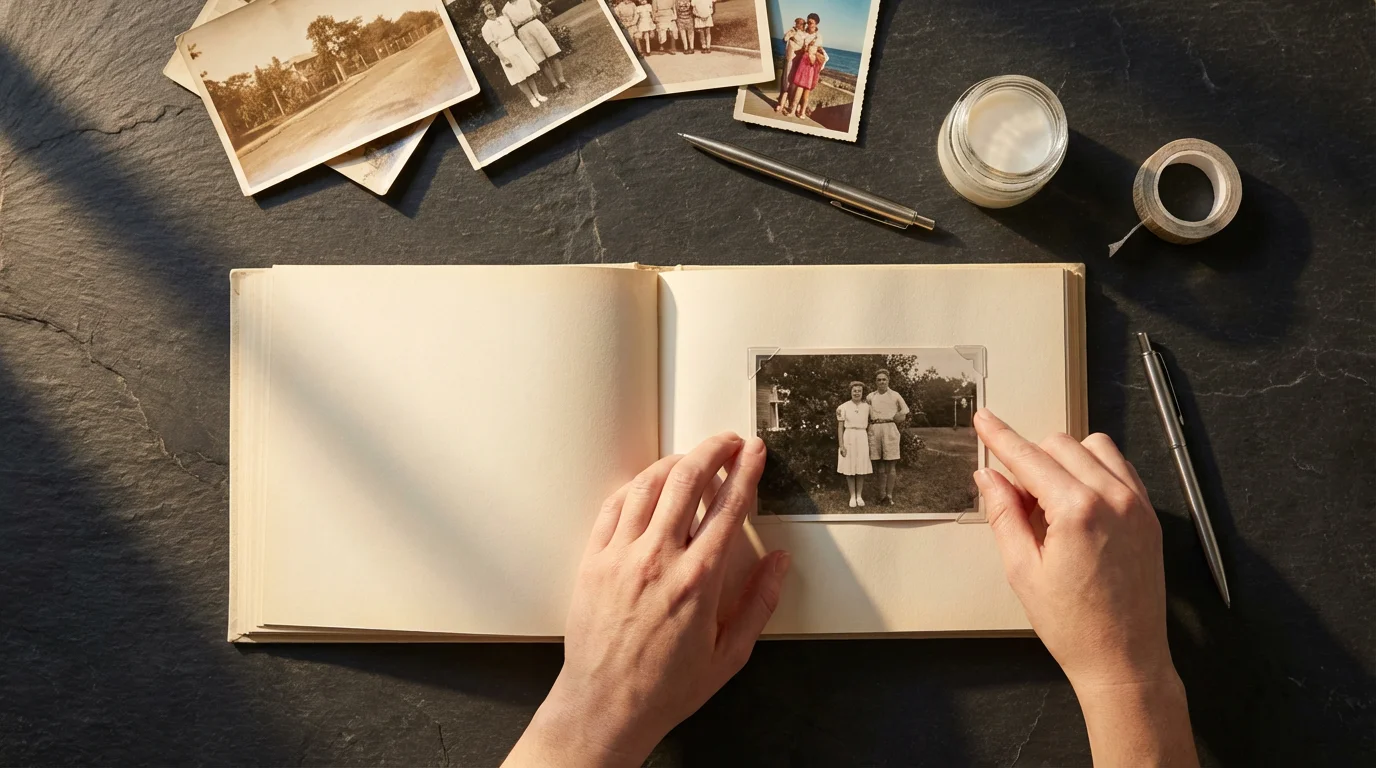
- Add Identifying Information: As you sort, if you know the details (who, what, when, where), lightly write them on the back of the print using your archival pen or pencil. If the photo is too fragile, write on an archival sleeve or a separate index card to accompany it. This step is critical for future context and ensures the memories are preserved along with the images.
This meticulous sorting process transforms a chaotic collection into an organized archive. You are now ready to consider how to permanently organize photo prints for long-term accessibility.

Phase 3: Digitization for Preservation and Accessibility
Digitizing your physical photo prints is a vital step in modern photo preservation. It provides a safeguard against loss from fire, flood, or decay, and significantly enhances your ability to share and enjoy your memories. You create a digital clone, protecting the legacy even if the physical original is compromised.
Once you have digitized your images, you will need a logical folder structure for your photo library to keep your computer organized.
Understanding how to scan old photos at home properly is essential to creating high-quality digital backups that last.
A critical part of this phase is deciding on the right storage medium by comparing external hard drives vs cloud storage for your long-term digital preservation.
Your Digitization Strategy:
- Choose Your Scanner:
- Flatbed Scanner: Ideal for most prints, especially those of varying sizes or delicate condition. It offers high resolution and control. Look for models capable of at least 600 dpi (dots per inch).
- Dedicated Photo Scanner: Some scanners specialize in photos, often offering faster batch scanning or features for slides and negatives.
- Scanning Service: If you have a massive collection or complex formats like slides and negatives, a professional scanning service can save you significant time and ensure high-quality results. Research services with good reviews and archival handling practices.
- Scanning Best Practices:
- Resolution: Scan at a minimum of 300 dpi for general viewing and printing, but 600 dpi or higher is recommended for archival purposes, allowing for future enlargements and detailed cropping.
- File Formats:
- TIFF (Tagged Image File Format): A lossless format, ideal for archival preservation. It retains all image data, making it suitable for editing and long-term storage without degradation.
- JPEG (Joint Photographic Experts Group): A compressed, “lossy” format. Use it for sharing and everyday viewing, but always keep a high-resolution TIFF master file if possible. Save JPEGs at the highest quality setting to minimize compression artifacts.
- Clean Photos and Scanner Bed: Before scanning, gently brush photos with a soft brush to remove dust. Clean the scanner glass regularly with a lint-free cloth and glass cleaner to prevent dust or smudges from appearing in your digital scans.
- File Naming Convention: Establish a consistent naming system (e.g., “YYYY-MM-DD_Event_Location_Subject.tif”). This helps organize photo prints digitally and ensures easy retrieval.
- Digital Storage and Backup:
- Local Storage: Save your scanned images to an external hard drive or your computer’s hard drive.
- Cloud Storage: Utilize cloud services (e.g., Google Photos, Dropbox, OneDrive) for offsite backup. This protects against local data loss.
- Redundancy: Follow the “3-2-1” backup rule: keep at least three copies of your data, on two different types of media, with one copy offsite. This might mean your computer, an external hard drive, and a cloud service.
- Use Archival Sleeves and Enclosures:
- Individual Protection: Place each valuable or fragile print in an individual archival polyester (Mylar), polypropylene, or acid-free paper sleeve. This prevents rubbing, scratching, and keeps dust away.
- Group Enclosures: For groups of photos that belong together (e.g., from the same event), place them in larger archival envelopes or folders before putting them in a box. Ensure these are also acid-free and lignin-free.
- Utilize Archival Photo Boxes:
- Sturdy and Acid-Free: Transfer your sleeved and grouped prints into sturdy, acid-free, lignin-free `photo boxes`. These boxes shield prints from light, dust, and airborne pollutants.
- Do Not Overfill: Pack boxes loosely enough that you can easily remove prints, but not so loosely that photos shift and buckle. Avoid cramming too many prints into one box, which can cause damage.
- Orientation: Store prints vertically, like files in a cabinet, if possible. This minimizes pressure on individual prints and prevents warping. Use acid-free dividers within the box to separate categories or prevent slumping.
- Environmental Control for Long-Term Storage:
- Temperature and Humidity: Store your photo boxes in a cool, dry, and stable environment. Ideal conditions are generally below 75°F (24°C) with relative humidity between 30% and 50%. Avoid basements, attics, garages, and exterior walls, which experience significant fluctuations.
- Light Exposure: Store prints in darkness. Light, especially UV light, causes fading and discoloration. Archival boxes provide excellent light protection.
- Pest Control: Keep storage areas clean to deter insects and rodents, which can cause irreparable damage to prints.
- Air Circulation: Ensure good air circulation around your storage boxes to prevent moisture buildup.
- Labeling and Indexing Your Boxes:
- Clear External Labels: Label each archival box clearly on the outside with its contents (e.g., “Family Photos 1960-1975,” “Weddings & Birthdays,” “Travel: Europe 1980s”).
- Internal Index: Create a more detailed index (digital or on an archival card inside the box lid) listing the specific contents, categories, and date ranges within that box. This makes it easy to find specific photos without rummaging.
- Archival Photo Albums: Create new, acid-free photo albums using your favorite prints. These allow for a curated narrative and are perfect for casual viewing. Consider themed albums for events, people, or eras.
- Digital Photo Frames: Load your digitized photos onto a digital photo frame. These offer a rotating display of your entire collection, bringing dynamic life to your living space.
- Custom Photo Books: Use online services to design and print high-quality photo books using your digitized images. These make wonderful gifts and provide a durable, engaging way to share your family story.
- Online Photo Galleries: Create private or public online galleries for family members to view and comment on. Many cloud storage services offer this functionality.
- Heirloom Photo Displays: Select a few truly iconic prints to frame using archival mats and UV-protective glass. Display these in areas away from direct sunlight and high humidity to prevent fading.
- Scrapbooking with Archival Materials: If you enjoy scrapbooking, ensure you use only acid-free and lignin-free papers, adhesives, and embellishments to protect your cherished prints within the scrapbook.
- Regular Check-Ins: Periodically, perhaps once a year, inspect your stored physical photo prints. Check for any signs of environmental damage, such as mold, insect activity, or warping. Address any issues promptly.
- Integrate New Photos Promptly: Develop a habit of processing new photos (both physical and digital) regularly. Do not let them accumulate in random piles. Assign them to your established categories and place them in their designated archival storage or digital folders.
- Update Your Digital Backups: Ensure your digital backups are current. Regularly sync your cloud storage and refresh your external hard drives. Technology evolves, so periodically migrate your digital files to new, stable media formats.
- Review and Refine: Your family history evolves. As new generations emerge or new stories are uncovered, you might need to adjust your categorization or add new descriptive metadata to your digital files. Your system should be flexible enough to accommodate these changes.
- Educate Family Members: Share your organization system with trusted family members. Show them where the photos are stored, explain the labeling, and teach them about archival care. This ensures the legacy can continue should you be unable to manage it.
Digitization safeguards your visual history, creating a robust backup and opening doors for sharing and creative projects. For more in-depth guidance on digital preservation, consult resources like the Image Permanence Institute.

Phase 4: Archival Storage Solutions for Physical Prints
After careful sorting and digitization, you are ready to implement archival `physical photo storage` solutions for your original prints. The goal is to protect them from environmental damage, physical harm, and chemical degradation. This is where your investment in archival supplies truly pays off.
Best Practices for Storing Physical Photographs:
By following these guidelines, you will establish the best way to store physical photographs, safeguarding them for future generations. The Library of Congress offers extensive resources on proper care and handling of photographs for those seeking more technical details on preserving their collection.
Phase 5: Creative Display and Sharing Your Memories
Preserving your photos is just the beginning. The ultimate joy comes from sharing and displaying your memories. After all the hard work to organize photo prints, you want to ensure your family history is seen and celebrated.
Ideas for Displaying and Sharing:
Sharing your photos breathes new life into old memories, sparking conversations and strengthening family bonds. You transform a static archive into a vibrant legacy.

Maintaining Your Organized Photo Collection
Organizing your photos is a significant undertaking, but it is not a one-time event. Establishing a routine for ongoing maintenance ensures your hard work endures and your collection remains manageable. A proactive approach protects your investment in time and resources.
To keep the clutter from returning, consider implementing a 10-minute daily photo organization routine to manage new acquisitions as they come into your home.
Tips for Ongoing Maintenance:
Consistent maintenance prevents the overwhelming chaos you initially faced. It transforms photo preservation from a monumental task into a simple, integrated part of your life, ensuring your family’s visual heritage remains vibrant and accessible.
Frequently Asked Questions
How often should I review my physical photo collection?
Review your physical photo collection at least once every 3-5 years. This allows you to check for any signs of deterioration, update your organization system, and ensure your preservation methods remain effective. Regular reviews also offer an opportunity to digitize any prints you might have overlooked or acquired since your last major organizing effort.
Can I store my photo albums in an attic or basement?
Attics and basements are generally unsuitable for long-term photo storage. These areas often experience significant fluctuations in temperature and humidity, which can accelerate the deterioration of photographs. High humidity can lead to mold growth and sticking, while extreme temperatures cause materials to expand and contract, damaging prints. Opt for a cool, dry, and stable environment within your main living space, like a closet or a dedicated storage cabinet, away from direct sunlight.
What is the most common mistake people make when organizing old photos?
One of the most common mistakes is trying to do too much at once. Facing a large collection can feel overwhelming, leading to burnout and abandonment of the project. A room-by-room approach, as discussed, breaks the task into manageable segments. Another frequent error is using non-archival materials, such as standard cardboard boxes or acidic paper albums, which can damage photos over time. Always prioritize acid-free and lignin-free products.
Is it better to store photos in albums or archival boxes?
Both archival albums and archival boxes offer excellent protection when chosen carefully. Archival albums, especially those with polypropylene pages and acid-free inserts, allow for easy viewing and storytelling. Archival boxes, on the other hand, provide a more compact and secure environment, protecting individual sleeved prints from light and dust. The best approach often combines both: use albums for frequently viewed or themed collections and archival boxes for the bulk of your organized, less frequently accessed prints.
Disclaimer: This article is for informational purposes only. When handling valuable or irreplaceable photographs, consider consulting a professional conservator. Always test preservation methods on non-valuable items first.
To determine which method suits your library, explore our comparison of organizing photos by event, date, or people to see which approach works best for your needs.
In addition to naming files, developing a logical folder structure for your photo library will make retrieving specific memories much faster.


Leave a Reply