
You have a treasure trove of memories, whether you inherited boxes of faded photographs or accumulated thousands of digital images on various devices. These photographs tell your family’s story, preserving moments, people, and places that define your heritage. However, the sheer volume can feel overwhelming, leading many to postpone the crucial task of organizing and preserving them. Creating a structured home photo archive protects these invaluable assets for future generations. This guide provides a step-by-step approach to build a robust photo organization system, ensuring your precious memories endure.

Why Create a Home Photo Archive?
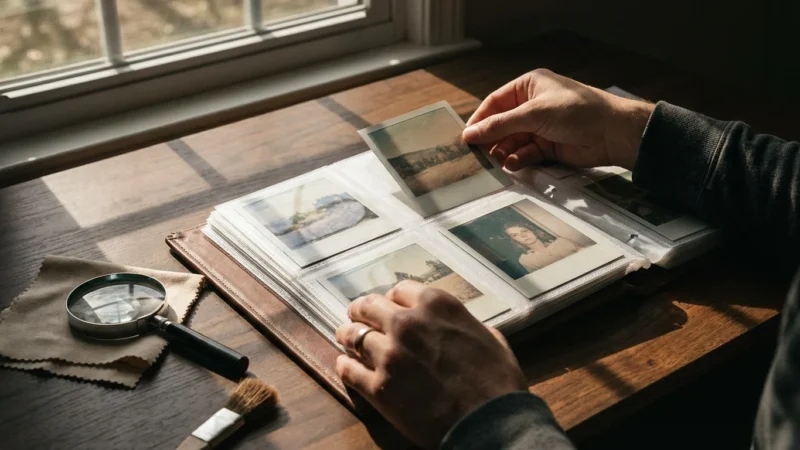
You might ask why dedicate time and effort to a formal home photo archive. The answer lies in safeguarding your history. Photographs are fragile; physical prints degrade over time due to light, humidity, and improper handling. Digital files face threats from hardware failure, software obsolescence, and data corruption. A well-organized photo archive prevents loss, ensures accessibility, and enhances your ability to share and celebrate your family’s journey. Imagine finding a box of unlabeled photos from your grandparents’ youth. Without proper organization, those faces remain anonymous, and stories untold. A systematic approach transforms a jumbled collection into an accessible narrative, a living legacy for you and your descendants. This proactive step ensures that the memories you cherish today will be available to future generations, complete with context and care.
If you have decades of files to sort, learning how to organize 20 years of digital photos can provide a clear roadmap for your digital archive.

Gathering Your Photographic Heritage
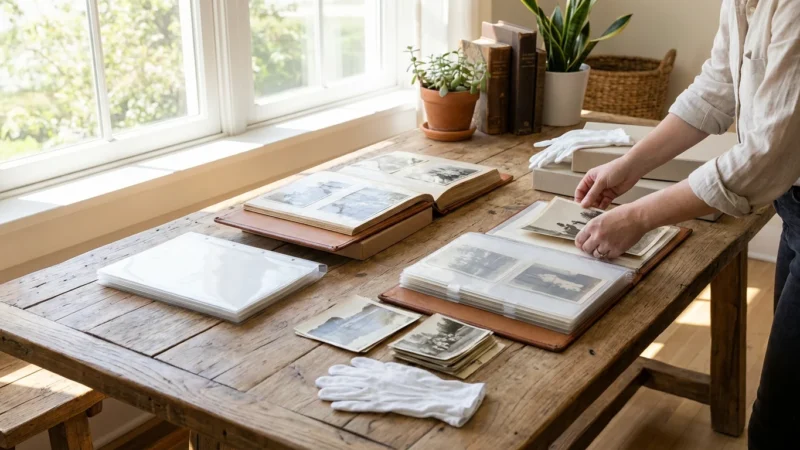
The first step in creating your home photo archive system involves collecting all your photographs. This initial phase can feel daunting, but a systematic approach makes it manageable. Gather every photograph, negative, slide, and digital image file you possess. Look in attics, basements, old shoeboxes, albums, digital camera memory cards, external hard drives, cloud storage accounts, and even old phones. Create a designated workspace, a clean, dry area where you can spread out your collection. Use a large table covered with a clean sheet or paper to protect your photos from dust and accidental spills. As you collect items, place them in temporary, acid-free storage boxes or archival quality folders. Avoid stacking large piles of photos directly on top of each other, as this can cause damage. Label these temporary containers broadly, for example, “Grandma’s Photos,” “Family Vacations,” or “Digital Photos Unsorted.” This initial collection phase is about bringing everything into one place, not about detailed organization yet. You want to see the full scope of your project.
If your collection is scattered throughout your house, following an organizing physical photo prints room-by-room approach can make the initial gathering process much less intimidating.
The American Institute for Conservation emphasizes, “The first step in any preservation effort is understanding the scope of your collection. You cannot protect what you do not know you have.” This principle applies directly to your home photo archive, guiding you to bring all elements of your photographic heritage into view before you begin detailed work.

Essential Supplies for Physical Photo Preservation
Before you begin handling and organizing your physical prints, ensure you have the correct archival-quality supplies. Using non-archival materials can do more harm than good, accelerating degradation. You will need:
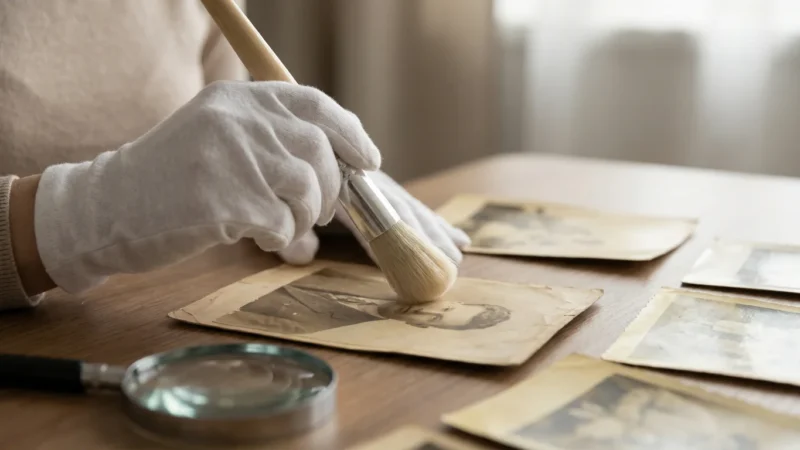
- Archival Gloves: Always wear clean, lint-free cotton or nitrile gloves when handling prints, negatives, or slides. Your skin’s natural oils and dirt can leave irreversible fingerprints and residues.
- Soft Brush or Air Blower: Use a soft, camel-hair brush or a photographic air blower to gently remove dust and loose debris from photos. Avoid canned air, which can contain propellants that damage emulsions.
- Archival Photo Boxes: These boxes are acid-free, lignin-free, and buffered to neutralize acids, preventing yellowing and deterioration. Choose sturdy boxes that can withstand long-term storage.
- Acid-Free Envelopes or Sleeves: Use individual sleeves or envelopes for delicate prints, negatives, and slides. Polypropylene, Mylar, or uncoated paper are safe materials. Avoid PVC sleeves, which leach plasticizers that damage photos over time.
- Pencils and Archival Pens: Label photos and enclosures with a soft-lead pencil on the back edges of prints (very lightly) or, ideally, on the archival sleeves/boxes. For more permanent labeling on archival materials, use an archival pigment-ink pen.
- Photo-Safe Adhesives (Optional): If you are re-attaching photos to new album pages, use photo corners or acid-free adhesive dots. Never use regular tape or glue.
- Notebook and Pen: Keep a detailed log of your progress, including locations of original photos, dates, and any identification information you discover.
Investing in these supplies protects your physical memories. Reputable archival suppliers specialize in products designed for long-term preservation, ensuring your materials meet industry standards. For specific recommendations, the Library of Congress Preservation resources offer excellent guidance on material selection.

The Physical Photo Preservation Process
Now that you have gathered your photos and acquired the necessary supplies, you can begin the hands-on preservation process for your physical collection. This systematic approach helps you manage even the largest collections.
During this phase, it is often helpful to focus on decluttering your photo collection to ensure you are only archiving the most meaningful images.
For more detailed techniques on long-term care, read our full guide on how to store old photographs to prevent fading and damage.
Step 1: Initial Sorting and Prioritization
Begin by broadly sorting your collected items into manageable piles. Categories might include: “Family History,” “Vacations,” “Events,” “Portraits,” or “Unidentified.” If a stack feels too large, subdivide it further, perhaps by decade or by the person who owned them. Prioritize the most fragile or historically significant items first. These might include very old photographs, unique artifacts, or items already showing signs of degradation. Handling these with extra care ensures their survival.
Step 2: Cleaning and Inspection
Wearing your archival gloves, gently clean each photograph. Use a soft brush or air blower to remove dust. For more stubborn surface dirt, a very soft, lint-free cloth can be used with extreme caution, but avoid any liquids or rubbing directly on the image emulsion. Inspect each photo for damage: tears, creases, fading, or pest damage. Separate severely damaged photos into a “Restoration Needed” pile. Do not attempt DIY repairs on valuable or severely damaged prints; consult a professional conservator for these.
Step 3: Identification and Documentation
This step is crucial for adding context to your visual history. As you handle each photo, try to identify the subjects, date, location, and event. If you know this information, lightly write it on the back edge of the photo using a soft pencil, or, even better, record it on the photo’s individual archival sleeve or box. Involve family members, especially older relatives, in this process. Their memories can unlock stories behind unidentified faces and places, adding immense value to your archive. Create a simple logbook or spreadsheet to record details for each photo or group of photos.
Step 4: Rehousing in Archival Materials
Once cleaned and identified, rehouse your photos. Place individual prints, negatives, and slides into their appropriate acid-free sleeves or envelopes. For prints, consider placing them horizontally in archival boxes, grouped by category, date, or family branch. Ensure prints lie flat and are not overcrowded. Label the sleeves and boxes clearly with the contents, dates, and any relevant details. This organized storage protects them from environmental damage and makes future retrieval easy. For example, a box might be labeled “Smith Family Album: 1950s Vacations” or “Johnson Family Portraits: 1970-1980.”

Digitizing Your Physical Photo Collection
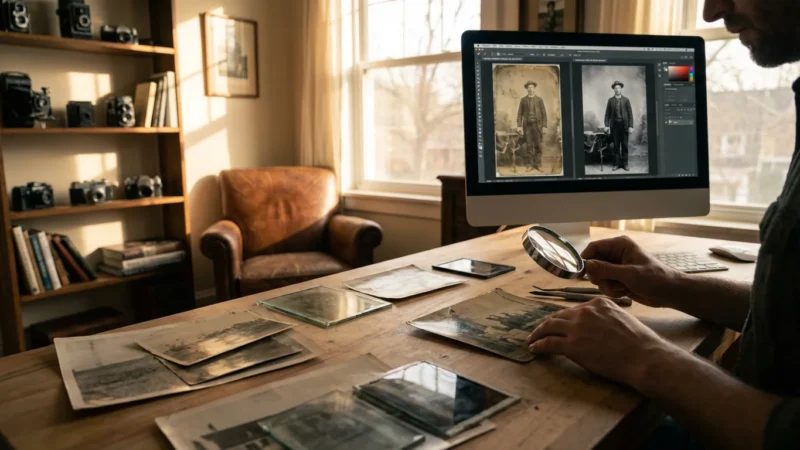
Digitizing your physical photographs creates a permanent digital backup and expands their accessibility. This process transforms fragile prints into robust digital files, protecting them from physical loss or degradation. High-quality digitization ensures that details, colors, and nuances are accurately captured. You can choose to outsource this task to a professional service or do it yourself.
For those with extensive physical libraries, batch scanning techniques can significantly speed up the conversion process.
After your images are scanned, creating a folder structure for your photo library will ensure your new digital assets remain easy to find and navigate.
Before starting your scanning project, it is helpful to understand the importance of backing up physical photos digitally to safeguard your family legacy.
DIY Digitization Options:
- Flatbed Scanner: A dedicated photo flatbed scanner offers the best quality for prints, negatives, and slides. Look for scanners with high optical resolution (at least 600 dpi for prints, 2400-4800 dpi for negatives/slides) and features like Digital ICE for dust and scratch removal. Scan photos as TIFF files for maximum quality and preservation, then save JPEGs for everyday viewing and sharing. TIFF files retain more data and are less prone to compression artifacts.
- Smartphone Scanning Apps: For quick digitization of non-critical prints, several smartphone apps (e.g., Google PhotoScan, Adobe Scan) use your phone’s camera to capture images, often with built-in glare reduction. While convenient, they offer lower resolution and detail compared to a flatbed scanner. Use these for casual sharing, not as your primary archival copy.
- Digital Camera with Macro Lens: For large volumes or oversized prints, a digital camera on a copy stand with good lighting and a macro lens can be efficient. This method requires careful setup to ensure even lighting, focus, and perspective.
Best Practices for Digitization:
- Resolution: Scan prints at a minimum of 300 dpi (dots per inch) for everyday use, and 600 dpi or higher for archival quality. Scan negatives and slides at even higher resolutions, such as 2400-4800 dpi, to capture maximum detail.
- Color Depth: Scan in 24-bit color (True Color) for color photos, and 8-bit grayscale for black and white.
- File Format: Always save your master digital files as uncompressed TIFFs or PNGs. These formats retain all image data without loss. Create JPEG copies for sharing and web use, as they are smaller and more universally compatible.
- Batch Scanning: Use your scanner’s software to batch scan multiple photos at once, then crop and adjust them individually. This saves significant time.
- Calibration: Calibrate your monitor regularly to ensure accurate color representation during editing.
Once digitized, you create a new set of assets that require their own preservation strategy. This transition from physical to digital means you extend the life of your memories, making them more accessible than ever.

Building Your Digital Photo Organization System
Digitized photos, or images born digital, need a robust digital photo organization system. Without structure, digital files can become an impenetrable mess, hindering your ability to find and enjoy your memories. A consistent system is key to long-term accessibility.
File Naming Conventions
Adopt a consistent file naming convention that provides context at a glance. Avoid generic names like “IMG_0001.jpg.” A good naming convention includes the date, a descriptive keyword, and potentially a sequence number. For example: `YYYY-MM-DD_EventName_Location_001.jpg`.
Here’s a breakdown:
- YYYY-MM-DD: Start with the year, month, and day. This allows chronological sorting regardless of creation date.
- EventName: A brief description, e.g., “FamilyReunion,” “GrandmasBirthday,” “CaliforniaTrip.”
- Location (Optional): Add if relevant, e.g., “Paris,” “GrandCanyon.”
- _001 (Sequence): A three-digit sequence for multiple photos from the same event, ensuring proper order.
Example: `2005-07-15_SmithWedding_Denver_001.jpg`, `2005-07-15_SmithWedding_Denver_002.jpg`
Folder Structure
Create a hierarchical folder structure that makes sense to you. A common and effective structure starts broad and narrows down. For instance:
Photos
├── 2023
│   ├── 2023-01_NewYearsParty
│   ├── 2023-03_SpringBreak_Florida
│   └── 2023-06_Graduation
├── 2022
│   ├── 2022-02_SkiTrip
│   └── 2022-08_SummerVacation_Europe
└── FamilyHistory
    ├── Grandparents_Smith
    │   ├── 1950s_EarlyLife
    │   └── 1970s_Anniversary
    └── Parents_Johnson
        ├── 1980s_Childhood
        └── 2000s_Travels
This structure organizes photos by year, then by event or month. You might also include top-level folders for “Scanned_Physical_Photos” to separate digitized prints from born-digital images initially, or for “ImportantDocuments” if you include other scanned family papers.
Keywords and Metadata
Beyond file names and folders, embed descriptive keywords (tags) into your digital images. Most photo management software (e.g., Adobe Lightroom, Apple Photos, ACDSee, digiKam) allows you to add keywords, captions, and other metadata directly to the image files (IPTC/EXIF data).
Suggested keywords:
- People: Names of individuals (e.g., “Sarah,” “Tom Smith,” “Grandma Carol”)
- Locations: Specific places (e.g., “Paris,” “Eiffel Tower,” “Family Home,” “Rocky Mountains”)
- Events: Occasions (e.g., “Wedding,” “Birthday,” “Christmas,” “Graduation,” “Vacation”)
- Themes: Broader categories (e.g., “Nature,” “Food,” “Architecture,” “Pets”)
- Years/Dates: Reinforce the date if not in the filename or as additional tags (e.g., “1995,” “Summer 2003”)
Metadata tagging enhances searchability dramatically. If you want to find all photos of “Aunt Martha” at “Christmas” in “Florida,” keywords make this instantaneous. This becomes crucial as your collection grows into thousands of images. Regular input of metadata is an investment that pays off immensely in the long run.

Implementing a Robust Digital Backup Strategy
A digital photo archive is only as secure as its backup strategy. Digital files are susceptible to various threats: hardware failure, accidental deletion, software glitches, and cyberattacks. A robust backup plan, often called the “3-2-1 rule,” minimizes the risk of catastrophic data loss.
The 3-2-1 Backup Rule:
- 3 Copies of Your Data: Maintain three copies of your important files. This means your primary working copy and at least two backups.
- 2 Different Media Types: Store your backups on at least two different types of storage media. This diversifies your risk; if one type fails, you have another. Examples include external hard drives, network-attached storage (NAS), USB drives, or cloud storage.
- 1 Off-Site Copy: Keep at least one copy off-site. A local disaster (fire, flood, theft) could destroy all local backups. An off-site copy, such as cloud storage or a drive stored at a friend’s house, protects against this.
Practical Backup Solutions:
- External Hard Drives: Affordable and offer large storage capacity. Connect them to your computer and manually or automatically sync your photo folders. Use at least two separate external drives for backups. Store one physically separate from your computer.
- Cloud Storage Services: Services like Google Drive, Dropbox, Microsoft OneDrive, Amazon Photos, or specialized photo backup services (e.g., Backblaze, CrashPlan) offer convenient off-site storage. They often provide automatic syncing and versioning, meaning you can retrieve older versions of files. While convenient, understand their terms of service regarding data privacy and accessibility.
- Network Attached Storage (NAS): A NAS is a dedicated storage device connected to your home network. It acts like your personal cloud, allowing multiple users and devices to access files. Many NAS systems support RAID configurations, which mirror data across multiple internal drives, providing an additional layer of local redundancy.
Automate Your Backups:
Manual backups are prone to human error and inconsistency. Set up automated backup routines using built-in operating system tools (e.g., Windows File History, Apple Time Machine) or third-party backup software. Schedule these backups to run regularly, ideally daily or weekly, depending on how often you add new photos. Regularly test your backups by restoring a few files to ensure they are functional and uncorrupted. A backup strategy is only effective if you can successfully retrieve your data when needed. This systematic approach to digital preservation ensures your digital photos remain safe and accessible, safeguarding your family’s history against unforeseen digital calamities.
The Image Permanence Institute (IPI) advises, “Digital preservation is not a one-time task but an ongoing commitment. Regular backups and monitoring of storage media are non-negotiable for long-term data survival.” This highlights the continuous nature of protecting your digital assets.

Creative Ways to Enjoy and Share Your Archive
An archive serves little purpose if it remains hidden away. Once you have organized and preserved your photos, you open up countless opportunities to enjoy and share them. This transforms your efforts from a task into a joyful experience, keeping memories alive and relevant for your family.
Digital Display and Sharing:
- Digital Photo Frames: Load a selection of your favorite photos onto a digital frame for a rotating display of memories in your home.
- Online Galleries: Create private online galleries using services like Flickr, SmugMug, or Google Photos to share specific albums with family and friends, no matter where they are.
- Social Media (Selectively): Share select historical photos or recent family events on social media platforms, adding context and stories to engage a broader audience. Remember to consider privacy settings.
- Video Montages: Use video editing software to create dynamic slideshows or video montages set to music, perfect for special occasions or family gatherings.
Physical Display and Creation:
- Photo Books: Design custom photo books that tell a specific story, such as “Our Family History,” “Grandma’s Life,” or “Summer Vacations 2000-2010.” These make wonderful gifts and coffee table books.
- Prints and Enlargements: Print high-quality copies of your favorite photos for framing and displaying around your home. Consider large format prints for impactful wall art.
- Memory Boxes: Create themed memory boxes that combine printed photos with other keepsakes like letters, tickets, or small mementos.
- Scrapbooking: For those who enjoy crafting, scrapbooking allows you to combine photos with decorative elements and journaling to tell more elaborate stories. Ensure you use archival-safe materials for any scrapbooking project.
Sharing your archive reinforces its value. It sparks conversations, educates younger generations about their heritage, and ensures that the faces and stories within your photos continue to resonate. By actively engaging with your archive, you prevent it from becoming a forgotten collection. You transform it into a vibrant, accessible history that enriches your life and the lives of your loved ones.

Maintaining Your Home Photo Archive
Creating a home photo archive is not a one-time project; it is an ongoing commitment. Regular maintenance ensures its integrity, accessibility, and continued relevance. Consistent habits prevent the accumulation of new unorganized items and protect against technological changes.
Regular Review and Update Schedule:
- Annual Check-up: Dedicate time at least once a year for a comprehensive review. Check physical storage for signs of environmental damage (humidity, pests). Review digital backups for functionality and completeness.
- Integrate New Memories: Develop a routine for processing new photos as they arrive. Whether from a phone, camera, or a newly discovered box of old prints, immediately incorporate them into your established organization and backup system. This prevents new backlogs.
- Update Metadata: As family members grow or events occur, update photo metadata. For example, add new names to group photos or update locations.
Monitoring Environmental Conditions:
For physical photos, environmental control is critical. Store your archival boxes in a stable environment. Ideal conditions include:
- Temperature: Maintain a consistent temperature, ideally between 65-70°F (18-21°C). Avoid extreme fluctuations.
- Humidity: Keep relative humidity between 30-50%. High humidity encourages mold growth and degradation, while very low humidity can make materials brittle. A dehumidifier or humidifier might be necessary depending on your climate.
- Light: Store photos away from direct sunlight and fluorescent light, which cause fading. Use opaque archival boxes for protection.
Staying Current with Technology:
Digital archiving requires vigilance regarding technological advancements. File formats become obsolete, and storage media degrade or are replaced by newer options.
- Migration: Periodically migrate your digital files to newer, more stable storage media as technology evolves. For example, move data from aging hard drives to newer, larger capacity drives or more reliable cloud services.
- Format Conversion: If you have files in proprietary or less common formats, consider converting them to more widely supported, open-source formats (e.g., TIFF, JPEG, PNG) to ensure long-term accessibility.
- Software Updates: Keep your photo management software updated to ensure compatibility with new operating systems and file formats.
By treating your home photo archive as a living entity that requires ongoing care, you ensure its continued health and longevity. This diligent maintenance ensures your family’s photographic heritage remains a vibrant, accessible resource for generations to come, a testament to your foresight and dedication.
Frequently Asked Questions
Can I use regular shoeboxes for storing old photos temporarily?
While a regular shoebox can serve as a very temporary solution for gathering photos, you should not use it for long-term storage. Shoeboxes, like many consumer paper products, often contain acids and lignin that can leach into your photographs, causing them to yellow, become brittle, or degrade over time. For proper preservation, transfer photos to acid-free, lignin-free archival boxes as soon as possible.
What is the best way to handle very old or fragile photos?
When handling very old or fragile photographs, always wear clean, lint-free cotton or nitrile gloves to protect them from skin oils and dirt. Support the entire photograph, using two hands if necessary. Avoid bending, creasing, or touching the image surface. For severely damaged or extremely valuable items, consult a professional photograph conservator. They possess specialized knowledge and tools for safe handling and repair.
How often should I back up my digital photo collection?
The frequency of your digital photo backups depends on how often you add new photos or make significant changes to your collection. For most individuals, backing up weekly is a good practice. If you are a prolific photographer, consider daily backups. Automated backup solutions make this process easy and consistent, ensuring you always have recent copies of your precious memories.
Should I discard physical photos after digitizing them?
We do not recommend discarding physical photos simply because you have digitized them. A digital copy is an excellent backup, but it cannot replicate the tactile experience, historical authenticity, or unique material properties of an original print. Keep your physical photographs, especially those of high sentimental or historical value, in archival-safe storage. Consider them two distinct but equally valuable components of your home photo archive.
What is the difference between archiving and organizing?
Organizing involves arranging your photos logically, making them easy to find and use. Archiving goes beyond simple organization. It encompasses the long-term preservation of your photographs, both physical and digital, using archival-quality materials, environmental controls, robust backup strategies, and consistent maintenance. Organizing makes your photos accessible today, while archiving ensures they endure for future generations.
Disclaimer: This article is for informational purposes only. When handling valuable or irreplaceable photographs, consider consulting a professional conservator. Always test preservation methods on non-valuable items first.


Leave a Reply