
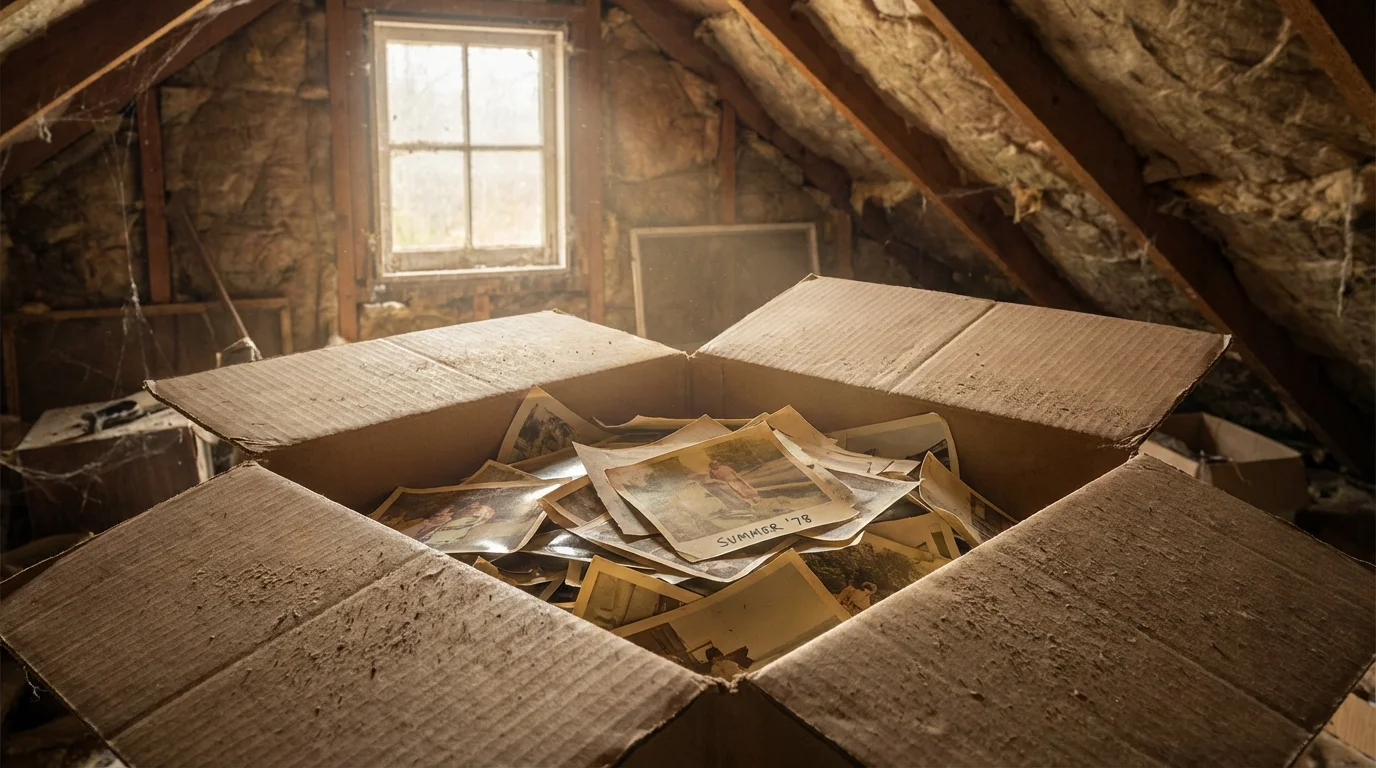
Your photographs hold priceless memories, capturing moments from family milestones to everyday joys. You likely treasure these tangible links to your past, whether they are brittle albumen prints from a century ago or glossy prints from a recent vacation. However, these precious objects face silent, persistent threats from their environment: humidity and temperature. These atmospheric conditions can significantly accelerate the deterioration of your photo collection, leading to irreversible damage. Understanding how these factors impact your images empowers you to implement effective preservation strategies, safeguarding your family history for generations to come. This guide provides you with practical, actionable insights to protect your photographic heritage.
In addition to climate factors, it is vital to protect photos from light damage and UV exposure to prevent long-term fading.

Humidity’s Insidious Impact on Photographs
Humidity, simply the amount of water vapor in the air, poses one of the most significant threats to the longevity of your photographs. Both high and low humidity levels cause damage, but high humidity is particularly destructive. Understanding the mechanisms of `photo humidity damage` helps you counter its effects effectively.
Certain formats, such as Polaroid prints, are particularly sensitive to moisture and may require even stricter climate controls.
**High Humidity: A Catalyst for Decay**
When the air holds too much moisture, photographic emulsions, paper bases, and even inks absorb this water. This absorption initiates a cascade of destructive processes:
* **Mold and Mildew Growth:** Relative humidity (RH) above 60% creates an ideal breeding ground for mold and mildew. These fungi feed on the organic components of photographs, leading to unsightly stains, structural weakening, and complete loss of image detail. Imagine uncovering a box of precious family photos, only to find black, fuzzy patches consuming your ancestors’ faces. That is mold at work, irreversibly destroying your memories.
* **Emulsion Softening and Sticking:** High moisture content softens the gelatin emulsion layer on many photographs. This makes images vulnerable to sticking to each other, to album pages, or to any surface they touch. Separating stuck photos almost invariably tears the emulsion, causing irreversible loss. You risk tearing a significant portion of the image, losing details that represent a moment in time.
* **Chemical Degradation:** Water acts as a solvent and a reactant. It accelerates chemical reactions within the photographic materials, fading dyes, causing silver images to tarnish or “mirror,” and yellowing paper bases. The vibrant colors of a snapshot from your childhood gradually diminish, replaced by dull, muted tones because of excessive moisture.
* **Physical Distortion:** The paper base of photographs expands and contracts with changes in moisture content. Repeated cycles of high and low humidity cause warping, curling, and brittleness. This stress weakens the paper fibers, making old photographs fragile and prone to cracking when handled. Think of an old postcard that curls inward, its edges stiff and easily broken.
**Low Humidity: A Different Threat**
While less common than high humidity damage, excessively low humidity also harms photographs. Dry conditions cause the paper and emulsion layers to become brittle and inflexible. This makes them highly susceptible to cracking, especially when you handle or move them. Low humidity can also lead to the shrinking and delamination of photographic layers, particularly in older, multi-layered prints. The delicate emulsion can separate from its paper backing, a devastating loss.
`How does humidity damage old photographs` is not a theoretical question, but a practical concern that demands your attention to prevent the physical and chemical breakdown of your collection.
Temperature: The Silent Accelerant of Photo Degradation
Temperature works hand in hand with humidity to influence the speed of photographic deterioration. While humidity often causes visible, immediate damage like mold, temperature primarily acts as a catalyst, accelerating the chemical reactions that lead to fading, discoloration, and embrittlement.
Special care must also be taken with metal-based images like tintypes and daguerreotypes, which react differently to extreme heat.
Learning how to store old photographs in a cool, dark environment is a fundamental step in preventing heat-induced decay.
**High Temperatures: Speeding Up Decay**
Elevated temperatures drastically increase the rate of chemical reactions within photographic materials.
* **Accelerated Fading:** Heat speeds up the degradation of organic dyes in color photographs and the silver image particles in black and white prints. Your vibrant family photos from the 1980s lose their color much faster in a hot attic than they would in a stable, cool environment. Scientific studies consistently show that for every 10°C (18°F) increase in temperature, the rate of chemical degradation approximately doubles.
* **Embrittlement:** High temperatures dry out the paper and emulsion, making them brittle and fragile. This makes the images prone to cracking and tearing with minimal handling. You might notice old photos feeling stiff, almost crunchy, when stored in consistently warm conditions.
* **Adhesive Failure:** Heat weakens the adhesives used in many photo albums, scrapbooks, and mounting materials. This causes photos to detach, curl, or slide, potentially damaging them as they rub against other surfaces or fall out.
* **Blocking and Sticking:** While primarily a high humidity issue, high temperatures can exacerbate the problem, especially with certain photographic processes. Heat softens the emulsion, making it more likely to stick to adjacent surfaces.
**Low Temperatures: A Preservation Advantage**
In contrast, cooler temperatures significantly slow down the rate of chemical reactions, extending the lifespan of photographs. Professional archives often store motion picture film and master photographic negatives in cold or even freezer storage because of this principle. Freezing temperatures practically halt chemical degradation, although they require careful climate control to prevent condensation.
**Temperature Fluctuations: A Destructive Cycle**
Consistent temperature is as important as the actual temperature itself. Rapid or significant fluctuations in `temperature storage` stress photographic materials.
* **Physical Stress:** Materials expand and contract at different rates with temperature changes. This differential movement causes internal stress, leading to cracking, delamination, and warping. Imagine the constant tug-of-war happening within your photos as temperatures swing from hot to cool and back again.
* **Condensation:** When warm, humid air meets a cold surface, it condenses, forming liquid water. This can happen if you move photos from a cold storage area to a warm room too quickly, or if your storage area experiences drastic temperature drops. Condensation directly introduces moisture to your photos, inviting mold growth and emulsion damage.
The `temperature storage` conditions you provide directly correlate with the longevity of your valuable photographs. Prioritizing stable, cooler environments helps preserve them.
The Golden Range: Ideal Climate for Your Photo Collection
You now understand the detrimental effects of inappropriate temperature and humidity. The good news is you can control these factors to create an optimal environment. The goal is stability and moderation.
Maintaining these levels is a critical step in the broader archiving process for your personal collection.
You can better maintain these levels by using archival boxes for long-term storage, which provide an extra physical buffer against minor climate fluctuations.
Professional archives and preservationists recommend specific ranges for `climate control photos`, based on extensive research by institutions like the Image Permanence Institute.
**Recommended Relative Humidity (RH): 30% to 50%**
* **Aim for 30-50% RH:** This range prevents both excessive dryness and harmful moisture levels.
* **Ideal target: 35-45% RH:** Within this broader range, a slightly narrower target offers an even safer zone. This minimizes the risk of mold while keeping materials flexible enough to avoid brittleness.
* **Stability is paramount:** Avoid fluctuations greater than ±5% RH within a 24-hour period. Consistent humidity prevents the physical stress of expansion and contraction.
**Recommended Temperature: 65°F to 70°F (18°C to 21°C)**
* **Aim for 65-70°F (18-21°C):** This cool, stable range significantly slows down chemical degradation processes without making your home uncomfortably cold.
* **Lower is better, within reason:** If you have a dedicated storage space, temperatures as low as 50°F (10°C) are even better for preservation, provided humidity remains stable. However, maintaining very low temperatures can be costly and impractical for most home environments.
* **Avoid extremes:** Never store photos in attics or basements that experience wild temperature swings, as these are often unregulated spaces.
* **Stability is critical:** Maintain temperature fluctuations within ±5°F (±3°C) over a 24-hour period. Consistent temperatures prevent physical stress and condensation.
Here is a summary of the `best temperature for storing vintage photos` and modern prints:
| Environmental Factor | Recommended Range | Why it Matters |
|---|---|---|
| Relative Humidity (RH) | 30% – 50% (ideal: 35% – 45%) | Prevents mold, sticking, embrittlement, and chemical degradation. |
| Temperature | 65°F – 70°F (18°C – 21°C) | Slows chemical decay, maintains material flexibility. |
| Fluctuations (daily) | ±5% RH, ±5°F (±3°C) | Minimizes physical stress and condensation risks. |
Remember, achieving the perfect environment may not be feasible for everyone. Prioritize stability within these recommended ranges. Even modest improvements to your storage conditions make a significant difference in the long-term preservation of your photo collection.
Mastering Humidity: Actionable Steps for Your Home
Controlling humidity in your home involves a combination of environmental monitoring and strategic interventions. You can implement several practical measures to protect your photo collection from `photo humidity damage`.
1. **Monitor Your Environment:**
* **Invest in a Hygrometer:** This inexpensive device measures relative humidity. Place one in your photo storage area. Digital hygrometers provide accurate, real-time readings, often displaying temperature as well. Regularly check the readings to understand your home’s typical conditions.
* **Log Readings:** Keep a simple log of humidity and temperature readings throughout the day and across seasons. This helps you identify trends and problematic periods.
2. **Control Humidity Levels:**
* **Dehumidifiers for High Humidity:** If your humidity consistently exceeds 50%, a dehumidifier is essential. Choose a unit appropriate for the size of your room. Many dehumidifiers have an adjustable humidistat, allowing you to set a target RH, for example, 40%. Regularly empty the water reservoir or connect it to a drain for continuous operation.
* **Humidifiers for Low Humidity:** In arid climates or during dry winter months, humidity can drop below 30%. A humidifier adds moisture to the air. Use caution, as over-humidification can quickly lead to mold. Again, choose a unit with a humidistat and monitor it closely.
* **Air Conditioning:** Your air conditioning system naturally dehumidifies the air as it cools. Running your AC, even if you do not feel warm, can help maintain lower humidity levels during humid seasons.
* **Ventilation:** Proper ventilation reduces moisture buildup. Ensure your home has adequate airflow, especially in areas prone to dampness like basements or bathrooms. Use exhaust fans when showering or cooking.
* **Avoid Basements and Attics:** These spaces are notoriously difficult to regulate for temperature and humidity. Basements often have high humidity and can flood, while attics experience extreme heat and cold. They are among the worst places for `temperature storage` of photographs.
3. **Storage Area Selection:**
* **Choose Interior Rooms:** Store photos in interior rooms away from exterior walls, windows, and direct sunlight. These areas generally have more stable temperatures and humidity.
* **Avoid Water Sources:** Never store photos near plumbing, in bathrooms, or in any area susceptible to leaks or floods.
* **Elevate Storage:** If storing items in a basement or garage, use shelving to keep boxes off the floor. This protects them from potential water damage during floods or spills.
By actively monitoring and adjusting humidity, you effectively prevent `how does humidity damage old photographs` from becoming a problem for your cherished collection.
Controlling Temperature: Practical Solutions for Photo Storage
Managing temperature in your home environment requires thoughtful planning and consistent effort. While you might not achieve professional archival cold storage, you can significantly improve `temperature storage` conditions for your photographs.
If you use a fireproof safe for protection, be aware that these units can trap humidity and require desiccant packs.
1. **Maintain Consistent Room Temperature:**
* **Central Heating and Air Conditioning:** If you have central HVAC, set your thermostat to maintain a steady temperature between 65°F and 70°F (18°C to 21°C) year-round. Avoid drastic temperature setbacks when you leave the house, as these cause damaging fluctuations.
* **Avoid Unconditioned Spaces:** As mentioned, attics, basements, garages, and sheds are almost always unsuitable for photo storage due to their extreme temperature swings and high likelihood of humidity issues. Do not store photographs in these areas.
* **Interior Closets:** These often provide the most stable temperatures and light conditions within a home, making them an excellent choice for storing photo boxes.
* **Away from Heat Sources:** Do not store photos near radiators, heat vents, fireplaces, or appliances that generate heat, such as refrigerators or water heaters. Direct sunlight also causes localized heating and accelerates fading, so keep photos out of its path.
2. **Insulation and Sealing:**
* **Improve Home Insulation:** Properly insulated walls and attics help stabilize indoor temperatures, reducing the strain on your HVAC system and minimizing temperature swings.
* **Seal Drafts:** Seal gaps around windows and doors to prevent outside air from influencing indoor temperatures and humidity.
* **Window Coverings:** Use blinds or curtains to block direct sunlight, which can heat a room rapidly.
3. **Consider Dedicated Storage Furniture:**
* **Archival Cabinets or Drawers:** While an investment, dedicated archival cabinets provide an extra layer of protection against environmental fluctuations. These are often made from inert, powder-coated steel and seal tightly to create a microclimate.
* **Sturdy, Acid-Free Boxes:** Even if you cannot afford specialized furniture, storing photos in sturdy, archival-quality boxes offers insulation against minor temperature changes and protects them from dust and light.
By implementing these strategies, you actively create a more stable thermal environment, directly impacting how well your collection withstands the test of time. Stable temperatures, combined with appropriate humidity control, form the backbone of effective `climate control photos` preservation.

Beyond climate control, utilizing the best archival boxes for long-term photo storage creates an additional protective micro-environment for your collection.
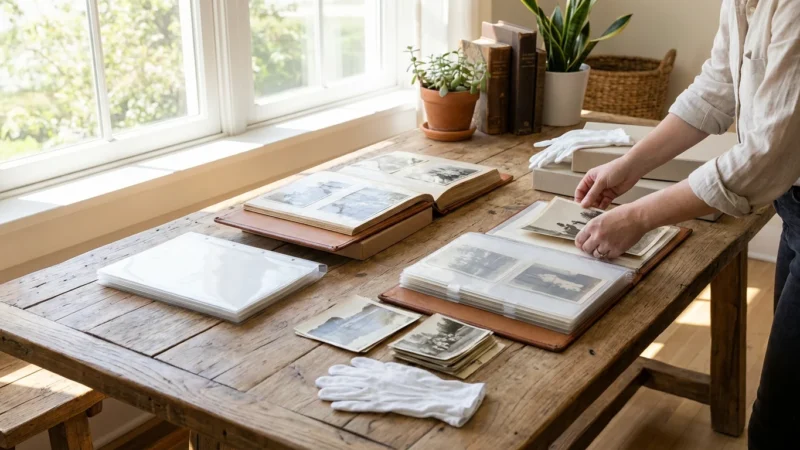
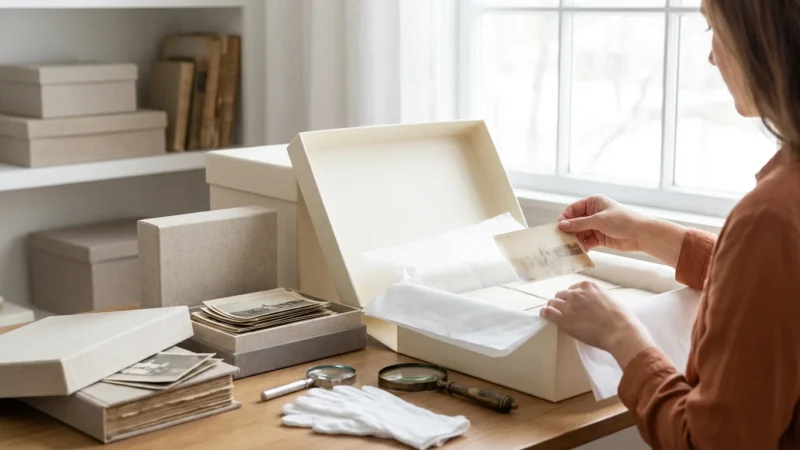
Archival Materials: Your Foundational Defense
Beyond environmental control, the materials you use for storing photographs play a critical role in their long-term preservation. Non-archival materials can actively damage your photos, even in an ideal climate. Always choose archival quality products.
1. **Understanding Archival Quality:**
* **Acid-Free and Lignin-Free:** This is the most crucial characteristic. Acid and lignin are naturally present in many papers and break down over time, releasing chemicals that cause yellowing, brittleness, and fading in photographs. Look for labels like “acid-free,” “pH neutral,” or “buffered.”
* **Photo Safe/PAT (Photographic Activity Test):** The PAT indicates that a material will not chemically interact with and damage photographs over time. This test, developed by the Image Permanence Institute, is a gold standard for archival photo storage products. Look for “PAT passed” or “photo safe” on product descriptions.
* **Inert Plastics:** Not all plastics are safe. Avoid PVC (polyvinyl chloride), which degrades over time, releasing damaging plasticizers that can stick to and destroy photographs. Safe plastics include polyester (Mylar D), polypropylene, and polyethylene. These are stable and do not outgas harmful chemicals.
“The choice of storage materials profoundly impacts the longevity of photographs. Using materials that meet archival standards prevents inherent vice and provides a protective buffer against environmental degradation, essentially buying precious time for your memories.” – American Institute for Conservation (AIC)
2. **Essential Archival Materials:**
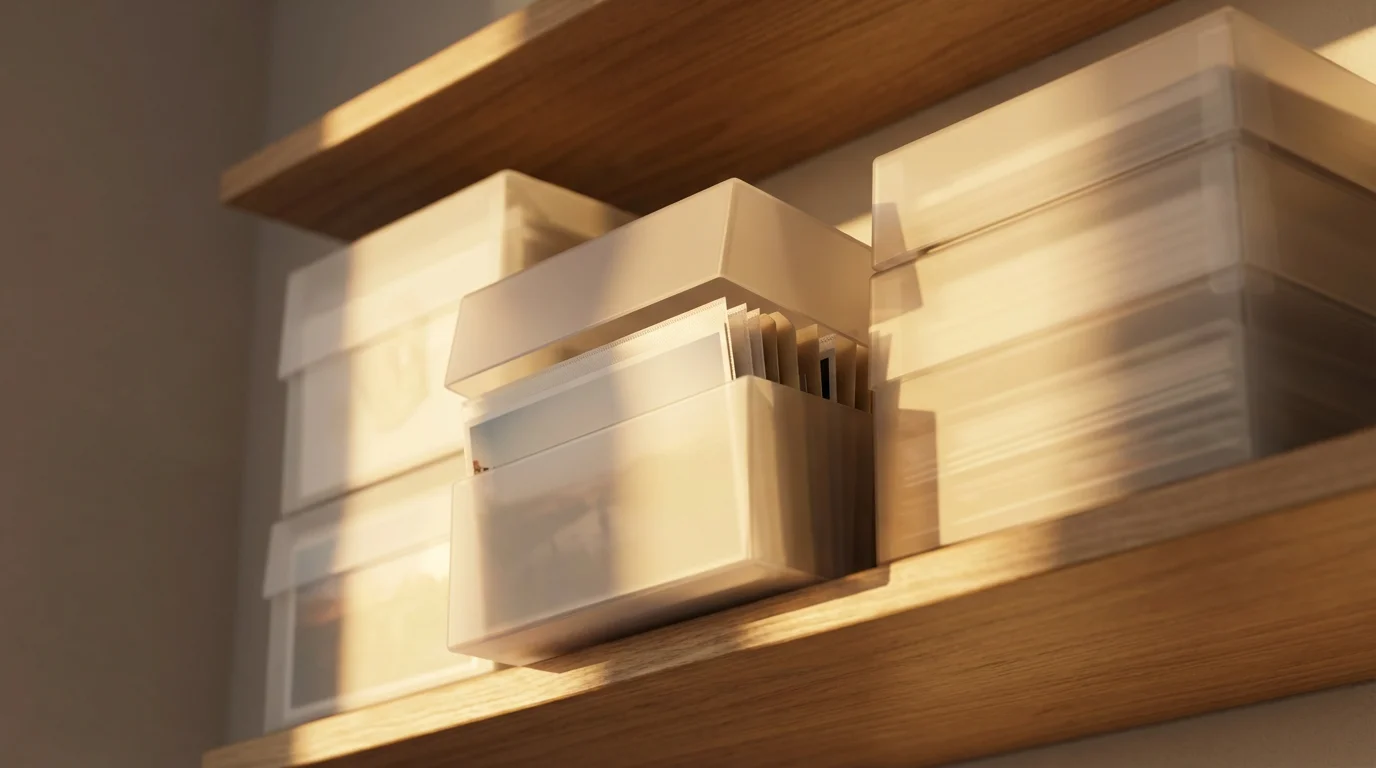
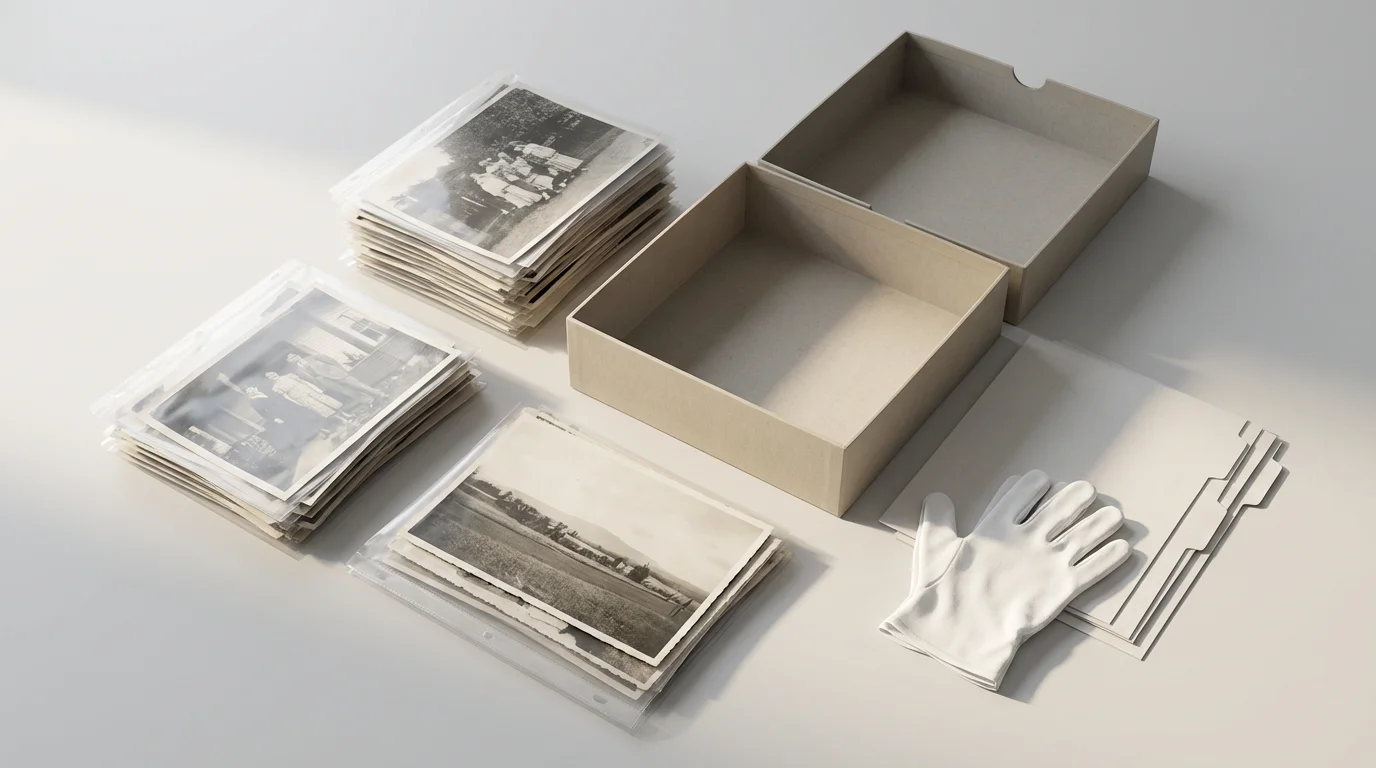
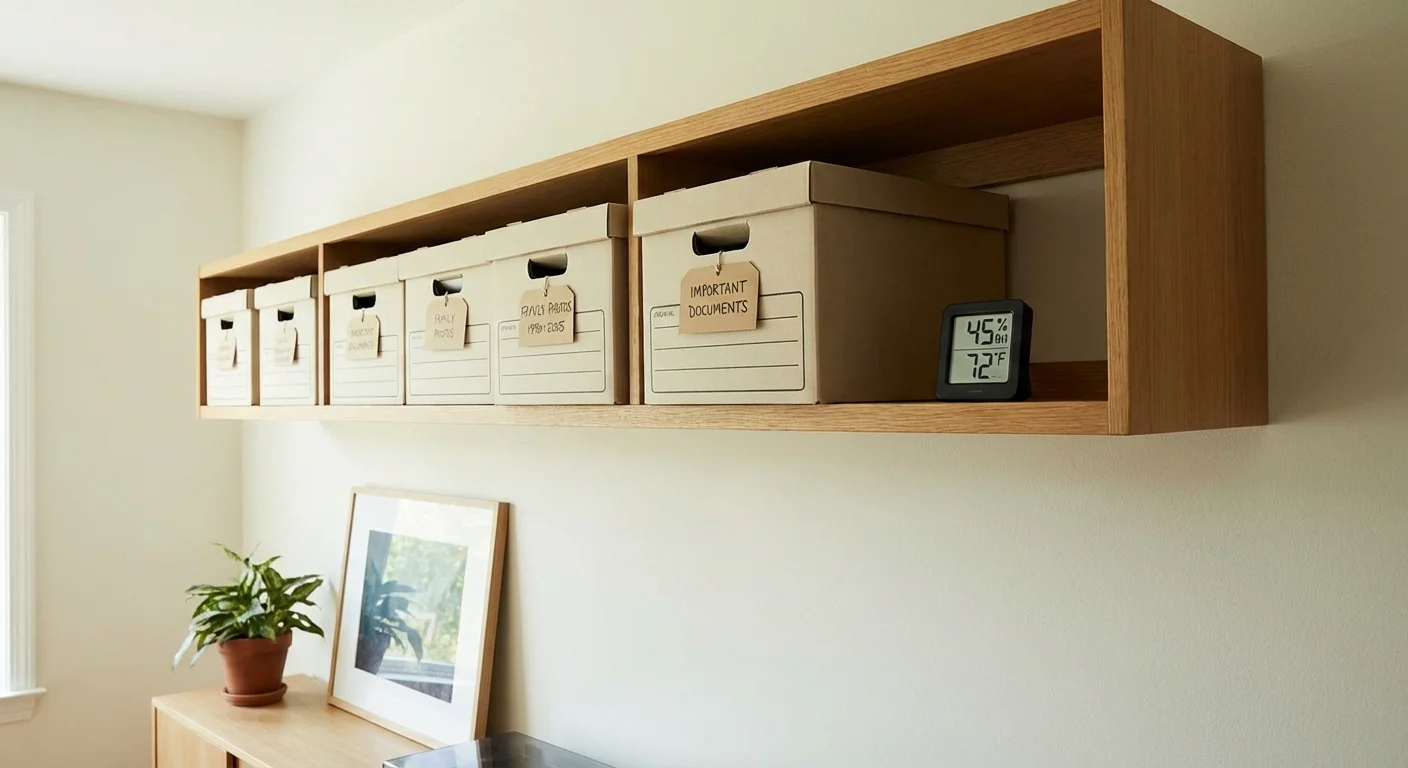
* **Archival Boxes:** Store loose prints, negatives, and slides in sturdy, acid-free, lignin-free boxes. These boxes provide structural support, protect against light, and offer a buffer against minor environmental fluctuations. Choose sizes appropriate for your items.
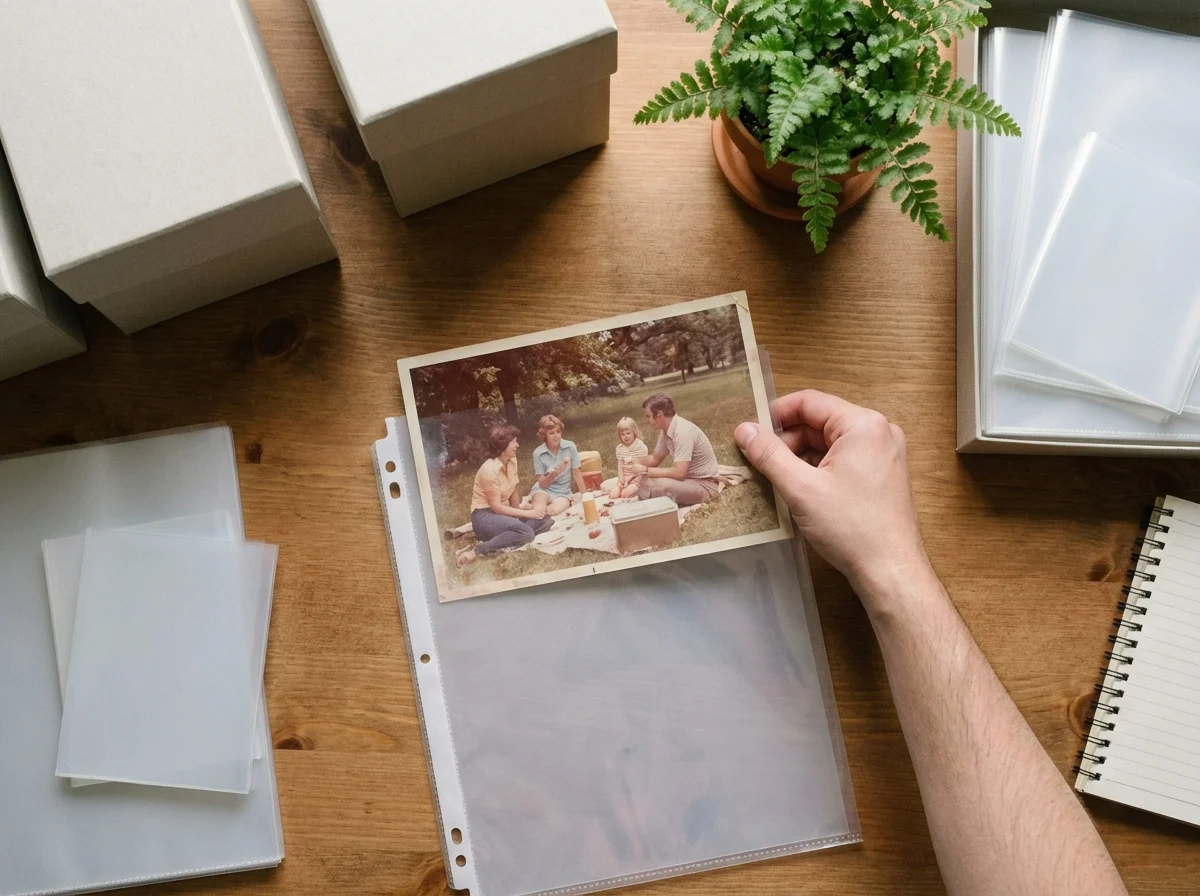
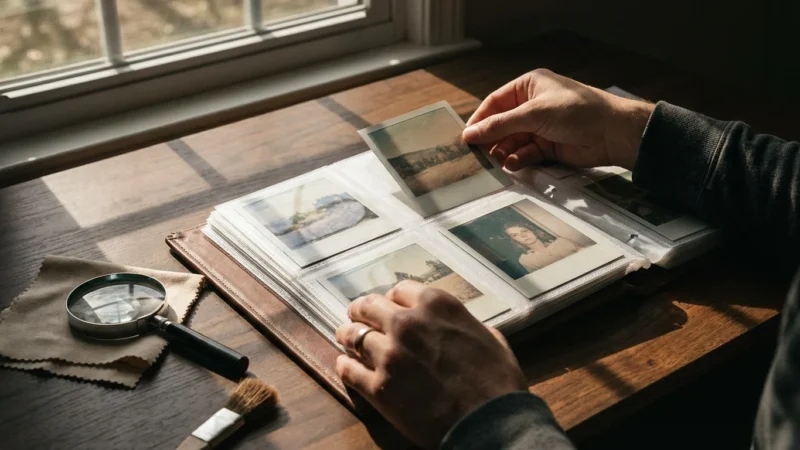
* **Print Enclosures (Sleeves/Pockets):**
* **Individual Sleeves:** Place individual prints, especially historically significant or fragile ones, in individual archival sleeves. These are typically made from polyester, polypropylene, or polyethylene. Choose sleeves that are slightly larger than the photo, allowing for easy insertion and removal.
* **Polypropylene or Polyester Pages:** For organizing prints in binders, use archival-quality sheet pages with pockets. Ensure they are specifically labeled as “photo safe” or “PAT passed.”
* **Negative and Slide Sleeves:** Negatives and slides are your original images, holding the most detail. Protect them in individual archival sleeves or strips made from polyester, polyethylene, or polypropylene. Store these in archival boxes or binders. Never use glassine envelopes for long-term storage, as they are often acidic.
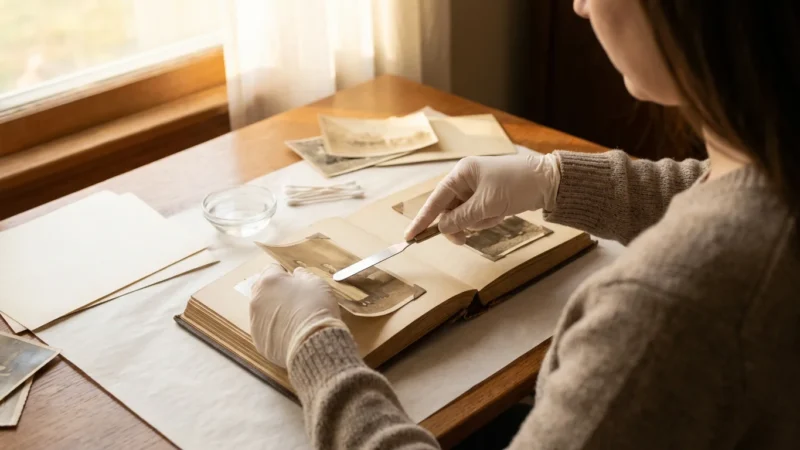
* **Tissue Paper and Interleaving:** Use acid-free, lignin-free tissue paper to interleave fragile prints or those with delicate surfaces (like albumen prints) to prevent rubbing and sticking.
* **Albums and Binders:** If you prefer albums, choose “archival quality” albums that use acid-free pages, covers, and adhesives. Avoid traditional magnetic albums, which contain highly acidic paper and reactive plastic overlays that cause irreversible damage. Use stainless steel or inert plastic binder rings if applicable.
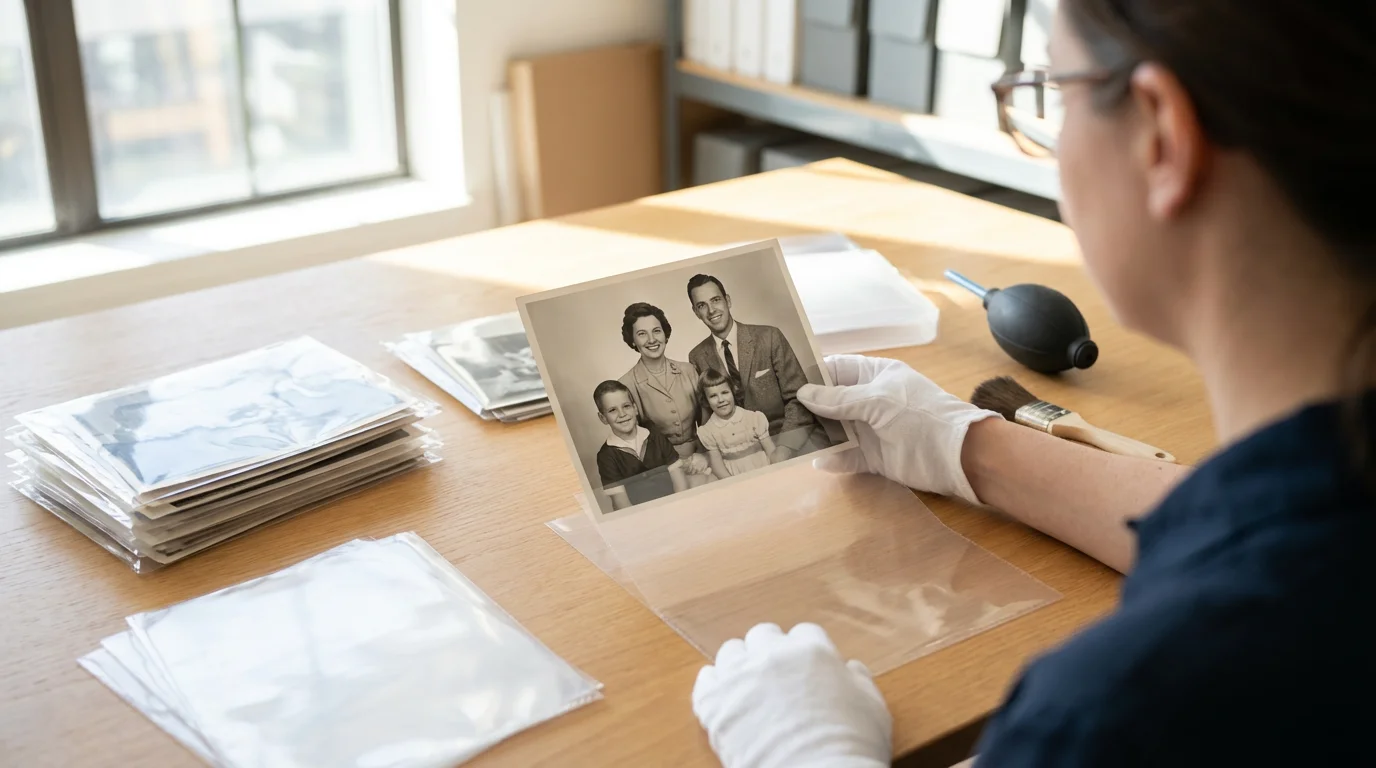
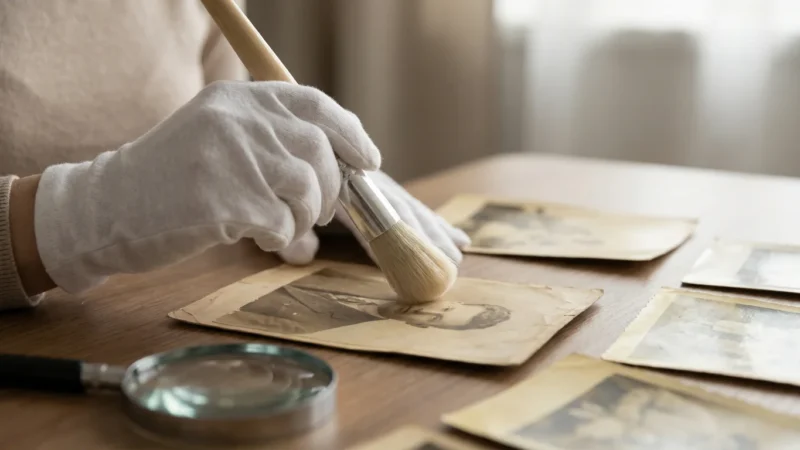
3. **Handling Your Collection:**
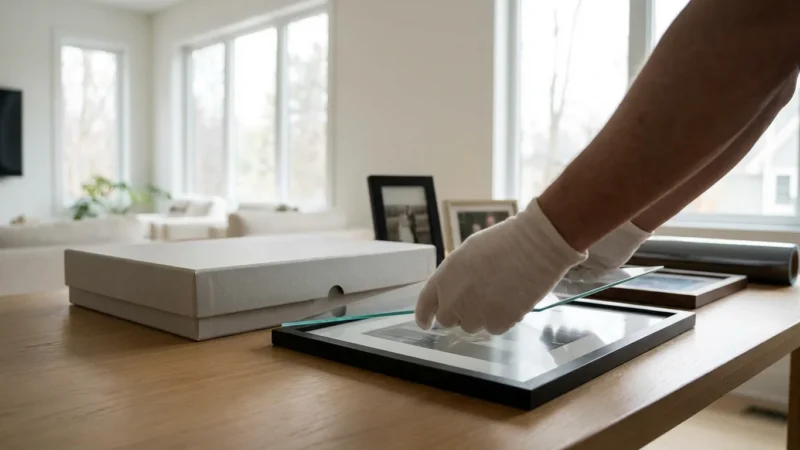
* **Wear Cotton Gloves:** The oils and acids from your skin can transfer to photographs, leaving fingerprints that can degrade the image over time. Wear clean, white cotton gloves when handling valuable or irreplaceable photographs.
* **Hold by Edges:** If not wearing gloves, hold prints by their edges to minimize contact with the image area.
* **Clean Work Surface:** Always work on a clean, dry, and flat surface to prevent dust, debris, or spills from damaging your photos.
By consistently using archival materials and practicing careful handling, you establish a strong physical defense for your collection, complementing your efforts in `climate control photos`.

Identifying and Mitigating Common Storage Mistakes
Many individuals unknowingly make storage choices that accelerate the deterioration of their photo collections. Recognizing these common mistakes is the first step toward correcting them and implementing better preservation practices.
Be sure to also remove any newspaper clippings stored alongside your photos, as their acidic nature can cause additional damage.
1. **Attics, Basements, and Garages:**
* **The Problem:** These spaces experience the most extreme fluctuations in temperature and humidity within a home. Attics become scorching hot in summer and freezing cold in winter. Basements are often damp and prone to flooding. Garages are uninsulated and subject to vehicle exhaust and pests. These conditions are a recipe for `photo humidity damage` and rapid fading.
* **The Solution:** Relocate all photographs from these areas to a stable, interior living space. An interior closet or a room with consistent temperature and humidity control is preferable.
2. **Shoeboxes and Cardboard Boxes:**
* **The Problem:** Standard cardboard boxes and shoeboxes are highly acidic and contain lignin. Over time, these materials off-gas harmful chemicals that yellow paper, fade images, and make photos brittle. They offer little protection against dust, pests, or moisture.
* **The Solution:** Transfer all photos from these containers into acid-free, lignin-free archival boxes. Use archival folders or envelopes within these boxes for further organization and protection.
3. **Magnetic Photo Albums:**
* **The Problem:** Popular in the 1970s and 80s, magnetic albums feature sticky, acidic paper pages covered by plastic sheets often made of PVC. The adhesive dries out, becoming incredibly strong and damaging to prints. The PVC off-gasses plasticizers that stick to and degrade the emulsion, causing irreversible staining and chemical damage.
* **The Solution:** Carefully remove photos from these albums. If prints are stuck, do not force them. Consult a professional conservator for advice on safe removal. Once removed, rehouse the photos in archival sleeves and boxes.
4. **Rubber Bands, Paper Clips, and Self-Adhesive Tapes:**
* **The Problem:** Rubber bands degrade, become brittle, and can permanently indent or stain photos. Paper clips rust, leaving permanent marks and scratches. Most household tapes contain acidic adhesives that yellow, become brittle, and leave sticky residue that discolors and weakens the paper.
* **The Solution:** Never use these items directly on photographs. Organize groups of photos with archival paper bands or store them individually in sleeves. For repairs, use only archival-grade document repair tape or photo corners, and always ensure methods are reversible.
5. **Plastic Bags and Non-Archival Plastic Containers:**
* **The Problem:** Many common plastic bags and containers are made from PVC or other unstable plastics that can off-gas damaging chemicals or trap moisture, creating a microclimate for mold growth.
* **The Solution:** Only use archival-safe plastics like polyester, polypropylene, or polyethylene for storing photographs. These plastics are inert and will not harm your collection.
By identifying and correcting these common mistakes, you significantly enhance the longevity of your photographs, ensuring they remain vibrant and accessible for years to come.
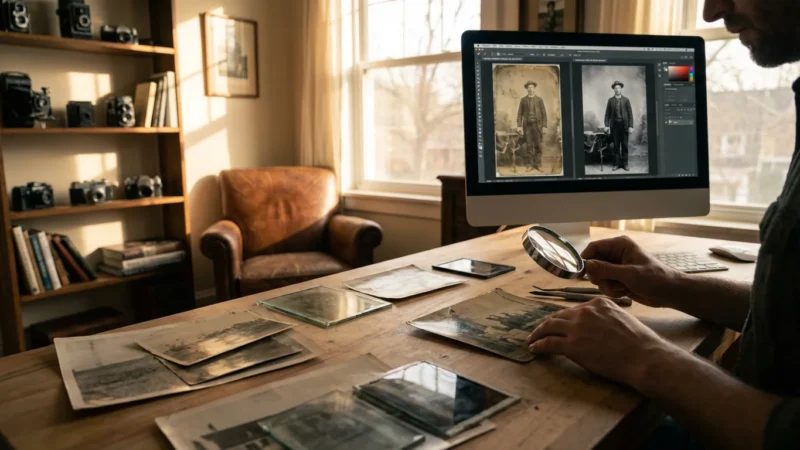
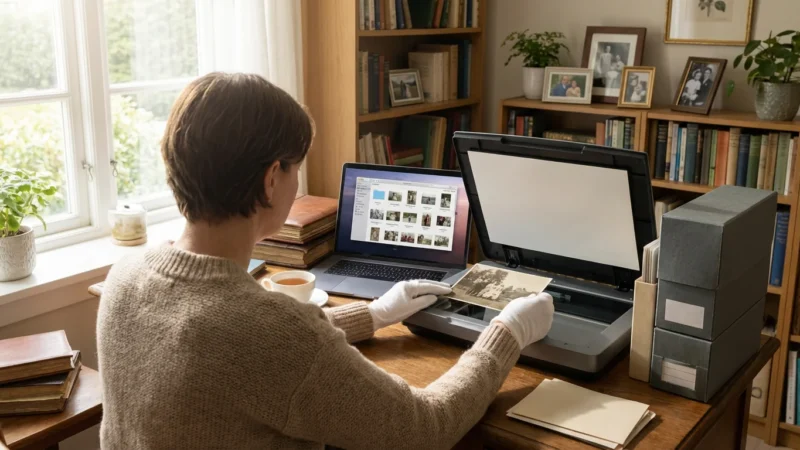
Digitization: A Proactive Preservation Strategy
While physical preservation of your original prints remains paramount, digitizing your photo collection offers an invaluable layer of protection against all forms of physical degradation, including `photo humidity damage` and `temperature storage` issues. Digitization creates a backup, a safety net that ensures your memories endure even if the original physical prints are lost or damaged.
Once your environment is stable, you can begin scanning your collection to create high-quality digital backups.
1. **Why Digitize Your Collection?**
* **Redundancy:** Digital copies provide a safeguard against physical damage from environmental factors, accidents, or natural disasters.
* **Accessibility:** Once digitized, you can easily share your photos with family, create digital albums, or incorporate them into creative projects without handling fragile originals.
* **Restoration Potential:** Digital images allow for non-destructive restoration of faded, stained, or damaged originals using photo editing software.
* **Space Saving:** Digital files eliminate the need for vast physical storage space for prints, negatives, and slides.
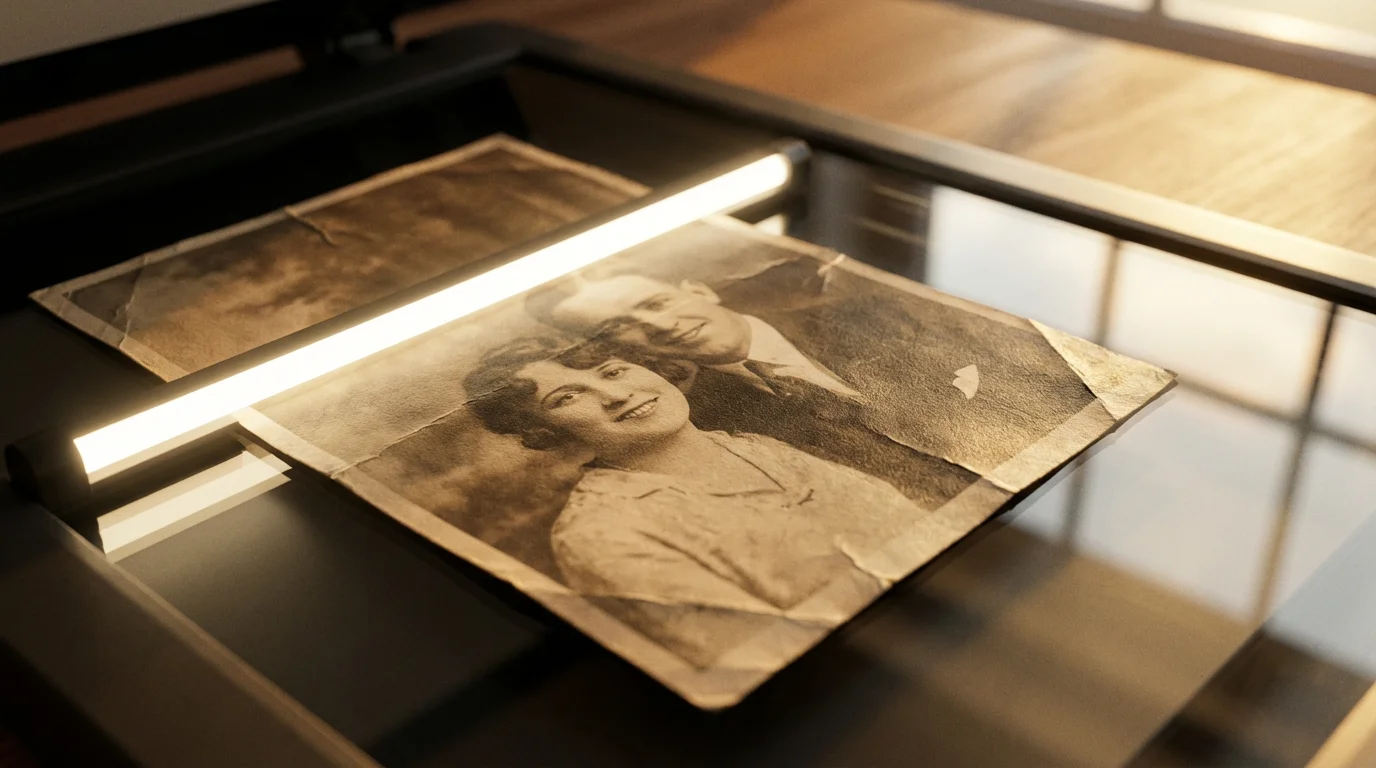
2. **Methods for Digitization:**
* **Flatbed Scanners:** For prints, a good quality flatbed scanner offers the best resolution and color accuracy. Look for scanners specifically designed for photos. Scan at a high resolution (at least 300-600 PPI) to capture maximum detail, saving files as uncompressed TIFFs or high-quality JPEGs.
* **Negative/Slide Scanners:** Dedicated film scanners or flatbed scanners with film adapters are necessary for negatives and slides, which hold the most original detail. Scan these at even higher resolutions (e.g., 2400-4800 DPI) for optimal results.
* **Professional Digitization Services:** For large, fragile, or highly valuable collections, consider using a professional digitization service. They possess specialized equipment and expertise to handle delicate materials and produce high-quality digital files.
* **Smartphone Apps (for quick access, not archival):** While convenient, smartphone scanning apps are generally not suitable for archival-quality digitization. They can introduce distortion, glare, and lower resolution compared to dedicated scanners. Use them for quick sharing, but not for your primary digital archive.
3. **Digital File Management:**
* **Organize Immediately:** Create a logical folder structure on your computer. Name files consistently (e.g., Year_Event_Names.jpg).
* **Metadata:** Add descriptive metadata (date, location, people, event) to your digital files. This makes them searchable and helps preserve context.
* **The 3-2-1 Backup Rule:**
* **3 copies:** Keep at least three copies of your important files.
* **2 different media types:** Store them on at least two different types of storage media (e.g., internal hard drive, external hard drive, cloud storage).
* **1 offsite:** Keep one copy in an offsite location (e.g., cloud backup, a relative’s house).
* **Regular Checks:** Periodically check your digital files for corruption and migrate them to newer storage formats or devices as technology evolves.
Digitization does not replace physical preservation, but it complements it, creating an enduring legacy for your memories regardless of the physical condition of your originals.
While maintaining a stable environment is crucial, understanding the importance of backing up physical photos digitally provides the ultimate insurance against environmental degradation.
Long-Term Storage: Considerations and Best Practices
Preserving your photographic heritage is a continuous journey that extends beyond immediate actions. Consider these best practices for truly long-term storage of your collection.
1. **Strategic Placement Within Your Home:**
* **Central Living Spaces:** As a rule, the most stable environments in your home are generally central, climate-controlled living areas. A dedicated closet in a main living area often provides the most consistent temperature and humidity.
* **Avoid External Walls:** Rooms or closets on exterior walls often experience more significant temperature swings and moisture infiltration than interior ones.
* **Away from Vents and Windows:** Direct airflow from heating or cooling vents can cause localized temperature and humidity fluctuations. Direct sunlight from windows causes rapid fading and heat damage.
2. **Professional Consultation:**
* **Irreplaceable Items:** For extremely valuable, fragile, or historically significant photographs, consider consulting a professional photographic conservator. They can assess the condition of your items, recommend specific treatments, and advise on optimal storage solutions that might be beyond the scope of home preservation. You can find conservators through organizations like the American Institute for Conservation.
* **Environmental Monitoring Devices:** Professional-grade data loggers can provide more detailed information about your home’s microclimates, helping you pinpoint problem areas.
3. **Regular Inspection and Maintenance:**
* **Annual Review:** Periodically inspect your photo collection. Once a year, check a sample of your stored photos for any signs of mold, insect damage, fading, or physical deterioration. This helps you catch problems early.
* **Storage Material Checks:** Examine your archival boxes and enclosures for signs of wear, damage, or degradation. Replace any materials that are no longer in optimal condition.
* **Environmental Equipment Maintenance:** Clean and maintain your dehumidifiers and humidifiers regularly according to manufacturer instructions. Replace filters as needed. Ensure your hygrometers are functioning correctly.
4. **Community and Education:**
* **Stay Informed:** Preservation science evolves. Stay updated on best practices by following reputable archival institutions and conservation blogs.
* **Share Knowledge:** Educate family members about the importance of proper `climate control photos` and handling techniques to ensure everyone contributes to the long-term care of your shared history.
Preserving your photographs is a labor of love, an ongoing commitment to protecting your family’s story. By understanding the science behind `how does humidity damage old photographs` and the role of `temperature storage`, and by consistently applying archival best practices, you ensure that these precious visual narratives continue to inspire and connect future generations. Your efforts today will define the legacy of your memories tomorrow.
Frequently Asked Questions
Can I store photos in my attic if it’s well-insulated?
Even a well-insulated attic often experiences significant temperature and humidity fluctuations that fall outside the recommended archival ranges. Insulation reduces the extremes but does not eliminate them entirely. Attics also face risks from pests, roof leaks, and dust. For optimal preservation, you should avoid storing photos in an attic.
What type of plastic is safe for photo storage?
You should use only inert plastics like polyester (Mylar D), polypropylene, and polyethylene. These materials are stable and do not degrade or off-gas harmful chemicals that can damage photographs. Avoid PVC (polyvinyl chloride), as it is unstable and can cause irreversible damage to emulsions.
How do I know if my photos have mold damage?
Mold typically appears as fuzzy, discolored spots or patches, often white, green, black, or brown. It can have a musty odor. If you suspect mold, isolate the affected photographs immediately to prevent it from spreading. Do not attempt to clean moldy photos yourself without professional guidance, as you could damage them further or spread spores. Consult a professional conservator.
Is it better to store photos in a very dry environment to prevent mold?
While extremely dry environments prevent mold, they create other problems. Relative humidity below 30% can cause photographic paper and emulsions to become brittle, leading to cracking, flaking, and delamination. The ideal range for photo preservation is 30% to 50% relative humidity, which balances mold prevention with material flexibility.
Should I store my old photo albums or remove the photos?
Many old photo albums, especially those with magnetic pages or acidic paper, contain materials that actively damage photographs. If your album uses non-archival materials, you should carefully remove the photos and rehouse them in archival sleeves and boxes. For very fragile or stuck photos, consult a professional conservator for safe removal.
Disclaimer: This article is for informational purposes only. When handling valuable or irreplaceable photographs, consider consulting a professional conservator. Always test preservation methods on non-valuable items first.
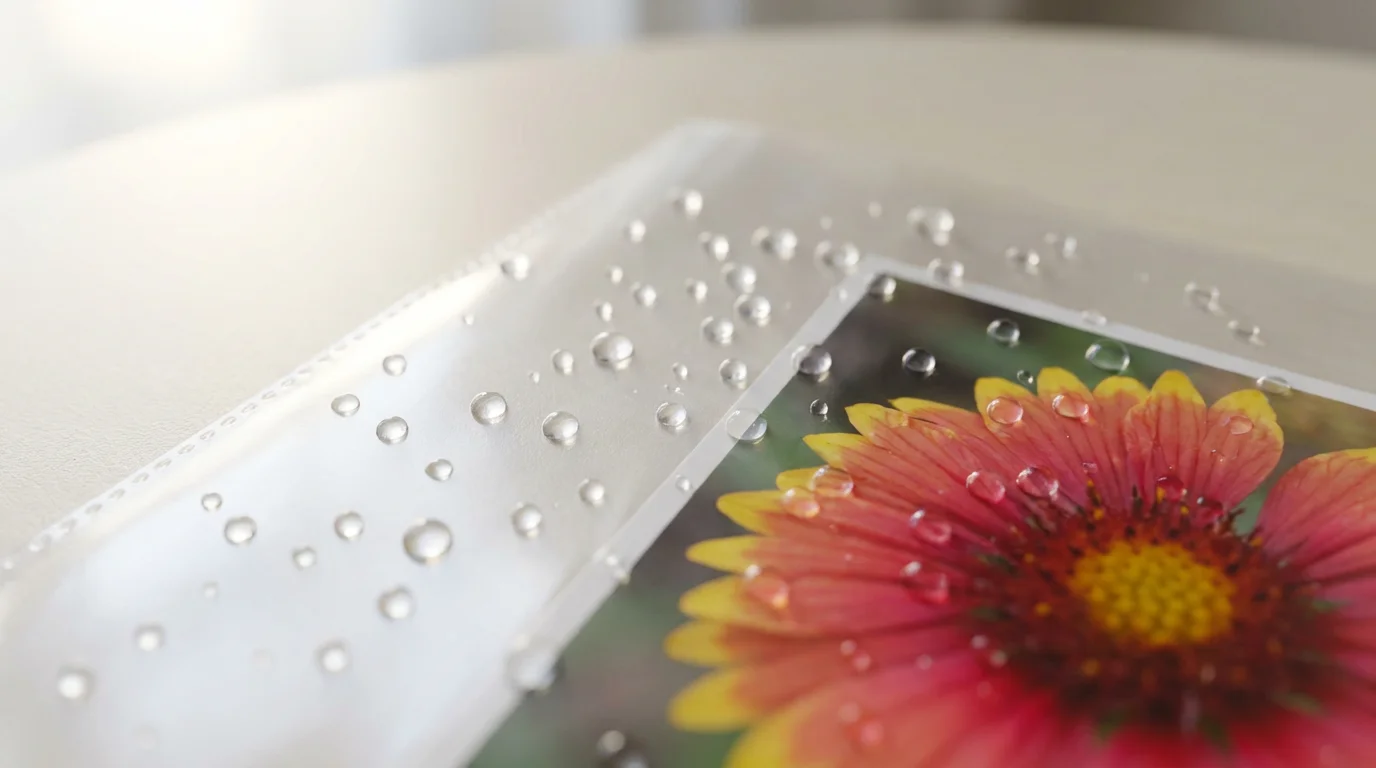
If extreme humidity leads to saturation, you may need specialized techniques for restoring water-damaged photos to prevent permanent loss.
Proper handling is also vital when moving items in heat-stressed conditions, so learn how to handle and display antique photographs safely to avoid further damage.

Leave a Reply