
Your family’s antique photographs hold more than just images; they carry stories, emotions, and a tangible connection to your past. From faded daguerreotypes capturing distant ancestors to sepia-toned albumen prints from generations past, these irreplaceable treasures deserve careful handling and thoughtful preservation. Many individuals inherit boxes of old family photos, unsure how to approach these delicate artifacts. Others simply want to display vintage photos safely without risking damage. Protecting your photographic heritage is a rewarding endeavor, ensuring these memories endure for future generations.
If you find that your collection has already suffered from the elements, there are specialized techniques for saving yellowed and discolored photographs to improve their appearance.
This comprehensive guide empowers you with practical, actionable steps to handle old photographs without damaging them. You will learn the best practices for handling, storage, and display, transforming uncertainty into confidence as you preserve your precious photo memories.
Understanding the Fragility of Antique Photographs
Before you even touch an antique photograph, recognize its inherent fragility. Unlike modern prints, many early photographic processes involved delicate chemical layers on various supports, making them highly susceptible to damage. Understanding these vulnerabilities equips you to protect them effectively.
For more specific details on preserving these early processes, you can read our comprehensive guide on how to care for tintype and daguerreotype photos.
Early photographic processes created unique challenges:
- Daguerreotypes (1839-1860s): These images form directly on a silver-plated copper sheet. The polished silver surface is incredibly delicate; even a light touch leaves permanent marks. The image itself sits just beneath the surface, making it vulnerable to abrasion and tarnishing.
- Ambrotypes and Tintypes (1850s-1880s): Ambrotypes are collodion positives on glass, while tintypes are on lacquered iron. Both are relatively robust but still suffer from flaking emulsion, rust (on tintypes), and breakage (on ambrotypes). They often reside in cases, which provide some protection, but the materials inside these cases can also degrade and harm the image.
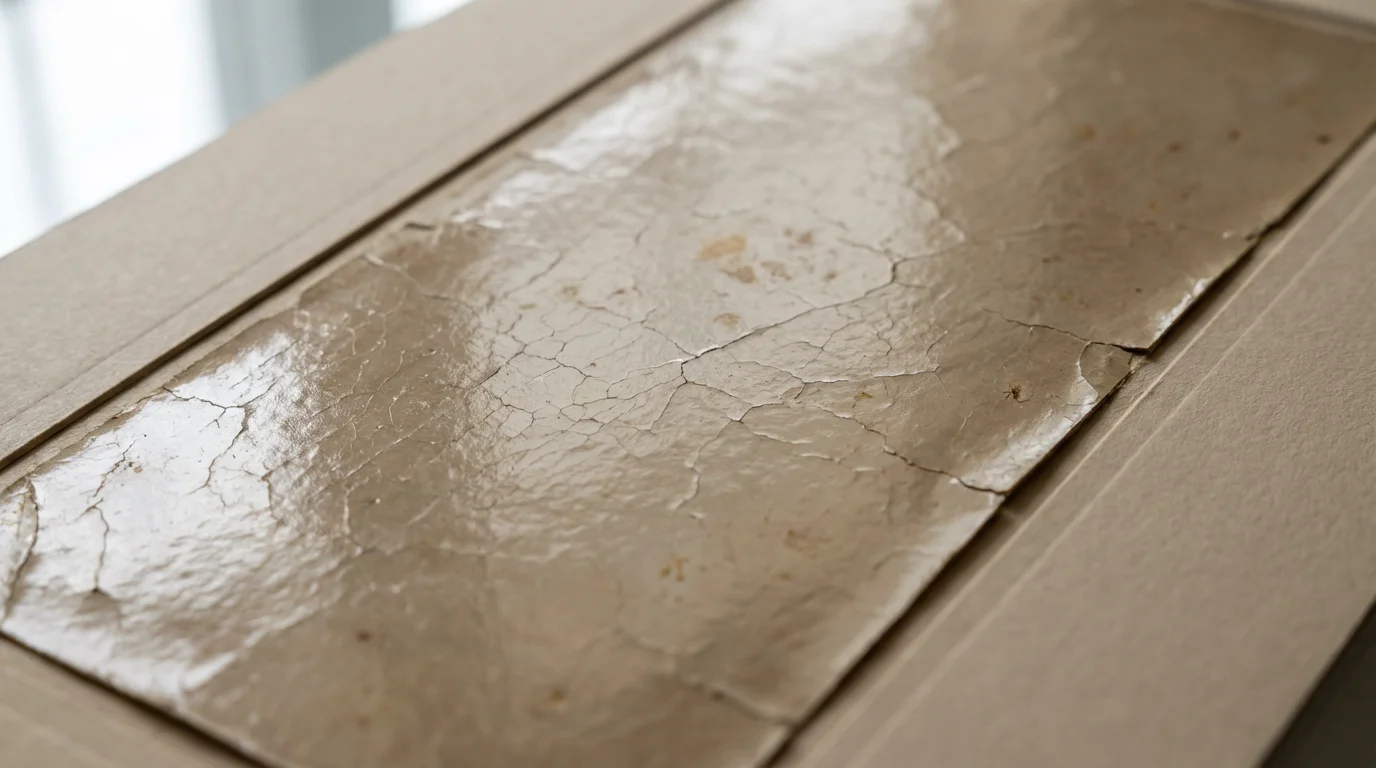
- Albumen Prints (1850s-1890s): The most common photograph of the 19th century, albumen prints feature an emulsion of egg whites and silver salts on thin paper. They are prone to fading, yellowing, cracking, and brittleness, especially at the edges. The albumen layer can also separate from the paper support.
- Gelatin Silver Prints (1880s-Present): While more stable than earlier forms, older gelatin silver prints still face threats. The gelatin emulsion can become brittle, crack, or yellow. Silver mirroring, a purplish sheen on dark areas, indicates chemical degradation.
Beyond the inherent material weaknesses, time itself takes a toll. Environmental factors like humidity fluctuations, temperature changes, and light exposure accelerate deterioration. Understanding these vulnerabilities forms the foundation for safe handling and preservation.
Essential Preparations Before Handling Antique Photographs
Thoughtful preparation significantly reduces the risk of accidental damage. Adopt these practices before you even pick up your first antique photo.
Establish a Clean Workspace
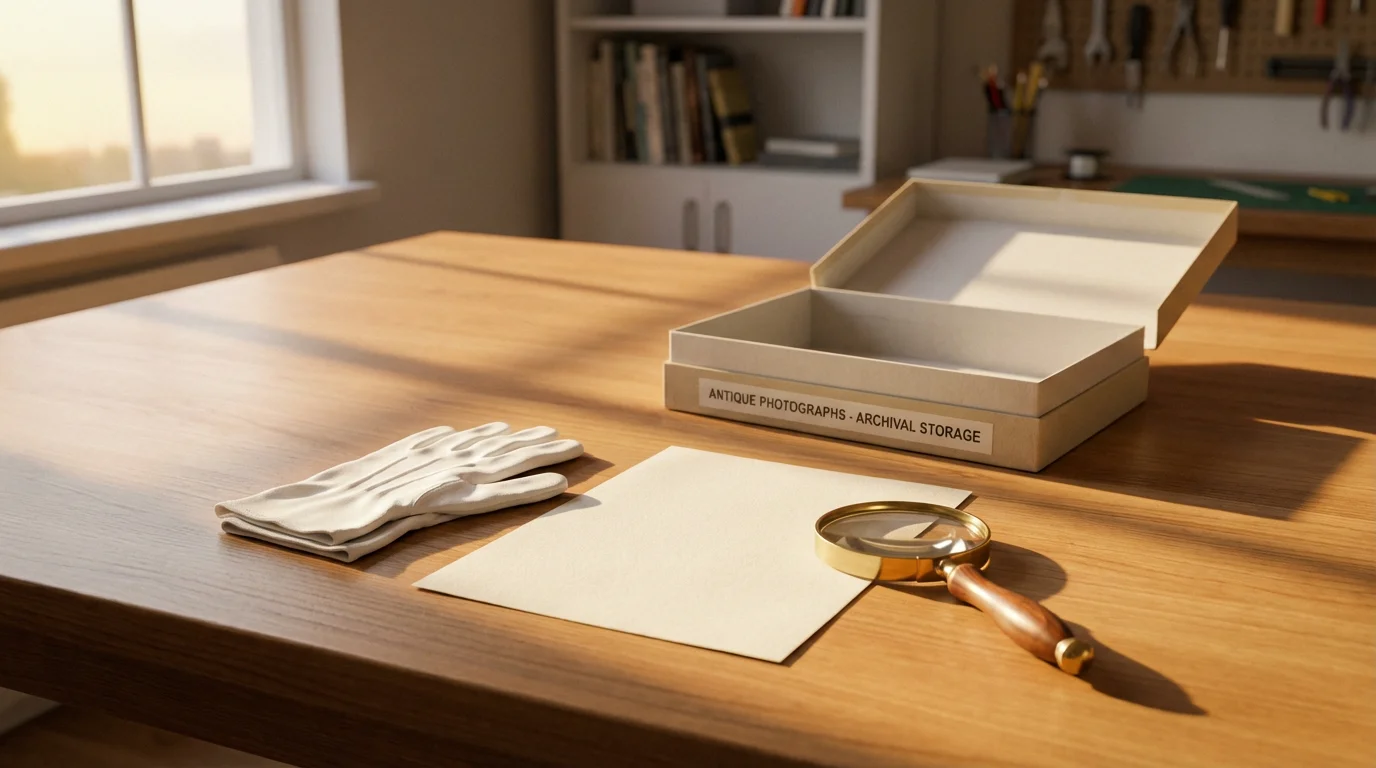
Designate a clean, flat, and dry surface for working with your photographs. Clear away food, drinks, pens, markers, and anything that could spill, stain, or scratch. A large, clean table covered with a lint-free cloth or archival paper provides an ideal environment. Ensure good lighting, but avoid direct sunlight.
Wash Your Hands Thoroughly
This seems obvious, yet it is critically important. Wash your hands with soap and water for at least 20 seconds, and dry them completely with a lint-free towel. Even clean hands carry natural oils, dirt, and lotions that can transfer to delicate photographic surfaces, leaving irreversible fingerprints or smudges. These oils attract dust and accelerate chemical degradation over time. Data from photographic conservators consistently shows skin oils contribute significantly to print degradation.
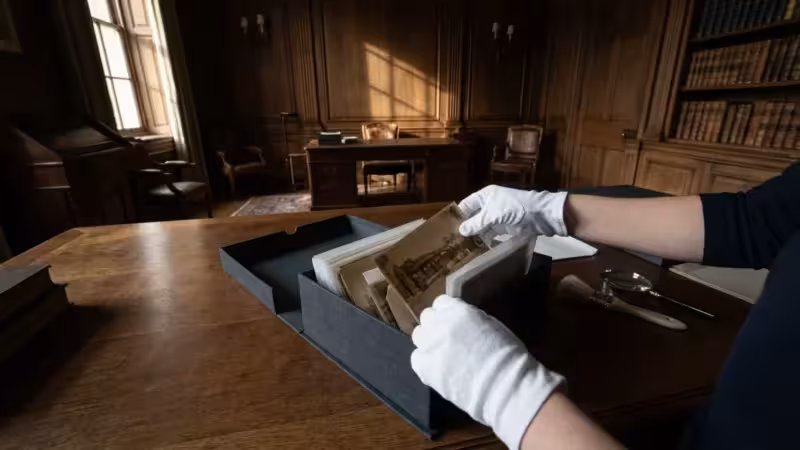
Wear Protective Gloves
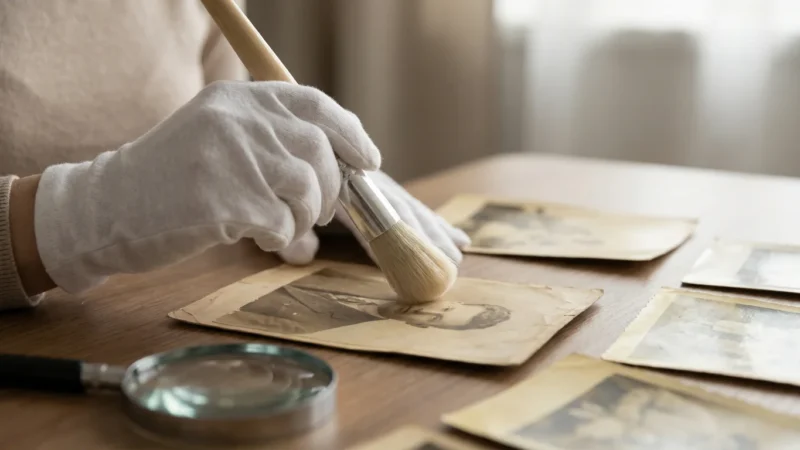
Washing your hands is a necessary first step, but not the only one. Always wear clean, white cotton gloves or nitrile gloves when handling antique photographs. These gloves provide a crucial barrier between your skin and the photograph’s surface. Ensure the gloves are powder-free if using nitrile, as powder can leave a residue.
Gather Necessary Tools
Have your archival supplies ready before you begin. This includes:
- Acid-free, lignin-free folders or envelopes.
- Archival polyester (Mylar D, Mellinex 516) sleeves for individual prints.
- Acid-free archival boxes.
- A soft, clean, natural-bristle brush (like a camel hair brush) or a photographer’s air blower for dust removal. Never use canned air directly on delicate surfaces, as it can be too powerful and contain propellants.
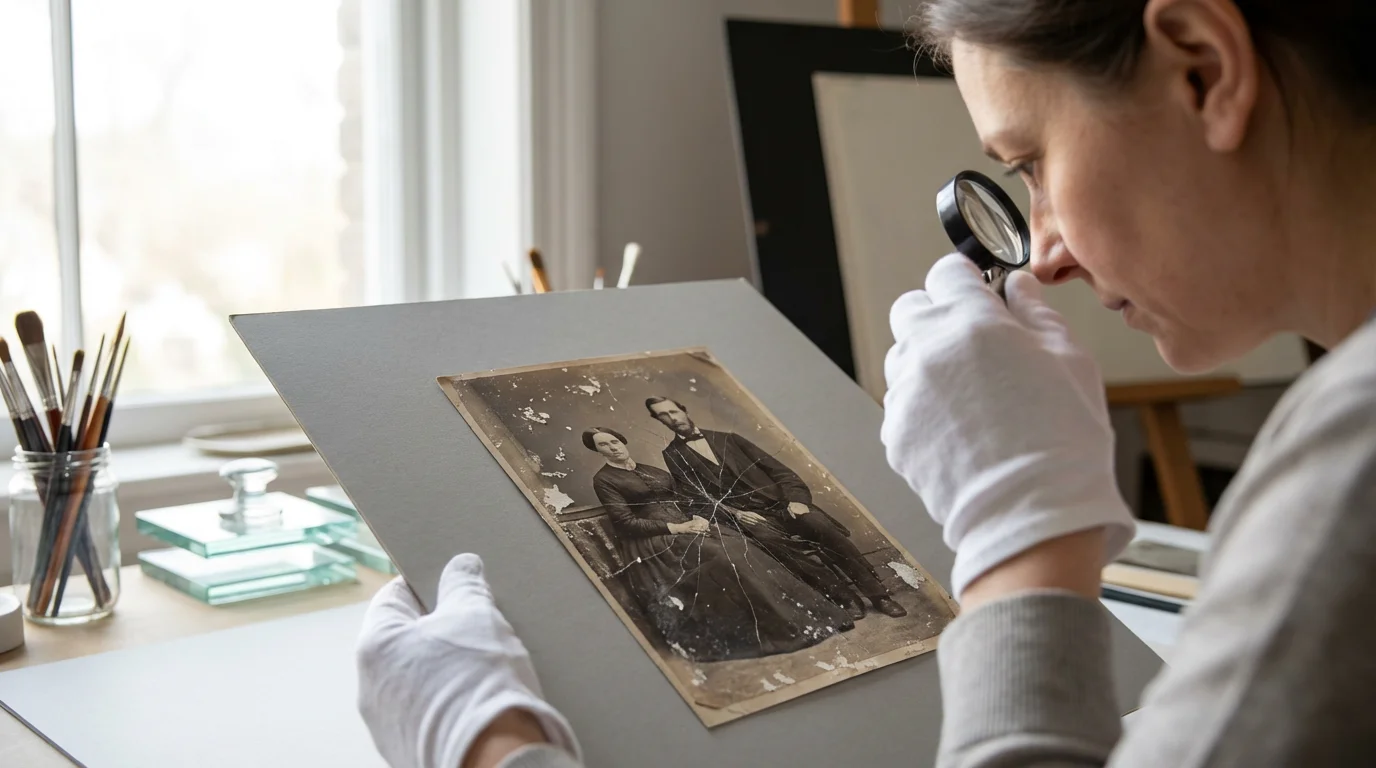
Assess the Photograph’s Condition and Type
Before any physical handling, take a moment to assess each photograph. Note its size, type (e.g., tintype, albumen print, gelatin silver), and any existing damage like tears, creases, or flaking emulsion. This assessment informs how you approach handling and storage. For instance, a brittle albumen print requires far more delicate handling than a more robust tintype.
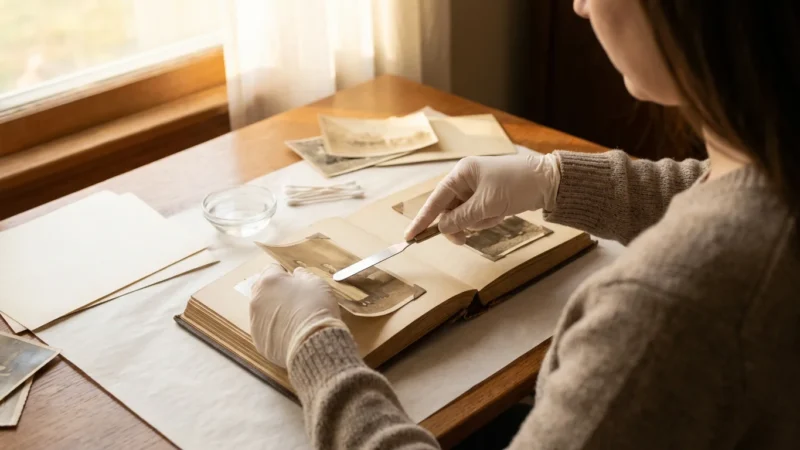
Mastering Gentle Handling Techniques
The cardinal rule for handling antique photos is “less is more.” Minimize physical contact and always support the photograph properly.
Establishing these careful habits is the critical first step toward creating a home photo archive that will protect your family history for generations.
Support the Entire Photograph
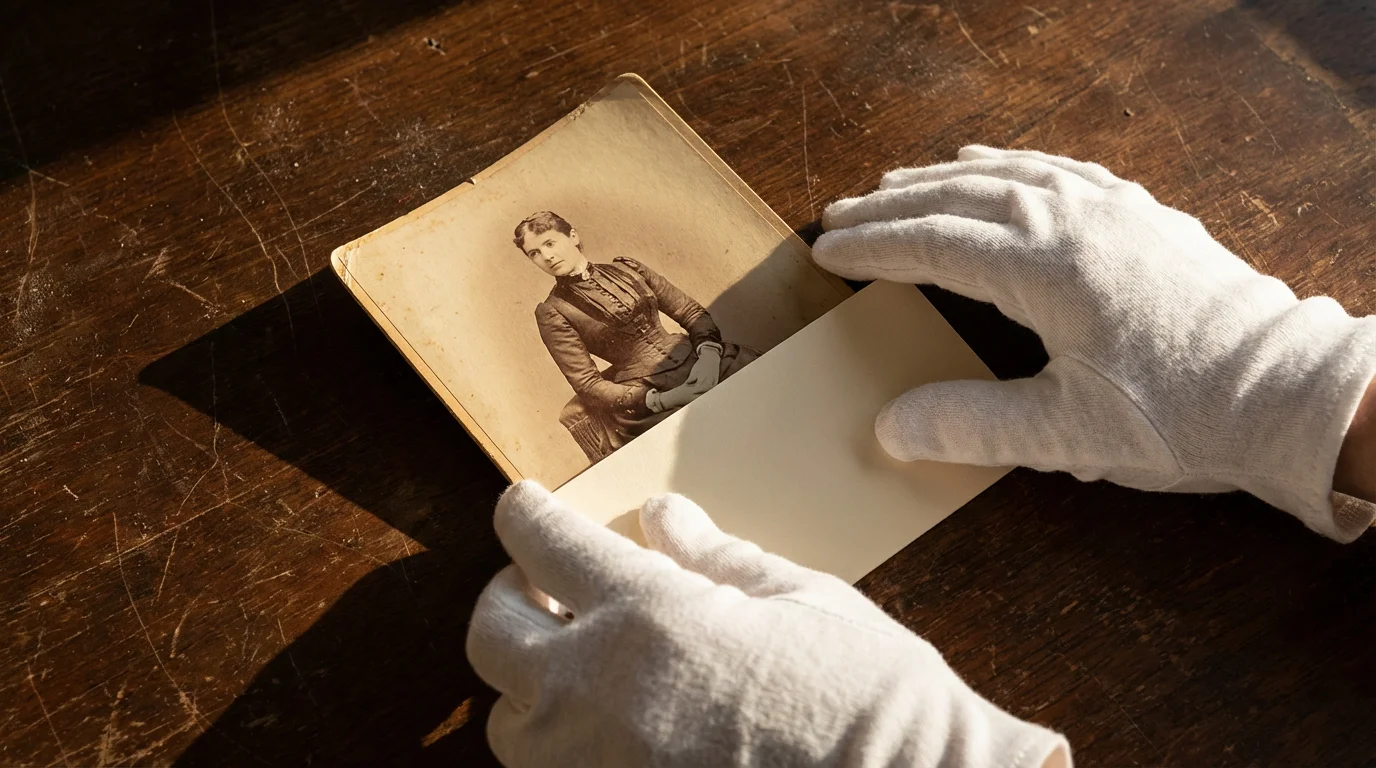
Never pick up a photograph by a corner or edge. This concentrates stress on one point, leading to creases, tears, or cracking, especially with brittle prints. Instead, slide a piece of acid-free card stock or a larger archival folder underneath the photograph to fully support it. Lift the card and photo together, using both hands if necessary for larger items.
Avoid Touching Image Surfaces
Even with gloves, avoid touching the emulsion or image surface of any photograph. Hold prints by their edges or mount boards. For daguerreotypes or ambrotypes, which often reside in cases, handle the case itself, not the plate or glass directly. If a photograph is uncased, support it from the edges while wearing gloves.
Do Not Bend, Fold, or Roll
Old photographic papers and emulsions lose flexibility with age. Bending or rolling them, even slightly, can cause irreversible cracks and breaks. Store and transport photographs flat whenever possible. If you must transport a large, rolled photograph, consult a conservator first. Do not attempt to unroll it yourself.
Handle One Photograph at a Time
Resist the urge to stack or shuffle through multiple photographs simultaneously. This risks scratches, abrasion, and damage to delicate surfaces. Work with one photograph at a time, placing it into its protective enclosure before moving to the next.
“Every touch carries potential risk for an antique photograph. Approach each piece as a unique and irreplaceable artifact, prioritizing its physical stability above all else. Gentle, deliberate movements, combined with appropriate tools and environmental controls, define best practice in preservation.”
— Sarah Jones, Senior Photo Conservator
Archival Storage Solutions for Long-Term Preservation
Proper storage is the cornerstone of preserving antique photos. Archival materials create a stable microenvironment, protecting photographs from physical damage and chemical deterioration.
While acid-free boxes offer excellent protection, some collections may also benefit from learning how to preserve photos in a fireproof safe for added security.
Understanding the best ways to store old photographs is essential for mitigating the risks of physical and chemical decay over time.
Choose Acid-Free and Lignin-Free Materials
This is paramount. Standard paper and cardboard contain acids and lignin that degrade over time, releasing harmful chemicals that cause photographs to yellow, become brittle, and fade. Always select materials explicitly labeled “archival,” “acid-free,” and “lignin-free.” The ISO 18902 standard defines these requirements for photographic storage materials.
Individual Sleeves and Envelopes
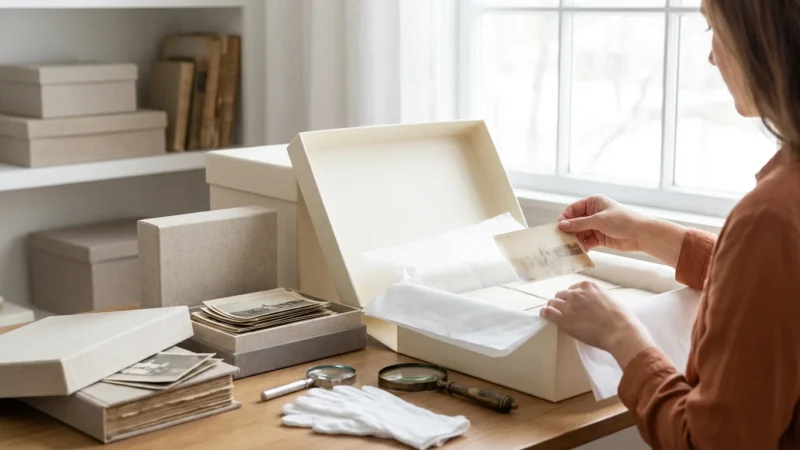
Store each photograph in its own individual protective sleeve or envelope. This prevents abrasion between prints, protects against dust, and provides a buffer from environmental fluctuations.
- Polyester (Mylar D, Mellinex 516) Sleeves: These clear, inert plastic sleeves are excellent for most prints, ambrotypes, and daguerreotypes. They allow for viewing without direct handling and offer good physical protection. Ensure they are uncoated and have passed the Photographic Activity Test (PAT) to confirm they will not harm your photos.
- Polypropylene or Polyethylene Sleeves: These are also inert plastics, more flexible than polyester, and suitable for many prints. Again, check for PAT certification.
- Acid-Free Paper Envelopes/Folders: For prints that do not require visibility, acid-free paper envelopes or folders provide a breathable, protective layer. Choose buffered paper for silver-based prints, as the alkaline reserve helps neutralize acids.
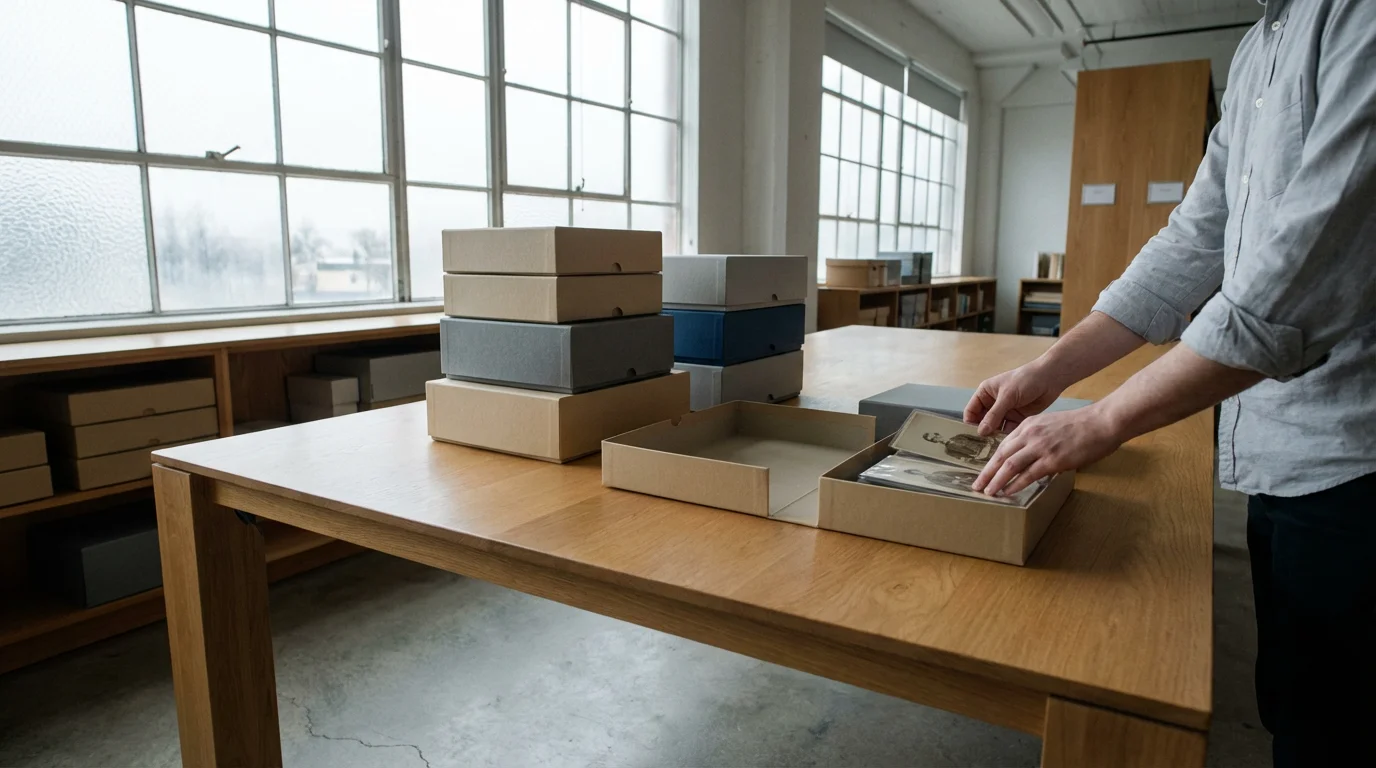
Archival Boxes
Once individually sleeved, store photographs flat in sturdy, acid-free archival boxes. Choose boxes made from corrugated board or binders that are PAT-certified. These boxes protect against light, dust, and physical damage. Label boxes clearly on the exterior with their contents, avoiding writing directly on sleeves or photos.
Consider these points for box storage:
- Size Appropriately: Do not overcrowd boxes, but also avoid leaving too much empty space, which can allow photos to shift and potentially crease.
- Store Flat: Whenever possible, store prints flat, especially larger ones, to prevent warping or bending.
- Vertical for Smaller Prints: Smaller, rigid prints like tintypes or cabinet cards can stand vertically within a box if supported by acid-free dividers to prevent slumping.
Avoid Harmful Materials
Never use standard plastic wraps, cling film, PVC binders, rubber bands, paper clips, or acidic glues and tapes on or near your photographs. These materials actively degrade, off-gas harmful chemicals, and can cause permanent damage, staining, and tearing.

Environmental Control: Your Photos’ Best Friend
The environment plays a pivotal role in the longevity of antique photographs. Controlling temperature, humidity, and light exposure dramatically slows down the rate of deterioration.
Maintaining a stable environment is crucial, but you should also be prepared for emergencies by reviewing the process for restoring water-damaged photos.
Maintain Stable Temperature and Humidity
Fluctuations in temperature and humidity are more damaging than consistently high or low levels. Aim for a cool, dry, and stable environment. The ideal conditions for most photographic materials are:
- Temperature: Between 65-70°F (18-21°C). Cooler temperatures further slow chemical degradation.
- Relative Humidity (RH): Between 30-50%. High humidity encourages mold growth, insect activity, and emulsion degradation. Low humidity causes prints to become brittle and curl.
Avoid storing photographs in basements, attics, garages, or external storage units. These areas typically experience extreme temperature and humidity swings and are prone to pests and leaks. A climate-controlled interior closet on an upper floor often provides the most stable environment in a home.
Eliminate Light Exposure
Light, especially ultraviolet (UV) light, is a primary catalyst for fading and discoloration in photographs. Store all antique photos in dark archival boxes or envelopes to completely block light. When displaying photos, take extreme precautions.
Even indirect or low-level light causes cumulative damage over time. Imagine exposing a newspaper to sunlight for a few weeks; the yellowing and brittleness are a clear example of light’s destructive power. Photographic emulsions react similarly, but often more subtly until the damage is extensive.
Protect from Pests and Pollutants
Insects, rodents, and airborne pollutants pose significant threats. Archival boxes offer a physical barrier against pests. Ensure your storage area is clean and free of food sources. Airborne pollutants like industrial fumes, cleaning product vapors, and even household dust contain reactive chemicals that can cause staining and fading. Good air circulation and keeping photos enclosed help mitigate this risk.
Safe Digitization: Preserving Antique Photographs Without Risk
Digitizing your antique photographs creates a backup, allows for safe viewing, and opens possibilities for sharing and creative projects, all without risking the originals. This process is a critical part of modern preservation.
Once you have handled and cleaned your prints, follow a complete guide to scanning old photos at home to create high-resolution digital backups safely.
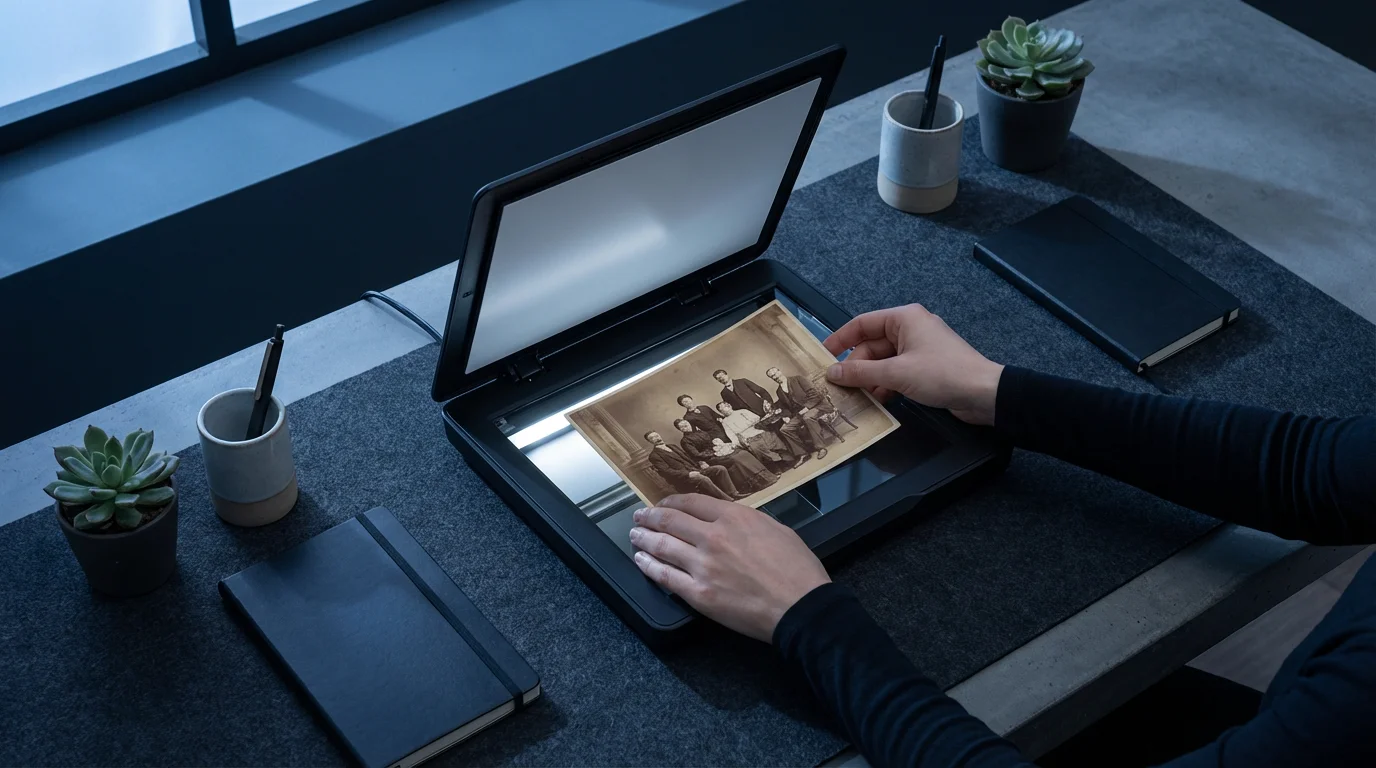
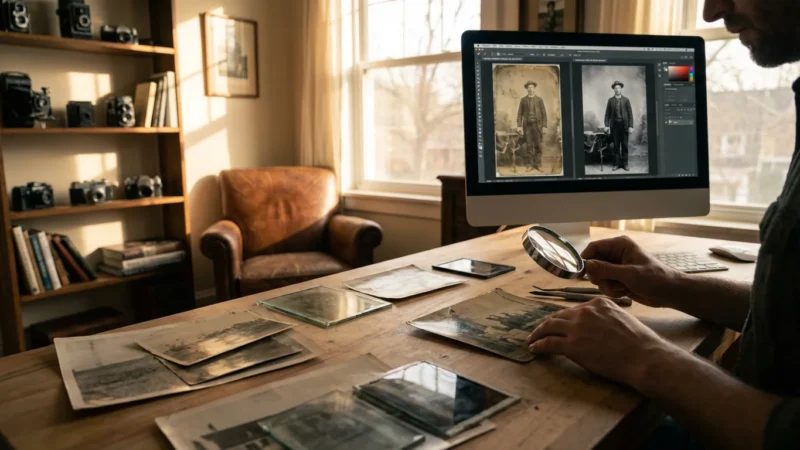
Choose the Right Scanner
A flatbed scanner is the safest and most effective tool for digitizing antique photos. Avoid sheet-fed scanners, which can bend or jam delicate prints and cause irreversible damage. Use a scanner with a high optical resolution (at least 600 dpi, preferably 1200 dpi for smaller images) to capture fine details.
Prepare for Scanning
- Clean the Scanner Glass: Use a lint-free cloth and an anti-static glass cleaner (designed for electronics, not household cleaners) to ensure the scanner bed is spotless. Dust and smudges on the glass will appear in your scans.
- Gentle Dust Removal: Before placing a photo on the scanner, use a soft, natural-bristle brush or a photographer’s air blower to gently remove any surface dust from the photograph. Do not wipe the photo directly.
- Handle with Gloves: Continue wearing your clean, white cotton or nitrile gloves during the entire scanning process to protect the original.
Scanning Techniques
- Place Gently: Carefully place the photograph face down on the scanner glass, aligning it straight. Close the scanner lid gently; do not press down on the photo.
- Use a Black Background: For ambrotypes or tintypes, which often have uneven edges or are within cases, place a piece of black archival paper over the photo before closing the lid. This creates a uniform background and enhances the image’s appearance in the scan.
- Scan at High Resolution: Aim for a minimum of 600 DPI for standard prints. For small photos, daguerreotypes, or images you plan to enlarge, scan at 1200 DPI or higher to capture maximum detail. This ensures future flexibility for printing or detailed viewing.
- Scan as TIFF: Save your master scans as uncompressed TIFF files. TIFF (Tagged Image File Format) is a lossless format that retains all image data, making it ideal for archival purposes. You can always create smaller JPEG copies from your TIFF masters for sharing or everyday use, but always keep the high-resolution TIFFs.
Backup Your Digital Files
Digitization is only half the battle. Implement a robust backup strategy:
- Redundancy: Store copies of your digital files on at least three different forms of media (e.g., external hard drive, cloud storage, network-attached storage).
- Off-site Backup: Keep at least one copy in a different physical location (e.g., a friend’s house, a secure cloud service) to protect against local disasters like fire or flood.
- Regular Checks: Periodically check your backup files to ensure they are accessible and uncorrupted. Digital files can degrade just like physical ones.
Thoughtful and Safe Display Methods
Displaying your antique photos allows you to share your family’s history, but it requires careful consideration to prevent damage. The safest option involves displaying high-quality reproductions, keeping originals safely stored.
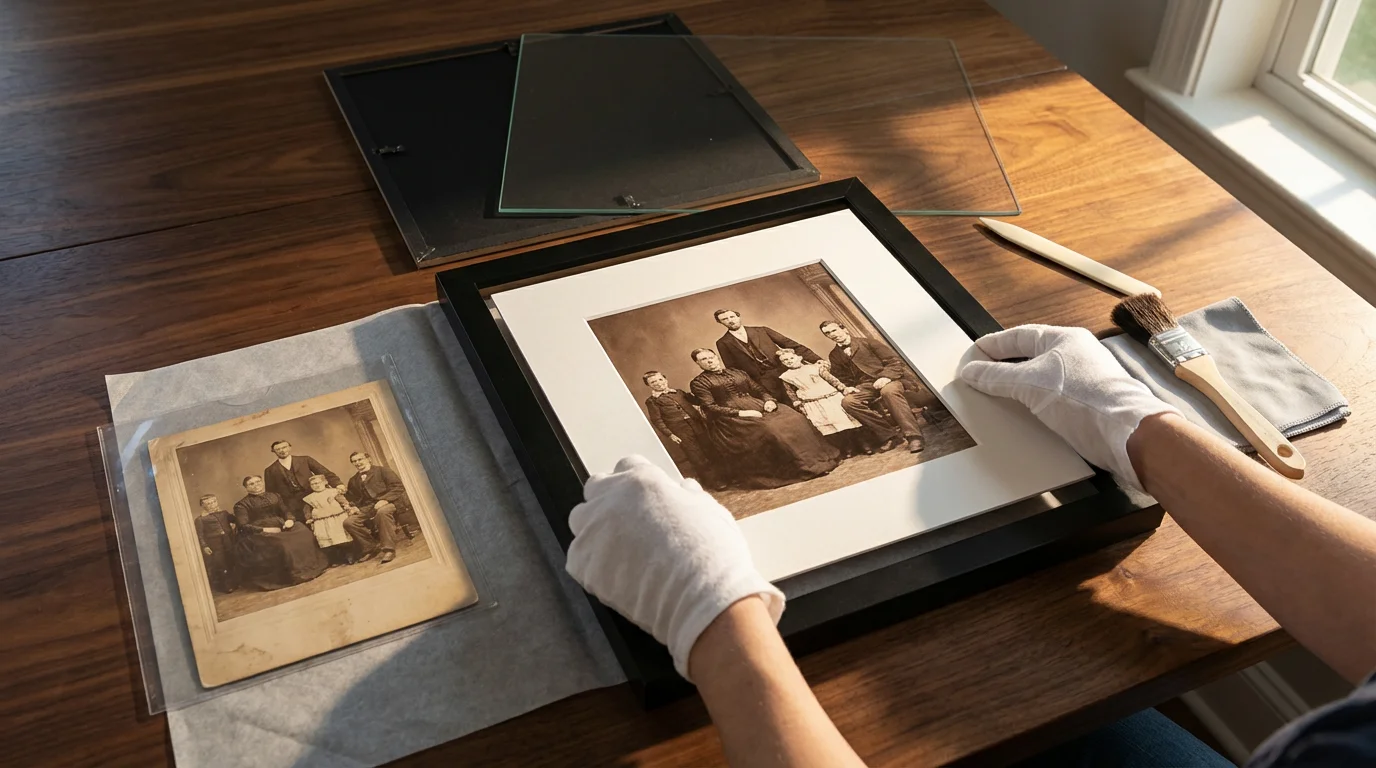
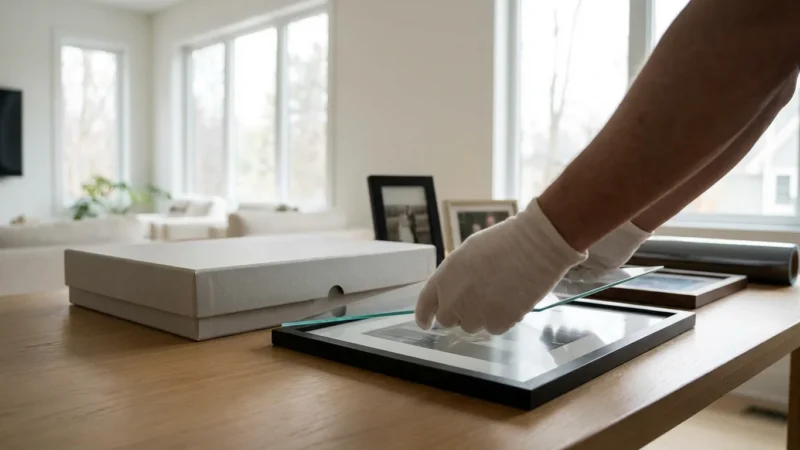
Displaying Original Antique Photos
If you choose to display original antique photos, follow these strict guidelines:
- Archival Framing: Frame photographs using 100% acid-free mats, backing boards, and hinging tapes (made from Japanese paper and wheat starch paste). The mat should create a space between the photo surface and the glass.
- UV-Filtering Glass or Acrylic: Always use glazing that filters out at least 98% of harmful UV light. This is a critical barrier against fading.
- Indirect Lighting: Hang framed photographs on interior walls, away from direct sunlight, windows, and artificial light sources that emit significant UV, such as fluorescent bulbs. Use low-intensity LED lighting if you must illuminate them, as LEDs emit minimal UV and heat.
- Stable Environment: Avoid hanging photographs in bathrooms, kitchens, or near fireplaces, vents, or external walls. These areas experience greater temperature and humidity fluctuations.
- Rotate Displays: Even with all precautions, light exposure is cumulative. Consider rotating your displayed originals every few months, storing them in the dark for periods to minimize exposure.
Displaying Reproductions
For maximum safety and peace of mind, display high-quality reproductions of your antique photos. This allows you to enjoy the images without any risk to the fragile originals.
- Professional Prints: Have your high-resolution digital scans professionally printed on archival paper using pigment-based inks. These prints offer excellent color stability and longevity.
- Digital Photo Frames: Load your scanned images onto a modern digital photo frame. Choose frames with good image quality and place them in areas away from direct sunlight or excessive heat. This method offers incredible flexibility and zero risk to originals.
- Photo Books and Albums: Create custom photo books or digital albums using your scanned images. Many online services offer high-quality printing on acid-free paper, providing a beautiful and durable way to share your family history.
Common Pitfalls to Avoid When Handling Old Photos
Understanding what not to do is as important as knowing what to do. Avoid these common practices that can lead to irreversible damage.
A frequent danger for many collections is the use of ‘sticky’ pages, making it vital to know how to remove photos from old magnetic albums safely before the adhesive causes permanent staining.
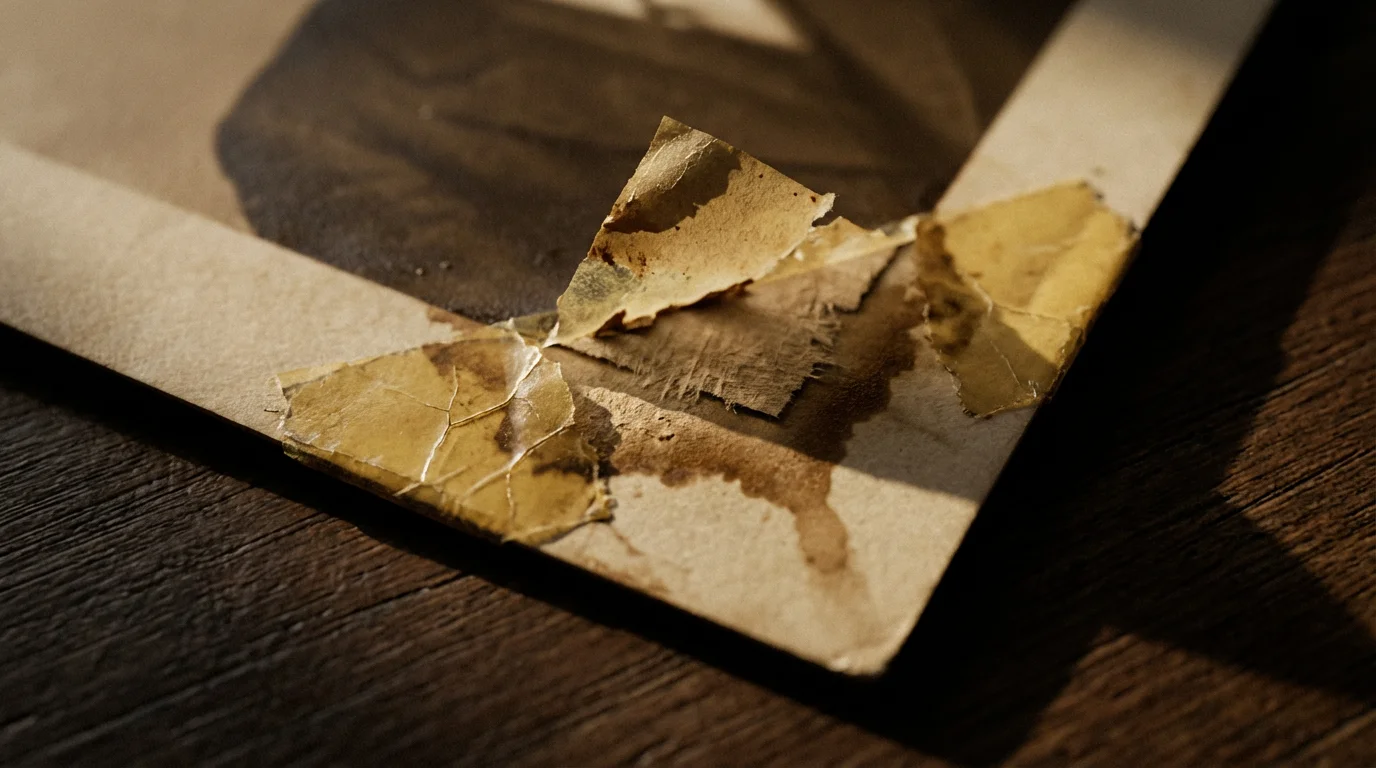
Never Use Tape or Glue
Any adhesive not specifically designed as archival quality will degrade over time, causing staining, discoloration, and physical damage. Standard tapes and glues are acidic and can become brittle or sticky, pulling at the photographic emulsion. If a photograph needs repair, such as a tear, consult a professional conservator. Do not attempt DIY repairs with household adhesives.
Do Not Laminate Photographs
Laminating antique photographs is a permanent, destructive process. The heat and pressure from lamination machinery can damage the delicate emulsion, while the plastic itself is typically not archival and will degrade, off-gassing chemicals that further harm the photo. Lamination also makes future conservation impossible. Choose archival sleeves for protection instead.
Avoid Writing Directly on Photos
Never write on the front or back of an antique photograph with pens, markers, or even most pencils. Ink can bleed through the paper, acids from the ink can stain, and pressure from writing can create indentations. Instead, write details on the outside of an archival sleeve or envelope using a soft pencil or permanent, acid-free marker.
Keep Photos Away from Food and Drink
This seems obvious, but accidents happen. Spills can cause irreversible staining, mold growth, and physical damage. Always keep food and drinks far away from your workspace and storage areas when handling antique photos.
Do Not Attempt Self-Repairs
Resist the urge to “fix” a damaged photograph yourself. Without specialized training and materials, you risk exacerbating the damage. Attempting to clean mold, flatten curled prints with heat, or repair tears with non-archival materials almost always causes more harm than good. When facing significant damage, your best course of action is to seek professional help.
When Professional Conservation is Necessary
Some antique photographs require expertise beyond what you can provide at home. Knowing when to call a professional conservator protects your most valuable or damaged pieces.
If your heirloom is beyond simple cleaning, you may want to research professional photo restoration services to repair severe physical or chemical damage.
Recognizing When to Seek Expert Help
Consult a professional photographic conservator if your photographs exhibit any of the following:
- Mold or Fungal Growth: Mold is highly destructive and requires specialized treatment to remove safely and prevent recurrence. Do not attempt to clean it yourself, as you can spread spores or embed the mold further.
- Significant Tears or Physical Damage: Extensive tears, missing pieces, or severe creasing often require precise, archival repair techniques.
- Chemical Degradation: Signs like severe silver mirroring, extensive fading, overall yellowing, or significant discoloration suggest chemical instability that a conservator can address.
- Water Damage: If photographs have been exposed to water, they are at high risk for mold and structural damage. A conservator can guide emergency salvage.
- Pest Damage: Evidence of insect infestations or rodent damage means the photographs need professional attention to stop further harm and repair existing issues.
- Valuable or Rare Photographs: If you possess extremely rare, historically significant, or monetarily valuable antique photos, always default to professional advice for any handling, storage, or display decisions.
Finding a Qualified Conservator
Locating a reputable professional is key. Look for conservators affiliated with professional organizations or institutions. The American Institute for Conservation of Historic and Artistic Works (AIC) maintains a directory of certified conservators, allowing you to search by specialty, such as photographic materials. An experienced conservator will assess the photograph’s condition, recommend appropriate treatment, and explain the process, ensuring the preservation of your precious heritage. You can find their directory at culturalheritage.org.
Frequently Asked Questions
Can I touch antique photographs with my bare hands if I wash them first?
Washing your hands is a critical first step, but it is not sufficient. Even clean hands carry natural oils that can transfer to photographic emulsions, leaving fingerprints or creating irreversible smudges over time. Always wear clean, white cotton gloves or nitrile gloves when handling antique photos to provide a protective barrier. This simple practice significantly reduces the risk of damage.
What is the best way to display old family photos without damaging them?
The safest way to display old family photos involves using archival quality materials and avoiding direct exposure to light and environmental fluctuations. Frame photos with UV-filtering glass or acrylic and acid-free mats and backing boards. Hang them on interior walls, away from windows, direct sunlight, and heat sources. Alternatively, scan your antique photos and display high-quality reproductions, keeping the originals safely stored in archival sleeves and boxes.
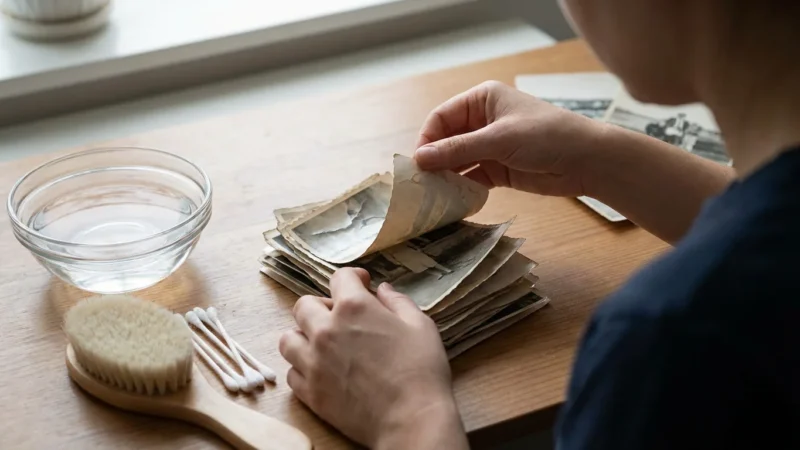
How do I clean antique photographs?
Approach cleaning antique photographs with extreme caution, as improper methods can cause irreversible damage. For surface dust, use a very soft, clean, natural-bristle brush, like a camel-hair brush, or a photographer’s air blower to gently remove particles. Never use liquids, chemical cleaners, or abrasive materials. If a photograph has mold, grime, or significant damage, do not attempt to clean it yourself. Consult a professional photographic conservator who possesses the expertise and specialized tools for safe restoration.
Is it safe to laminate antique photographs for protection?
Laminating antique photographs is highly discouraged and can cause irreversible damage. The heat and pressure from lamination machines can damage the delicate emulsion and support layers of old prints. Furthermore, the plastic used in lamination is rarely archival quality and can degrade over time, off-gassing chemicals that accelerate photo deterioration. Lamination is also a permanent process, making future conservation efforts impossible. Opt for archival sleeves made from polyester, polypropylene, or polyethylene to protect your photos instead.
Preserving your family’s antique photographs is a deeply rewarding act of heritage stewardship. By understanding their delicate nature, implementing proper handling and archival storage, and making informed decisions about display and digitization, you safeguard these precious visual legacies. You ensure that the faces, places, and moments captured in these invaluable images continue to tell their stories for generations to come. Your efforts protect not just photographs, but the very fabric of your family’s history.
Disclaimer: This article is for informational purposes only. When handling valuable or irreplaceable photographs, consider consulting a professional conservator. Always test preservation methods on non-valuable items first.
It is critical to understand how humidity and temperature affect your photo collection to prevent irreparable warping and mold growth.


Leave a Reply