Disclaimer: This article is for informational purposes only. When handling valuable or irreplaceable photographs, consider consulting a professional conservator. Always test preservation methods on non-valuable items first.
Since these albums often contain more than just prints, you may also want to research preserving newspaper clippings and memorabilia found tucked between the pages.
Rescuing these images is vital, but you should also learn how to store old photographs to prevent long-term fading once they are out of the album.
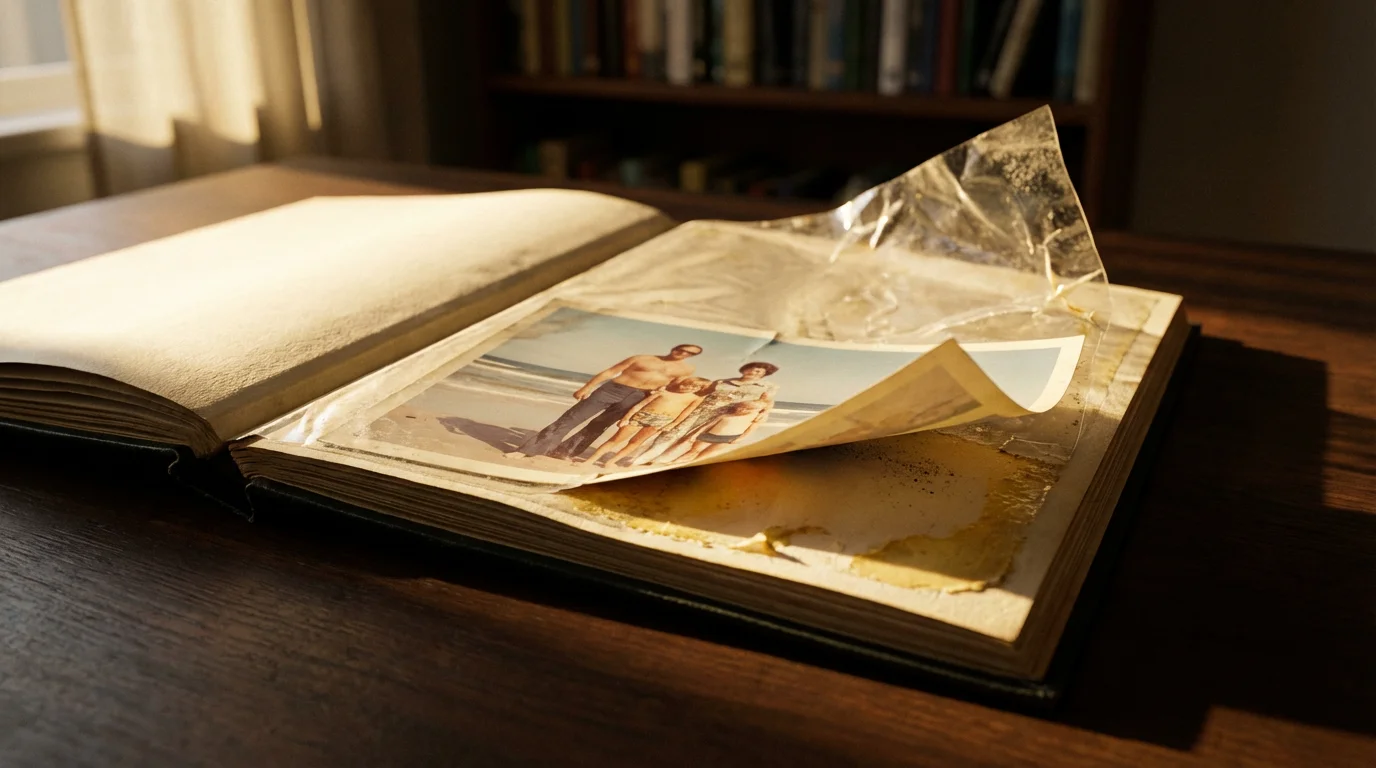
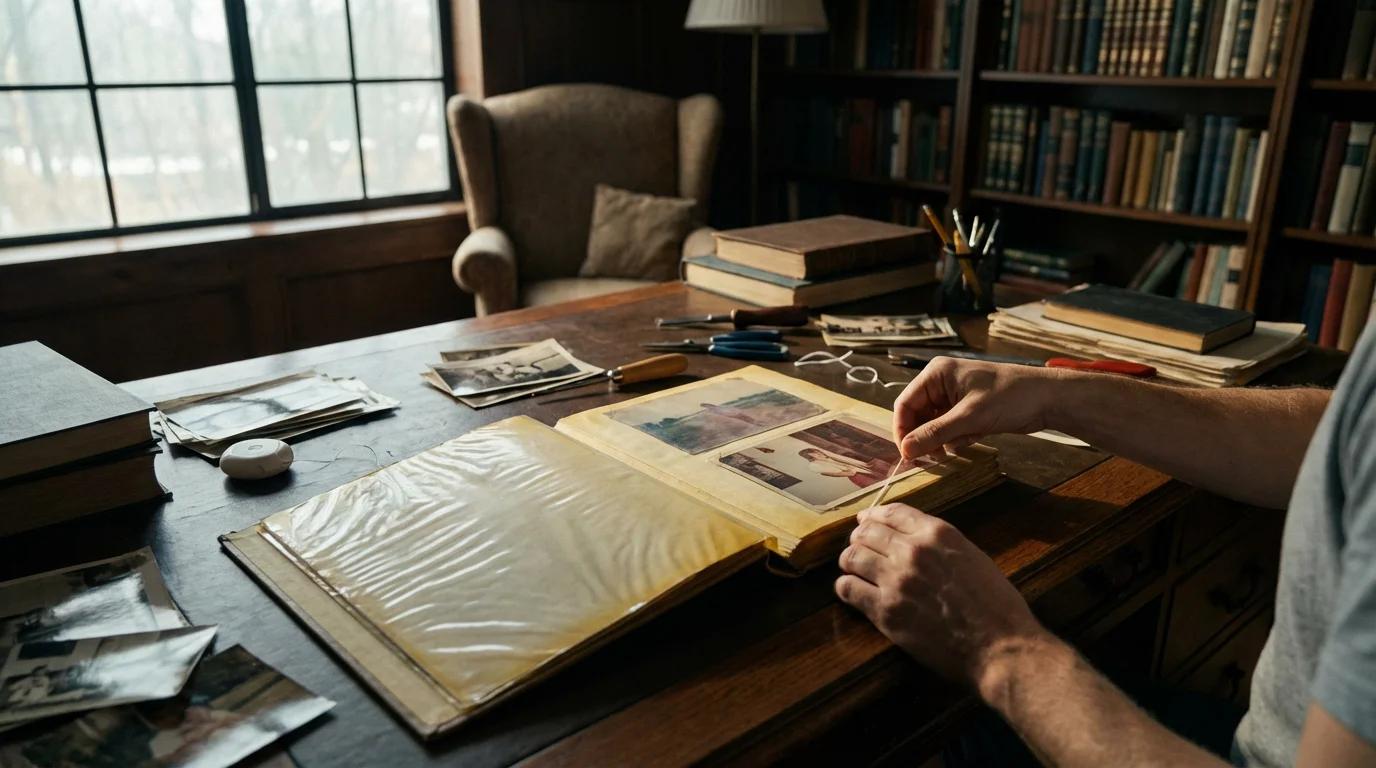
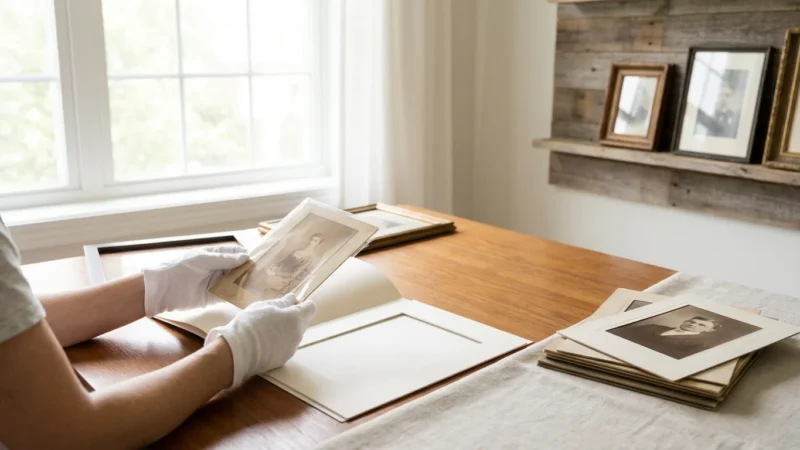
You have likely encountered them, perhaps hidden away in an attic or basement: those bulky, self-stick photo albums popular decades ago. While convenient at the time, these “magnetic” albums, which use sticky pages with a clear plastic overlay, are notorious for trapping and damaging precious photographs. The adhesive backing often turns acidic over time, causing photos to yellow, become brittle, and permanently bond to the album page. Your family’s photographic legacy resides within these pages, and rescuing those images is a critical step in preserving your heritage.
This guide provides a practical, step-by-step approach to safely removing photos from sticky magnetic albums. We focus on gentle, effective techniques to minimize damage, offering actionable insights you can implement today. With patience and the right tools, you can liberate your photos, clean them, and rehouse them in archival-safe storage, ensuring their longevity for generations to come. Your memories deserve this careful attention.
Understanding the Challenge: Why Magnetic Albums Harm Your Photos
The term “magnetic album” is a misnomer, creating a false sense of security for many owners. These albums do not use magnets. Instead, they feature pages coated with a pressure-sensitive adhesive and covered by a clear, often brittle, acetate or plastic sheet. You place your photos on the sticky surface and press the plastic sheet over them to hold them in place.
If the acidic adhesive has already caused visible staining, you may need specialized techniques for saving yellowed and discolored photographs once they are removed.
This design, while convenient for quick arrangement, presents several significant problems for long-term photo preservation:
- Acidic Adhesives: Manufacturers often used cheap, unstable glues that contain acids. Over time, these acids leach into the photographic emulsion, causing irreversible damage. This chemical reaction leads to yellowing, fading, brittleness, and a general degradation of image quality. Data from preservation experts consistently shows that acidic materials are a primary cause of photographic decay.
- Permanent Bonding: The adhesive, exposed to air and varying temperatures over years, hardens and creates a strong, often permanent, bond with the back of your photographs. This bond makes removal incredibly challenging, risking tears, creases, or even the loss of the emulsion layer.
- Plastic Overlay Degradation: The clear plastic sheets themselves can degrade. They become brittle, yellow, crack, and sometimes stick to the front surface of your photos, creating a static charge that attracts dust and debris. This can also trap moisture, promoting mold growth in humid environments.
- Lack of Air Circulation: Trapping photos tightly against an adhesive surface without proper air circulation can contribute to a microenvironment conducive to chemical reactions and decay.
Understanding these risks underscores the urgency and care required when approaching the task of getting photos out of magnetic photo albums. Each image represents a moment, a person, or a story, making their safe rescue paramount.
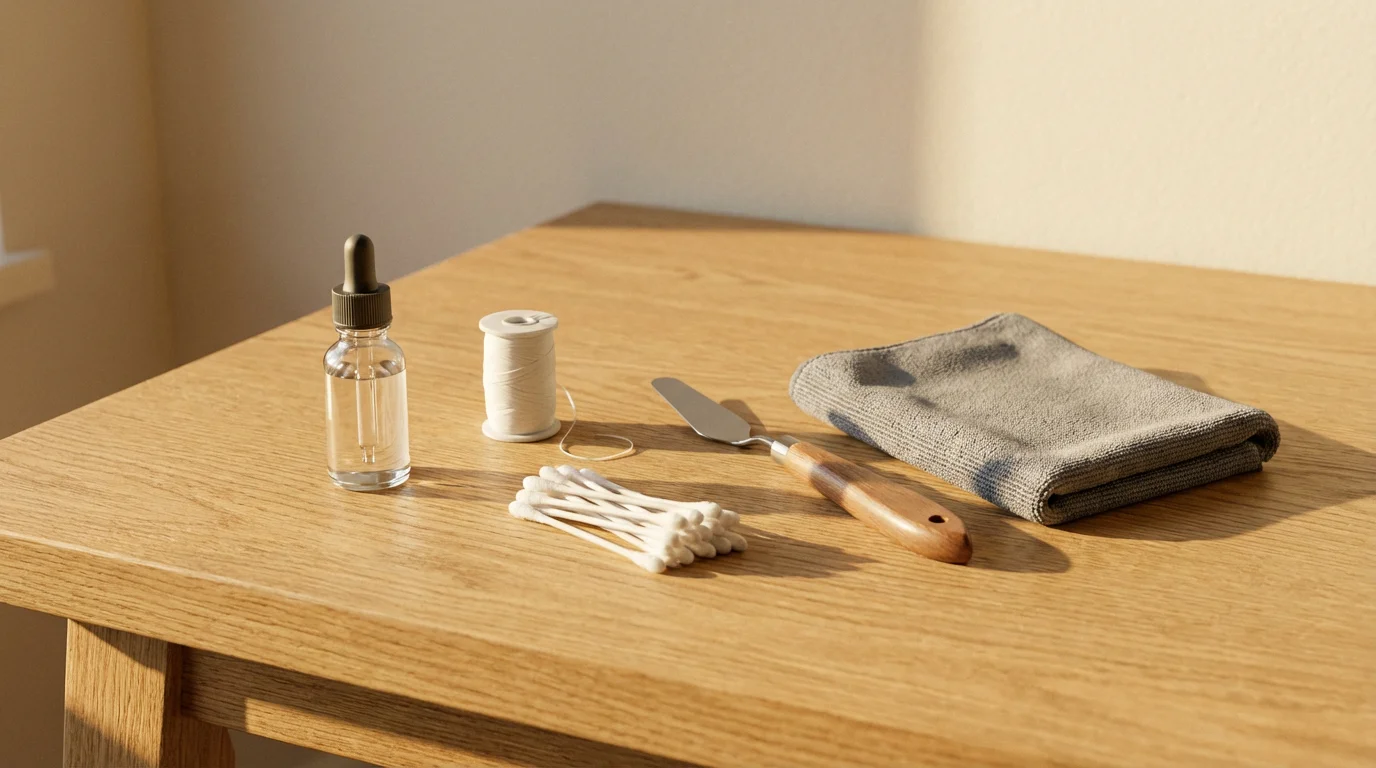
Gathering Your Tools: Essential Supplies for Safe Photo Removal
Successful photo removal hinges on having the right tools. Assemble these items before you begin to ensure a smooth and safe process. Many of these tools are inexpensive and readily available.
- Dental Floss (Unwaxed, Unflavored): This is your primary tool for separating photos. Its thin, strong, and non-abrasive nature allows it to slide under the photo without tearing. Opt for unwaxed and unflavored to avoid transferring residues.
- Thin Metal Spatula or Palette Knife: Look for a very thin, flexible spatula, often found in craft or art supply stores. A thin metal cake decorating spatula also works. The thin edge helps to gently pry edges. Avoid anything with sharp or serrated edges.
- Hairdryer (Low Heat Setting): Controlled, gentle heat can soften the adhesive. Use it on the lowest heat and fan setting, holding it at a safe distance from the photo. Never use a heat gun, which produces excessively high temperatures.
- Archival Photo Sleeves: These are crucial for rehousing your photos immediately after removal. Choose sleeves made from polypropylene, polyester (Mylar), or polyethylene, labeled “acid-free” and “PAT certified” (Photographic Activity Test).
- Archival Photo Boxes: Store your sleeved photos in sturdy, acid-free, lignin-free boxes. These provide physical protection and protect against environmental contaminants.
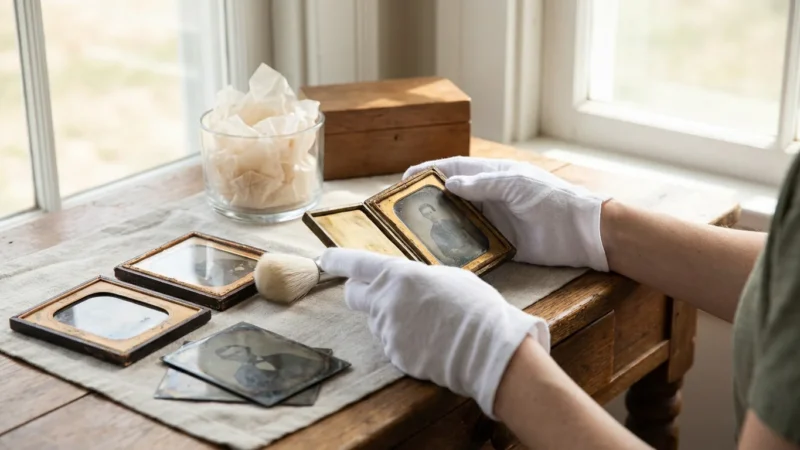
- Cotton Gloves: Handle photos with clean cotton gloves to prevent transferring oils and dirt from your hands to the delicate photo surfaces.
- Tweezers (Blunt-tipped): Useful for gently lifting photo corners or peeling away small pieces of residue. Ensure the tips are smooth, not sharp.
- Soft Eraser (e.g., Staedtler Mars Plastic): For gently removing light adhesive residue from the back of photos. Test on an inconspicuous area first.
- Pencil and Notebook: Document any details about the photos as you remove them, such as dates, names, or events, especially if they are no longer identifiable on the back.
- Clean, Flat Workspace: A well-lit, uncluttered table or desk is essential.
“Many old photo album adhesives were never intended for long-term preservation. They contain volatile chemicals that continuously react with photographic materials. Removing photos from these albums is often the first, most critical step in saving them from irreversible damage.”
Preparing Your Workspace and Mindset for Photo Removal
Before you tackle getting photos out of magnetic photo albums, set yourself up for success. Preparation is key to preventing accidental damage and maintaining your patience.
As you extract these images, having a strategy for organizing physical photo prints will ensure your family history is orderly and easy to find.
- Choose a Clean, Flat Surface: Select a large, stable table or desk. Cover it with a clean, lint-free cloth or a sheet of acid-free paper to protect your photos from dust and scratches.
- Ensure Good Lighting: Bright, even lighting is crucial for seeing exactly what you are doing. Natural light is ideal, but a good desk lamp can also work. Avoid harsh, direct spotlights that could create glare or heat.
- Gather All Your Tools: Arrange your dental floss, spatula, hairdryer, cotton gloves, archival sleeves, and any other necessary items within easy reach. This prevents fumbling or searching mid-process.
- Work in a Quiet, Uninterrupted Environment: This task requires focus and a steady hand. Minimize distractions. Inform family members that you need uninterrupted time.
- Wear Cotton Gloves: Put on your clean cotton gloves. These prevent the transfer of oils, fingerprints, and dirt from your skin to the delicate emulsion and paper surfaces of your photos.
- Adopt a Patient and Gentle Mindset: This is not a race. Expect the process to take time, especially for deeply stuck photos. Haste is the biggest enemy of preservation. Approach each photo with the respect it deserves, understanding its irreplaceable value. If you feel frustrated, take a break.
- Take Notes: Keep a notepad and pencil handy. As you remove photos, you might discover handwritten notes on the back or recognize people. Document this information immediately, especially if you plan to rehouse them separately.
- Prepare for Immediate Archiving: Have your archival sleeves and boxes ready. As soon as you successfully remove a photo, place it into a protective sleeve. This prevents further exposure or accidental damage.
By preparing thoroughly, you establish a controlled environment that significantly reduces the risk of damaging your precious images during the removal process. Your attention to detail here will pay off in the long run.
The Step-by-Step Process: Gently Releasing Your Photos
This is where your patience and precision become essential. Follow these steps carefully, always prioritizing the photo’s safety. Remember, the goal is to free the photo with minimal stress to its structure.
Be especially careful with instant prints, as protecting Polaroid photos from the chemical breakdown of magnetic adhesives is particularly difficult.
If you find that a photo is too fragile to move, you might consider scanning photos from albums without removing them to ensure the image is preserved digitally before attempting further extraction.
Different images may react differently based on their construction, so understanding photo paper types can help you tailor your removal technique.
Step 1: Assess the Situation
Before touching any photo, carefully examine the album page. Are the photos stuck to the clear plastic overlay, the sticky page, or both? Some albums have a plastic sheet that has fused to the front of the photo, while others only adhere to the back. Determine the level of stickiness by gently trying to lift a corner of the plastic overlay, if present. Identify photos that appear less stuck versus those deeply embedded.
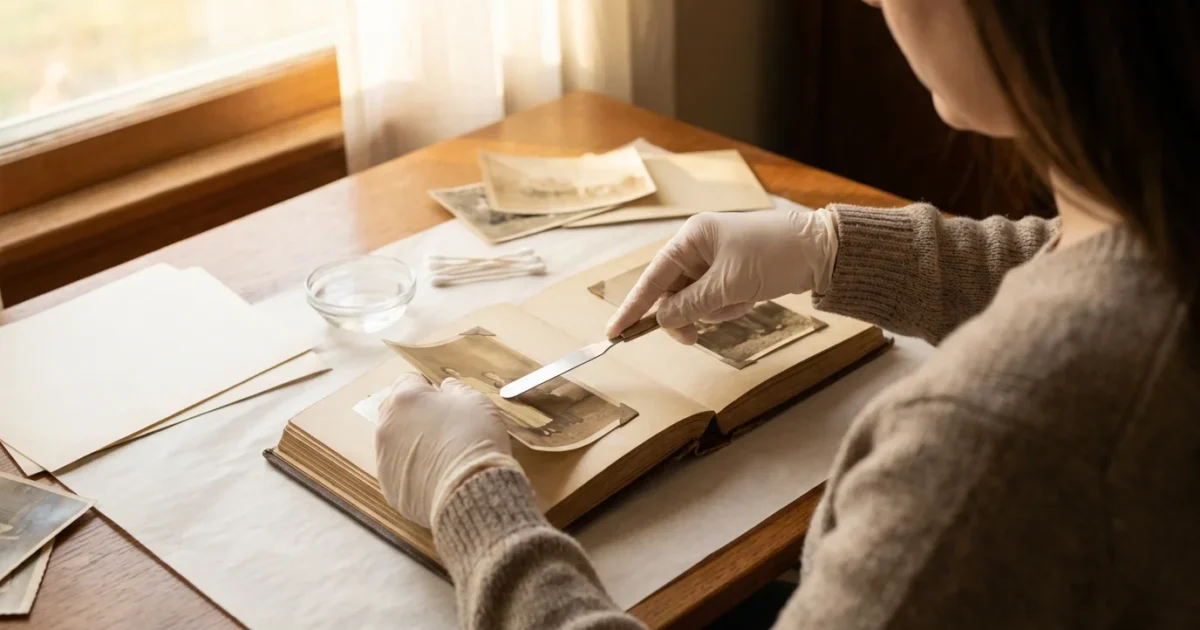
Step 2: Start with the Least Invasive Method – The Dental Floss Technique
This is the safest and most recommended method for photos stuck to the sticky page:
- Lift a Corner (If Possible): Gently try to lift one corner of the photo using your blunt tweezers or the very edge of your thin spatula. If it lifts even a millimeter without resistance, you have a good starting point. If the corner does not lift, skip to the heat application technique below.
- Slide the Floss Under: Once a corner is slightly lifted, carefully slide a length of unwaxed, unflavored dental floss underneath the photo, starting from the lifted edge. Hold the floss taut with both hands.
- “Saw” Gently: With steady, controlled movements, gently pull the floss back and forth in a slow, sawing motion. Keep the floss as flat against the album page as possible to avoid digging into the photo. Work slowly across the photo, separating it from the adhesive.
- Support the Photo: As the photo separates, use your free hand or the spatula to gently support the photo from above, preventing it from bending or tearing.
- Continue Until Free: Continue the sawing motion until the entire photo releases from the page. This method minimizes direct pulling on the photo’s delicate paper.
Step 3: Applying Gentle Heat to Soften Adhesive
If the dental floss technique proves too difficult because the photo is too firmly adhered, or if you cannot lift a corner, controlled heat can help. Heat softens the adhesive, making it more pliable.
- Prepare the Hairdryer: Set your hairdryer to its lowest heat and fan setting.
- Apply Heat Gently: Hold the hairdryer about 6-8 inches away from the photo. Move it slowly over the photo for 10-20 seconds at a time. Do not concentrate heat on one spot. The goal is to warm the adhesive, not to cook the photo.
- Test and Repeat: Immediately after heating, try the dental floss or thin spatula technique again. You should feel the adhesive becoming slightly softer and more yielding. If necessary, reapply heat in short bursts, always checking the photo’s response.
- Monitor the Photo: Watch for any signs of curling, discoloration, or warping. If you see these, stop immediately and let the photo cool. Excessive heat can cause irreversible damage.
Step 4: Using a Thin Spatula for Persistent Edges
For areas where the floss struggles, or to initiate the lift:
- Insert Spatula: Carefully slide the very thin edge of your metal spatula under a photo corner or edge. Keep the spatula as flat as possible against the album page.
- Gentle Prying Motion: Apply very slight, upward pressure, wiggling the spatula gently to separate the photo from the adhesive. Work in small increments.
- Combine with Floss: Once you have a small section lifted with the spatula, you can often reintroduce the dental floss to complete the separation.
Step 5: Addressing Photos Stuck to the Plastic Overlay
Sometimes, the clear plastic sheet itself adheres to the front of the photo. This presents a unique challenge:
- Gentle Peel: Try to peel the plastic overlay away from the photo very slowly and at a shallow angle. Pulling at a sharp angle can tear the photo.
- Localized Heat: If the plastic is stuck, apply very brief, gentle heat with the hairdryer to the specific area where the plastic meets the photo. This can sometimes soften the bond enough for the plastic to release.
- Extreme Caution: This is one of the riskiest scenarios. If the plastic does not release easily, do not force it. You risk tearing off the photo’s emulsion layer, destroying the image. In such cases, professional conservator intervention is the safest course of action.
Always remember to work slowly and methodically. Each photo is unique, and some will release more easily than others. Your careful effort now prevents permanent loss.

Handling Stubborn Photos: Advanced Techniques and When to Seek Help
Despite your best efforts with dental floss and gentle heat, some photos may remain stubbornly attached. This section covers more advanced methods for particularly difficult cases and, critically, advises on when to recognize the limits of DIY preservation and seek professional assistance.
If moisture has caused the images to fuse completely to the page, our guide on restoring water-damaged photos offers additional specialized recovery techniques.
Advanced Technique: The Archival Solvent Method (Use with Extreme Caution)
This method involves using a solvent to dissolve the adhesive. It carries significant risks and is only recommended for photos you cannot release by other means, and only after testing.
- Select an Archival-Safe Solvent: For photo adhesives, conservators sometimes use solvents like Heptane or Bestine (rubber cement thinner, which is mostly n-Heptane). These are relatively inert to photographic emulsions. **Never use water, rubbing alcohol, nail polish remover, lighter fluid, or other household solvents**, as these will almost certainly damage your photos.
- Work in a Well-Ventilated Area: Solvents produce fumes. Ensure excellent airflow to avoid inhalation.
- Test on a Discarded Photo or Inconspicuous Area: Crucially, test the solvent on a less valuable photo or a tiny, unseen corner of a photo. Apply a small amount with a cotton swab to see how the photo reacts. Look for any discoloration, bleeding, or emulsion lifting.
- Application:
- Place the album page on a clean, non-porous surface.
- Using a fine-tipped dropper or a cotton swab, apply a very small amount of solvent to the adhesive from the back of the album page, directly behind the photo. You want the solvent to wick through the paper of the album page to the adhesive, not directly onto the photo itself if possible.
- Alternatively, if you can lift an edge of the photo slightly, carefully wick the solvent directly onto the exposed adhesive with a cotton swab, working slowly.
- Gentle Separation: As the solvent softens the adhesive, gently re-attempt the dental floss or spatula technique. The photo should begin to release. You may need to apply solvent repeatedly in small doses as you work across the photo.
- Allow to Dry Completely: After removal, place the photo on a clean, absorbent paper towel in a well-ventilated area to allow the solvent to evaporate fully before rehousing.
Warning: The archival solvent method is for experienced individuals. Incorrect solvent choice or application can ruin your photographs. If you are unsure, do not attempt this method.
When to Seek Professional Help
Recognizing when a photo is too valuable or too deeply stuck for DIY methods is a sign of responsible preservation. A professional photograph conservator possesses specialized knowledge, tools, and chemicals to safely handle even the most challenging cases.
Consider consulting a conservator if:
- The Photo is Irreplaceable and Extremely Valuable: This includes historical documents, unique family portraits, or photos with significant monetary or sentimental value that cannot be reproduced.
- The Photo Shows Signs of Extensive Damage: If the photo is already brittle, cracked, moldy, or has a severely damaged emulsion, attempting DIY removal could exacerbate the issues.
- The Plastic Overlay is Fused to the Image: If the clear plastic cover has chemically bonded to the front of the photographic image, risking the emulsion layer, a conservator’s expertise is essential.
- Repeated Attempts Fail: If you have tried the gentle methods described previously and the photo remains stubbornly stuck without any movement, further DIY attempts may cause damage.
You can find qualified conservators through organizations like the American Institute for Conservation of Historic and Artistic Works (AIC). Investing in professional conservation ensures the safest possible outcome for your most treasured and challenging photographs. Remember, their expertise can save images you might otherwise consider lost.
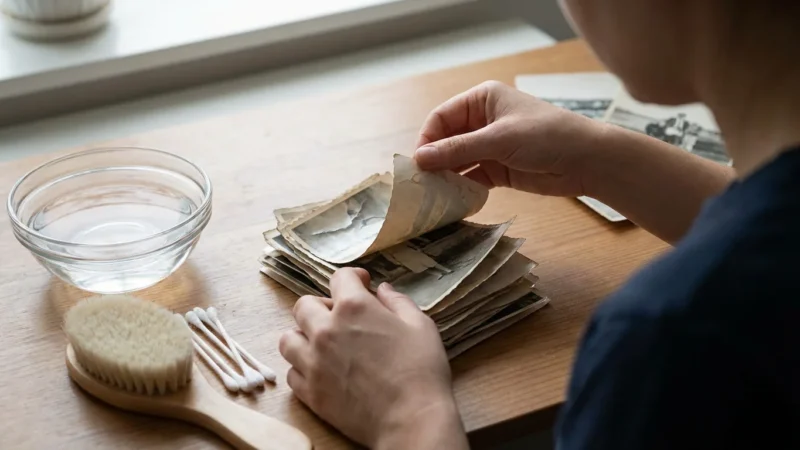
After Removal: Cleaning and Archiving Your Rescued Images
Congratulations on successfully removing your photos! The work is not over, however. Proper post-removal care and archiving are crucial for their long-term survival. This involves cleaning any residual adhesive and rehousing them in archival-safe materials.
Once your images are clean and safe, your next priority should be creating high-quality digital backups; follow our complete guide to scanning old photos at home to preserve them forever.
Step 1: Removing Residual Adhesive
After a photo is free, you may find sticky residue on its back. Removing this is important because it can attract dust and dirt, and potentially continue to degrade over time.
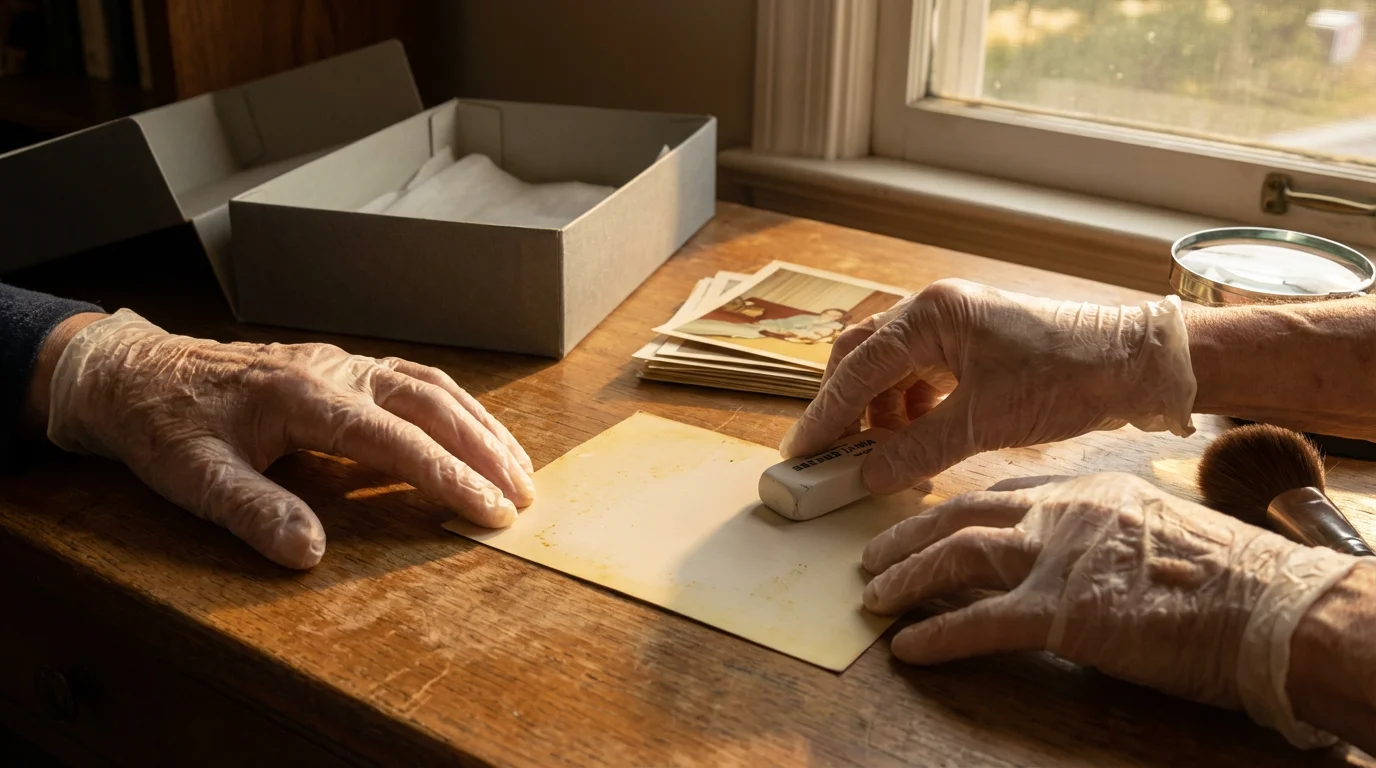
- Gentle Eraser Method: For minor, dry adhesive residue, gently rub the back of the photo with a soft, archival-quality plastic eraser (like a Staedtler Mars Plastic or a drafting eraser). Work carefully, using light pressure. The eraser lifts the adhesive particles without abrading the photo paper. Avoid pressing hard or rubbing the image side.
- Archival Adhesive Remover (Optional, Use with Caution): If the residue is extensive and sticky, you might consider an archival-safe adhesive remover, such as “Un-Du” or similar products designed for photos. Always test on an inconspicuous area or a non-valuable photo first. Apply sparingly with a cotton swab to the back of the photo only, then gently blot with a clean cloth. Ensure adequate ventilation. These products are often naphtha-based, similar to the solvents mentioned for removal, and require careful handling.
- Avoid Water and Harsh Chemicals: Never use water, soap, alcohol, or harsh household cleaners to remove adhesive. These can cause irreversible damage to the photographic emulsion, leading to stains, swelling, or complete loss of the image.
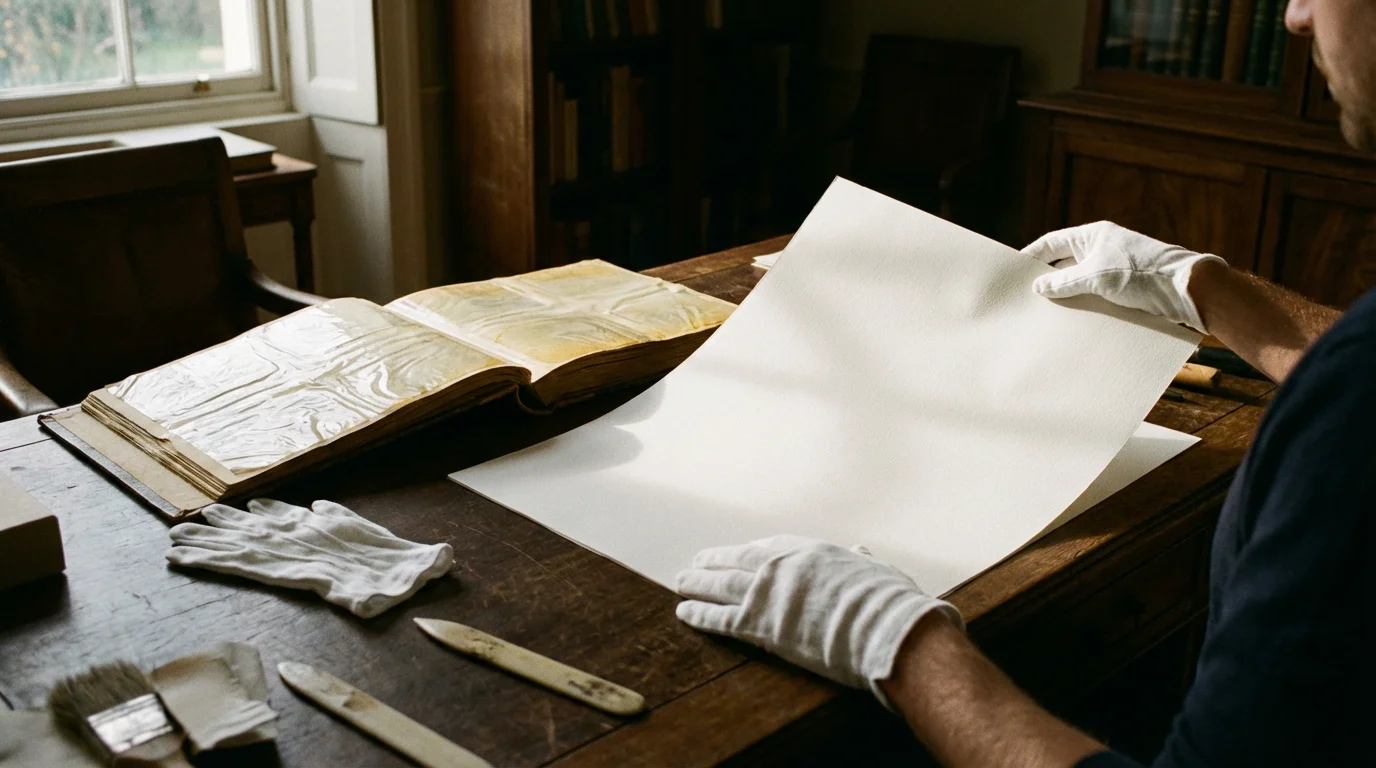
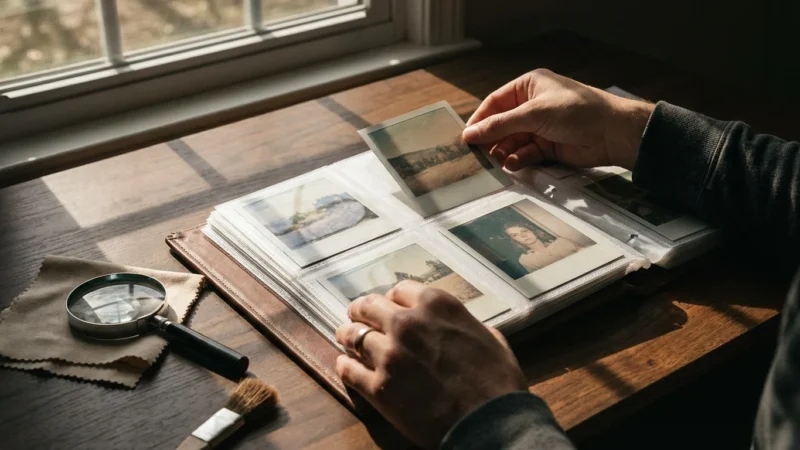
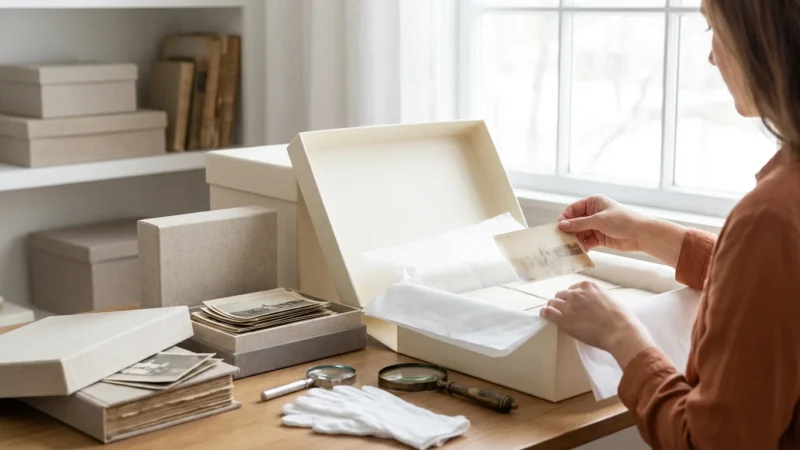
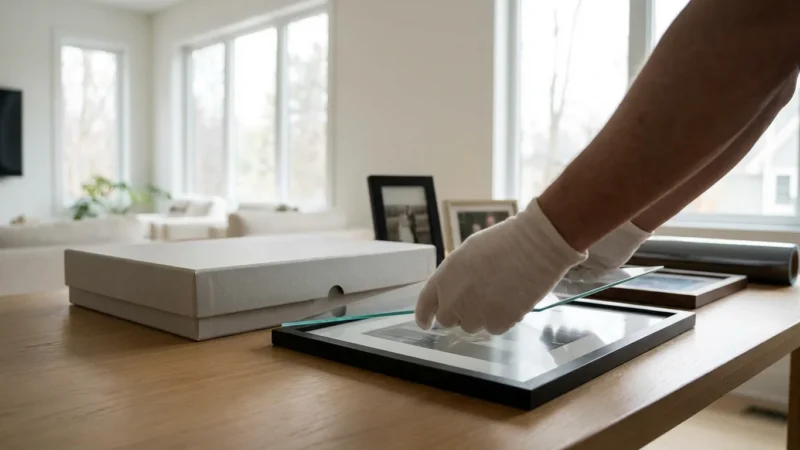
Step 2: Rehousing in Archival Materials
This is arguably the most critical step after removal. Rehousing your photos in proper archival storage prevents future damage from environmental factors and acidic materials.
- Individual Photo Sleeves: Place each photo into its own archival-quality sleeve.
- Material: Choose sleeves made from chemically stable plastics like polypropylene, polyester (Mylar), or polyethylene. These materials are inert and will not interact negatively with your photos. Avoid PVC (polyvinyl chloride), often found in cheap photo album pages, as it emits harmful plasticizers.
- Certification: Look for sleeves labeled “acid-free,” “lignin-free,” and “PAT certified” (Photographic Activity Test). PAT certification indicates the material has been tested and proven safe for photographic materials.
- Type: Opt for either clear polyester sleeves (which offer excellent clarity and protection) or paper envelopes made from acid-free, lignin-free paper. Paper envelopes provide opaque protection from light but require handling to view the photo.
- Archival Photo Boxes: Once sleeved, store your photos in sturdy, acid-free, lignin-free storage boxes.
- Protection: These boxes protect photos from dust, light, air pollution, and physical damage.
- Size: Choose boxes that are appropriately sized for your photos to minimize shifting and bending.
- Material: Ensure the boxes are made from buffered or unbuffered acid-free board. Buffered board offers an alkaline reserve to neutralize acids over time.
- Labeling: Label your archival boxes and sleeves clearly with dates, names, events, or any other pertinent information. Use an archival-safe pencil or pen that will not bleed or fade.
This careful rehousing process creates a safe, stable environment for your photographs, safeguarding them for future generations. It’s a significant upgrade from the detrimental magnetic albums.

Preventing Future Damage: Best Practices for Photo Storage
Removing photos from magnetic albums is a rescue mission. Now, you need a long-term strategy for their preservation. Implementing best practices for photo storage ensures your diligent work pays off and your memories remain vibrant for years to come.
For ultimate peace of mind, consider preserving photos in a fireproof safe to protect your most precious rescued memories from unforeseen disasters.
1. Always Use Archival-Quality Materials
This cannot be stressed enough. Every material that touches your photographs must be archival safe. This includes:
- Albums: If you choose to re-album your photos, select post-bound or ring-bound albums with acid-free paper pages and archival-safe page protectors (polypropylene, polyester, or polyethylene). Avoid “self-stick” or “magnetic” pages at all costs.
- Mounting Adhesives: If you mount photos, use photo corners, archival double-sided tape, or dry mounting tissue that is acid-free and reversible. Never use rubber cement, cellophane tape, or glue sticks.
- Markers and Pens: When writing directly on the back of photos or on album pages, use archival-quality, pigment-based pens that are acid-free, permanent, and fade-resistant.
The Library of Congress Preservation resources highlight the importance of stable, inert materials for long-term storage, corroborating these recommendations.
2. Control the Storage Environment
Environmental conditions significantly impact the longevity of your photographs. Aim for a stable, moderate environment:
- Temperature: Store photos in a cool environment, ideally below 70°F (21°C). Cooler temperatures slow down chemical degradation.
- Humidity: Maintain relative humidity between 30-50%. High humidity (above 60%) encourages mold growth and insect activity. Low humidity (below 15%) can cause brittleness and cracking. Avoid storing photos in basements, attics, or garages where temperature and humidity fluctuate wildly.
- Light: Store photographs in darkness, inside archival boxes or albums. Light, especially UV light, causes fading and discoloration over time. If displaying photos, use UV-filtering glass and rotate them to minimize exposure.
- Air Quality: Protect photos from air pollutants like ozone, sulfur dioxide, and nitrogen oxides, which can accelerate degradation. Archival boxes and sleeves offer a good barrier. Avoid storing photos near fresh paint, fumes, or cleaning supplies.
3. Digitize Your Photo Collection
Digitization is a crucial component of a comprehensive preservation strategy. It provides an indispensable backup in case your physical originals are ever damaged or lost.
- High-Resolution Scanning: Scan your photographs at a high resolution (at least 300-600 dpi for prints, higher for negatives or slides) to capture maximum detail. Use a flatbed scanner designed for photos.
- Metadata: Embed metadata into your digital files, including dates, names, locations, and descriptions. This makes your digital collection searchable and preserves vital contextual information.
- Multiple Backups: Store your digital files in multiple locations: on an external hard drive, cloud storage, and ideally, on a secondary external drive. Follow the “3-2-1 backup rule”: three copies of your data, on two different media types, with one copy offsite.
- Regular Review: Periodically check your digital files and update storage media as technology evolves.
By combining careful physical storage with robust digital backups, you create a resilient system that protects your precious memories from various threats, ensuring they endure for generations to enjoy. The National Archives Preservation resources offer excellent guidance on digital preservation, reinforcing these practices.
Frequently Asked Questions
What are magnetic photo albums, and why are they harmful?
Magnetic photo albums feature pages with a sticky adhesive surface and a clear plastic overlay. Manufacturers marketed them for their convenience, allowing you to position and reposition photos easily. However, the adhesive backing is often highly acidic and chemically unstable, directly transferring acids to your photographs. This acid exposure causes photos to yellow, become brittle, and fade over time. The adhesive also permanently bonds to the photo’s emulsion, making removal difficult and risky.
Can I remove photos from magnetic albums without damaging them?
Yes, you can often remove photos from magnetic albums safely, but it requires extreme patience, the right tools, and gentle techniques. The key is to minimize stress on the photo’s emulsion layer. You will use a combination of carefully applied heat, thin non-abrasive tools, and controlled lifting. Always work slowly and stop if you feel resistance that suggests the photo might tear or crease. Sometimes, professional intervention is the safest option for highly valuable or extremely stuck photographs.
What should I do with my photos after removing them from a magnetic album?
After removing your photos, clean any residual adhesive from their backs using an archival-safe adhesive remover, if necessary. The most crucial next step is to rehouse them in archival-quality storage. Use acid-free, lignin-free photo sleeves made from polypropylene, polyester, or polyethylene. Store these sleeved photos in acid-free boxes. Digitizing your photos immediately after removal creates a digital backup, ensuring their long-term preservation and allowing you to share them widely without risk to the originals.
How do I prevent future damage to my photos?
Preventing future damage involves using proper archival storage materials and maintaining a stable environment. Always choose photo albums, sleeves, and boxes labeled ‘acid-free’ and ‘lignin-free,’ and ideally ‘photo-safe’ or ‘PAT certified.’ Avoid direct sunlight, extreme temperature fluctuations, and high humidity. Store your photos in cool, dry, dark places, away from basements or attics. Regular digitization also provides a critical layer of protection, creating duplicates that are immune to physical decay.


Leave a Reply