Your old photographs hold more than just images; they encapsulate moments, memories, and the very fabric of your family’s history. These tangible links to the past, whether sepia-toned prints from a century ago or color snapshots from your childhood, are irreplaceable. Time, however, poses a relentless threat. Fading, discoloration, brittleness, and damage can erase these precious records permanently. Understanding how to store photographs long term safely protects these invaluable heirlooms for future generations.
You can safeguard your photographic heritage with practical steps and the right materials. This guide delivers actionable insights into preserving your physical photo collection, preventing common forms of deterioration, and ensuring your memories endure.
Understanding the Threats to Your Photographs
To effectively preserve old photos, you must first recognize the enemies of photographic prints. These threats silently erode your images, causing irreversible damage. Environmental factors play a significant role in their deterioration, making mindful photo storage critical.
Light Exposure: A Fading Enemy
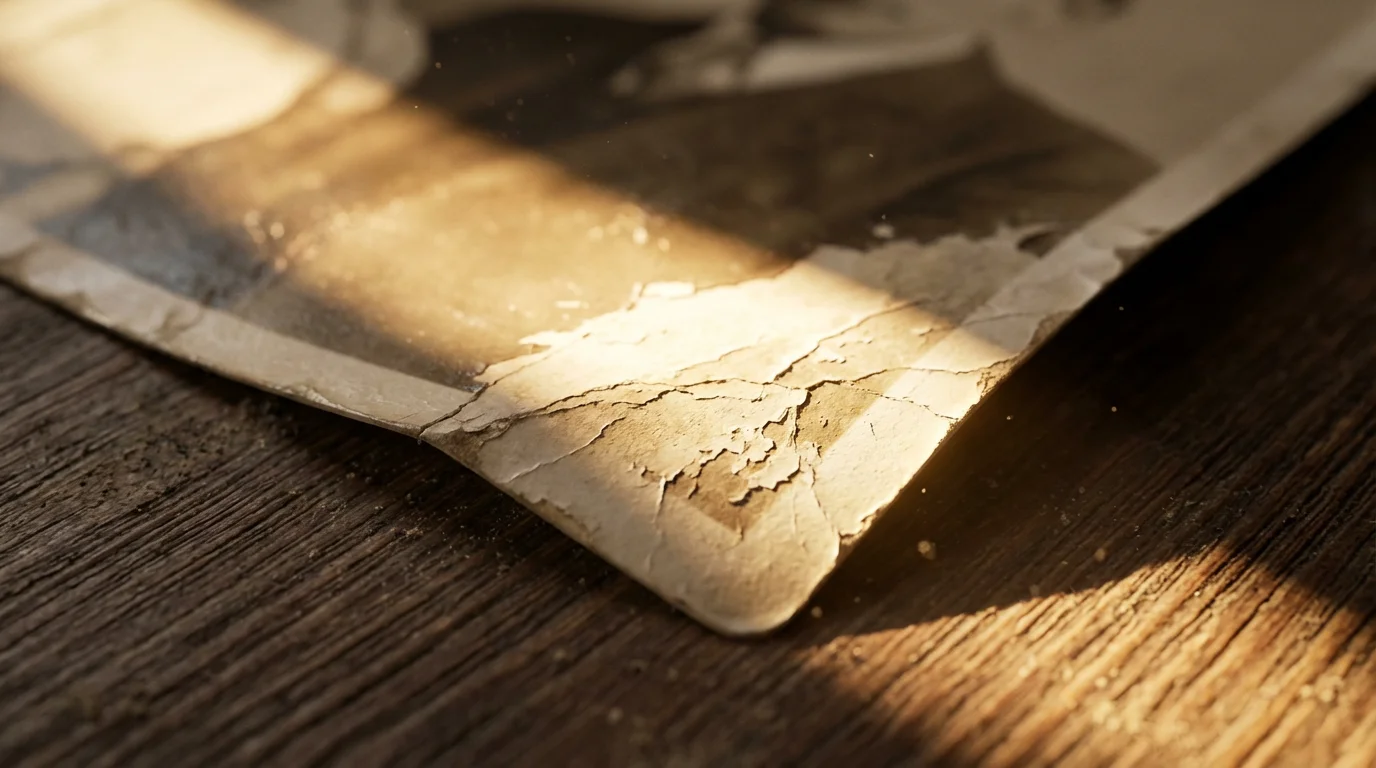
Light, especially ultraviolet (UV) light, causes dyes and pigments in photographs to break down, leading to fading and color shifts. Direct sunlight is the most obvious culprit, but even ambient room light contributes to degradation over time. Think of a newspaper left in a sunny window; it yellows and becomes brittle quickly. Your photos react similarly, albeit sometimes more slowly, depending on their age and photographic process.
Temperature and Humidity: The Silent Destroyers
Fluctuations in temperature and humidity wreak havoc on photographic materials. High heat accelerates chemical deterioration, causing prints to yellow, become brittle, or stick together. High humidity encourages mold growth, gelatin emulsion softening, and ferrotyping, which is sticking to adjacent surfaces. Low humidity, conversely, makes prints curl and crack. Rapid shifts between hot and cold, or damp and dry, stress the photographic layers and paper base, leading to physical damage.
“Maintaining a stable environment with consistent temperature and relative humidity levels is paramount for the long-term preservation of photographic collections. Fluctuations are often more damaging than consistently high or low conditions.”
Chemical Contaminants: Invisible Damage
Many everyday materials contain chemicals harmful to photographs. Acidic paper products, like common cardboard boxes, cheap photo albums, or newspaper clippings, release lignin and other acids that migrate into your photos. This causes yellowing and embrittlement. Volatile organic compounds (VOCs) from fresh paint, cleaning supplies, or even certain plastics also accelerate deterioration. You must choose archival storage materials to protect against these invisible threats.
Physical Handling: Wear and Tear
Each time you touch a photograph, you risk transferring oils, dirt, or moisture from your hands onto the delicate surface. This leads to smudges, fingerprints, and even scratches. Improper handling also includes bending, creasing, or tearing prints. Over time, these small actions accumulate, degrading the physical integrity of your images.
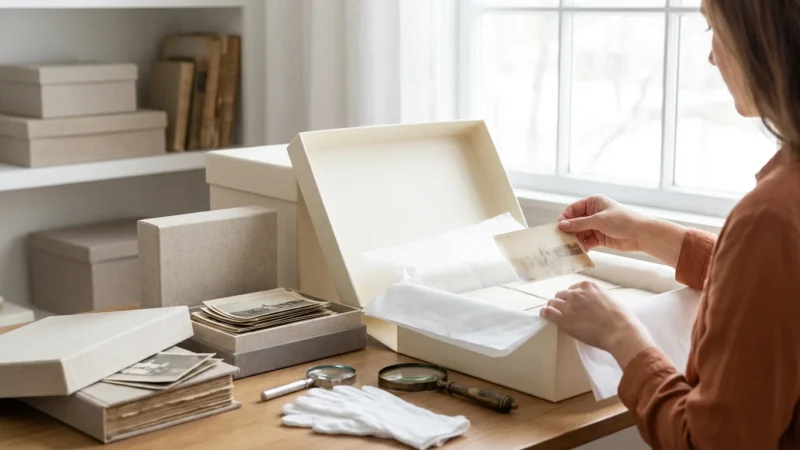
Essential Archival Storage Materials
When you commit to preserving your photo memories, investing in the correct archival storage materials is non-negotiable. These specialized products prevent chemical reactions and provide physical protection. Avoid common office supplies or crafting materials, as they often contain harmful acids and chemicals.
Acid-Free, Lignin-Free, and PAT-Tested: Your Gold Standard
You need materials that are acid-free, lignin-free, and passed the Photographic Activity Test (PAT). This is the benchmark for the best photo storage materials for collectors and family archivists alike.
- Acid-Free: This means the material has a pH of 7.0 or higher. Acids accelerate the deterioration of photographs. Always look for this label.
- Lignin-Free: Lignin is a natural component of wood pulp that breaks down into acids over time. Paper products made without lignin will remain stable and non-damaging.
- PAT-Tested: Developed by the Image Permanence Institute, the PAT is an international standard (ISO 18916) that confirms a material will not chemically react with or harm photographs over time. Look for products specifically labeled “PAT-tested” or “photo-safe.” You can learn more about these standards and research from the Image Permanence Institute directly.
Archival Boxes and Sleeves
These form the backbone of your physical photo storage system.
- Archival Storage Boxes: Choose sturdy, acid-free, lignin-free, and PAT-tested boxes. These boxes provide a stable microenvironment, protecting photos from dust, light, and pollutants. They come in various sizes to accommodate different print dimensions. Select boxes that allow prints to lie flat without crowding.
- Individual Sleeves or Enclosures: Place individual photographs into sleeves made from stable plastics like polypropylene, polyethylene, or Mylar (polyester). These plastics are inert and provide physical protection against fingerprints, scratches, and abrasion. Avoid PVC (polyvinyl chloride) as it degrades, becoming sticky and acidic, which severely damages photos. Ensure sleeves are clear to view the photo without removal.
- Print Pages/Albums: If you use albums, select those with archival-quality pages and sleeves. Ring-binder albums are popular, but ensure the rings are sturdy and do not put undue stress on the pages. Avoid magnetic albums entirely; their sticky pages and acidic paper are notorious for damaging photographs.
Interleaving Paper
For prints not placed in individual sleeves, or for oversized prints, use acid-free, lignin-free tissue or paper between them. This prevents photos from sticking to each other, minimizes abrasion, and provides an additional buffer against environmental changes. Ensure the interleaving material is also PAT-tested.

Creating the Ideal Storage Environment
Beyond the materials you use, the environment where you store your photographs significantly impacts their longevity. You need to identify a stable, consistent location within your home.
For an extra layer of security against environmental disasters, you may want to learn how to preserve photos in a fireproof safe specifically designed for media storage.
Temperature and Relative Humidity Control
The ideal environment for photo storage features stable temperature and relative humidity (RH). Aim for a consistent temperature below 75°F (24°C), with cooler temperatures, around 65-70°F (18-21°C), being even better for color materials. Keep relative humidity between 30-50%. Extremes and rapid fluctuations in either category cause the most damage.
- Avoid Basements and Attics: These areas are typically poor choices for photo storage. Basements often experience high humidity, mold, and potential flooding. Attics suffer from extreme temperature swings, becoming very hot in summer and very cold in winter. These environments drastically shorten the lifespan of your photos.
- Steer Clear of External Walls: Rooms directly exposed to exterior walls often have greater temperature and humidity fluctuations. Interior closets or shelves are generally more stable.
- Monitor Conditions: Use a simple hygrometer to monitor temperature and relative humidity in your storage area. This allows you to identify problems and take corrective action, such as using a dehumidifier or air conditioner, if necessary.
Light Protection
Store photographs in the dark. Archival boxes naturally block light, providing excellent protection. If you display photos, use UV-filtering glass or acrylic for frames, and avoid placing them in direct sunlight or under strong artificial lights for extended periods. Rotate displayed photos periodically to minimize exposure.
Protection from Pests and Pollutants
Insects and rodents view paper products as food or nesting material. Store boxes off the floor, ideally on sturdy shelves, to reduce pest access. Keep storage areas clean and free of food debris. Also, protect photos from household pollutants. Avoid storing them near heating vents, air conditioners (which can dry the air excessively), or areas with significant dust or chemical fumes. Ensure good air circulation in your storage area.

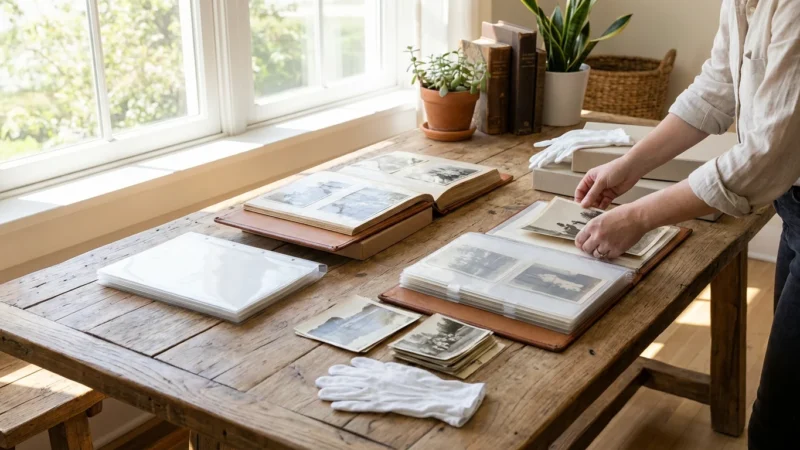
Organizing Your Physical Photo Collection for Preservation
A well-organized collection is a protected collection. Systematically approaching your photo archives makes them easier to access, enjoy, and maintain. This process involves careful handling and thoughtful arrangement.
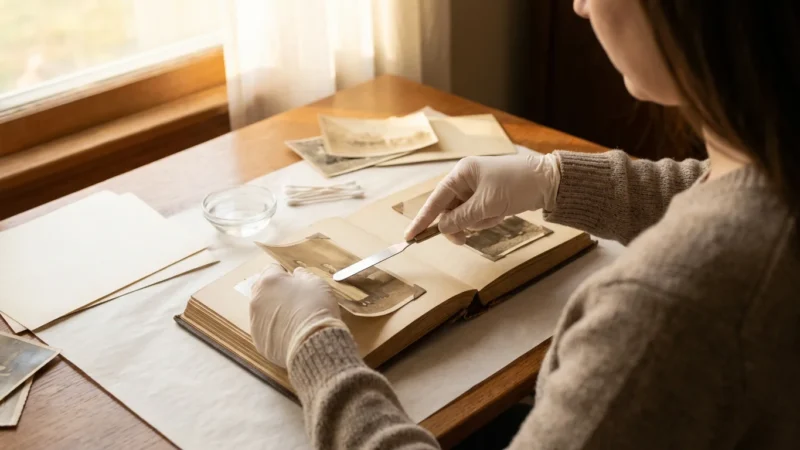
Step 1: Gather and Assess
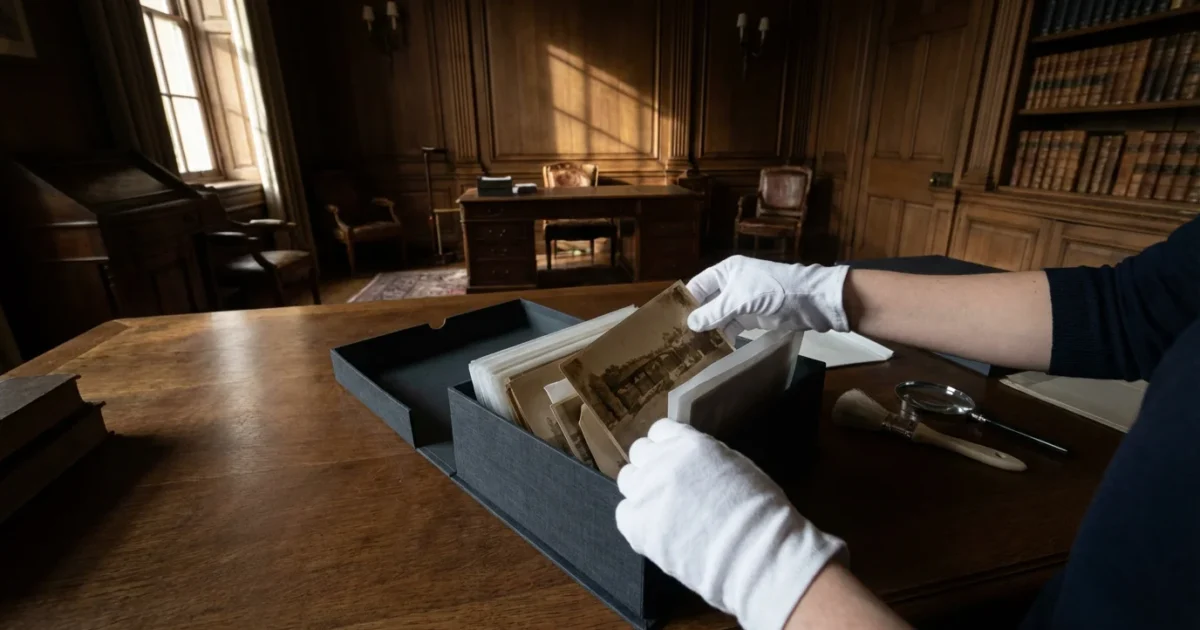
Collect all your physical photos from various locations in your home. This might include old shoeboxes, albums, frames, and even drawers. Wear clean cotton gloves when handling photos to prevent transferring oils and dirt. Briefly assess the condition of each photo to identify those requiring immediate attention, such as curled, torn, or mold-affected prints.
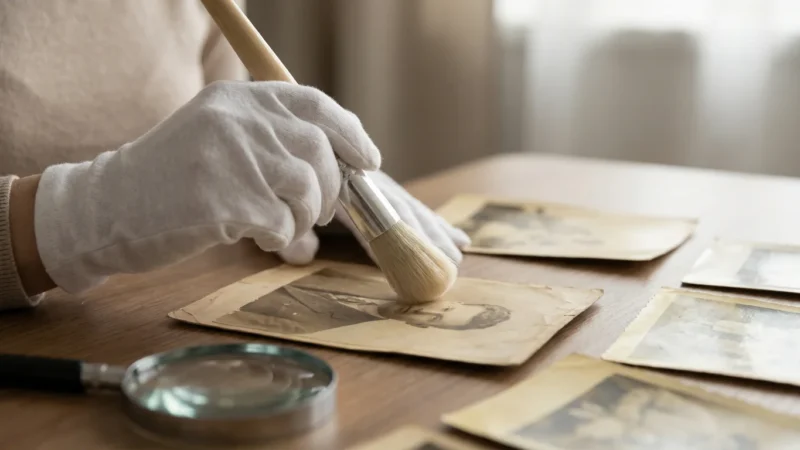
Step 2: Clean Gently
For most photos, a soft, dry brush (like a camel hair brush) or a lint-free microfiber cloth can gently remove surface dust and loose debris. Never use water, cleaning solutions, or harsh chemicals. If photos have more significant damage or mold, consult a professional conservator. Attempting to clean them yourself could cause irreversible harm. The American Institute for Conservation provides a conservator directory to help you find local experts.
Step 3: Sort and Identify
Organize your photos logically. Common sorting methods include:
- Chronological Order: Arrange by date, from earliest to latest. This often makes sense for family histories.
- Thematic Groupings: Sort by event (weddings, vacations), person, or subject.
- Geographical Location: Useful for extensive travel collections.
As you sort, identify individuals and events. You can write details in pencil on the back border of the print, using a soft lead pencil (2B or softer) and light pressure. Never use pens, markers, or write heavily, as this can emboss the image or chemically damage it.
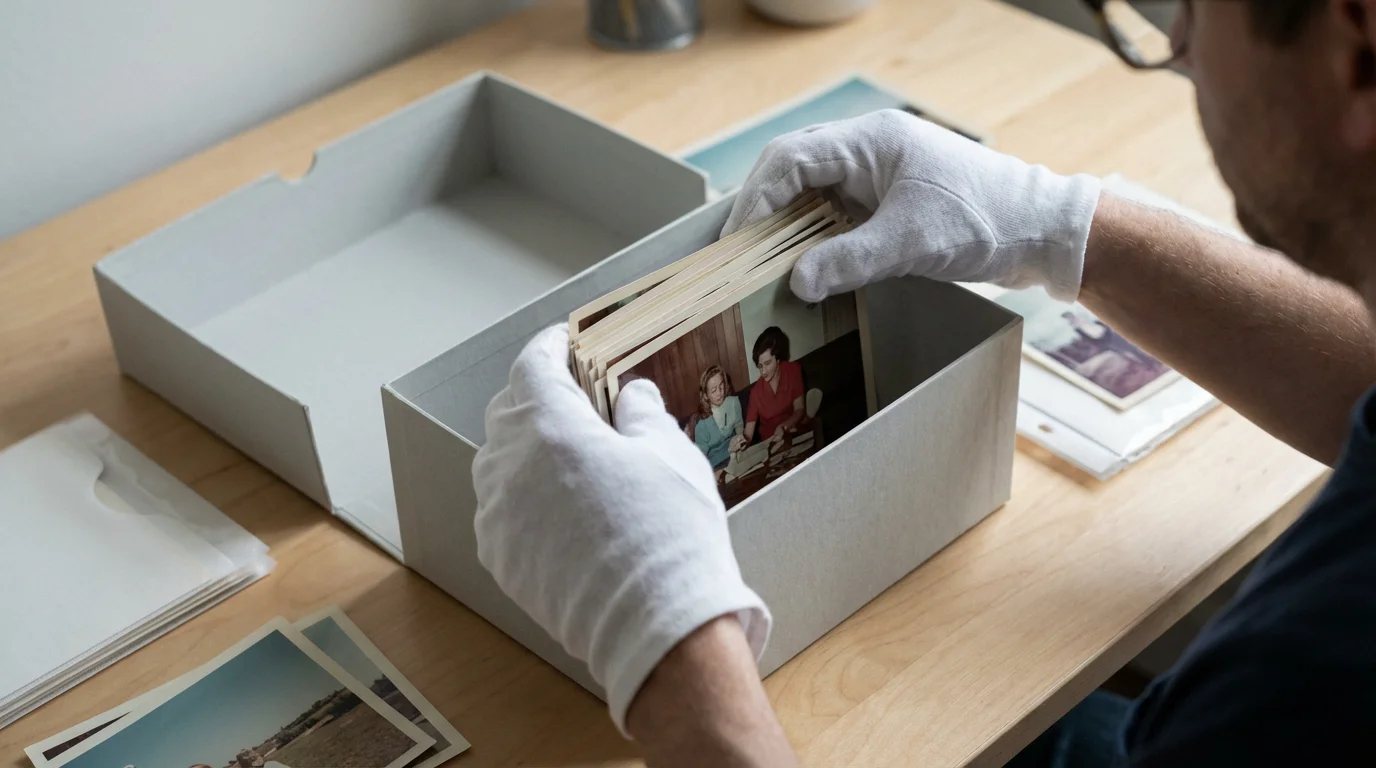
Step 4: Rehouse with Archival Materials
Once cleaned and organized, rehouse your photos using the archival materials discussed previously:
- Individual Sleeves: Place each print into an individual polypropylene, polyethylene, or Mylar sleeve. This protects it from handling and environmental elements.
- Archival Boxes: Arrange sleeved photos upright in appropriately sized acid-free, lignin-free boxes. Do not overpack boxes, as this can damage prints; leave a little room for air circulation. Similarly, do not under-pack them, as photos can slump and curl. Use acid-free dividers to separate groups of photos within boxes.
- Flat Storage for Oversized Items: For large prints, store them flat in oversized archival folders or boxes to prevent creasing or bending.

The Role of Digitization in Long-Term Preservation
Digitizing your physical photographs provides an essential layer of security for your memories. It acts as a robust backup, safeguarding against physical damage or loss. Digitization does not replace physical preservation, but complements it, offering accessibility and redundancy.
Why Digitization is Crucial
Physical photographs are vulnerable to fire, flood, pests, and gradual deterioration. A digital copy, properly stored, ensures that even if disaster strikes your physical collection, the visual record of those memories remains intact. Digitized images are also incredibly versatile; you can share them instantly with family, create new prints, or use them in digital projects.
Best Practices for Scanning
When you digitize, aim for high-quality scans to capture as much detail as possible. This ensures your digital files serve as true archival backups.
- Resolution: Scan at a minimum of 300 dpi (dots per inch) for general use, but aim for 600 dpi or higher for archival-quality scans, especially for smaller photos or those you might want to enlarge.
- Color Depth: Scan in 24-bit color or higher to capture a full range of tones and colors.
- File Format: Save original scans as uncompressed TIFF files. TIFFs preserve image quality without loss. You can then create JPEG copies for sharing and everyday use, as JPEGs are smaller and more universally compatible.
- Metadata: Embed descriptive information (who, what, when, where) into your digital files. This is invaluable for future identification and organization.
Digital Storage Strategy
Just as physical photos need proper storage, so do your digital files. Implement a “3-2-1” backup strategy:
- 3 Copies: Keep at least three copies of your important digital files.
- 2 Different Media: Store these copies on at least two different types of storage media (e.g., external hard drive, cloud storage, network-attached storage).
- 1 Off-site: Keep one copy in an off-site location (e.g., cloud backup, a relative’s house) to protect against localized disasters.
Common Mistakes to Avoid When Storing Old Photos
Preventing damage often comes down to avoiding common pitfalls. Many seemingly innocuous actions can have long-term detrimental effects on your precious images.
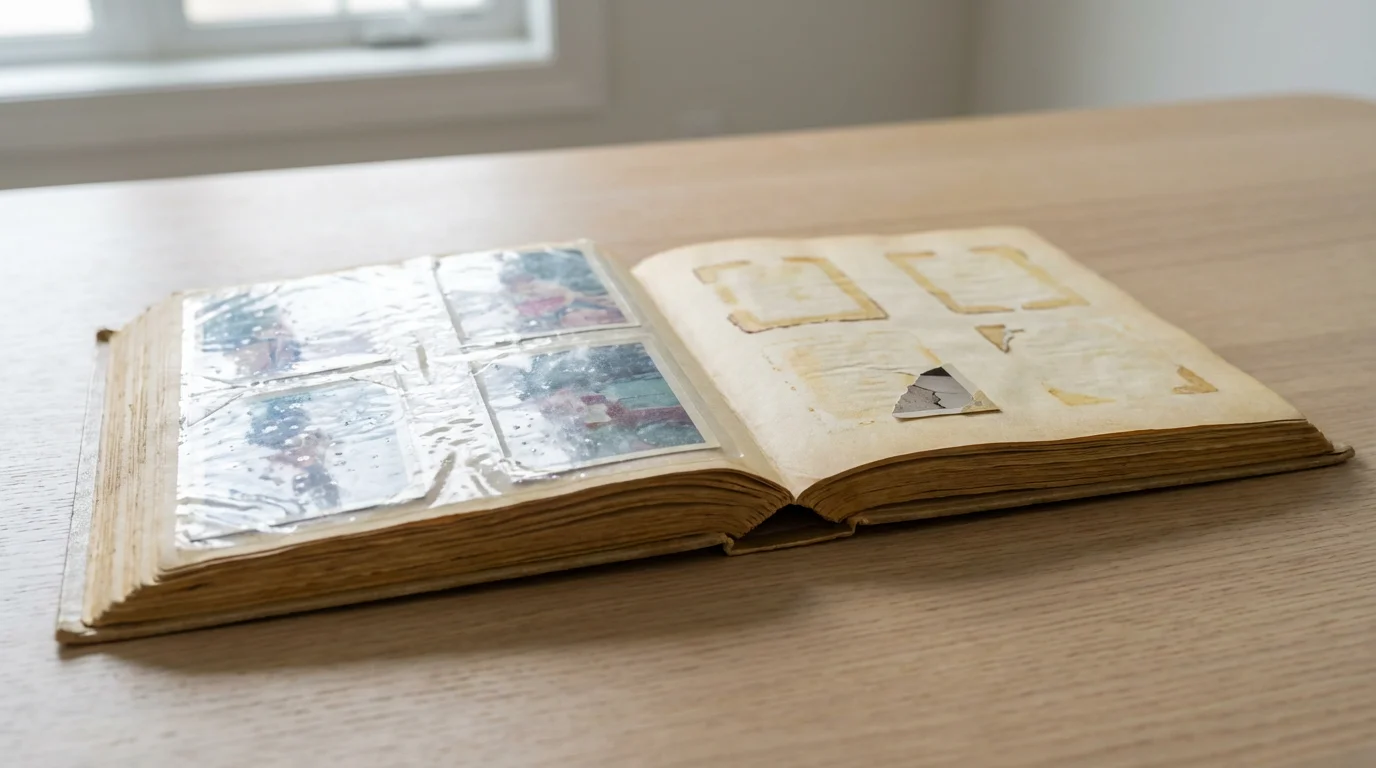
Mistake 1: Storing Photos in Magnetic or Sticky Albums
These albums, popular in the 1970s and 80s, are notorious for damage. Their acidic paper and plastic sheets, often made of PVC, yellow photos, make them brittle, and cause them to permanently adhere to the album pages. Remove photos from these albums carefully; if they are severely stuck, seek professional help rather than forcing them off.
Mistake 2: Using Non-Archival Materials
Regular paper envelopes, cardboard boxes, rubber bands, paper clips, and Scotch tape all contain acids and chemicals that will damage your photos over time. Rubber bands degrade and leave sticky residue. Paper clips can indent and rust. Scotch tape leaves a lasting, discolored mark and can tear the emulsion. Always opt for acid-free, lignin-free, and PAT-tested materials.
Mistake 3: Storing in Basements, Attics, or Garages
As mentioned, these areas typically experience extreme temperature swings, high humidity, and are prone to pests, leaks, and dust. They are the worst places for long-term photo storage. Choose a stable, interior room in your living space.
Mistake 4: Overcrowding or Improper Handling
Cramming too many photos into a box or album causes bending, creasing, and surface abrasion. Handle prints by their edges, wearing clean cotton gloves, to prevent fingerprints and smudges. Never stack heavy objects on top of photo boxes.
Mistake 5: Neglecting Digitization
Relying solely on physical storage, no matter how carefully done, leaves your collection vulnerable to unforeseen events. Failing to create high-quality digital backups risks permanent loss of your memories. Prioritize digitizing your most precious images as a crucial step in their overall preservation.
Frequently Asked Questions
Can I store photos in plastic bags or Ziploc bags?
Avoid regular plastic bags or Ziploc bags for long-term photo storage. These bags often contain PVC or other unstable plastics that can degrade and off-gas chemicals, damaging your photographs. They also trap moisture, creating a microenvironment for mold. Only use archival-quality sleeves made from polypropylene, polyethylene, or Mylar.
How do I remove photos that are stuck together?
Never force stuck photographs apart. You risk tearing the emulsion and destroying the image. Consult a professional conservator immediately. They have specialized techniques and tools to safely separate stuck prints, often using controlled humidity or solvents, which you should not attempt at home.
Is it okay to write on the back of photos?
You can write on the back of photos, but do so carefully and with the right tools. Use a soft lead pencil (2B or softer) and apply minimal pressure to avoid embossing the front of the image. Write only on the border if possible. Never use pens, markers, or heavy pressure, as the ink can bleed through or the pressure can damage the emulsion.
What should I do with old photo albums that are not archival?
Carefully remove photos from non-archival albums, such as magnetic or sticky albums. If the photos are stuck, do not force them; instead, consult a professional conservator. Once removed, rehouse the photos individually in archival sleeves and store them in acid-free boxes. You can discard the old, damaging albums.
How often should I check on my stored photos?
Check your stored photos at least once a year. Look for signs of deterioration, pest activity, or environmental issues like mold or excessive humidity. This routine inspection allows you to catch problems early and take corrective action, ensuring the continued safety of your collection.
Your photographic legacy is a treasure. By understanding the threats, investing in archival materials, creating a stable environment, and diligently organizing your collection, you actively prevent fading and damage. Take these actionable steps today to preserve your precious photo memories for generations to come. Your future self, and your family, will thank you.
Disclaimer: This article is for informational purposes only. When handling valuable or irreplaceable photographs, consider consulting a professional conservator. Always test preservation methods on non-valuable items first.
For a deeper look at preventing solar damage, see our detailed guide on how to protect photos from light damage and UV exposure.
Selecting the best archival boxes ensures your collection is shielded from dust and harmful pollutants.


Leave a Reply