Your boxes of old 35mm film negatives hold irreplaceable moments. These tiny strips of celluloid preserve family history, personal milestones, and cherished memories. While physical prints fade, crack, or get lost over time, negatives contain the original image data, often in better condition than their corresponding prints. Digitizing these 35mm negatives ensures their long-term survival, making them accessible, shareable, and safeguardable for generations to come. You embark on a crucial preservation journey, transforming fragile relics into permanent digital assets.
If your family history includes more than just film, you may also need to learn how to scan and preserve old photo albums to keep the original context of your pictures intact.
If you also have a collection of physical prints, you might want to check out our complete guide on scanning old photos at home to preserve your entire family archive.
This comprehensive guide walks you through the entire process of digitizing your 35mm film negatives at home. You will learn about essential equipment, proper handling techniques, step-by-step scanning instructions, and critical post-digitization practices to protect both your new digital files and your original negatives.

Why Digitize Your 35mm Negatives?
Digitizing your 35mm negatives offers unparalleled benefits for memory preservation and accessibility. Consider these compelling reasons to start your negative digitization project today:
Before you begin your project, ensure you understand which file formats for scanned photos will offer the best balance of quality and storage for your negative scans.
If you find the DIY process overwhelming for a large collection, you can explore whether professional photo scanning services are worth it for your needs.
- Prevent Further Degradation: Film negatives, even properly stored ones, are susceptible to physical damage, chemical degradation, and color shifts over time. Digitization creates a stable, non-degrading copy. You safeguard the image information from environmental factors, accidental damage, or the inevitable decay of organic materials.
- Restore and Enhance Images: Digital files allow you to repair damage, correct color fading, remove dust, and enhance overall image quality using photo editing software. You can bring new life to old, faded memories.
- Easy Sharing and Access: Once digitized, your images become instantly shareable with family and friends across the globe. You can easily view them on screens, create photo books, or print new copies without handling the delicate originals. You transform archived memories into living, accessible history.
- Space Saving and Organization: A digital collection eliminates the need for physical storage boxes, freeing up valuable space. You can organize thousands of images with metadata, keywords, and folders, making specific photos easy to find.
- Insurance Against Loss: Digital files provide a crucial backup against the loss of your physical negatives due to fire, flood, or other disasters. You achieve peace of mind knowing your family’s visual legacy has multiple copies in secure locations.
“Film negatives hold the purest form of your photographic heritage. Digitizing them offers not just a backup, but an opportunity to rediscover and re-engage with your visual history in a modern, accessible format. You empower your memories to live on.”
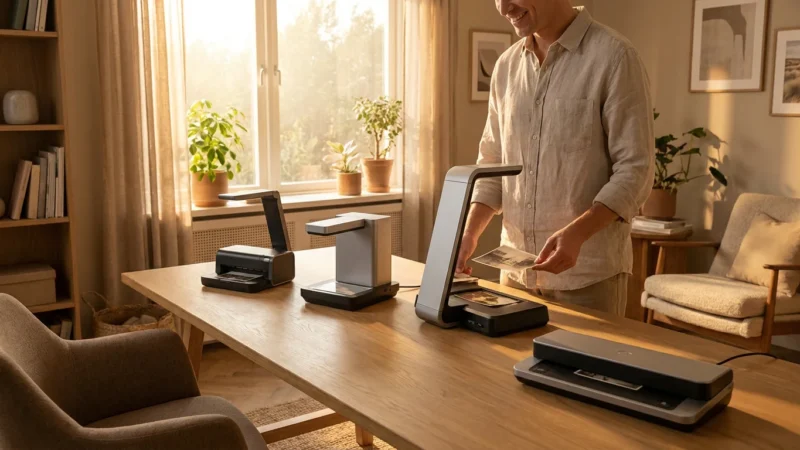
Essential Equipment for Home Negative Digitization
Selecting the right tools forms the foundation of a successful negative digitization project. Your choice of equipment depends on your budget, desired quality, and the volume of negatives you plan to scan.
If you have a massive library of film, learning how to batch scan can help you digitize large collections much faster.
Beyond film-only hardware, many users benefit from versatile equipment listed in our review of the best photo scanners for home use.
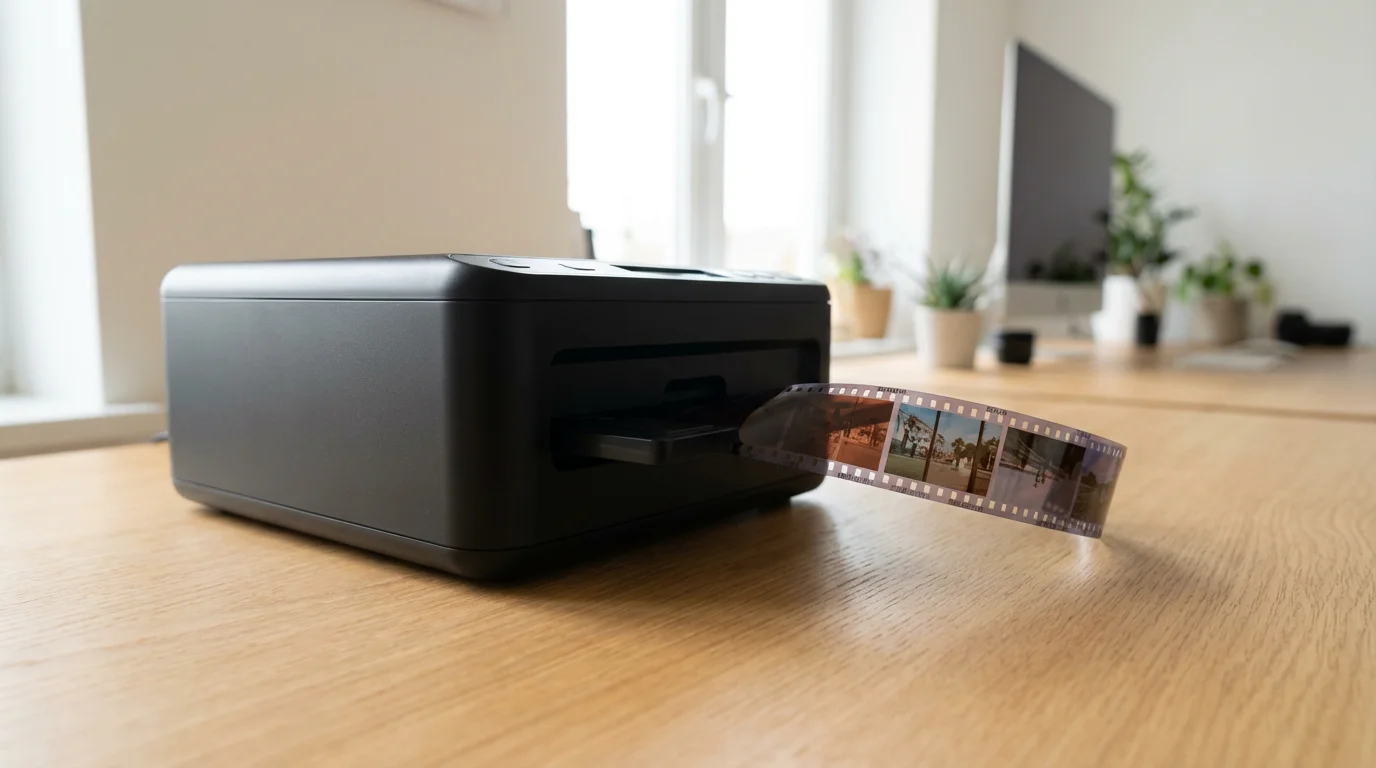
Dedicated Film Scanners
For the highest quality results when digitizing 35mm negatives, a dedicated film scanner is the gold standard. These specialized devices specifically handle film, offering superior resolution, dynamic range, and color accuracy compared to general-purpose flatbed scanners. They often feature Digital ICE technology, which automatically detects and removes dust and scratches during the scanning process, saving you significant post-processing time.
- Pros: Excellent image quality, high resolution (often 2400-4000 dpi or more), fast scanning for batches, often include dust/scratch removal.
- Cons: Can be expensive, dedicated purpose means less versatility for other scanning needs.
- Best Scanner for 35mm Film Negatives: Popular brands like Plustek and Reflecta (Pacific Image) offer models specifically designed for 35mm film. High-end Nikon Coolscan models, while often refurbished, remain highly regarded.
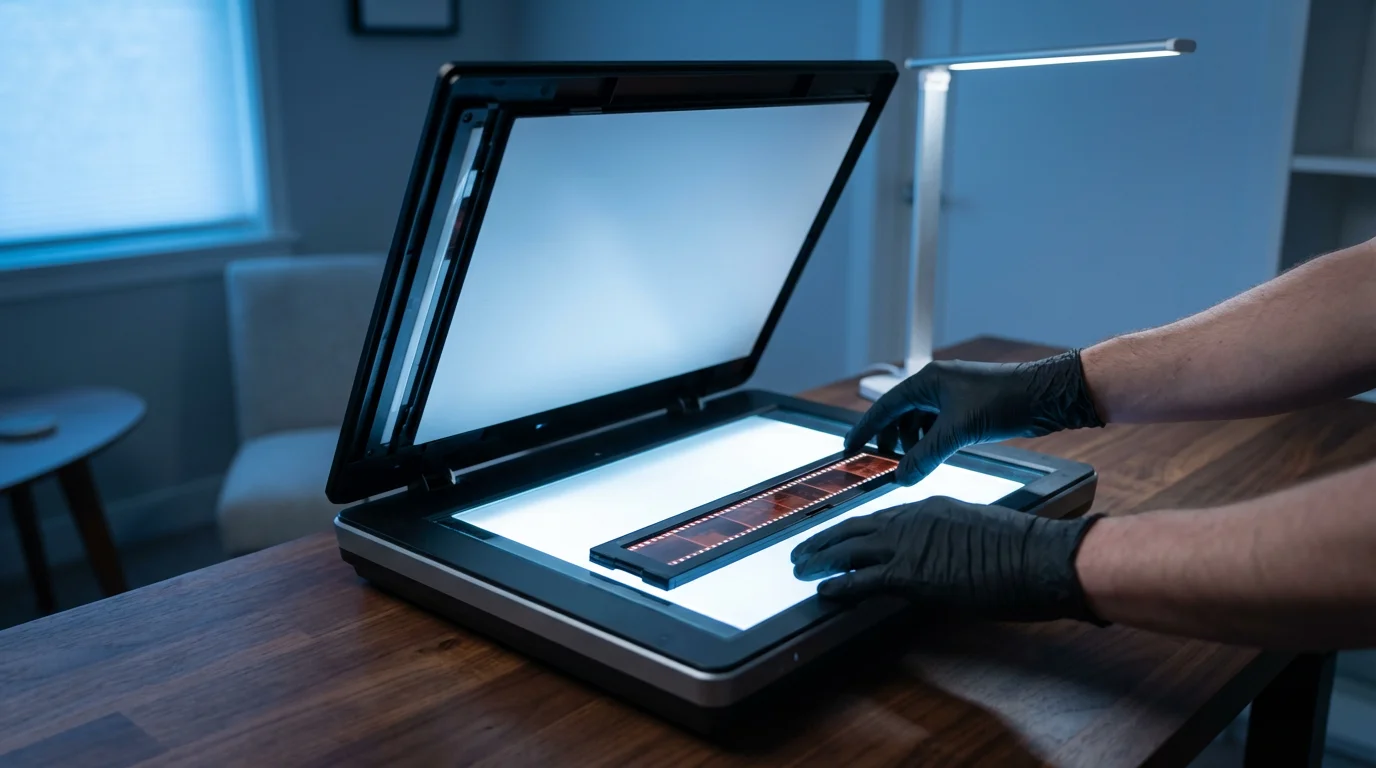
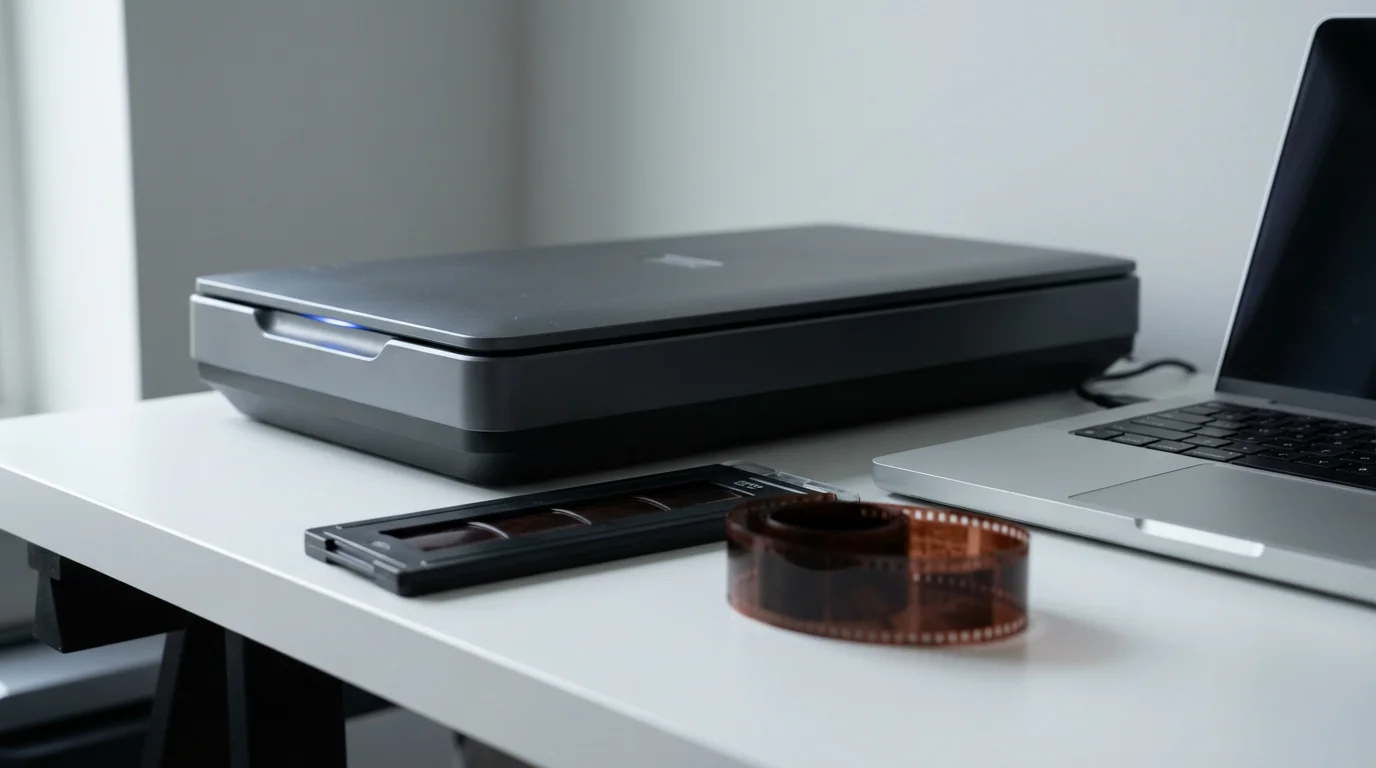
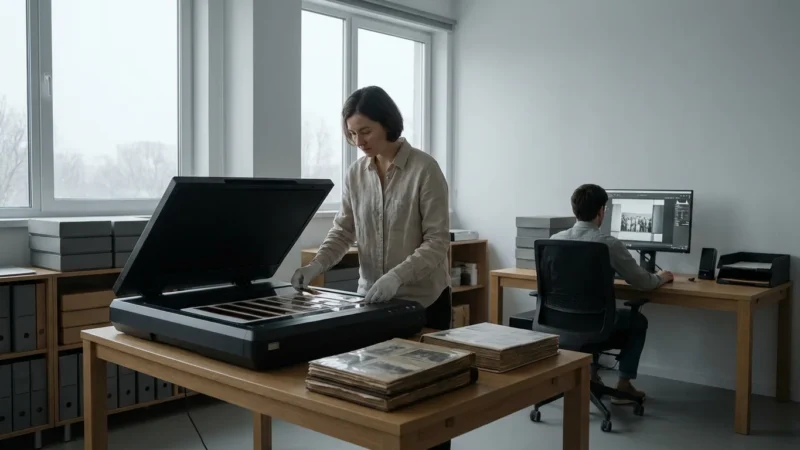
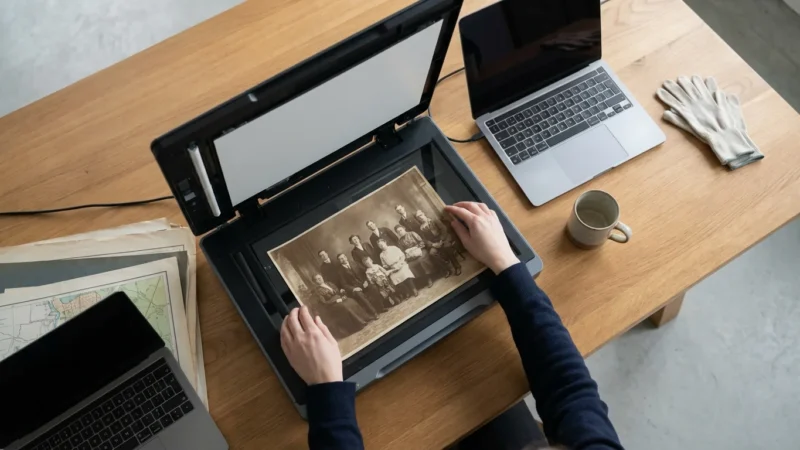
Flatbed Scanners with Transparency Adapters
Many photo-oriented flatbed scanners include a built-in transparency adapter, sometimes called a film lid or light unit. This adapter illuminates the film from above, allowing the scanner’s sensor to capture the image. While not typically matching the peak performance of dedicated film scanners, these offer a versatile and often more affordable option for digitizing 35mm negatives, especially if you also need to scan prints or documents.
- Pros: Versatile (scans prints, documents, and film), more affordable than dedicated film scanners, widely available.
- Cons: Lower resolution for film compared to dedicated scanners, slower scanning, often lack advanced dust/scratch removal.
- Recommended Models: Epson Perfection series scanners are popular choices known for good film scanning capabilities at their price point.
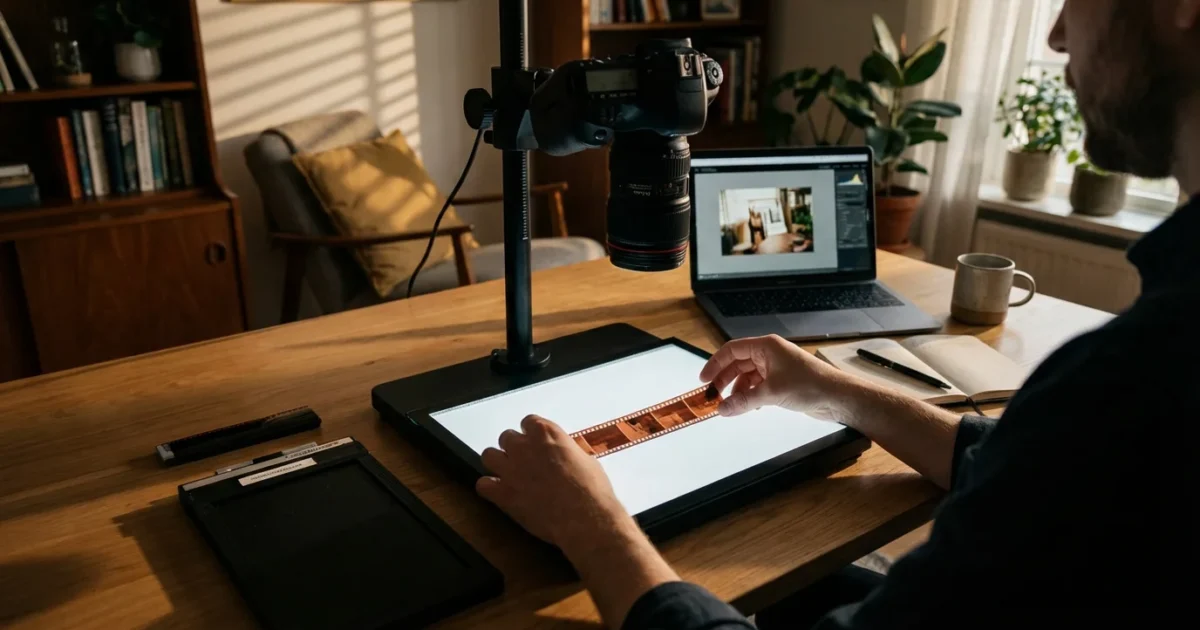
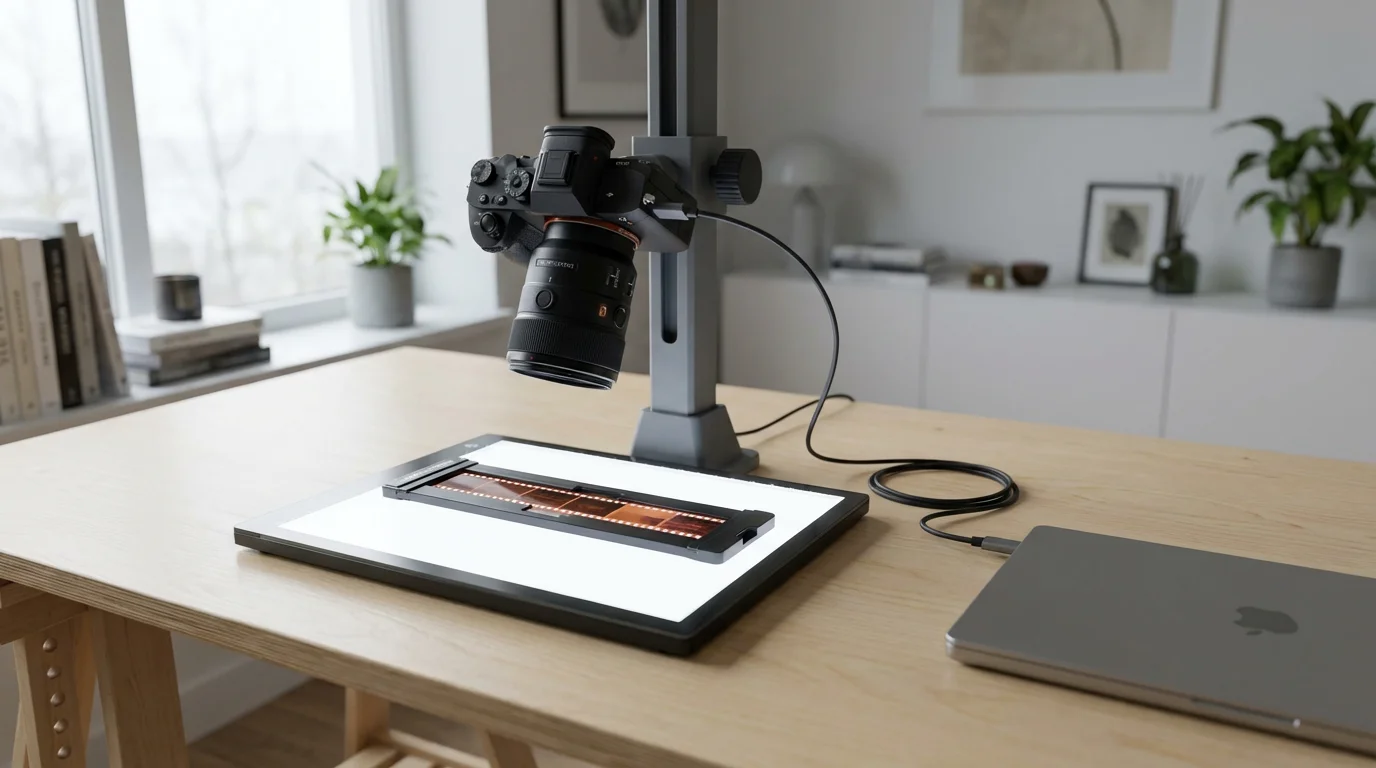
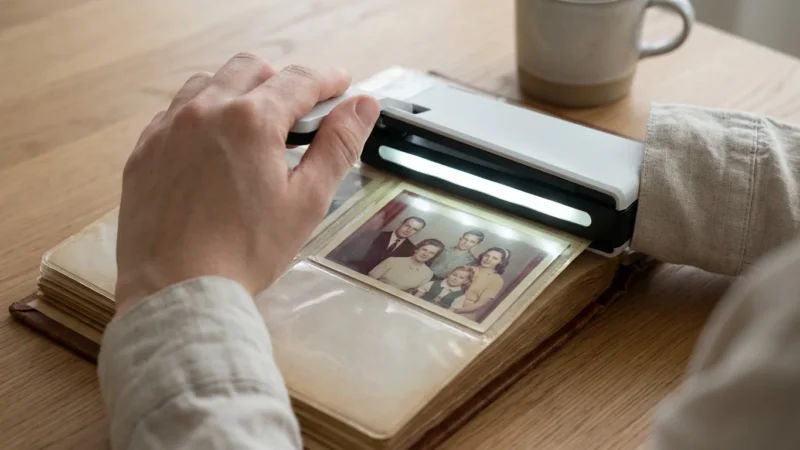
Digital Camera Scanning (DSLR/Mirrorless)
You can also digitize 35mm negatives using a digital camera. This method involves re-photographing your negatives with a macro lens, a light source, and a film holder. It requires a good quality camera and specific accessories but offers high flexibility and speed once set up.
- Pros: Very fast once set up, high resolution if using a good camera and lens, full control over image capture, often more affordable if you already own suitable camera gear.
- Cons: Requires careful setup for even illumination and focus, can have a steeper learning curve, color inversion and correction often happen in post-processing.
- Essential Gear: Digital camera (DSLR or mirrorless), macro lens, light source (LED light panel or light box), film holder/digitization adapter, copy stand or tripod.
Other Essential Supplies
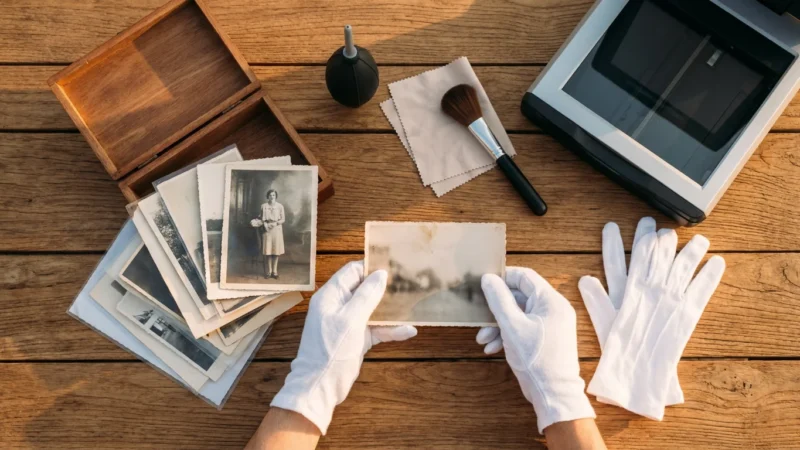
- Gloves: Wear lint-free cotton or nitrile gloves to prevent fingerprints and oils from transferring to your negatives.
- Air Blower: A hand-pump air blower (like a Giottos Rocket Blaster) effectively removes dust without touching the film. Avoid compressed air cans, which can spray propellant.
- Microfiber Cloth: For cleaning scanner glass or camera lenses.
- Film Cleaning Solution (Optional): Specific solutions like PEC-12, used sparingly with PEC PADS, can remove stubborn grime. Always test on a less important negative first.
- Archival Sleeves/Storage: After scanning, store your negatives in archival quality sleeves to protect them.
Preparing Your Negatives for Scanning
Proper preparation is crucial for achieving high-quality scans and avoiding damage to your precious negatives. Treat your negatives with the care they deserve.
Reviewing standard photo preparation tips can ensure your workflow remains clean and damage-free.
The cleaning steps outlined here are very similar to the process used for scanning slides, as both formats are sensitive to dust and fingerprints.
- Gather Your Negatives: Collect all the 35mm negatives you intend to digitize. Organize them by roll, date, or event if possible.
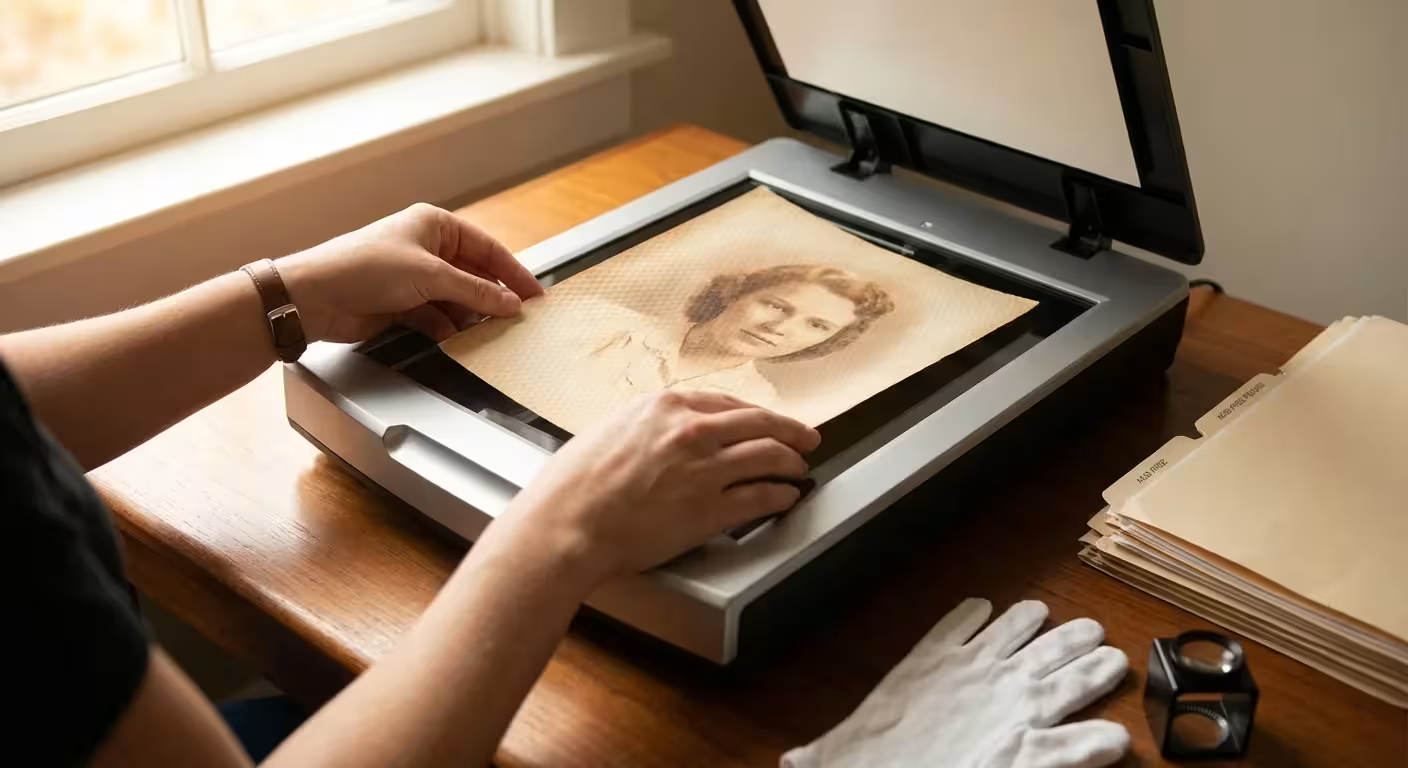
- Work in a Clean Environment: Choose a clean, well-lit workspace. Minimize dust by damp wiping surfaces beforehand and avoid working near open windows or air vents.
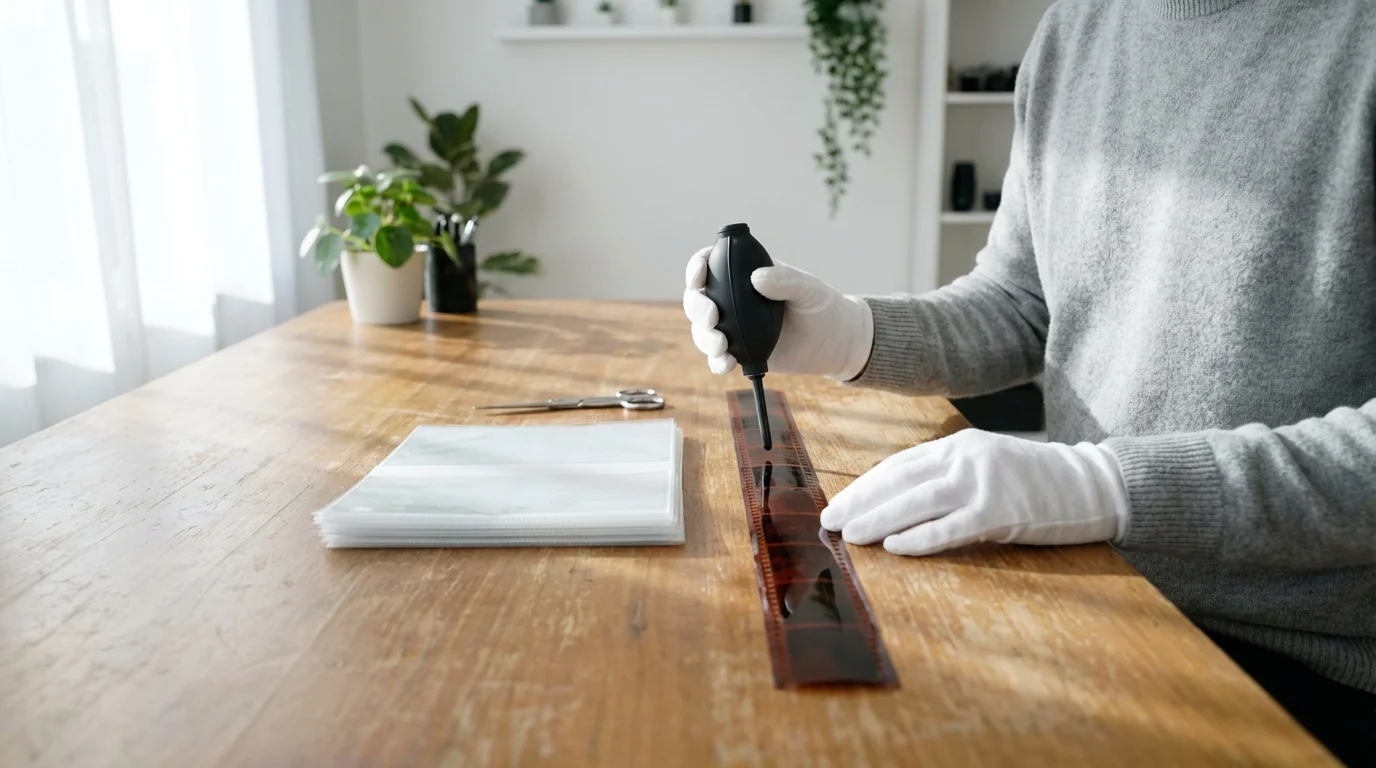
- Wear Gloves: Always wear lint-free cotton or nitrile gloves when handling negatives. Fingerprints leave oils that attract dust and can permanently etch the film emulsion.
- Clean the Negatives:
- Blow Away Dust: Use a hand-pump air blower to gently remove loose dust particles from both sides of each negative strip. Hold the negative by its edges and direct the air across its surface.
- Address Stubborn Debris (Use with Caution): For more embedded dust or smudges, use a very soft, lint-free brush or a dedicated film cleaning solution (like PEC-12) on a PEC PAD. Gently wipe in one direction. Always test any cleaning solution on a less important negative first to ensure it does not damage the emulsion.
- Inspect for Damage: Examine each negative for scratches, tears, or mold. Note any significant damage you might need to address in post-processing.
- Cut Film Strips (if necessary): If your negatives are still in long rolls, carefully cut them into strips that fit your scanner’s film holder, typically 4-6 frames per strip. Use sharp, clean scissors or a film cutter. Avoid touching the image area.
- Clean Your Scanner: Before placing negatives, use an air blower and a clean microfiber cloth to remove any dust or smudges from the scanner’s glass bed and film holders.
Step-by-Step Guide to Scanning 35mm Negatives with a Dedicated Film Scanner
This method offers the best quality for your 35mm negatives. Follow these steps for optimal results:
- Install Scanner Software: Install the dedicated scanning software that came with your film scanner. Ensure you have the latest drivers for your operating system.
- Prepare the Film Holder: Open your scanner’s 35mm film strip holder. Carefully place your cleaned negative strip into the holder, ensuring the emulsion side faces the correct direction (refer to your scanner’s manual, usually dull side up or down depending on the model). The frames should align precisely within the holder’s guides.
- Load the Film Holder: Insert the loaded film holder into the scanner. It often clicks into place or slides in smoothly.
- Launch Scanning Software: Open your scanner’s software.
- Select Settings: This is the most critical step.
- Scan Mode: Choose “Negative” or “Color Negative Film.”
- Resolution (DPI): Aim for a high resolution to capture maximum detail. For archival purposes and large prints, 3000-4000 dpi is ideal. You achieve high-resolution digital files suitable for various uses.
- Color Depth: Select 48-bit color (16 bits per channel) if available. This captures more tonal information, providing greater flexibility for editing.
- Output File Format: Scan to TIFF (Tagged Image File Format) for uncompressed, lossless quality. JPEG is acceptable for quick sharing but incurs lossy compression.
- Digital ICE/FARE (Dust & Scratch Removal): If your scanner features this technology, enable it. It automatically corrects most dust and minor scratches, saving significant time in post-processing. Adjust the intensity if needed.
- Exposure/Brightness: Use the software’s preview function to adjust brightness and contrast. Aim for a balanced exposure that retains detail in both highlights and shadows. Avoid clipping (pure white or pure black areas with no detail).
- Color Correction: Make basic color adjustments if necessary, but remember that extensive color correction is often best performed in image editing software later. Aim for a neutral starting point.
- Preview Scan: Perform a preview scan to confirm your settings and framing. Adjust the crop box if needed to exclude film borders.
- Initiate Scan: Click “Scan.” The scanner will begin processing the image. This can take several minutes per frame, especially at high resolutions with dust removal enabled.
- Save Your Scan: Once the scan completes, save the file to your designated folder with a descriptive filename (e.g., “FamilyTrip_1985_Frame01.tif”).
- Repeat: Remove the scanned strip, insert the next one, and repeat the process for all your negatives.
Using a Flatbed Scanner with a Transparency Adapter
Flatbed scanners with transparency adapters offer a viable alternative for digitizing 35mm negatives, especially for casual users or those with fewer negatives.
- Clean Your Scanner and Negatives: Just like with a dedicated scanner, ensure your scanner glass and negatives are meticulously clean.
- Prepare the Film Holder: Your flatbed scanner will come with a specific film holder or template. Carefully place your negative strips into this holder, ensuring they are flat and properly aligned. The holder typically lifts the film slightly above the glass to prevent Newton rings (concentric color patterns).
- Position the Film Holder: Place the loaded film holder onto the flatbed scanner’s glass. Align it with the designated marks.
- Activate the Transparency Adapter: Close the scanner lid. Some flatbed scanners require you to remove a white backing from the lid to expose the transparency light source. Consult your scanner’s manual.
- Launch Scanning Software: Open your scanner’s software.
- Select Settings:
- Scan Mode: Choose “Film” or “Transparency” and specify “Color Negative Film.”
- Resolution (DPI): Aim for at least 2400-3200 dpi for 35mm negatives. While flatbeds may not deliver true optical resolution at their highest stated DPI for film, this range often provides a good balance of detail and file size.
- Color Depth: Select 48-bit color.
- Output File Format: Choose TIFF for archival quality.
- Dust Removal: Some flatbeds include basic dust reduction features, but they are generally less effective than Digital ICE. Enable them if available.
- Exposure/Brightness/Color: Use the preview function to adjust these settings, aiming for a neutral, well-exposed image.
- Preview and Scan: Perform a preview scan, adjust the crop, and then initiate the final scan.
- Save Files: Save your TIFF files with descriptive names.
Digitizing Negatives with a Digital Camera (DSLR/Mirrorless)
Camera scanning offers speed and flexibility, especially if you possess a high-quality DSLR or mirrorless camera with a macro lens.
- Set Up Your Gear:
- Camera and Lens: Mount your DSLR or mirrorless camera on a copy stand or sturdy tripod. Attach a macro lens or a standard lens with extension tubes/bellows to achieve 1:1 or greater magnification.
- Light Source: Position an even, diffused light source (like an LED light panel, light box, or flash with a diffuser) beneath your film holder. Ensure it provides consistent illumination across the negative.
- Film Holder: Use a dedicated film holder or a DIY solution to keep the negative perfectly flat and still, a few inches above the light source.
- Clean Negatives and Camera: Meticulously clean your 35mm negatives and ensure your camera lens and sensor are dust-free.
- Position and Focus:
- Negative Placement: Carefully place a cleaned negative strip into the film holder.
- Camera Alignment: Ensure your camera sensor is perfectly parallel to the negative plane to avoid distortion.
- Focus: Use live view with magnification to achieve critical focus on the grain of the film. Manual focus provides the best control.
- Camera Settings:
- File Format: Shoot in RAW for maximum image data and flexibility in post-processing.
- ISO: Use the lowest native ISO (e.g., ISO 100 or 200) to minimize noise.
- Aperture: Use an aperture that provides sufficient depth of field (e.g., f/8 or f/11) to ensure the entire negative is sharp, but avoid going too high to prevent diffraction softening.
- Shutter Speed: Adjust shutter speed for correct exposure. Use a remote shutter release or self-timer to prevent camera shake.
- White Balance: Set a custom white balance using your light source, or set it to “daylight” and correct in post-processing.
- Exposure: Aim for a slight overexposure to capture maximum shadow detail, which helps in the inversion process.
- Capture Images: Take your shot. Review the image on your camera’s screen for sharpness and exposure. Adjust as needed.
- Advance and Repeat: Advance the negative to the next frame and repeat the capture process.

Optimizing Your Scans: Software and Post-Processing Tips
After you scan 35mm negatives, post-processing helps convert them into positive images and refine their appearance. Dedicated photo editing software provides the tools you need.
- Invert Negatives to Positives:
- Dedicated Scanner Software: Most dedicated film scanner software inverts the image during the scan.
- Flatbed Scanners: Flatbed scanner software usually includes a “negative” option that inverts and basic color corrects.
- Camera Scans: For camera-scanned negatives, you must manually invert the image in editing software. Invert the image (Ctrl+I or Cmd+I), then adjust the color curves (especially red, green, and blue channels) to balance the colors. Many software programs offer specific negative inversion tools or plugins.
- Crop and Straighten: Crop out any unwanted film borders or dust from the edges. Straighten the image if it is slightly skewed.
- Adjust Exposure and Contrast: Fine-tune the brightness, contrast, and blacks/whites to achieve a well-balanced image. Use the histogram to guide your adjustments.
- Color Correction: Correct any color shifts or tints. Old negatives often have an orange or magenta cast. Use the white balance tools, color balance sliders, or curves adjustments to restore natural colors. Sometimes, finding a neutral gray or white point in the image helps calibrate color. For a deeper dive into color theory and correction, consider resources like Cambridge in Colour.
- Dust and Scratch Removal: Even with Digital ICE, some imperfections may remain. Use cloning, healing, or spot removal tools in your editing software to meticulously clean up remaining dust spots, scratches, or minor blemishes. Take your time with this step, especially for important images.
- Sharpening: Apply a subtle amount of sharpening to enhance detail. Be careful not to over-sharpen, which can introduce artifacts.
- Noise Reduction: If scanning at high ISO with a camera, you may see some digital noise. Apply noise reduction sparingly, as it can soften details.
- Save and Versioning: Save your edited files. Consider saving a master TIFF file of your final edited image, and then export smaller JPEGs for sharing or web use. You maintain the highest quality version while generating convenient derivatives.

Organizing and Storing Your Digital Files
Digitizing your images is only half the battle. Proper organization and storage ensure you can find, access, and protect your digital memories for the long term.
- Consistent Naming Convention: Establish a clear and consistent file naming system from the start. A common approach includes date, event, and sequence number: `YYYY-MM-DD_EventName_001.tif`. For example, `1987-07-04_FamilyPicnic_001.tif`.
- Folder Structure: Create a logical folder hierarchy. Start with a main “Scanned Negatives” folder, then subfolders by year, event, or family member. For instance: `Scanned Negatives > 1987 > 1987-07-04_FamilyPicnic`.
- Add Metadata: Utilize your photo editing software or digital asset management (DAM) tools to add metadata (information about the image) to each file. This includes:
- Keywords: Tag images with names, places, objects, and themes (e.g., “Grandma,” “Summer,” “Vacation,” “Beach”).
- Dates: Ensure the correct capture date is embedded.
- Description: Add a brief description of the photo’s content.
Metadata significantly enhances searchability.
- The 3-2-1 Backup Rule: This rule is paramount for digital preservation.
- 3 Copies: Keep at least three copies of your important files.
- 2 Different Media Types: Store these copies on at least two different types of storage media (e.g., external hard drive, cloud storage, NAS).
- 1 Off-Site Copy: Keep at least one copy in a different physical location (e.g., a cloud service, a friend’s house, a safe deposit box).
You protect your digital archive from single points of failure.
- Recommended Storage Options:
- External Hard Drives: Affordable, high capacity. Use multiple drives and refresh them every 3-5 years.
- Cloud Storage: Services like Google Drive, Dropbox, iCloud, or specialized photo backup services offer off-site protection and accessibility. Ensure privacy and security settings.
- Network Attached Storage (NAS): A personal cloud solution, excellent for families with large collections, offering redundancy (RAID).
- Archival Optical Discs (M-Disc): While not as convenient, M-Disc technology offers a very long lifespan for cold storage.

Protecting Your Physical Negatives After Digitization
Even after creating digital copies, your original negatives remain valuable artifacts. Treat them with the same respect and care you would give museum pieces.
- Wear Gloves: Continue to handle negatives with lint-free cotton or nitrile gloves.
- Archival Storage Sleeves: Store each strip of 35mm negatives in individual, archival-quality sleeves made of polyester, polypropylene, or polyethylene. These materials are inert, meaning they will not react with or degrade your film over time. Avoid PVC sleeves, which can off-gas damaging chemicals.
- Archival Storage Pages: Place the sleeved negatives into archival storage pages (sometimes called print or negative pages). These pages typically fit into standard three-ring binders.
- Archival Boxes: Store your binders or individual sleeves in acid-free, lignin-free archival boxes. These boxes protect against light, dust, and environmental fluctuations.
- Controlled Environment: Store your negatives in a cool, dry, and stable environment. Avoid attics, basements, or garages where temperature and humidity fluctuate wildly. Optimal conditions are generally below 70°F (21°C) and between 30-50% relative humidity. You can find comprehensive guidelines on film preservation from institutions like the Library of Congress Preservation division.
- Avoid Direct Sunlight: Keep negatives away from direct sunlight and strong artificial light, which can accelerate fading and degradation.
- Handle with Care: When you need to retrieve a negative, handle it by the edges only. Return it to its archival sleeve and box immediately after viewing.
Frequently Asked Questions
What resolution should I scan 35mm negatives at?
For archival quality and the ability to make large prints, aim for at least 3000-4000 dpi. This resolution captures sufficient detail from the film grain, providing a versatile digital file. You can always create smaller versions later, but you cannot add detail that was not scanned.
How long does it take to digitize 35mm negatives at home?
The time varies significantly based on your equipment and workflow. A dedicated film scanner with dust removal might take 2-5 minutes per frame. A flatbed scanner can be slower, and camera scanning can be very fast per frame once set up. For a collection of hundreds or thousands of negatives, expect a project that spans weeks or months, not days.
Can I use my phone camera to digitize negatives?
While possible for quick previews, phone cameras generally do not offer the resolution, dynamic range, or control necessary for high-quality, archival negative digitization. You will likely encounter issues with uneven lighting, chromatic aberration, and insufficient detail capture. Invest in a proper scanner or dedicated camera setup for serious preservation.
What is the difference between negative scanning and slide scanning?
Both negatives and slides are film, but they differ in how they capture color and tone. Negatives have an orange base and inverted colors, requiring a specific inversion process to become positive images. Slides (transparencies) are positive images from the start and do not require inversion, simplifying the color correction process. Dedicated film scanners often handle both types, but their software applies different processing.
Is it worth sending my negatives to a professional scanning service?
Professional services offer convenience and often high-quality results, especially for very large collections or historically significant negatives. However, they come at a cost. Digitizing at home gives you full control over quality, resolution, and color correction, and can be more economical for smaller to medium collections, provided you invest the time and learn the process.
Disclaimer: This article is for informational purposes only. When handling valuable or irreplaceable photographs, consider consulting a professional conservator. Always test preservation methods on non-valuable items first.


Leave a Reply