Old photo albums hold more than just individual pictures, they represent chapters of your family’s story, complete with handwritten notes, ticket stubs, and the original arrangement of images. These albums are rich historical documents, offering context and a tangible connection to the past that loose photographs often cannot convey. As time passes, these physical albums face threats from fading, deterioration, and accidental damage. Digitizing them page by page ensures you capture not only each precious photograph but also the album’s unique narrative and presentation. This comprehensive guide provides the practical steps you need to preserve your irreplaceable photo albums, transforming fragile physical heirlooms into enduring digital legacies you can cherish and share for generations. You will learn to assess album conditions, choose the right scanning equipment, employ effective scanning techniques, and implement robust digital and physical preservation strategies.
Understanding the importance of backing up physical photos digitally is vital for safeguarding your history against unforeseen disasters.
Before focusing on albums specifically, you may want to read our complete guide on scanning old photos at home to master the basics of high-quality digitization.

Assessing Your Albums and Preparing for Scanning
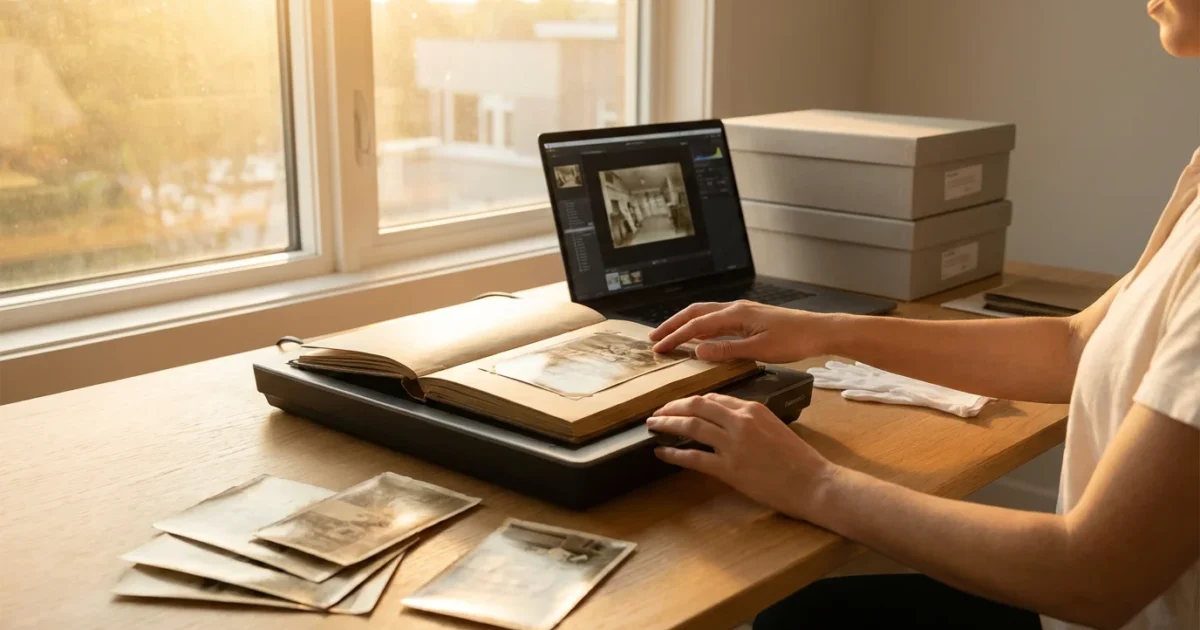
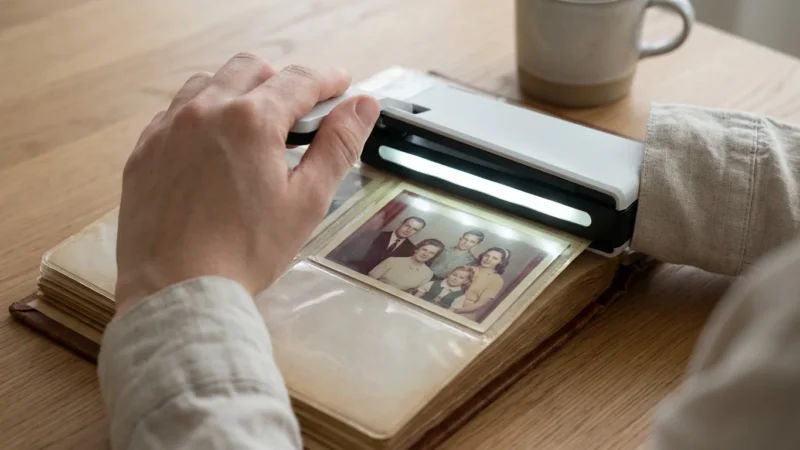
Before you begin to scan photo albums, a thorough assessment and preparation phase protects your valuable items and streamlines the digitization process. Handle all albums and photographs with extreme care. Wear lint-free cotton or nitrile gloves to prevent transferring oils and dirt from your hands onto the delicate surfaces.
While preparing, you should also review the best ways to store old photographs to prevent environmental damage after your scanning is complete.
Evaluate Album Condition:
Examine each album for signs of deterioration. Look for:
- Binding integrity: Are pages loose, torn, or detached from the spine? A fragile binding might require extra caution or even professional intervention if you intend to keep the album intact.
- Photo adhesion: How are photos attached? Common methods include corner mounts, glue, tape, or slipping photos into sleeves. Albums from the 1950s to 1980s often feature “magnetic” or self-adhesive pages with sticky backing and a cellophane overlay, which can cause significant damage over time.
- Page material: Are the pages acidic, brittle, or yellowed? Acidic paper accelerates photo degradation.
- Mold or pest damage: If you find any mold, consult a professional conservator. Do not attempt to clean it yourself, as you risk spreading spores and further damaging the album. If you suspect pest damage, isolate the album immediately.
Gather Your Supplies:
Having the right tools on hand makes the process smoother and safer.
- Lint-free cotton or nitrile gloves.
- Soft brush or air blower (like a photographer’s rocket blower) to gently remove dust and debris. Do not use canned air directly on photos, as the propellant can damage surfaces.
- A clean, flat workspace, preferably a table with good lighting.
- Archival-safe spatula or very thin, dull blade (only for extremely careful, minimal prying, if necessary, and only if you are comfortable and experienced).
- Archival-safe plastic sheets or tissue paper to interleave pages if they are sticking together.
Test Before You Commit:
If photos are loosely inserted or held by corner mounts, you might consider carefully removing them for individual scanning, which often yields higher quality. However, if your goal is to preserve the album’s original context and arrangement, page scanning is the preferred method. For photos glued directly to pages, or “magnetic” album pages, removal is risky and often causes irreparable damage. In these cases, it is crucial to scan the entire page. Perform a small test scan on a less valuable page or a corner of an album page to finalize your chosen method and settings.
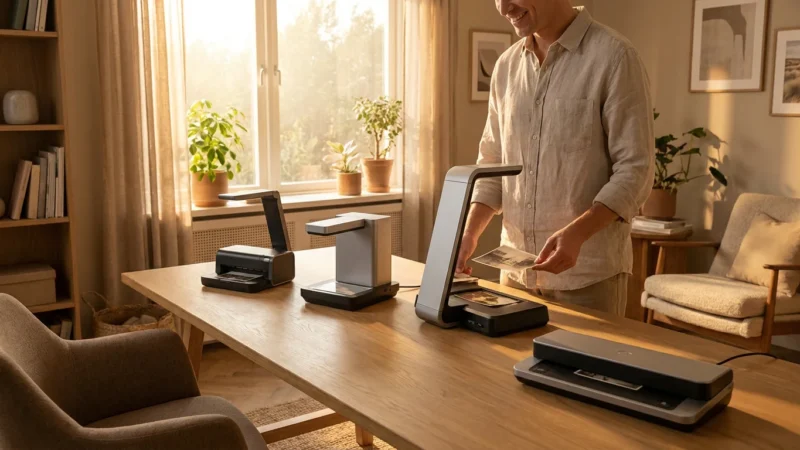
Choosing the Right Scanning Equipment for Album Pages
Selecting the appropriate equipment directly impacts the quality and efficiency of your page scanning project. Your choice depends on the album’s condition, your budget, and the desired output quality.
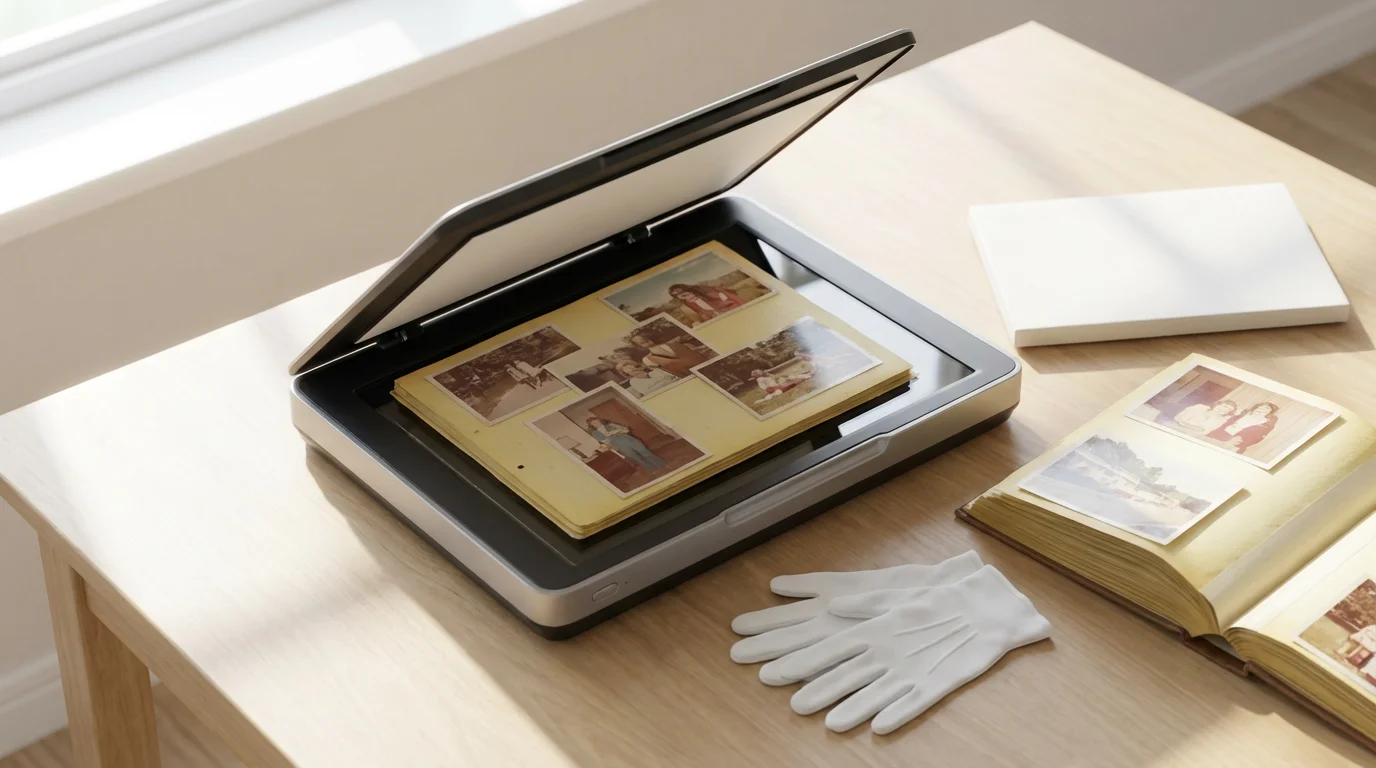
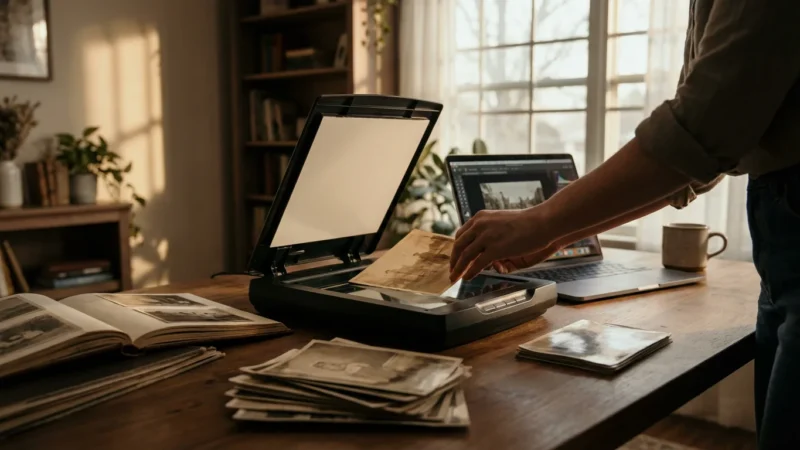
Flatbed Scanners: The Gold Standard for Quality and Delicate Items
A flatbed scanner offers the best quality for digitizing old photo album pages. Its design allows you to lay the entire album page flat on a glass platen, minimizing stress on fragile bindings and delicate photos. This method ensures optimal clarity and color accuracy.
- Pros: Excellent image quality, high resolution capabilities, handles delicate and irregularly shaped items, preserves the entire page context including notes and memorabilia. You gain precise control over scanning area and settings.
- Cons: Slower process compared to other methods, requires manual placement for each page, albums with very thick spines might not lie perfectly flat, leading to distortion near the spine.
- Recommendation: Look for models with a large scanning area, high optical DPI (at least 600-1200 DPI), and good color depth. Brands like Epson Perfection series are popular choices for photo and document scanning.
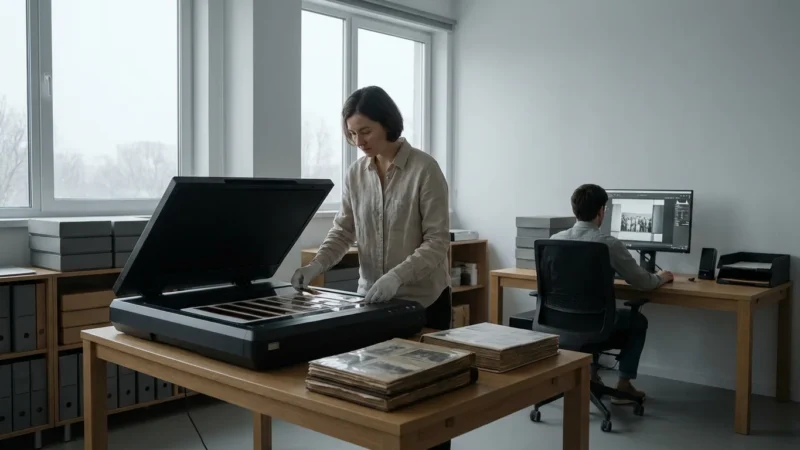
Overhead Scanners (Book Scanners): Speed and Non-Contact Advantages
Overhead scanners, also known as book scanners, operate by scanning documents from above, eliminating direct contact with the glass platen. This method is particularly beneficial for very fragile albums or books that cannot open flat without damage.
- Pros: Non-contact scanning protects fragile originals, faster than flatbeds for multiple pages, often includes software for curvature correction, ideal for thick albums or those with tight bindings.
- Cons: Generally more expensive, some models may offer lower resolution than dedicated flatbed photo scanners, potential for glare or uneven lighting if not properly configured.
- Recommendation: Consider these if you have a significant number of very delicate, thick albums and budget allows.
Smartphone Scanning Apps: Convenience for Casual Use
Several smartphone apps can digitize photos and documents using your phone’s camera. While convenient, they often fall short in archival quality.
- Pros: Highly accessible, quick and easy for sharing, free or low-cost.
- Cons: Lower resolution, susceptible to glare, color inaccuracies, distortion (keystoning), and shadows, making them unsuitable for professional or archival purposes.
- Recommendation: Use smartphone apps for quick reference or sharing with family, but not for creating your primary archival scans.
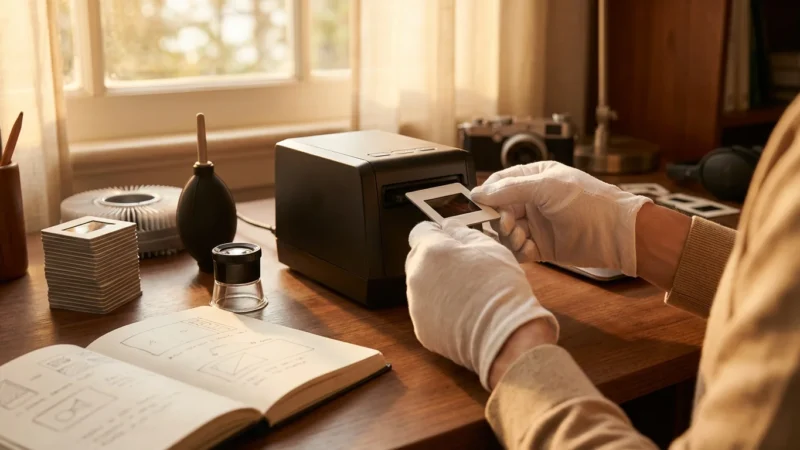
Professional Scanning Services: When to Outsource
For highly valuable, extremely fragile, or unusually sized albums, professional scanning services offer expertise and specialized equipment. They handle delicate materials with care and produce high-quality, archival-grade scans.
- Pros: Expert handling, specialized equipment (e.g., large format scanners, sophisticated book scanners), high-resolution output, color correction, and often included metadata tagging.
- Cons: Can be costly, requires entrusting your originals to a third party.
- Recommendation: Consider this option for irreplaceable heirlooms, very large collections, or if you lack the time or confidence to do it yourself.

Step-by-Step Scanning Process for Album Pages
Successfully digitizing an entire photo album page by page requires a methodical approach. Follow these steps to ensure you capture every detail while protecting your originals.
To manage a large volume of work, you can apply batch scanning principles to organize your files more efficiently.
1. Prepare Your Workspace and Scanner:
Ensure your scanning area is clean, dust-free, and well-lit. Clean your flatbed scanner’s glass platen with a micro-fiber cloth and a gentle, non-abrasive glass cleaner specifically designed for electronics. Dust or smudges on the platen will appear on your scans. Put on your lint-free gloves before handling any album.
2. Adjust Scanner Settings:
Optimal settings are critical for high-quality archival scans. Use these guidelines as a starting point:
- Resolution (DPI): Scan at a minimum of 600 DPI (dots per inch) for general photos. For images you might want to enlarge significantly or crop heavily, consider 1200 DPI. This provides ample detail for future use and allows for potential restoration. Scanning at too low a DPI results in pixelated images when enlarged.
- Color Depth: Scan in 24-bit color (True Color). This captures a wide range of colors and provides the best fidelity.
- File Format: Save your initial scans as uncompressed TIFF files. TIFFs are an archival-grade format that retains maximum image data without loss. You can create smaller JPEG copies for sharing later.
- Exposure/Brightness: Avoid automatic exposure settings, as they can over or underexpose different areas of an album page. Use manual settings if available, or scan a bit brighter than ideal and correct in post-processing.
- Dust/Scratch Removal: Disable any automatic dust or scratch removal features on your scanner. These features can sometimes soften details or introduce artifacts that are difficult to correct. You can address dust and scratches during post-processing manually.
3. Position the Album Page Carefully:
This is where patience is paramount. Gently open the album to the desired page. If the album binding is stiff or fragile, place a soft, clean towel or foam block under the opposite side of the album to help it lie as flat as possible without stressing the spine. Position the page face down on the scanner glass, aligning it squarely. If the page does not lie perfectly flat, use a clean, heavy book or a gentle, even pressure on the back of the album to minimize curvature. Be extremely gentle to avoid damaging the album or its contents.
“When scanning an entire album page, you capture a moment in time, not just an image. The placement of photos, the handwritten captions, and even the type of paper tell a story that individual photos cannot. Prioritize preserving that full context.”
4. Handle Challenging Pages:
- Stuck Photos: If photos adhere directly to the page, do not attempt to pry them off. Scan the entire page as is. You can digitally enhance or separate photos in editing software later.
- Cellophane Overlays: For “magnetic” albums, the cellophane may be wrinkled, yellowed, or stuck to the photos. You can try gently lifting the cellophane just enough to scan the photos beneath, but be cautious. If it causes resistance or appears to be pulling on the photos, scan through the cellophane. Address any glare or reflections during post-processing.
- Textured Pages: Pages with texture can sometimes create shadows or unevenness. Experiment with scanner lid pressure. Some scanners allow you to remove the lid; if yours does, you might use a piece of black archival foam board on top of the album page to block ambient light and create an even background.
- Uneven Thickness: If pages vary in thickness due to memorabilia, place neutral, archival-safe packing material (like acid-free foam sheets) around the object to create a more even surface level with the scanner glass.
5. Execute the Scan:
Once the page is positioned and settings are correct, initiate the scan. Review each scan immediately on your computer screen. Check for focus, exposure, completeness, and any missed areas. Rescan if necessary. Maintain consistency in your scanning angle and placement for a uniform digital archive.
6. Naming Your Scans:
Establish a clear and consistent file naming convention from the start. This prevents confusion and makes future organization much easier. For example: `AlbumTitle_Volume_YYYY-MM-DD_Page##_Description.tif` (e.g., `GrandmaSallysAlbum_Vol1_1955-1960_Page01_FrontCover.tif`, `GrandmaSallysAlbum_Vol1_1955-1960_Page02_Christmas1955.tif`).
Post-Scanning Workflow: Editing, Organizing, and Tagging
Your work is not complete once you finish the scanning process. A robust post-scanning workflow transforms raw scans into a usable, searchable, and well-preserved digital collection. This step ensures your digitized memories are easily accessible and future-proof.
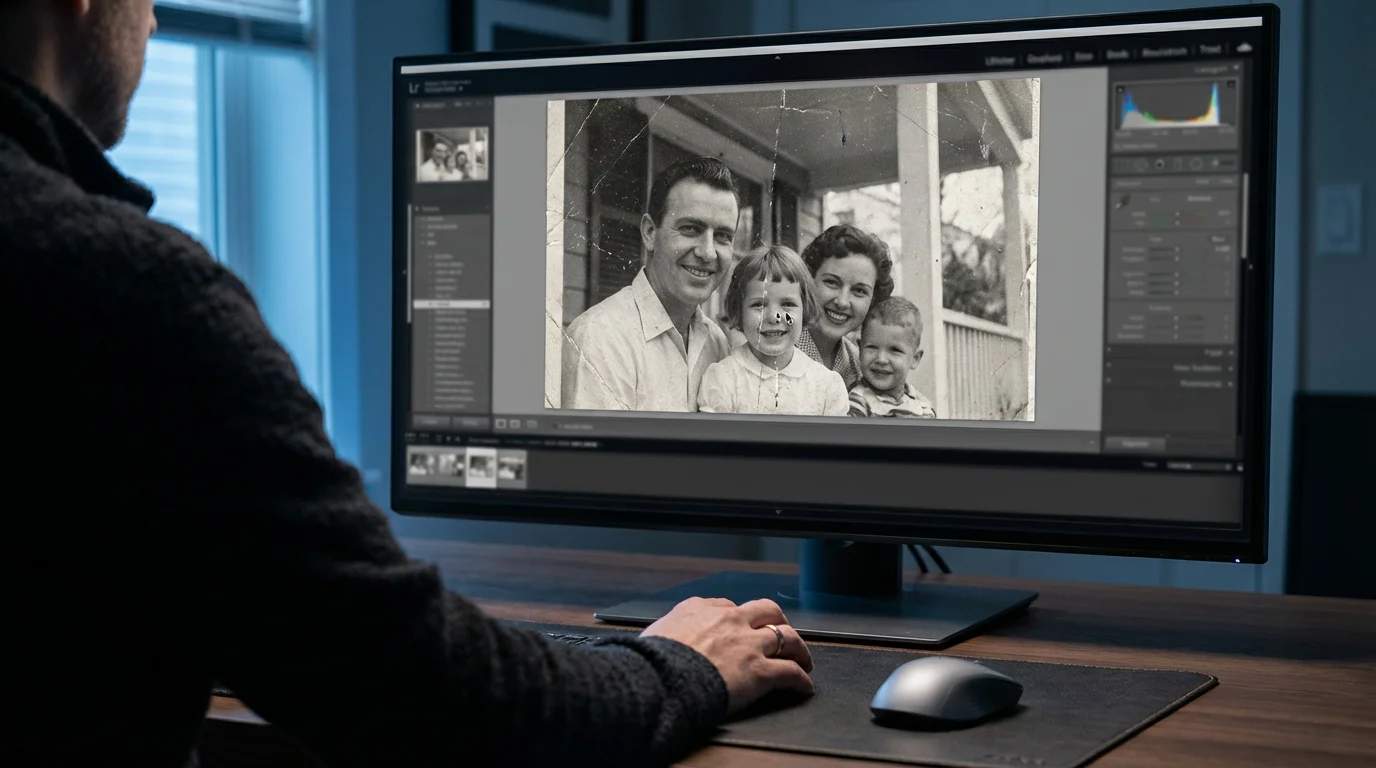
1. Basic Image Editing:
Perform essential adjustments to enhance your scans without altering their historical integrity. Use non-destructive editing software whenever possible, which allows you to revert changes at any time.
- Crop and Straighten: Correct any skewing from the scanning process and crop out the scanner bed’s background. Maintain the original aspect ratio of the page.
- Rotate: Orient the page correctly.
- Color Correction: Adjust white balance, contrast, and saturation to restore faded colors and improve clarity. Be careful not to over-saturate or introduce unnatural colors. Aim for natural representation.
- Dust and Scratch Removal: Use tools like the spot healing brush or clone stamp to carefully remove dust specks, minor scratches, and lint. Avoid heavy-handed retouching that might erase historical details.
- Sharpening: Apply a subtle amount of sharpening to bring back some detail, but avoid over-sharpening, which can introduce artifacts.
2. Consistent File Naming and Folder Structure:
Reinforce the file naming convention you established during scanning. Organize your files into a logical folder structure. For example, create a main folder for “Family Photo Albums” and subfolders for each album, then sub-subfolders for specific events or date ranges within that album. This systematic approach ensures easy navigation through your growing digital archive.
- Example Structure:
- My Digital Archives
- Family Photo Albums
- Grandma Sally’s Album (1955-1960)
- Scans (Original TIFFs)
- GrandmaSallysAlbum_Vol1_1955-1960_Page01_FrontCover.tif
- GrandmaSallysAlbum_Vol1_1955-1960_Page02_Christmas1955.tif
- Edits (JPEG copies for viewing)
- GrandmaSallysAlbum_Vol1_1955-1960_Page01_FrontCover.jpg
- GrandmaSallysAlbum_Vol1_1955-1960_Page02_Christmas1955.jpg
- Scans (Original TIFFs)
- Smith Family Album (1970s)
- Grandma Sally’s Album (1955-1960)
- Family Photo Albums
- My Digital Archives
3. Metadata and Tagging for Searchability:
Metadata, or “data about data,” makes your digital collection searchable. Most image editing software allows you to embed metadata directly into the file. Apply tags that include:
- Date: The approximate date the album page was created or the dominant date of photos on the page.
- Location: Places depicted or where the album originated.
- Names: Individuals identified on the page.
- Events: Holidays, birthdays, trips, or other occasions.
- Keywords: “Photo album,” “family history,” “genealogy,” “vintage,” etc.
- Source: Note that this is a “Scanned album page from [Album Title].”
Consistent tagging allows you to quickly locate specific memories, even years later, without manually browsing through thousands of images. This is particularly valuable for large collections of digitize entire photo album pages.

Long-Term Digital Preservation Strategies
Digitizing your photo albums is an excellent first step, but it only creates a fragile digital copy without proper preservation strategies. Digital files are susceptible to hardware failure, accidental deletion, and format obsolescence. Implement a robust strategy to protect your scanned treasures.
1. The 3-2-1 Backup Rule:
This industry-standard rule provides excellent redundancy for your digital files:
- 3 Copies: Maintain three copies of your data. This includes your primary working copy (e.g., on your computer’s hard drive) and two backup copies.
- 2 Different Media Types: Store your backups on at least two different types of storage media. For example, one copy on an external hard drive and another in the cloud or on a network-attached storage (NAS) device. This protects against a single point of failure related to a specific technology.
- 1 Offsite Copy: Keep at least one copy in a geographically separate location. This protects your data from local disasters like fire, flood, or theft that could affect all on-site copies. Cloud storage services are ideal for offsite backups.
2. Storage Media Options:
- External Hard Drives: Affordable and offer large storage capacity. Choose reliable, reputable brands. Store them safely, away from extreme temperatures and physical damage. Replace drives every 5-7 years, as their lifespan is limited.
- Cloud Storage: Services like Google Drive, Dropbox, OneDrive, or specialized photo storage services offer convenient offsite backup and accessibility from multiple devices. Evaluate their security, privacy policies, and pricing.
- Network-Attached Storage (NAS): A personal cloud solution, a NAS allows you to store files on your home network, accessible from any device. Many NAS devices offer RAID (Redundant Array of Independent Disks) configurations, providing data redundancy across multiple internal hard drives.
- Archival Optical Discs (M-DISC): While traditional CDs/DVDs are not reliable for long-term storage, M-DISCs are designed for extended longevity, boasting lifespans of hundreds of years. They are a “write once” solution, suitable for static archival copies.
3. File Format Migration:
Technology evolves, and file formats can become obsolete, making older files unreadable. To prevent this, periodically review your archival TIFF files. When new, open-source, and widely supported archival formats emerge, consider migrating your collection to the new standard. Organizations like the Image Permanence Institute provide research and guidelines on digital preservation, offering valuable insights on format longevity and best practices.
4. Regular Data Integrity Checks:
Periodically check your backup copies to ensure files are still readable and haven’t corrupted. Open a selection of files from your backups to verify their integrity. This helps you identify potential issues before data loss becomes irreversible.

Preserving the Physical Album After Digitization
Digitization makes your memories accessible, but the physical photo album remains a unique artifact. Its texture, smell, and the tactile experience of turning its pages connect you to the past in a way digital files cannot replicate. Therefore, the physical album also deserves proper care and preservation.
1. Why Keep the Original Album?
The original album serves as a tangible link to your heritage. It contains the physical evidence of its creation, often showing the very hand of your ancestors through their placement of photos or handwritten notes. It possesses inherent value as an original document, providing an experience that digital copies cannot fully replicate.
2. Archival Storage Solutions:
The goal is to protect the album from further deterioration using materials that will not cause harm.
- Acid-Free Boxes: Store albums in archival-quality, acid-free, lignin-free boxes. These boxes protect against dust, light, and harmful acids that accelerate degradation. Ensure the box is appropriately sized, providing support without crushing the album.
- Interleaving Sheets: If pages contain varying materials, loose items, or photos that might stick, interleave them with archival tissue paper or Mylar sheets. This creates a barrier between pages, preventing chemical migration and physical adhesion.
- Avoid Harmful Materials: Remove any non-archival materials from the album if possible and safe to do so. This includes rubber bands, paper clips, sticky notes, or any plastic sleeves that are not archival-safe (e.g., PVC plastic, which off-gasses harmful chemicals).
3. Environmental Control:
The environment plays a critical role in the longevity of physical photographs and albums.
- Temperature and Humidity: Store albums in a cool, dark, and dry environment with stable temperature and humidity levels. Ideal conditions are generally between 65-70°F (18-21°C) with 30-50% relative humidity. Avoid attics, basements, or garages, which experience significant fluctuations. These environments invite mold, pests, and material degradation.
- Light Protection: Store albums away from direct sunlight and artificial light sources, which cause dyes to fade and paper to yellow. Archival boxes provide excellent light protection.
4. Reversible Repair Methods:
If your album requires repair, consider reversible methods only. This means any repair should be undoable without damaging the original material.
- Consult a Conservator: For significant damage, such as torn pages, detached covers, or active mold, consult a professional conservator specializing in paper and photographic materials. Organizations like the American Institute for Conservation offer directories of qualified professionals.
- Avoid Non-Archival Tapes and Adhesives: Never use common household tapes (scotch tape) or glues for repairs. They are acidic, yellow over time, become brittle, and can cause irreversible staining and damage.
- Simple Supports: For minor tears, an archival-quality polyester film or Japanese tissue paper with a reversible, pH-neutral adhesive can provide temporary support, but a professional conservator’s assessment is always best.

Creative Ways to Share Your Digitized Album Memories
Digitizing your photo albums opens up exciting possibilities for sharing these cherished memories with family and friends, both near and far. These creative projects transform your digital archive into engaging, interactive experiences.
1. Digital Photo Books and Online Galleries:
Design custom digital photo books using online services. You can arrange your scanned album pages chronologically or thematically, adding new captions, stories, and historical context. Many services allow you to print high-quality physical copies for gifts or to create a more durable, new album. Alternatively, create private online galleries or websites to share your collections. Platforms like SmugMug or private family history sites allow you to upload, organize, and share your digitized pages securely, often with password protection.
2. Engaging Slideshows and Videos:
Transform your scanned pages into dynamic slideshows or short videos. Add music, voiceovers narrating stories behind the photos, and text overlays to create a compelling visual narrative. Use simple video editing software to produce these, then share them on family video calls, at gatherings, or upload them to private YouTube channels. This brings your ancestors’ stories to life in an accessible and entertaining format.
3. Family History Websites and Genealogical Projects:
Integrate your digitized album pages into family history websites or genealogical projects. Many online genealogy platforms allow you to upload images and link them directly to individuals and events in your family tree. This adds a rich visual dimension to your research, providing concrete evidence and personal touches that make your history more relatable and engaging for future generations. Imagine someone discovering a scanned page showing their great-grandparents’ wedding, complete with handwritten notes from the original album.
4. Personalized Gifts and Printed Reproductions:
Use your high-resolution scanned pages to create unique, personalized gifts. Print individual photos from the album pages onto archival paper, or create custom calendars, mugs, or canvases. Reproduce entire album pages or spreads to highlight the original context. These make heartfelt presents and ensure the memories are enjoyed in new, tangible forms.
Frequently Asked Questions
Should I remove photos from old albums before scanning?
Generally, no. Removing photos from old albums, especially those glued in or on “magnetic” pages, often causes irreversible damage to both the photograph and the album page. Your primary goal when you scan photo albums page by page is to preserve the album’s context, including the layout, handwritten notes, and any memorabilia attached. Scan the entire page as is, and address individual photos in your post-processing software.
What DPI (dots per inch) should I use for scanning album pages?
Scan your album pages at a minimum of 600 DPI for standard photos. If you plan to heavily crop, enlarge, or print specific images from the page, or if the photos contain very fine detail, consider scanning at 1200 DPI. This high resolution ensures you capture enough detail for future use and potential restoration, providing flexibility for various projects later.
How do I handle sticky “magnetic” album pages or fragile cellophane overlays?
Proceed with extreme caution. If the cellophane overlay is stuck or fragile, avoid forcing it, as this can tear photos or the page. Scan through the cellophane. Address any glare or reflections during post-processing by adjusting lighting or using editing software tools. For very sticky pages, you might gently lift a corner of the cellophane to see if it releases easily, but if it resists, do not risk damage. Professional conservators possess specialized tools and techniques for these situations if you deem the album invaluable and wish to save individual photos.
My album pages are larger than my scanner bed. What should I do?
If an album page exceeds your flatbed scanner’s size, you can scan it in multiple overlapping sections. Ensure you capture a sufficient overlap between scans, ideally 1-2 inches. Later, use image editing software (like Photoshop or free alternatives like GIMP) to stitch these sections together seamlessly. Many programs have automatic photomerge or panorama features that can simplify this process. Alternatively, consider an overhead book scanner or professional scanning services for oversized albums.
Is it acceptable to use my smartphone to digitize album pages?
Smartphone scanning apps offer convenience and speed for casual sharing, but they are not suitable for archival-quality preservation. They typically produce lower resolution images, suffer from distortion, glare, and less accurate color reproduction compared to a dedicated flatbed scanner. For your primary archival copies of precious album pages, invest in a good flatbed scanner or consider professional services to ensure the best possible quality and longevity for your digitize entire photo album collection.
Disclaimer: This article is for informational purposes only. When handling valuable or irreplaceable photographs, consider consulting a professional conservator. Always test preservation methods on non-valuable items first.


Leave a Reply