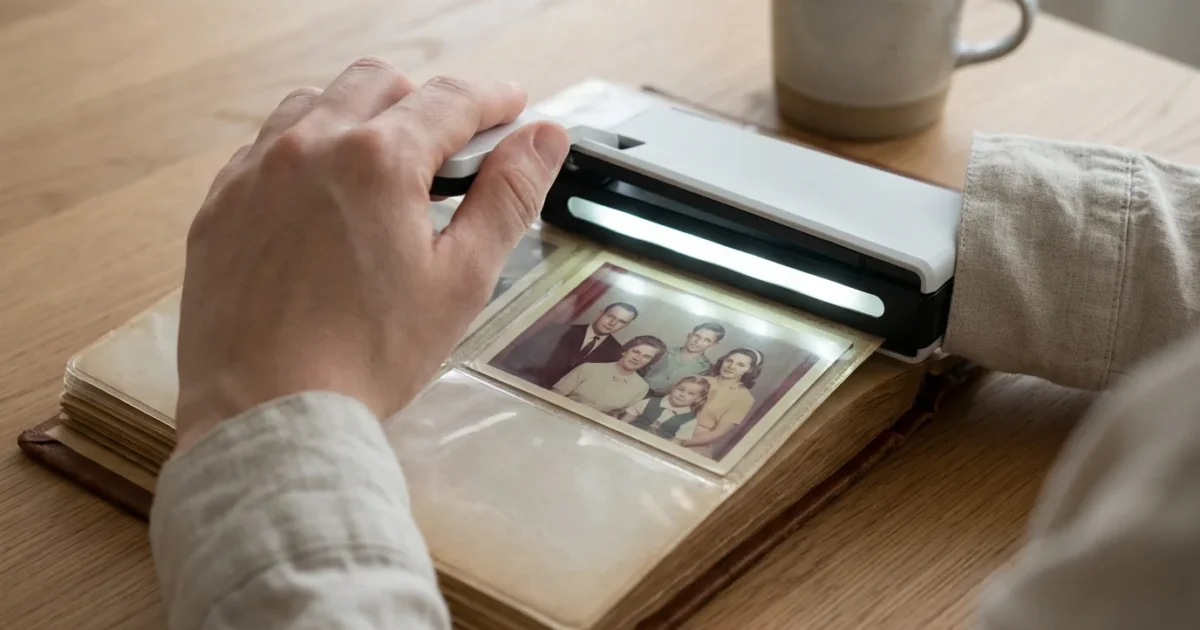
Preserving your family’s photographic history often means encountering old photo albums. These albums are more than just collections of images; they are tangible testaments to cherished moments, holding stories within their pages. The thought of digitizing these albums can feel overwhelming, especially when photos stick stubbornly to the pages, held by decades-old adhesives or trapped under fragile plastic overlays. Removing these photos risks damage to the prints themselves and the historical context provided by their original placement.
Digital scanning is only half the battle; knowing how to store your original physical photos is equally important for their long-term survival.
Fortunately, you can digitize your precious album photos without ever needing to remove them. This approach safeguards both the physical integrity of the photographs and the narrative sequence your ancestors carefully curated. By learning the right techniques and using the appropriate tools, you empower yourself to create a lasting digital archive, ensuring these memories remain vibrant for generations to come. This comprehensive guide walks you through the entire process, offering practical steps and expert advice to make your album digitization project a success.

Why Scan Photos Without Removing Them?
Digitizing photos directly from their albums offers significant advantages, primarily centered on preservation and contextual integrity. When you consider the age and fragility of many historical photographs, the risks associated with removal become clear.
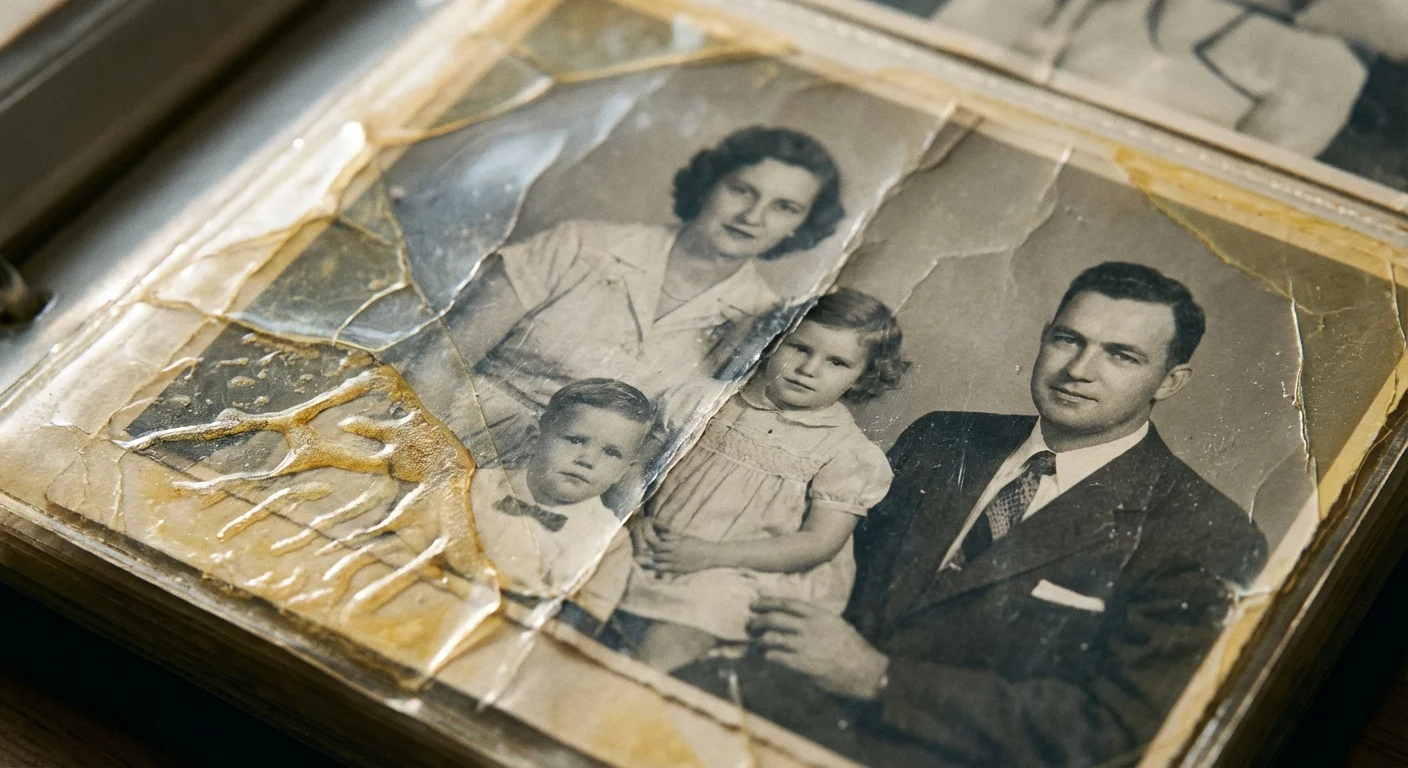
First, removing photos can cause irreversible physical damage. Many older albums use acidic glues, mounting corners, or self-adhesive pages that become brittle and aggressive over time. Peeling a photo away can tear the print, leave adhesive residue, or even strip away the emulsion layer, permanently altering the image. This damage diminishes the photo’s historical and personal value. For example, trying to remove a photo from an old “magnetic” album, notorious for its sticky, acidic pages, often results in the paper backing tearing or the image surface being marred by sticky residue. Preserving the physical integrity of your photographs is paramount. The Image Permanence Institute provides valuable resources on the stability of photographic materials and the importance of proper handling, which underscores why minimizing physical intervention is a best practice.
Second, albums often tell a story through their arrangement. Your grandparents may have meticulously placed photos in chronological order, added handwritten captions, or included mementos like newspaper clippings or tickets on the same page. This arrangement provides crucial context, creating a visual narrative. Digitizing the page as a whole preserves this context, allowing future generations to understand not only who is in the picture, but also its place within a larger personal history. Imagine an album page showing a birthday party with a child’s height marked on a wall, surrounded by family members, and a handwritten note about their age. Scanning just the individual photos loses the height marker and the note. Scanning the whole page captures the full memory.
Third, removal can be an incredibly time-consuming and tedious process, particularly if you have many albums. The effort required to carefully detach each photo, especially those stubbornly affixed, often discourages people from starting the digitization project altogether. Non-removal scanning streamlines this process, allowing you to work through albums more efficiently while maintaining safety. This approach helps you avoid burnout and keeps your project moving forward.

If you decide to capture entire layouts at once, understanding how to scan and preserve old photo albums page by page can help you maintain the original flow of the book.
Understanding the Challenges of Non-Removal Scanning
While scanning photos directly in albums offers significant benefits, it also presents unique challenges. Recognizing these obstacles allows you to prepare effectively and choose the best tools and techniques.
Once scanned, you might consider moving these images into high-quality archival albums to ensure their physical survival.
**Album Types and Their Specific Issues:**
* **Self-Adhesive (“Magnetic”) Albums:** These albums, popular from the 1960s to 1980s, feature sticky pages covered by a clear plastic overlay. The adhesive often degrades, becoming highly acidic and permanently bonding to photos. The plastic overlay can yellow, become cloudy, or develop static cling, making it difficult to achieve clear scans. You must scan through this plastic, which can introduce glare and reduce sharpness.
* **Traditional Paste-in Albums:** Photos are glued directly onto paper pages, often with rubber cement or corner mounts. While less overtly damaging than magnetic albums if the glue is archival, old, acidic glues can stain or embrittle photos. The texture of the album page itself, or any decorative elements, might interfere with the scan.
* **Pocket Albums:** These albums have clear plastic pockets into which photos slide. The plastic is often thick, can scratch easily, and may create reflections or distortions. Removing photos from pockets can sometimes be difficult if the photos are tightly fitted or swollen. However, of all album types, pocket albums usually pose the least risk to the photos themselves.
* **Scrapbooks:** These creative albums often include various ephemera alongside photos, like tickets, letters, or fabric swatches. Their varied textures, irregular shapes, and varying thicknesses make scanning a challenge, as flatbed scanners are designed for flat documents.
**Photo Condition and Album Layout:**
* **Curled or Warped Photos:** Photos not fully adhered or exposed to humidity can curl away from the page. This creates uneven surfaces, making it difficult for scanners to focus properly and leading to blurry areas.
* **Reflections and Glare:** Shiny photo surfaces, glossy album pages, or plastic overlays are highly reflective. Light from your scanning device or ambient room light can bounce off these surfaces, creating bright spots or washed-out areas in your digital images. This problem is particularly acute when scanning through clear plastic.
* **Irregular Placement:** Photos are rarely perfectly aligned on album pages. They may be crooked, overlap, or be placed at odd angles. This necessitates careful cropping and rotation during post-processing.
* **Handwritten Captions:** Often, captions are written near or even on the photos. You need to ensure your scanning method captures these valuable annotations without distortion or cropping.
* **Page Curvature and Thickness:** Older albums, especially those with many pages, often do not lie perfectly flat when opened. This curvature can make contact scanning difficult, creating uneven pressure or causing photos near the binding to be out of focus. The thickness of the album itself can also prevent it from fitting comfortably on a standard flatbed scanner.
Understanding these specific challenges prepares you to select the right equipment, employ appropriate scanning techniques, and approach post-processing with realistic expectations.
Essential Equipment for Album Scanning
Choosing the right tools is crucial for successful non-removal album digitization. Your equipment impacts the quality, efficiency, and safety of your project.
While this guide focuses on albums, many of the same cameras can be adapted for scanning photographic slides with a few additional accessories.
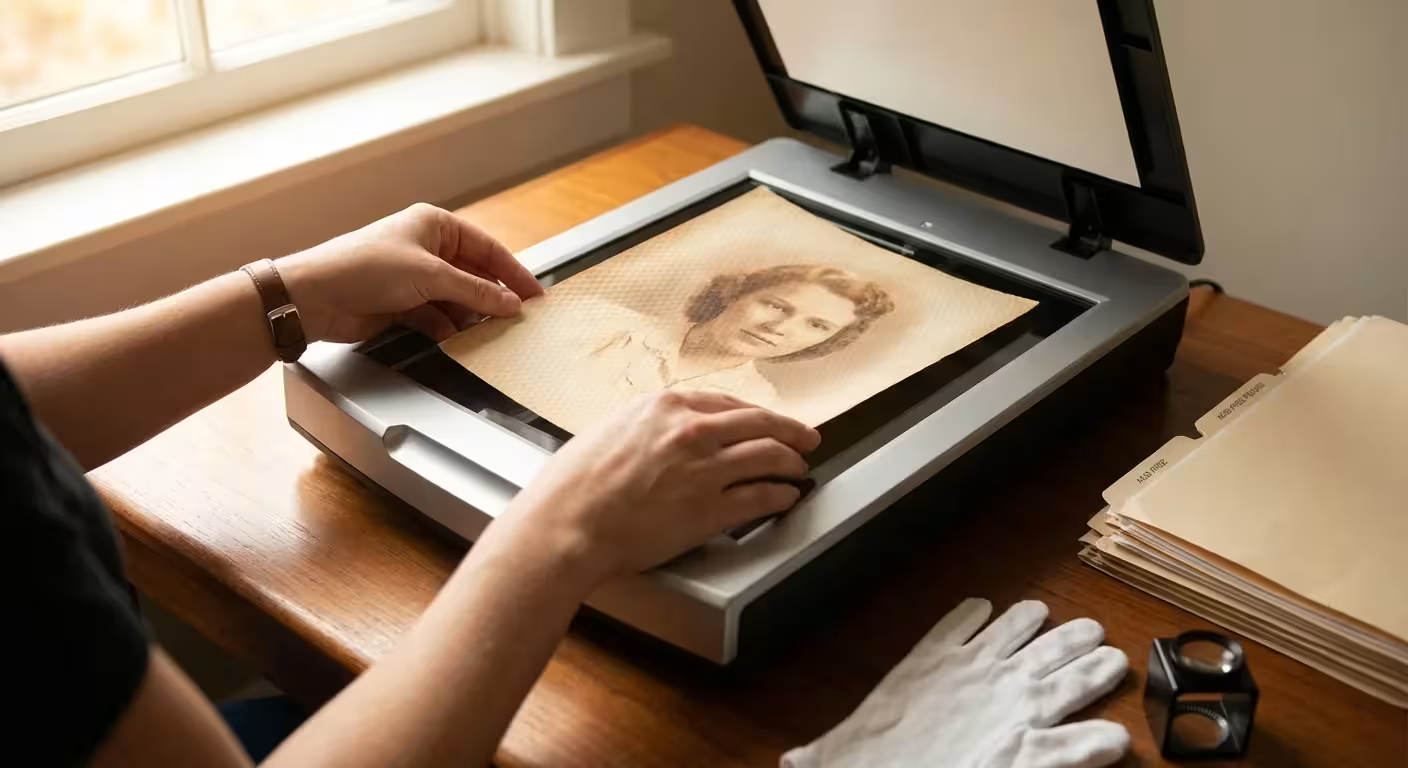
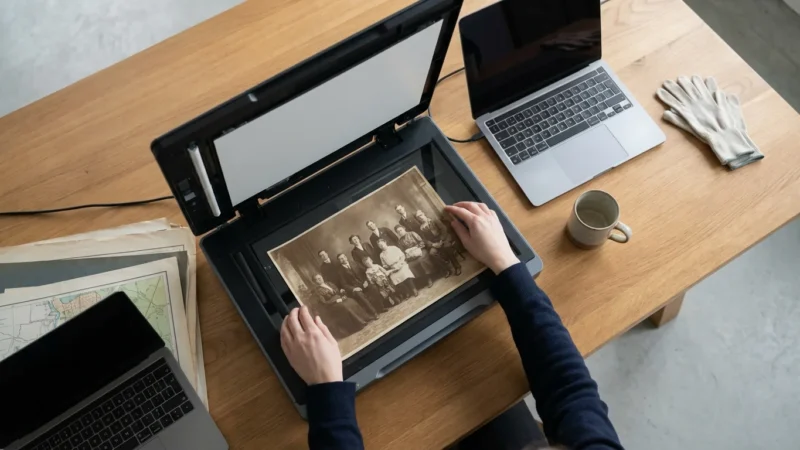
**1. Flatbed Scanner:**
For scanning photos in albums, a flatbed scanner is generally the best choice.
* **Advantages:** It provides a flat surface for the album page, reducing distortion. High-resolution flatbeds (e.g., Epson Perfection series) offer excellent image quality, capable of capturing fine details. They work well for scanning individual photos or entire pages. Many models also feature a lid that can extend or detach, accommodating thicker albums. Look for models with a high optical resolution (e.g., 2400 dpi or higher) for optimal results.
* **Considerations:** Even with an extendable lid, very thick or fragile albums might not lie perfectly flat. The pressure from the lid can potentially damage delicate pages.
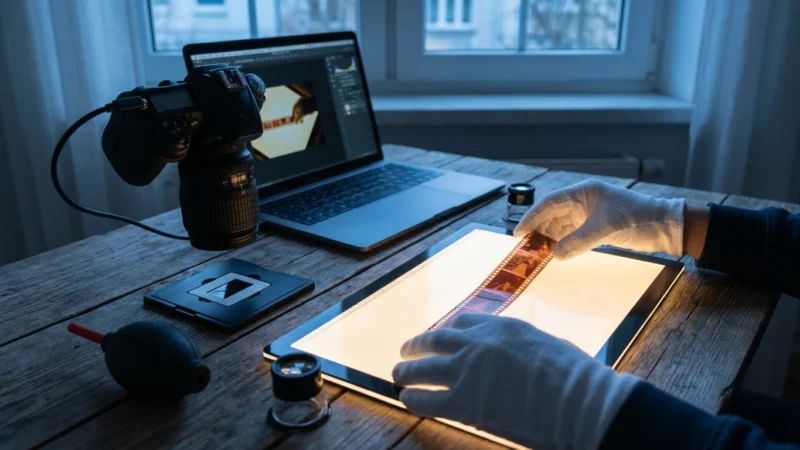
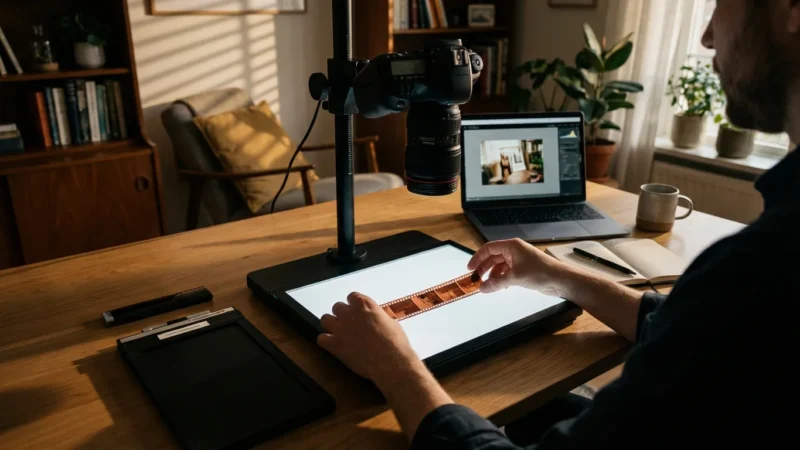
**2. DSLR or Mirrorless Camera with a Macro Lens (Camera Scanning):**
This method involves photographing the album pages rather than scanning them directly.
* **Advantages:**
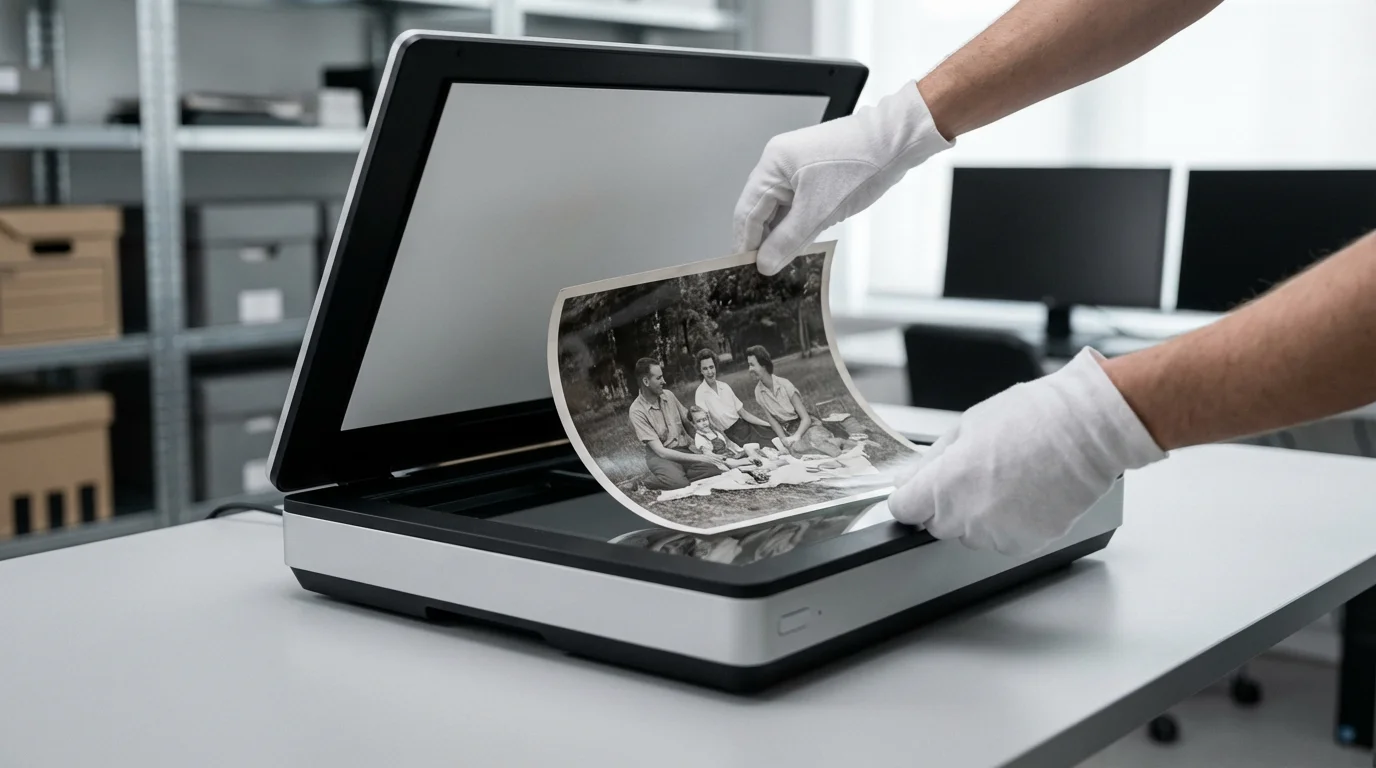
* **Non-Contact:** Ideal for extremely fragile or very thick albums that cannot be placed on a flatbed scanner without risking damage. This is a key advantage when preserving the album’s original state.
* **Speed:** You can capture images much faster than with a flatbed scanner.
* **Flexibility:** You have greater control over lighting, perspective, and depth of field.
* **Equipment Needed:**
* **High-Resolution Camera:** A DSLR or mirrorless camera (20+ megapixels is ideal).
* **Macro Lens:** Essential for sharpness and detail when shooting close-ups. A macro lens allows you to fill the frame with the photo or album section.
* **Tripod or Copy Stand:** Provides stability for the camera, preventing blur and ensuring consistent positioning. A copy stand is particularly effective for maintaining perfect alignment.
* **Even Lighting:** Two continuous light sources (LED panels are excellent) placed at a 45-degree angle to the album page minimize reflections and shadows. Polarizing filters for both your lights and your lens can dramatically reduce glare, especially on glossy photos or plastic overlays.
* **Considerations:** Requires more technical photography skill to achieve optimal results, including managing reflections, focus, and white balance.
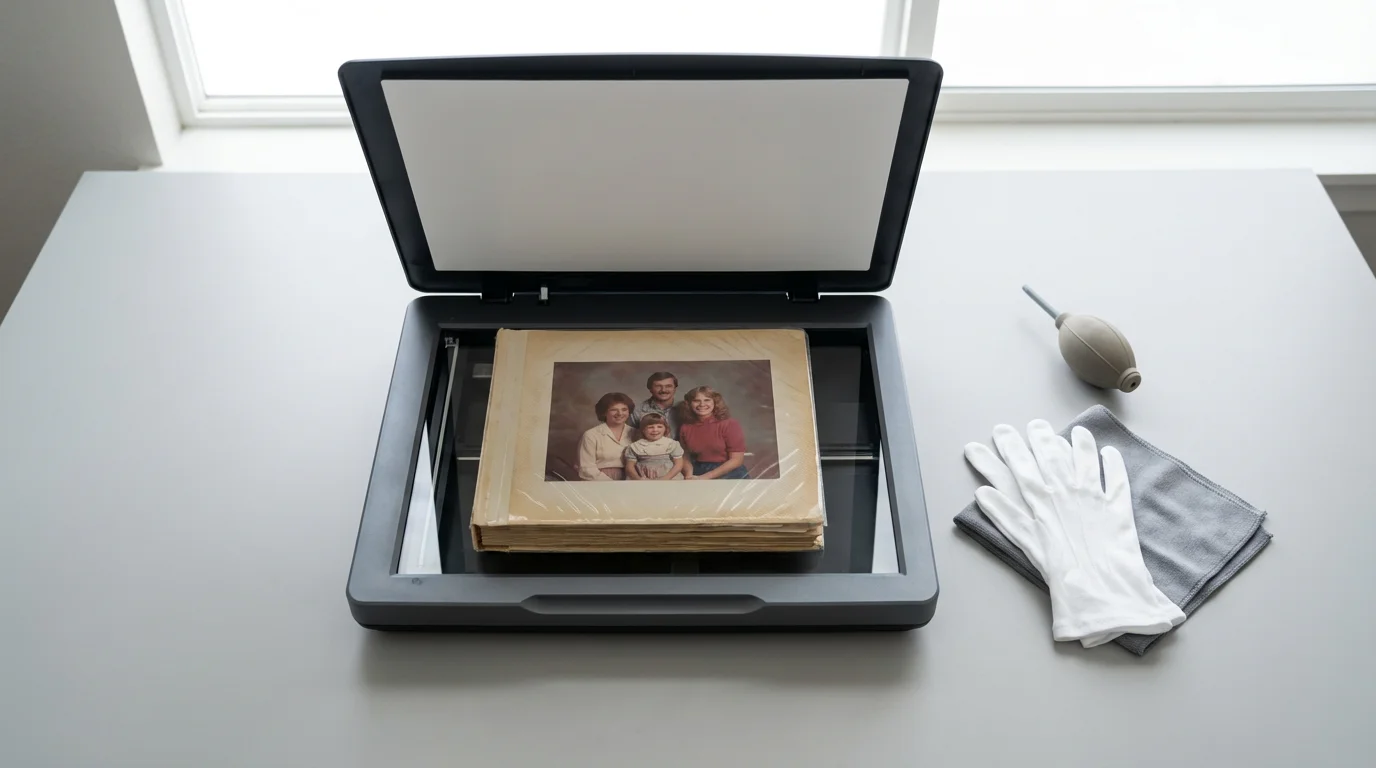
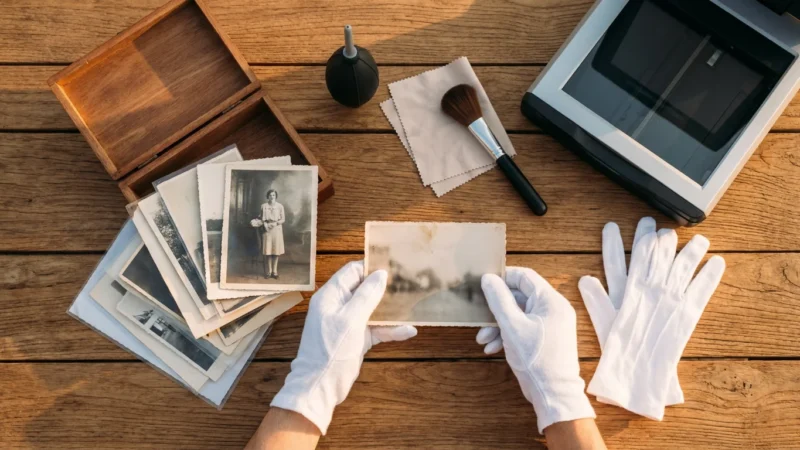
**3. Cleaning Supplies:**
* **Soft, Lint-Free Cloths (Microfiber):** For gently wiping scanner glass or camera lenses.
* **Canned Air/Blower Brush:** To remove dust and loose debris from album pages and photos before scanning. Never use your breath, as moisture can cause spotting.
* **White Cotton Gloves:** Protect your photos from natural oils and dirt on your hands. Always wear these when handling old photos or albums.
**4. Software:**
* **Scanner Software:** Most scanners come with proprietary software that allows you to control resolution, color depth, and other settings.
* **Image Editing Software:** Programs like Adobe Photoshop, GIMP (free), or Affinity Photo are invaluable for cropping, rotating, color correction, scratch removal, and sharpening after the initial scan. These tools help you transform a raw scan into a beautifully restored digital image.
* **Cataloging Software:** Consider programs like Adobe Lightroom, Google Photos, or specialized genealogy software for organizing and tagging your digitized collection.
**5. Support Materials (for Flatbed Scanning):**
* **Acid-Free Foam or Books:** To prop up the album so the page you are scanning lies as flat and level as possible with the scanner bed, reducing page curvature and maintaining consistent focus.
* **Weights:** Gentle, clean weights (like archival paperweights or beanbags) can help hold down album pages without damaging them, especially near the binding.
Selecting the right combination of these tools depends on your album’s condition, your budget, and your comfort level with different technologies. Prioritize safety and quality to ensure your efforts yield lasting digital treasures.

Preparing Your Album and Workspace
Careful preparation is key to a smooth and successful scanning process. This stage minimizes potential damage and maximizes image quality.
**1. Set Up Your Workspace:**
* **Clean, Flat Surface:** Choose a sturdy table in a well-lit, dust-free area. Ensure ample space to open the album fully and operate your scanner or camera setup.
* **Good Lighting:** While direct sunlight can cause glare, sufficient ambient light helps you inspect the album. For camera scanning, prepare your controlled light sources.
* **Organize Your Tools:** Keep your scanner, camera, cleaning supplies, and computer within easy reach.
**2. Clean Your Equipment:**
* **Scanner Glass/Camera Lens:** Use a microfiber cloth specifically designed for optics, along with a mild lens cleaning solution if necessary, to clean your scanner bed or camera lens. Dust, smudges, or fingerprints on your equipment will appear in your scans.
* **Computer Screen:** A clean screen ensures you accurately assess image quality during the process.
**3. Prepare Your Album:**
* **Handle with Care:** Always wear white cotton gloves when handling old albums and photographs. Your skin’s natural oils can leave fingerprints that degrade over time.
* **Gentle Cleaning:** Before scanning each page, use a soft, dry blower brush or canned air to gently remove any loose dust or debris. Do not wipe photos directly, as this can scratch delicate surfaces. Avoid chemical cleaners.
* **Inspect Each Page:** Before you even position the album, look closely at the page you plan to scan. Identify any particularly fragile areas, loose elements, or stubborn plastic overlays. Note where photos are curled or where glare might be an issue.
* **Flatten the Album:**
* For flatbed scanning, open the album as flat as possible without forcing the binding. Use archival foam blocks, books, or a stack of magazines to prop up the sides of the album, ensuring the page you are scanning lies level with the scanner glass. This prevents distortion and ensures consistent focus across the entire page. Do not press down excessively on the album’s spine.
* For camera scanning, a copy stand setup naturally keeps the album flat and open under the camera’s lens. If using a tripod, ensure the album is on a stable, flat surface.
**4. Test Your Setup:**
Before committing to full scans, perform a few test scans or shots. This allows you to check for:
* **Reflections:** Adjust lighting or scanner placement to minimize glare, especially from plastic overlays.
* **Sharpness:** Ensure your camera is in focus or your scanner settings are appropriate.
* **Color Accuracy:** Check if colors appear natural and balanced.
* **Exposure:** Confirm that images are not too dark or too bright.
This thorough preparation saves time and prevents potential headaches later in the process, ensuring you capture the best possible digital representations of your memories.

Step-by-Step Guide to Scanning Photos in Albums
Whether you choose a flatbed scanner or camera scanning, a systematic approach ensures consistent quality and protects your valuable albums.
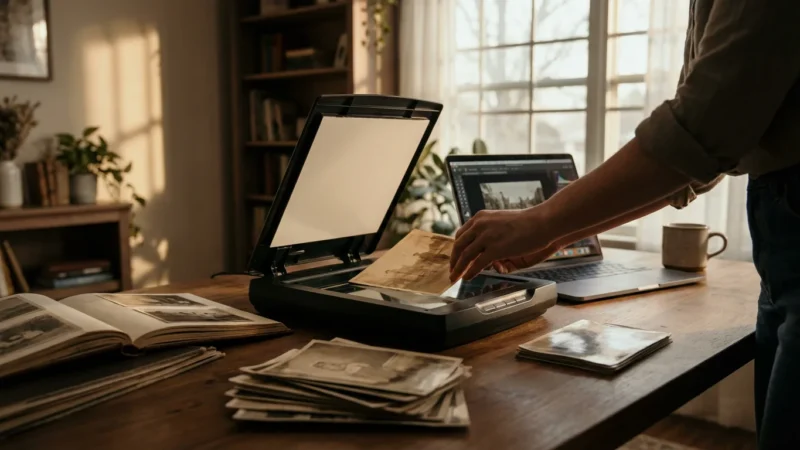
**Method 1: Flatbed Scanning**
1. **Position the Album:** Gently open the album to the desired page. Place it face down on the scanner bed, aligning the photos as best as possible within the scanner’s capture area. Use your propping materials (foam blocks, books) to ensure the album page lies as flat and level as possible against the glass. Avoid forcing the album or stressing its binding.
2. **Adjust Scanner Settings:**
* **Resolution (DPI):** For archival purposes, scan at a minimum of 600 DPI (dots per inch). This resolution captures sufficient detail for future printing or extensive digital restoration. If you plan to crop small sections of larger photos or anticipate significant enlargement, consider 1200 DPI. Remember, higher DPI creates larger file sizes.
* **Color Depth:** Scan in 24-bit color (standard) or 48-bit color for maximum color information. This provides more flexibility for color correction in post-processing.
* **File Format:** Save your original scans as uncompressed TIFF files. TIFF is a lossless format, meaning it retains all image data, making it ideal for archiving. You can always convert to JPEG for sharing or web use later.
* **Disable Automatic Corrections:** Turn off any automatic color correction, sharpening, or dust removal features in your scanner software. These automated processes can make irreversible changes to your original scan data. You retain full control over these adjustments in post-processing.
3. **Perform a Preview Scan:** Initiate a preview scan to see how the page appears. Use this preview to adjust positioning, verify focus, and identify potential issues like reflections.
4. **Execute the Final Scan:** Once satisfied with the preview, perform the full-resolution scan.
5. **Review and Save:** Immediately review the scanned image on your computer. Check for clarity, reflections, and accurate color. Save the TIFF file with a descriptive name (e.g., “FamilyAlbum001_Page005.tif”).
6. **Repeat:** Carefully turn to the next page, clean the scanner glass again, and repeat the process.
**Method 2: Camera Scanning (Photographic Digitization)**
1. **Set Up Camera and Lighting:** Mount your camera on a tripod or copy stand, positioned directly above the album page, ensuring the lens is parallel to the page surface. Arrange your two continuous light sources at approximately 45-degree angles to the album, aiming to illuminate the page evenly and minimize reflections. Polarizing filters on your lights and lens are highly recommended to cut glare.
2. **Adjust Camera Settings:**
* **File Format:** Shoot in RAW format. This captures the maximum amount of image data, giving you the greatest flexibility for adjustments during post-processing.
* **ISO:** Keep ISO as low as possible (e.g., ISO 100 or 200) to minimize digital noise.
* **Aperture:** Choose an aperture that provides sufficient depth of field to keep the entire page in focus, typically f/8 to f/11.
* **Shutter Speed:** Adjust the shutter speed to achieve correct exposure based on your lighting and aperture. Use a remote shutter release or the camera’s self-timer to avoid camera shake.
* **White Balance:** Set a custom white balance using a neutral gray card placed on the album page. This ensures accurate color representation.
3. **Focus:** Manually focus your lens on the album page. Use live view with magnification on your camera’s screen to achieve precise focus.
4. **Capture the Image:** Take the shot, carefully reviewing the image on your camera’s LCD or tethered computer for focus, exposure, and reflections.
5. **Adjust and Repeat:** If necessary, adjust lighting or camera position. Capture the next page, repeating the process.
**General Tip for Both Methods:**
* **Scan Whole Pages First:** Capture the entire album page as a single image. This preserves the original layout and any accompanying notes. Later, you can use image editing software to crop individual photos from these larger page scans. This also applies to scanning photos in photo albums where individual pictures are distinct but the overall page has meaning.
By following these detailed steps, you ensure that your `scan album photos` project captures the most accurate and high-quality digital versions of your cherished memories, preparing them for the next stage of organization and preservation.

Optimizing Scan Quality for Preserved Memories
Capturing the initial scan is only the first step. The real magic of bringing old photos to life happens during the optimization process. This involves careful attention to settings and targeted post-processing.
**Scanner Settings for Maximum Data Capture (Flatbed):**
* **Resolution (DPI):** As mentioned, prioritize 600 DPI for standard prints. For negatives or slides, or if you plan to significantly enlarge a small portion of a physical print, consider 1200 DPI or even higher. A study by the National Archives and Records Administration (NARA) recommends scanning photographs at resolutions that capture sufficient detail for anticipated future use, emphasizing that a higher initial capture saves time in the long run by avoiding rescans.
* **Color Depth:** Use 24-bit color for general photos. If your scanner offers 48-bit color, utilize it for maximum color information, especially with faded images. This provides a wider gamut for correction.
* **File Format:** Always save primary archival files as uncompressed TIFFs. TIFF files retain all the original image data and are not subject to the generation loss that JPEGs incur with repeated saving and editing.
* **Disable Auto-Corrections:** Turn off any “auto-enhance,” “auto-sharpen,” or “dust removal” features in your scanner software. These automated adjustments often apply irreversible changes that might not be ideal for your specific image, or they can introduce artifacts. You want the rawest possible data to work with.
**Post-Processing Techniques for Enhancement:**
After scanning, transfer your TIFF files to your computer for editing. Use image editing software like Photoshop, GIMP, or Affinity Photo.
1. **Cropping and Straightening:**
* Crop out unwanted album page borders, scanner bed edges, or parts of the background.
* Straighten crooked photos. Most editing software has a straighten tool that lets you draw a line along a known straight edge (like the photo border) to correct perspective.
* For album pages with multiple photos, you can crop each individual photo into separate files, but remember to keep a master scan of the full page for context.
2. **Color Correction and White Balance:**
* **White Balance:** Old photos often suffer from color shifts, developing a yellow, red, or blue cast. Use the white balance tool to neutralize these shifts. Find a neutral gray or white area in the photo and click on it with the eyedropper tool to adjust the overall color balance.
* **Color Restoration:** For severely faded photos, use adjustment layers (e.g., Curves, Levels, Hue/Saturation) to bring back lost colors. Sometimes, converting a faded color photo to black and white can yield a more pleasing result if color restoration proves difficult.
3. **Exposure and Contrast Adjustment:**
* Adjust brightness and contrast using Levels or Curves adjustments. Many old photos are underexposed or have lost contrast over time. Aim for a natural look with good detail in both highlights and shadows. Avoid blowing out highlights or clipping shadows.
4. **Sharpening:**
* Apply sharpening judiciously. Scans can sometimes appear a little soft. Use an “Unsharp Mask” filter with a small radius and amount to enhance edge detail without introducing a grainy or artificial look. Oversharpening can introduce artifacts.
5. **Dust and Scratch Removal:**
* This is often the most time-consuming step. Use tools like the Spot Healing Brush, Clone Stamp, or Patch tool to meticulously remove dust spots, scratches, and minor blemishes. Work zoomed in and take your time. Avoid overly aggressive cleaning that removes genuine photographic detail. For delicate work, the American Institute for Conservation offers guidelines on photographic conservation which emphasizes minimal, reversible intervention, a principle that translates well to digital restoration.
6. **Saving Edited Files:**
* Save your *edited* versions as high-quality JPEGs for everyday viewing and sharing. Use a high-quality setting (e.g., 8-10 on a 12-point scale) to minimize compression artifacts.
* Always retain your original, unedited TIFF files as the masters. This ensures you can always go back to the raw scan if future editing techniques or software improvements emerge.
* Consider creating a standardized naming convention (e.g., “YYYYMMDD_FamilyName_Event_OriginalScan.tif” and “YYYYMMDD_FamilyName_Event_Edited.jpg”) to keep your collection organized.
By following these steps, you not only preserve the image but also enhance its clarity and vibrancy, making your album digitization project a truly rewarding endeavor.

Post-Scanning Workflow: Organizing and Safeguarding Your Digital Files
Digitizing your albums is a significant achievement, but the work does not end with the scan. A robust post-scanning workflow ensures your digital memories are organized, accessible, and securely preserved for the future.
**1. Consistent File Naming Convention:**
Adopt a clear and consistent naming strategy from the outset. This makes finding specific photos much easier.
* **Example:** `YYYYMMDD_Subject_Event_OriginalAlbumPage_ImageNumber.tif`
* `19780715_GrandmaBirthday_FamilyAlbum03_Page22_001.tif` (for the first photo cropped from that page)
* `19780715_GrandmaBirthday_FamilyAlbum03_Page22_FullScan.tif` (for the full page scan)
* Include key information: date (if known), names of people or events, original album context, and an indicator for original versus edited versions.
**2. Folder Structure:**
Create a logical folder hierarchy on your computer. This mirrors the organization of physical albums or follows a chronological structure.
* **Example:**
* `Photo Archive`
* `Original Scans (TIFF)`
* `Family Album 1 (1950s-1970s)`
* `Family Album 2 (1980s-1990s)`
* `Loose Photos (Unidentified)`
* `Edited Photos (JPEG)`
* `By Year`
* `1955`
* `1960`
* `1978`
* `By Event`
* `Weddings`
* `Birthdays`
* Separate original, unedited TIFF files from your edited JPEG or other format copies. This ensures the integrity of your master archive.
**3. Metadata Tagging:**
Metadata is data about your data. Embedding information directly into your image files makes them searchable and future-proof.
* Use image editing software or dedicated photo management tools (like Adobe Lightroom, Apple Photos, or open-source alternatives like digiKam) to add:
* **Keywords/Tags:** Names of people, places, events, themes (e.g., “Grandma,” “Camping,” “Christmas,” “1970s,” “Birthday Party”).
* **Dates:** The exact date the photo was taken, if known.
* **Descriptions:** A brief narrative explaining the photo’s content or significance.
* **Copyright Information:** Your name or “Family Archive.”
* This rich metadata allows you to quickly locate specific images years down the line, even if your folder structure changes.
**4. The 3-2-1 Backup Strategy:**
This is the gold standard for digital preservation, recommended by experts like the Library of Congress for safeguarding digital information.
* **3 Copies of Your Data:** Keep at least three copies of your precious photo collection.
* **2 Different Media Types:** Store these copies on at least two different types of storage media (e.g., your computer’s hard drive, an external hard drive, cloud storage).
* **1 Off-Site Location:** Ensure at least one copy is stored off-site, in a physically separate location (e.g., cloud backup, a friend’s house, a safe deposit box). This protects against local disasters like fire, flood, or theft.
* **Backup Options:**
* **External Hard Drives:** Affordable and convenient for local backups. Use multiple drives and rotate them.
* **Cloud Storage:** Services like Google Drive, Dropbox, Backblaze, or Amazon Photos offer off-site storage and accessibility from anywhere. Choose a reputable provider with strong security measures.
* **Network Attached Storage (NAS):** For advanced users, a personal NAS provides robust local storage with redundancy.
* Regularly verify your backups to ensure files are not corrupted and are accessible.
By implementing these steps, you transition from simply scanning photos to actively managing and safeguarding a priceless digital heritage. Your efforts ensure these memories are not just digitized, but truly preserved.

Common Pitfalls and How to Avoid Them
Even with the best intentions, certain challenges can derail your album digitization project. Recognizing these common pitfalls helps you navigate them effectively.
**1. Neglecting Proper Cleaning:**
* **Pitfall:** Dust, hair, or smudges on the scanner glass, camera lens, or album pages will show up prominently in your scans, requiring extensive post-processing.
* **Solution:** Make cleaning a habit. Before each scanning session, and periodically throughout, use a lint-free cloth and blower brush on your equipment. For album pages, gently use canned air or a soft brush. Always wear cotton gloves to prevent transferring oils from your hands.
**2. Ignoring Reflections and Glare:**
* **Pitfall:** Glossy photos, plastic overlays, or highly reflective album pages create bright spots or washed-out areas in your scans, obscuring details.
* **Solution:**
* **Flatbed:** Close the scanner lid completely. If the album is too thick, use a dark, non-reflective cloth over the exposed area to block ambient light. Scan in a room with diffused, indirect lighting.
* **Camera Scanning:** This is where lighting control is paramount. Use two continuous light sources at 45-degree angles. Crucially, add polarizing filters to both your lights and your camera lens, and rotate the lens filter until reflections disappear. This is a game-changer for glossy surfaces.
**3. Poor Resolution Choices:**
* **Pitfall:** Scanning at too low a resolution results in pixelated images that cannot be enlarged or cropped without losing quality. Rescanning is often not an option for fragile albums.
* **Solution:** Always scan at a minimum of 600 DPI for prints, and higher (1200+ DPI) for smaller photos, negatives, or slides. It is always better to capture too much data than too little. You can always downsize a high-resolution image, but you cannot add detail to a low-resolution one.
**4. Over-reliance on Automated Scanner Corrections:**
* **Pitfall:** Allowing scanner software to automatically adjust colors, sharpness, or remove dust can lead to irreversible, often suboptimal, changes to your raw image data.
* **Solution:** Disable all automatic corrections in your scanner software. Capture the purest, rawest data possible. Perform all corrections manually in dedicated image editing software, where you have full control and can make non-destructive adjustments (e.g., using adjustment layers).
**5. Inconsistent Naming and Organization:**
* **Pitfall:** Saving files with generic names (e.g., “Scan001.tif”) or dumping them into a single folder makes it impossible to find specific photos later, defeating the purpose of digitization.
* **Solution:** Develop and strictly adhere to a consistent file naming convention and logical folder structure from the very beginning. Implement metadata tagging for detailed searchability. This disciplined approach saves countless hours in the long run.
**6. Not Backing Up Your Digital Files:**
* **Pitfall:** Losing your digitized collection to a hard drive crash, theft, or natural disaster after all your hard work.
* **Solution:** Implement the 3-2-1 backup strategy immediately after scanning and editing. Regularly verify your backups. Digital files are fragile; robust backup is non-negotiable for true preservation.
By proactively addressing these common pitfalls, you safeguard both your precious physical albums and the valuable digital archive you are creating.
When to Seek Professional Help
While DIY digitization is empowering and cost-effective for many, certain situations warrant the expertise of professional conservators or scanning services. Recognizing these instances protects your irreplaceable memories.
**1. Extremely Fragile or Damaged Albums/Photos:**
If an album’s binding is completely disintegrated, pages are crumbling, or photos show severe damage like extensive tearing, mold, or active deterioration, handling them yourself risks further damage. A professional conservator has specialized training, tools, and environments to stabilize and repair such items before any digitization attempt. The American Institute for Conservation (AIC) offers a “Find a Conservator” tool that helps you locate qualified professionals who adhere to ethical standards for preserving cultural heritage.
**2. Irreplaceable and Highly Valuable Items:**
For photographs of immense historical, monetary, or sentimental value (e.g., unique historical documents, rare family heirlooms, photos documenting significant events), the stakes are too high for a DIY approach if you are unsure. Professionals possess specialized, archival-grade equipment and controlled environments that minimize risk and maximize quality. Their services come with insurance and expertise that personal setups cannot match.
**3. Large Volume of Photos or Albums:**
If you inherit dozens of albums or thousands of loose photos, the sheer scale of the project can be overwhelming and incredibly time-consuming. Professional services can process large volumes efficiently, often providing bulk discounts. They have high-throughput scanners and specialized workflows that significantly reduce the time needed to digitize your collection. This can be a practical consideration if your time is limited.
**4. Specialized Formats:**
Digitizing formats beyond standard prints, such as glass plate negatives, ambrotypes, tintypes, or large-format panoramic photos, requires specialized equipment and expertise. These formats are delicate and demand specific handling techniques that average home scanners cannot accommodate. Professionals have the right cradles, lighting, and software for these unique challenges.
**5. Desire for the Highest Possible Archival Quality:**
While home scanners can achieve good results, professional services often utilize drum scanners or very high-end flatbed scanners with superior optical resolution, dynamic range, and color accuracy. They might also offer advanced color correction and restoration services that go beyond what hobbyist software can provide, ensuring museum-quality digital reproductions.
**6. Limited Time or Technical Skill:**
If you lack the time, patience, or technical comfort level required for detailed scanning, post-processing, and organizing, outsourcing the project can be a smart investment. Professionals deliver a ready-to-use digital archive, saving you the steep learning curve and labor.
When considering professional services, research reputable companies that specialize in photo preservation and digitization. Ask for examples of their work, understand their processes for handling fragile materials, and clarify their pricing structure. A professional assessment can also offer insights into the condition of your albums and the best path forward for their long-term care.
“True preservation of photographic heritage often requires a balance between personal effort and professional expertise. Do not hesitate to consult a conservator when faced with fragile, unique, or exceptionally valuable items. Their knowledge ensures these irreplaceable artifacts are handled with the care they deserve.”
If your albums are excessively fragile or the project feels too large to handle, you might consider whether professional photo scanning services are worth it for your specific collection.
Frequently Asked Questions
Can I use my phone camera to scan photos in albums?
While you can use a phone camera for quick captures, it is not recommended for archival-quality digitization. Phone cameras struggle with reflections, maintain consistent focus across a non-flat surface, and often produce lower resolution images compared to flatbed scanners or dedicated camera scanning setups. For casual sharing, a phone is fine, but for preservation, invest in proper equipment.
What is the best resolution to scan old photos for future use?
For most old photographic prints, scanning at 600 DPI (dots per inch) is an excellent balance between detail capture and manageable file size. This resolution provides enough information for quality prints, enlargements, and digital restoration. If you plan to crop very small sections or if the original photo is tiny, scanning at 1200 DPI offers even greater flexibility.
How do I deal with photos stuck under plastic overlays in “magnetic” albums?
Scanning through the plastic overlay is the recommended approach to avoid damaging the photo. To minimize glare, use controlled, indirect lighting or, ideally, polarizing filters on your camera lens and light sources if you are camera scanning. For flatbed scanning, ensure the lid is fully closed or cover the exposed area with a dark cloth. In post-processing, you can often mitigate remaining glare and improve clarity.
Should I remove handwritten notes or captions from my scans?
No, preserve them! Handwritten notes and captions provide invaluable historical context and personal connections. Scan the entire album page to capture these annotations alongside the photos. You can always crop individual photos later, but ensure you retain a master scan of the full page with all its contextual elements.
How often should I back up my digitized photo collection?
Implement a consistent backup schedule. For active projects where you add new scans regularly, back up weekly or bi-weekly. For a completed archive, perform full backups monthly or quarterly, ensuring you follow the 3-2-1 backup strategy. Always verify that your backup files are intact and readable.
Disclaimer: This article is for informational purposes only. When handling valuable or irreplaceable photographs, consider consulting a professional conservator. Always test preservation methods on non-valuable items first.
Before you begin, ensure you choose the best file formats for scanned photos to balance image quality with storage space.


Leave a Reply