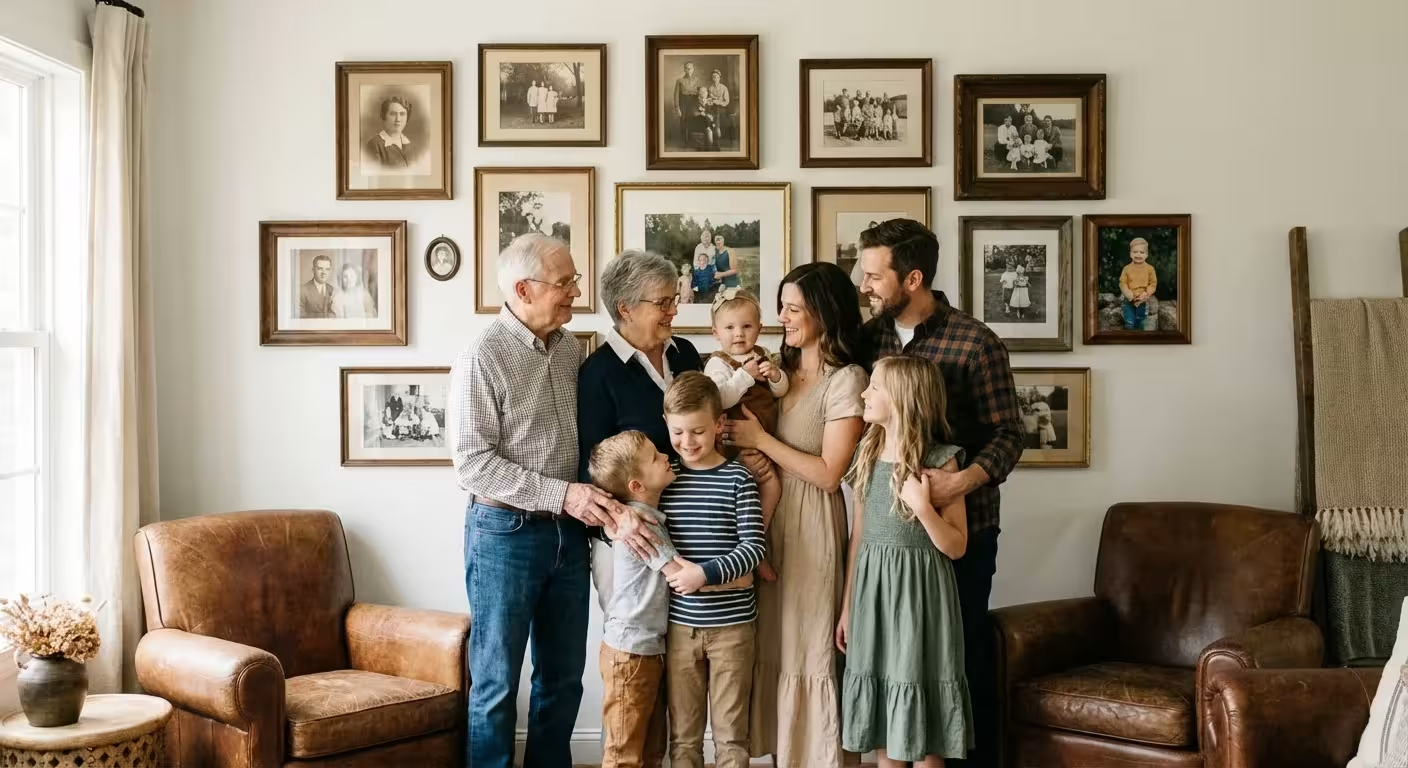
A heritage wall serves as more than just a decorative element; it functions as a living archive of your family’s journey through time. When you step into a room and see the faces of ancestors who lived a century ago alongside your own children, you bridge the gap between the past and the present. Most people harbor a collection of old photographs tucked away in dusty shoeboxes or hidden in digital folders, but these memories lose their power when they remain invisible. By transforming these scattered artifacts into a curated, interactive display, you create a focal point for storytelling and a sense of belonging for every family member who enters your home.
Creating this display requires a blend of genealogical research, photo preservation techniques, and interior design. You are not simply hanging pictures; you are constructing a narrative. This guide walks you through the process of selecting the right stories, preserving the integrity of your images, and using modern technology to make your family tree come alive. Whether you have a vast collection of tintypes from the 1800s or a hard drive full of high-resolution digital scans, you can build a display that honors your history while utilizing the best practices of modern preservation.

Defining the Narrative Goal of Your Heritage Wall
Before you pick up a level or a hammer, you must decide what story you want to tell. A heritage wall can take many forms, and your choice determines the layout and the photos you select. Some families prefer a literal family tree approach, where a central trunk fans out into generations. Others opt for a “Timeline of Resilience,” showing the family’s migration from one country to another. You might even focus on a “Century of Childhood,” displaying photos of ancestors at the same age as your current children.
Consider the emotional impact you want the display to have. A chronological display helps children understand the passage of time and the context of historical events. For example, seeing a great-grandfather in a World War II uniform next to a photo of him holding a newborn provides a tangible link to history. If your goal is to honor diversity or specific cultural roots, you might choose images that highlight traditional clothing, celebrations, or ancestral homes. By defining this goal early, you avoid the common pitfall of a “clutter wall,” where too many unrelated images fight for attention.
Think about the physical space available to you. A long hallway provides the perfect “walk through time” for a chronological timeline. A wide living room wall suits a sprawling, multi-generational tree. A small nook or entryway works best for a focused tribute to a specific branch of the family. Match your narrative to the architecture of your home to ensure the display feels like a natural part of your environment rather than an afterthought.
Curating and Organizing Your Family Archives
Effective curation is the difference between a mess and a masterpiece. You likely have hundreds, if not thousands, of images to choose from. Your task is to select the “hero” shots—those photos that capture a person’s spirit or a significant milestone. Look for images where the subjects are clear and the composition is engaging. While a blurry snapshot of a distant relative might have sentimental value, it may not be the best candidate for a large-scale display.
Start by gathering all physical and digital assets. Sort them into categories: paternal lineage, maternal lineage, weddings, childhood, and candids. Use a large table or a digital organization tool to view your candidates side-by-side. You are looking for visual consistency and a balanced representation of both sides of the family. If you have ten photos of one grandfather but only one of a grandmother, you might need to reach out to extended family members or check genealogical databases to find a better balance.
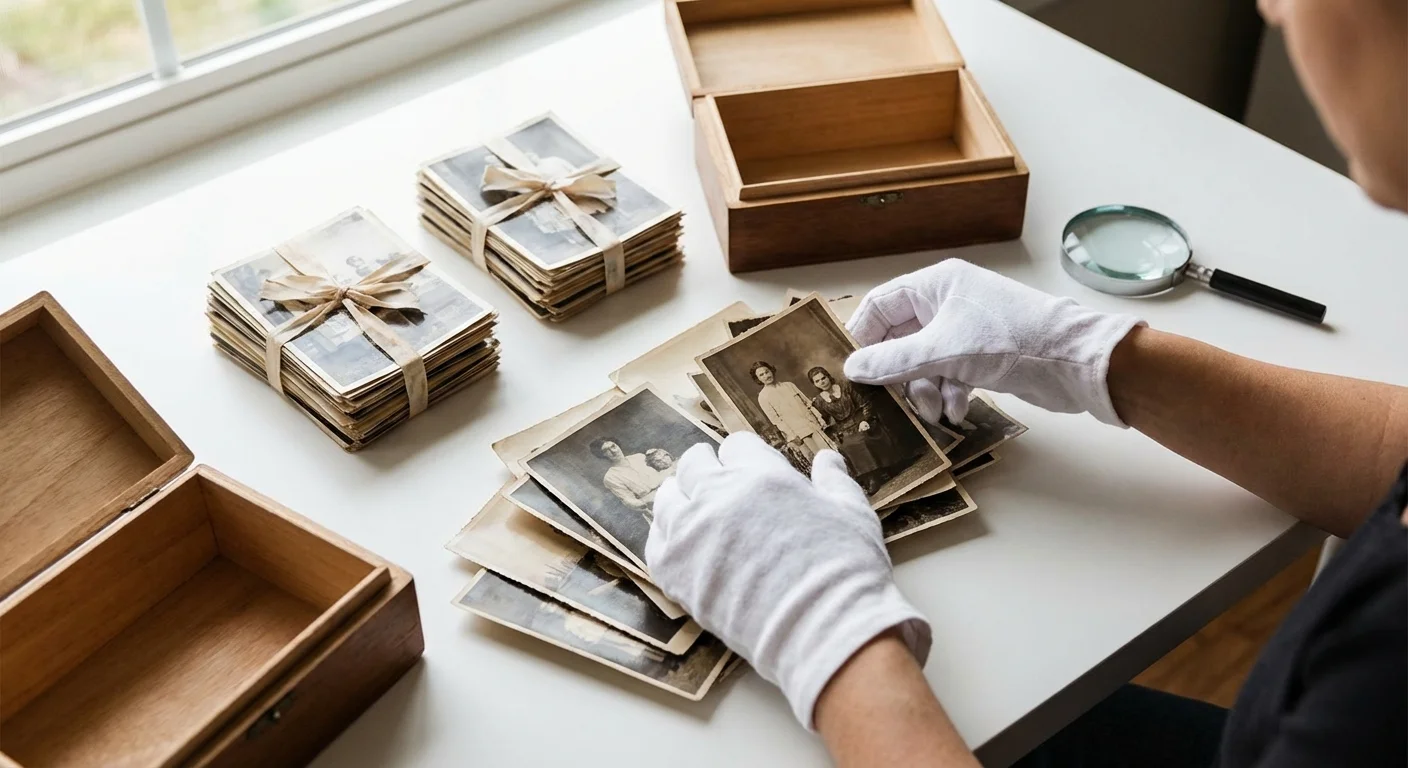
Data from the Smithsonian Institution Archives suggests that proper organization is the first step in long-term preservation. As you curate, take the time to identify the people in the photos. If the information isn’t written on the back, interview older relatives now. Once you lose the oral history associated with a photo, the image loses much of its context for future generations. Label your digital files with names, dates, and locations so that the information stays attached to the image as you move into the design phase.

Preservation and Digitization Standards
Preservation is the most critical technical step in building your heritage wall. You must follow one unbreakable rule: Never hang your original, one-of-a-kind historical photographs on the wall. Light, temperature fluctuations, and humidity are the enemies of photographic emulsions. Over time, UV rays will bleach the silver or dyes in your photos, leading to irreversible fading.
Instead, create high-quality digital surrogates. Use a flatbed scanner rather than a phone camera for the best results. For standard 4×6 or 5×7 prints, scan at a minimum of 600 DPI (dots per inch). If you have small tintypes or “gem” portraits that you plan to enlarge, scan them at 1200 DPI or higher. This allows you to print a large, clear version of a tiny original without losing detail. Save these scans as TIFF files for your archive and JPEGs for your printing needs.
“Preservation is not about stopping time; it is about slowing down the inevitable decay of physical objects through proper environment and handling.” — National Archives Preservation Standards
When handling your originals, wear lint-free cotton gloves to prevent skin oils from transferring to the surface. These oils can cause permanent staining and attract dust. According to the National Archives, you should store your original photographs in acid-free, lignin-free folders and boxes within a “cool, dry, and stable” environment. This usually means a closet in the main part of your home, not an attic or basement where temperatures swing wildly.
Designing a Visual Layout That Tells a Story
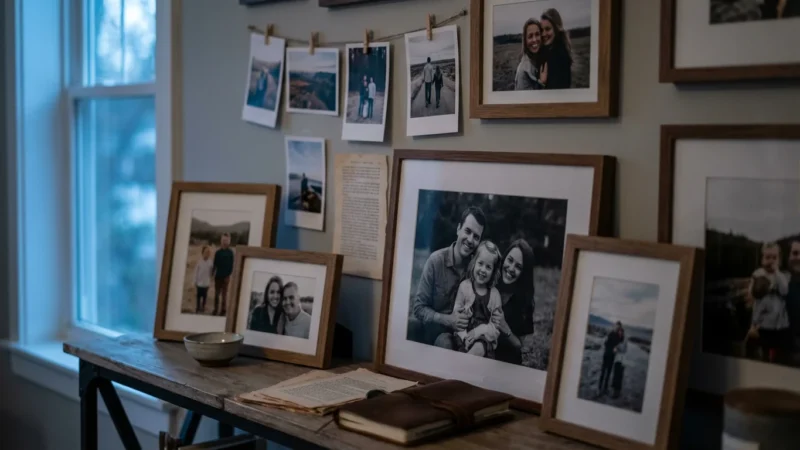
The layout of your heritage wall should guide the viewer’s eye. A random scatter of frames can feel chaotic, so you need a structural anchor. One popular method is the “Organic Family Tree.” You can use a vinyl wall decal of a tree as a backdrop or simply arrange frames in a way that suggests branches. Place the oldest ancestors at the bottom or the center and move outward as the generations progress.
Another sophisticated approach is the “Grid System.” This works exceptionally well if you have a large number of photos and want a clean, modern look. Use identical frames and mats to create a uniform grid. This style emphasizes the collective history of the family rather than individual photos. If your home has a more traditional feel, a “Gallery Wall” with varied frame styles in a coordinated color palette (such as all dark wood or all gold) offers a more curated, antique aesthetic.
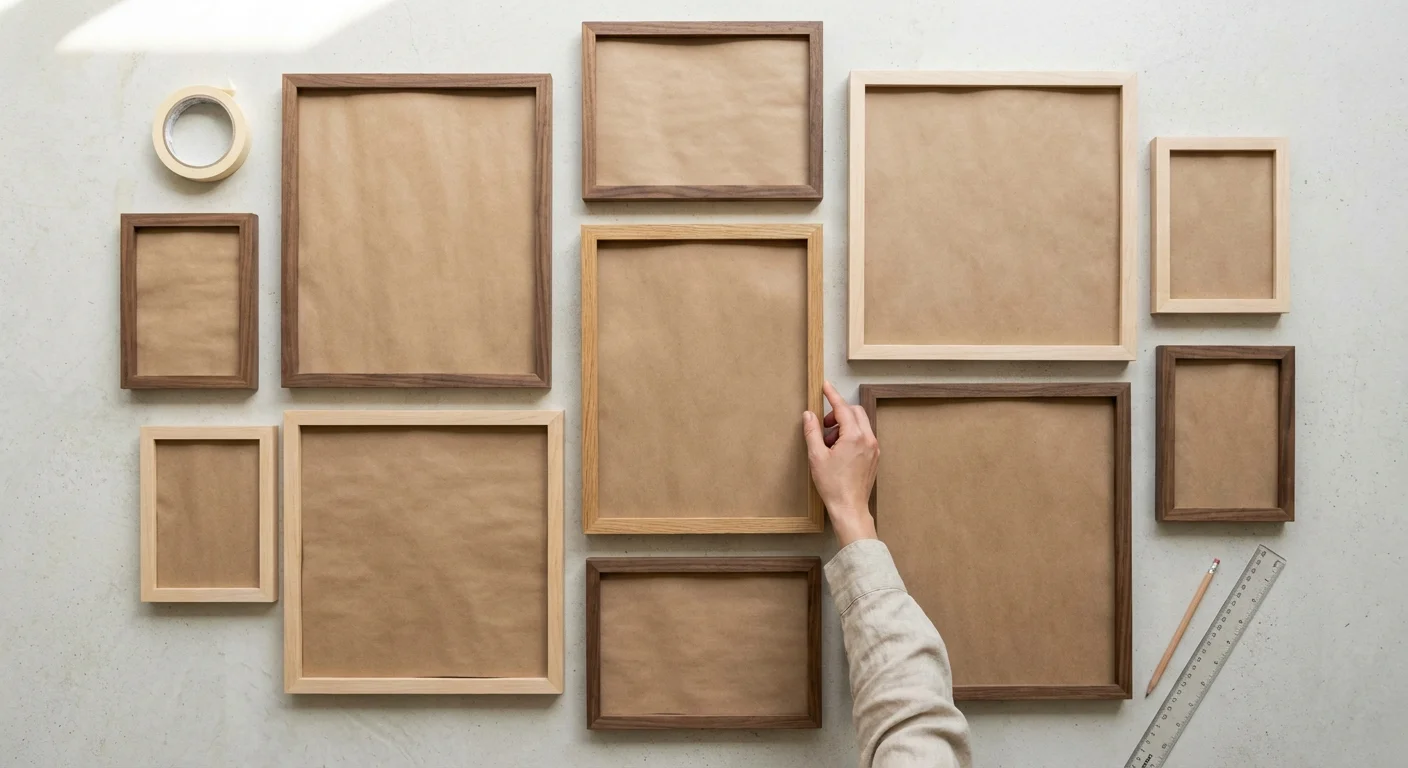
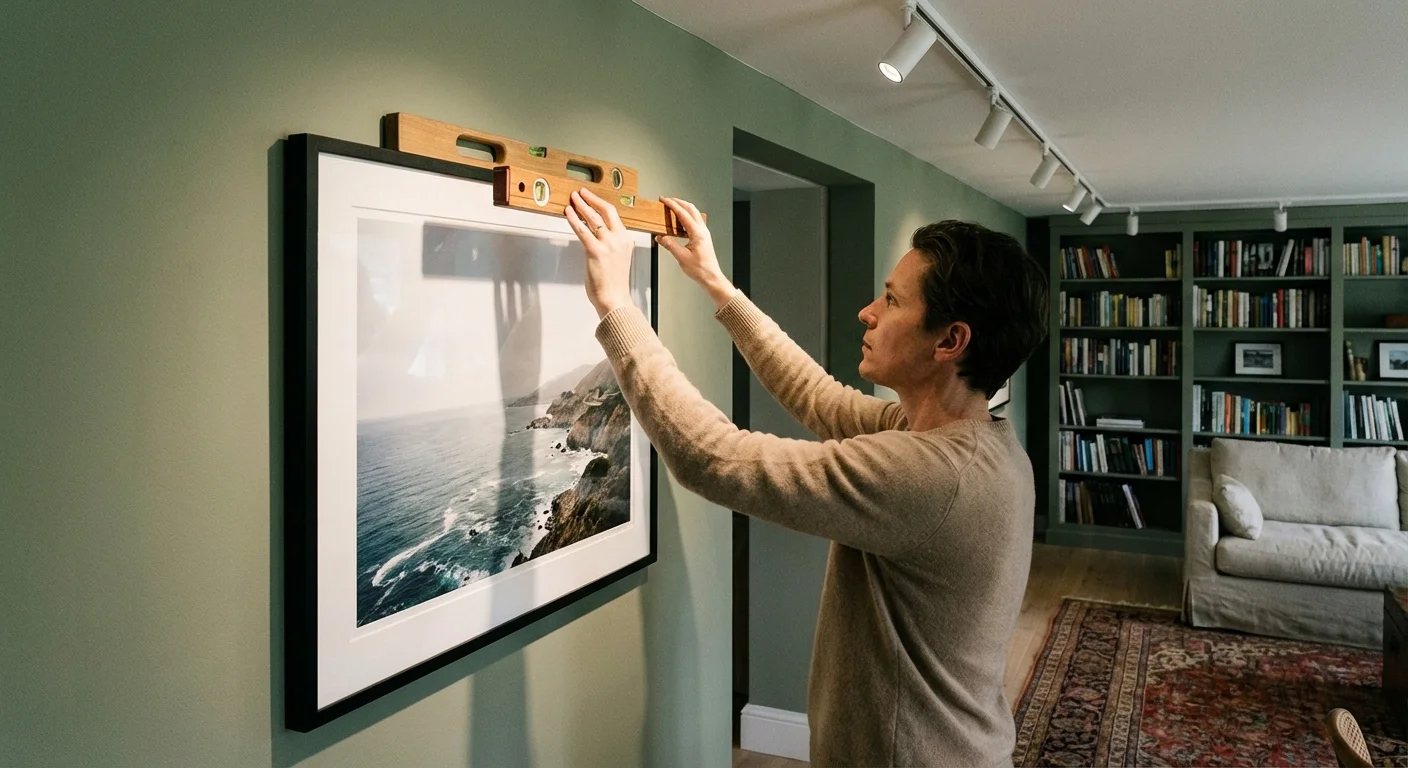
To plan your layout without making unnecessary holes in your wall, follow this professional tip:
- Measure your wall space and mark the boundaries on the floor using painter’s tape.
- Arrange your framed photos (or paper cutouts representing the frames) within that space.
- Take a photo of the floor arrangement from a high angle.
- Tape the paper cutouts to the wall to see how the height and spacing feel in the actual room.
- Adjust until the center of the display is roughly at eye level (57 to 60 inches from the floor).
Selecting Frames and Archival Display Materials
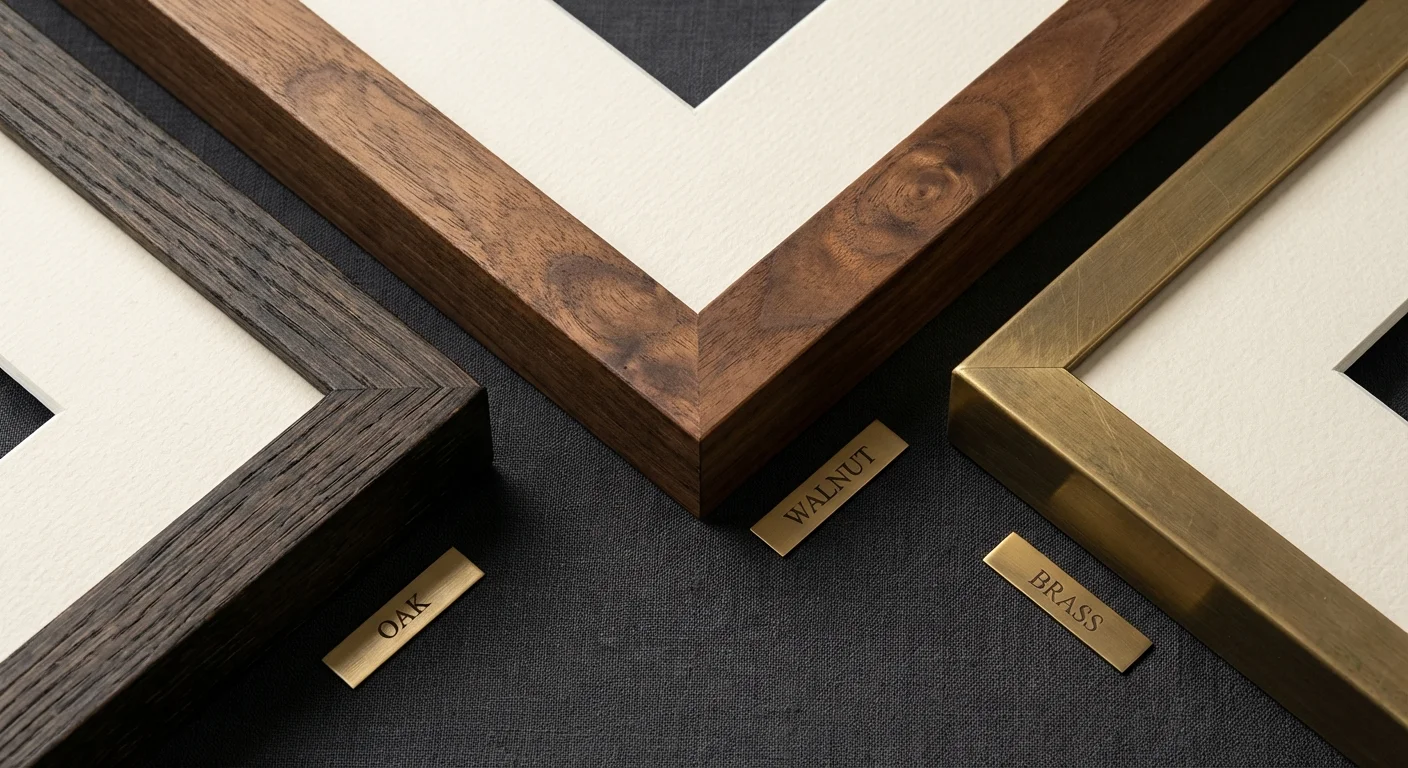
The materials you choose for your display significantly impact both its beauty and its longevity. Since you are using reproductions, you have more flexibility, but using archival materials still ensures that your display looks professional and lasts for decades without yellowing or warping. Professional framing involves three main components: the frame, the mat, and the glazing.
Avoid cheap “ready-made” frames that use cardboard backing, as the acids in the cardboard will eventually seep into your photo and cause brown spots known as “foxing.” Instead, look for frames that accommodate acid-free foam core backing. The matting should also be “acid-free” or “museum-grade” cotton rag. A mat provides more than just a decorative border; it creates a crucial air gap between the photo and the glass, preventing the image from sticking to the glazing over time.
| Material | Standard Quality | Archival Quality | Benefit of Archival |
|---|---|---|---|
| Mat Board | Wood pulp (acidic) | Alpha-cellulose or Cotton Rag | Prevents yellowing and edge burning. |
| Backing | Cardboard or Brown paper | Acid-free Foam Core | Provides structural support without chemical off-gassing. |
| Glazing | Standard Glass | UV-Filtering Acrylic or Glass | Blocks 99% of light damage; acrylic is shatter-proof. |
| Adhesive | Clear Tape or Glue sticks | Linen Hinging Tape | Reversible and will not stain the print. |
For the prints themselves, choose a paper that complements the age of the photos. A matte or luster finish often looks better for historical images than a high-gloss finish, which can create distracting reflections. Fine art papers with a slight texture can give your reproductions the feel of an original artifact.
Adding Interactive Elements for a Modern Experience
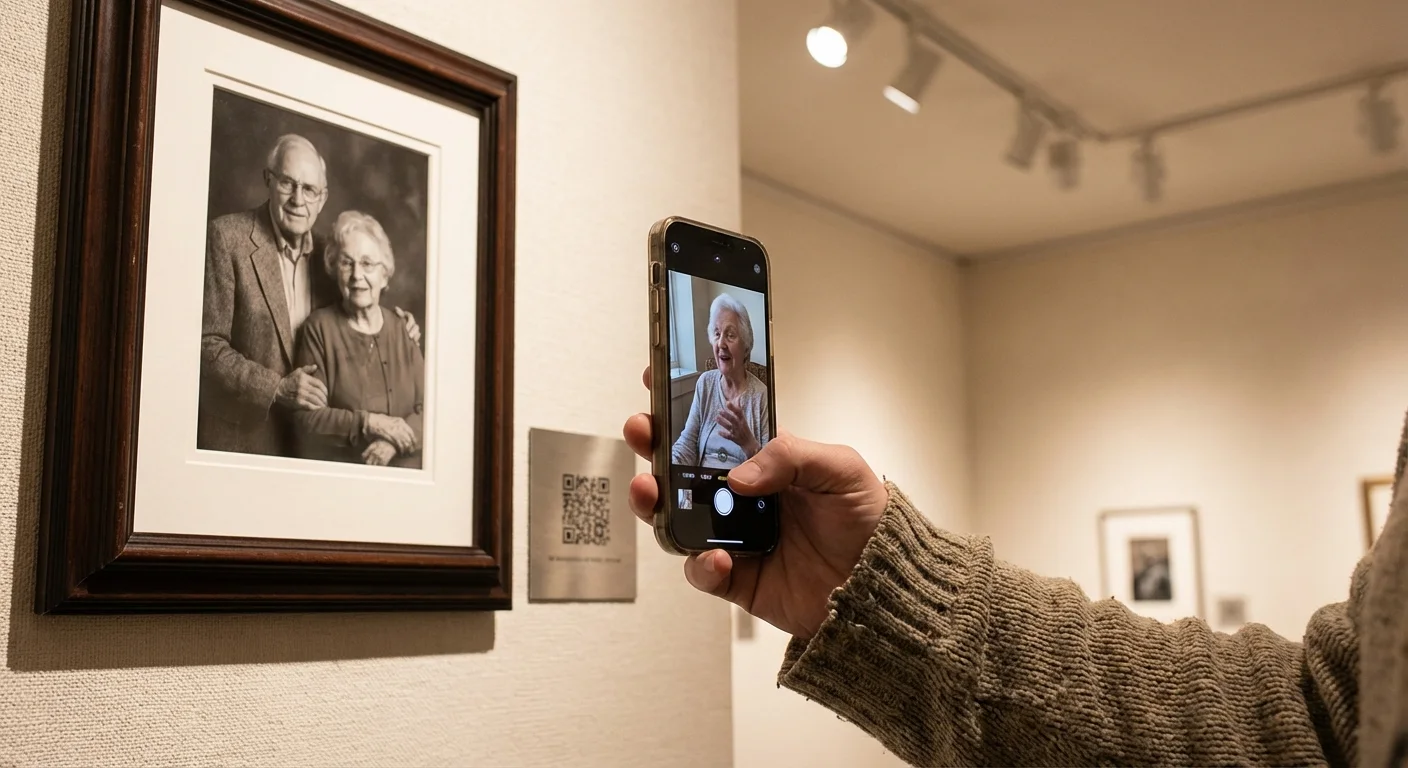
The “interactive” part of a heritage wall is what truly distinguishes it from a standard gallery. By integrating technology, you allow visitors to go beyond the surface of the image. The most effective way to do this is through QR codes. You can print small QR codes on the corner of the matting or on small brass plaques mounted next to the frames.
Imagine your grandchild scanning a code next to a photo of their great-grandmother and immediately hearing a recording of her voice telling a story about her childhood. You can host these audio files on private cloud storage or specialized memory-sharing platforms. If you have digitized old 8mm films or VHS tapes, you can link a QR code to a private video link so the family can see the person in the photo come to life on their smartphone screen.
Other interactive ideas include:
- Hidden Compartments: Use “shadow box” frames that can be opened. Inside, place a copy of a birth certificate, a locket, or a handwritten letter that people can gently handle.
- Digital Frames: Incorporate one digital photo frame into the middle of your physical wall. Set it to loop through photos that didn’t make the “final cut” for printing, ensuring that even the more obscure family memories get screen time.
- A Guest Book: Keep a high-quality journal on a console table below the wall. Encourage relatives to write down their memories of the people they see on the wall, creating a growing archive of oral history.
Installation, Lighting, and Long-Term Maintenance
Proper installation ensures your heritage wall remains safe and visually appealing. Use high-quality picture hangers designed for the weight of your frames. For larger or heavier frames, use two hangers to ensure the frame stays level even when the house vibrates or someone walks by quickly. If you live in an earthquake-prone area, use security hangers that lock the frame to the wall.
Lighting is the final touch that makes your display pop. Avoid direct spotlights, which can create harsh glare on the glass and heat up the prints. Instead, use soft, indirect lighting. Dimmable LED picture lights are an excellent choice because they emit very little heat and no UV radiation. Position the lights so they wash the wall in a gentle glow. If the wall is opposite a window, you must use UV-filtering glazing on your frames, or you will find your beautiful prints faded within a few years.
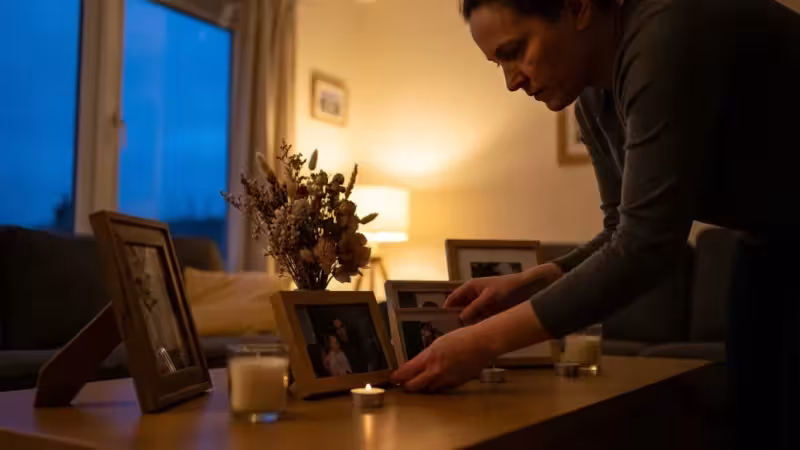
Maintenance is simple but necessary. Dust your frames regularly with a microfiber cloth to prevent buildup. Avoid using glass cleaner directly on the frames; spray the cleaner onto a cloth first to prevent liquid from seeping behind the glass and damaging the mat or print. Every few years, take a moment to review the wall. Is there a new marriage? A new baby? A heritage wall is a living project. By leaving space in your design for future generations, you ensure that the story of your family continues to grow alongside the people who live within its walls.
Building a heritage wall is an act of love and a commitment to preservation. It requires patience to gather the materials and a critical eye to design the layout, but the result is a priceless heirloom that serves your family daily. When you take those photos out of the dark and put them into the light, you ensure that the names and faces of those who came before you are never forgotten.
Frequently Asked Questions
Should I use original photographs or copies for my heritage wall?
You should always use high-quality reproductions for display. Direct sunlight and fluctuating humidity can destroy original prints over time. By scanning your originals and printing copies on archival paper, you protect the primary artifacts in a dark, climate-controlled environment while still enjoying the images on your wall.
How do I make the heritage wall interactive for younger generations?
Integrate QR codes into the corner of your frames or on small plaques. These codes can link to voice recordings of family members, private YouTube videos of old home movies, or digital family trees that offer deeper genealogical data. This turns a static display into a multi-sensory experience.
What is the best way to arrange photos without making the wall look cluttered?
Use a cohesive element to tie the collection together, such as matching frame colors or a consistent monochromatic filter (like sepia or black and white) for all prints. Use a paper template system on your wall before hammering any nails to ensure the spacing feels intentional and balanced.
What type of glass offers the best protection for displayed photos?
Look for Museum Glass or UV-filtering acrylic. Standard glass only blocks about 45% of UV rays, while conservation-grade glass blocks up to 99%. This prevents the yellowing and fading that typically occurs when photographs are exposed to ambient light.
Disclaimer: This article is for informational purposes only. When handling valuable or irreplaceable photographs, consider consulting a professional conservator. Always test preservation methods on non-valuable items first.


Leave a Reply