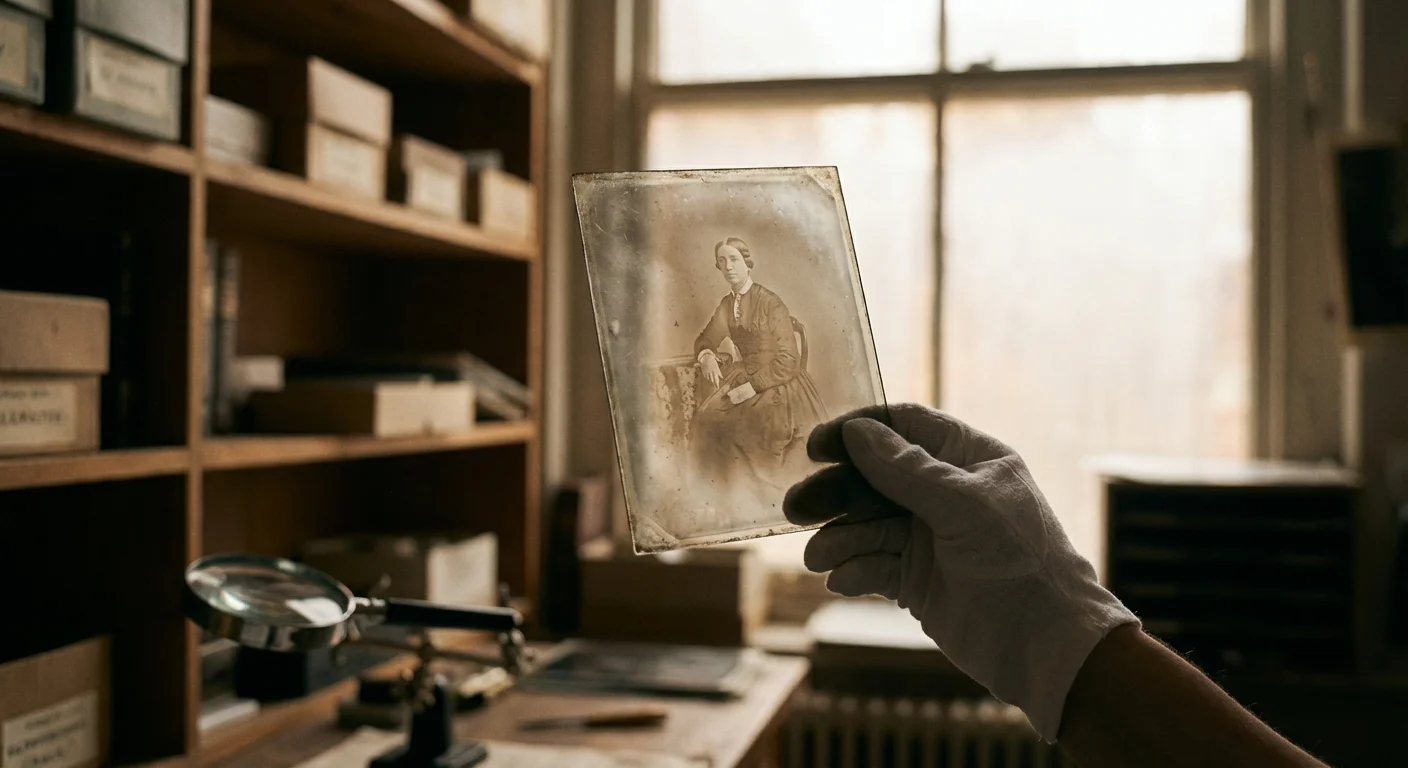
You may have discovered them in a heavy wooden crate or a forgotten shoebox in the attic—thick, cold rectangles of glass that reveal ghostly images when held up to the light. These glass plate negatives represent a pivotal era in photographic history, spanning from the mid-19th century to the early 20th century. Unlike modern film, these objects are both incredibly durable and heartbreakingly fragile. The glass itself can survive for centuries, yet a single accidental drop or a humid summer can destroy the image forever.
Preserving these treasures requires a shift in your mindset. You are no longer just a family historian; you are a steward of a physical artifact that combines chemistry, geology, and light. To protect your collection, you must understand how to handle the glass without causing fractures, how to select archival housing that prevents chemical decay, and how to create an environment that halts the march of time. This guide provides the technical roadmap you need to stabilize and store your glass plate negatives for future generations.
Understanding the Anatomy of Glass Plate Technology
Before you begin moving your collection, you must identify what you are holding. Glass negatives primarily fall into two categories: wet-plate collodion and dry-plate gelatin. Understanding the difference dictates how you treat the emulsion, which is the light-sensitive layer carrying the image.
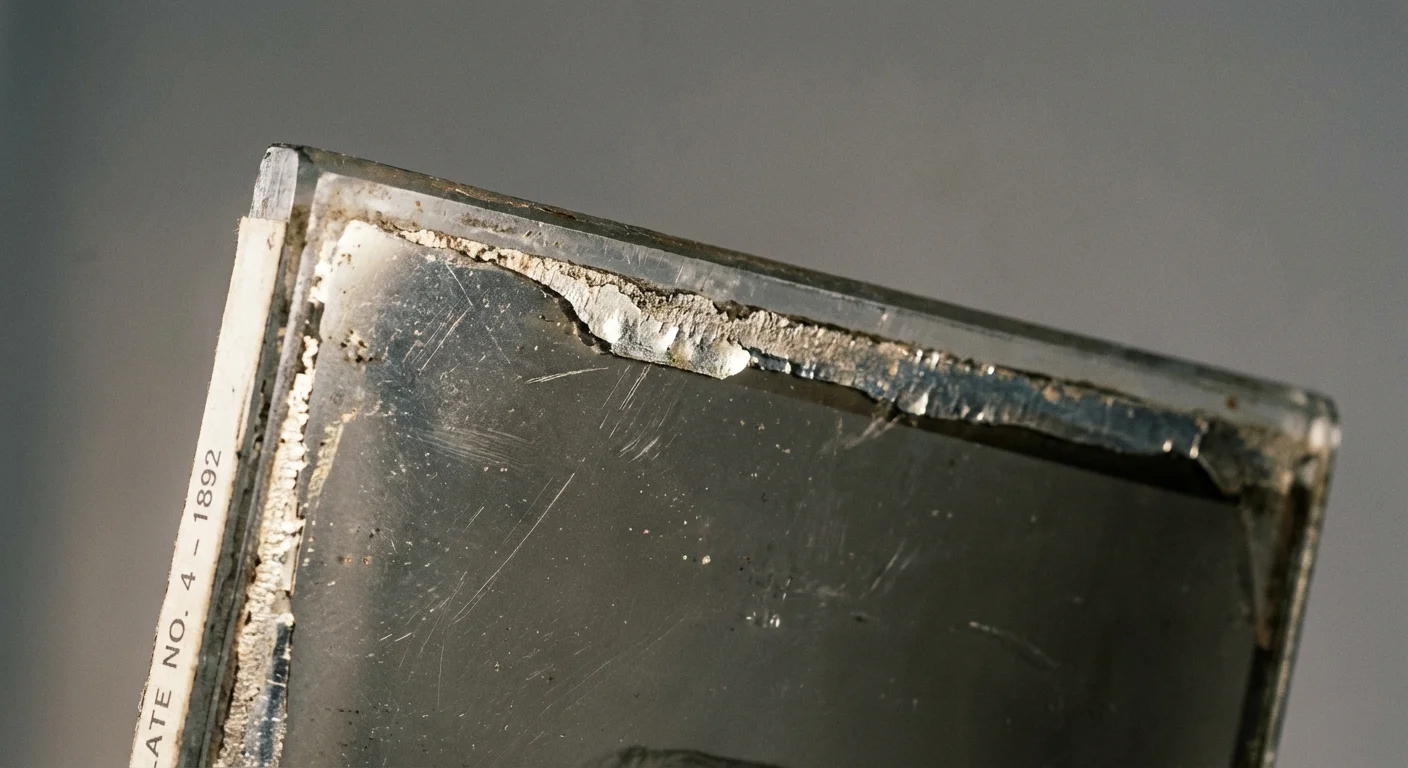
Wet-Plate Collodion (approx. 1851–1885): These plates required the photographer to coat the glass, sensitize it, and expose it while still damp. Because these were handmade, you will notice thick, uneven pools of emulsion near the corners and edges. They often have a warm, brownish tone and may be varnished to protect the fragile collodion layer. These are exceptionally sensitive to moisture and abrasion.
Dry-Plate Gelatin (approx. 1880–1925): These were the first mass-produced photographic plates. They feature a uniform coating of silver halides suspended in gelatin. The edges are clean and factory-cut. These are the most common glass plates you will find in family archives. While more stable than wet plates, the gelatin layer is prone to “silver mirroring”—a metallic sheen caused by oxidation—and can swell or flake if stored in high humidity.
The glass itself is often “soda-lime” glass. Over decades, if stored in damp conditions, the glass can undergo a process called “glass disease” or weeping, where the chemicals within the glass leach to the surface. This can cause the emulsion to lift entirely. Recognizing these materials helps you prioritize which plates need the most urgent intervention.
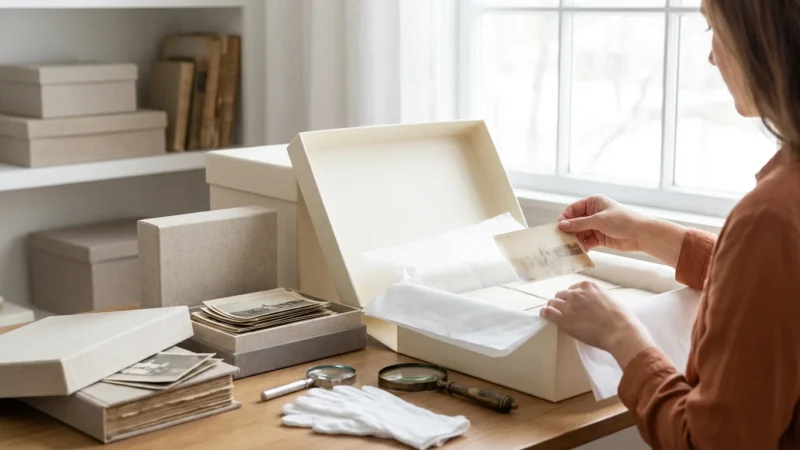
Essential Protocols for Safe Handling
Handling glass negatives is a high-stakes task. A single crack can spiderweb across the entire image, and the oils from your skin can cause permanent chemical staining. You must establish a dedicated workspace before opening any boxes.
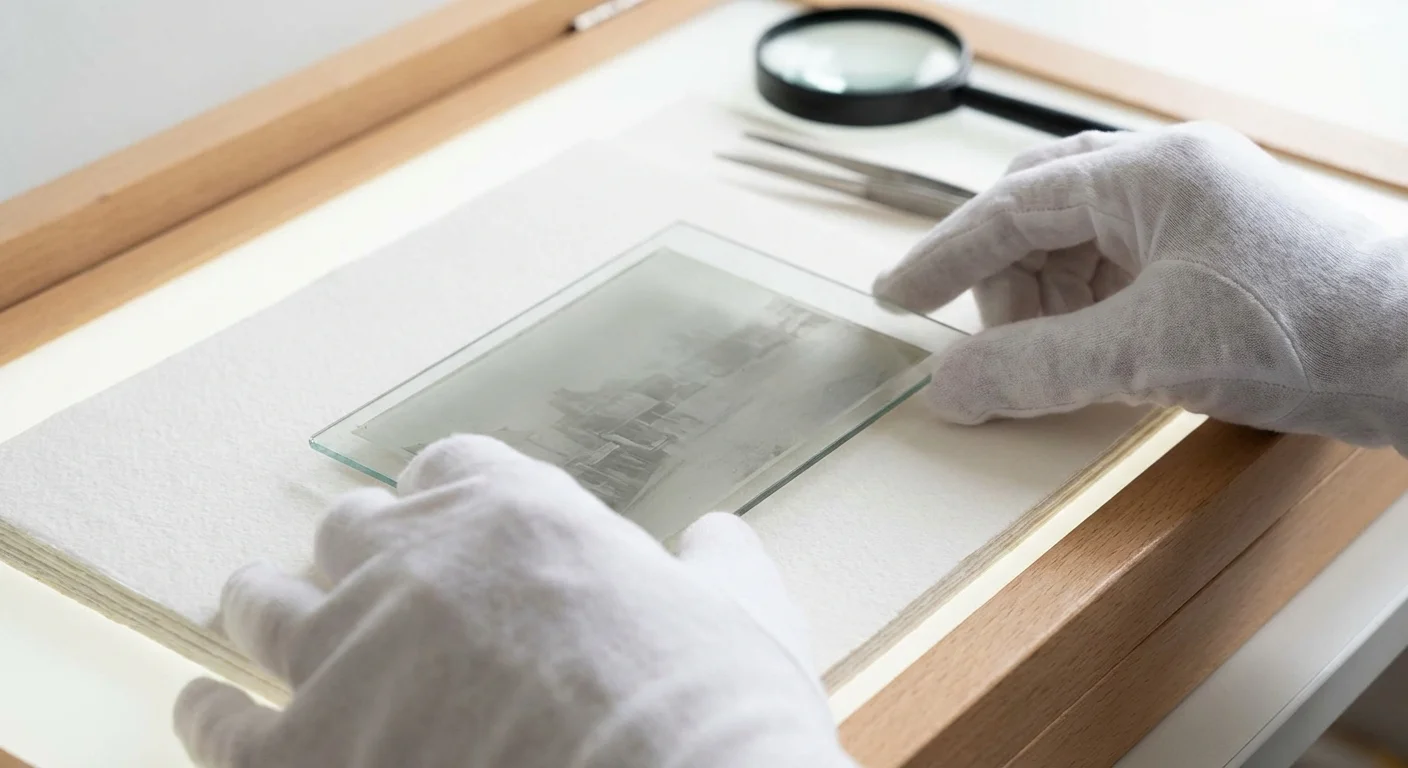
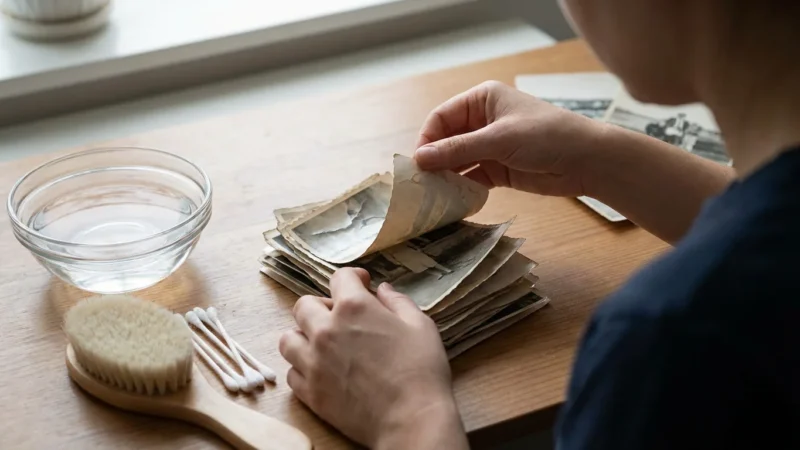
First, clear a flat, sturdy table. Cover the surface with a clean, lint-free blotter or a white archival paper. This provides a soft landing spot and makes it easier to see any glass shards that may have flaked off. Never work over a hard, bare surface like stone or wood.
Your choice of gloves matters. While many archivists prefer white cotton gloves for paper, they are dangerous for glass. Cotton is slippery and can snag on flaking emulsion or sharp glass edges. Instead, use powder-free nitrile gloves. They provide a superior grip and an effective barrier against skin oils without the risk of dropping the plate. If you find gloves too cumbersome, you may handle plates by the very edges with clean, dry hands, but nitrile remains the gold standard for safety.
The primary goal of handling is to minimize contact with the emulsion side of the plate; always grasp the glass by the edges to prevent pressure and fingerprints.
When you lift a plate, use both hands. Support the weight evenly. If you encounter a plate that is already cracked, do not lift it by one corner. Slide a piece of stiff, acid-free cardstock underneath it to provide a secondary support system. This prevents the crack from widening or the plate from snapping in half under its own weight.
Environmental Standards for Long-Term Preservation
Environment is the single most important factor in the survival of your collection. Glass negatives are a composite of inorganic glass and organic binders (gelatin or collodion). These materials expand and contract at different rates when temperature and humidity fluctuate. This “mechanical stress” is what causes the image to peel away from the glass base.
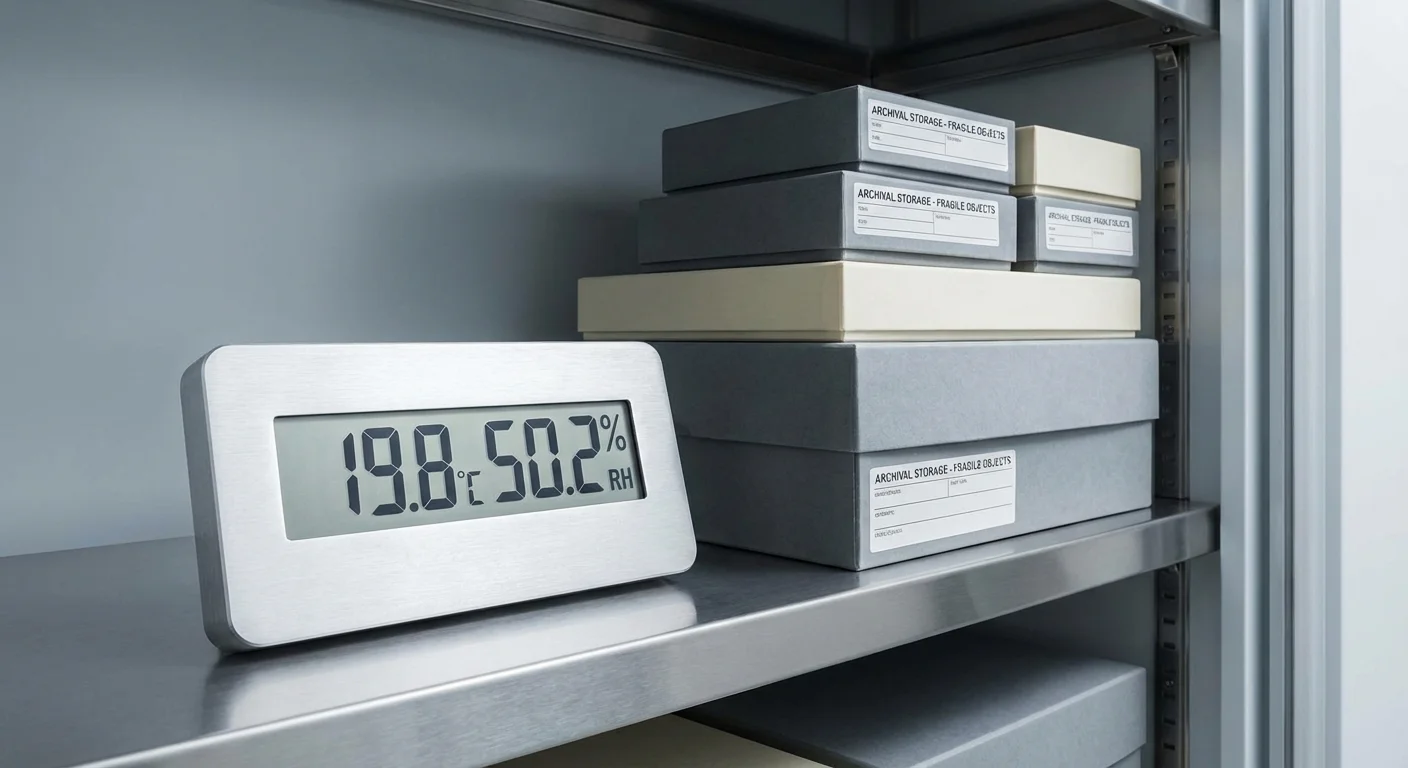
According to the Image Permanence Institute, consistency is more important than achieving a perfect “museum” number. However, you should aim for the following targets:
- Temperature: Keep the storage area between 55°F and 65°F (13°C–18°C). Avoid attics, which bake the plates in summer, and basements, which are often too damp.
- Relative Humidity (RH): Aim for a stable 30% to 40%. If humidity rises above 50%, the gelatin emulsion can soften and become a breeding ground for mold. If it drops below 20%, the emulsion can become brittle and flake.
- Light: Total darkness is best. UV light reacts with the silver in the image, leading to fading or “bronzing.” Keep your plates in light-tight archival boxes.
To monitor these conditions, place a digital hygrometer in your storage room. If you discover your collection in an unstable environment, move it to a climate-controlled room in the main living area of your home, such as a closet on an interior wall. This simple move can double the life expectancy of your photographs.
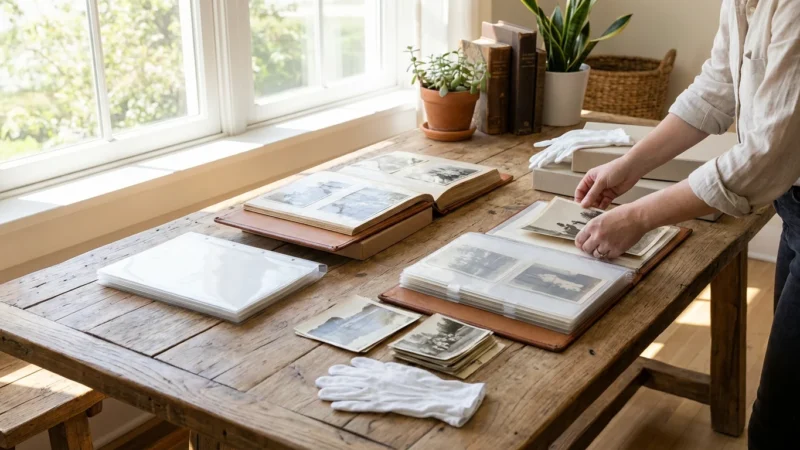
Selecting the Right Archival Housing Materials
You must replace old, acidic paper sleeves and rotting wooden boxes immediately. The acids in wood and poor-quality paper migrate into the emulsion, causing yellowing and brittleness. When shopping for supplies, look for products that have passed the Photographic Activity Test (PAT). This international standard ensures the material will not chemically react with your photos.
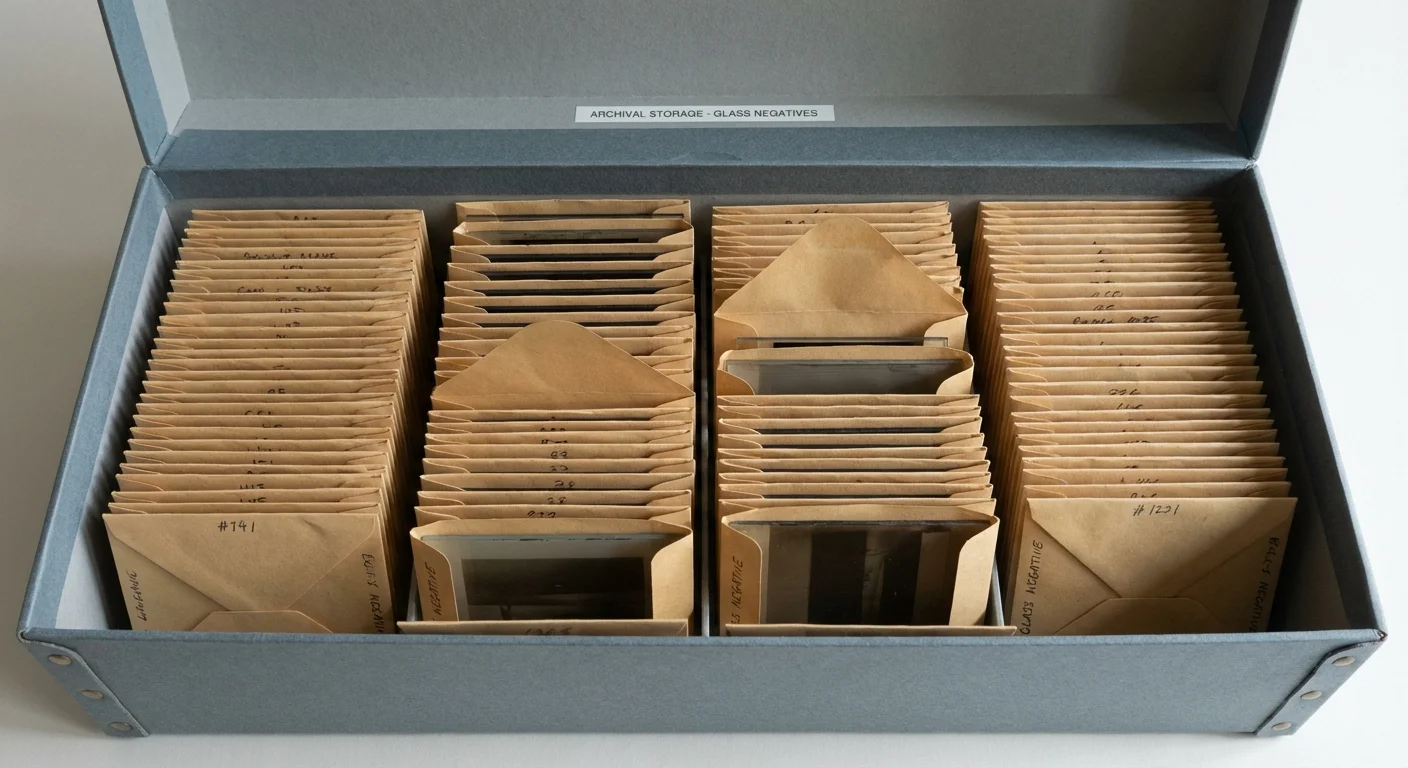
The best housing for a glass plate is a four-flap paper enclosure. Unlike a standard envelope, a four-flap enclosure unfolds completely. This allows you to place the plate in the center and fold the sides over it. This design is crucial because it eliminates the need to “slide” the plate into a sleeve. Sliding creates friction, which can abrade the emulsion or catch on a loose corner of glass. Use unbuffered, acid-free, lignin-free paper for most collections.
While some people use plastic sleeves (like Mylar or Polyester), paper is generally preferred for glass. Paper provides a slight cushion and allows the plate to “breathe,” preventing moisture from becoming trapped against the emulsion. If you use paper, always place the plate so that the emulsion side (the duller side) is facing away from any seams or folds in the paper.
Physical Storage: Shelving, Weight, and Orientation
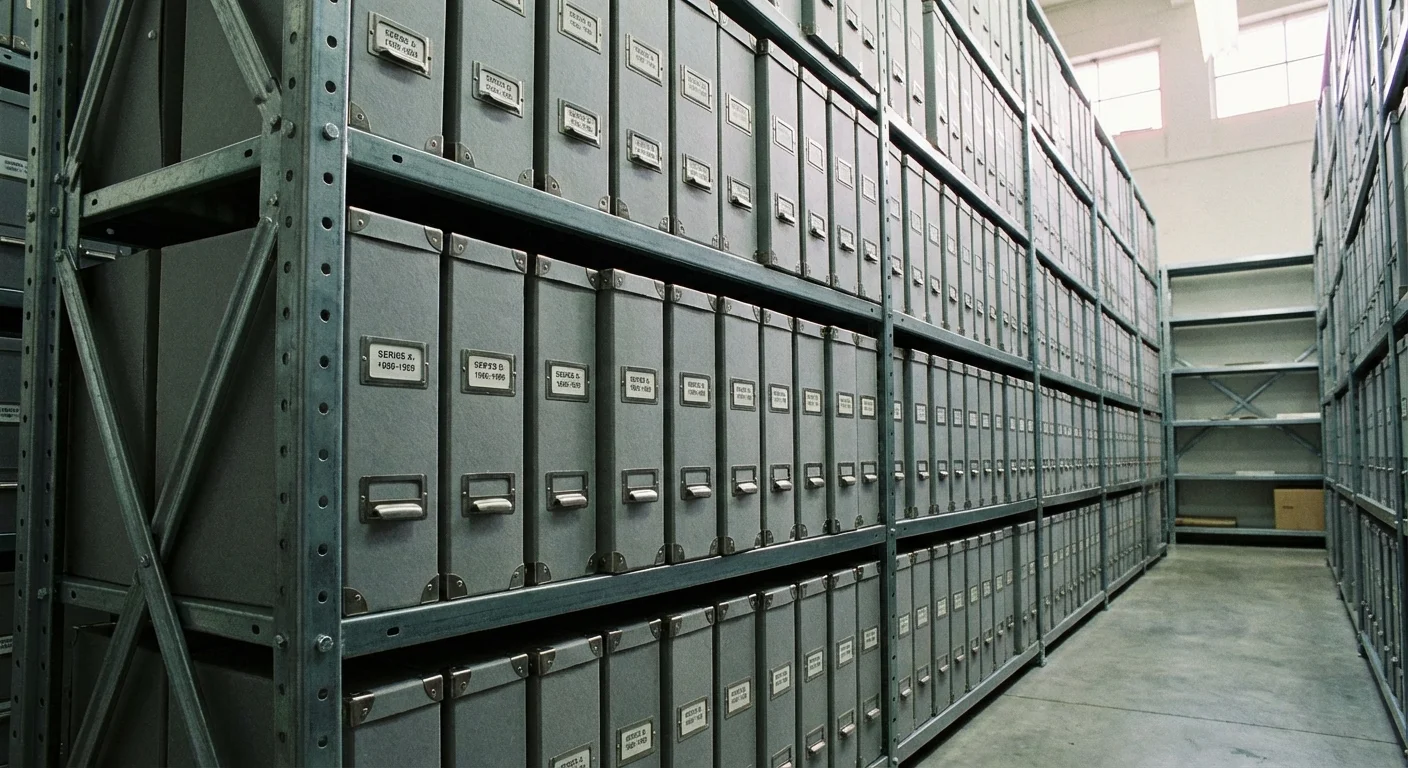
The way you arrange your boxes on a shelf determines whether your plates remain intact or succumb to pressure fractures. The golden rule of glass negative storage is: Always store plates vertically on their long edge.
When you stack glass plates horizontally (flat), the weight of the top plates exerts immense pressure on the bottom ones. If there is even a tiny pebble or a slight bow in the glass, the bottom plates will shatter. Vertical storage distributes the weight across the shelf rather than through the glass stack.
| Storage Aspect | Incorrect Method | Correct Archival Method |
|---|---|---|
| Orientation | Stacked flat (horizontal) | Upright on long edge (vertical) |
| Container | Wooden crates or shoeboxes | PAT-compliant acid-free boxes |
| Support | Plates leaning at an angle | Plates supported by dividers or spacers |
| Environment | Attics or basements | Climate-controlled interior rooms |
Use sturdy, acid-free “flip-top” boxes designed specifically for glass negatives. Do not overstuff the boxes. You should be able to slide a finger easily between the plates. If a box is not full, use spacers—pieces of acid-free corrugated board—to keep the plates from leaning. Leaning creates “point pressure,” which can lead to breakage over time.
Remember that glass is heavy. A box of 25 plates can weigh 10 to 15 pounds. Ensure your shelving is rated for the weight and is made of powder-coated steel rather than raw wood. For more detailed guidance on archival standards, consult the National Archives Preservation guidelines.
Basic Cleaning and Stabilization Techniques
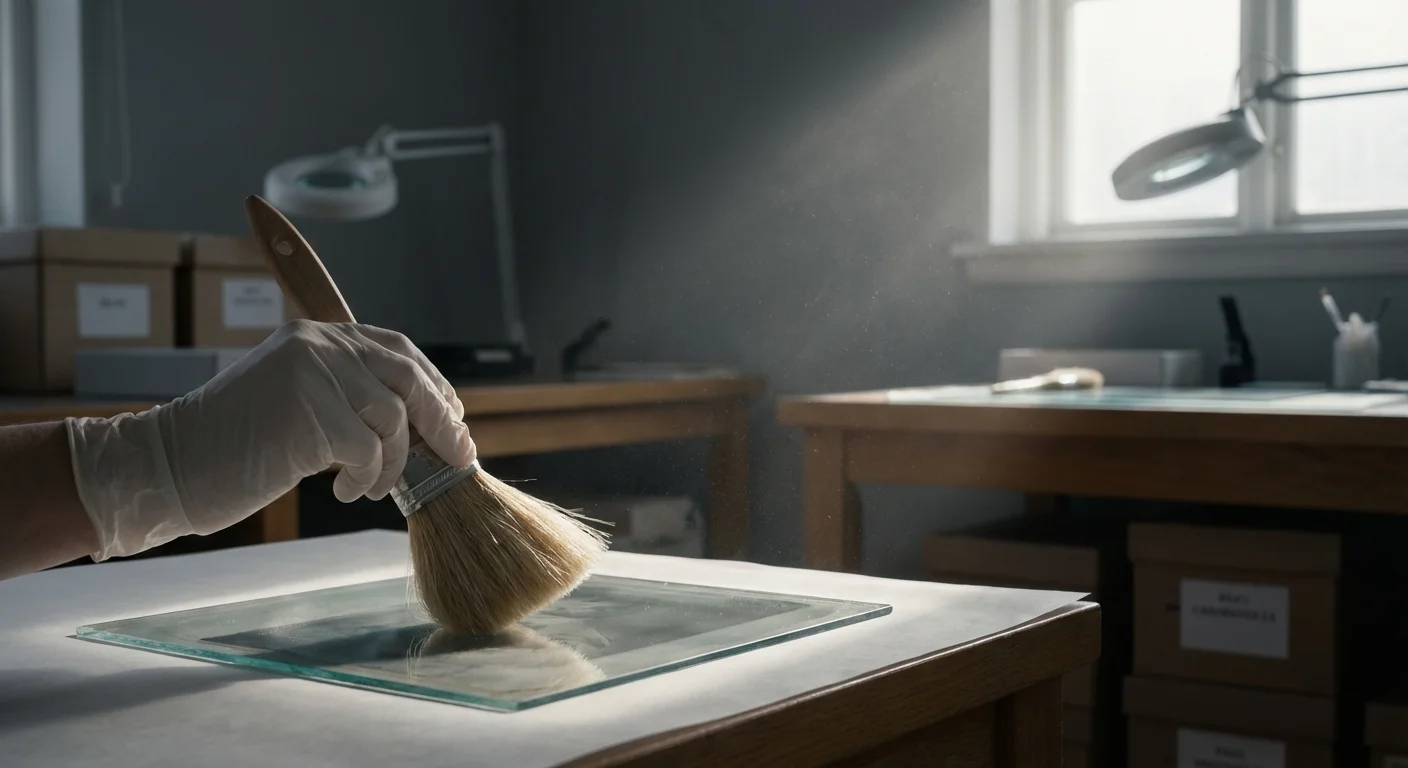
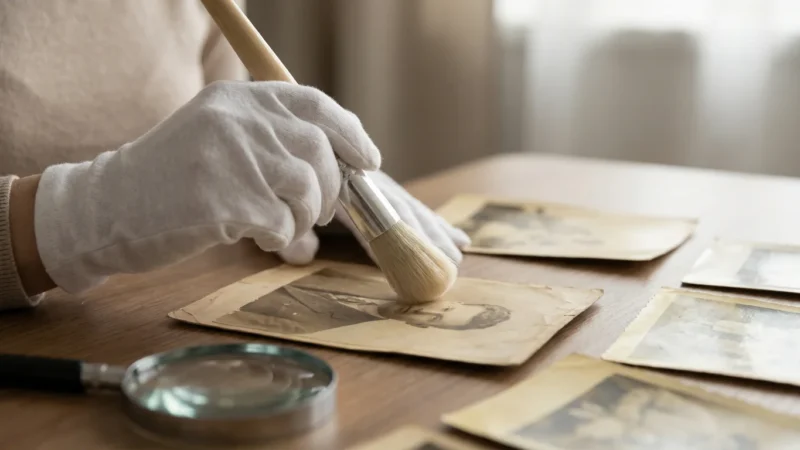
Cleaning glass plates is a delicate operation that you should approach with extreme caution. If the emulsion is flaking, bubbling, or peeling, do not attempt to clean it. In these cases, your only goal is to house the plate safely and contact a professional conservator. However, if the glass is stable but covered in surface dust, you can perform a basic cleaning.
Start with a bulb air blower (like those used for camera lenses) to puff away loose dust. Do not use your breath, as it contains moisture and enzymes. If dust remains, use a very soft, clean hake brush or a dedicated anti-static brush. Lightly flick the brush across the surface, moving from the center toward the edges.
You should only clean the non-emulsion side (the shiny glass side) with liquid if absolutely necessary. Dampen a lint-free microfiber cloth with a small amount of distilled water or a 50/50 mix of distilled water and pure ethanol. Gently wipe the glass side, being careful not to let any liquid wrap around the edge to the emulsion side. Never spray anything directly onto the plate.
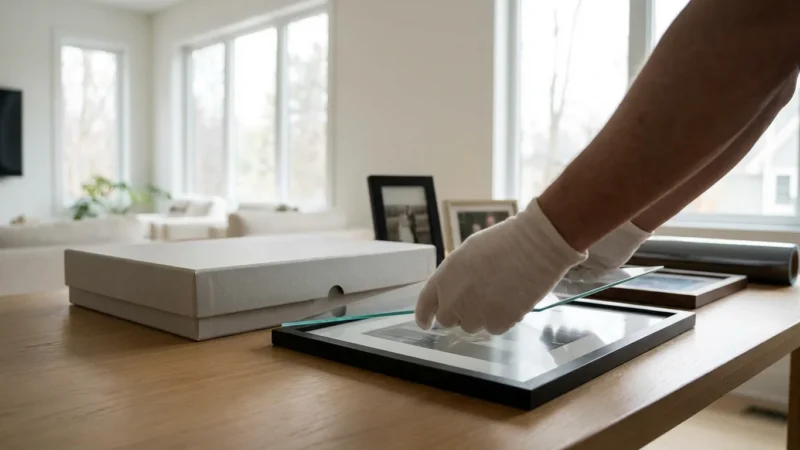
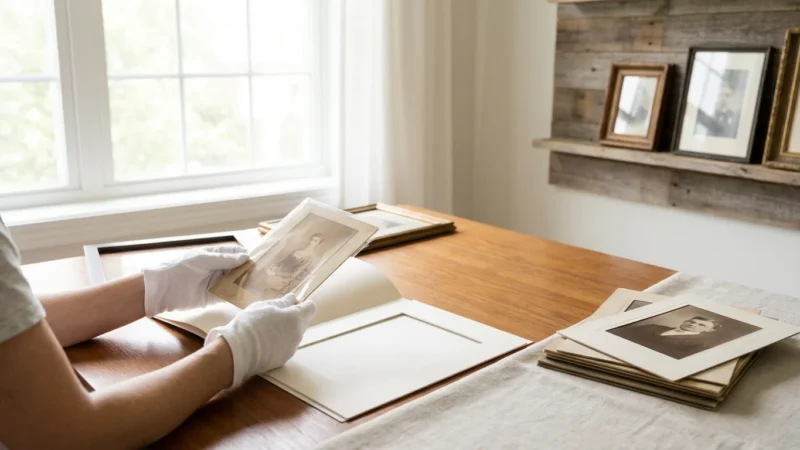
If you encounter a broken plate, do not attempt to glue it back together. Adhesive off-gassing can ruin the image, and most glues are permanent and non-reversible. Instead, place the pieces in their relative positions inside a four-flap enclosure, or sandwich them between two pieces of archival-quality glass or “sink mats” for support. This keeps the pieces together for digitization without further damage.
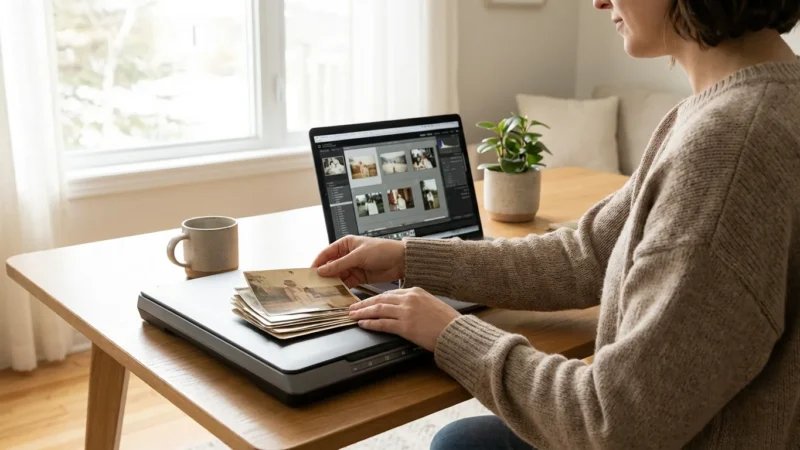
Digitization Strategies for Glass Negatives
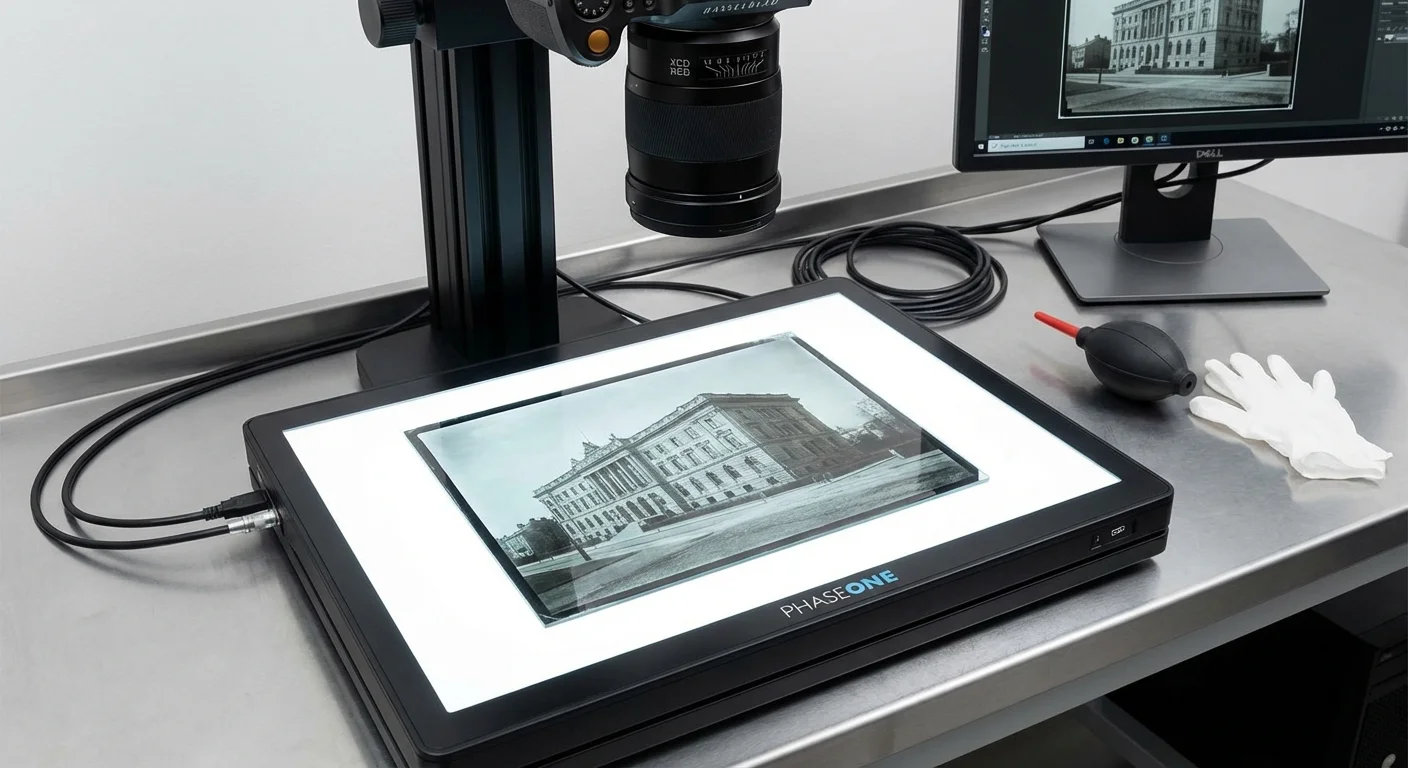
Digitizing your glass negatives is the best way to share the history while keeping the originals safe in their dark, climate-controlled boxes. Because these are negatives, you cannot simply photograph them with a flash. You must use transmitted light—light that passes through the glass from behind.
Option 1: Flatbed Scanners. If you use a flatbed scanner, it must have a “transparency adapter” (a light in the lid). Place the negative emulsion-side up on the scanner glass to get the sharpest image, but use a “film guide” or small shims to slightly elevate the plate if you are worried about “Newton’s Rings”—distorting oily patterns caused by two glass surfaces touching. Scan at a minimum of 600 DPI to capture the incredible detail present in glass plates.
Option 2: DSLR/Mirrorless Camera. Many professionals now prefer “camera scanning.” You place the glass negative on a high-quality LED light pad and take a photo of it from above using a macro lens and a tripod. This method is often faster and safer, as it involves less handling and no contact with a scanner lid. Ensure the light pad has a high Color Rendering Index (CRI) for accurate tones.
Once you have the digital image, you will need to “invert” it in photo editing software to see the positive image. You will likely be amazed by the clarity. Glass negatives often hold more detail than modern 35mm film because of their large physical size (frequently 4×5 or 8×10 inches). For more information on digitization standards, the Library of Congress offers extensive resources on high-resolution imaging for historical artifacts.
Frequently Asked Questions
Is it okay to stack my glass negatives if I put paper between them?
No, you should still avoid stacking them flat. Even with acid-free paper between them, the weight of the glass remains the primary threat. The pressure on the bottom plates in a stack of ten or twenty can cause micro-fractures that eventually lead to a full break. Vertical storage is always the safer choice.
How can I tell which side is the emulsion side?
Hold the plate at a slight angle to a light source. The shiny, reflective side is the glass. The duller, matte side that has a slight “texture” or “tooth” is the emulsion side. On some plates, you can see the image “etched” into the emulsion side. Always store the plate with the emulsion side protected from contact with seams or fasteners.
What should I do if the glass is “sweating” or feels oily?
This is a sign of glass deterioration or “weeping.” It happens when high humidity causes the glass chemistry to break down. You must immediately improve the environment by lowering the humidity. Use a soft, dry cloth to very gently blot the glass side (not the emulsion), and consult a professional conservator to stabilize the plate.
Can I display my original glass negatives in a window?
You should never display original glass negatives in a window or under direct light. The UV rays and heat will rapidly degrade the silver and the binder. Instead, scan the negative, print a high-quality positive on archival paper, and frame the print. Keep the original negative in its dark, archival box to ensure its survival.
Disclaimer: This article is for informational purposes only. When handling valuable or irreplaceable photographs, consider consulting a professional conservator. Always test preservation methods on non-valuable items first.


Leave a Reply