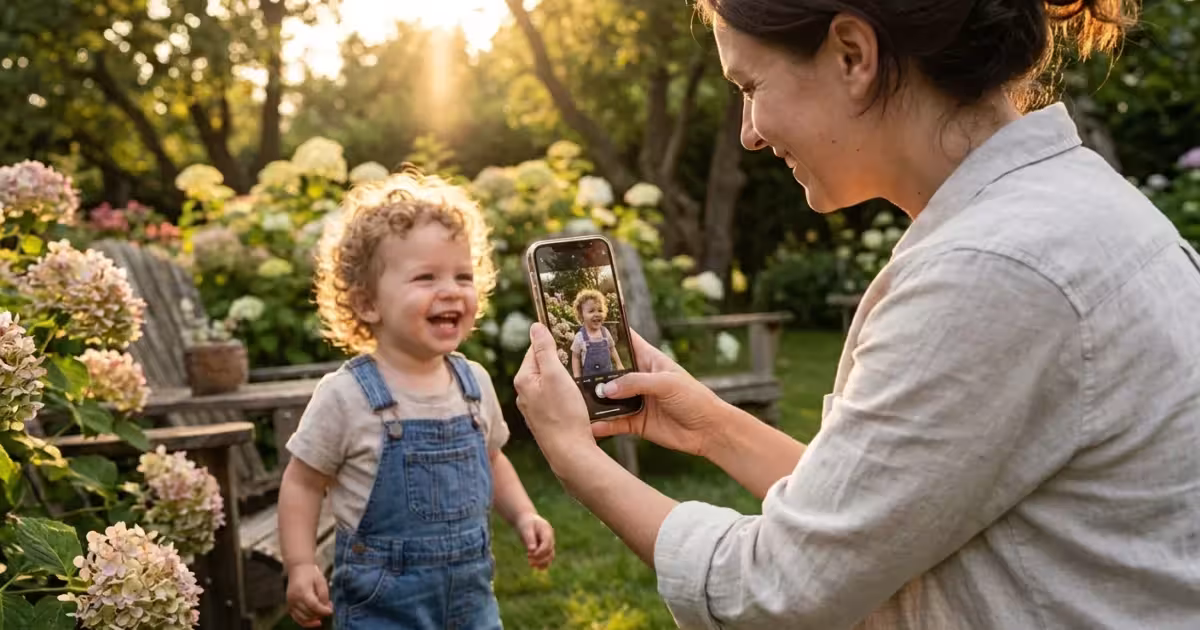
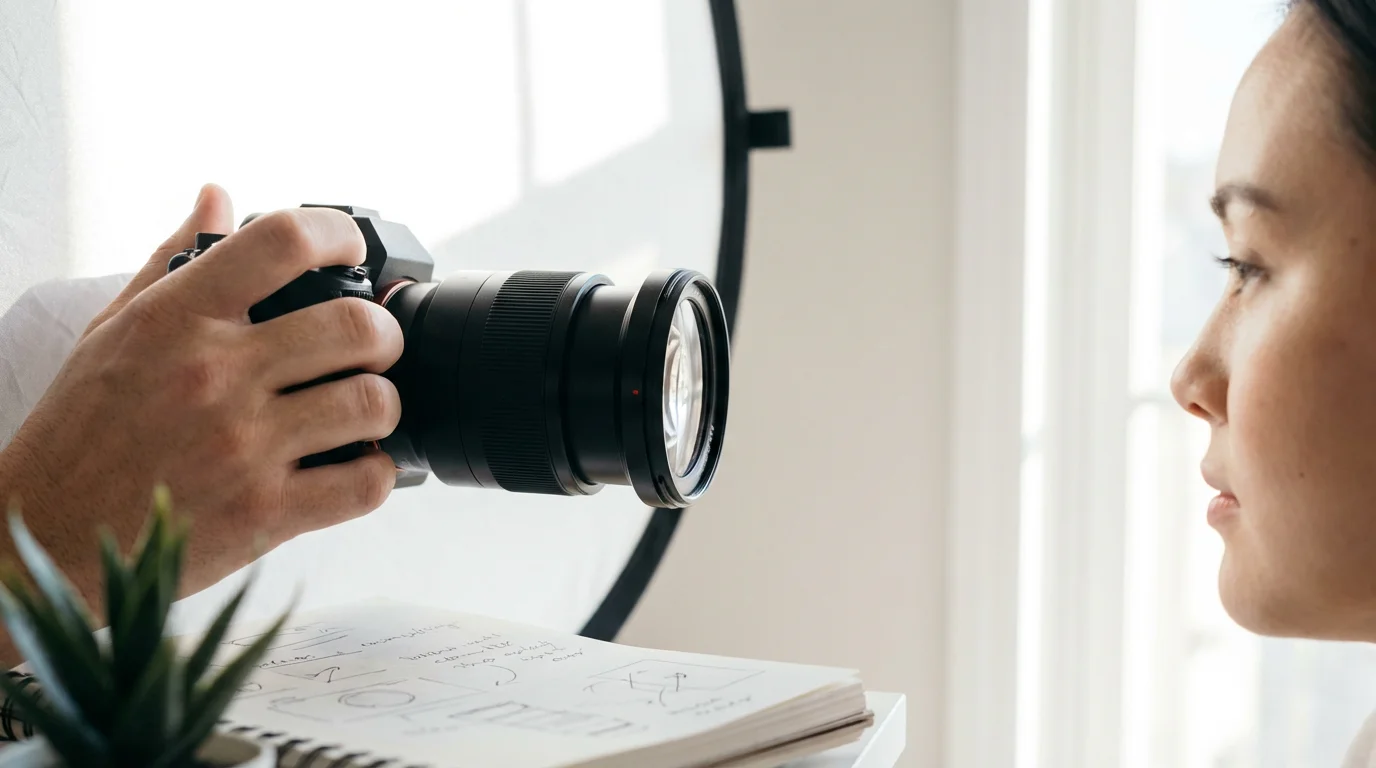
The transition from bulky film cameras to the sleek smartphone in your pocket changed the way families document their history. Decades ago, capturing a professional-looking portrait required expensive lenses, a darkroom, and years of technical training. Today, your iPhone offers a sophisticated suite of tools that mimic high-end hardware. Portrait Mode stands out as the most powerful of these features, allowing you to isolate your children, parents, or pets against a soft, creamy background. However, simply sliding the camera to “Portrait” is only the first step. To create images that deserve a spot in a physical album or a framed gallery wall, you must master the nuance of light, distance, and digital depth.
While Portrait Mode is excellent for composed shots, learning when to use candid vs posed styles can help you capture the full range of your family’s personality.
Before diving into specific modes, it’s helpful to master general smartphone photography tips to ensure your device is always ready for the perfect shot.
Creating high-quality images is about more than just aesthetics; it is an act of preservation. When you take a clear, well-composed photo of a loved one, you create a digital heirloom. These images serve as the “vintage photos” of the future, and their quality determines how well your family’s story is told to the next generation. By understanding the mechanics of your device, you ensure that these memories remain vibrant and clear for years to come.

The Science of the Bokeh Effect Phone
To use Portrait Mode effectively, you should understand what is happening behind the glass of your iPhone. Unlike a traditional DSLR camera, which uses large glass elements to create a shallow depth of field, your iPhone uses “computational photography.” This process involves the device’s processors analyzing the scene to create a “depth map.” The phone identifies the subject—the person or object you want in focus—and then mathematically applies a blur to everything else. This mimics the bokeh effect phone users often crave, where the background looks like a soft wash of color.
Your iPhone typically uses two lenses or a single lens combined with machine learning to identify edges. This is why the camera sometimes struggles with complex textures like fine hair, translucent veils, or the spokes of a bicycle. When you know that the phone is “calculating” the blur, you can help it succeed. Choose backgrounds that have some distance from the subject; if your subject is leaning directly against a wall, the software cannot easily distinguish between the two planes, and the bokeh effect will look flat or artificial.
The most successful smartphone portraits occur when there is a clear physical gap between the subject and the background, allowing the software to draw a sharp boundary.
Newer iPhone models have significantly improved this edge detection. By using the LiDAR (Light Detection and Ranging) scanner found on Pro models, the device can literally “see” in 3D, even in low light. This hardware advancement means your family portraits will look increasingly professional, with fewer of the “cut-out” errors common in older smartphone generations.
Mastering Light and Shadow for Natural Skin Tones
Light is the literal raw material of photography. No amount of software processing can save a photo taken in poor lighting. For family portraits, your goal is to find “soft” light. Soft light wraps around faces, minimizing wrinkles and softening the appearance of skin. The best source of this light is the sun during the “Golden Hour”—the period shortly before sunset. During this time, the sun is lower in the sky, creating a warm, directional glow that is inherently flattering.
If you are shooting indoors, look for a large window. Position your family so the light hits them at a 45-degree angle. This creates subtle shadows on one side of the face, which adds dimension and prevents the “flat” look common with overhead indoor lighting. Avoid using the built-in flash for portraits whenever possible. The iPhone flash is a small, harsh light source that often creates “red-eye” and washes out natural skin tones, making your subjects look startled rather than relaxed.
Consider the “white balance” of your environment. If you are under bright yellow incandescent bulbs, your family’s skin might look unnaturally orange. Moving near a window or outdoors under a porch provides a more neutral light that accurately represents the colors of clothing and complexion. When you get the light right, the iPhone sensor doesn’t have to work as hard, resulting in a cleaner image with less digital “noise” or graininess.
The Sweet Spot: Composition and Subject Distance
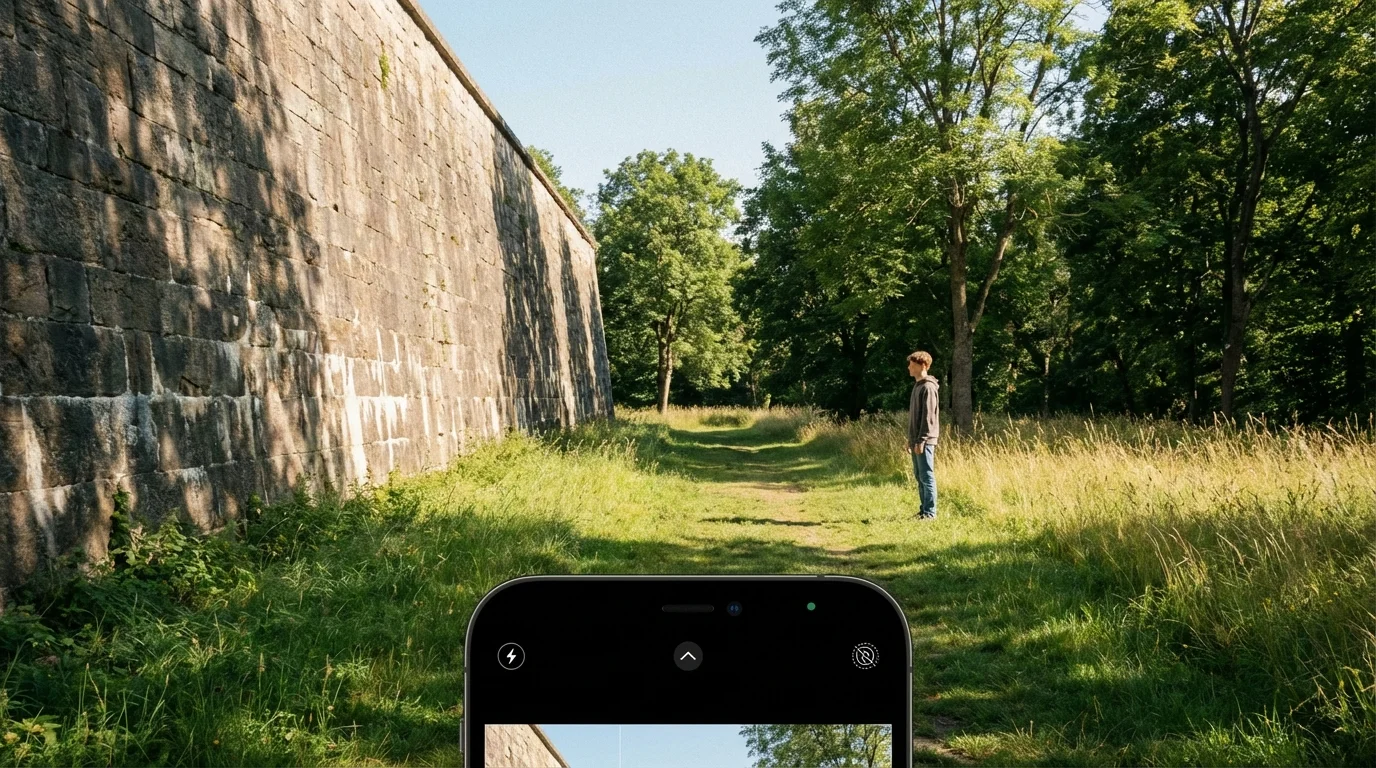
When you enter Portrait Mode, the iPhone often prompts you with instructions like “Place subject within 8 feet” or “Move farther away.” These prompts are vital. If you are too close, the wide-angle nature of smartphone lenses can distort facial features—making noses appear larger or foreheads appear elongated. Ideally, you should stand about 4 to 6 feet away from your subject. On iPhone Pro models, you can switch between 1x, 2x, or 3x zoom within Portrait Mode. Using the 2x or 3x (telephoto) setting is almost always better for faces, as it compresses the features and creates a more flattering, professional look.
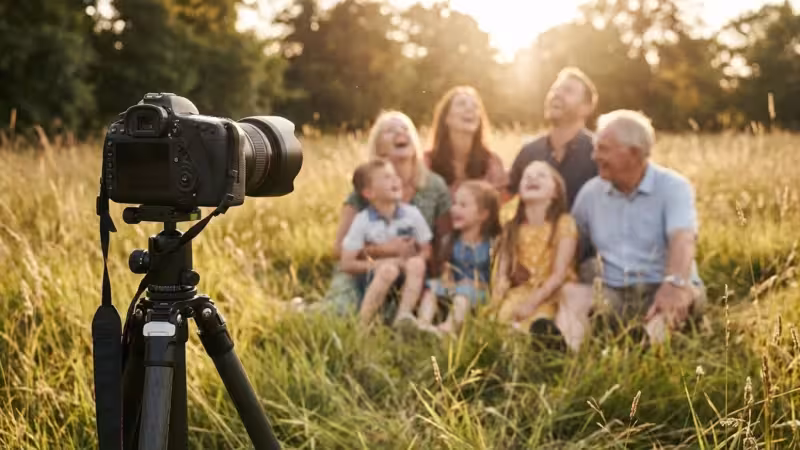
To ensure your phone remains perfectly steady for these precise shots, using one of the best tripods for family portraits can significantly improve your results.
While these rules are perfect for individuals, you can apply similar logic when learning how to take great group photos at large family events.
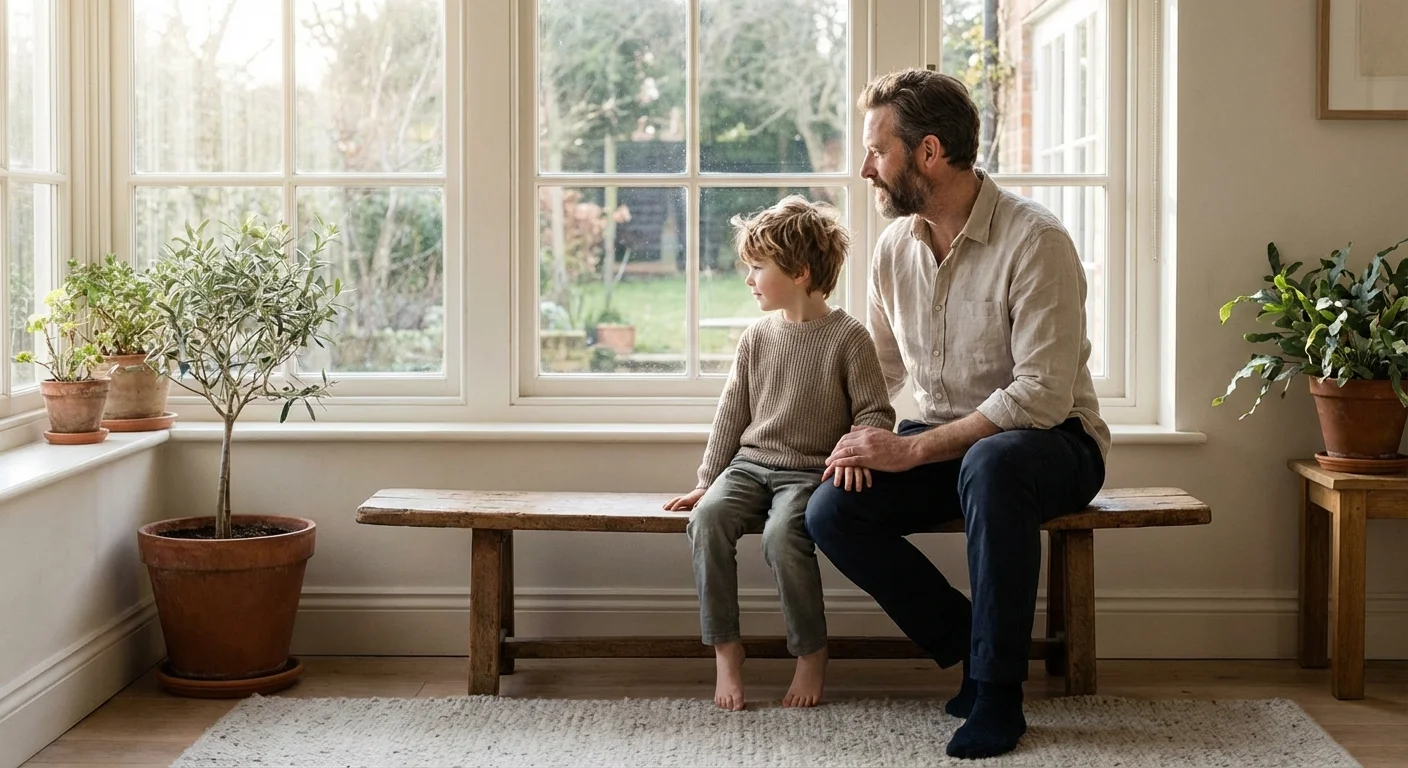
Compositionally, the “Rule of Thirds” remains your best friend. Imagine your screen is divided into a 3×3 grid. Instead of placing your family member directly in the center of the frame, align their eyes with the top horizontal line and their body along one of the vertical lines. This creates a more dynamic and engaging image. Also, pay attention to “eye level.” When photographing children, drop down to their height. Taking a photo from a high angle looking down makes the child look small and disconnected; getting on their level creates an intimate, powerful portrait that captures their personality.
Watch for “merges” in the background. A common mistake is taking a beautiful portrait of a grandparent only to realize later that a tree branch appears to be growing out of their head. Before you tap the shutter, scan the edges of your frame. A quick step to the left or right can clean up the background and ensure your subject is the undisputed star of the photo.
Advanced Depth Control and Aperture Simulation
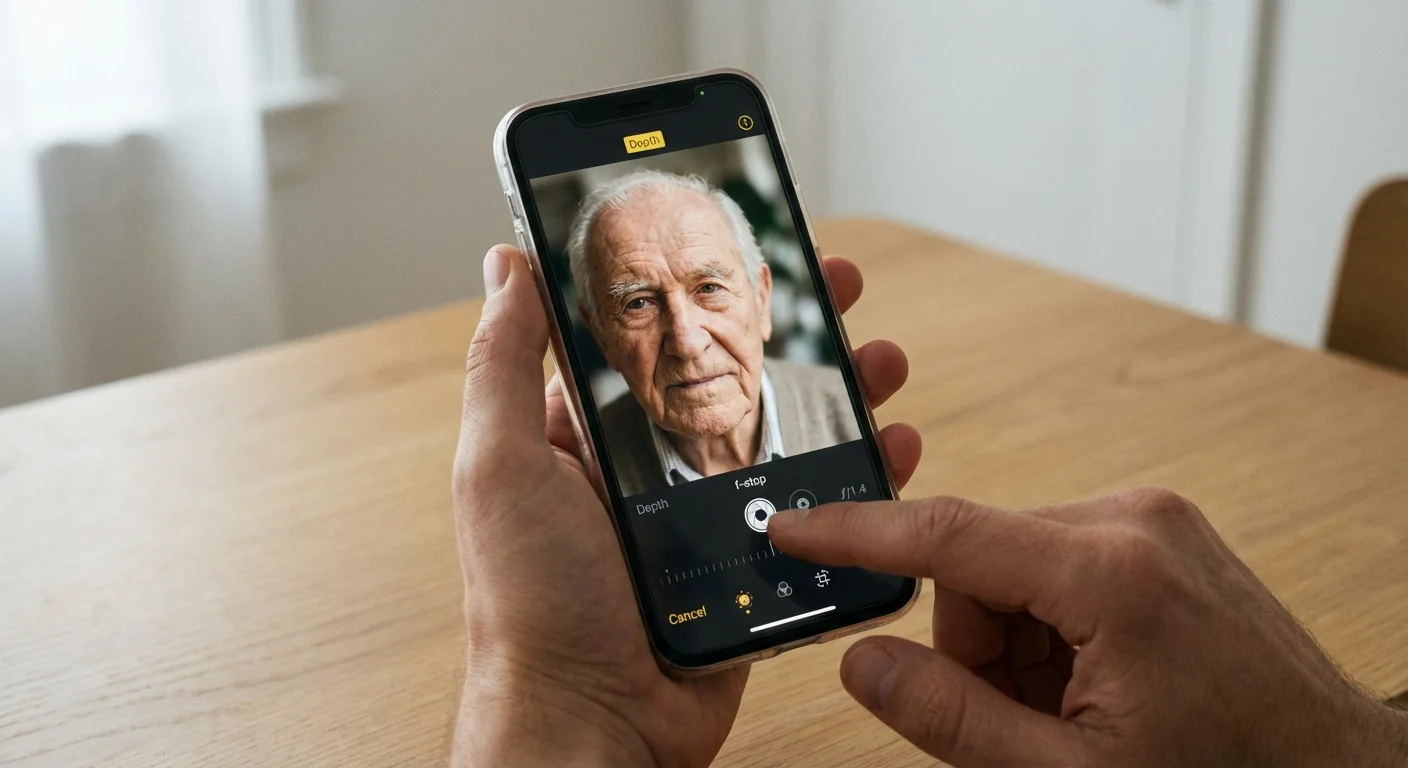
One of the most underused features of iPhone Portrait Mode is the ability to change the “aperture” after you have already taken the photo. In traditional photography, the aperture (measured in f-stops) controls how much of the image is in focus. A lower number like f/1.4 means a very blurry background, while f/16 means everything from the foreground to the horizon is sharp.
After adjusting your aperture, you can use portrait editing for beginners to further refine details like skin texture and eye clarity.
When you open a Portrait Mode photo in your “Photos” app and tap “Edit,” you will see an “f” icon in the top left corner. Tapping this allows you to slide a scale to adjust the depth of field. This is revolutionary for family photography. If the background is messy or distracting, slide the number down (to f/2.8 or f/2.0) to blur those distractions away. If you are taking a photo of a child holding a trophy and you want both the child and the trophy in sharp focus, you might need to slide the number up to f/5.6 or f/8.0.
This flexibility allows you to “fix” a photo that didn’t look quite right at the moment of capture. It also helps you maintain a consistent look across a series of photos. If you are building a family album, having a similar level of background blur across all portraits creates a cohesive, professional aesthetic that rivals high-end studio work.
Using Studio and Stage Lighting Effects Effectively
The iPhone doesn’t just blur the background; it also allows you to change the lighting character of the scene using the Portrait Lighting menu. You can access these options by swiping the yellow dial at the bottom of the camera interface. Each setting serves a specific purpose:
If you want to move beyond these built-in styles, you can also learn how to create vintage and retro photo effects to give your portraits a timeless feel.
If the built-in effects aren’t quite enough, consider using specialized photo editing apps for your phone to add unique filters and professional touches.
| Lighting Mode | Best Use Case | Visual Result |
|---|---|---|
| Natural Light | Everyday family moments | A soft, unedited look that keeps the original lighting. |
| Studio Light | Professional headshots or clean portraits | Brightens facial features as if you have a softbox nearby. |
| Contour Light | Dramatic or artistic portraits | Adds highlights and shadows to define the jawline and cheekbones. |
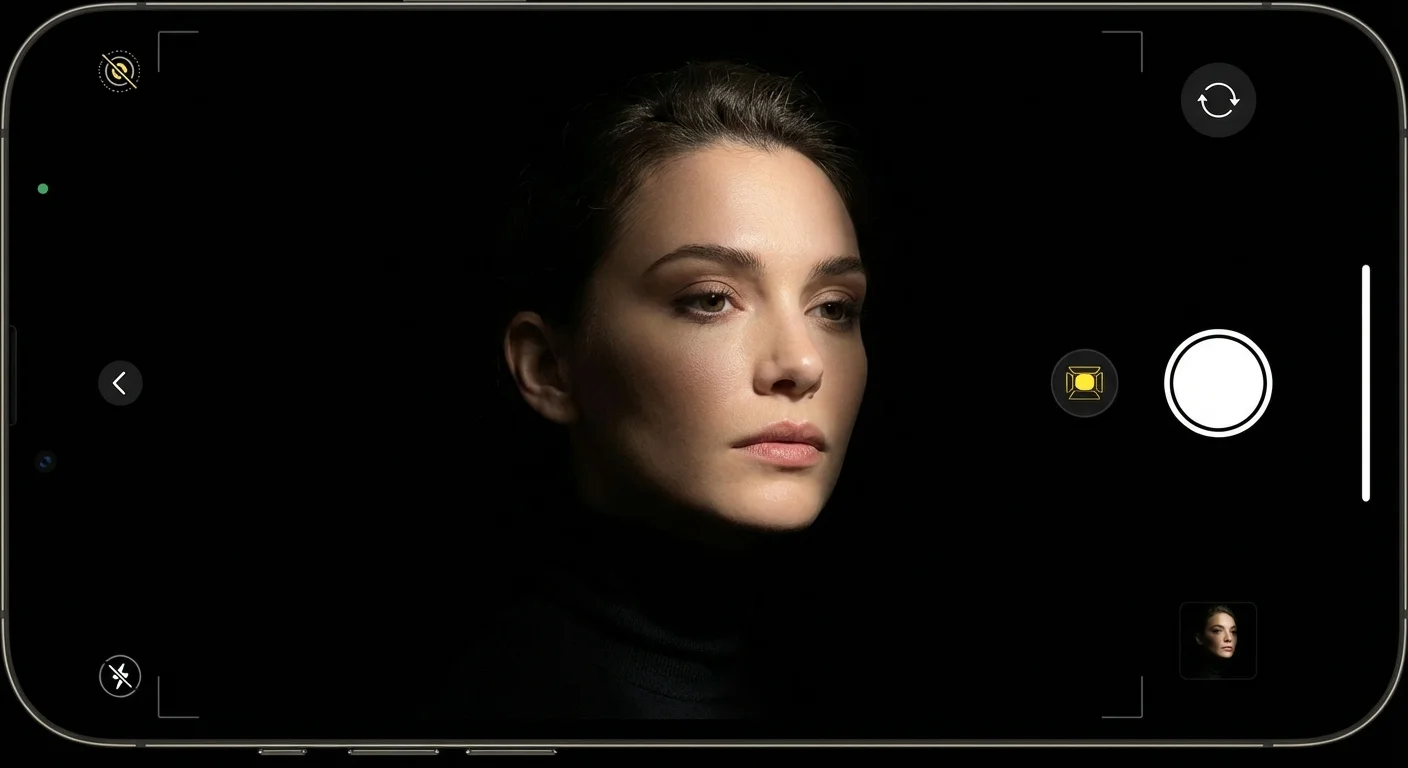
| Stage Light | Isolating a single subject | Puts the subject in a spotlight against a deep black background. |
| High-Key Light Mono | Fine-art black and white | Creates a striking grayscale subject against a pure white background. |
Be cautious with Stage Light and High-Key Light Mono. These modes require very clean edge detection to look good. If your child has flyaway hair or is wearing a textured sweater, the “cut-out” effect can look jagged and digital. Use these for simpler subjects or when the lighting is very clear. For most family heritage photos, “Studio Light” is the most reliable choice; it subtly enhances the face without making the photo look “over-processed.”

From Screen to Shelf: Preserving Your Digital Portraits
A photograph is only a memory if you can find it. Many families have thousands of images buried in their “All Photos” album, never to be seen again. To truly preserve your heritage, you must move beyond the screen. Start by “Favoriting” (tapping the heart icon) the best portraits immediately after you take them. This makes it easier to find the “keepers” when you are ready to print or share.
For those with existing physical collections, scanning photos with your smartphone is a great way to bring your old family history into this same digital ecosystem.
Backups are non-negotiable. While iCloud is convenient, it is not a complete preservation strategy. Use the “3-2-1” rule: have 3 copies of your photos, on 2 different types of media (like a cloud service and a physical hard drive), with 1 copy located off-site. For your most precious family portraits, consider using a service that specializes in archival-quality prints. Physical prints on acid-free paper can last over 100 years, whereas a digital file can become corrupted or inaccessible as technology changes.
When you are ready to print, check the resolution. A standard iPhone portrait has enough detail for a high-quality 8×10 inch print. If you want to go larger, like a 16×20 canvas, ensure you are using the original file and not a version sent through a social media app, which often strips away the data needed for large-scale printing. Taking the time to curate, back up, and print your images ensures that your efforts in mastering Portrait Mode result in a legacy that your grandchildren can hold in their hands.
To learn more about the technical specifications of mobile sensors and how they compare to traditional cameras, you can explore the detailed reviews at Digital Photography Review. Understanding the limitations of your hardware helps you work within its strengths, resulting in better photos every time you tap the shutter.
Frequently Asked Questions
Why does my iPhone Portrait Mode look blurry or unnatural sometimes?
Portrait mode relies on computational photography to distinguish between the subject and the background. If you are too close—less than 19 inches—or too far away—more than 8 feet—the software struggles to create an accurate depth map. Poor lighting also degrades the sensor’s ability to define edges, leading to “shaggy” hair or blurred glasses.
Can I use Portrait Mode for large family groups?
iPhone Portrait Mode works best for one to three people standing on a similar focal plane. Because the software applies a synthetic blur to the background, having people at different distances from the camera can confuse the lens. For large groups, it is often better to use the standard Photo mode and focus manually to ensure everyone stays sharp.
What is the best lighting for an iPhone portrait?
Natural, diffused light is the gold standard. Aim for “Golden Hour”—the hour after sunrise or before sunset—to get a warm, soft glow. Indoors, place your subject near a large window but out of direct, harsh sunlight to avoid deep shadows on the face.
How do I print iPhone portraits without losing quality?
To maintain high quality, ensure you do not crop the image too aggressively before printing. Use the “High Efficiency” (HEIC) or “Most Compatible” (JPEG) setting in your camera options. For the best physical results, transfer the original file to a computer rather than sending it via text message, which compresses the data.
Disclaimer: This article is for informational purposes only. When handling valuable or irreplaceable photographs, consider consulting a professional conservator. Always test preservation methods on non-valuable items first.


Leave a Reply