
Every family possesses a scattered archive of moments—a faded black-and-white portrait of a great-grandfather, a grainy Polaroid of a 1970s road trip, and thousands of digital files sitting forgotten on smartphones. These fragments tell the story of where you came from, but when they remain disorganized, the narrative stays silent. Creating a family photo timeline transforms these disconnected images into a cohesive visual history that preserves your legacy for future generations. This project is more than just an organizational task; it is an act of storytelling that bridges the gap between the past and the present.
If you are starting with a massive pile of unorganized images, learning to conquer photo chaos first will make selecting your timeline photos much easier.
By building a chronological timeline, you move beyond simply owning photos to actually understanding them. You begin to notice patterns: the family resemblance that skips a generation, the evolving landscape of a childhood home, or the repeated traditions that define your family culture. This guide provides the practical steps you need to gather, organize, and present your family history in a way that is both visually stunning and archivally sound.
Gathering and Curating Your Family Collection
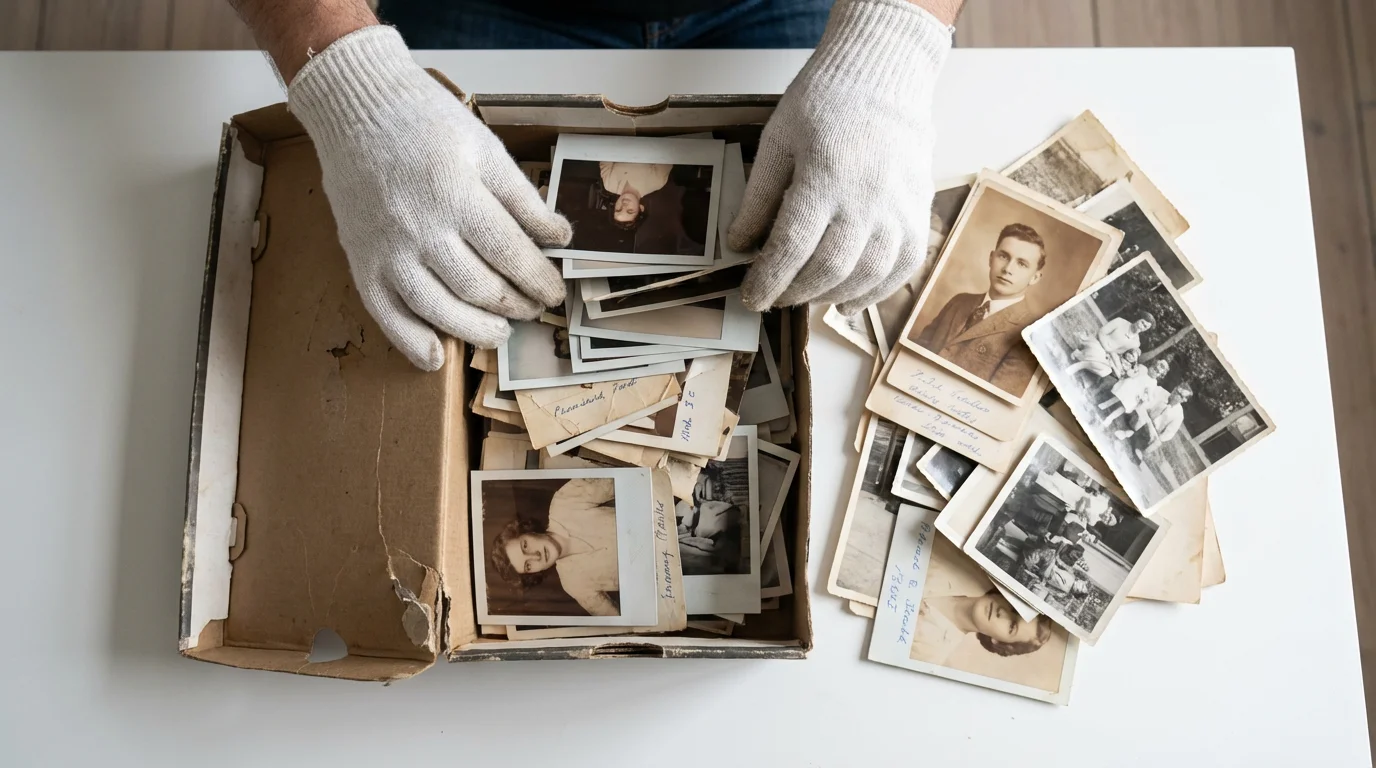
The first step in your family photo timeline project is the “great gathering.” You likely have photos stored in various locations: shoeboxes in the attic, old magnetic albums (which are often acidic and harmful), and various digital devices. Start by bringing everything to a centralized, clean workspace. Use a large table and ensure your hands are clean and dry; better yet, wear lint-free cotton or nitrile gloves to prevent oils from transferring to the delicate photographic emulsions.
For a broader strategy to preserve your entire collection, consider building a family photo archive to keep your materials safe.
Curating is the most difficult but rewarding part of the process. You do not need to include every single photo ever taken to tell an effective story. In fact, a timeline with 100 meaningful images is far more powerful than one with 1,000 repetitive ones. Focus on the “tentpole” moments—weddings, births, graduations, and major moves—but do not ignore the “everyday” shots. A photo of your grandmother in her 1950s kitchen often says more about her daily life than a stiffly posed studio portrait.
Sort your collection into broad eras first: the early ancestors (pre-1900), the early 20th century, the mid-century years, and the modern era. As you sort, discard or set aside blurry photos, duplicates, and landscape shots that hold no personal meaning. Be ruthless during this phase so that the truly special memories can shine. If you are struggling to choose, ask yourself: “If I could only show my great-grandchild one photo of this person, which one would it be?”
The Detective Work: Dating and Identifying Unlabeled Photos
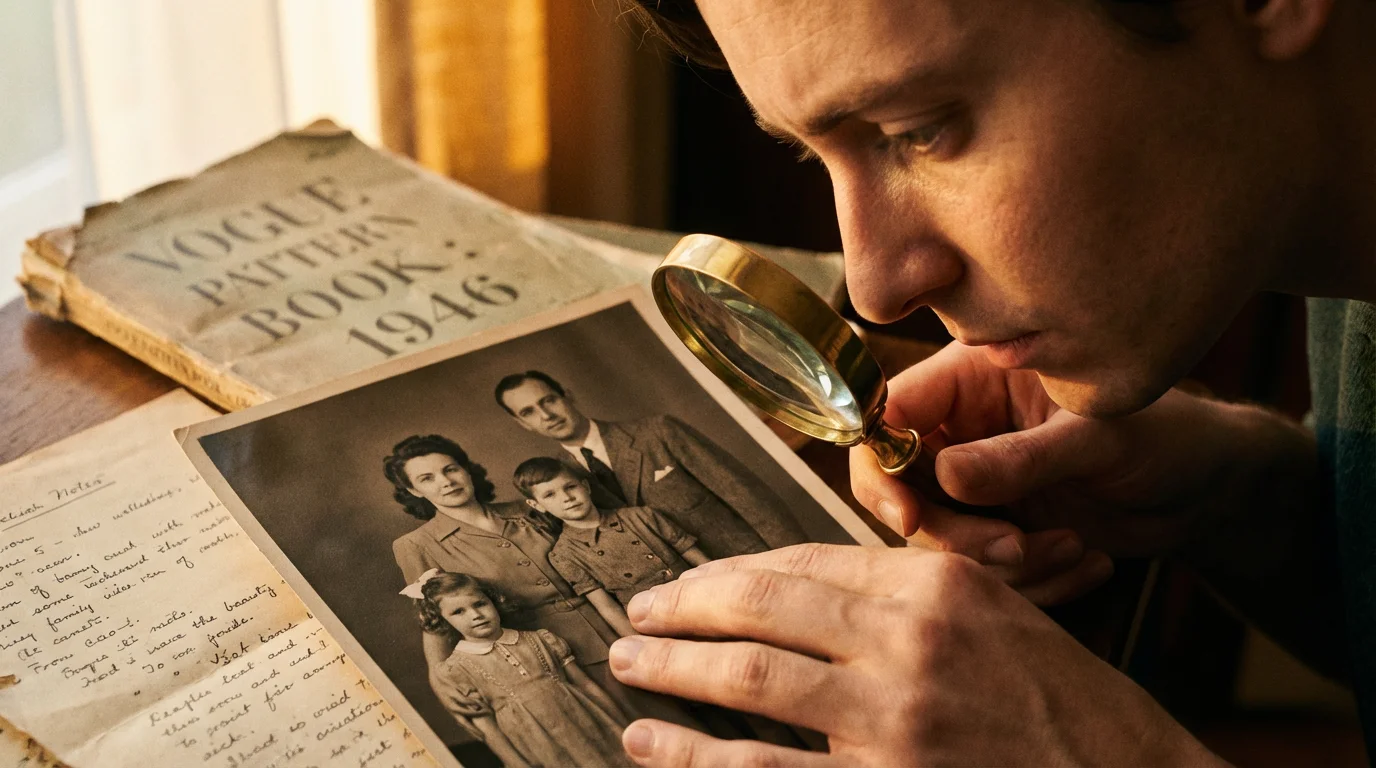
Inevitably, you will encounter the “mystery pile”—photos of people you do not recognize or events you cannot place. This is where your family history project turns into detective work. Look for internal clues within the image. Clothing styles are one of the most reliable indicators of time; for example, the width of a man’s tie or the silhouette of a woman’s dress can narrow a decade down to a few specific years. Architecture also provides clues; you can research when certain buildings were constructed or when specific car models were released to establish a “no earlier than” date.
If you are starting this project after inheriting a photo collection, a structured approach can help you sort through mystery photos with ease.
Physical clues within a photograph, such as the type of paper or the photographer’s stamp, offer vital evidence for dating a family’s history accurately.
Check the back of the prints for any markings. Even if there is no name, sometimes there is a developer’s date stamp or a pencil-written note. If you are still stumped, reach out to your oldest living relatives. Send them digital copies or bring a small selection of prints to their home. You will find that an old photo often acts as a key, unlocking memories that haven’t been discussed in years. Use a voice recorder during these sessions—their spoken stories are as valuable as the photos themselves.
For digital photos, the work is often easier because of EXIF data. This metadata, embedded in the file, usually includes the exact date and time the photo was taken. However, if you are working with scans of old prints, the “date created” on the computer will reflect when you scanned it, not when the photo was taken. You will need to manually update the metadata or file names to reflect the true historical date (e.g., 1942-05-12-Grandpa-Navy-Basic-Training.jpg) to keep your digital timeline organized.
Digitization and Archival Preservation Standards
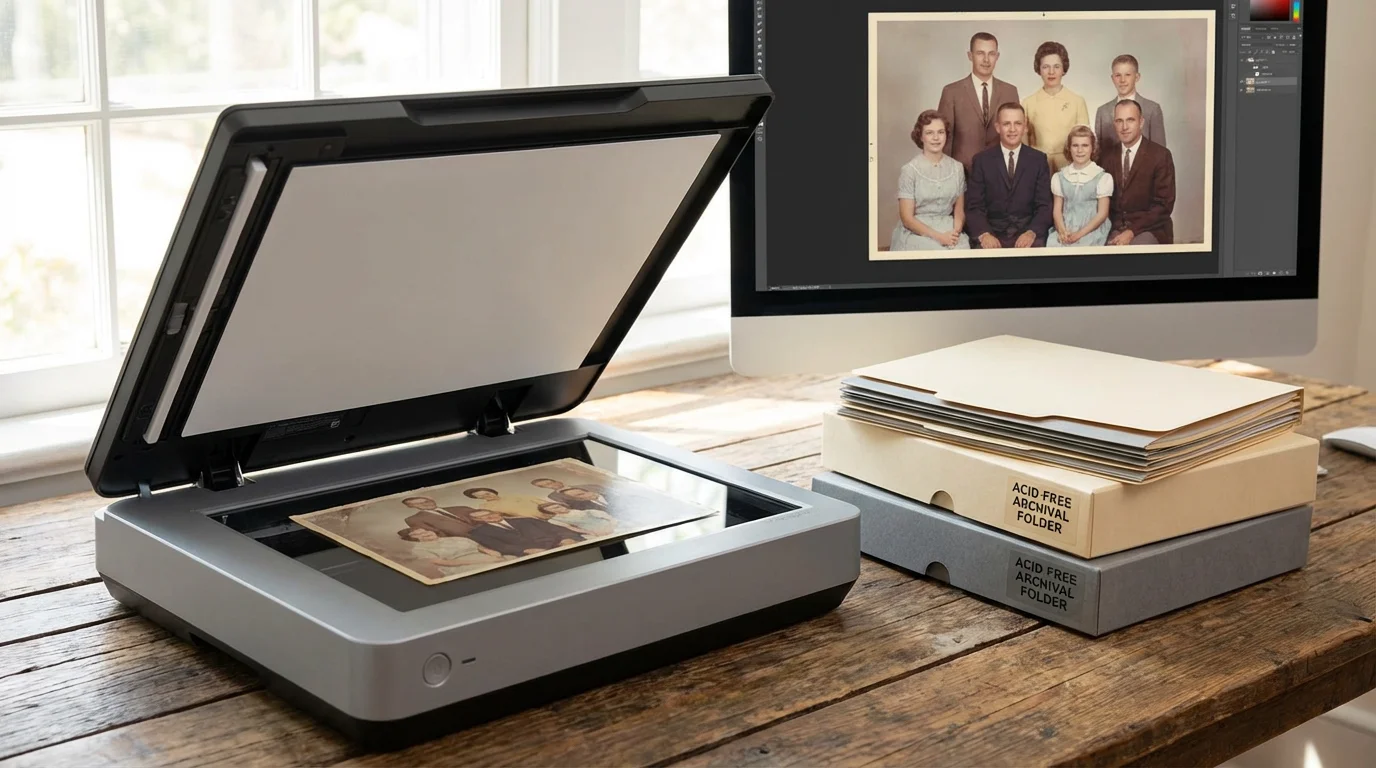
Preservation is a two-fold process: protecting the physical originals and creating high-quality digital backups. The Smithsonian Archives emphasizes that proper storage is the best defense against deterioration. Once you have sorted your photos, store the physical prints in acid-free, lignin-free folders and boxes. Avoid “magnetic” albums with sticky pages, as the adhesive contains chemicals that will eventually eat through the photo paper.
To get the best possible quality from your scanner, follow our comprehensive DIY photo scanning at home tutorial.
When digitizing for your family photo timeline project, quality matters more than quantity. Use a flatbed scanner rather than a phone camera whenever possible to avoid distortion and uneven lighting. Set your scanner to a minimum of 600 DPI for standard prints. This resolution ensures that you can crop or enlarge images later without them becoming pixelated. Save your master files in a lossless format like TIFF for maximum preservation, though high-quality JPEGs are sufficient for the versions you share online or use in a photo album.
Consider the following technical settings for your digitization workflow:
| Item Type | Recommended DPI | File Format | Purpose |
|---|---|---|---|
| Standard 4×6 Print | 600 DPI | TIFF or JPEG | Archive and Printing |
| Small Snapshot (e.g., 2×3) | 1200 DPI | TIFF | High-detail Enlargement |
| 35mm Slide or Negative | 2400-3200 DPI | TIFF | Capturing Film Detail |
| Newspaper Clippings | 300 DPI | PDF or JPEG | Legibility and Reading |
Once scanned, apply the 3-2-1 backup rule: keep three copies of your digital timeline, stored on two different types of media (like a hard drive and a cloud service), with one copy located off-site. This protects your family history against hardware failure, fire, or natural disasters.

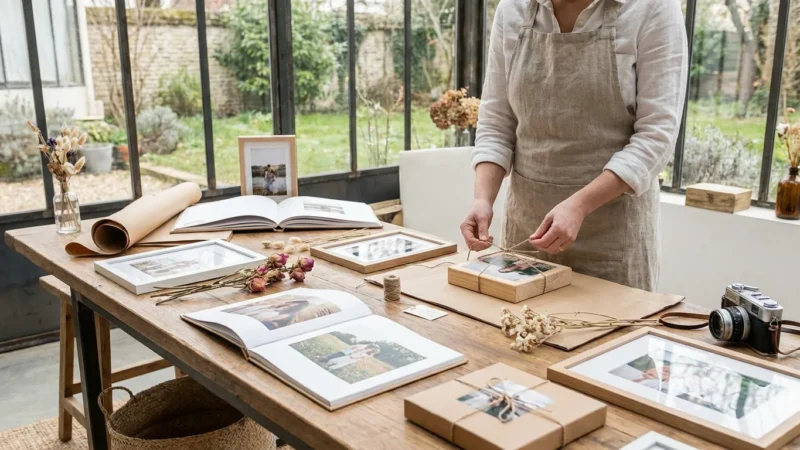
Choosing the Right Format for Your Timeline
The beauty of a family photo timeline is its versatility. You can create a physical photo album, a digital photobook, or even a wall-mounted display. Your choice should depend on how you intend to interact with the memories. A large-format coffee table book is excellent for storytelling and can be printed in multiple copies for siblings and cousins. A physical scrapbook allows you to include memorabilia like ticket stubs, locks of hair, or handwritten letters.
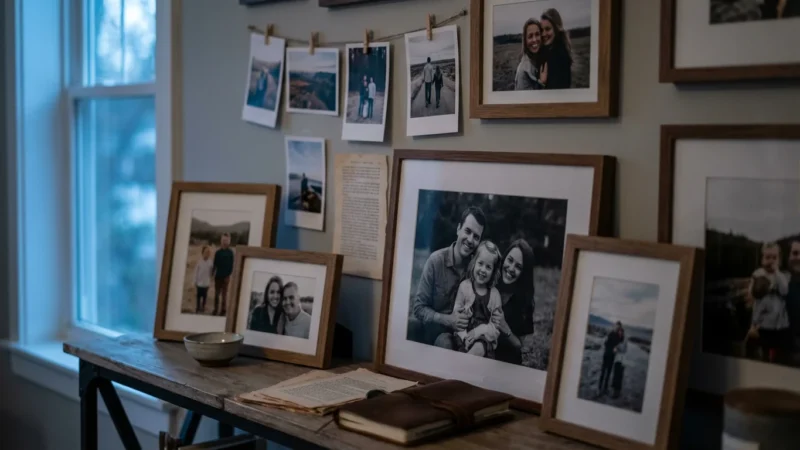
For a physical installation in your home, learning how to build a heritage wall is an excellent way to showcase your timeline.
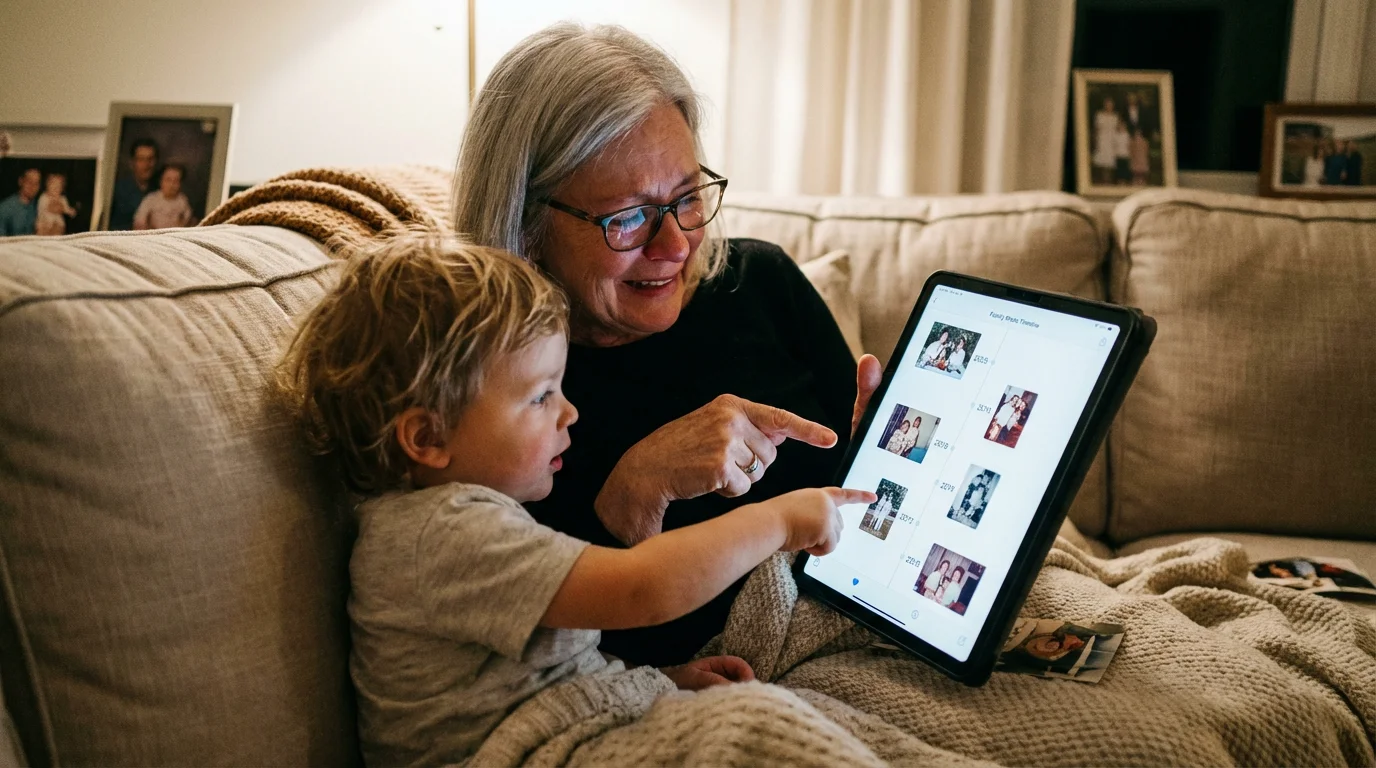
If you prefer a digital approach, many memory keeping platforms allow you to build interactive timelines. These are particularly useful for large, geographically dispersed families. You can invite relatives to “pin” their own photos to specific years, creating a living document that grows over time. For those who want to see their history daily, a wall timeline—featuring framed photos arranged chronologically along a hallway—turns your home into a gallery of your heritage.
When selecting a physical how to create photo album strategy, look for products that pass the Photographic Activity Test (P.A.T.). This is an international standard (ISO 18902) that ensures the album materials will not react chemically with your photographs. The Library of Congress Preservation department provides detailed guidelines on selecting stable materials for long-term storage, which is vital if you want your timeline to last for another century.

Storytelling Through Captions and Context
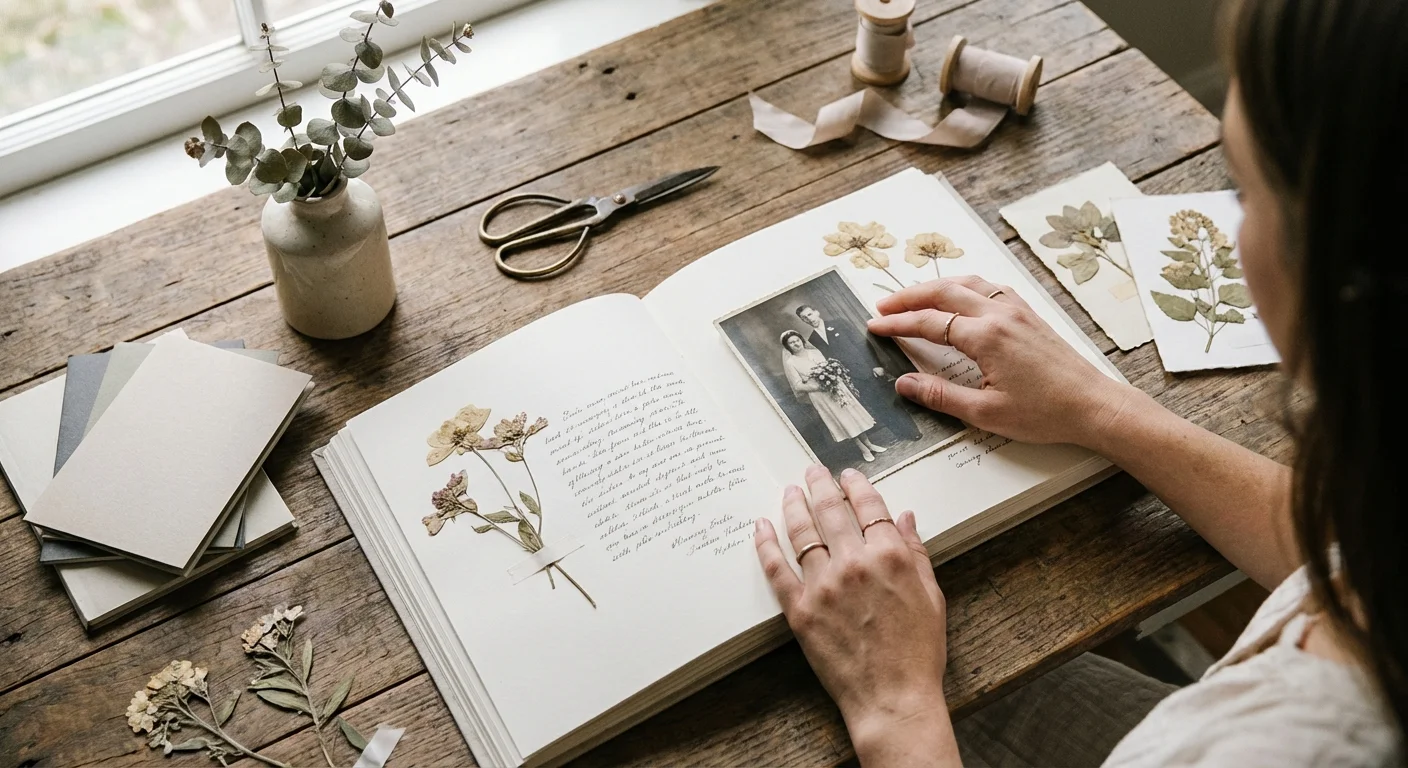
A photo of a house is just a photo; a photo of a house accompanied by a caption explaining that your grandfather built it by hand in 1948 is a legacy. As you assemble your timeline, the “who, what, where, and why” are essential. Avoid generic captions like “Me in the park.” Instead, aim for “Me at Central Park, June 1985—this was the day I finally learned to ride my bike without training wheels.”
Incorporate “historical markers” to give your personal photos context. If your family immigrated to a new country in 1920, include a scan of the ship’s manifest or a newspaper headline from that year. This places your family’s private history within the broader context of world events. It helps younger generations understand the challenges their ancestors faced and the resilience required to build the family they see today.
Don’t be afraid to include the “missing” chapters. If you don’t have a photo of a particular event, use a written narrative or a photo of a significant object related to that time. A photo of a grandmother’s favorite necklace can serve as a placeholder for her story if a portrait from her youth doesn’t exist. The goal of the family photo timeline project is to create a complete narrative, even if every “page” doesn’t have a perfect image.
Maintaining and Sharing Your Family Legacy
Your family photo timeline is a living project. As new events occur—a new baby, a wedding, a milestone anniversary—make it a habit to add these to the collection immediately. This prevents the “shoebox effect” from happening again. Set aside one day a year, perhaps during a holiday or a family reunion, to update the timeline and share the new additions with the rest of the family.
Sharing is the ultimate goal of memory keeping. Digital versions can be shared via private websites or cloud folders, but physical copies have a unique weight. Consider printing a smaller, “budget-friendly” version of your timeline book to give as gifts. Not only does this spread the joy of your family history, but it also serves as an extra layer of preservation—the more copies that exist in different homes, the less likely the history is to be lost.
If you find yourself overwhelmed by the scale of the project, remember that you do not have to finish it in a weekend. Focus on one decade at a time. The process of connecting with your roots, identifying the faces of ancestors, and organizing your own life’s milestones is a deeply rewarding journey. You are not just organizing pictures; you are honoring the lives lived before you and providing a roadmap for those who will follow. For more information on professional standards for handlingIrreplaceable items, you can consult the National Archives for advanced conservation techniques.
Frequently Asked Questions
How do I date old family photos that have no labels?
You can date unlabeled photos by examining background clues like car models, household appliances, or street signs. Fashion is also a major indicator—pay attention to lapel widths, hemline lengths, and hairstyles. If the photo is a studio portrait, the photographer’s name and address on the mounting board can help you narrow down the timeframe through local historical records.
What is the best resolution for scanning old photographs?
For standard prints, scan at a minimum of 600 DPI (dots per inch). This allows you to enlarge the photo later without significant quality loss. If you are scanning small snapshots or 35mm slides, increase the resolution to 1200 DPI or higher to capture the fine details hidden in the small negative or print area.
Should I use glue or tape in a physical family photo timeline album?
No, you should never use standard glue or scotch tape. These contain acids and adhesives that turn yellow and brittle, eventually destroying the photo. Use only archival-safe photo corners or acid-free, lignin-free mounting strips. These methods are reversible and keep the original photograph safe from chemical damage.
How do I involve my family in the photo timeline project?
Host a scanning party or a storytelling night where you share the images digitally or in person. Ask elder relatives to identify faces and record their stories using a voice memo app. Sharing a collaborative digital folder allows relatives in different locations to upload their own contributions to the timeline.
Disclaimer: This article is for informational purposes only. When handling valuable or irreplaceable photographs, consider consulting a professional conservator. Always test preservation methods on non-valuable items first.


Leave a Reply