
Photography captures a moment in time, but the raw data captured by your camera sensor or the aging emulsion of a scanned print often fails to represent the vibrancy of your actual memory. You might look at a digital image and feel it lacks the “pop” you remember, or perhaps a scanned family portrait from 1974 appears muddy and yellowed. This is where Adobe Lightroom becomes an essential tool in your preservation kit. Unlike basic filters that apply a blanket look to an image, Lightroom allows you to surgically enhance specific elements of a photo without ever destroying the original file.
If you are not yet ready to commit to a monthly Adobe subscription, you might first explore some of the best free photo editing software for beginners to practice these core concepts.
Professional editors spend years mastering the nuances of post-processing, but you do not need a degree in digital imaging to achieve professional results. By implementing a few specific “hacks”—shortcuts and techniques that leverage Lightroom’s powerful internal engine—you can transform flat, dull images into striking visual narratives. These techniques work whether you are processing a high-resolution RAW file from a modern mirrorless camera or a 600 DPI scan of a fragile heirloom photograph. The goal is not to “fake” a photo, but to reveal the beauty already present within the frame.

The Alt-Key Trick for Perfect Dynamic Range
One of the most common mistakes in photo editing involves guessing where the highlights and shadows end. If you push your “Whites” slider too far, you lose detail in the clouds or skin tones; if you pull the “Blacks” too low, your shadows turn into featureless ink. This loss of detail is known as “clipping.” To avoid this and ensure your photo has a full, professional dynamic range, you must use the Alt-key (Windows) or Option-key (Mac) hack.
Once you have established the proper dynamic range, you can combine these exposure edits with smart cropping and straightening to give your photographs a balanced, professional composition.
While in the Develop module, hold down the Alt/Option key as you move the Whites slider. Your screen will turn black. As you slide to the right, colored pixels will begin to appear. These pixels indicate exactly where you are losing detail. For a punchy, clean image, move the slider until you just see a few specks of white or color, then stop. Repeat this process with the Blacks slider. This time, the screen will turn white, and black spots will appear as you slide to the left. By finding the exact threshold where clipping begins, you maximize the contrast of your image without sacrificing the integrity of the data.
This technique is particularly vital when preparing photos for print. Printers require a clear distinction between the darkest black and the lightest white to produce a balanced physical copy. According to technical guides from Digital Photography Review, maintaining this balance ensures that your image maintains its “luminance integrity,” which prevents the muddy look often seen in amateur edits. You are essentially telling Lightroom exactly where the “ends” of your photo should be, creating a solid foundation for every other adjustment you make.
Targeted Color Adjustments via the TAT Tool
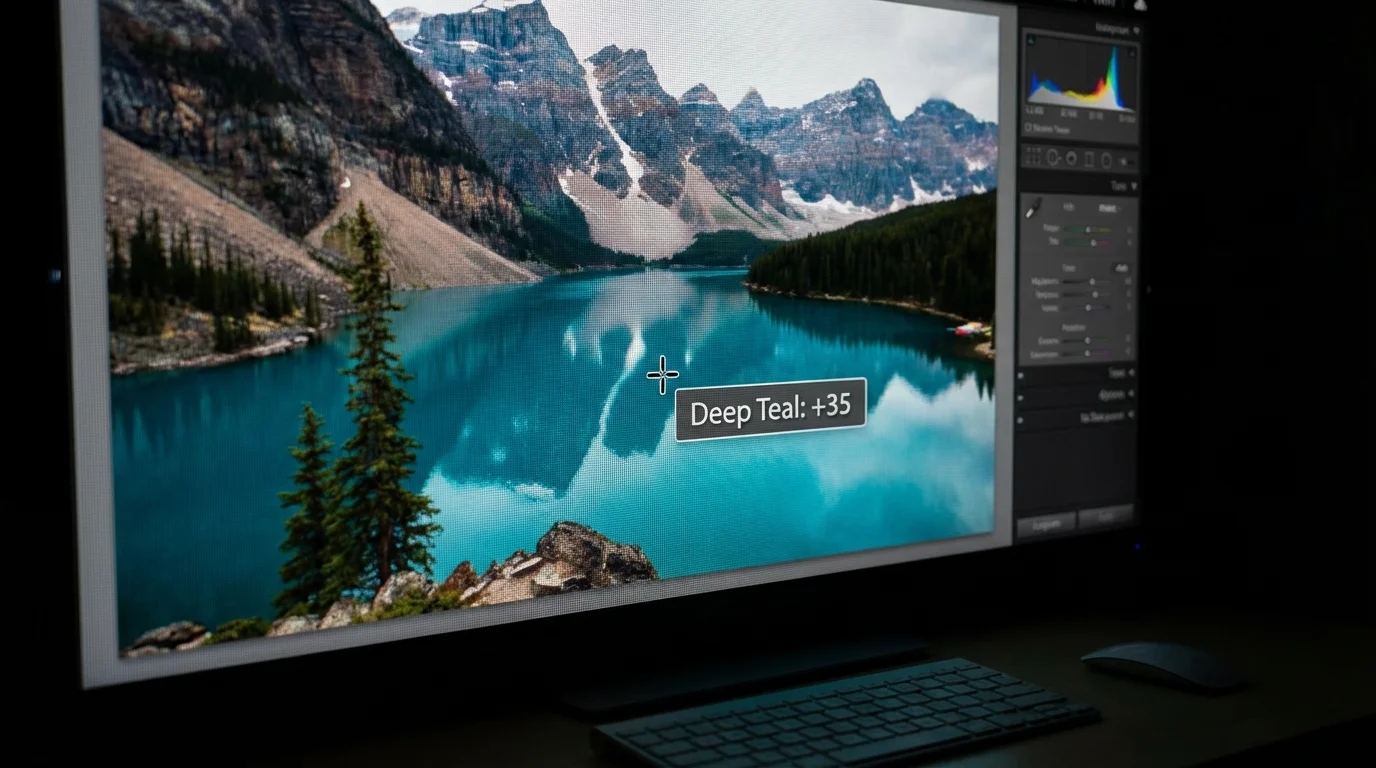
Have you ever tried to make the sky bluer by moving the blue slider, only to realize that the subject’s blue shirt also becomes neon and distracting? Most beginners struggle with the HSL (Hue, Saturation, and Luminance) panel because colors in the real world are rarely “pure.” A green leaf often contains significant amounts of yellow; a blue sky might lean toward aqua. To edit with precision, you should use the Targeted Adjustment Tool (TAT).
Using target selection is one of the most effective color correction tips for scanned photos when dealing with shifted dyes in old prints.
Look for the small, circular icon in the top-left corner of the HSL/Color panel. When you click this tool and hover over your image, Lightroom identifies the exact mixture of colors under your cursor. Click and drag upward on a specific area—like a faded patch of grass in an old photo—and Lightroom will automatically adjust the corresponding sliders (such as Green and Yellow) in perfect proportion. This hack removes the guesswork and prevents the “halos” or strange color shifts that occur when you move sliders manually.
“The goal of color correction is not just to make colors vivid, but to make them truthful to the memory of the moment.”
For photo preservation, the Luminance tab within the TAT tool is your best friend. If you are editing an old portrait where the skin looks “washed out” or gray, use the TAT tool on the Luminance setting. Click the skin and drag up slightly. This adds brightness to those specific tones, giving the subject a healthy, lifelike glow without affecting the background. This level of control is what separates a generic “filter” from a professional restoration.

Leveraging AI Masking for Instant Subject Pop
In the past, isolating a person or a background required meticulous “brushing” that could take twenty minutes per photo. Lightroom’s newer AI-powered masking tools have revolutionized this workflow. By clicking the Masking icon (the circle with a dotted border) and selecting “Select Subject,” Lightroom uses machine learning to identify the person or object in your frame with incredible accuracy.
These AI tools work remarkably well even when doing photo editing on your phone using mobile versions of the software.
Once you have selected your subject, try the “Invert” hack. Create a mask for your subject, then right-click the mask and choose “Duplicate and Invert Mask.” Now you have two perfectly synced masks: one for the person and one for everything else. You can slightly lower the exposure or clarity on the background while increasing the sharpness and highlights on your subject. This creates a subtle “depth of field” effect that makes your subject pop off the screen.
This tool is equally effective for sky replacement or enhancement. If you have a family vacation photo where the sky is a bright, featureless white, use the “Select Sky” mask. You can pull down the highlights and increase the “Dehaze” slider specifically in the sky area. This restores the clouds and color without making the rest of the photo look dark or “crunchy.” When you use AI masking, you are applying local adjustments that mimic how the human eye naturally focuses on a scene—emphasizing the important parts while letting the secondary elements recede.
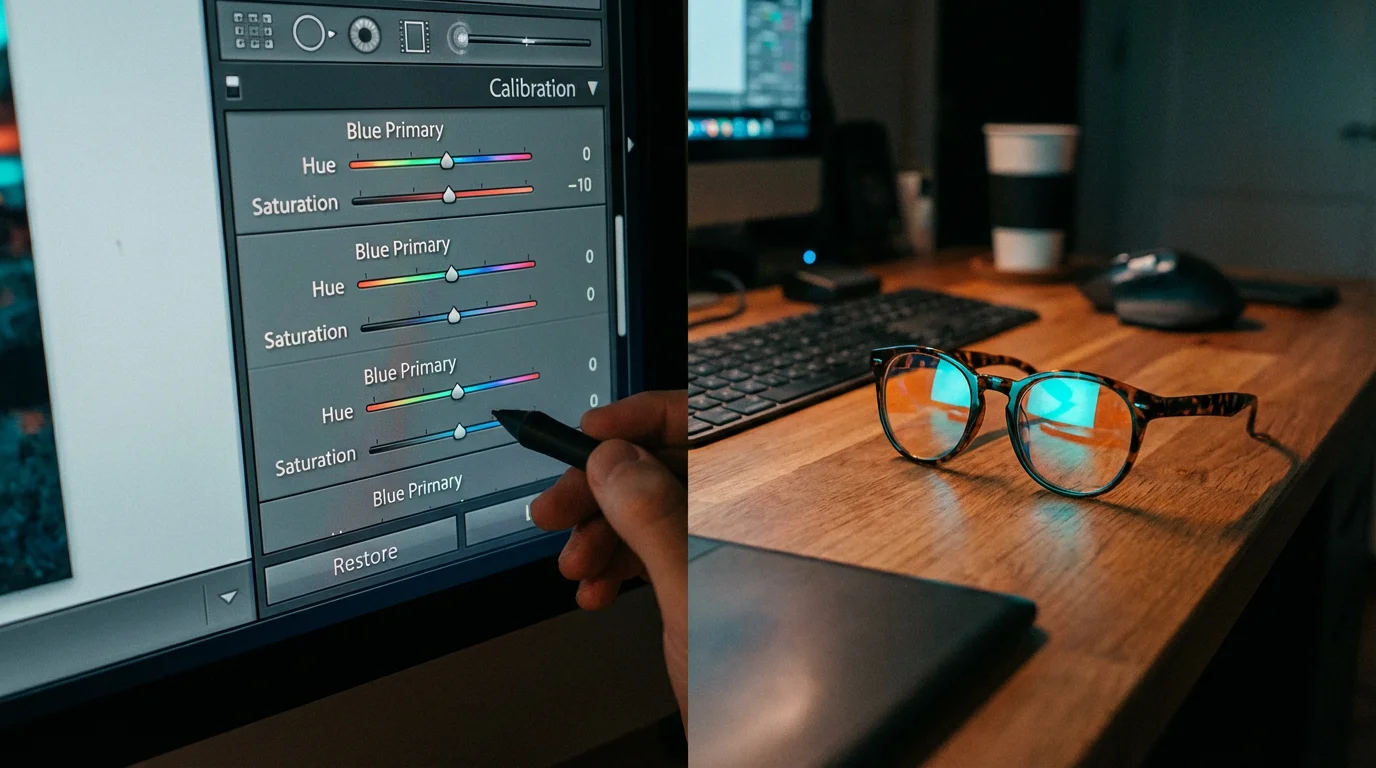
Unlocking the Hidden Power of the Calibration Panel
At the very bottom of the Develop module lies the Calibration panel. Most users ignore it, thinking it is only for fixing camera-specific technical errors. In reality, the Calibration panel is a “secret weapon” for color grading. While the HSL panel adjusts specific colors, the Calibration panel adjusts how Lightroom interprets the Red, Green, and Blue (RGB) primary pixels across the entire image.
If you are working with a massive archive of scanned negatives, combining these calibration adjustments with batch editing techniques will save you countless hours of manual work.
A popular hack among professional travel and portrait photographers involves the “Blue Primary” slider. Try pushing the Blue Primary Saturation slider to the right (around +30 to +50) and then slightly adjusting the Blue Primary Hue toward the left. This often creates a rich, cinematic color palette that feels “expensive” and polished. It deepens skin tones and makes oranges and teals feel more harmonious. Because this happens at the “calibration” level, the effect feels more organic and less like a digital overlay.
For those preserving older, scanned photos, the Calibration panel helps correct the general color “cast” that happens as film chemicals age. If an entire box of scanned photos looks slightly magenta, you can use the “Tint” slider in the Shadows section of the Calibration panel to neutralize that cast across every image simultaneously. It is a powerful way to bring consistency to a collection that may have been shot on different film stocks over several decades.
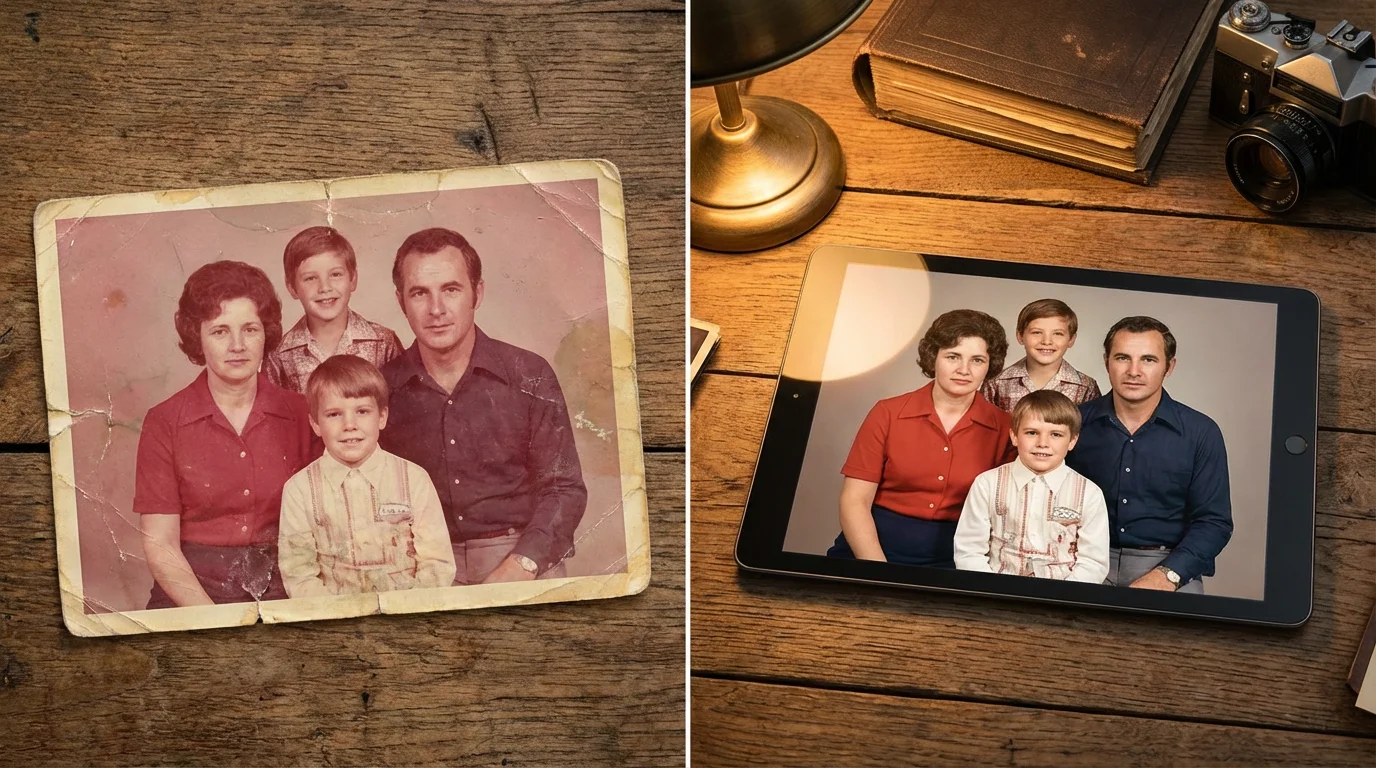
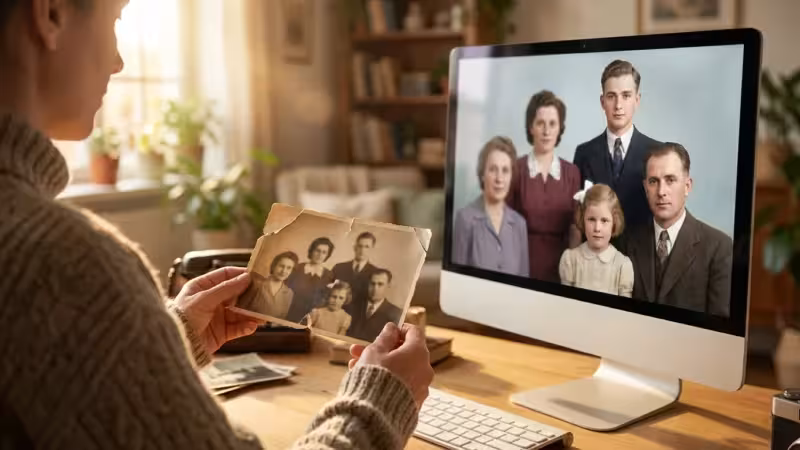
Non-Destructive Restoration for Faded Family Heirlooms
When you handle a physical photograph from the 1920s, you are touching a fragile piece of history. When you edit a digital scan of that photo, you must treat the digital file with the same respect. Lightroom is the perfect tool for this because it is non-destructive; it never touches the original pixels of your scan. One of the most effective hacks for restoring faded photos is the “Tone Curve” combined with the “Dehaze” tool.
Understanding how to restore old faded photos with photo editing software allows you to choose the best digital tools to save precious historical prints.
Old photos often lose their “black point,” resulting in a gray, washed-out appearance. First, apply a small amount of “Dehaze” (found in the Basic panel). This tool was designed to cut through atmospheric fog, but it works miraculously on the “fog” of aged photo paper. Next, go to the Tone Curve and create a slight “S-Curve” by pulling the bottom-left of the line down and the top-right up. This restores the lost contrast that occurs as silver halides in old prints degrade over time.
If the photo has cracks or dust, do not reach for the “Heal” tool immediately. Instead, use the “Spot Removal” tool set to “Clone” for large tears and “Heal” for small dust specks. Zoom in to 100% and work in small sections. By taking your time, you can remove distracting damage while keeping the authentic grain of the original film. Keeping that grain is essential for preservation; as noted by the Image Permanence Institute, the “texture” of a photograph is a vital part of its historical record. You want the photo to look like a well-preserved version of itself, not a plastic, over-smoothed digital recreation.

Choosing Your Lightroom Version: A Comparison
To use these hacks effectively, you need to know which version of the software fits your lifestyle. Adobe offers two main versions: Lightroom Classic (the traditional, folder-based desktop app) and Lightroom (the cloud-based, mobile-friendly version). Both are powerful, but they serve different needs for the home archivist and photographer.
To understand how Adobe’s ecosystem fits your overall archive management, it is helpful to compare Lightroom vs Photoshop to see which tool handles organization and advanced retouching better.
| Feature | Lightroom Classic (Desktop) | Lightroom (Cloud/Mobile) |
|---|---|---|
| Best For | Large archival collections, heavy editing. | Quick edits on the go, social sharing. |
| Storage | Local hard drives and external drives. | Adobe Cloud storage (1TB+). |
| Organization | Folders, Collections, Keywords, and Smart Collections. | Albums and AI-powered “Sensei” search. |
| Advanced Tools | Full Printing module, Tethering, Virtual Copies. | Simplified interface, automatic syncing. |
| AI Masking | Full Support. | Full Support. |
If you have 10,000 scanned family photos, Lightroom Classic is your best bet because it handles large local databases more efficiently. However, if you are currently traveling and want to edit photos of your grandchildren as you take them, the cloud-based Lightroom app allows you to apply these same hacks from your tablet or phone. Regardless of the version, the logic behind the sliders remains identical.
Consistency is the final “hack.” Once you find a look that works for a specific batch of photos—perhaps a set of slides from a 1960s road trip—you don’t have to redo the work for every image. Use the “Sync” button (or Cmd/Ctrl+Shift+C) to copy your settings from one photo and paste them onto hundreds of others. This ensures that your entire digital album has a cohesive, professional look that honors the original era of the photography.
By mastering these five hacks—the Alt-key dynamic range check, the TAT color tool, AI masking, the Calibration panel, and non-destructive restoration—you move from being a passive observer of your photos to an active guardian of your family’s visual heritage. Editing is not an act of changing history; it is the art of making history visible again. You now have the tools to ensure your memories look as vibrant today as they felt the moment the shutter clicked.
Frequently Asked Questions
Is Lightroom better than Photoshop for beginners?
Lightroom is generally more intuitive for beginners because it focuses on photographic adjustments like lighting and color, whereas Photoshop is a pixel-level editor used for complex manipulation and compositing. Lightroom also uses non-destructive editing, which means your original photo remains untouched.
Will editing my old scanned photos in Lightroom damage the files?
No, Lightroom is a non-destructive editor. It stores your edits as a set of instructions rather than overwriting the original file. To keep your edits, you must export a new version of the image, leaving your original scan completely safe.
What is the most important slider in Lightroom?
While it depends on the photo, the Exposure slider is the most fundamental. However, the Whites and Blacks sliders, when used with the Alt-key hack, provide the most significant boost in professional polish by establishing a true dynamic range.
Can I use these hacks on my phone?
Yes, many of these features, including AI masking and HSL adjustments, are available in the Lightroom Mobile app. The interface looks different, but the underlying technology and editing principles remain the same.
Disclaimer: This article is for informational purposes only. When handling valuable or irreplaceable photographs, consider consulting a professional conservator. Always test preservation methods on non-valuable items first.


Leave a Reply