Every scratch on an old photograph tells a story of survival—of decades spent in shoeboxes, moving across states, or being passed between curious hands. While these marks represent the physical journey of your family history, they often obscure the very faces and moments you want to remember. Modern technology offers us a remarkable bridge between the past and the present; you no longer have to accept a damaged heirloom as it is. By following a structured restoration process, you can lift the veil of time and reveal the crisp, clear image hidden beneath the surface of a worn print.
Once you have repaired your favorite prints, organizing them correctly is the first step toward creating a home photo archive for your family legacy.
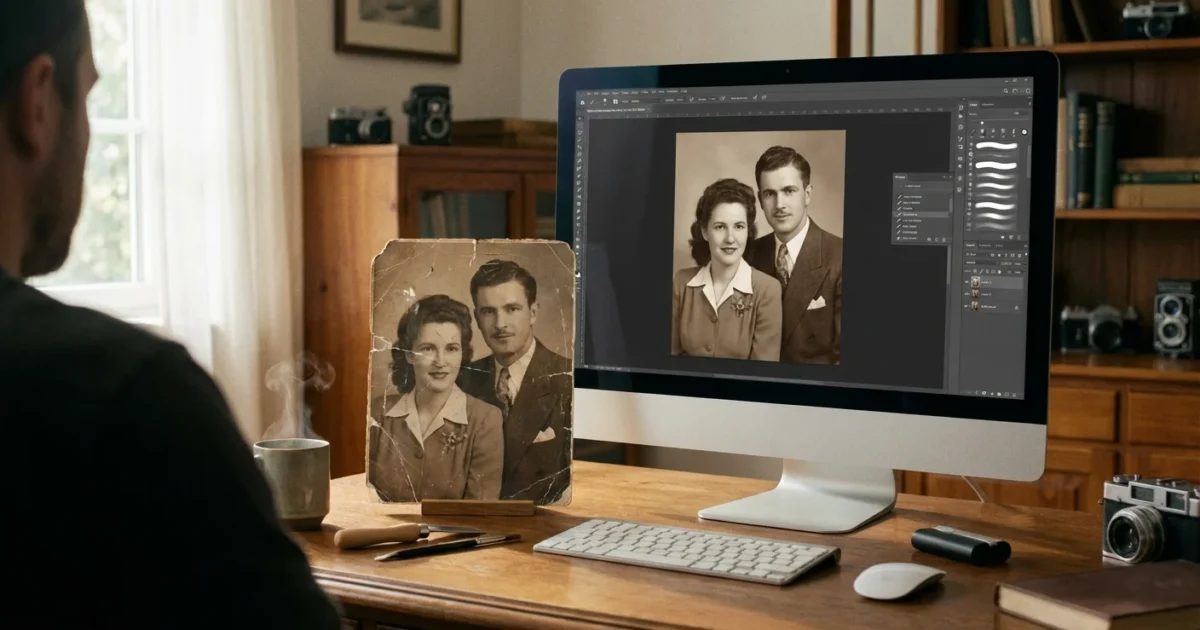
Repairing scratched photos requires a blend of patience, the right digital tools, and a deep respect for the original object. Whether you are dealing with hairline fractures in a gelatin silver print or deep gouges in a color snapshot from the 1970s, the goal remains the same: to preserve the visual legacy without compromising the integrity of the memory. This guide focuses on a “non-destructive” philosophy—meaning you will perform all significant repairs on a digital twin, leaving your precious original safe from harm.
Assessing the Type and Severity of Photo Damage
Before you open any editing software, you must understand exactly what kind of damage you are facing. Scratches on photographs generally fall into three categories: surface scuffs, emulsion cracks, and deep substrate gouges. Surface scuffs often appear as dull or matte areas on a glossy photo; they usually don’t remove pigment but disrupt the light reflecting off the surface. These are the easiest to manage because the image data remains largely intact underneath.
Beyond surface damage, if your collection has taken on a brown or yellow hue, you may also need strategies for saving yellowed and discolored photographs to return them to their original tone.
If your images exhibit signs of mold or paper sticking, you may need a specialized approach for restoring water-damaged photos before addressing surface scratches.
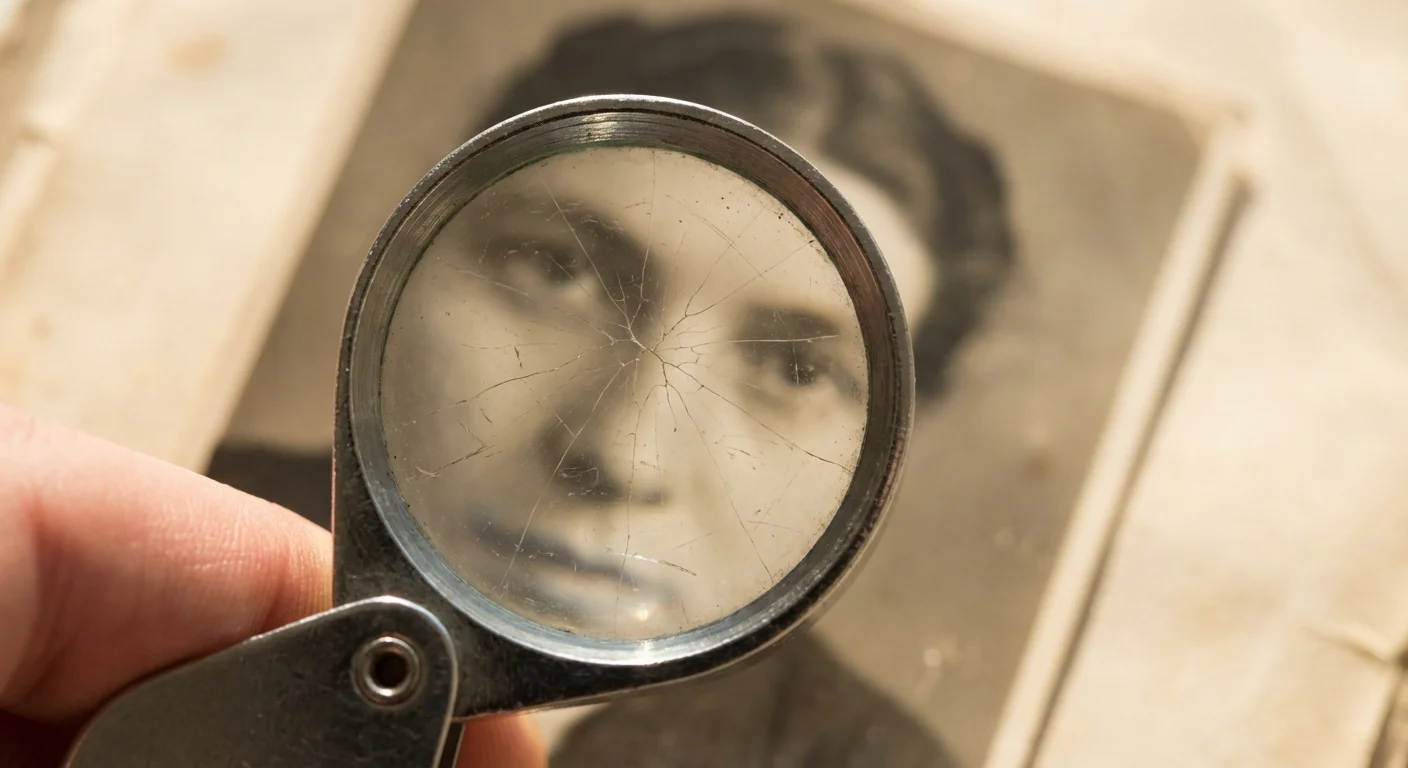
Emulsion cracks are more serious. As old photographs age, the gelatin layer that holds the silver or dye can become brittle. Changes in humidity cause the paper to expand and contract, while the brittle emulsion stays rigid, resulting in a network of fine, web-like cracks. If your photo looks like a dry lakebed, you are dealing with emulsion failure. These require careful digital “stitching” to bridge the gaps without making the skin of the subjects look like plastic.
The most difficult damage is the deep gouge, where the scratch has physically removed the emulsion and exposed the white paper or plastic base underneath. In these cases, the visual information is gone. You aren’t just “cleaning” the photo; you are reconstructing missing data. You must look at the surrounding areas—the textures, colors, and patterns—to realistically fill in what was lost. Understanding these distinctions helps you set realistic expectations for your restoration project.
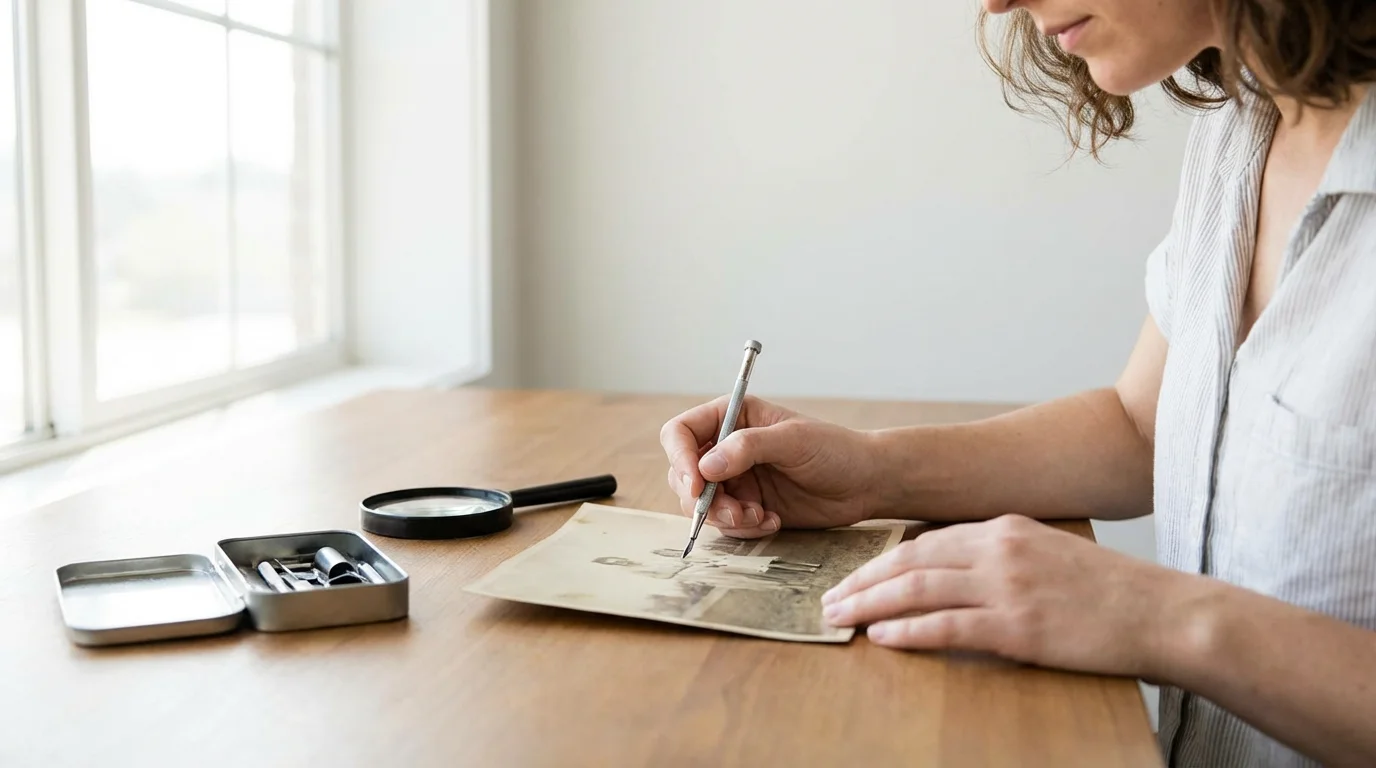
Safe Handling and Pre-Scan Preparation
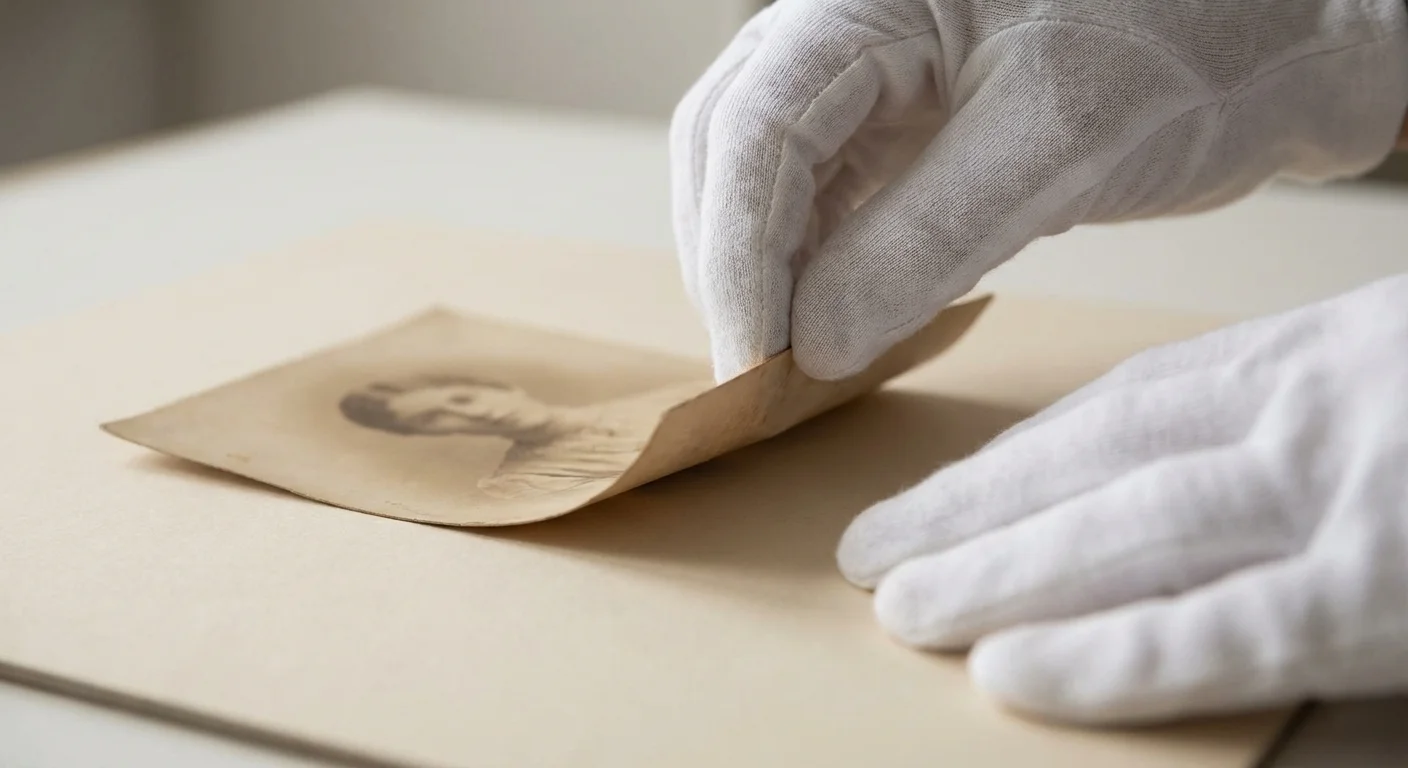
Your original photograph is a fragile chemical object. The oils from your skin contain salts and acids that can accelerate the degradation of the image over time. Before you begin the repair process, prepare a clean workspace. Use a flat, hard surface and ensure your hands are freshly washed and dried—or better yet, wear lint-free cotton or nitrile gloves. This prevents you from adding new fingerprints to the very surface you are trying to clean.
Learning how to prepare photos for scanning can prevent you from accidentally rubbing abrasive dust into the fragile emulsion.
If the photo is dusty, do not use a cloth to wipe it down immediately. Dust particles are often abrasive and can act like sandpaper, creating new micro-scratches as you wipe. Instead, use a soft-bristled brush specifically designed for optics or a manual air blower (like those used for camera sensors) to gently remove loose debris. If there is stubborn residue, stop. Do not use household cleaners, water, or solvents. The American Institute for Conservation emphasizes that many traditional cleaning methods can cause the emulsion to swell or dissolve, leading to permanent loss.
“The first rule of photo restoration is to do no harm to the original. Every physical intervention carries a risk of permanent damage; therefore, we prioritize digital intervention over physical repair.”
Capturing the Best Digital Foundation
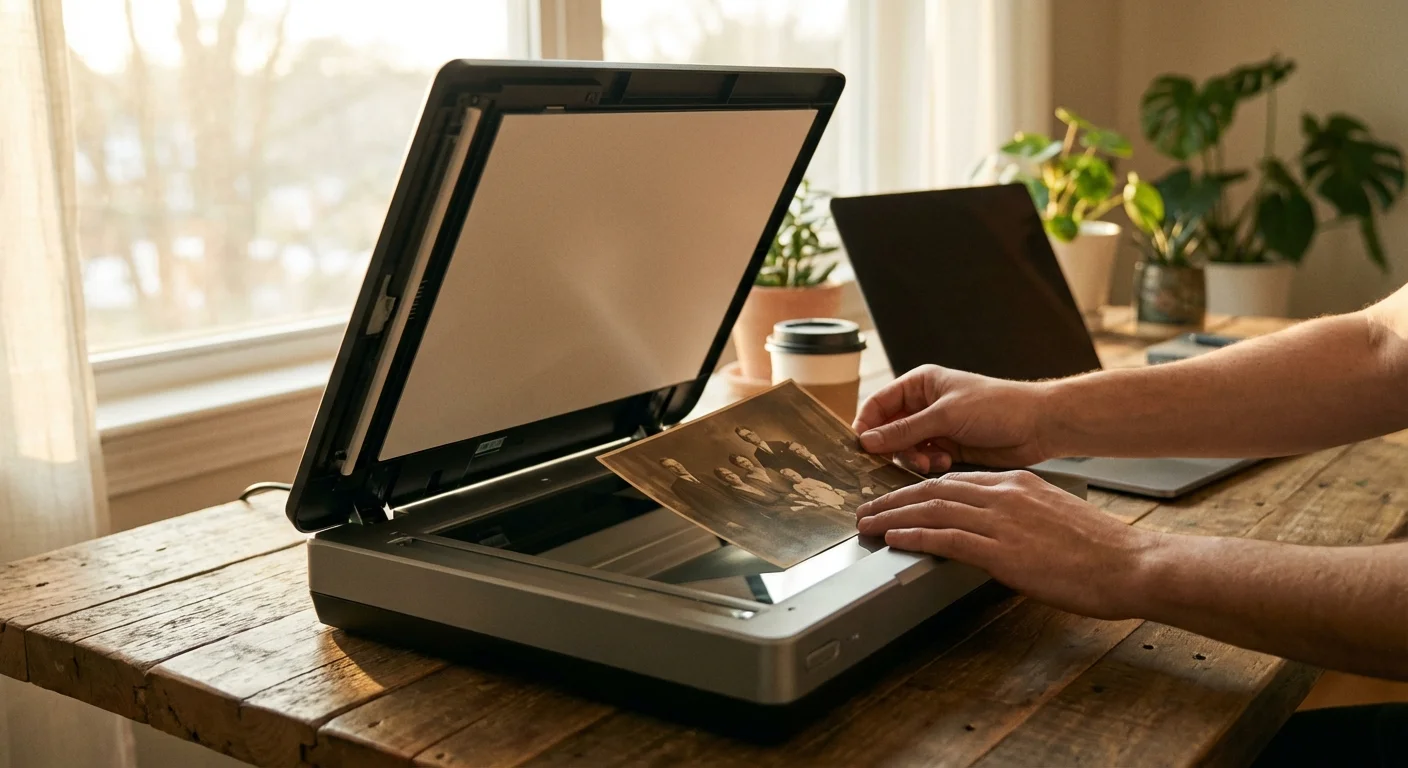
The success of your restoration depends entirely on the quality of your scan. If you start with a low-resolution, compressed file, you will lack the “pixels” necessary to blend scratches seamlessly. You should use a flatbed scanner rather than a smartphone camera whenever possible. Flatbed scanners provide consistent lighting and hold the photo perfectly flat, which minimizes the shadows cast by deep scratches.
In some cases, even a high-resolution scan can reveal focus issues, making it necessary to sharpen blurry photos before proceeding with the scratch removal.
Set your scanner to at least 600 DPI for standard 4×6 prints. If the original is small, go up to 1200 DPI. Always save your initial scan as a TIFF file. Unlike JPEGs, TIFFs are “lossless,” meaning they don’t discard data to save space. This gives you a much “thicker” file to work with during the repair process. If your scanner software offers “Digital ICE” or infrared dust removal, use it with caution. While it works wonders on color film and slides, it can sometimes smudge the details in silver-based black and white prints.
| Feature | Standard Scan (Archive) | Restoration Scan (Repair) |
|---|---|---|
| Resolution (DPI) | 300 DPI | 600 – 1200 DPI |
| File Format | JPEG (High Quality) | TIFF (Uncompressed) |
| Color Depth | 8-bit | 16-bit (if available) |
| Color Mode | RGB | RGB (Even for B&W photos) |

Essential Software and Manual Repair Tools
To repair scratched photos effectively, you need software that supports layers and “aware” filling. Adobe Photoshop remains the industry standard, but powerful alternatives like GIMP (free) or Affinity Photo (one-time purchase) offer nearly identical capabilities. You want tools that can sample pixels from one area of the photo and apply them to the damaged area while matching the texture, lighting, and grain.
The most important tools in your arsenal will be the Clone Stamp, the Healing Brush, and the Patch Tool. The Clone Stamp is a precision instrument; it takes an exact copy of a clean area and paints it over the scratch. The Healing Brush is smarter—it takes the texture of the sample area but blends it with the color and lighting of the destination. When used together, these tools allow you to hide even the most aggressive gouges. For large areas of damage, modern “Content-Aware Fill” features can analyze the entire image to suggest a plausible replacement for a missing corner or a large background scratch.
A Step-by-Step Digital Restoration Workflow
Once you have your high-resolution TIFF file, open it in your editing software. Your first move should always be to duplicate the background layer. Never work directly on the original “Background” layer; this allows you to toggle your progress on and off to ensure you aren’t losing the original character of the photo. Label this new layer “Scratch Repair.”
Start with the Spot Healing Brush for small dust marks and hairline scratches. This tool is “point and click”—the software looks at the pixels surrounding the scratch and attempts to fill the gap. It works like magic on simple backgrounds like skies or plain walls. For scratches that cross over complex textures, such as a person’s jacket or a patterned wallpaper, switch to the Clone Stamp tool. Lower the opacity of the brush to about 50% and use short, feathering strokes. This builds the repair gradually and prevents the “telltale” look of a digital fix.
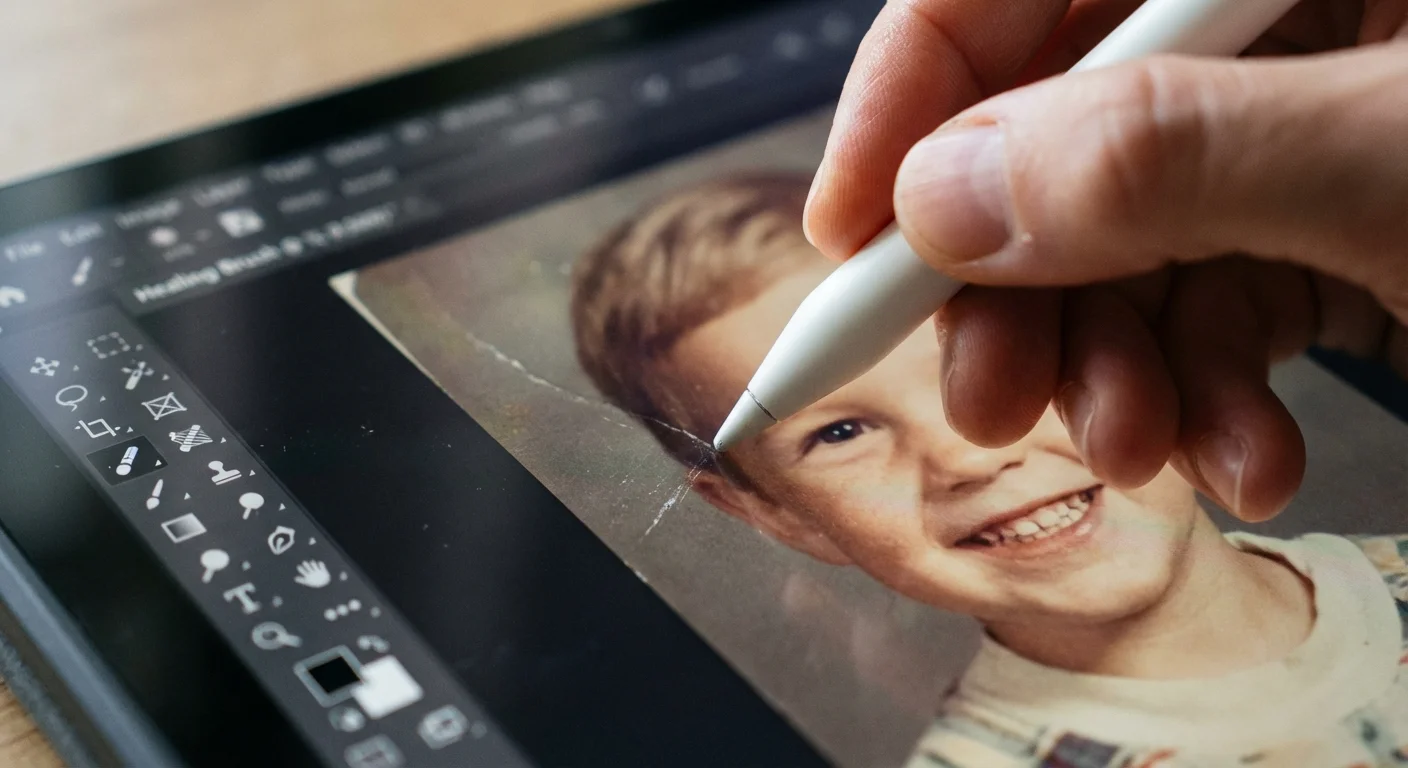
When repairing faces, be extremely cautious. You should work at a high zoom level (200% or 300%). If a scratch runs through an eye, do not try to “paint” a new eye. Instead, look for a clear section of the other eye, flip it horizontally, and carefully align it. This maintains the biological symmetry of the person and looks far more natural than manual drawing. Always follow the natural lines of the face—the jawline, the bridge of the nose, and the eyelids—to guide your repairs. According to the Library of Congress, preserving the visual truth of an image is the primary goal of any restoration effort.
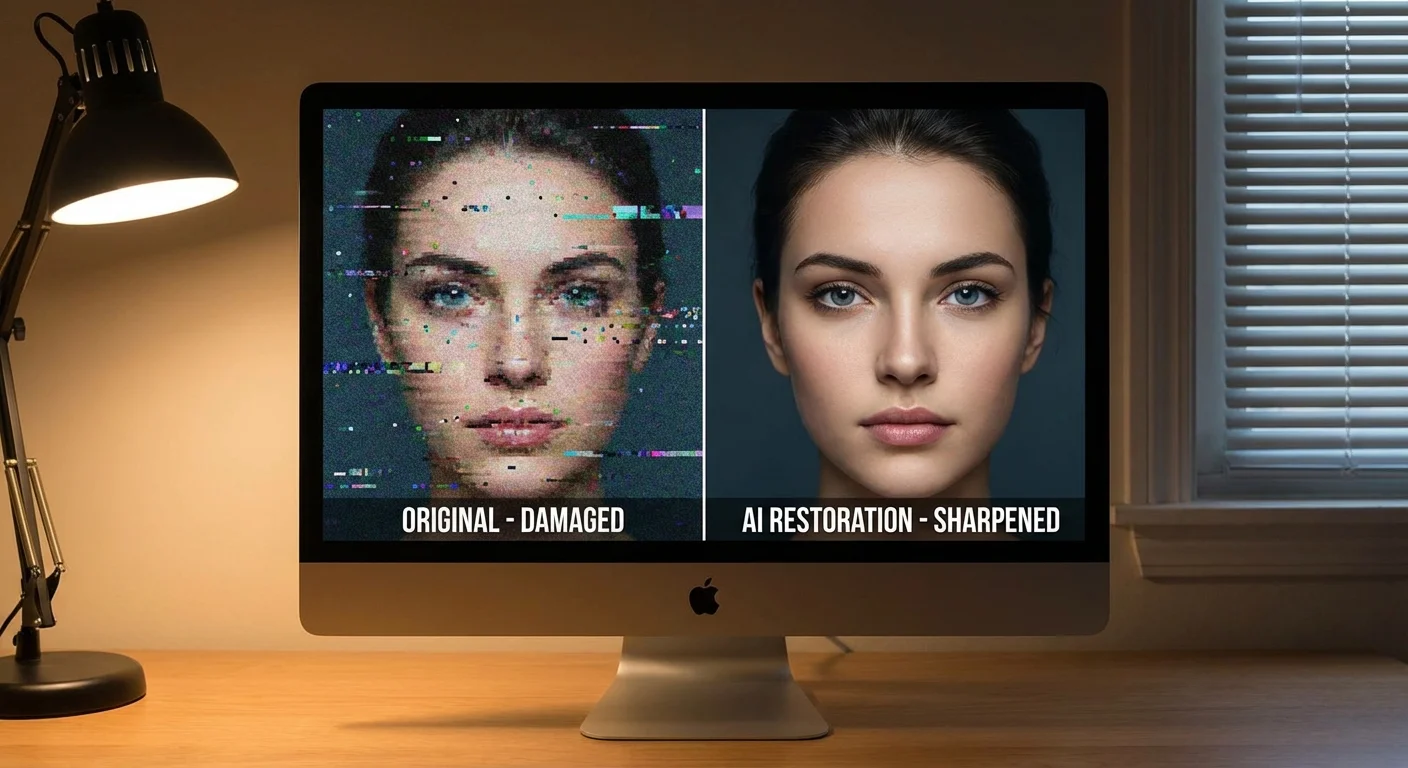
Leveraging Artificial Intelligence for Complex Repairs
The landscape of photo restoration has shifted dramatically with the advent of Artificial Intelligence. Tools like Adobe’s Neural Filters or specialized web-based AI restorers can now handle tasks that used to take hours in minutes. AI is particularly adept at “denoising” grainy photos and reconstructing facial features that have been severely damaged by deep scratches or fading.
After the physical repairs are complete, many enthusiasts take the next creative step and colorize black and white photos digitally to see their family history in a whole new light.
However, AI is not a magic wand. It often has a tendency to “over-smooth” skin, making your ancestors look like CGI characters. To avoid this, you should use AI-generated repairs as a separate layer and reduce the opacity until the natural film grain of the original photo begins to show through. This hybrid approach—using AI for the heavy lifting and manual tools for the finishing touches—yields the most professional results. You get the speed of modern technology without losing the authentic “soul” of the vintage photograph.
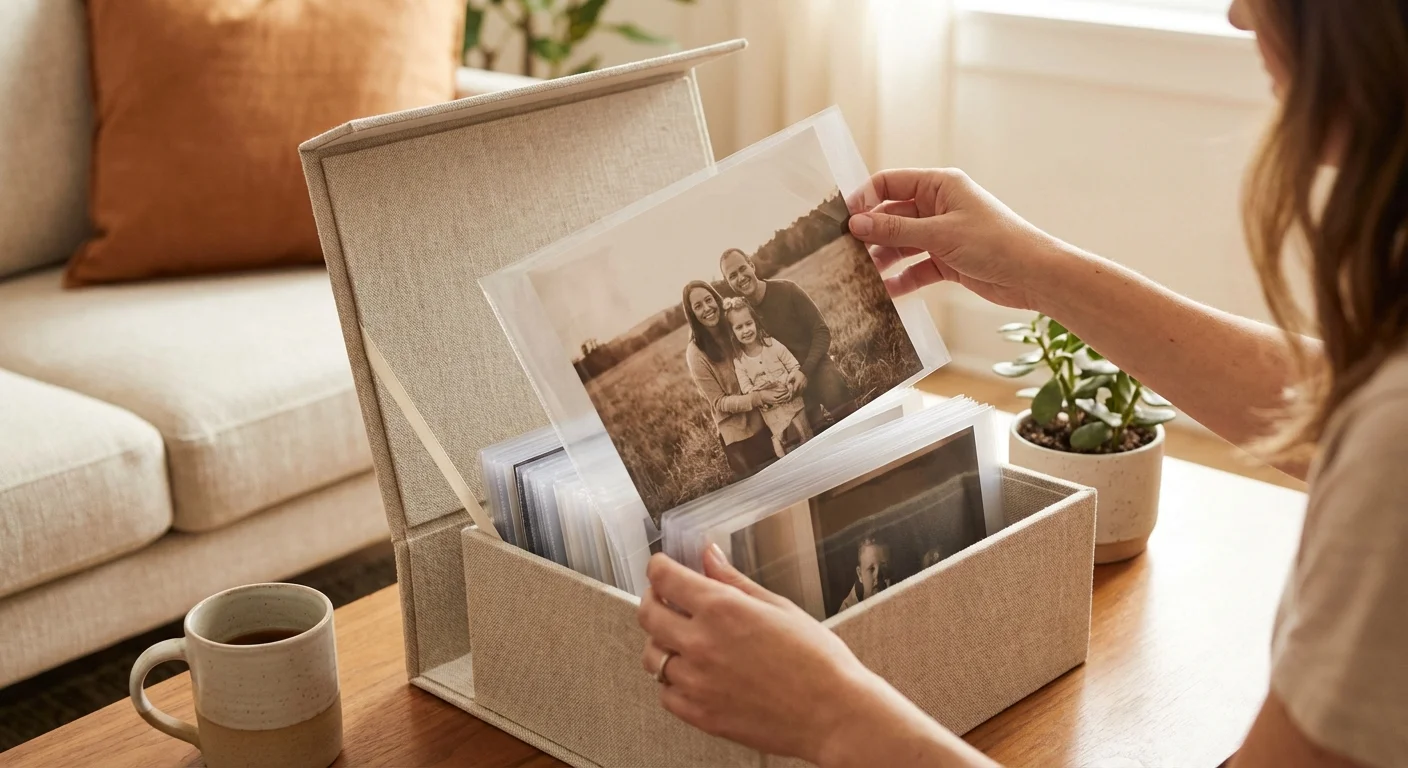
Protecting Your Originals and New Prints
After you have successfully repaired your photos digitally, you must address the survival of the physical originals. The damage you just fixed was likely caused by poor storage conditions. Heat, humidity, and “off-gassing” from acidic paper or plastic sleeves are the primary enemies of photographic longevity. To prevent new scratches and stop the progression of existing cracks, you should move your collection into archival-grade housing.
Proper archiving is the final stage of any restoration; learn how to store old photographs to prevent fading and damage to ensure your originals don’t require further repair in the future.
Look for materials that have passed the Photographic Activity Test (PAT). This is an international standard that ensures the storage material will not react chemically with your photos. Use acid-free, lignin-free envelopes or folders. If you prefer albums, ensure the sleeves are made of stable plastics like polyester (Mylar), polypropylene, or polyethylene. Avoid “magnetic” or “sticky” albums from the 20th century, as the adhesives will eventually destroy the photo’s backing. By coupling your digital restoration with proper physical storage, you ensure that these memories survive for another hundred years.
Frequently Asked Questions
Can I fix a physical scratch on an original photograph using chemicals?
You should generally avoid applying chemicals, waxes, or oils to an original photograph to hide scratches. These substances often cause irreversible chemical reactions that lead to yellowing or further emulsion breakdown over time. The safest approach involves digitizing the photo and performing repairs on the digital copy.
What is the best resolution for scanning damaged photos?
For restoration work, you should scan your photos at a minimum of 600 DPI (dots per inch). If the original is very small—such as a wallet-sized photo or a slide—increase the resolution to 1200 DPI. High resolution captures the maximum amount of detail, which provides more data for software tools to use when blending away scratches.
Are AI photo restorers better than manual editing?
AI restoration tools excel at speed and can often reconstruct missing facial features with surprising accuracy. However, manual editing via software like Photoshop provides greater control and prevents the “uncanny valley” effect where faces look overly smoothed or artificial. A hybrid approach—using AI for a base layer and manual tools for fine details—often yields the best results.
How do I know if a photo is too damaged to repair at home?
If a scratch or tear goes through a critical area like a person’s eyes or mouth, or if the emulsion is flaking off the paper, the project becomes significantly more difficult. If the photo is a rare historical artifact or holds immense sentimental value, you should contact a professional conservator rather than attempting a DIY repair.
Disclaimer: This article is for informational purposes only. When handling valuable or irreplaceable photographs, consider consulting a professional conservator. Always test preservation methods on non-valuable items first.


Leave a Reply