
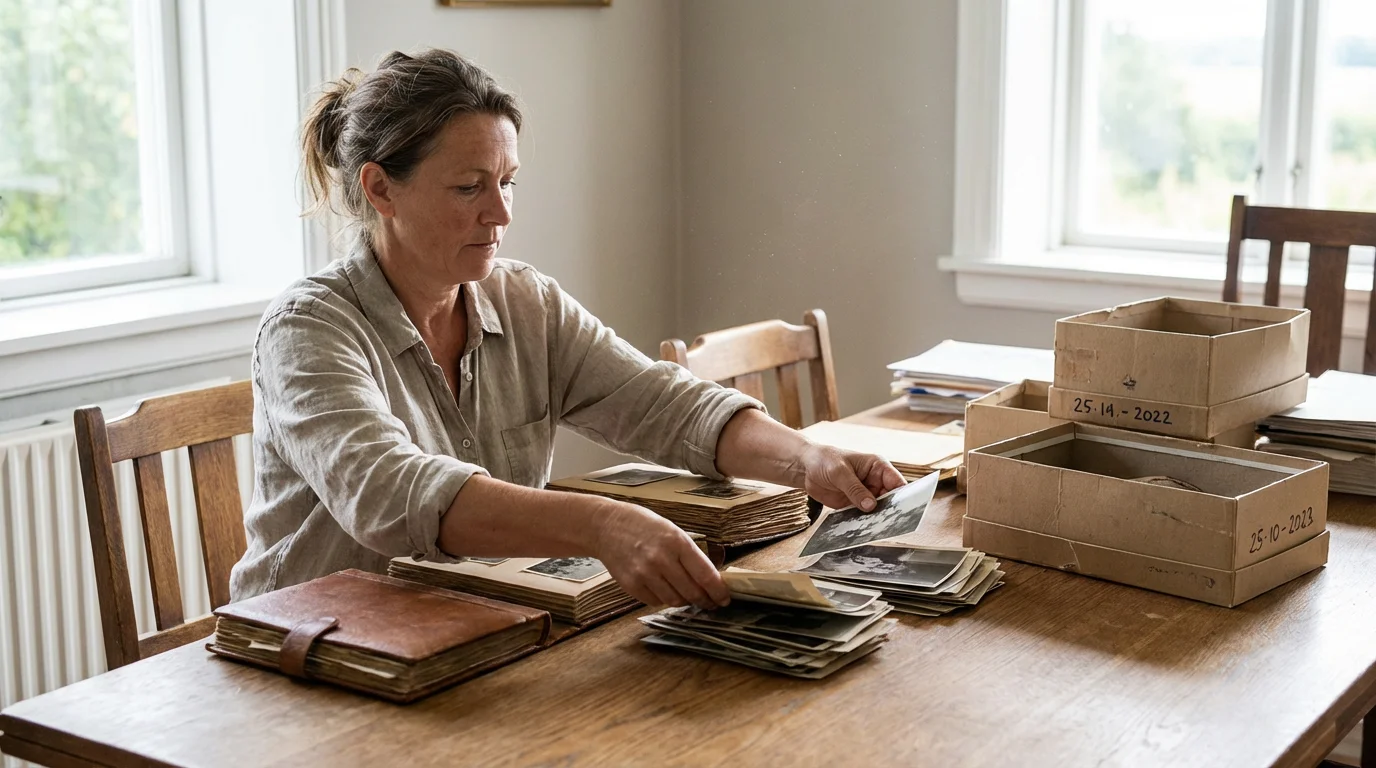
A family photo collection often begins as a chaotic mix of heavy magnetic albums from the 1970s, shoeboxes of loose 4×6 prints, and a bloated smartphone camera roll containing thousands of unsorted images. Without a deliberate strategy, these fragments of your personal history risk fading into digital or physical obscurity. You possess the power to transform this scattered media into a curated, searchable, and permanent digital family archive—a true heirloom that outlasts the devices used to create it.
Once organized, you can use these digital assets to build creative projects, such as creating a family photo timeline that visually maps out your family history.
Recognizing the importance of backing up physical photos digitally will keep you motivated as you tackle large boxes of vintage prints.
If you have recently inherited a photo collection, taking a few days to assess the materials can make the archiving process much more manageable.
Creating an archive involves more than just hitting “upload” on a cloud service; it requires a systematic approach to digitizing, labeling, and protecting your visual legacy. You are the bridge between the generations that came before you and those that will follow. By establishing a professional-grade archival system today, you ensure that your great-grandchildren can identify the faces in those old black-and-white portraits and understand the stories behind your own digital snapshots.

Defining the Digital Family Archive
A digital family archive is a centralized, organized, and protected repository of your family’s most significant visual and historical records. Unlike a simple camera roll, which acts as a chronological dump of every meal and sunset you capture, an archive is a curated selection. It prioritizes the “why” and “who” over the “when.” When you build an archive, you move from being a passive collector to an active curator of your family history.
Establishing a reliable system from the start is much easier when you follow established home photo archiving best practices to guide your workflow.
This project addresses the two-pronged threat to modern memories: physical decay and digital obsolescence. Physical prints suffer from acidic paper, humidity, and light exposure; meanwhile, digital files face bit rot, format shifts, and the fragility of cloud accounts. A successful archive utilizes digital technology to create high-fidelity copies of the past while using redundant storage methods to safeguard the present. You are building a system that treats a digital file with the same reverence as a 19th-century daguerreotype.
Auditing Physical and Digital Collections
Before you touch a scanner or purchase more cloud storage, you must understand the scope of your holdings. Start by gathering every physical photo, negative, slide, and album in your home. Check the attic, the basement, and the back of closets. While gathering these items, maintain their current order—often, the way an ancestor grouped photos provides vital clues about the people and events depicted.
Applying the KonMari method to your memories can help you decide which photos bring joy and which ones you can safely discard.
If you feel completely overwhelmed by volume, a plan to conquer photo chaos can break down the task of sorting thousands of loose assets into bite-sized steps.
Next, audit your digital landscape. You likely have photos scattered across several locations:
- Smartphone camera rolls (iPhone/Android)
- Social media accounts (Facebook, Instagram, Flickr)
- Old hard drives and “dead” laptops
- External SD cards from digital cameras
- Cloud services like Google Photos or Dropbox
The goal of this audit is to identify the “Master Collection.” You do not need to archive every blurry photo of a receipt or every accidental screenshot. Use a “triage” mindset. Focus on images that document milestones, relationships, and daily life. According to the Library of Congress, the key to successful preservation is focusing on items that are unique and provide the most significant historical value. If you have ten nearly identical shots of a birthday cake, select the one with the best lighting and the most people in the frame, then move on.
Selecting Formats and Technical Specifications
The technical choices you make at the start determine whether your archive remains accessible in fifty years. You must distinguish between “Archival Masters” and “Access Copies.” An archival master is a high-resolution, uncompressed file intended for long-term storage. An access copy is a smaller, compressed version used for emailing, social media, or digital frames.
Master File Formats
For your archival masters, use the TIFF (Tagged Image File Format). TIFFs are “lossless,” meaning they retain every ounce of data captured by your scanner or camera. While JPEGs are more common, they use “lossy” compression. Every time you edit and resave a JPEG, the quality degrades—a phenomenon known as digital generation loss. For your modern digital photography, keep your original RAW files or convert them to DNG (Digital Negative), which is a more open standard for long-term accessibility.
Scanning Resolution (DPI/PPI)
Resolution determines how much detail you capture. Do not settle for the default “web” settings on most scanners. Follow these guidelines for optimal results:
| Original Media | Recommended DPI/PPI | Reasoning |
|---|---|---|
| Standard Prints (4×6 or 5×7) | 300 – 600 DPI | 300 is standard; 600 allows for 2x enlargement. |
| Small Photos or Wallets | 600 – 1200 DPI | Higher resolution is needed to capture detail in small areas. |
| 35mm Slides and Negatives | 2400 – 4800 DPI | The source is tiny; you need high DPI to create a usable image. |
| Documents and Letters | 300 DPI | Sufficient for legibility and OCR (optical character recognition). |
Always scan in 24-bit color, even for black-and-white photos. Scanning a monochrome image in color mode allows you to capture the subtle sepia tones or the aging of the paper, which provides a more authentic archival record. You can always convert a copy to grayscale later for aesthetic reasons.

The Digitization Workflow for Paper and Film
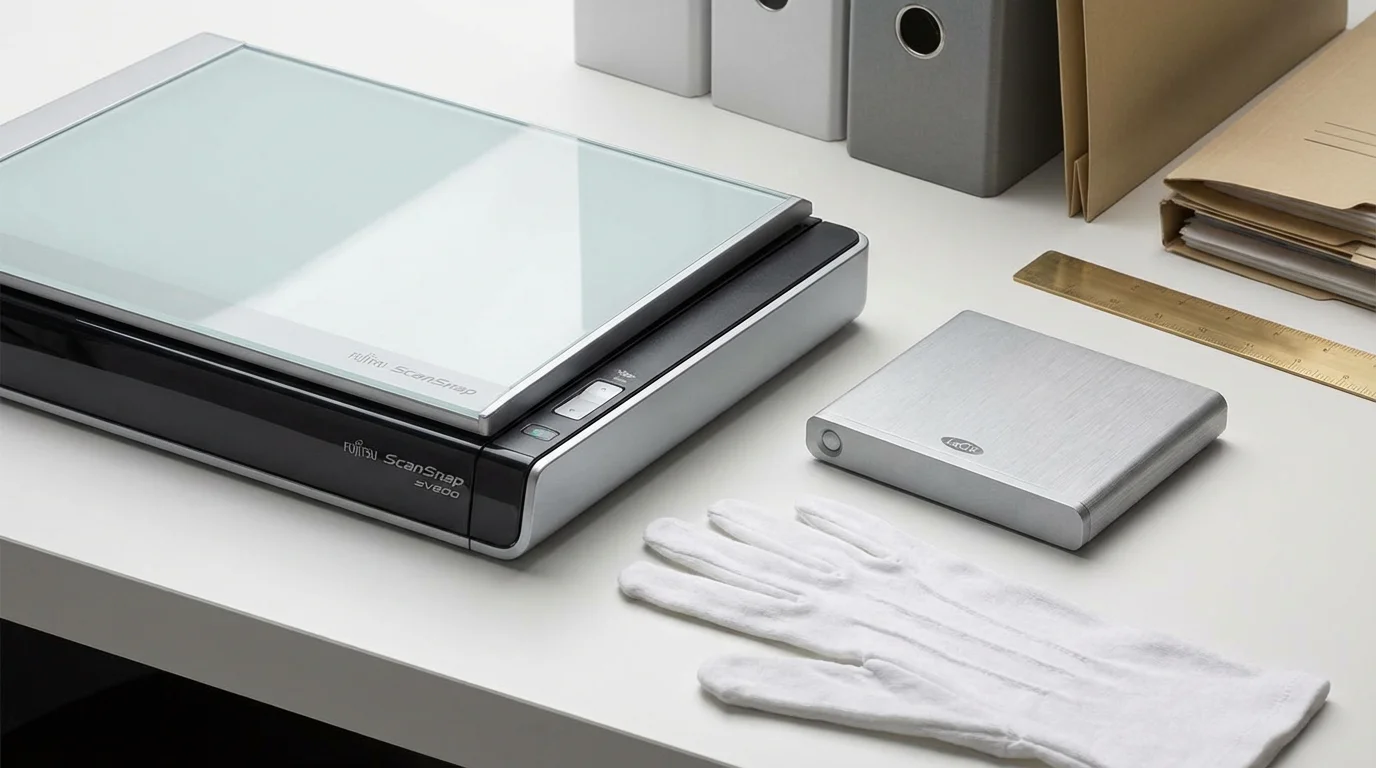
Efficiency in digitization comes from a repeatable workflow. You want to handle the physical originals as little as possible to prevent oil transfer from your skin. Wear clean, lint-free cotton gloves when handling negatives or delicate prints. Use a soft bulb blower to remove dust; avoid using canned air, which can spray liquid propellants onto your photos.
For most projects, pursuing DIY photo scanning at home is the most cost-effective and secure way to convert physical prints into digital files.
You have two primary options for digitization: a flatbed scanner or a digital camera setup. A flatbed scanner is the traditional choice and provides consistent results for flat prints. However, many archivists now prefer “camera scanning”—using a high-resolution mirrorless or DSLR camera mounted on a copy stand. This method is significantly faster for large collections and often produces higher dynamic range. For deep dives into the latest hardware, sites like Digital Photography Review offer comprehensive comparisons of sensors and macro lenses suitable for this task.
“The best time to digitize a photograph was ten years ago; the second best time is today. Physical decay is a patient enemy, and digital tools are our only defense against the inevitable fading of the physical record.”
When scanning, name your files immediately. Do not leave them as “IMG_001.tif.” Use a consistent naming convention that includes the date and a brief description, such as YYYY-MM-DD-Event-Person.tif. If you only know the year, use 1985-00-00-Summer-Vacation.tif. This ensures that even if your database fails, the file names themselves provide context and chronological order.
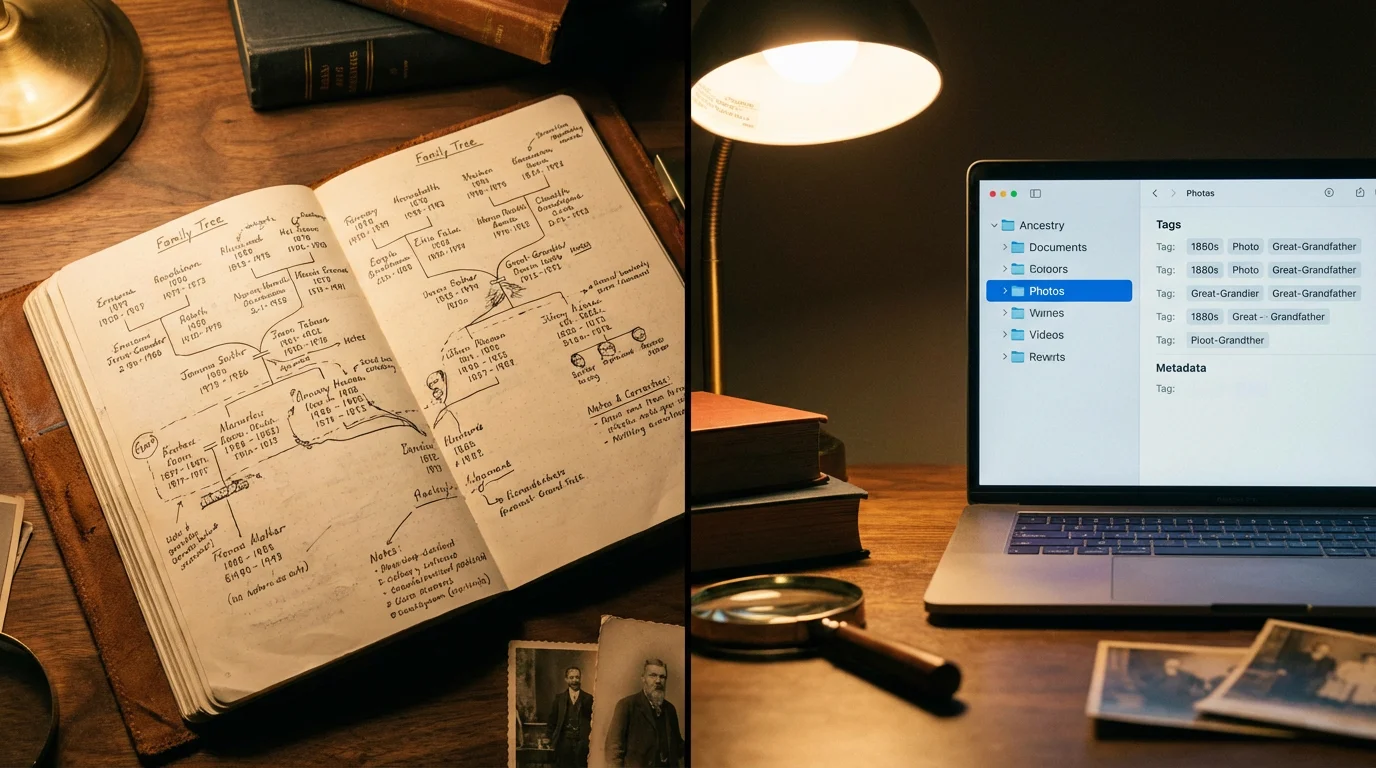
Metadata and the Art of Organization
A photo without context is just a picture of strangers. Metadata—data about your data—is the digital equivalent of writing on the back of a photo. Modern digital archiving relies on “embedded metadata.” This information lives inside the file itself, traveling with the image wherever it goes. The two main standards are EXIF (usually containing camera settings) and IPTC/XMP (containing descriptions, keywords, and copyright information).
An excellent way to prevent future accumulation is adopting a simple daily photo organization routine to manage your newly captured files in real time.
While getting organized is a great milestone, learning how to create a photo organization system that lasts ensures your collection stays structured for years to come.
You should prioritize three types of metadata:
- Descriptive: Who is in the photo? Where was it taken? What is happening?
- Temporal: What is the exact or approximate date?
- Administrative: Who owns the physical original? Who performed the scan?
Use software like Adobe Lightroom, Adobe Bridge, or open-source tools like DigiKam to batch-process your images. If you have 200 photos from your grandparents’ 50th wedding anniversary, you can select them all and apply the same “Event” and “Location” tags in seconds. This makes your archive searchable. Ten years from now, you should be able to type “Grandpa” and “Fishing” into a search bar and see every relevant image across your entire collection instantly.
Avoid complex, deeply nested folder structures. Digital librarians suggest a flat or shallow hierarchy. A folder for each year, with subfolders for specific events, is usually sufficient. Rely on your tags and metadata for more specific filtering. This approach prevents the “Where did I put that?” syndrome that plagues overly complicated filing systems.

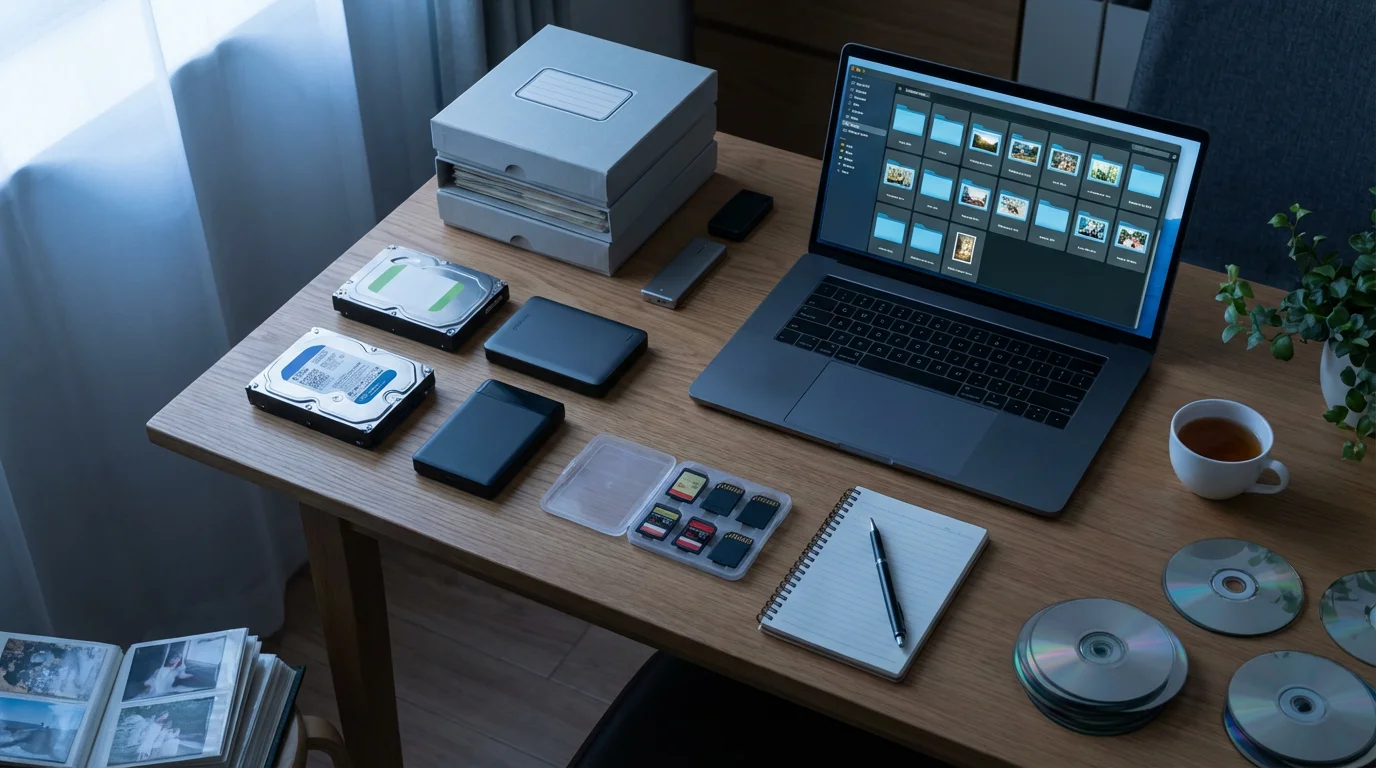
The 3-2-1 Backup Strategy for Total Security
Digital files are notoriously fragile. A single hardware failure or a spilled cup of coffee can erase decades of history. To protect your digital family archive, you must implement the 3-2-1 backup strategy. This is the industry standard for data preservation used by professional photographers and IT experts alike.
- 3: Create three copies of your data. The original “Master” and two backups.
- 2: Use two different media types. For example, keep one copy on an External Hard Drive (HDD or SSD) and another on a cloud-based server. This protects you against failures specific to one technology.
- 1: Keep one copy off-site. If a fire or flood strikes your home, your local backups will be destroyed along with your computer. An off-site copy—either in the cloud or a physical drive kept at a relative’s house—ensures the archive survives.
Monitor the health of your physical drives. Hard drives have an average lifespan of 3 to 5 years. Solid State Drives (SSDs) are more durable but can still fail without warning. According to the Image Permanence Institute, maintaining a stable environment is just as important for digital media as it is for physical prints. Keep your backup drives in a cool, dry place, away from magnetic fields and extreme temperature fluctuations.

Sharing and Future-Proofing Your History
The ultimate goal of a digital family archive is use. An archive that no one sees is a dead archive. Once you have secured your masters, create “access copies” (high-quality JPEGs) to share with your extended family. Consider creating a private family website, a shared Google Photos album, or a digital “heritage book” that combines photos with transcribed stories.
To ensure the archive lasts for the next hundred years, you must plan for digital inheritance. Who will manage the archive when you no longer can? Provide your heirs with the “Keys to the Kingdom.” This includes:
- Clear instructions on where the physical backup drives are located.
- A printed list of passwords or access to a password manager.
- A “Read Me” file in the main archive folder explaining the organization system.
- Funds set aside to cover cloud storage subscriptions for several years.
Periodically “migrate” your data. Every 5 to 10 years, assess the current technology. If the world moves away from TIFF files or USB-C ports, you must proactively move your archive to the next standard. Preservation is not a one-time event; it is an ongoing commitment to the story of your family. By following these steps, you transform a fragile collection of aging paper and fleeting digital bits into a robust, permanent legacy that will enlighten and inspire your descendants for generations to come.
Frequently Asked Questions
Is it better to use a professional scanning service or do it myself?
This depends on your volume of photos and your budget. Professional services have high-end equipment and can handle large quantities quickly, which is great for “clearing the backlog.” However, doing it yourself allows you to maintain control over the metadata and naming, and it ensures your precious originals never leave your sight. Many families choose a hybrid approach: DIY for the most important heirlooms and professional services for the bulk collections.
Can I just take a picture of my old photos with my smartphone?
While smartphone cameras have improved, they are generally not suitable for archival work. They introduce “keystoning” (distortion from the lens angle), glare from the glossy photo surface, and loss of detail due to internal processing. If you must use a phone, use a dedicated scanning app like PhotoScan by Google, which helps mitigate glare, but remember that these are for quick sharing, not long-term preservation.
How should I store the physical photos after they are digitized?
Digitization is not an excuse to throw away the originals. Once scanned, store your physical photos in acid-free, lignin-free boxes and sleeves. Avoid “magnetic” albums with sticky pages, as the adhesive will eventually destroy the image. Store the boxes in a “living” area of your home—where temperature and humidity are stable—rather than a garage or attic.
What should I do with old video tapes or film reels?
Video preservation is more complex because it requires functional playback hardware, which is increasingly rare. For VHS, Hi8, or 8mm film, professional conversion is usually the best route. Once you receive the digital files (usually as MP4 or MOV), incorporate them into your same 3-2-1 backup strategy and naming convention to keep your visual history unified.
Disclaimer: This article is for informational purposes only. When handling valuable or irreplaceable photographs, consider consulting a professional conservator. Always test preservation methods on non-valuable items first.


Leave a Reply