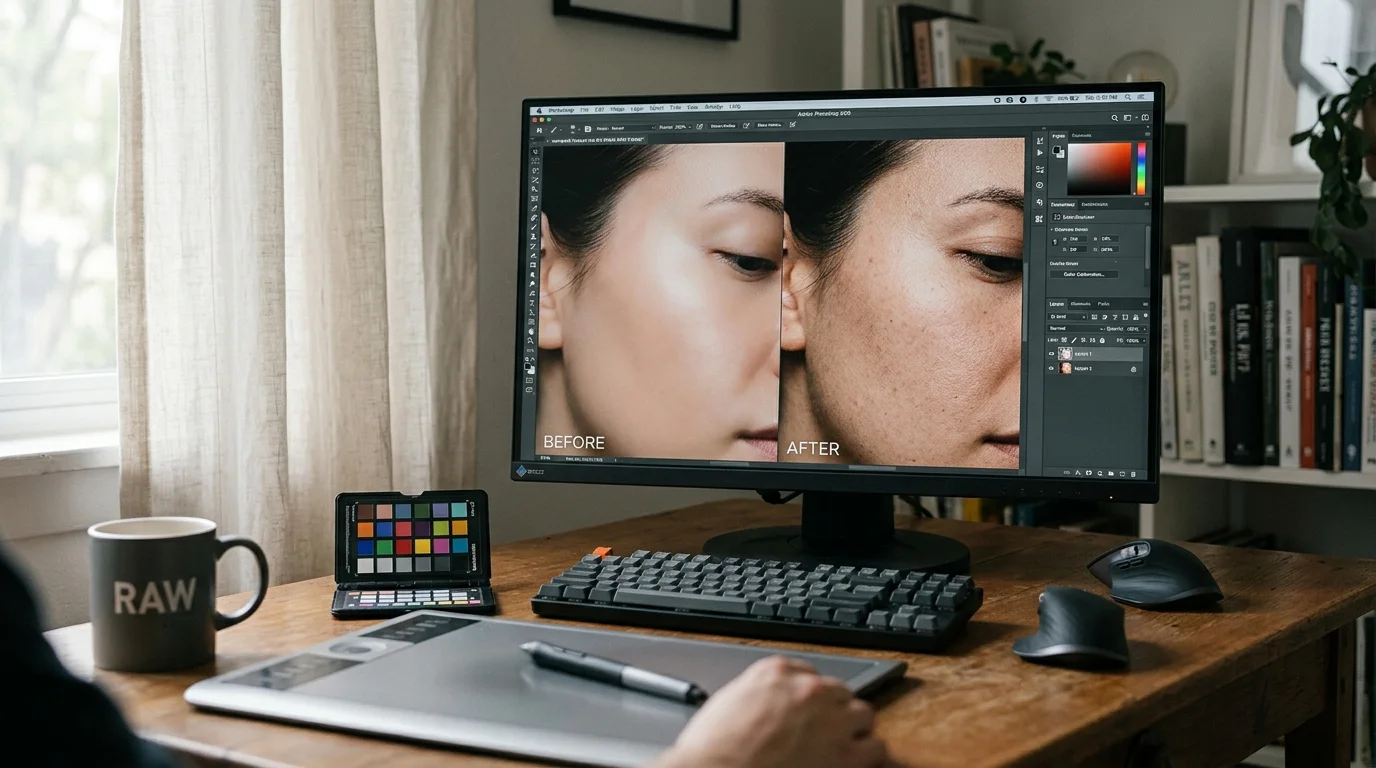
You can rescue that blurry, waxy school auditorium performance snapshot without starting over from scratch. When automated smartphone processing smears your child’s face into a flat watercolor painting, the underlying structural facial landmarks remain intact.
Unlike conventional guides that suggest lowering your denoising slider, our high-pass grain overlay method extracts edge micro-frequencies to fix over smoothed AI photo artifacts while maintaining clean shadows.
By splitting fine spatial frequencies from broad tonal gradients, you can restore skin texture AI noise reduction destroyed and remove plastic look from restored photo keepsakes in minutes.

The School Stage Dilemma: Why AI Denoising Creates Uncanny Plastic Skin
School auditorium productions push mobile camera sensors beyond their physical limits. Dim house lights force your phone to shoot at high ISO levels from dozens of rows away.
Tiny smartphone sensors generate heavy luminance noise when recording distant, dimly lit subjects. The sensor records random electrical fluctuations as mottled gray speckles across skin surfaces.
Modern mobile phones rely on aggressive neural denoising networks to scrub this digital static. These computational models analyze the image and automatically replace noisy pixels with averaged tonal patches.
Unfortunately, AI models cannot distinguish between high-frequency digital noise and organic skin pores. The algorithm treats your child’s delicate facial texture as unwanted signal interference.
The neural engine paints over fine features with sweeping synthetic patches. This process erases nasal contours, smooths philtrum ridges, and leaves the face looking like liquid wax.
Stage spotlights make this damage even more noticeable. Hard overhead lighting creates intense specular highlights that confuse AI edge-detection routines.
When the denoising filter encounters these bright highlights, it blends the boundary between cheek highlights and midtones. The facial structure collapses into an eerie, featureless mask.
You cannot correct this flaw with standard contrast adjustments. Cranking up contrast merely highlights the flat, rubbery planes that the AI created.
The Frequency Problem: High Luminance Noise Versus Facial Micro-Detail
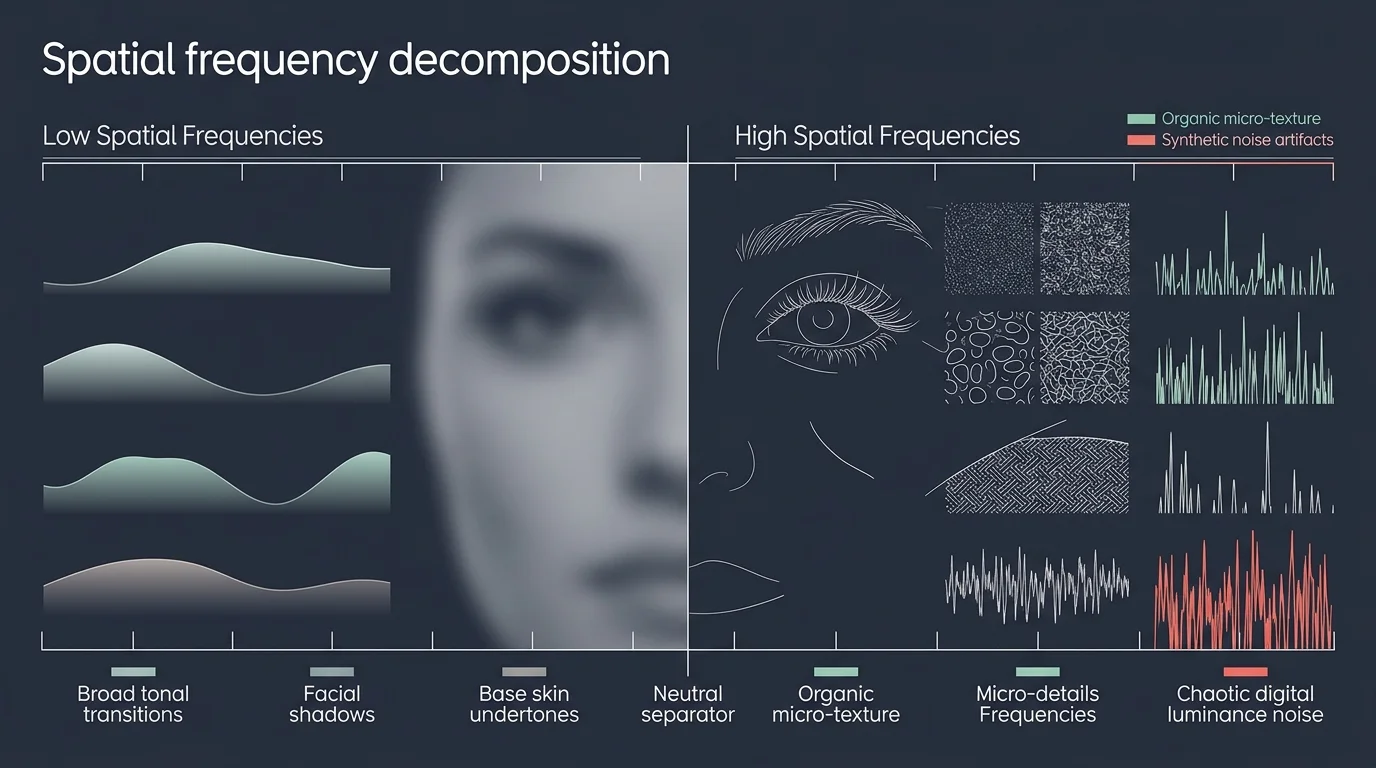
Digital photographs contain distinct layers of visual information known as spatial frequencies. Understanding how these layers interact is essential for repairing damaged portraits.
Low spatial frequencies carry broad tonal transitions, shadows, and overall color information. They define the roundness of cheeks, the shape of the jawline, and skin undertones.
High spatial frequencies contain microscopic details such as individual eyelashes, fabric weaves, and skin pores. Detailed visual explanations on spatial frequencies can be explored through Cambridge in Colour’s technical tutorials on digital image noise.
Automated neural denoising treats microscopic facial variations as unwanted luminance errors, scrubbing away identity along with digital grain.
When an AI denoiser attacks an image, it completely wipes out the high-frequency layer. It preserves the low-frequency color blocks but leaves no tactile surface detail behind.
Standard sharpening tools cannot fix over smoothed AI photo areas because they do not generate new information. Instead, tools like Unsharp Mask merely exaggerate existing boundaries.
When you apply standard sharpening to a waxy face, you darken the outlines of the smudges. This accentuates the artificial, blotchy look rather than restoring organic skin pores.
To restore realistic skin texture after AI noise reduction, you must construct a replacement high-frequency layer. You can blend this layer directly into the underlying color foundations.
This process separates the visual repair into two controlled operations. You maintain clean, noise-free shadow zones while rebuilding tactile skin texture where the human eye expects it.

Step-by-Step: The High-Pass Grain Overlay Restoration Technique
You can execute this method using standard layer-based photo editing software like Adobe Photoshop, Affinity Photo, or GIMP. The entire process takes less than ten minutes.
- Duplicate the Base Image: Open your AI-smoothed photograph and press Control-J (Command-J on macOS) twice to create two duplicate working layers.
- Name Your Working Layers: Rename the middle layer “Tone Base” and the top layer “High-Pass Detail” to keep your project organized.
- Isolate Fine Structural Edges: Select the “High-Pass Detail” layer and navigate to Filter > Other > High Pass.
- Dial the High-Pass Radius: Adjust the filter radius slider between 1.2 and 2.2 pixels until fine facial outlines emerge against a neutral gray field.
- Set the High-Pass Blend Mode: Change the layer blend mode to “Overlay” or “Soft Light” to merge the edge frequencies back onto the tone layer.
- Build a Synthetic Micro-Texture Layer: Create a new blank layer directly above the High-Pass layer and name it “Organic Grain.”
- Fill with Neutral Tone: Fill this new layer with 50% neutral gray using the Edit > Fill command.
- Generate Controlled Noise: Apply Filter > Noise > Add Noise with a value between 2.5% and 4.5%, checking both “Gaussian” and “Monochromatic.”
- Soften the Digital Noise: Apply a subtle Gaussian blur of 0.3 to 0.5 pixels to the noise layer to simulate photographic film grain rather than digital pixel hash.
- Blend and Mask: Set the “Organic Grain” layer blend mode to “Soft Light,” reduce opacity to 35%, and attach a black layer mask for selective painting.
Setting the High Pass radius correctly is the most critical decision in this sequence. If you choose a radius above 3.0 pixels, you introduce thick halos around dark edges.
A radius between 1.2 and 1.8 pixels isolates pure surface micro-texture. This range targets pore structures and delicate skin folds without disturbing underlying shadow values.
The monochromatic noise step supplies the randomized organic texture that modern neural filters eliminate. It breaks up the plastic sheen that coats the cheeks and forehead.
Blended at low opacity, this synthetic grain tricks the human visual cortex into recognizing natural skin texture. It removes the plastic look from restored photo prints completely.
Worked Example: Rescuing an ISO 3200 Auditorium Portrait
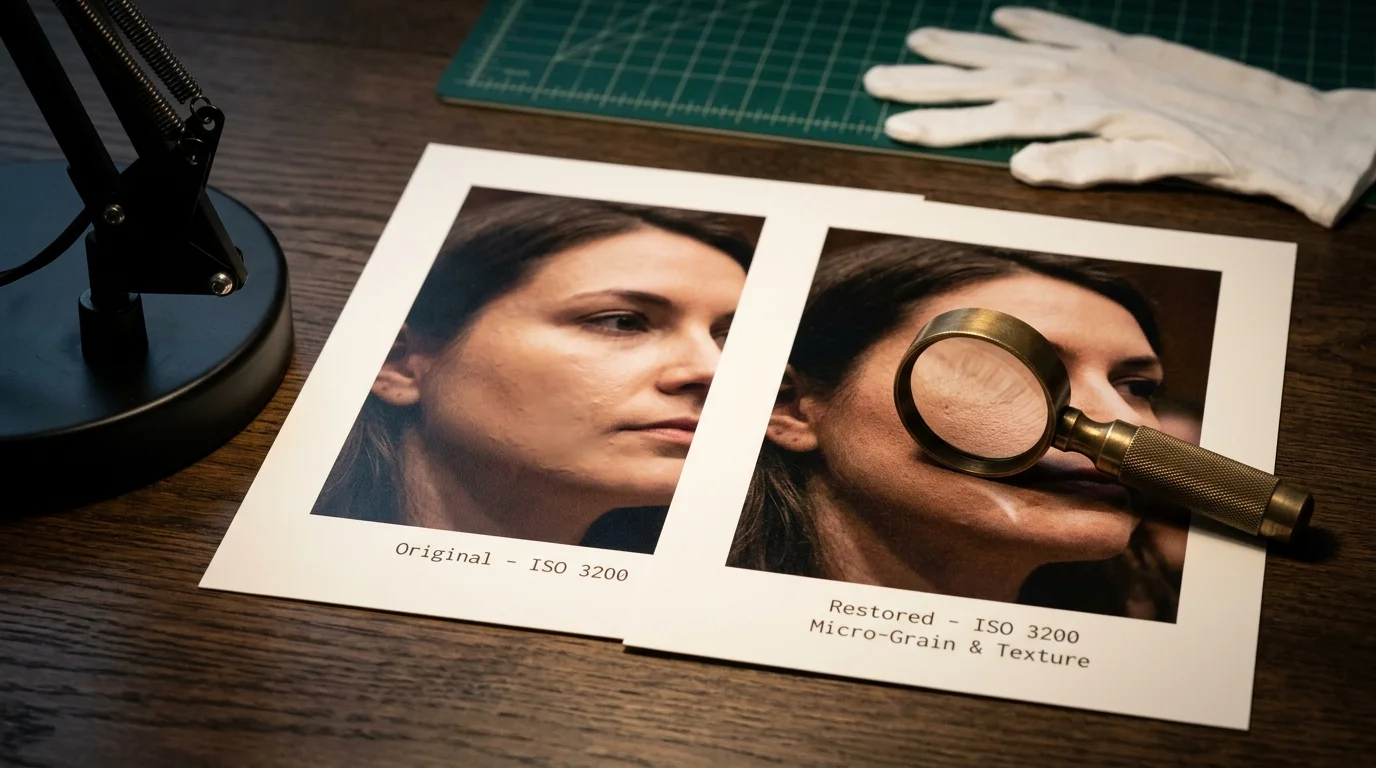
Consider an authentic parent scenario: an elementary school performance captured from row fourteen. The camera was an Apple iPhone 13 Pro telephoto lens at 77mm equivalent focal length.
The camera selected f/2.8, a 1/60-second shutter speed, and an extreme sensitivity of ISO 3200. The original 12-megapixel raw file measured 4032 by 3024 pixels.
The device’s automatic night mode processing detected intense luminance speckling. It smeared the child’s cheekbones into a featureless 420-pixel patch of flat, peach-colored plastic.
The stage spotlight also blew out specular highlights on the child’s forehead. The automated algorithm turned the eyebrows into disconnected smudges floating over rubbery skin.
We loaded the 12-megapixel file into our editing workspace and created our working duplicates. We set the High Pass filter radius to exactly 1.6 pixels.
This 1.6-pixel value matched the physical pixel density of the child’s face within the composition. The High Pass preview displayed the subtle outline of the nose and lower eyelid margins.
Next, we set the High-Pass layer blend mode to “Soft Light” and adjusted layer opacity to 65%. This restored structural clarity to the eyelid margins without adding harsh edge lines.
We then generated the 50% neutral gray layer, adding 3.2% Gaussian monochromatic noise. We softened that layer using a 0.4-pixel Gaussian blur.
We set the grain layer blend mode to “Overlay” and set the master opacity to 42%. We attached an inverted black layer mask to conceal the effect across the background.
Using a soft white brush set to 25% flow and 0% hardness, we painted over the waxy cheeks, nose bridge, and forehead. The restoration took seven minutes from start to finish.
The child’s face regained natural surface breakup without reviving the distracting chroma noise of the original ISO 3200 exposure. The print appeared crisp, organic, and lifelike.
Comparing Detail Reconstruction Workflows for AI-Damaged Faces
Photographers employ several methods to combat the artificial appearance left by aggressive denoising tools. Each workflow produces distinct results regarding texture realism and processing overhead.
Understanding these trade-offs helps you select the right intervention based on how much time you have and your final display format.
| Reconstruction Method | Processing Time | Pore Texture Realism | Edge Ringing Risk | Minimum Source Resolution |
|---|---|---|---|---|
| Global Unsharp Mask / Clarity Slider | 1 Minute | Very Low (Accentuates waxy planes) | High (Severe haloing at 2+ pixels) | Any Resolution |
| High-Pass Grain Overlay Method | 6 to 8 Minutes | High (Recreates micro-pore structure) | Very Low (When kept under 2.0px radius) | 6 Megapixels |
| Secondary Neural Face Enhancement | 3 Minutes | Moderate (Can generate alien features) | Moderate (Artifacts along hair boundaries) | 8 Megapixels |
| Manual Texture Cloning from Donor Photo | 25 to 40 Minutes | Very High (True biological texture) | None (Manually painted) | 12 Megapixels |
Global sharpening sliders fail because they lack selectivity. They treat flat, waxy surfaces and high-contrast edges with the same heavy-handed math.
Pushing clarity sliders accentuates the borders of the AI smudges. This makes the artificial smoothing look more pronounced rather than less visible.
Secondary neural face restorers introduce a different hazard: hallucinated anatomy. These tools frequently substitute your child’s actual smile with generic teeth and fabricated eyelids.
The High-Pass Grain Overlay method occupies the sweet spot for family archivists. It restores physical plausibility while preserving your child’s authentic anatomical geometry.
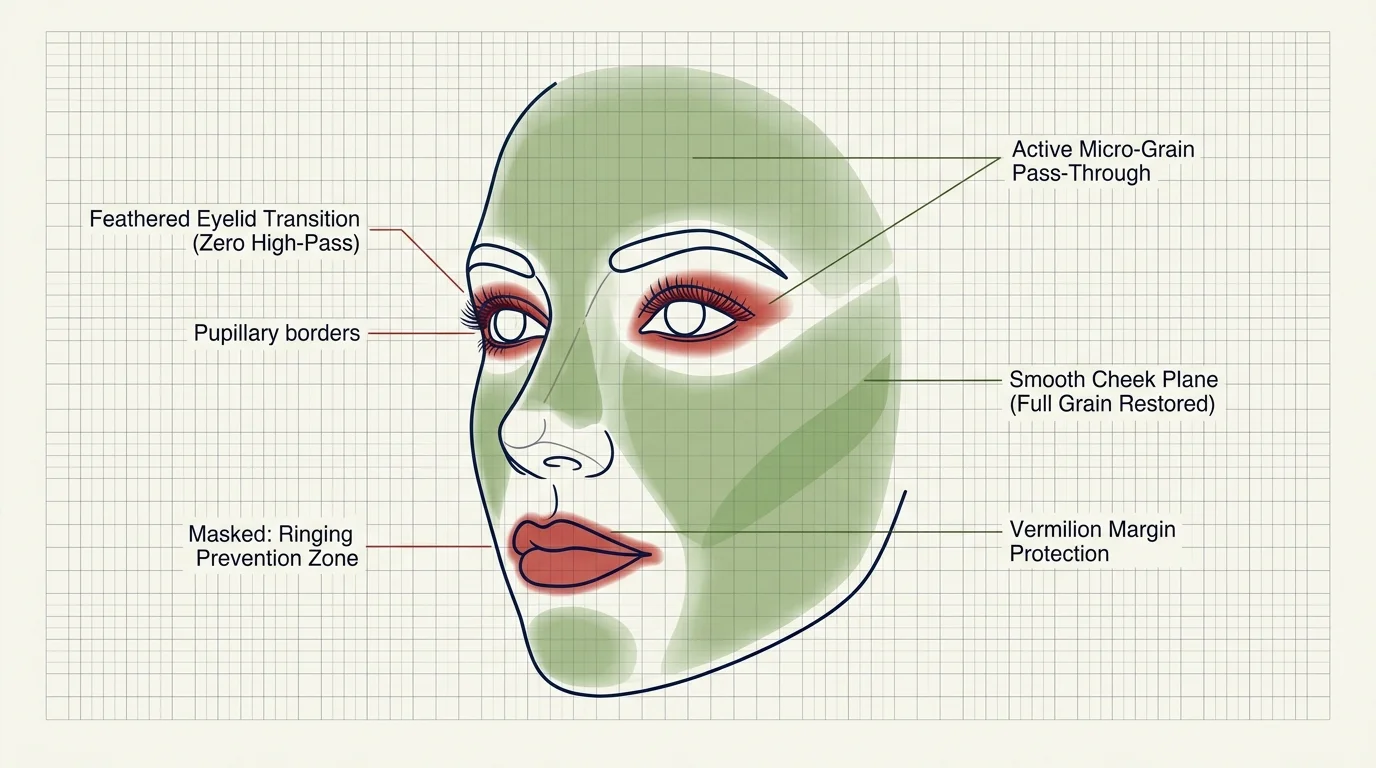
Targeted Masking: Preventing Edge Ringing Around Eyes and Lips
Global sharpening ruins portraits because different facial structures require different texture treatments. Skin needs micro-grain, while eyes and lips require sharp, clean contours.
If you apply high-pass grain across the entire face, you degrade the delicate appearance of the eyes. Catchlights turn gritty, and the smooth surface of the cornea loses its clarity.
Teeth also suffer when subjected to blanket grain overlays. Adding monochromatic noise to tooth enamel makes smiles appear dirty or chalky in physical prints.
Always conceal your High-Pass and Grain layers behind a black mask. You can create this mask by holding Alt (Option on macOS) while clicking the Add Layer Mask icon.
Select a soft-edged brush with hardness set to 0%. Reduce the brush flow to approximately 20% to build your adjustments gradually across multiple passes.
Paint over the broadest expanses of the cheeks, forehead, chin, and neck. These areas suffer the most from AI smoothing and benefit most from synthetic micro-texture.
Keep your brush at least five pixels away from the dark edges of the eyelashes and lip margins. This gap prevents edge ringing, which creates glowing outlines around dark contours.
For the bridge and tip of the nose, lower your brush opacity to 15%. Over-texturing the nose can create an unflattering, leathery appearance under direct lighting.
Toggle your layer visibility on and off frequently at 100% zoom. Comparing your adjustment against the smoothed base ensures you maintain a natural, balanced result.

Archival Considerations for Digitally Corrected Family Prints
Fixing an over-smoothed digital file on your computer screen is only half the battle. Preparing that file for long-term physical storage requires extra care.
Monitors display images using backlit RGB pixels, which exaggerates fine noise patterns. Pigment inks absorb into paper fibers, naturally softening fine synthetic grain during the printing process.
Because physical printing softens detail, grain settings that look slightly strong on screen often print beautifully. A 3% noise overlay can disappear entirely on matte fine art paper.
If you plan to print your image on smooth cotton rag, increase your grain opacity by 5% to 8%. The paper fibers absorb the ink droplets and reduce visual sharpness.
For high-gloss or luster finishes, keep your grain opacity lower. Glossy surfaces preserve every droplet of ink, which makes synthetic grain more prominent under direct light.
Preserving your restored family photographs requires using stable media and proper storage environments. Consult the Image Permanence Institute preservation research for technical guidelines on print longevity.
A physical photographic print requires fine edge contrast to counteract the natural ink dot gain of fine-art archival papers.
Always save your restored file as an uncompressed 16-bit TIFF alongside the original camera image. Never overwrite your original capture with the modified version.
Future restoration technologies will continue to improve. Preserving your untouched source file ensures you can reprocess irreplaceable childhood memories as better tools emerge.
Organize your digital masters using clean, date-based folder hierarchies. Back up your files using local physical drives as well as secure off-site cloud storage.
Frequently Asked Questions
Why does AI noise reduction make faces look like plastic?
AI denoising algorithms use neural networks trained to eliminate high-frequency luminance noise. Because skin pores share the same spatial frequencies as digital noise, the algorithm scrubs away both, leaving flat, unnatural surfaces.
Can I use this method in free software like GIMP?
Yes, you can execute this exact workflow in GIMP. Use the High Pass filter under Filters > Enhance, fill a layer with 50% gray, add RGB noise, and blend both layers using Soft Light mode.
What High-Pass radius should I use for a smartphone portrait?
For standard 12-megapixel smartphone images, use a High-Pass radius between 1.2 and 2.0 pixels. Larger values create wide, artificial halos around the eyes and mouth that ruin the portrait.
Will adding synthetic grain make my final print look noisy?
No, controlled monochromatic grain blends into the paper texture during printing. It breaks up unnatural digital smearing and produces a rich, film-like appearance on archival photo paper.
Disclaimer: This article is for informational purposes only. When handling valuable or irreplaceable photographs, consider consulting a professional conservator. Always test preservation methods on non-valuable items first.