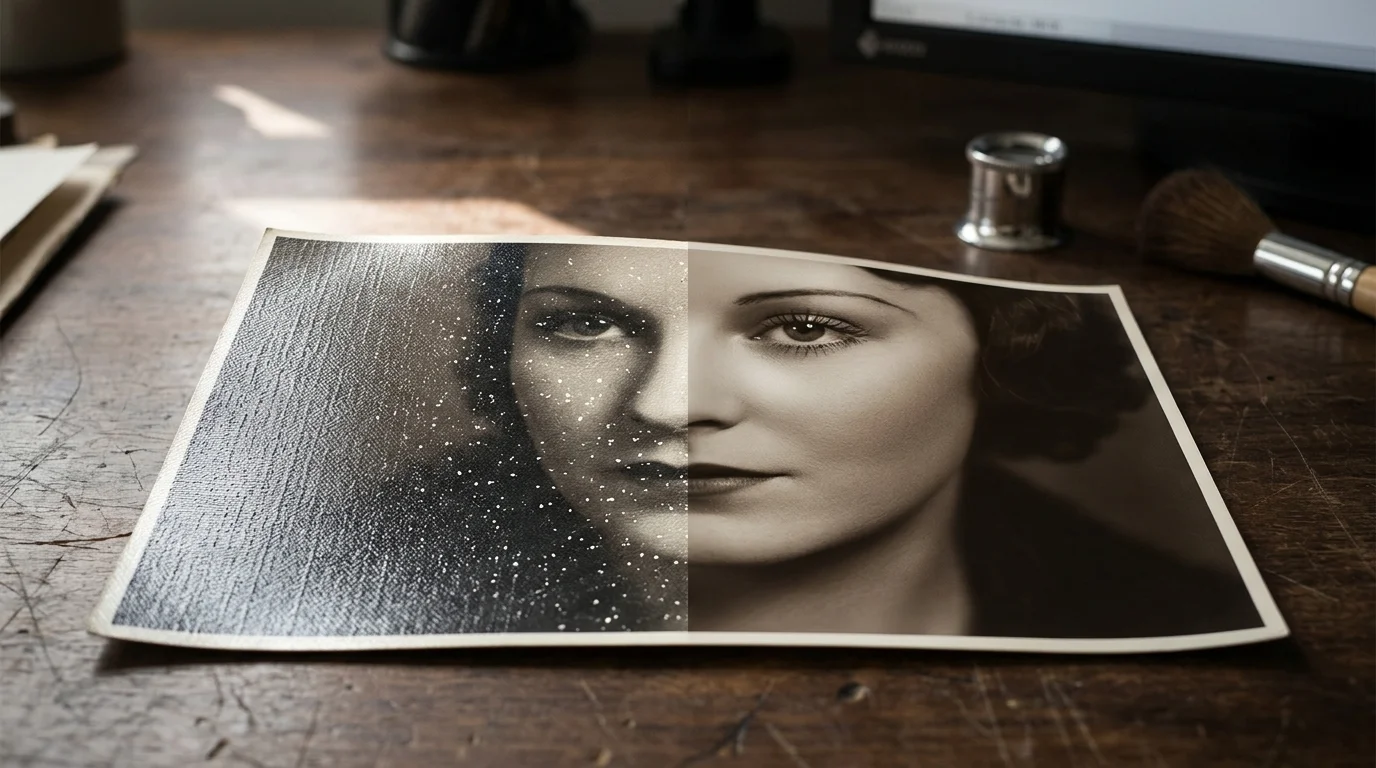
You can remove linen texture scanned photo artifacts from your 1930s family portraits without sacrificing sharp eyelashes or iris details. Standard blurs destroy fine edges, but Fast Fourier Transform (FFT) processing targets only repeating geometric reflections.
Traditional photo editing attempts fail because they treat scratches and paper textures identically. In contrast, an FFT filter isolates the periodic grid of embossed silk into discrete mathematical coordinates you can erase in seconds.
This guide walks you through cleaning surface scanner reflections from vintage textured prints while keeping your ancestor’s delicate facial features completely intact.
The Anatomy of 1930s Linen Paper and Scanner Glare
Portrait studios in the 1930s frequently printed on heavy, embossed linen and silk-finish photographic papers. These embossed patterns gave family portraits a luxurious, tactile surface that resisted fingerprint oils.
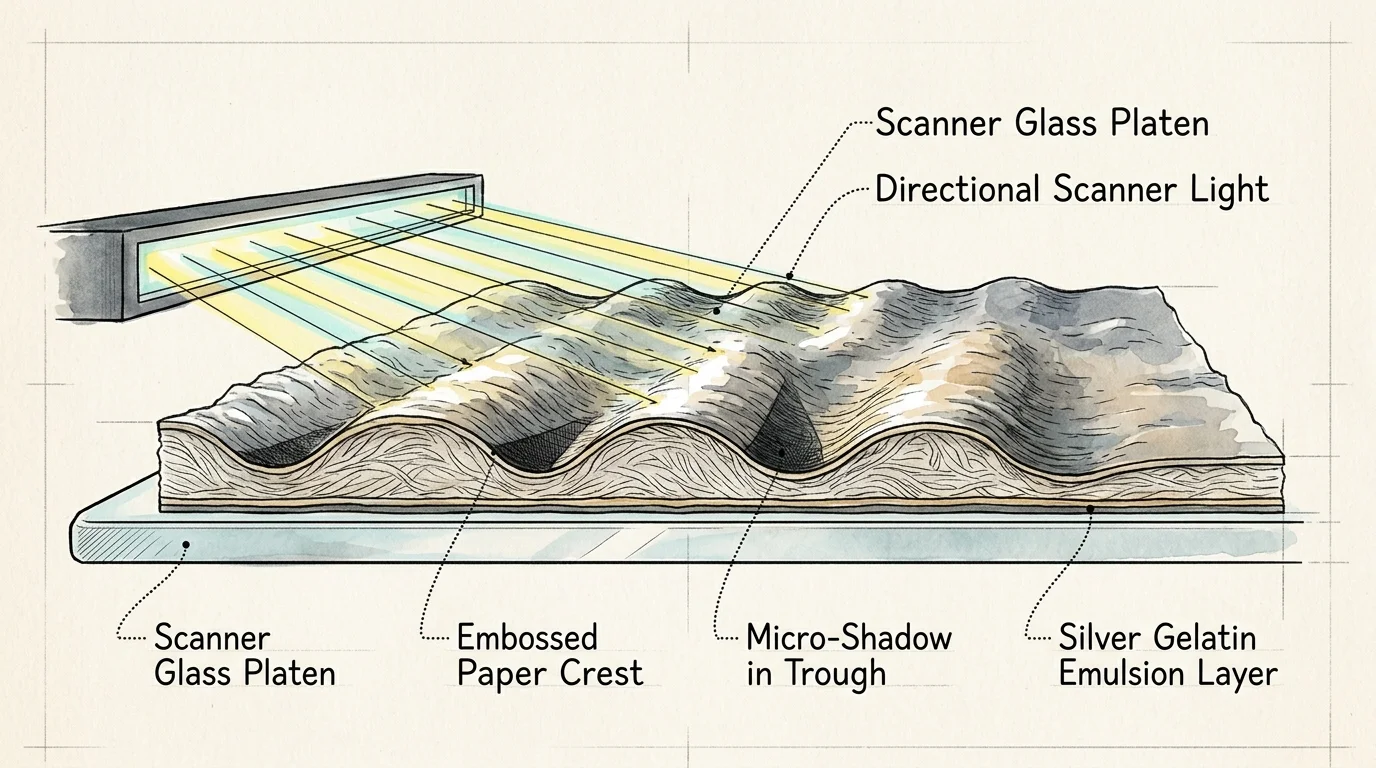
Problems arise when you place these textured silver gelatin prints onto a modern flatbed scanner glass. The scanner’s internal cold cathode lamp or LED bar projects directional light across each paper ridge.
This directional illumination creates thousands of microscopic specular highlights on the crest of every embossed fiber. Simultaneously, deep micro-shadows pool inside the troughs of the paper weave.
Your resulting digital scan displays an aggressive grid of white sparkles across dark clothing and delicate skin. These harsh reflections obscure your ancestor’s facial expressions and overwhelm subtle shadow transitions.
Because physical abrasion or chemical solvents would permanently ruin the original silver emulsion, you must solve this problem digitally. Safe handling practices outlined by the Library of Congress Preservation Directorate emphasize non-destructive approaches to historic media.
By capturing the physical document without chemical interference, you protect the heirloom original. You can then address the scanner reflection artifacts purely inside your digital darkroom workspace.

Spatial Blur vs. Frequency Domain: How FFT Preserves Eyelashes
Most editors instinctively reach for spatial filters like Gaussian blur, median smoothing, or surface blur. These spatial tools evaluate neighboring pixels to calculate a blended color average across contrast boundaries.
Spatial smoothing cannot tell the difference between a linen weave highlight and an individual eyelash hair. When you blur away the linen texture, you blur away facial sharpness, pupil catchlights, and fabric weaves.
Fast Fourier Transform algorithms process image information in the frequency domain rather than the standard spatial pixel domain. Spatial domain represents where brightness sits; frequency domain represents how rapidly brightness changes repeat across distance.
Understanding these spatial patterns aligns with mathematical concepts explained in Cambridge in Colour tutorials on image processing. Fast Fourier transforms separate organic photographic elements from mechanical repetitions cleanly.
Unique, non-repeating facial features—such as eyelids, lip textures, and stray hairs—scatter randomly across the frequency spectrum. They form a soft, cloud-like gradient radiating outward from the spectrum center.
Repeating structures behave entirely differently under Fourier analysis. Because the embossed paper grid repeats at rigid intervals across your print, it produces hyper-concentrated spikes of high energy.
An FFT filter converts continuous spatial grids into bright, symmetrical star coordinates. By blacking out those isolated mathematical coordinates, you eliminate the repeating texture without touching organic features.
When you transform the modified frequency spectrum back into spatial pixels, the physical linen weave vanishes. The underlying portrait details emerge crisp and untouched beneath the removed glare pattern.

FFT Restoration Tool Comparison: Photoshop, Affinity, and G’MIC
Several digital editing platforms support Fast Fourier Transform operations, though their workflows vary significantly. You must choose an environment that supports high-bit-depth files without crushing delicate shadow information.
Adobe Photoshop requires third-party plugins to process frequency transformations. The Robin Kelly 64-bit FFT filter and the Ivan Cherevko plugin remain the two most reliable freeware solutions for modern Windows and macOS systems.
Serif Affinity Photo includes a native live filter called FFT Denoise. This tool integrates frequency suppression directly into a non-destructive layer stack, eliminating manual channel separation steps.
The open-source community provides robust FFT capabilities through GIMP paired with the versatile G’MIC filter library. The G’MIC Fourier Transform filter decomposes scans into separate magnitude and phase layers for manual editing.
| Software Platform | Workflow Structure | Supported Bit Depth | Frequency Map Precision | Setup Complexity |
|---|---|---|---|---|
| Adobe Photoshop CC (with Robin Kelly Plugin) | Destructive layer filter; requires manual forward and inverse steps | 16-bit and 8-bit channels | High; displays full magnitude spectrum in grayscale workspace | Moderate; requires manual plugin file installation |
| Affinity Photo 2 (Native FFT Denoise) | Non-destructive live filter with brush-based masking preview | 32-bit float, 16-bit, and 8-bit | Very High; real-time dual-mirrored frequency canvas | Minimal; native tool accessible directly from filter menus |
| GIMP 2.10 (via G’MIC Fourier Filter) | Split magnitude and phase layers; manual inverse compilation | 32-bit float, 16-bit integer | High; provides separate phase control layers | Moderate; requires installing external G’MIC package |
| ImageJ / Fiji (Academic Module) | Direct mathematical editing on raw array matrices | 32-bit floating point | Extreme; offers analytical frequency thresholding | Advanced; scientific interface designed for researchers |
For most restoration projects, Photoshop with a dedicated plugin or Affinity Photo offers the best balance of speed and control. Both platforms preserve fine photographic textures while filtering out mechanical noise.
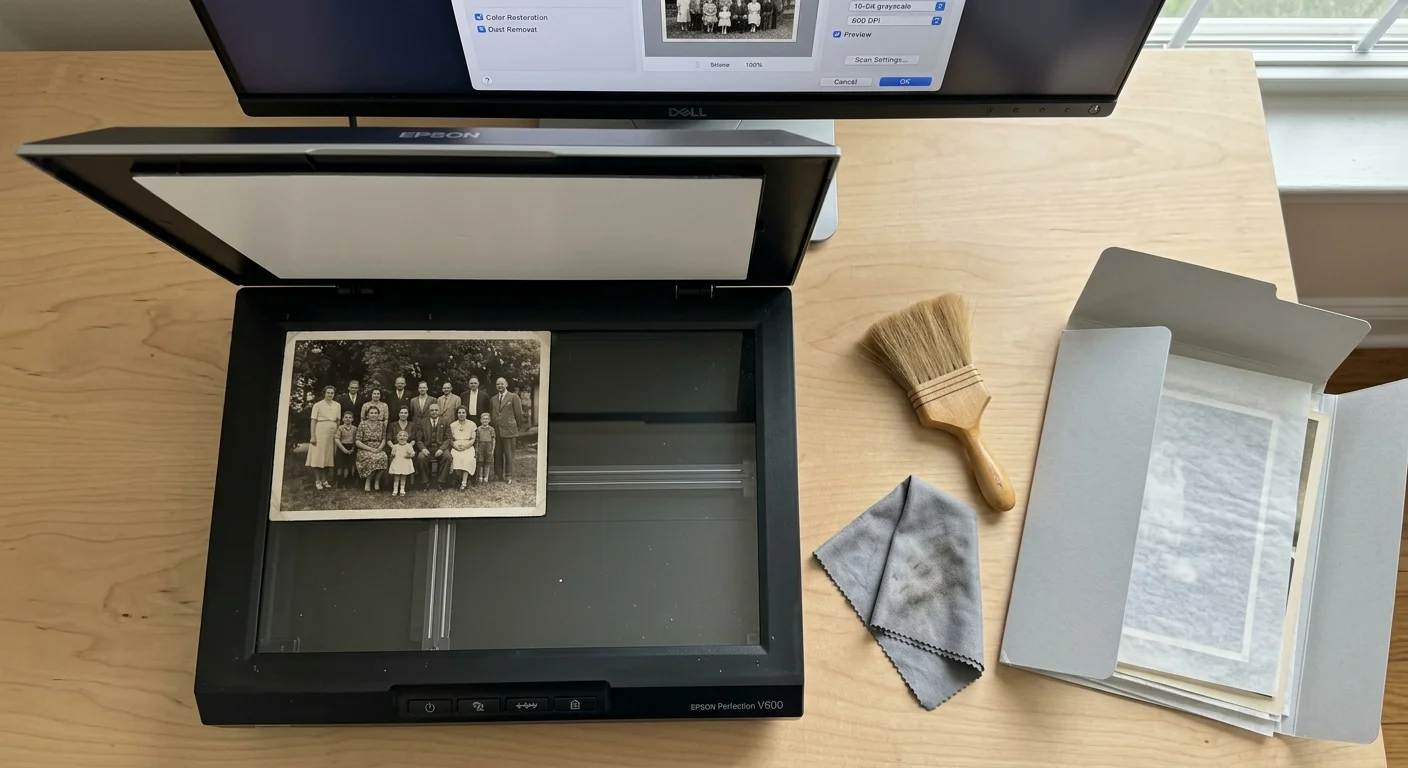
Preparing Your High-Resolution Scan for Frequency Separation
Your digital scan determines the mathematical clarity of your Fourier spectrum. A low-resolution scan blends adjacent embossed dots together, destroying the sharp mathematical frequencies required for clean filtering.
Clean your scanner platen with an optical microfiber cloth before mounting your 1930s print. Never apply liquid cleaner directly to the glass surface, as moisture can wick into the platen housing.
Align the physical photograph perfectly square against the scanner guide rails. An angled scan rotates the resulting frequency spikes, making them harder to isolate along standard horizontal and vertical axes.
- Set optical capture resolution between 600 DPI and 1200 DPI to resolve the physical fiber ridges cleanly.
- Capture in 16-bit grayscale for black-and-white prints, or 48-bit RGB for sepia-toned portraits.
- Turn off all automatic scanner software sharpening, digital ICE, and automated contrast enhancement features.
- Save the master scan in uncompressed TIFF format to avoid lossy 8-bit JPEG compression artifacts.
Lossy JPEG compression breaks images into 8×8-pixel discrete cosine transform blocks. These compression blocks create their own artificial frequencies that clutter your frequency spectrum with false data points.
Once scanned, duplicate your background layer inside your editing software. Never apply transformation filters directly to your original archival scan layer.

Worked Example: Eliminating Reflection Grids from a 1934 Portrait
Consider a practical scenario: restoring a 5×7-inch double-weight studio portrait of a woman photographed in 1934. The portrait features a deep black velvet dress, soft skin tones, and delicate lace collar trim.
The original paper features an embossed silk grid measuring 42 ridges per linear inch. Scanning this print at 1200 DPI produces an 84-megapixel master image measuring 6000 by 8400 pixels.
Under directional flatbed lighting, those 42 ridges per inch produce roughly 61,000 specular white reflection dots across the face and velvet fabric. These dots completely obscure the iris contours and fabric details.
Opening the 144-megabyte 16-bit TIFF in Photoshop CC, you run the Robin Kelly 64-bit Fast Fourier Transform filter. Within 14 seconds, the software converts the image into a grayscale frequency spectrum.
The center of the spectrum displays a solid white orb representing overall image brightness. Surrounding this center, eight bright, pin-sharp star points sit arranged in a symmetrical diamond array.
You select a round paint brush set to 18 pixels in diameter with a hardness of 100 percent. Using pure black, you click once directly over each of the eight surrounding star points.
You run the inverse Fourier transform filter, which calculates the spatial reconstruction in 12 seconds. The velvet dress turns smooth black, the lace edges remain razor-sharp, and the 61,000 white dots completely disappear.

Pinpointing and Masking Repeating Pattern Stars in the Spectrum
Interpreting a Fourier transform spectrum requires understanding its geometric layout. The absolute center coordinate of the frequency map—known as the DC component—governs global contrast and exposure.
Never paint over or darken the center DC component. Painting over this central white point destroys the global tonal data, turning your restored photograph into a flat, gray silhouette.
The distance of any point from the spectrum center corresponds directly to frequency speed. Points near the center represent broad tonal transitions, while points near the outer boundaries represent fine edges.
Repeating paper textures appear as crisp, isolated star points or symmetrical constellations around the central core. A standard square weave generates four primary star points, while textured linen generates primary and secondary harmonics.
Frequency space operates symmetrically: every frequency spike at positive coordinate (+X, +Y) has a corresponding conjugate pair at (-X, -Y). You must mask both opposing points to eliminate the spatial pattern.
Use a hard-edged brush when masking out pattern stars. A soft-edged brush covers too much surrounding territory, accidentally erasing random, organic high-frequency details from the image.
Keep your brush diameter as compact as possible while still covering the bright star point. Masking an area just three to four pixels wider than the star core ensures clean texture elimination.
If you encounter faint concentric rings around the primary stars, those represent harmonic overtones. Paint out these secondary harmonics sequentially to eradicate faint residual patterns from high-contrast shadow areas.

Post-FFT Polish and Archival Handling for Historic Prints
Running the inverse FFT filter leaves your photograph free of periodic scanner glare, but secondary imperfections often remain. Physical dust, emulsion cracks, and chemical stains are non-periodic flaws that ignore Fourier filtering.
Address these remaining non-repeating defects using the Clone Stamp tool set to Current and Below on a separate layer. With the distracting grid removed, spotting stray dust motes takes a fraction of the time.
Next, inspect your tonal curve. Specular reflections artificially elevate black levels across dark garments; eliminating the grid often reveals slightly hazy shadows that need calibration.
Add a Curves adjustment layer above your restored base. Set your black point threshold to anchor the deepest velvet shadows, recovering the dynamic range the photographer originally intended in the 1930s.
Once you complete your digital restoration, turn your attention to protecting the physical heirloom print. Never store textured historic prints in standard acidic cardboard boxes or adhesive magnetic albums.
Slide the original print into an inert, unplasticized polyester (Mylar) or polyethylene sleeve that has passed the Photographic Activity Test (PAT). Store the sleeved print flat inside an acid-free, lignin-free archival box kept in a climate-controlled room.
Frequently Asked Questions
Why does my photo turn completely gray after applying the inverse FFT filter?
This happens when you accidentally paint black paint over the central white point of the frequency spectrum. That bright center point controls the entire image’s baseline brightness, so leave it untouched.
Can FFT filtering remove random scratches and physical paper tears?
No, FFT filters only eliminate repeating, periodic geometric patterns like paper grids, halftone print dots, or linen weaves. Non-repeating damage like scratches, tears, and chemical spots requires manual clone stamping.
Should I convert my scan to black and white before running an FFT filter?
Yes, converting your scan layer to 16-bit grayscale simplifies the frequency calculation and prevents chromatic phase misalignments. You can restore original sepia toning later using an overlay Curves layer.
Will an FFT filter soften the hair or iris details in my family portrait?
No, because organic shapes do not repeat at rigid mathematical intervals across the print surface. Facial details scatter across the frequency map, remaining completely untouched when you mask isolated pattern stars.
Disclaimer: This article is for informational purposes only. When handling valuable or irreplaceable photographs, consider consulting a professional conservator. Always test preservation methods on non-valuable items first.