You can rescue your family reunion portrait when elderly relatives blink by transplanting open eyes from unposed candid snapshots without introducing a zombie-like gaze. This surgery succeeds only when you reconstruct the anatomical eyelid cast shadow and match directional ocular luminance.
Most tutorials instruct you to feather an elliptical selection over closed lids, creating a flat, radioactive uncanny valley glow. True photographic realism requires three-dimensional ocular orbit warping, specular catchlight replacement, and micro-shadow carving beneath the brow ridge.
By calibrating RGB values and grain structure across mismatched camera settings, you will preserve your family milestone permanently.
Anatomy of the Uncanny Valley in Composited Eyes
The human brain dedicates substantial neurological circuitry to facial recognition, specifically monitoring the eyes for social cues and micro-expressions. When an eye looks synthetic, your visual cortex immediately flags an evolutionary danger signal.
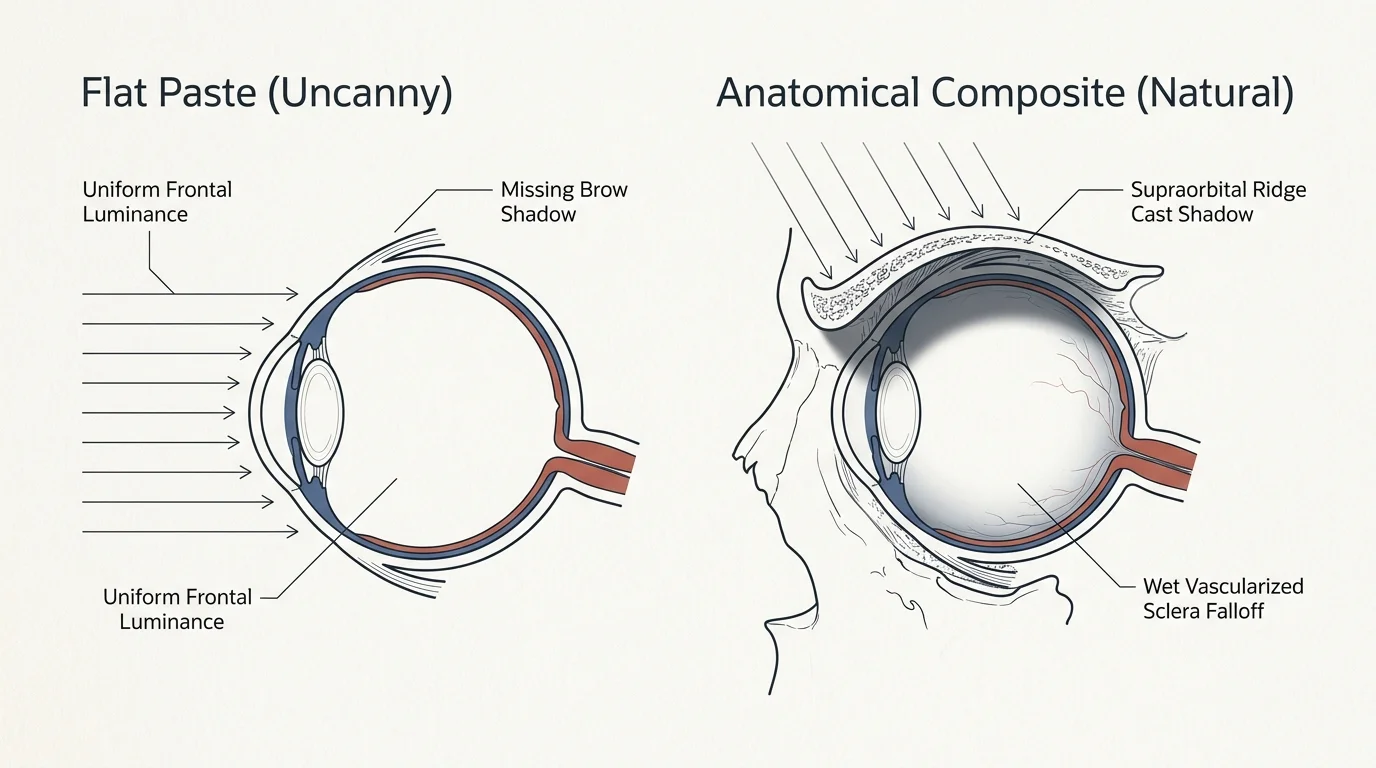
This uncanny failure rarely stems from imperfect edge blending along the skin folds. Instead, it occurs because you pasted a flat, frontally illuminated eyeball into an orbital socket shaded by direct outdoor sunlight.
The human sclera is not paper-white; it is a wet, vascularized sphere resting inside a bony cavern. When direct sunlight strikes the forehead, the supraorbital ridge casts a dense downward shadow across the upper half of the eyeball.
If your donor eye comes from a flash snapshot or an open-shade candid, its sclera possesses uniform brightness across its entire surface. Pasting that evenly illuminated eyeball into a harsh daylight portrait produces an unsettling, self-luminous glow.
To understand specular highlights and shadow falloff across rounded surfaces, you must treat the eyeball as a three-dimensional sphere rather than a flat, two-dimensional sticker.
Sourcing and Auditing Candidate Donor Frames
When you need to fix blinked photo group arrangements after a chaotic family reunion, you must audit every auxiliary photograph taken that afternoon. Do not restrict your search to formal portraits where subjects held stiff poses.
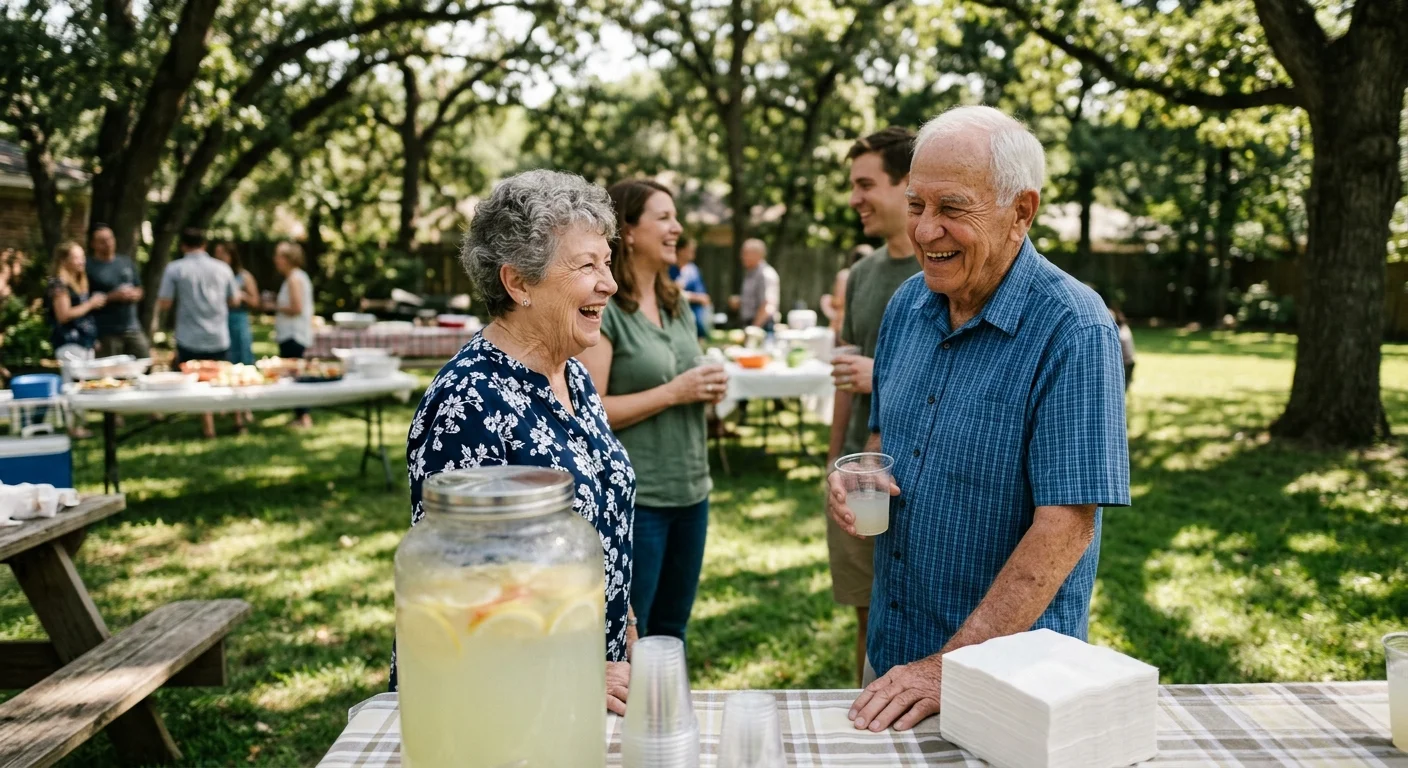
Candid images captured near the food tables, during lawn games, or while guests conversed offer relaxed ocular muscles. Look for shots taken within two hours of the primary portrait to ensure consistent skin hydration and iris dilation.
Audit the angle of the head across three distinct axes: yaw (turning left or right), pitch (tilting up or down), and roll (tilting sideways). A perspective difference greater than eight degrees will distort the anatomical relationship between the pupil and the tear duct.
Verify that the donor image provides sufficient pixel density across the eye socket. If your main portrait renders an eye across 140 horizontal pixels, your donor crop must meet or exceed that exact resolution to avoid interpolation blur.
Successful facial reconstruction relies on respecting anatomical topography. When donor features match the underlying facial skeleton, photographic edits remain completely undetectable to the viewer.
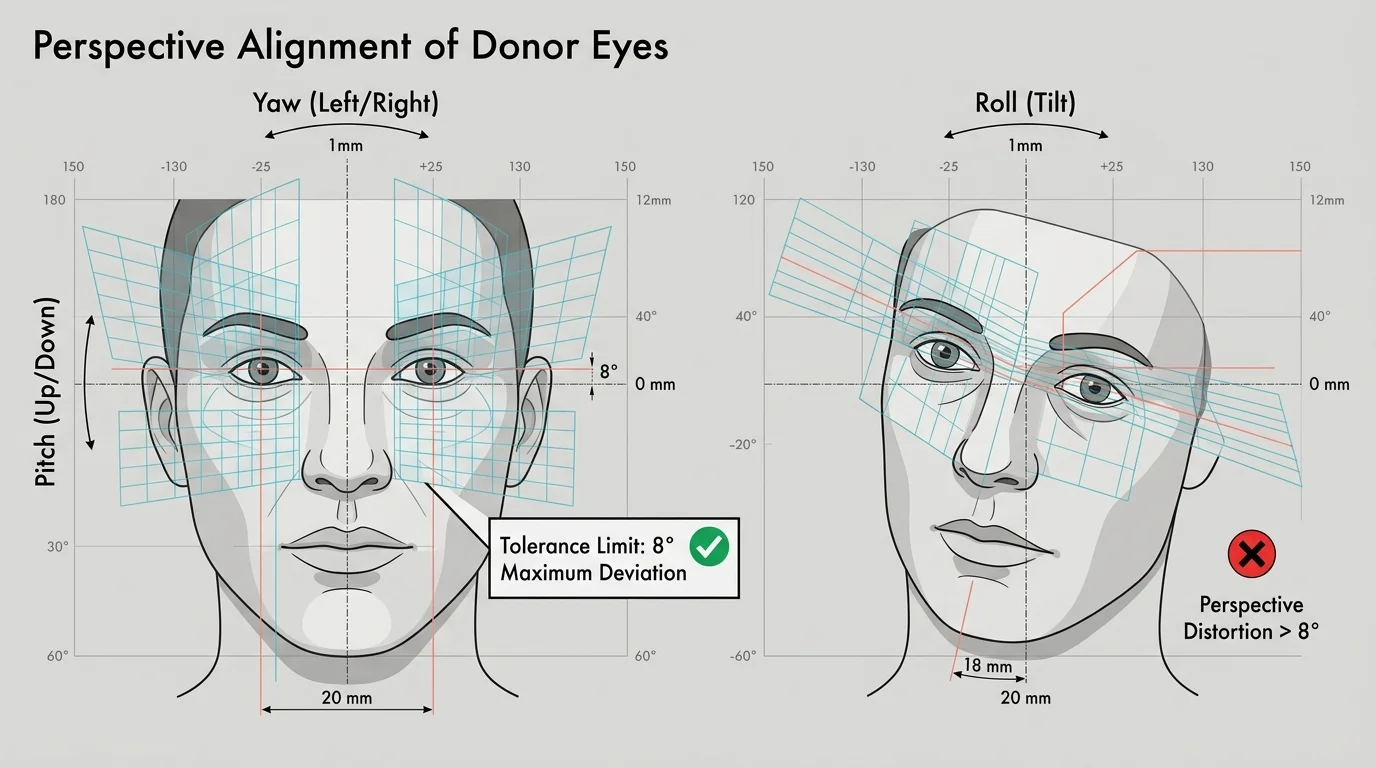
Step 1: Geometric Alignment and Orbit Warping
Open your primary family group shot inside Adobe Photoshop alongside your selected donor candid frame. In this worked scenario, your master file measures 8,192 by 5,464 pixels, shot at 50mm, f/8, 1/250 second, and ISO 100 on July 14 at 1:15 PM.
Grandma Martha, seated front and center, blinked fully during the sole sharp exposure of the entire nineteen-person gathering. Your donor image is a candid shot of Martha laughing at 1:42 PM under a patio canopy, taken at 85mm, f/2.8, 1/160 second, and ISO 800.
Use the Lasso tool with a feather radius of zero pixels to select Martha’s open left eye, including the eyebrow and upper cheekbone. Copy this selection and paste it as a new layer directly above her closed eye in the group portrait.
Reduce the donor layer opacity to 50 percent so both the closed lid and open donor eye remain visible simultaneously. Press Control-T (or Command-T on macOS) to enter Free Transform mode, placing the reference anchor directly over the medial canthus (the inner tear duct).
Scale the donor layer uniformly while holding the Shift key until the distance between the inner tear duct and outer corner matches the base face. Rotate the layer until the horizontal axis of the donor eye aligns with the underlying eyelid crease.
Switch to Edit > Transform > Warp to accommodate the muscular tension present in the formal shot. Outdoor squints pull the lower eyelid upward; pull the bottom control handles of the donor layer upward by three to five pixels to replicate this squint.
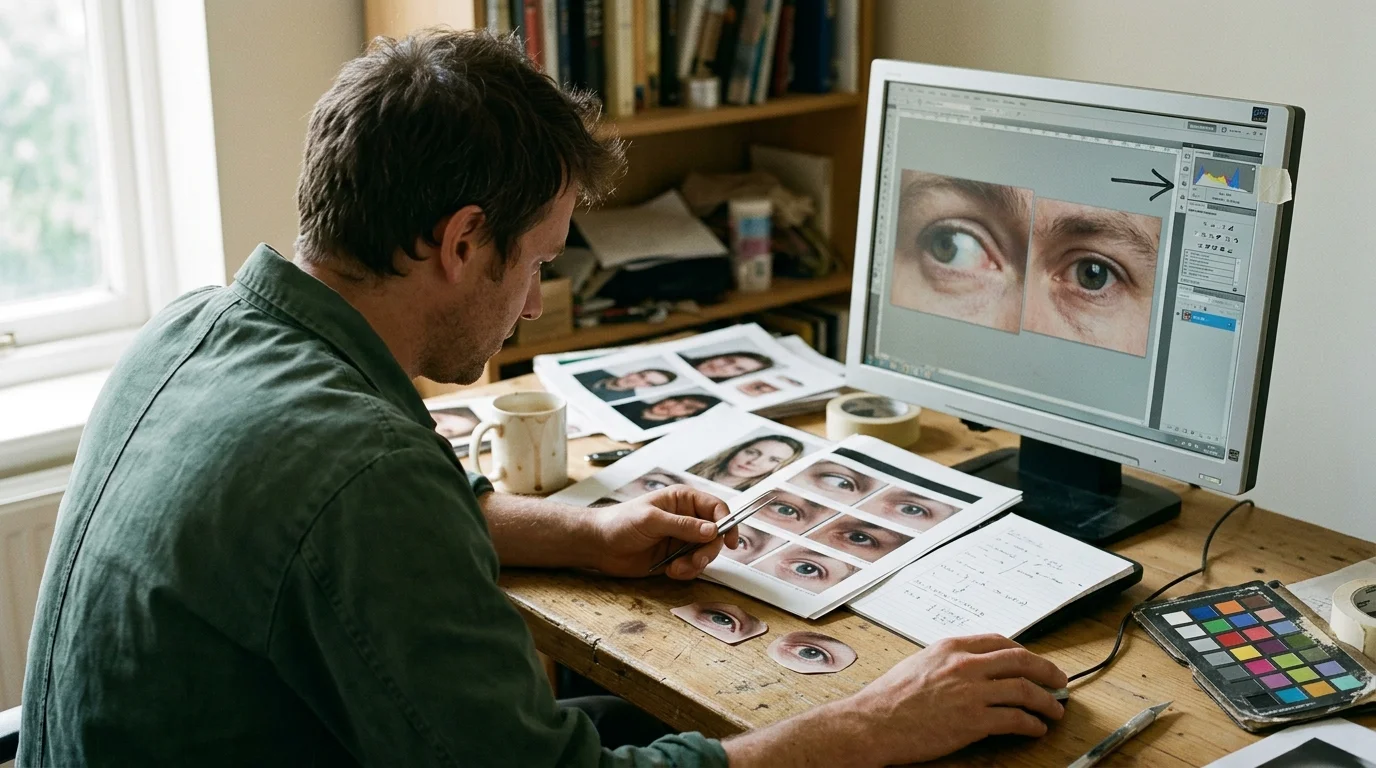
Step 2: Luminance Balancing and Color Cast Correction
Once you swap closed eyes photo photoshop layers into geometric alignment, return the layer opacity to 100 percent. The donor eye will immediately look mismatched because the porch canopy introduced cool ambient shadows, while the group shot features warm overhead sunlight.
Add a Curves adjustment layer immediately above the donor layer, and click the clipping mask icon so your tonal changes affect only the donor patch. Sample the white of the sclera using the Info panel to measure individual 8-bit RGB values.
In our reunion portrait, Martha’s sunlit skin exhibits an RGB ratio of 218 red, 172 green, and 142 blue. Martha’s donor sclera from the shaded canopy reads 148 red, 155 green, and 168 blue, creating an icy, unnatural tint.
Select the Red channel on your clipped Curves layer and lift the midtones by pulling the curve upward at input 148 to output 175. Switch to the Blue channel and pull the curve downward at input 168 to output 138, eliminating the cool canopy color cast.
Next, adjust the composite RGB curve to balance absolute luminance. Drop the overall midtones by fifteen points to prevent the eye from appearing brighter than the surrounding sunlit forehead and cheek tissues.
Refer to historical preservation standards at the Library of Congress Preservation division to appreciate how balanced tonality protects long-term optical fidelity in restored historical records.
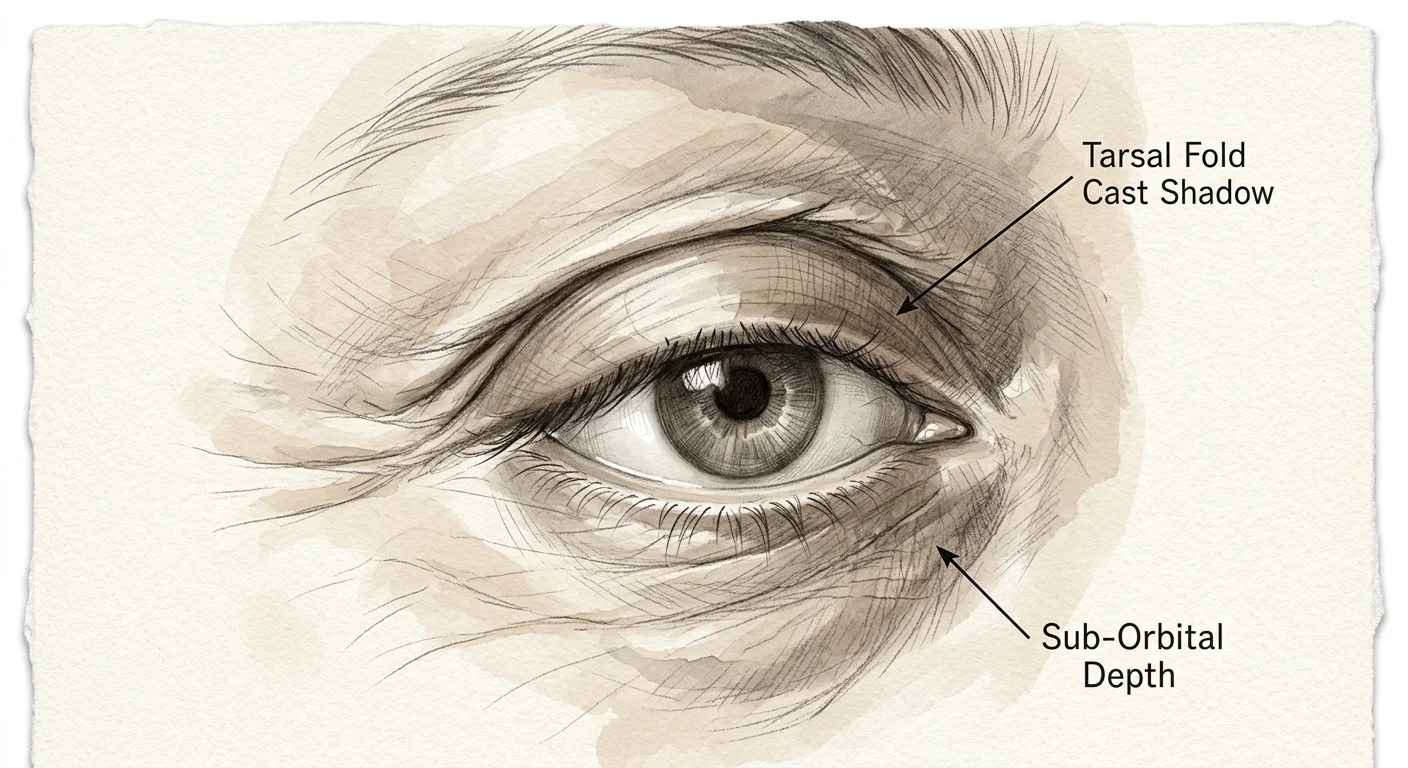
Step 3: Micro-Shadow Carving and Eyelid Depth Recovery
The primary reason a composited eye looks pasted on is the absence of an eyelid cast shadow. In direct sunlight, the upper eyelid acts like a roof cornice, projecting a razor-sharp shadow downward across the eyeball surface.
Create a new blank layer directly above your color-corrected donor eye, and set its blending mode to Multiply. Clip this layer to the donor eye layer so your brush strokes never spill onto the surrounding original facial skin.
Select a soft round brush set to an opacity of 20 percent and a flow of 40 percent. Sample the deep shadow color from the adjacent nostril or ear fold to capture the subject’s authentic subcutaneous melanin hue.
Paint a curved band of shadow across the upper third of the sclera and iris, following the exact contour of the upper lash line. This shadow should measure between three and six pixels in vertical thickness on an 8,000-pixel landscape portrait.
Build a second pass of shadow concentrated strictly along the top two pixels directly beneath the eyelashes. This establishes an anatomical contact shadow, grounding the eyeball firmly inside the skull rather than letting it float on the surface.
Add a layer mask to the main donor eye layer, choose a soft brush with a 65 percent hardness setting, and gently mask the outer skin margins. Blend along natural anatomical boundaries, such as the infraorbital fold and crows’ feet wrinkles, rather than across smooth skin expanses.
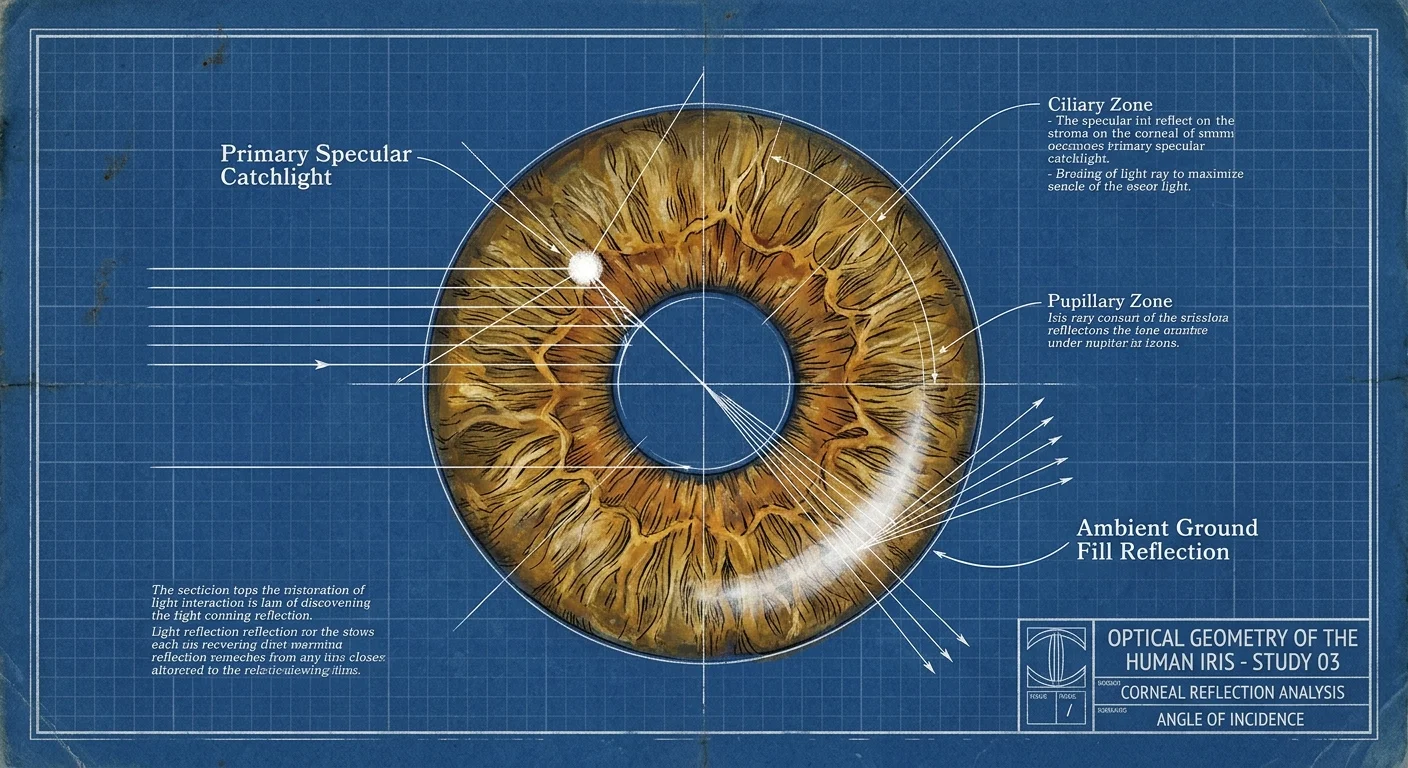
Step 4: Catchlight Reconstruction and Specular Calibration
Catchlights represent the mirror reflection of the ambient environment on the moist corneal dome. When you composite open eyes family picture frames, catchlights frequently betray the manipulation by reflecting the wrong light source.
Martha’s donor eye displays a broad, soft white rectangle reflecting the open sky outside the porch canopy. However, everyone else in the group portrait features a tiny, pin-sharp specular point of light created by the unimpeded midday sun at a one o’clock position.
Create a new layer named Corneal Highlights set to Normal blending mode. Select the Clone Stamp tool, set its sample mode to Current Layer, and zoom in to 400 percent magnification on the donor pupil.
Paint out the broad canopy reflection using clean pupil tones sampled from the adjacent dark iris tissue. Your subject will temporarily look blind, but you have cleared the canvas for accurate catchlight reconstruction.
Sample the exact RGB highlight value from Uncle Arthur’s eyes in the same group shot, which reads 248, 245, 238. With a 2-pixel hard brush at 100 percent opacity, stamp a single pinpoint reflection at the one o’clock position on Martha’s iris.
Reduce the layer opacity to 85 percent and duplicate the layer. Apply a 0.5-pixel Gaussian Blur to the lower layer to generate the realistic optical bloom produced by camera lenses pointed at bright outdoor scenes.
Step 5: Grain Matching and Edge Integration
Mismatched ISO noise immediately exposes digital composites when viewed on high-resolution displays or large archival prints. Martha’s donor frame was shot at ISO 800 under low light, introducing visible luminance noise and chrominance speckling.
Meanwhile, the group portrait shot at base ISO 100 looks pristine, smooth, and noise-free. If you insert a noisy ISO 800 eye into an ISO 100 face, the eye appears covered in sand.
Apply Filter > Noise > Reduce Noise to the donor eye layer before final sharpening. Set Strength to 8, Preserve Details to 60 percent, and Reduce Color Noise to 100 percent to neutralize the high-ISO digital sensor artifacts.
If your candid donor came from an older smartphone or compressed JPEG, the reverse problem may happen: the donor eye is overly smoothed. In that scenario, create a neutral 50-percent gray layer set to Overlay mode and clip it to your composite.
Apply Filter > Noise > Add Noise with a setting of 0.8 percent, Monochromatic distribution, and Gaussian curve. This injects authentic physical texture that matches the primary sensor’s microscopic noise floor.
Institutional workflows documented by the Image Permanence Institute demonstrate that preserving structural visual consistency prevents visual fatigue during human document analysis.

Donor Eye Selection Matrix and Technical Tolerance
Before spending forty-five minutes warping and color-grading an unvetted candid shot, assess your candidate donor frames against objective photographic thresholds. The following criteria determine whether an eye transplant will succeed seamlessly or look permanently flawed.
| Candidate Image Type | Angular Variance Tolerance | Luminance Correction Required | Catchlight Action Plan | Feasibility Rating |
|---|---|---|---|---|
| Same-Session Shaded Candid | Less than 5 degrees yaw/pitch | Minor (+10 to +20 RGB midtone lift) | Soft reflection requires pinpoint replacement | High (15-20 min edit) |
| Direct-Sun Side Profile Candid | 6 to 12 degrees yaw/pitch | Extreme (asymmetrical iris illumination) | Rebuild catchlight and redraw sclera edge | Moderate (35-45 min edit) |
| Indoor Flash Snapshot (Night Prior) | Less than 8 degrees yaw/pitch | Severe (desaturate red-eye and balance tungsten) | Erase direct bulb blast; repaint ambient sky | Low (50+ min edit) |
| Different Season / Old Studio Shot | Greater than 15 degrees yaw/pitch | Uncalibrated (incompatible skin age & elasticity) | Complete ocular rebuild required | Unviable (produces uncanny valley) |
Always prioritize candids shot with the same camera body or lens whenever available. Shared sensor color science significantly cuts the time required to match delicate iris pigmentation and scleral blood vessel coloration.
When working with elderly relatives, never erase eyelid folds or tear-trough hollows during the blending phase. Those structural wrinkles define their unique likeness; removing them will make your relative look unrecognizable to their own children.
Frequently Asked Questions
Can I use AI automated eye-opening tools instead of manual layer compositing?
Automated artificial intelligence tools generate synthetic iris textures and generic scleras rather than using your relative’s authentic biological features. These algorithms frequently introduce mismatched eye colors, unnatural pupillary distances, and smooth plastic skin textures that disrupt family resemblances.
What should I do if my only sharp donor image shows the subject looking sideways?
Isolate the iris and pupil onto an independent sub-layer separate from the sclera and eyelid margins. Shift the iris horizontally to center the gaze toward the camera, then repaint the exposed sclera using the Clone Stamp tool sampled at 30 percent opacity.
How do I handle donor eyes photographed behind strong prescription eyeglasses?
High-prescription lenses introduce barrel or pincushion optical distortion and colorful chromatic aberration along the rim boundaries. You must apply the Lens Correction filter specifically to the donor patch to counteract the magnification before attempting to align the eye into the group portrait.
Why does my composited eye look flat even after applying the correct curves adjustment?
Flatness indicates missing micro-shadows along the lower eyelid margin and absent corneal depth. Paint a 1-pixel specular highlight along the wet waterline of the lower lid and deepen the contact shadow under the upper lash line to restore three-dimensional roundness.
Disclaimer: This article is for informational purposes only. When handling valuable or irreplaceable photographs, consider consulting a professional conservator. Always test preservation methods on non-valuable items first.