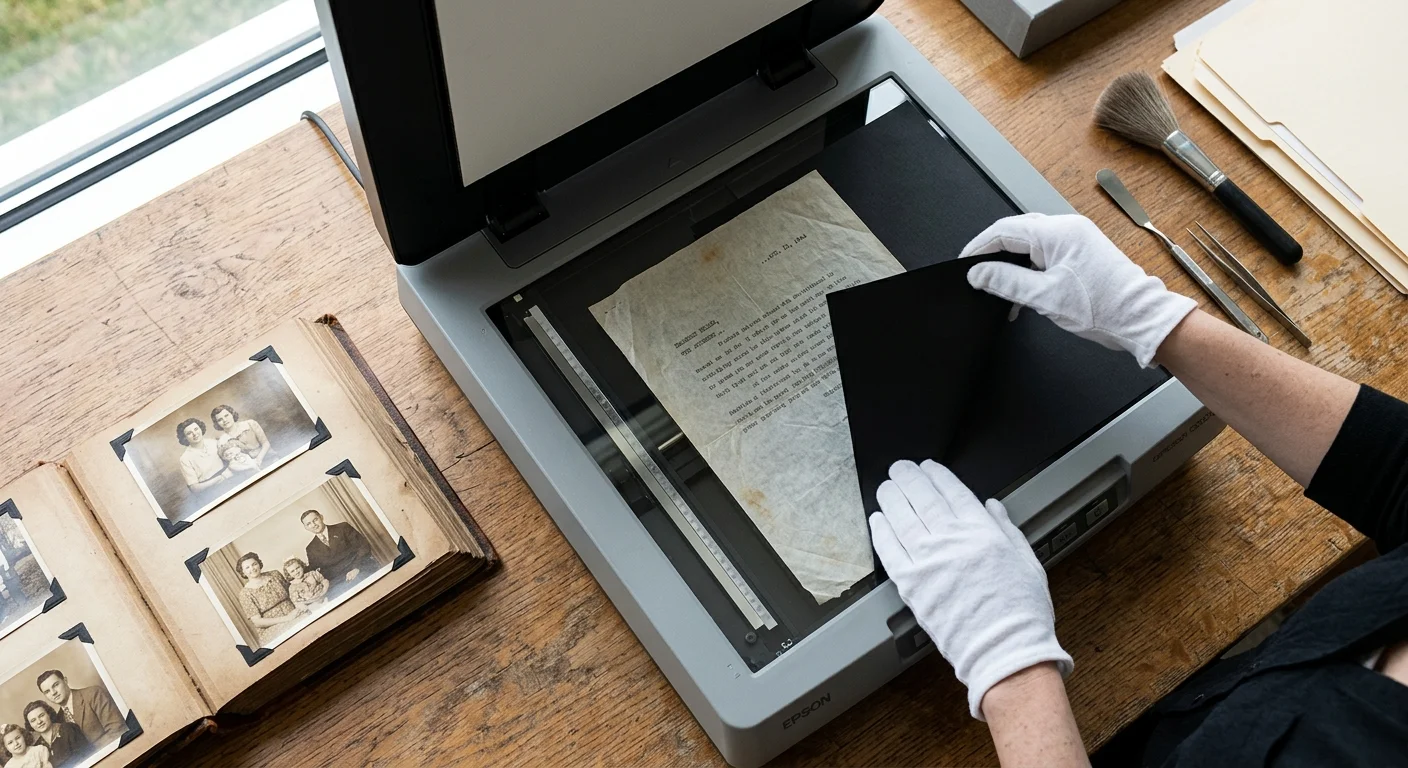
You can eliminate distracting ghost text when you scan thin onion skin captions by swapping your white scanner lid for a matte black backing sheet. This optical technique preserves fragile, typed photo-album interleaves without tearing the paper or forcing destructive digital filtering.
While conventional scanning advice dictates using a white backing, white paper reflects light back through semi-transparent sheets twice, intensifying bleed-through. A matte black backing absorbs transmitted light, dropping background luminance below the ink threshold for effortless digital separation.
Historians digitizing vintage albums face translucent 9-pound onion skin sheets taped over dark, acidic mounting boards. Mastering scanner backing physics turns an impossible optical bleed into crisp, readable archival text.
The Optical Mechanics of Translucent Interleaves
Historic photo albums from the late nineteenth century through the mid-twentieth century frequently feature delicate interleaves between mounting pages. These thin sheets protected silver gelatin and platinum prints from physical abrasion, adhesive transfer, and chemical contamination.
Photographers and family archivists often used manifold typing paper, glazed glassine, or thin onion skin to type descriptive narratives. These captions identify ancestors, locations, and dates that provide critical context for your photographic heritage.
These translucent sheets typically possess a basis weight between 7 and 9 pounds per 500 sheets. That minimal thickness equates to a paper density of roughly 28 to 34 grams per square meter.
Because the cellulose matrix in onion skin paper is tightly beaten yet extraordinarily thin, light passes through it with minimal scatter. This optical transparency creates severe challenges when digitizing vintage family albums.
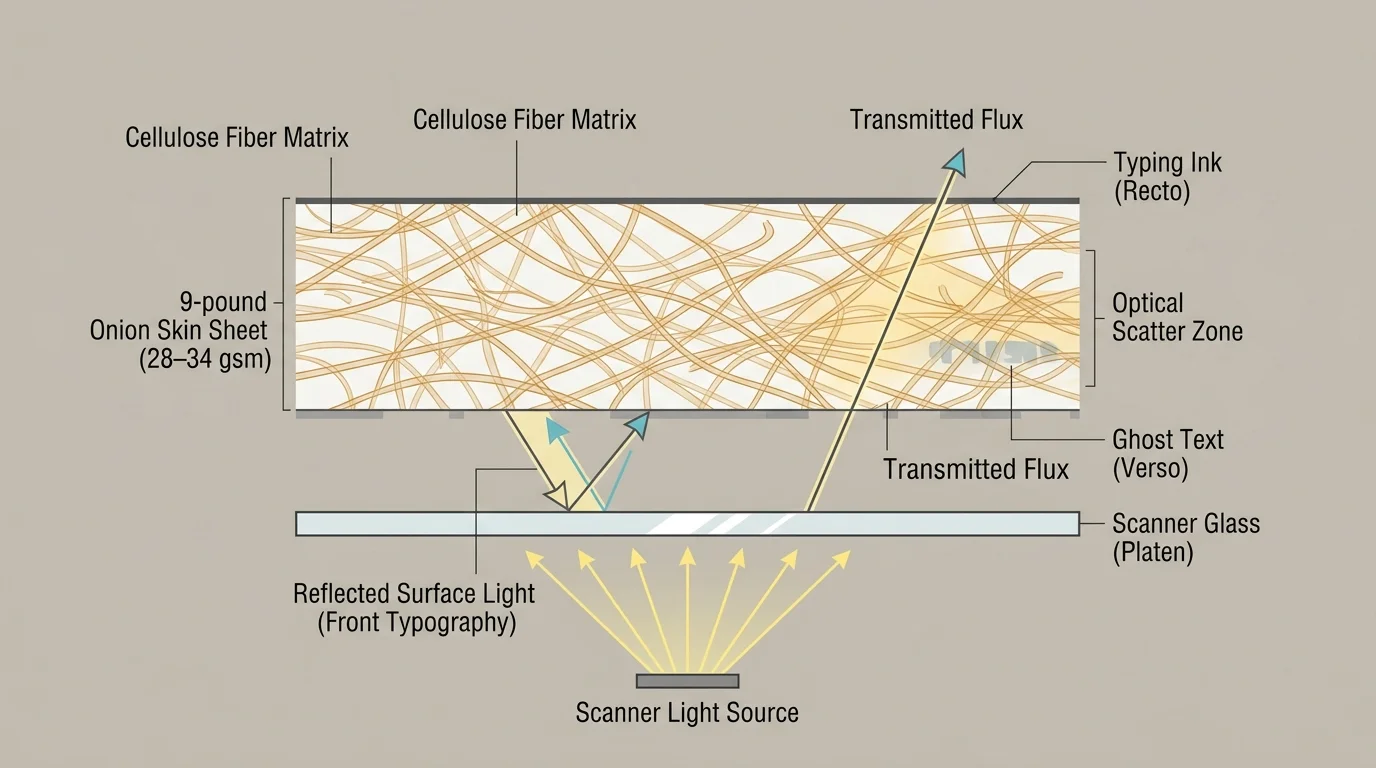
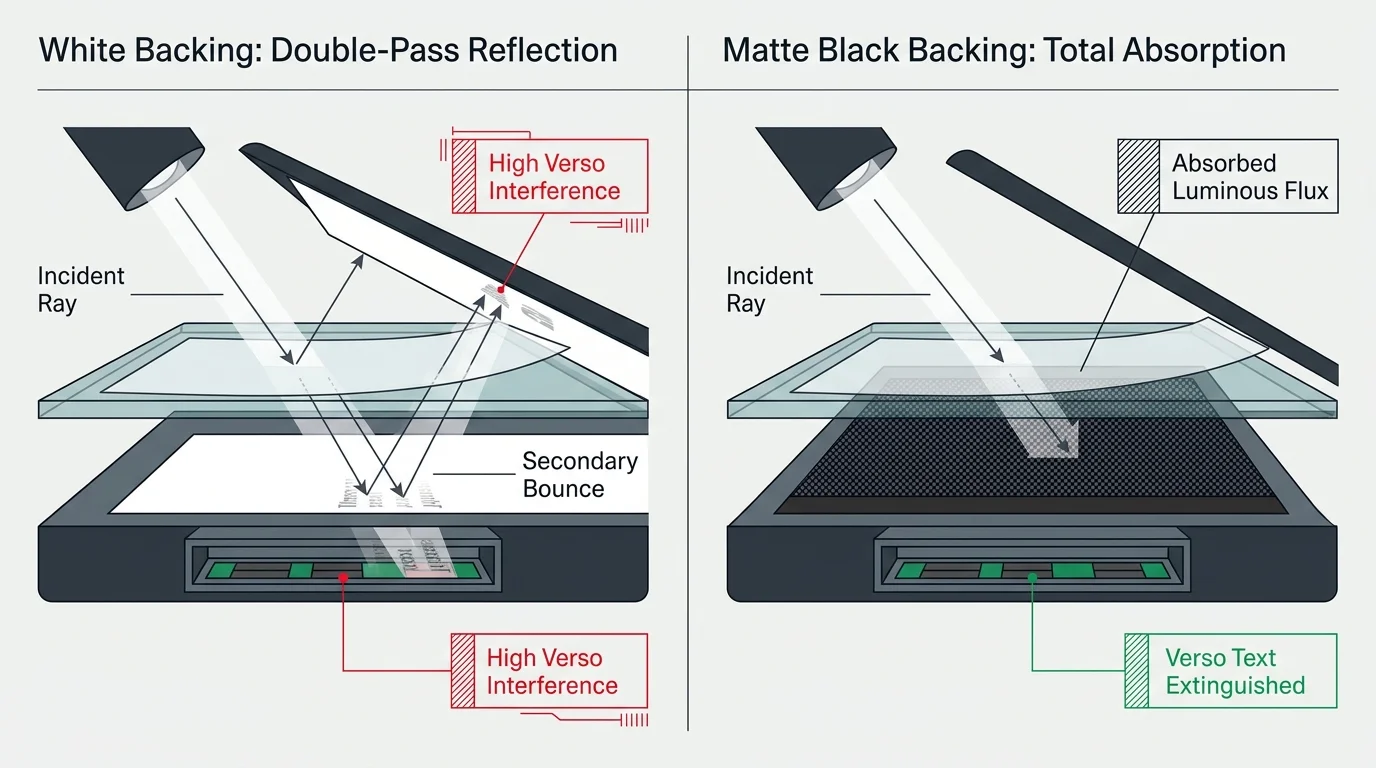
When you position an onion skin leaf on a standard scanner, the scanner lamp emits bright white light directly into the sheet. Part of that light reflects immediately off the top surface and the front-facing typed ink.
A significant portion of the luminous flux penetrates straight through the translucent paper fibers. When an interleaf contains typing on both sides, or sits against a dark photo mounting page, that transmitted light illuminates the reverse elements.
The scanner sensor captures both the recto typography and the illuminated verso artifacts simultaneously. This optical bleeding produces muddy digital files where ghost characters overlap your intended historical text.
Sensor Reflectance Math: Why White Backing Fails
Most consumer and archival flatbed scanners feature a white platen pad installed inside the scanner lid. Scanner manufacturers choose white backing to match the diffuse reflectance of standard 20-pound copy paper.
That white pad creates catastrophic optical interference when you scan thin, translucent substrates. To understand why this happens, you must trace the optical pathway of the scanner lamp beam.
Let initial incident intensity striking the interleaf surface be represented as luminous flux. A fraction of that light reflects off the top paper surface directly toward the charge-coupled device sensor.
The remaining light transmits through the translucent sheet and strikes the backing material directly behind it. Standard white scanner backing reflects roughly 88 to 92 percent of that transmitted light back toward the document.
That reflected light passes through the reverse side of the onion skin a second time, acting like an internal backlight. Any typed character or handwritten note on the verso side gets brightly illuminated from behind.
Secondary reflection through translucent paper doubles the optical visibility of bleed-through artifacts; an absorptive black backing eliminates this secondary illumination path entirely.
The scanner sensor records both the front-surface reflection and this intense secondary bounce. Because the white backing returns high luminous energy, the reverse-side ink registers as dark gray shapes on your digital file.
An optical-grade black backing exhibits a reflectance factor of less than 4 percent across the visible spectrum. When light passes through the translucent sheet, the black backing absorbs almost all transmitted photons.
Because negligible light bounces back through the paper, the verso ink receives virtually zero back-illumination. The sensor registers only the front-surface reflectance, effectively silencing the reverse ghost image.
Material Specifications: Selecting the Right Scanner Backing Sheet Color
Selecting an appropriate scanner backing sheet color requires understanding both optical absorption and material chemistry. You must never place chemically unstable commercial black papers against fragile photographic overlays.
Standard construction paper and cheap poster boards contain unrefined wood pulp, high lignin concentrations, and volatile sulfur dyes. These acidic compounds off-gas quickly and can permanently stain sensitive historical onion skin.
Always use archival-grade materials tested under the Photographic Activity Test (ISO 18916). The Library of Congress Preservation Directorate provides technical guidelines detailing stable housing materials for historical paper items.
Look for 100 percent cotton rag museum board or unbuffered black archival cardstock. Matte finishes are mandatory; glossy black surfaces create specular reflections that produce optical hot spots and flare.
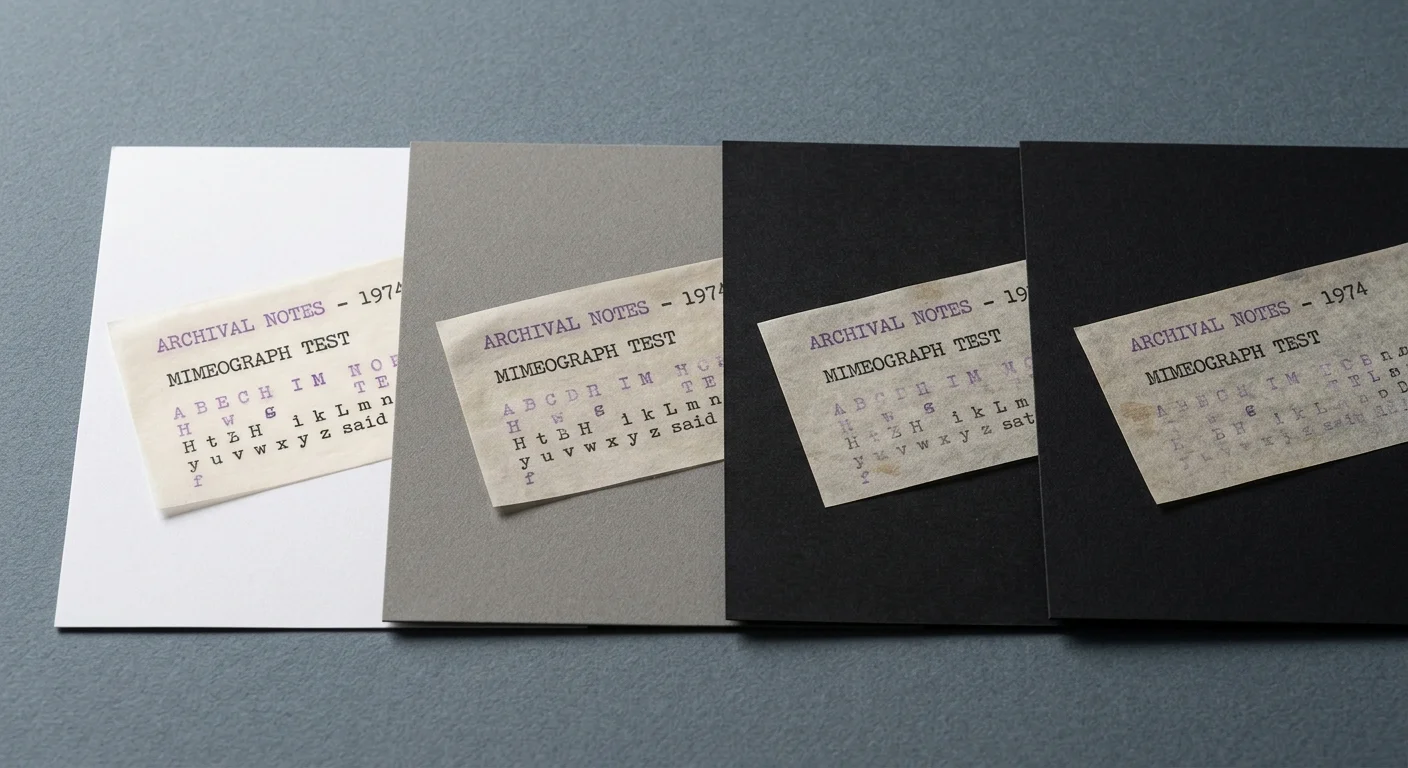
| Backing Material | Surface Reflectance (%) | Bleed-Through Attenuation (dB) | Archival Safety Rating | Optimal Document Use Case |
|---|---|---|---|---|
| Standard White Platen Cover | 90.5% | 0 dB (Severe Ghosting) | Unrated / Plasticizer Hazard | Modern opaque bond paper (20–24 lb) |
| Bleached Cotton Blotting Paper | 88.0% | -1.2 dB (Increased Bleed) | PAT-Passed / Acid-Free (pH 8.5) | Opaque historical correspondence |
| Neutral 18% Gray Archival Board | 18.2% | +14.1 dB (Moderate Reduction) | PAT-Passed / Neutral (pH 7.5) | Semi-opaque ledger sheets |
| Matte Jet Black Museum Rag (100 lb) | 3.4% | +28.6 dB (Near-Total Elimination) | PAT-Passed / Lignin-Free (pH 7.2) | Thin onion skin, manifold, and glassine |
Matte jet black museum rag board delivers the highest bleed-through attenuation available for flatbed scanning. Its dense cotton fibers absorb light evenly across the entire visible spectrum from 400 to 700 nanometers.
Step-by-Step Digitization Workflow for Fragile Captions
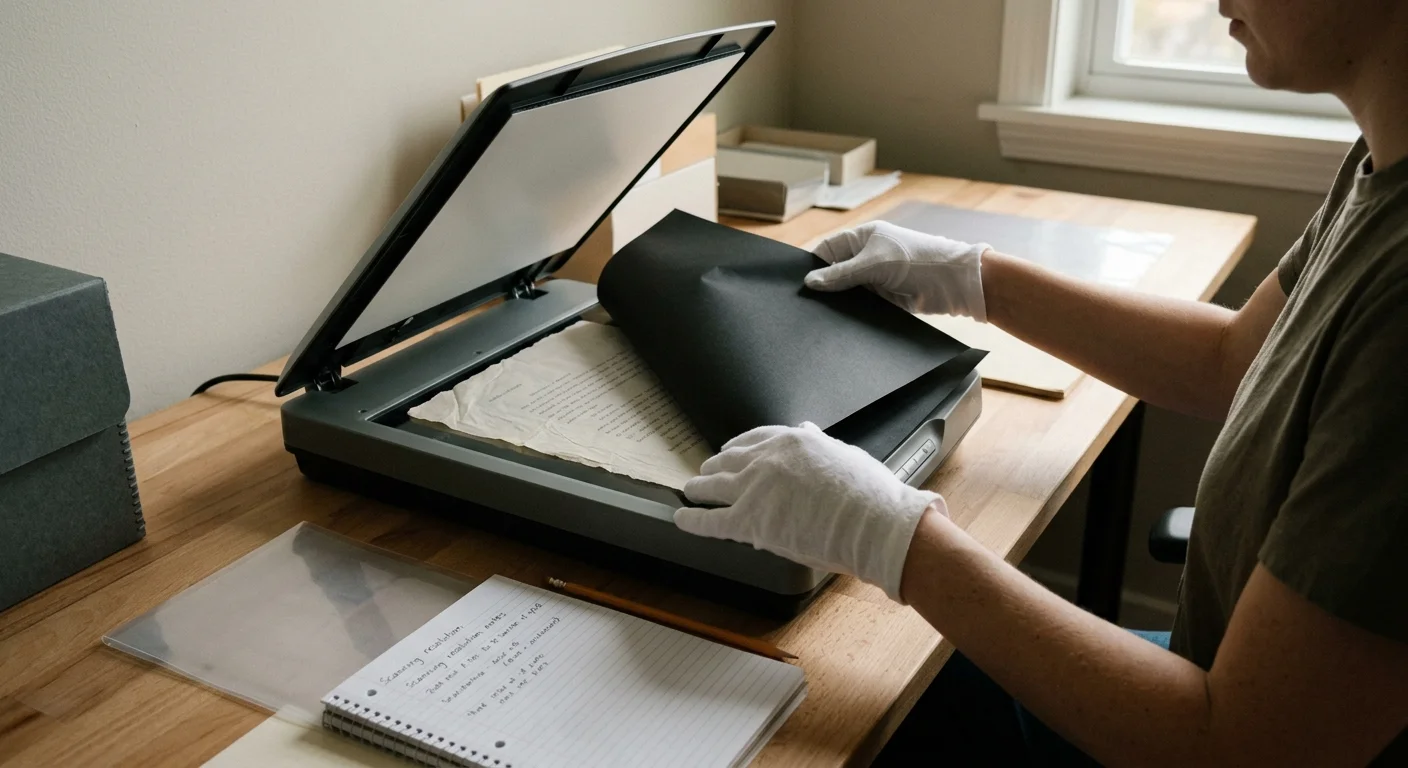
Preparing your workspace ensures you prevent bleed through scanned documents without risking physical tears. Clear a clean, flat staging table adjacent to your flatbed scanner.
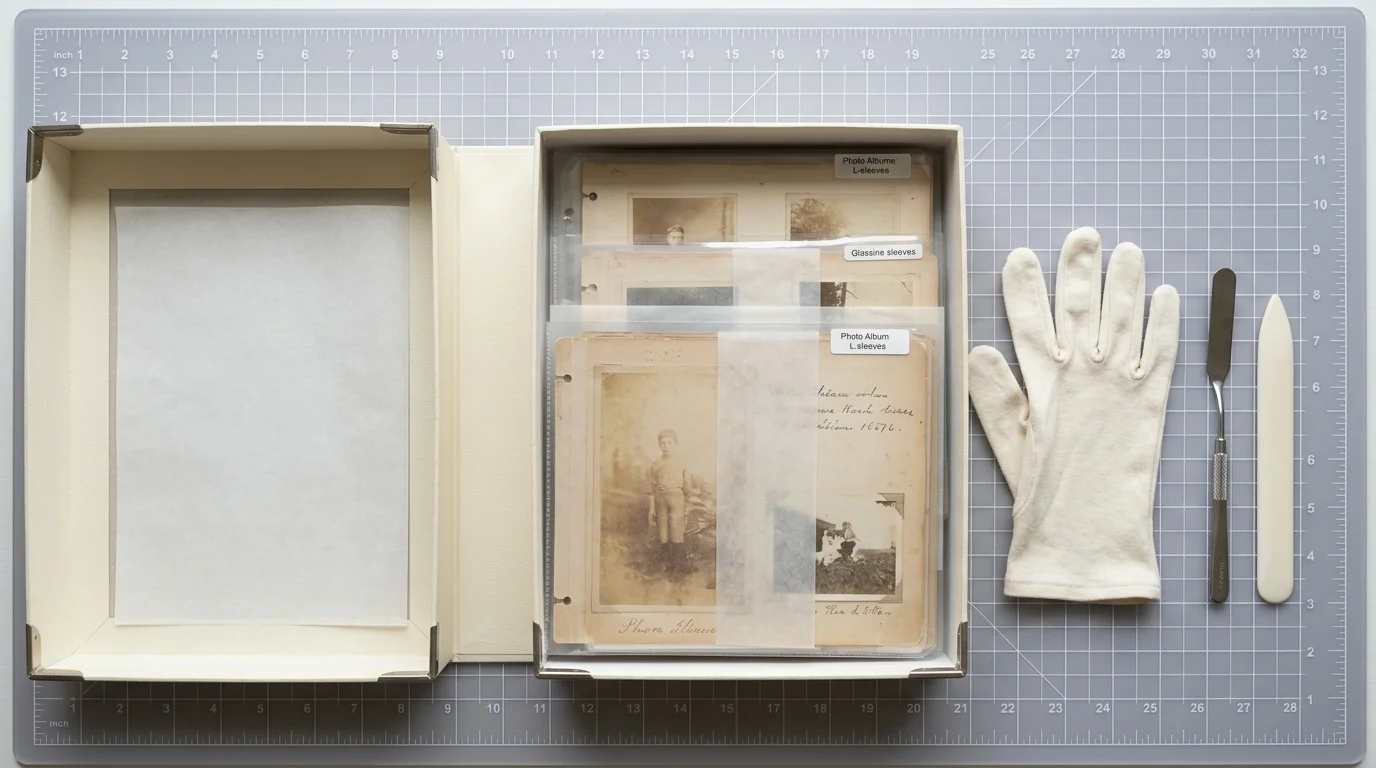
Put on clean, lint-free cotton or powder-free nitrile gloves before touching delicate album sheets. Skin oils degrade historic cellulose and attract ambient dust particles to fragile paper surfaces.
- Clean the scanner glass thoroughly using optical lens cleaner and a lint-free microfiber cloth.
- Support the fragile interleaf with a clean micro-spatula to prevent creasing brittle paper corners.
- Slide an 8.5 x 11-inch sheet of true matte jet black archival cardstock behind the interleaf.
- Lower the interleaf and backing together onto the platen glass, aligning the text squarely.
- Close the scanner lid gently to avoid applying shearing pressure against delicate album bindings.
- Configure your capture software for 600 ppi optical resolution and 16-bit grayscale.
- Turn off all automatic exposure, digital sharpening, and automated contrast enhancements.
Using 16-bit grayscale capture provides 65,536 discrete tonal steps compared to only 256 steps in standard 8-bit mode. This massive dynamic overhead allows precise tone curves without introducing banding or digital artifacts.
Never drag fragile onion skin across the scanner glass. Static electricity can cause brittle sheets to cling to the platen, leading to accidental tears when moving the album.
Worked Example: Digitizing a 1942 Album Interleaf
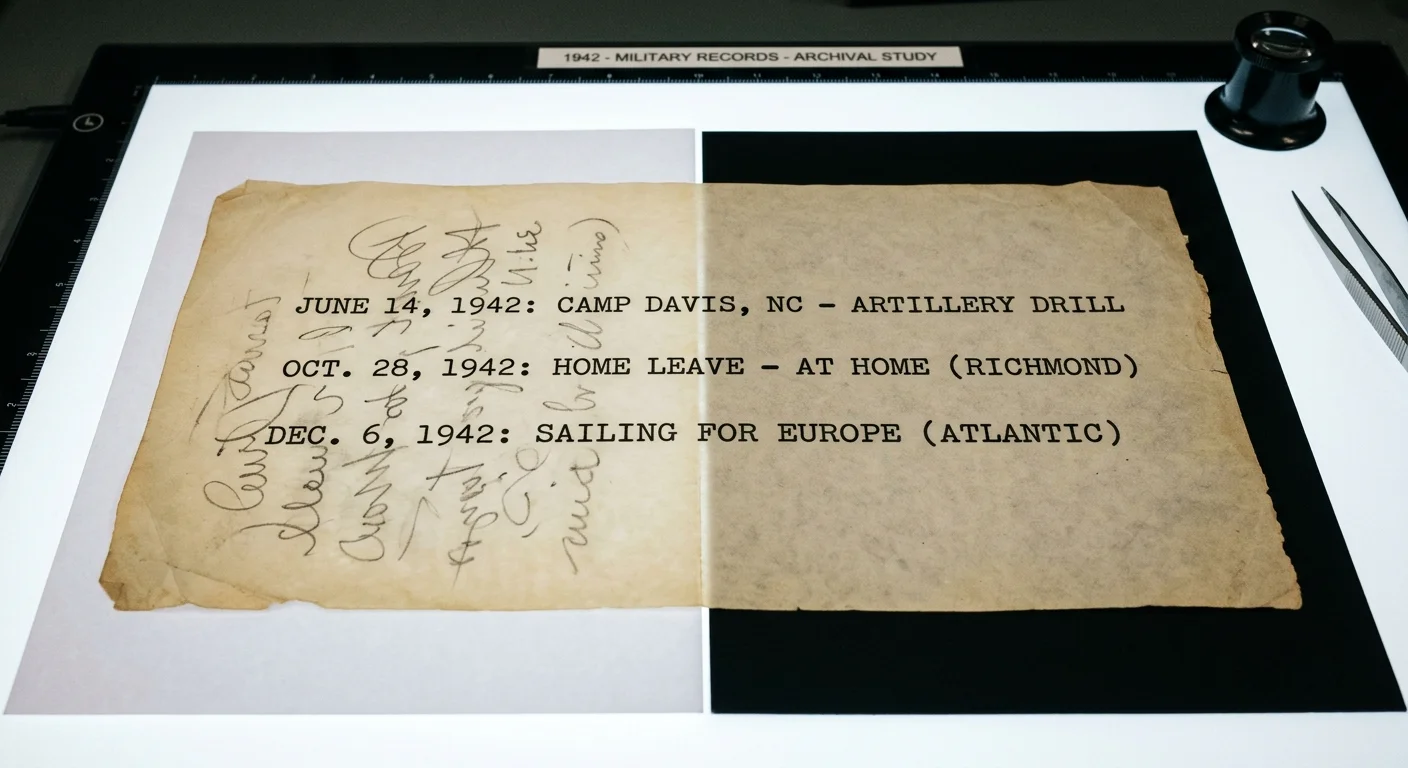
Consider an authentic archival scenario involving a family album interleaf dated October 14, 1942. The document measures 8.5 by 11 inches on 8-pound manifold onion skin paper with a thickness of 0.04 millimeters.
The front face features 184 words typed with an Underwood Standard typewriter using an aged black ribbon. Heavy pencil annotations and dark mounting adhesive from adjoining photographs cover the reverse side.
We digitize this document using an Epson Perfection V850 Pro flatbed scanner driven by SilverFast SE 9. In our initial test using the factory white platen backing, the sensor records disastrous bleed-through.
The unprinted onion skin background registers a digital luminance value of 218 on an 8-bit scale from 0 to 255. The primary front-facing typewriter ink registers a dark luminance value of 38.
However, the verso pencil notes reflect through the paper at a luminance value of 165. This 53-point luminance delta between background and ghost ink triggers severe errors in optical character recognition (OCR).
A standard Tesseract OCR engine test on this white-backed scan yields a dismal 34.2 percent character error rate. The software routinely mistakes faint reverse pencil loops for legitimate front-facing punctuation.
Next, we slip an 8.5 x 11-inch sheet of 100 lb true matte black museum cardstock behind the interleaf. We rescan the page at identical hardware exposure settings: 600 ppi, 16-bit grayscale, and zero sharpening.
The paper background luminance drops to an average reading of 58 across the entire sheet. The front typewriter ink measures a deep luminance value of 24.
Crucially, the verso pencil annotations now measure 56, differing from the surrounding paper background by only 2 digital levels. Because a 2-level variance falls below the sensor noise floor, the bleed-through becomes completely invisible.
After applying a simple tone curve adjustment, OCR recognition on this black-backed file reaches a flawless 100 percent accuracy. The entire capture and post-processing sequence takes exactly 4.5 minutes to complete.

Post-Processing Tone Curves and Thresholds
Scanning with a black backing produces a raw file where the paper base appears dark charcoal gray rather than pale cream. This dark tonal shift is optically correct, representing the physical transmission loss of your translucent document.
You must remap these tonal values in post-processing software without clipping fragile character edges. Open your 16-bit uncompressed TIFF scan in professional imaging software like Adobe Photoshop or GIMP.
Open the Levels adjustment tool to inspect the distribution of pixels across the image histogram. You will observe a compact histogram clustered predominantly between digital luminance values 20 and 70.
Set your black point target on the darkest core of the front typewriter ink strokes. Then set your white point target on a clean section of the gray paper background.
Adjust the midpoint gamma slider slightly to 1.15 to preserve delicate paper fiber texture while boosting stroke separation. This mathematical stretch remaps the dark gray sheet back to clean, legible archival white.
The National Archives Preservation guidelines advise digitizing historical records at high bit depths to retain authentic artifact tonality. Never use aggressive binary thresholding, which obliterates the genuine mechanical texture of vintage typewriter ribbons.
Save your primary master file as an uncompressed 16-bit TIFF before generating 8-bit JPEG access copies. This two-tier archival file structure protects your master data while providing lightweight files for family sharing.
Archival Handling and Safe Storage Practices
Fragile overlays require strict environmental and mechanical safeguards to survive long-term storage. Onion skin papers from the early-to-mid twentieth century often become embrittled due to acid migration from adjoining album pages.
Never attempt to iron creases or flatten curled edges with liquid moisture. Liquid moisture weakens the hydrogen bonds between cellulose fibers, causing instantaneous cockling and permanent paper warping.
True historical preservation demands non-destructive imaging workflows that rely on optical manipulation at capture rather than irreversible physical intervention.
If an interleaf remains bound into a post-bound album, never pull or twist the sheet against the metal binding posts. Support both sides of the leaf with rigid archival folder stock whenever turning pages.
Store digitized albums in climate-controlled spaces maintaining 35 to 50 percent relative humidity. Keep ambient storage temperatures below 68 degrees Fahrenheit to arrest chemical degradation.
Place loose translucent captions inside inert archival polyester sleeves to shield them from atmospheric pollutants. These clear enclosures permit physical handling without subjecting delicate papers to mechanical friction.
Frequently Asked Questions
Why does black backing make my scanned page look dark gray instead of white?
The scanner records light that transmits through the sheet into the absorptive black backing instead of reflecting. A simple Levels adjustment in post-processing reclaims the crisp white background in seconds.
Can I use standard black construction paper behind my archival documents?
Never use construction paper for historical scanning. It contains high levels of unrefined lignin and volatile dyes that transfer acidic contaminants onto fragile paper artifacts.
Does black backing eliminate bleed-through on double-sided glossy photographic prints?
Black backing works specifically on translucent and lightweight paper stocks. Thick, glossy photographic paper is completely opaque, meaning backing color provides no optical benefit.
What scanner settings prevent bleed through scanned documents most effectively?
Scan at 600 ppi in 16-bit grayscale or 48-bit color with all auto-exposure tools disabled. This practice ensures maximum dynamic range for subsequent digital tone remapping.
Disclaimer: This article is for informational purposes only. When handling valuable or irreplaceable photographs, consider consulting a professional conservator. Always test preservation methods on non-valuable items first.