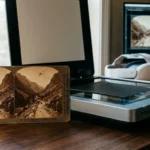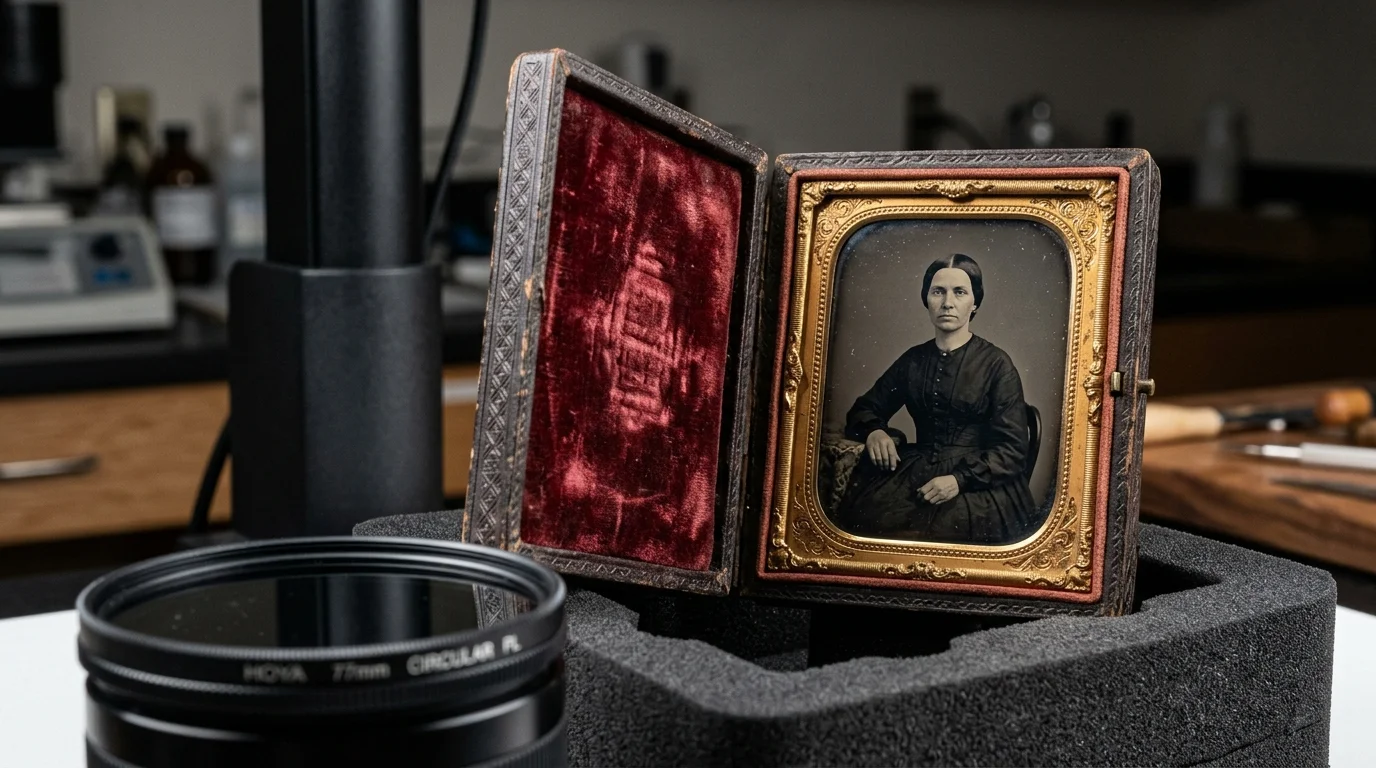
You can safely digitize your inherited collection of fragile Union case tintypes without cracking their historic hinges or fighting blinding reflections. Mounting these cases upright on an angled support neutralizes joint tension while cross-polarization lighting completely extinguishes metallic plate glare.
Standard flatbed scanners force brittle thermoplastic and paper hinges past their stop points, risking catastrophic structural failure. Vertical digitization paired with cross-polarized light bypasses both cover glass reflections and iron varnish specular highlights without stressing 170-year-old materials.
This technical guide shows you how to build an archival vertical copy cradle, extinguish harsh collodion glare, and scan antique metal photos safely.
The Vulnerability of Victorian Union Cases and Japanned Iron
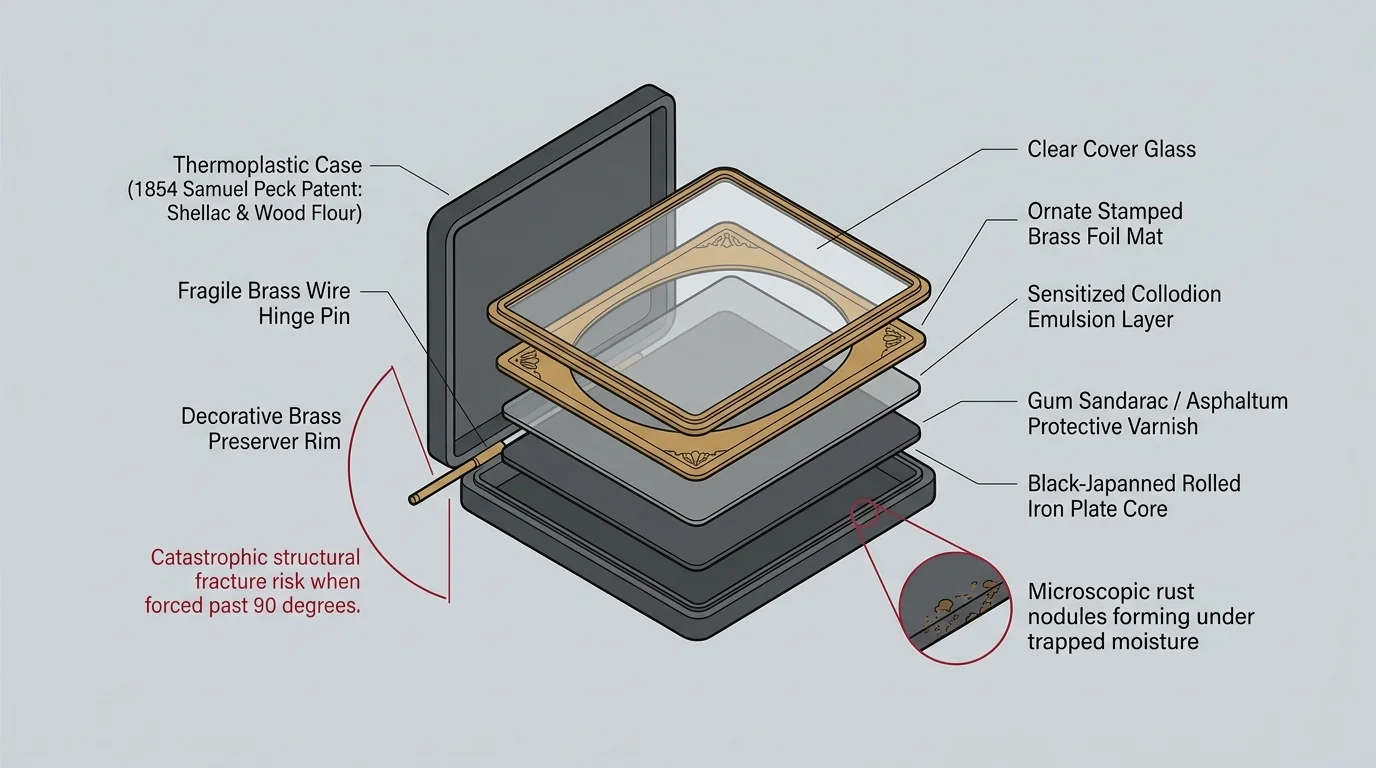
Thermoplastic Union cases represent the earliest commercially molded synthetics in photography history. Patented by Samuel Peck in 1854, these ornate cases blend shellac, wood flour, and pigment into an intricate, highly rigid structure.
Age makes this historic compound exceptionally brittle. Over decades, ambient temperature cycles leach organic binding agents from the matrix, leaving the outer casework vulnerable to spontaneous fracturing under light tension.
The internal hinge mechanism presents the greatest preservation hazard. Victorian manufacturers embedded delicate brass wire pins directly into the molded shellac rim or secured the two halves with gummed bookbinding cloth.
Opening an original thermoplastic case past a 90-degree angle exerts severe mechanical leverage against those brass hinge anchor points. Forcing both case halves to open completely flat creates immense rotational torque that will shear the brittle rim instantly.
Conservators at the American Institute for Conservation urge extreme caution when manipulating original assemblies. Internal components cannot withstand repetitive handling or uncalibrated mechanical stress without permanent loss.
Inside the protective casing sits the ferrotype plate itself. A tintype consists of a thin sheet of rolled black-japanned iron coated with a sensitized collodion emulsion.
Photographers varnished these iron plates using gum sandarac or asphaltum lacquers to shield the fragile silver image. A decorative brass foil mat, a protective cover glass, and a flexible brass preserver pinch the layers together.
This multi-layered lamination traps ambient moisture against the iron core over time. Humidity reacts with exposed iron margins, creating microscopic rust nodules that flake off if you bend the plate.
Preserving these inherited family heirlooms requires leaving the entire brass package intact within its velvet-lined well. You must never dismantle the brass preserver to remove the plate for reproduction.
Why Flatbed Scanners Threaten Historic Ferrotypes
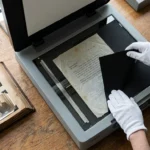
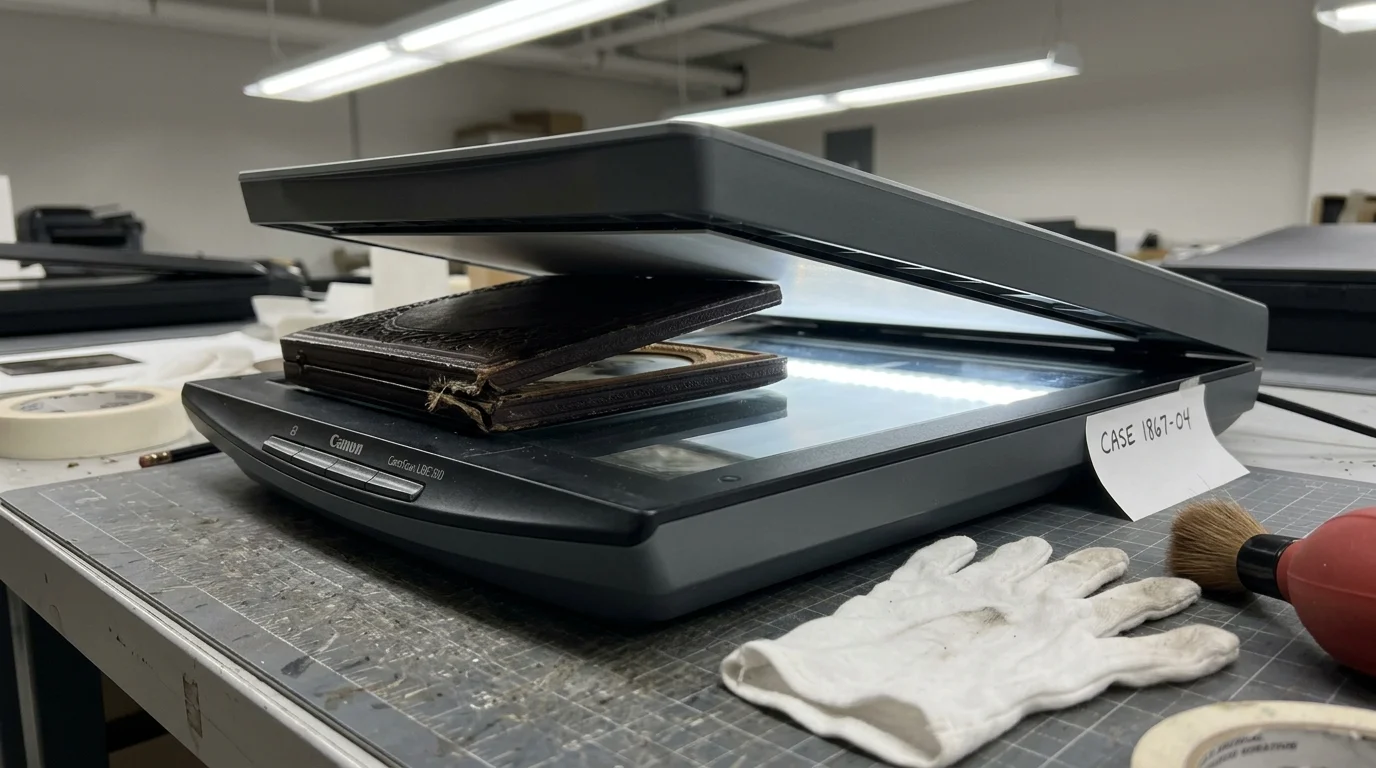
Placing an antique cased photograph on a standard desktop flatbed scanner invites catastrophic physical and optical failure. The scanner platen requires full surface contact, demanding that the case lay opened at a flat 180-degree angle.
Applying downward pressure with a scanner lid easily snaps 170-year-old thermoplastic hinges. Even leaving the lid raised leaves the suspended case lid hanging backward, placing unsupported strain on Victorian cloth joints.
Attempts to safely digitize tintype in union case housings on flatbed glass also encounter insurmountable optical barriers. Flatbed sensor arrays cast linear fluorescent or LED light perpendicular to the target surface.
This direct illumination bounces off the original cover glass, washing out midtone skin values with cloudy internal reflections. The scanner captures flare instead of the rich silver highlights of your ancestor’s portrait.
Even unglazed plates fare poorly under standard platen optics. The shiny, dark-japanned asphaltum lacquer acts as a secondary mirror, reflecting the scanner light bar directly back into the imaging sensor.
Guidelines published by the Library of Congress Preservation branch emphasize non-contact photographic capture for fragile photographic artifacts. Non-contact methods eliminate physical compression and solve acute reflection problems through directional positioning.
Modern camera sensors mounted to rigid copy supports deliver higher resolving power than consumer flatbeds. Digital camera sensors capture raw image data without subjecting historical casings to moving mechanical scanner trays.
Using a non-contact reproduction setup protects delicate brass preservers from abrasive scratches. Your family heirlooms remain securely cradled in a natural, stress-free resting posture throughout the entire digital capture process.
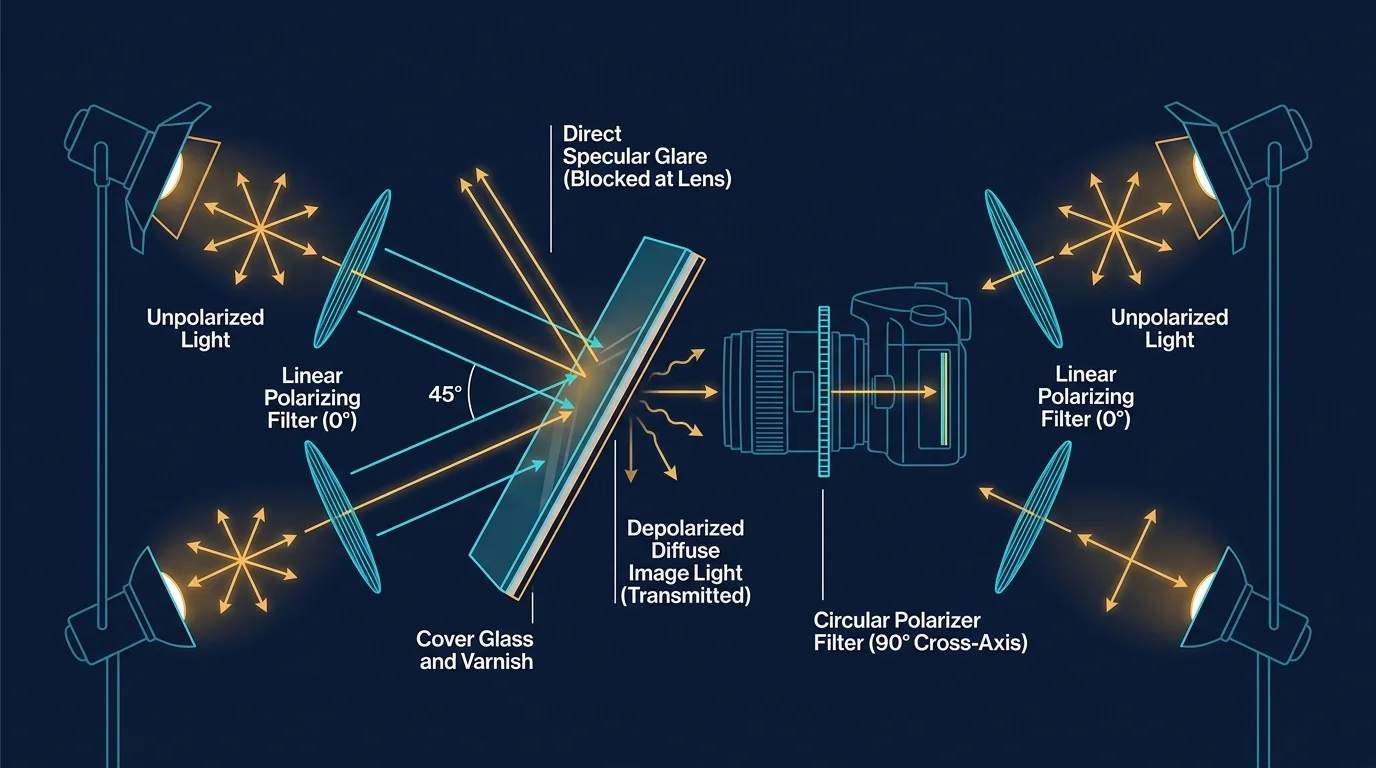
Physics of Cross-Polarization: Eliminating Iron Plate Glare
Photographing metal plates requires an understanding of specular versus diffuse reflection. Specular reflection occurs when incident light strikes a smooth, glossy surface and bounces off at the exact reciprocal angle.
Cover glass and japanned iron varnish produce intense specular reflections that overwhelm delicate silver tones. Diffuse reflection occurs when light penetrates the image emulsion, scattering omnidirectionally off the metallic silver collodion particles.
Cross-polarization isolates diffuse reflection by filtering light waves based on their geometric oscillation plane. Linear polarizing sheets placed over your light sources restrict light rays to a single vibrational axis.
When this linearly polarized light strikes the smooth surface of cover glass or varnish, it reflects directly without altering its polarization angle. The specular glare retains the exact orientation established by the light source filters.
In contrast, light rays that enter the collodion layer scatter across irregular silver particles and hand-applied pigments. This subsurface scattering completely scrambles the geometric orientation, transforming the return light into unpolarized, diffuse waves.
Mounting a circular polarizing filter to your camera lens establishes an optical gate. Rotating this lens filter to a 90-degree offset relative to the light filters blocks the polarized specular reflections entirely.
Cross-polarization strips away blinding surface glare from metallic plates and historic cover glass, revealing the true density of the underlying collodion layer.
You can review detailed optical extinction physics through tutorials on Cambridge in Colour, which explain how perpendicular filters extinguish unwanted reflections. The camera records only the diffuse image-forming information while canceling surface sheen.
This technique allows you to photograph tintype without glare while leaving original cover glass undisturbed. You reveal hidden pupil details, hand-tinted rouge, and intricate clothing textures previously obscured by murky optical reflections.
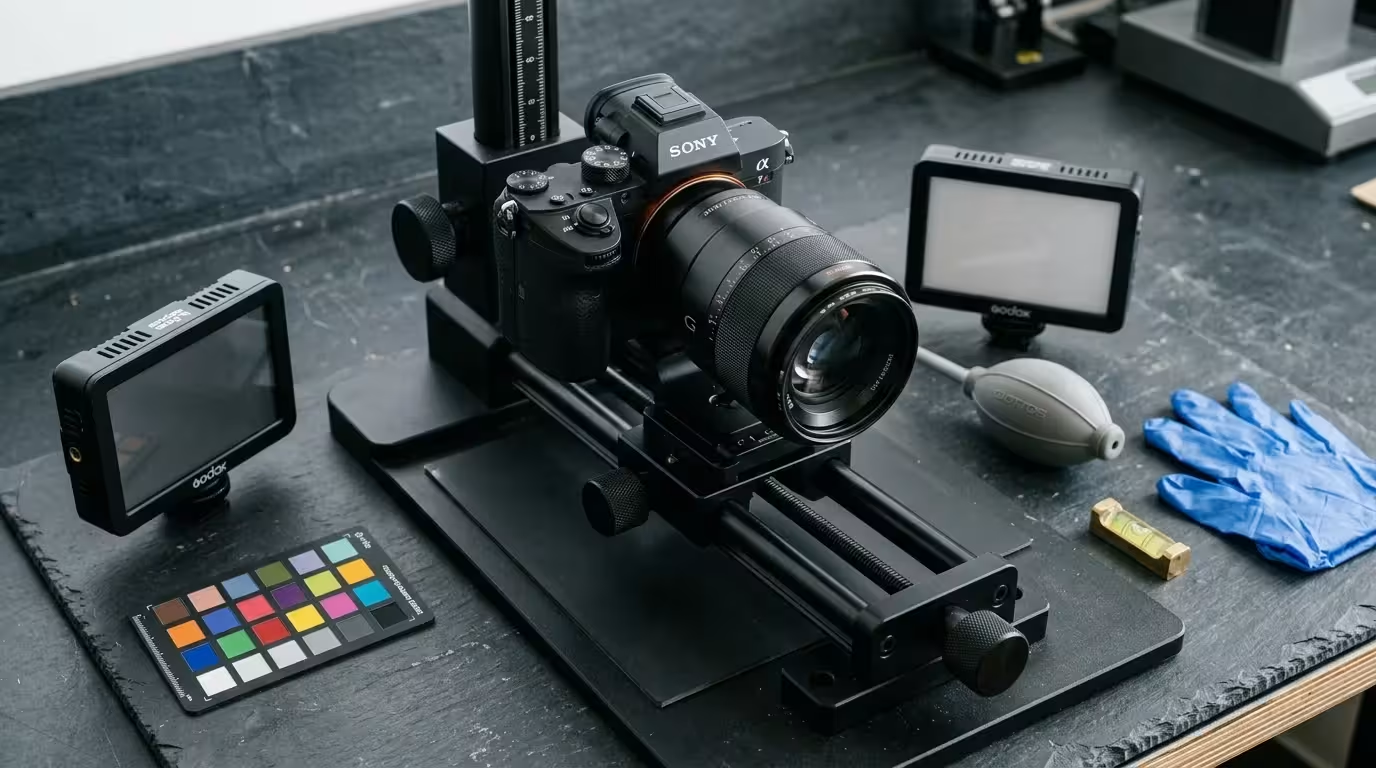
Essential Gear and Optical Setup for Vertical Digitization
Executing clean vertical copy work requires rigid physical equipment and precise optical alignment. You need an interchangeable-lens camera body paired with a dedicated flat-field macro lens.
Standard zoom lenses introduce barrel distortion and chromatic aberration along high-contrast metal borders. A 90mm or 105mm macro lens provides a flat field of focus, ensuring tack-sharp corner-to-corner reproduction across the entire plate.
Longer macro focal lengths provide generous working distance between your front lens element and the tintype. This 12-to-18-inch clearance leaves ample room to position lights at steep lateral angles without casting shadows.
Mount your camera to a heavy-duty tripod equipped with a horizontal center column or lateral arm. Alternatively, employ a professional copy stand featuring a vertical track and a 90-degree rotating tripod head.
Position two identical, balanced continuous LED lights or studio strobes on adjustable light stands. The light units must share matching color temperatures, ideally calibrated between 5000K and 5600K with a 95+ Color Rendering Index.
Cut two sheets of high-grade linear polarizing film to match your light modifiers or reflector bells. Rosco Cinegel Linear Polarizing Filter #7300 or American Polarizers linear sheets provide excellent optical extinction ratios.
Screw a premium circular polarizing filter onto your macro lens. Multi-coated options like the B+W HTC Kaesemann Circular Polarizer minimize internal flaring and maintain color neutrality across deep shadows.
Keep a bubble level or a digital two-axis hot shoe cube handy for alignment. Precise alignment guarantees your camera sensor rests completely parallel to the angled face of the antique metal photograph.

Building an Archival Vertical Cradle for Angled Support
Never balance a rare Union case on an improvised stack of household books. You must construct a stable, inert support cradle that props the open case securely at an 80-degree rake.
An 80-degree vertical angle lets gravity hold the case halves firmly against a rear support board. This steep angle prevents the case from tipping forward while eliminating mechanical tension from the fragile hinge knuckle.
Cut a rigid backboard from acid-free, four-ply museum matboard or inert Ethafoam closed-cell polyethylene foam. Ethafoam provides firm, non-abrasive backing that absorbs light vibrations during shutter release.
Fashion a narrow supporting lower lip along the cradle base to catch the bottom edge of the case. Ensure this shelf supports the perimeter frame evenly without concentrating weight on the delicate bottom hinge corner.
Line the interior contact surfaces of your cradle with black archival cotton velvet or inert polyester felt. The dark fabric prevents stray light bounce while protecting ornate thermoplastic relief designs from scuffing.
Leave ample side clearance so the open case lid rests unsupported by hinges at an open arc between 75 and 85 degrees. Resting both halves against separate foam wedges prevents the case from torquing sideways.
Fasten your cradle components using pH-neutral polyvinyl acetate (PVA) adhesive or archival 3M #415 double-sided tape. Allow all adhesives to cure completely for 48 hours to prevent off-gassing near antique collodion surfaces.
Once assembled, place your cradle on a non-slip neoprene mat set atop a level work surface. This dedicated support system isolates your inherited treasures from sudden shocks during optical alignment and capture.
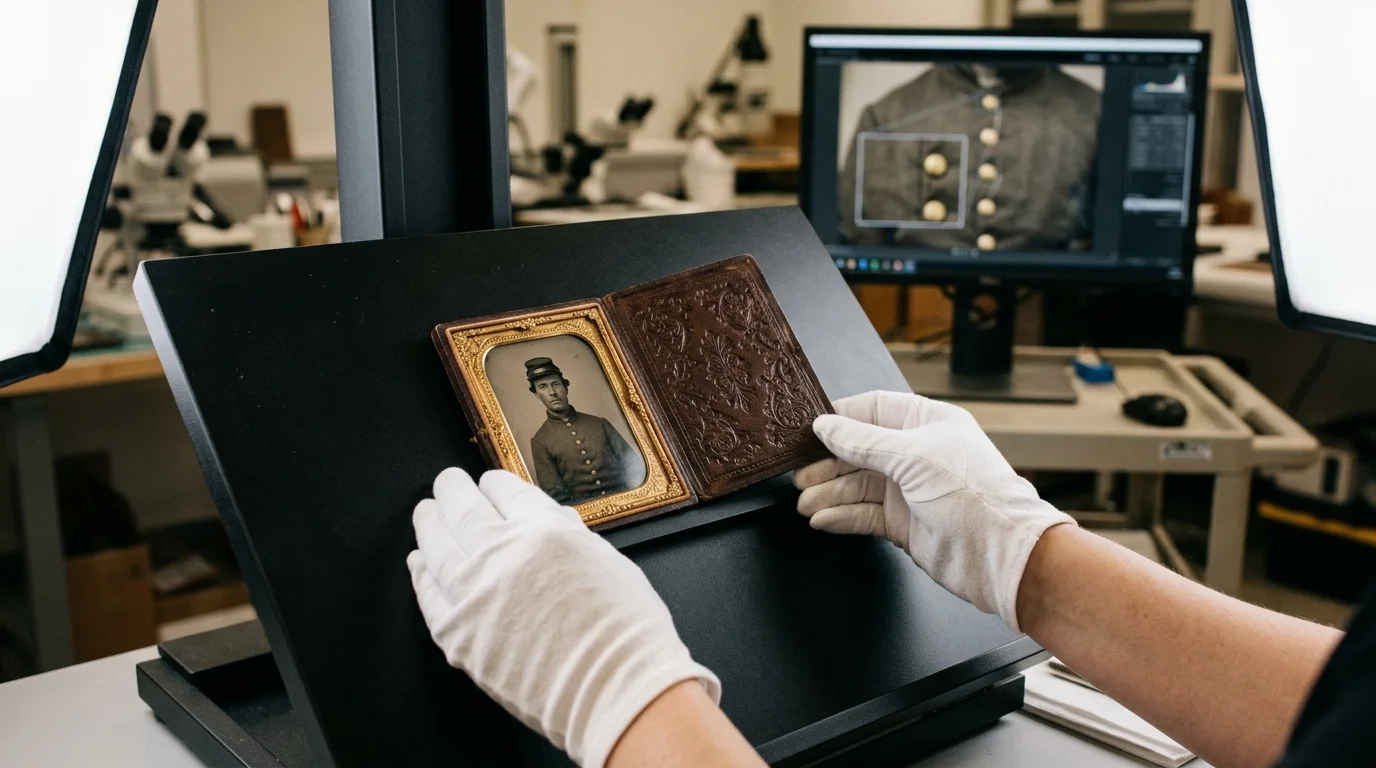
Worked Example: Sixth-Plate Union Case Portrait Setup
Consider an authentic scenario digitizing an inherited sixth-plate tintype measuring 2.75 by 3.25 inches. The artifact features an unmounted Civil War infantry soldier portrait captured on October 14, 1862.
The image sits inside an ornate thermoplastic Union case manufactured by Littlefield, Parsons & Company. The case measures 3.25 by 3.75 inches closed, featuring brittle shellac corners and fragile internal paper hinge joints.
The digitization equipment array utilizes a full-frame mirrorless camera paired with a 90mm macro lens. The equipment cost and operational settings break down into exact measurable metrics:
- Camera and Lens: 61-megapixel full-frame body with 90mm f/2.8 macro lens positioned 14 inches from the plate.
- Illumination: Twin continuous 5600K LED studio heads drawing 60 watts each, placed 22 inches away at 45 degrees.
- Polarization Filters: Two Rosco #7300 linear sheets ($34.50 each) and one 62mm B+W Kaesemann CPL ($95.00).
- Support Materials: Custom 80-degree Ethafoam cradle built from scrap material ($12.00 archival foam block).
- Total Dedicated Filtration and Support Outlay: $176.00 total material investment.
- Exposure Parameters: ISO 100, aperture f/8.0, shutter speed 1/8 second, daylight white balance (5600K).
Before engaging cross-polarization, the cover glass bounce washed out 65 percent of the dark soldier uniform. Strong specular reflection from the underlying japanned iron completely obliterated the hand-painted gold belt buckle details.
Rotating the lens filter extinguished 98 percent of surface reflections within four minutes of setup adjustment. The cross-polarized capture clearly revealed the stamped regimental brass insignia, faint pencil annotations on the preserver, and authentic cheek tinting.
The entire physical digitizing run required 25 minutes of initial rig alignment. Each subsequent cased tintype in the 50-piece heirloom collection required just three minutes of handling and capture time.
The Union case never opened past an 80-degree angle throughout the entire digitization session. The historic thermoplastic structure remained intact, preserving both the digital data and physical family legacy safely.
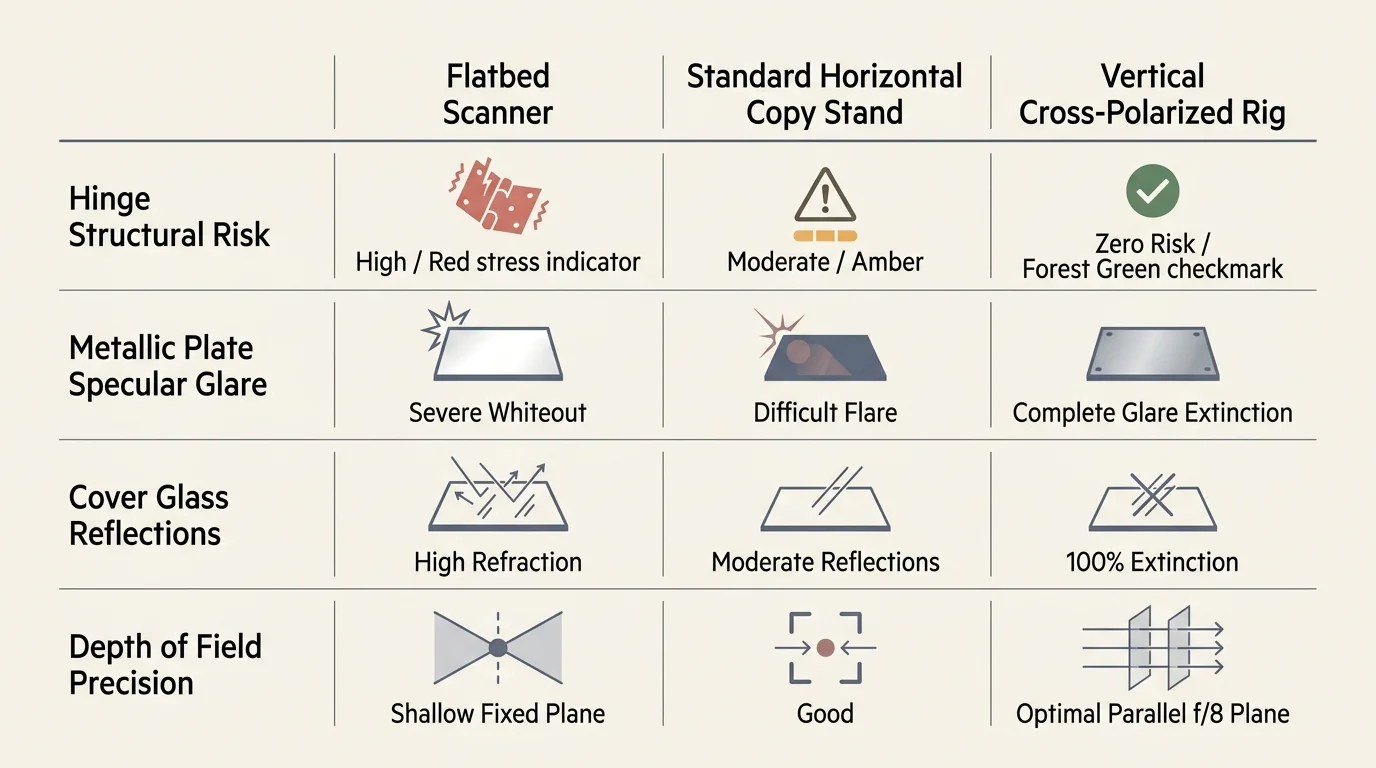
Comparison of Cased Metal Photo Capture Methods
Selecting the right digitizing strategy depends on evaluating physical safety, optical fidelity, and gear complexity. The following table provides measurable criteria for different photographic reproduction techniques.
| Digitization Method | Mechanical Opening Angle | Hinge Failure Risk | Glare Extinction Ratio | Optical Resolution | Average Setup Cost |
|---|---|---|---|---|---|
| Consumer Flatbed Scanner (e.g., Epson V850 Pro) | 180° forced flat | Extreme (90% risk of joint shear) | 0% (Uncontrolled specular reflections) | 1,800 true optical DPI | $1,150.00 |
| Overhead Horizontal Copy Stand (Direct Light) | 110° to 135° propped | Moderate (Gravity pulls lid backward) | 15% to 30% (Severe cover glass flare) | 3,200 to 4,500 effective DPI | $650.00 |
| Vertical Angled Copy Rig (Cross-Polarized) | 75° to 85° supported | Zero (Neutral gravity distribution) | 95% to 99% (Complete specular extinction) | 4,000 to 6,000+ effective DPI | $176.00 (Accessories only) |
The comparative data highlights why flatbed scanners present an unacceptable mechanical threat to historic cases. Flatbed platens require complete 180-degree extension, placing irreplaceable Victorian materials at catastrophic mechanical risk.
Overhead copy stands reduce physical breakage but struggle with metallic glare unless paired with bulky polarizing sheets. Angling your target vertically delivers superior optical control while keeping delicate hinge pins completely resting in neutral gravity.
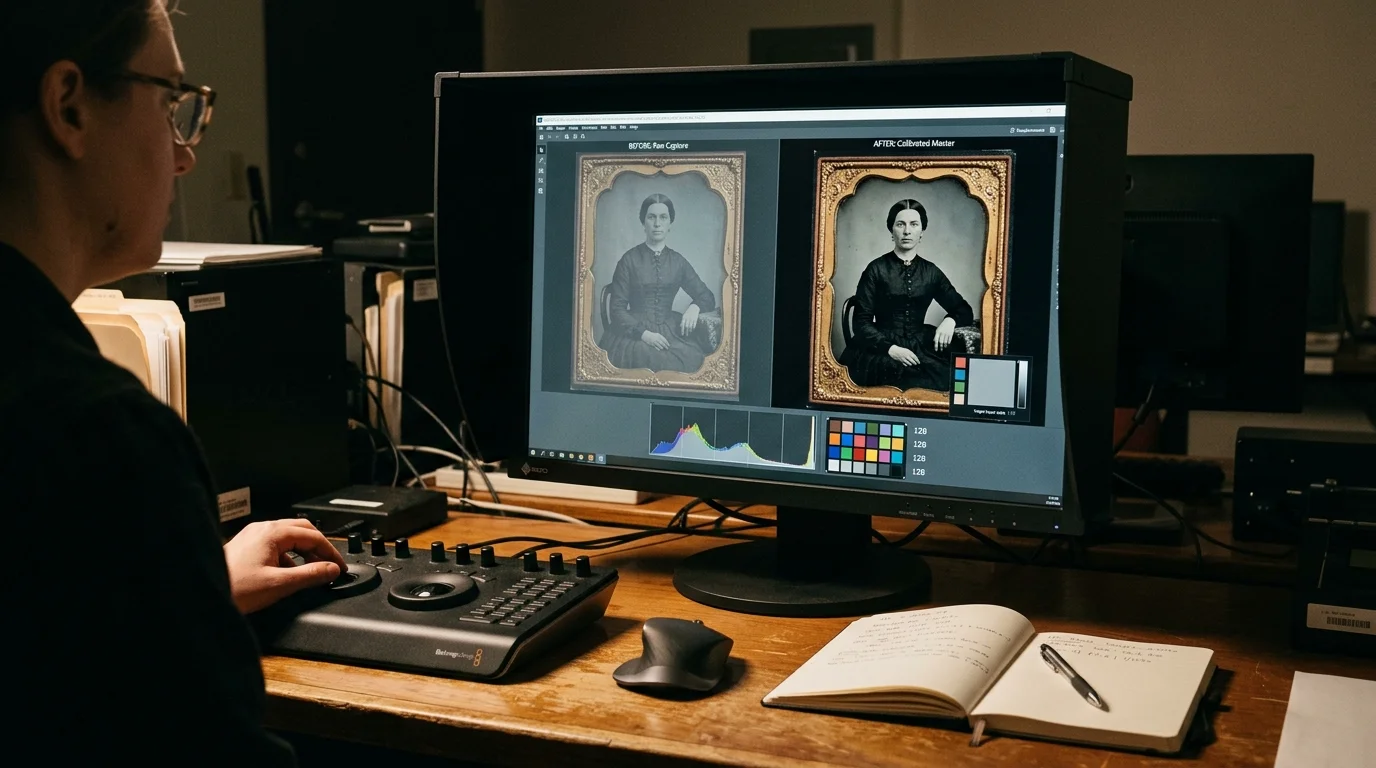
Post-Processing and Master Archival File Export
Cross-polarization increases perceived visual contrast by extinguishing surface reflections that normally lift shadow tones. Raw files captured under cross-polarized illumination require slight tone curve adjustments to restore authentic tonal gradations.
Import your uncompressed 14-bit or 16-bit raw image files into your professional image editing software. Avoid automated auto-contrast filters, which aggressively clip deep shadow details in black-japanned iron backgrounds.
Sample a neutral gray area on a photographic color card placed next to your cradle during framing. Adjust your global color temperature to neutralize minor color shifts introduced by polarizing film sheets.
Lift shadow levels gently to recover delicate emulsion gradations in dark wool garments and hair shadows. Apply a subtle S-curve adjustment to midtones to replicate the visual warmth of 19th-century collodion plates.
Export your finished digital master as an uncompressed, 16-bit TIFF file at Adobe RGB (1998) or ProPhoto RGB color space. Retaining full 16-bit color depth prevents posterization during future preservation migrations.
Store your master preservation TIFFs on redundant storage using the standard 3-2-1 archival backup framework. Keep three copies across two distinct media types, storing one backup offsite or in cloud storage.
Generate lightweight derivative sRGB JPEG or WebP files for everyday family sharing, genealogical research, and web displays. These accessible derivatives protect your master archival digital assets from accidental overwriting or deletion.
Frequently Asked Questions
Can I safely clean the tintype cover glass before vertical photography?
Clean only the exterior surface of the cover glass using a dry camel-hair brush or an optical bulb blower. Never spray liquid cleaners or dismantle the brass preserver, as moisture will seep inside and destroy the iron plate.
Why do cross-polarized tintype photographs sometimes display rainbow colors?
Victorian cover glass often contains internal mechanical stress patterns created during historic annealing processes. Cross-polarized light reveals this stress as subtle birefringence rainbows; rotating your lens filter slightly off full extinction will eliminate the effect.
Do I need specialized linear polarizers for my lights, or do circular filters work?
Light heads require linear polarizing sheets because they produce uniform polarization across large emission angles. Circular polarizers work well on camera lenses to avoid autofocus sensor errors, but are inefficient when mounted across studio lights.
What should I do if an inherited thermoplastic Union case hinge is already broken?
Support both separated case halves independently within your archival foam cradle during photography without forcing them together. Never attempt repairs using commercial superglues or epoxy resins; consult a professional conservator to repair historic shellac composites safely.
Disclaimer: This article is for informational purposes only. When handling valuable or irreplaceable photographs, consider consulting a professional conservator. Always test preservation methods on non-valuable items first.