Preserving your grandmother’s yellowed handwritten recipe cards requires precise flat capture to prevent blurred handwriting and curved ruling lines. Standard smartphone lenses bend card edges when held close, turning your family heirloom binder into a distorted record.
You can eliminate this barrel distortion completely by mounting your mobile device at a 31-centimeter metric offset and selecting the 2x teleconverter setting. This optical configuration produces straight margins across standard 3×5 and 4×6 index cards without buying a flatbed scanner.
This guide details the exact focal length thresholds, copy stand geometry, and raking-light mitigation strategies necessary to capture fragile recipe ephemera cleanly.
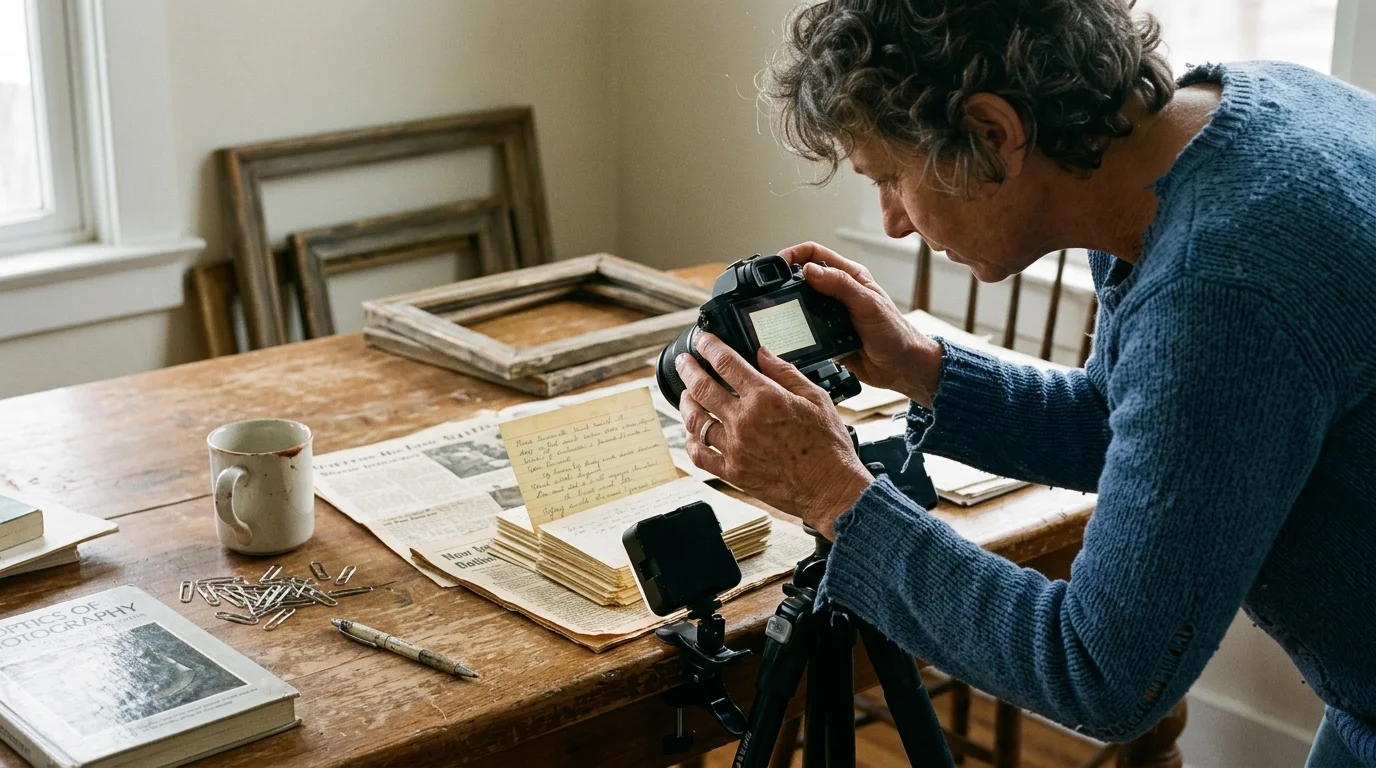
The Optical Physics of Document Keystoning and Barrel Distortion
Document reproduction photography demands strict geometric fidelity. When you photograph a small physical document like a 3×5 index card, two distinct optical aberrations can ruin the image: keystoning and barrel distortion.
Keystoning occurs when your camera sensor plane is not parallel to the document plane. If your smartphone tilts even two degrees off-axis, the edge closest to the lens appears unnaturally magnified while the opposite edge recedes.
This perspective skew transforms a rectangular index card into a trapezoid. Software tools can crop and rectify keystoning later, but digital correction stretches pixel data and degrades fine ink strokes.
Barrel distortion is an inherent lens aberration where straight lines bow outward toward the edges of the frame. Wide-angle mobile lenses bend the blue horizontal rules of recipe cards into curved arcs.
According to technical tutorials on lens geometry from Cambridge in Colour, retrofocus wide-angle camera designs suffer higher field curvature when focusing on flat objects at close distances.
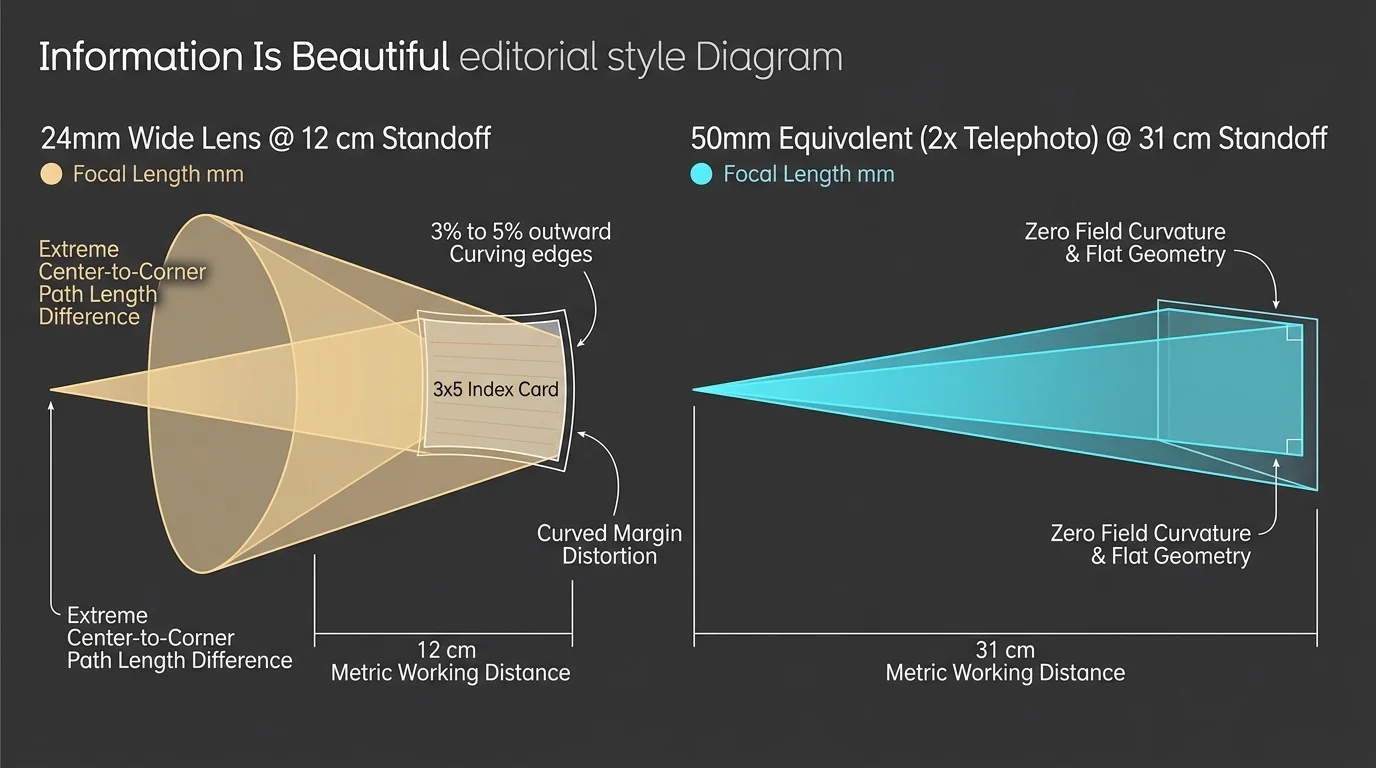
When you place a phone 10 centimeters above a card, the center of the card sits closer to the lens than the corners. This distance variation forces the card edges into optical curvature.
Eliminating barrel distortion requires increasing the distance between your lens and the card. Backing away reduces the difference in optical path length between the card center and its outer borders.
The 50mm Focal Length Threshold: Why Wide Lenses Warp 3×5 Cards
Most modern smartphones feature a primary camera with a 24mm to 28mm full-frame equivalent focal length. These wide perspectives are designed for landscape scenes and group portraits, not macro document capture.
If you frame a 3×5 card with a 24mm lens, you must position the phone approximately 12 centimeters away. At this proximity, barrel distortion curves card borders by as much as three to five percent.
Switching your smartphone camera to its 2x telephoto setting alters the optical rendering. This mode utilizes a 48mm to 52mm equivalent focal length, bringing the lens geometry closer to normal human visual perspective.
A 50mm equivalent focal length compresses perspective and straightens peripheral lines. The optical elements capture parallel document margins without turning ruled index lines into bulging curves.
Standardizing reproduction captures at a 50mm equivalent focal length flattens your perspective, ensuring that index cards remain geometrically square from corner to corner.
Using the 2x focal length also avoids the aggressive software dewarping algorithms native to ultra-wide lenses. Those algorithmic corrections frequently smear handwritten recipe annotations and fine pencil marks.
You preserve authentic archival records by relying on optical standoff distances rather than computational image stretching. The 50mm threshold provides the ideal balance between resolution density and geometric flatness.
Repro Photography Smartphone Rig: Exact Metric Heights and Standoffs
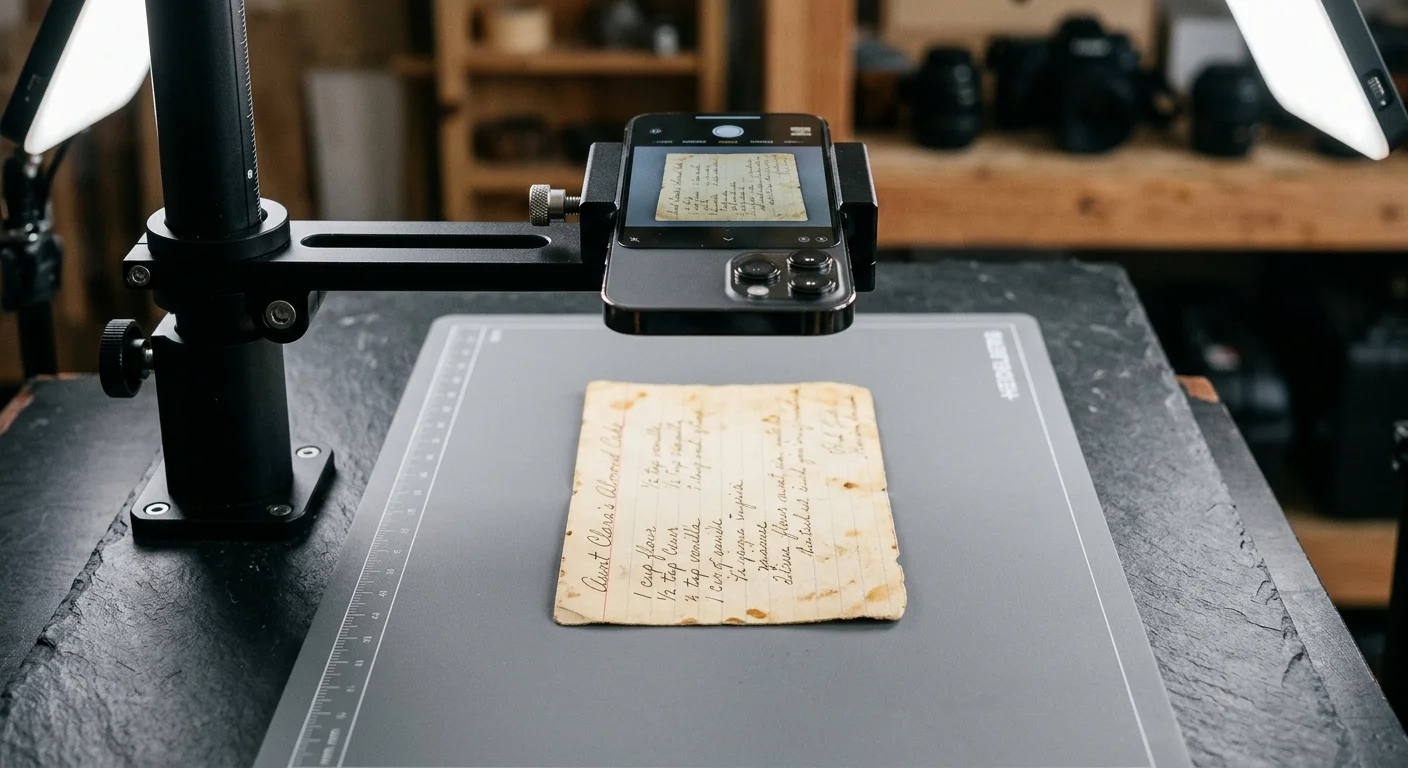
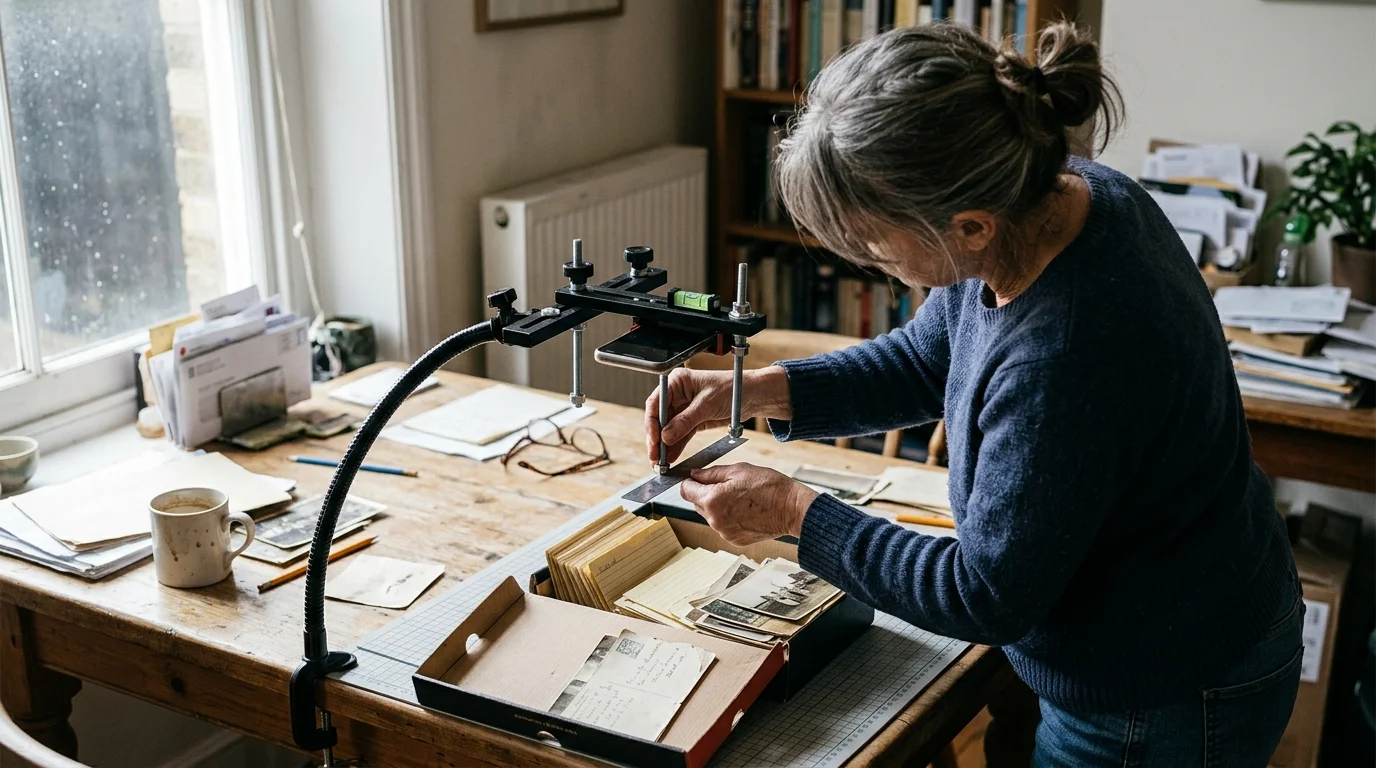
Handholding your smartphone introduces micro-jitters, uneven lighting shadows, and angular pitch errors. You need a rigid desktop copy stand or a heavy articulated arm clamped to a stable work surface.
Precision repro photography requires an exact metric height offset. For a standard 3×5 index card (76.2 x 127.0 mm), set your smartphone camera sensor at an elevation of 31.0 centimeters above the baseboard.
At 31.0 centimeters with a 2x (48mm–50mm equivalent) focal setting, the card fills approximately 75 percent of your viewfinder. This framing leaves an optimal border cushion around the ephemera.
Keeping a 15 to 20 percent margin around the card avoids the extreme corners of the image frame. Even corrected telephoto mobile lenses exhibit minor optical falloff at the outer two percent of their image circle.
If you are digitizing larger 4×6 index cards (101.6 x 152.4 mm), adjust your standoff height to 38.5 centimeters. This vertical shift maintains the identical framing proportion without altering your focal length.
Use a two-axis torpedo bubble level to calibrate your physical baseboard. Place the level flat on the copy board surface, ensure absolute zero tilt, and then transfer the level directly to the back of your smartphone.
Activate the native grid and level overlays on your mobile operating system. On iOS or Android, two central crosshairs merge into a single target when your device sits parallel to the table.
Maintain an alignment threshold under 0.5 degrees of deviation. A deviation of just one full degree introduces noticeable keystoning across a 127-millimeter card edge.
Dual 45-Degree Balanced Cross-Lighting for Aged Ephemera
Direct overhead lighting is disastrous for flat reproduction work. Overhead light reflects off glossy ink, catches grease stains, and creates a silhouette of your phone directly across the recipe instructions.
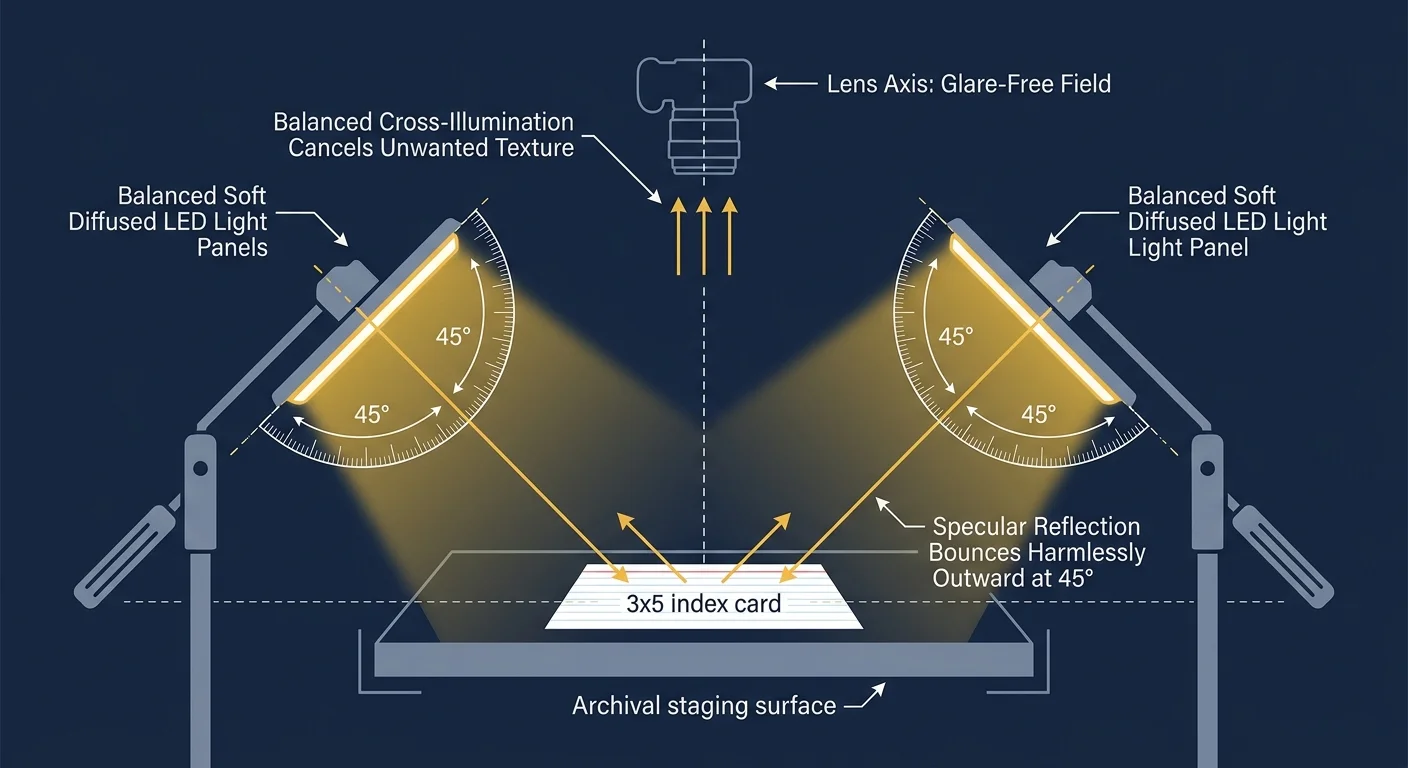
Professional repro setups use dual 45-degree balanced cross-lighting. Position two identical light sources on opposing sides of your copy board, angled inward at 45 degrees toward the center.
Setting the fixtures at 45 degrees directs light bounces away from the camera lens. This geometry eliminates specular glare while illuminating the fibrous surface of aged paper uniformly.
Place each light head exactly 45 centimeters away from the card center. Placing both fixtures at identical distances balances light output across the entire document plane.
Use LED bulbs rated at 5000 Kelvin (daylight balanced) with a Color Rendering Index (CRI) of 95 or higher. High-CRI illumination renders faded iron-gall inks, vanilla extract splatters, and pencil margins accurately.
Avoid standard 2700K incandescent or warm-white residential bulbs. Warm bulbs force smartphone sensors to push the blue balance channel, amplifying digital noise in white card areas.
Fit each lamp with a matte diffusion panel or sheer diffusion paper. Diffuse illumination softens paper texture without creating directional shadows behind torn edges or curled corners.
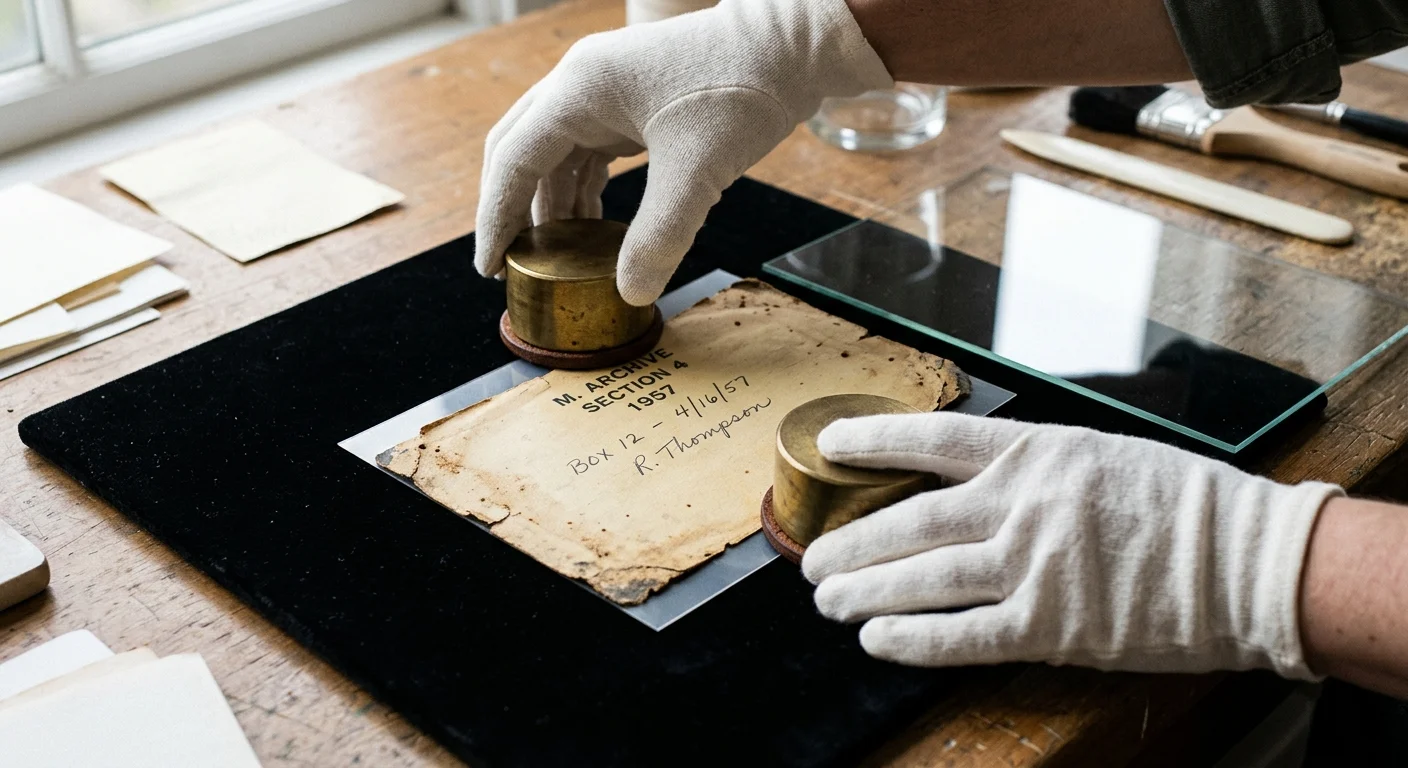
Surface Flattening and Safe Archival Handling of Fragile Cards
Vintage recipe cards are often brittle, stained with animal fats, and warped by humidity. Flattening them carelessly can crack old paper fibers or flake off dry ink notations.
Never apply tape, adhesive putty, or synthetic post-it notes to secure a card to the copy board. Adhesives leave chemical residues that accelerate acid degradation in wood-pulp card stock.
According to the American Institute for Conservation, paper artifacts should always be handled with clean, dry hands on stable surfaces to prevent chemical transfer and structural tears.
To flatten warped cards without destructive pressure, place an optical-grade anti-reflective glass sheet or acrylic platen over the card. Ensure the glass edges are smooth and taped to protect your hands.
If you prefer not to touch fragile graphite writing with glass, use clear archival polyester sleeves. Archival polyester films, such as Melinex 516, hold the card flat while maintaining chemical neutrality.
The Library of Congress preservation guidelines recommend polyester film encapsulations for fragile paper items because the static charge holds curling ephemera flat naturally.
Lay a sheet of non-reflective neutral-gray paper beneath your recipe card. A 18% gray or matte black background provides contrast for edge detection and assists automated cropping workflows.
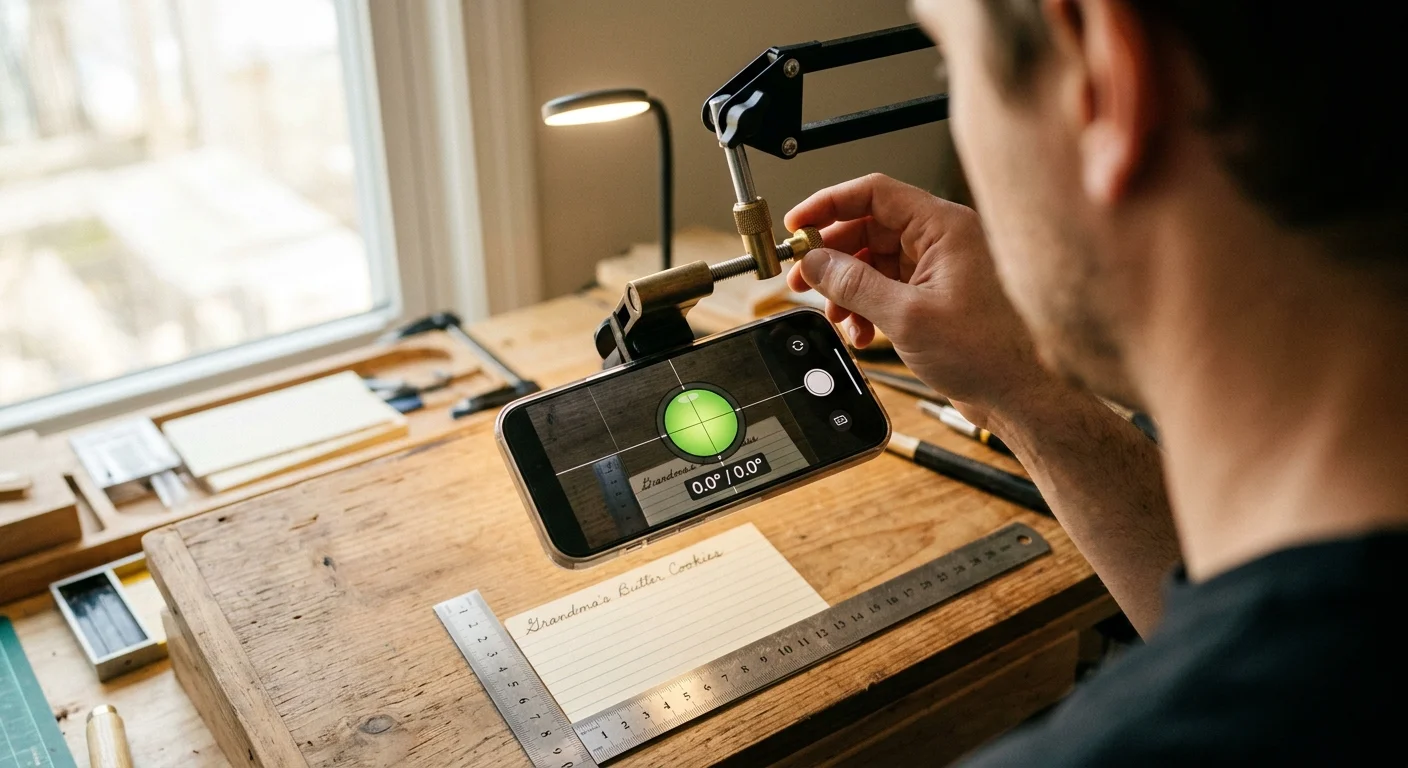
Step-by-Step Repro Calibration: A Worked 3×5 Recipe Card Example
Consider this practical scenario: digitizing a yellowed 1948 butter-cookie recipe written in pencil on a 3×5 index card. The paper exhibits curled upper corners and a minor cooking oil spot.
First, secure your smartphone into an overhead clamp attached to a rigid arm. Position the baseboard on a level counter, verifying zero pitch with a small bubble level.
Next, adjust the vertical arm until the camera lens rests exactly 31.0 centimeters above the card plane. Switch your camera app to 2x telephoto mode to engage the 50mm optical profile.
Place two 5000K 95-CRI LED work lights on the left and right sides. Position each light 45 centimeters from the center point, tilted downward at a 45-degree angle.
Set a matte 18% gray card on the baseboard. Open your camera app, lock the auto-exposure, and set manual color temperature to 5000K to prevent color-shifting between cards.
Replace the gray card with your vintage recipe card. Verify that the card aligns with your on-screen compositional grid lines, ensuring the red margin rule runs parallel to the vertical guide.
Place a small sheet of 2-millimeter anti-reflective framing acrylic over the card to tame corner curling. Check that no specular reflections bounce back into the viewfinder.
Set your camera shutter delay to a 3-second self-timer. Triggering the shutter with a timer prevents hand vibration from introducing micro-blur into the fine pencil writing.
Inspect the final capture at 100 percent magnification on your screen. The ruling lines should register straight within a 0.2-millimeter tolerance across the entire 127-millimeter length.
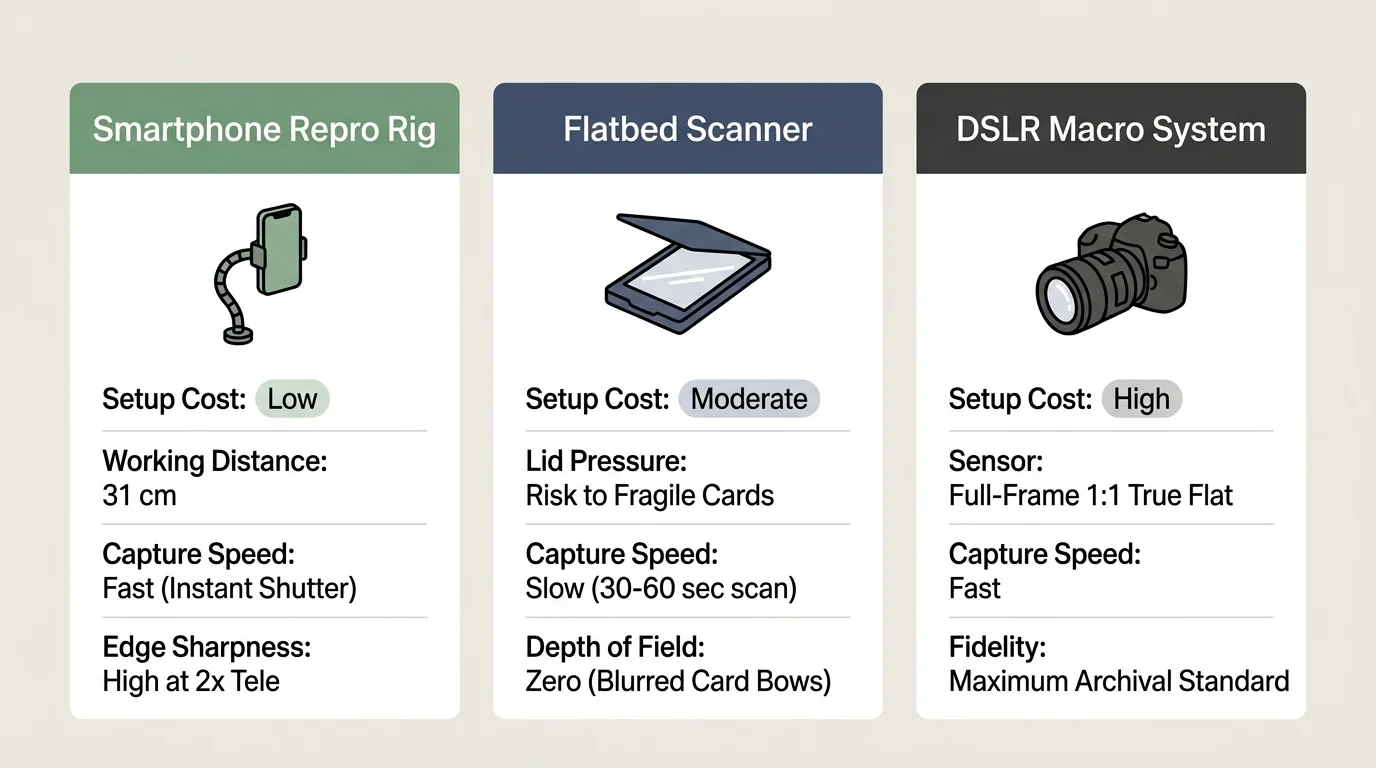
Hardware Comparison: Smartphone Repro vs Flatbed and Dedicated Macro
Choosing the right digitizing setup depends on collection volume, fragile card condition, and available space. The table below compares four distinct capture workflows using empirical optical metrics.
| Capture Method | Working Distance | Optical Barrel Distortion | Effective Optical Resolution | Fragile Media Safety | Capture Speed per Card |
|---|---|---|---|---|---|
| Smartphone Repro Rig (50mm Eq.) | 31.0 cm | < 0.4% (Imperceptible) | 300–400 DPI equivalent | High (Non-contact overhead) | 5–8 seconds |
| Smartphone Handheld (24mm Wide) | 12.5 cm | 3.2%–4.8% (Pronounced) | 150–220 DPI (Edge falloff) | Moderate (Accidental contact) | 10–15 seconds |
| Desktop Flatbed Scanner | 0.0 cm (Contact) | 0.0% (Zero distortion) | 600–1200 True DPI | Low (Lid pressure shearing) | 45–60 seconds |
| Mirrorless Camera + 50mm 1:1 Macro | 28.5 cm | < 0.1% (Optically Flat) | 800–1400 DPI equivalent | High (Non-contact overhead) | 4–6 seconds |
As the table demonstrates, the calibrated smartphone repro rig closely rivals dedicated macro photography in distortion management. It holds edge curvature under 0.4 percent while dramatically outpacing flatbed scanners in workflow speed.
Flatbed scanners provide zero barrel distortion, but their heavy lids pose shearing risks to friable pencil graphite and brittle paper stock. A non-contact overhead stand protects fragile heritage ephemera completely.
Handheld wide-angle captures produce unacceptably high barrel distortion that warps historical handwriting. Adopting the metric standoff and 50mm equivalent focal threshold transforms standard smartphone cameras into reliable archival tools.
Frequently Asked Questions
Why does my phone camera automatically switch lenses when I lower it toward the card?
Modern mobile phones engage automatic macro switching, switching from the telephoto lens to the ultra-wide lens when focusing closely. Disable macro switching in your camera settings to lock your capture to the 2x telephoto camera.
Can I use an iron to flatten curled index cards before photographing them?
Never apply a clothes iron to vintage recipe cards. High heat scorches dry paper fibers, melts fatty kitchen stains into the paper core, and can cause old ink to bleed or vaporize instantly.
Why do the blue lines on my recipe cards appear wavy in the final photo?
Wavy lines indicate barrel distortion caused by shooting with a wide-angle lens too close to the card surface. Elevate the camera to 31 centimeters, select the 2x focal setting, and align the phone parallel to the baseboard.
Is anti-reflective acrylic better than standard picture frame glass for flattening ephemera?
Anti-reflective museum acrylic is preferable because it minimizes surface glare from cross-lights while weighing less than glass. Standard picture frame glass reflects bright specular highlights that obscure handwritten ink annotations.
Disclaimer: This article is for informational purposes only. When handling valuable or irreplaceable photographs, consider consulting a professional conservator. Always test preservation methods on non-valuable items first.