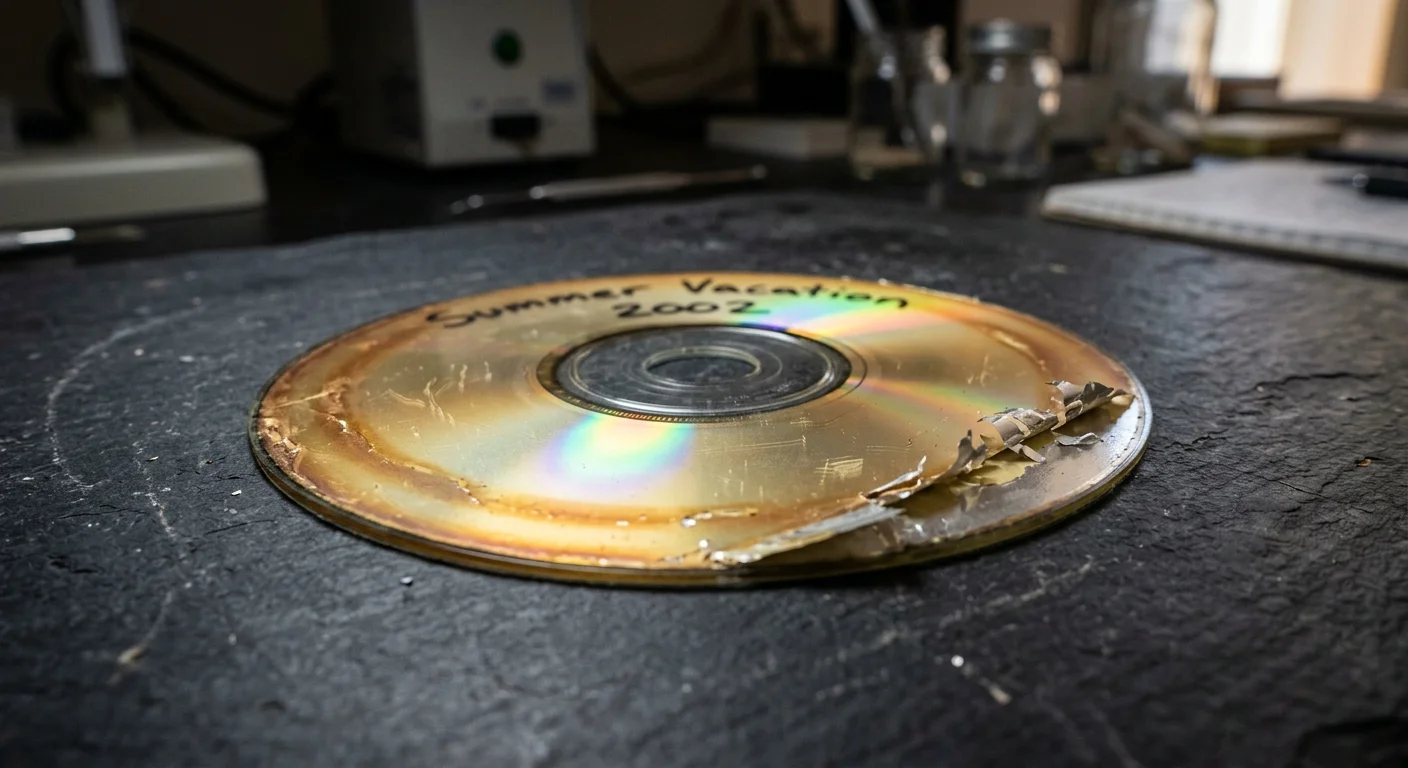
If you inherited a spindle of early 2000s family vacation CD-Rs, you likely face frozen drives and read errors. Amber discoloration rings and peeling edges signal active optical media decay across your irreplaceable family snapshots.
Cleaning the clear polycarbonate base will not fix this failure. The true damage occurs inside the top lacquer layer, where chemical oxidation strips the reflective metal away from the organic recording dye.
Standard file managers abandon unreadable discs through endless I/O timeouts, but you can rescue these photographs. Raw block-level sector extraction bypasses operating system errors to recover your digital memories before total degradation.
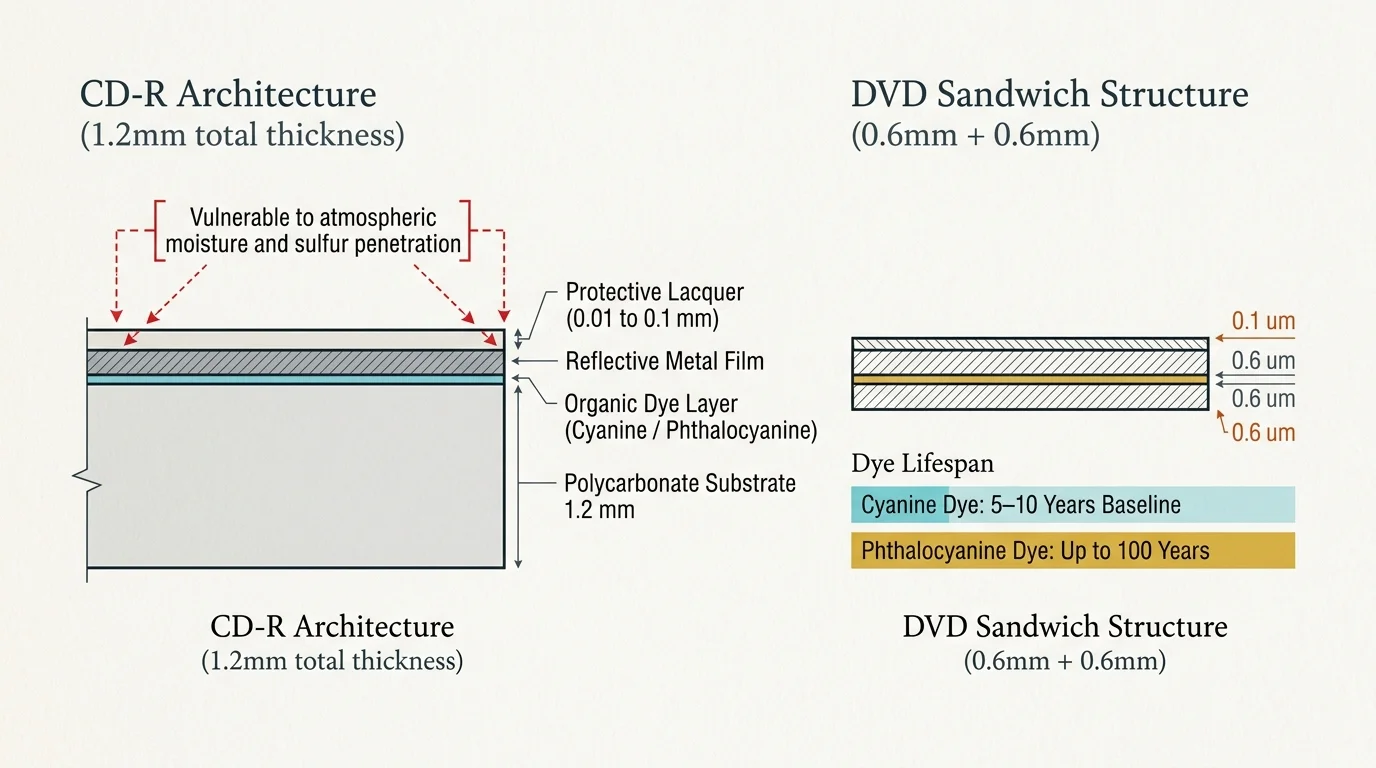
The Anatomy of CD-R Decay: Cyanine, Phthalocyanine, and Top-Layer Exposure
Optical recordable media relies on a delicate sandwich of organic chemistry and thin metallic film. Unlike pressed commercial discs with molded pits, CD-Rs encode digital data by chemically altering an organic dye layer with a writing laser.
Beneath the surface, your family photographs depend entirely on the optical contrast between altered and unaltered dye areas. A reflective metal layer bounces the reading laser back to the drive sensor to register binary data.
The data layer of a CD-R sits directly beneath the printed label, protected by mere microns of lacquer rather than solid plastic. A scratch or oxidation on the top surface destroys the data immediately.
Standard 1.2-millimeter CD-Rs place the reflective metal and dye layers within roughly 0.01 to 0.1 millimeters of the top label surface. Conversely, DVDs sandwich their data layer safely between two bonded 0.6-millimeter polycarbonate substrates.
Because CD-Rs lack thick protective backing on top, atmospheric moisture and airborne sulfur penetrate defective acrylic lacquer coatings easily. This exposure triggers catastrophic oxidation in standard consumer discs burned twenty years ago.
The organic dye itself dictates your rescue timeline. Early consumer CD-Rs commonly used cyanine dye, recognizable by its cyan-blue hue, or azo dyes with deep blue tones.
The Library of Congress optical media preservation research highlights that cyanine dyes are highly susceptible to light degradation and environmental moisture. They exhibit baseline lifespans as brief as 5 to 10 years under typical domestic conditions.
Discs manufactured with phthalocyanine dye appear light green or light gold. This chemical compound exhibits far superior resistance to heat and humidity, offering theoretical lifespans extending toward 100 years.
Most home-burned discs from 1998 through 2005 utilized cheaper cyanine or metal-azo formulations combined with vulnerable silver alloy reflective layers. Today, these discs have crossed their projected 20-year survival window, creating an urgent preservation emergency.
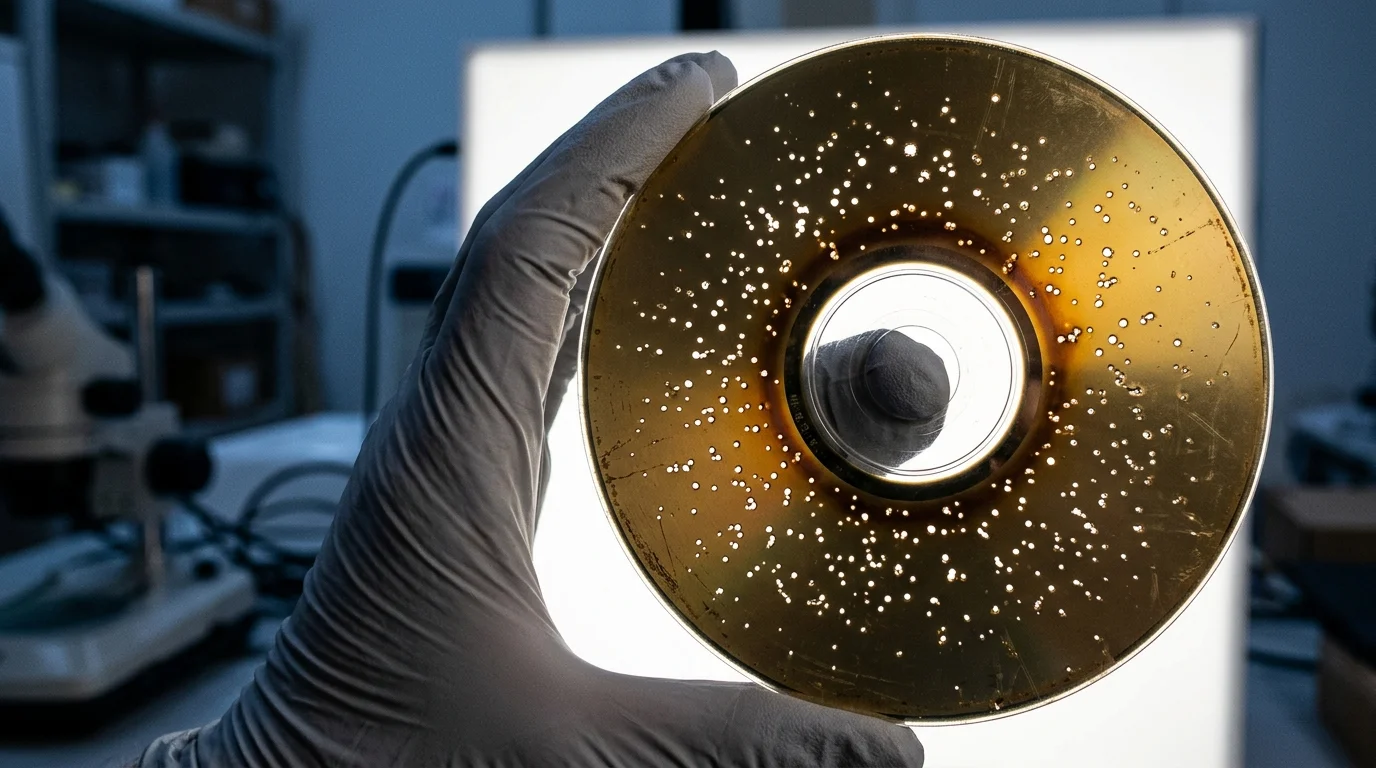
Diagnosing Disc Rot: Bronzing, Pinholing, and Operating System Timeouts
You can identify progressive optical media decay through simple visual inspection under a direct halogen or incandescent light. Look for physical transformations on both the top lacquer surface and the underlying reflective plane.
Disc bronzing appears as an uneven amber, golden-brown, or copper discoloration spreading inward from the outer disc rim. This discoloration stems from silver oxidation, which destroys the reflective properties needed for laser read-back.
Pinholing presents as tiny points of light shining through when you hold the disc up against a strong backlight. Each visible pinhole represents a complete loss of the metallic reflective layer and its associated data blocks.
Edge delamination occurs when the clear polycarbonate disc body separates from the metallic and lacquer layers. As air enters the separating layers, the reflective material curls, cracks, and flakes away permanently.
When you insert a decaying disc into a modern computer, standard operating systems react predictably and poorly. Windows File Explorer and macOS Finder attempt to mount the disc by reading the primary volume descriptor.
As the optical drive laser encounters oxidized dye or missing reflective metal, it loses track synchronization. The hardware driver enters an internal retry cycle that hangs your system indefinitely.
Standard operating systems assign a 30-second input/output timeout to every failed block. A rotten disc with thousands of degraded sectors can freeze your operating system for hours before aborting the copy process.
Normal copy commands discard entire directories when encountering a single unreadable cluster. Preserving these images requires bypassing the operating system filesystem driver through direct, hardware-level sector extraction.
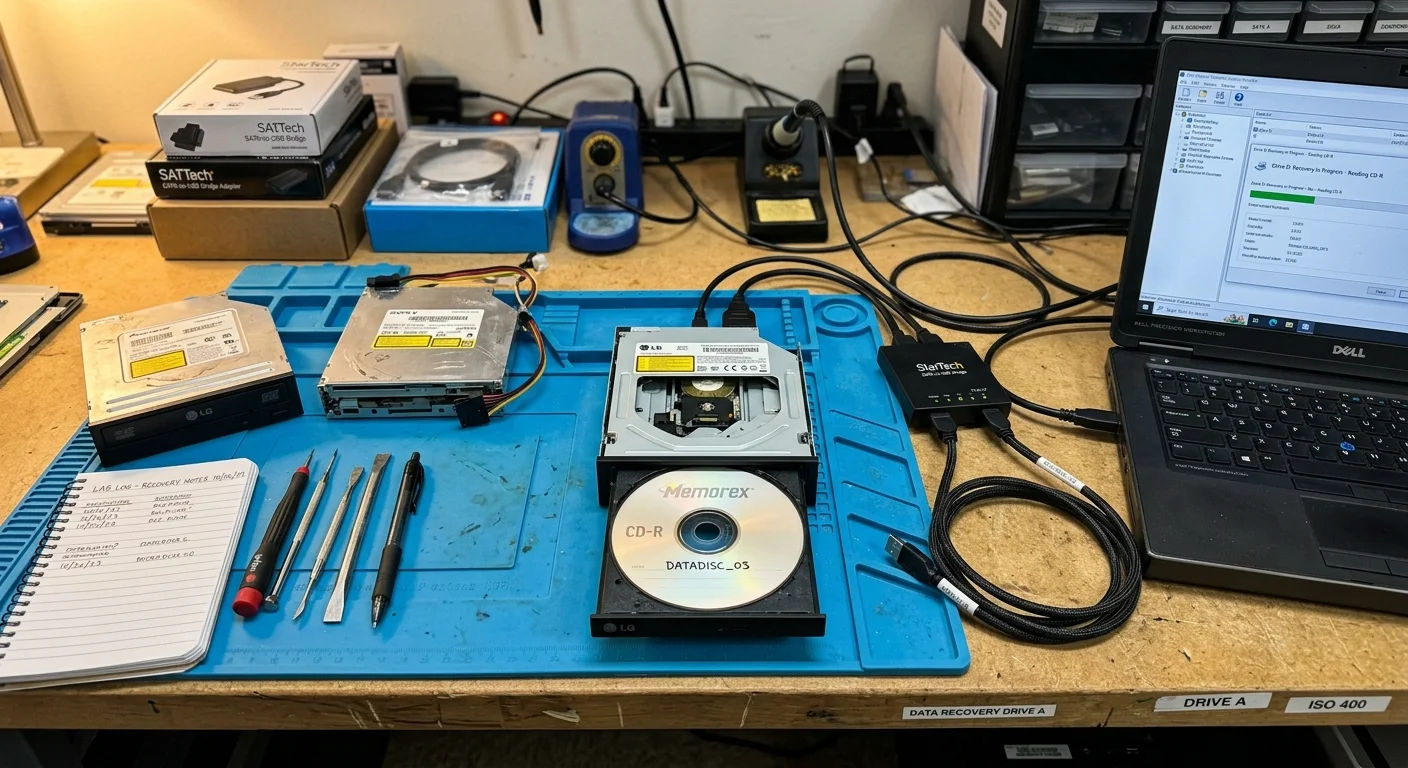
Hardware Selection: Optical Drives, Firmware, and Read Speeds
Successful data extraction from marginal optical media depends heavily on your drive hardware. Modern slim external USB drives designed for ultrabooks feature weak laser assemblies and aggressive power-saving firmware.
These lightweight laptop drives rapidly spin down or abandon read operations when encountering high block jitter. For decaying media, use a full-sized 5.25-inch internal desktop drive mounted in an external, mains-powered enclosure.
Desktop drives feature larger optical pickup units with superior focus actuators and robust laser diodes. Look for drives featuring MediaTek or Renesas controller chipsets, such as the LG WH16NS40 or legacy Plextor Premium series.
Drive firmware determines how aggressively the optical unit attempts track-following over oxidized dye patches. Certain drive firmwares allow third-party utilities to disable automatic hardware retries, preventing drive lockups on bad sectors.
Controlling reading speed is the single most critical hardware setting you can manipulate. Standard modern optical drives attempt to spin burned CD-Rs at 48x or 52x constant angular velocity.
High rotational speeds induce physical disc wobble, making tracking impossible through oxidized dye. Force your drive to read at 4x or even 1x constant linear velocity using hardware management commands.
Lower rotational speeds dramatically increase the laser diode dwell time over each data transition. This improved signal-to-noise ratio allows the drive photodiode to register marginal pit edges that fail completely at higher speeds.
Comparison of Disc Preservation Profiles and Extraction Tools
Selecting the correct tool depends on the structural failure mode of your photographic CD-R. The table below details common disc architectures, their vulnerability mechanisms, and the appropriate recovery configuration.
| Optical Disc Media Profile | Primary Degradation Mechanism | Optimal Read Speed | Extraction Software Strategy | Estimated Home Lifespan |
|---|---|---|---|---|
| Cyanine Dye / Silver Alloy (Early Vacation Burns) | Silver oxidation (bronzing) and photochemical dye fading | 1x to 4x CLV | GNU ddrescue raw binary clone with multi-pass scraping | 5 to 12 years |
| Phthalocyanine / Silver (Budget Mid-2000s) | Top-layer moisture entry leading to lacquer delamination | 4x CLV | IsoBuster Pro with hardware retry limits set to zero | 10 to 20 years |
| Azo Dye / Aluminum (Commercial Media) | Dye degradation and aluminum oxidation pinholing | 4x to 8x CAV | Raw sector imaging followed by PhotoRec JPEG carving | 10 to 15 years |
| Phthalocyanine / Gold (Archival Grade) | Polycarbonate scratching (inert gold resists oxidation) | 8x to 16x CAV | Standard ISO extraction or gentle optical disc imaging | 50 to 100 years |
Commercial data recovery laboratories charge between $150 and $300 per disc for physical cleanroom extraction. Before committing hundreds of dollars per family spindle, you can deploy professional extraction utilities at home.
IsoBuster Pro offers consumer-friendly optical session extraction for a lifetime license fee of $64.95. It bypasses Windows filesystem restrictions and talks directly to the drive controller to extract raw session tracks.
For cross-platform extraction without licensing costs, open-source utilities provide exceptional precision. Pairing GNU ddrescue with PhotoRec gives you commercial-grade disc cloning and sector carving for free.

Raw Block-Level Sector Imaging: Step-by-Step ddrescue Configuration
Never run file-recovery or image-viewing software directly against a physically decaying optical disc. Every rotation causes laser thermal stress and mechanical shear on delaminating lacquer layers.
Standard operating systems abort an entire disc transfer after repeated read timeouts on a single bad sector. Block-level tools isolate damaged sectors and rescue every surrounding cluster first.
Your goal is to extract every readable sector into a single raw disc image file on your hard drive in one continuous session. Once cloned, you can analyze, repair, and extract photos without risking the fragile original physical disc.
GNU ddrescue uses an intelligent two-phase algorithm designed specifically for failing media. In the first phase, it copies healthy sectors rapidly, skipping damaged blocks without grinding the drive head.
In the second phase, ddrescue reverses direction and scrapes the edges of damaged sectors block by block. A critical mapfile tracks every recovered sector, allowing you to stop and resume extraction safely.
Connect your optical drive containing the bronzed CD-R to your workstation. Identify the drive block device identifier, typically designated as /dev/sr0 on Linux or /dev/rdisk# on macOS.
Execute the initial non-destructive extraction pass using the terminal command below:
ddrescue -b 2048 -d -n -v /dev/sr0 vacation_2002.iso recovery.map
The -b 2048 flag sets the hardware sector size to the optical CD standard of 2,048 bytes. The -d flag enables direct disc access, completely bypassing your operating system memory caching.
The -n parameter instructs the software to skip difficult or unreadable sectors during the first pass. This ensures you rescue the maximum amount of intact photo data before media wear accelerates.
Once the initial pass completes, run the scraping pass against the marginal sectors recorded in the mapfile:
ddrescue -b 2048 -d -r 2 -v /dev/sr0 vacation_2002.iso recovery.map
The -r 2 flag instructs the drive to attempt exactly two retries per unreadable block before moving forward. This parameter prevents drive overheating while recovering salvageable edge data along bronzed disc sections.
Carving and Rebuilding Damaged JPEGs from Raw Disc Images
Once you generate the raw disc image file, you may find that file directories remain unreadable. Severe disc rot often destroys the ISO 9660 or Joliet file table located near the disc hub.
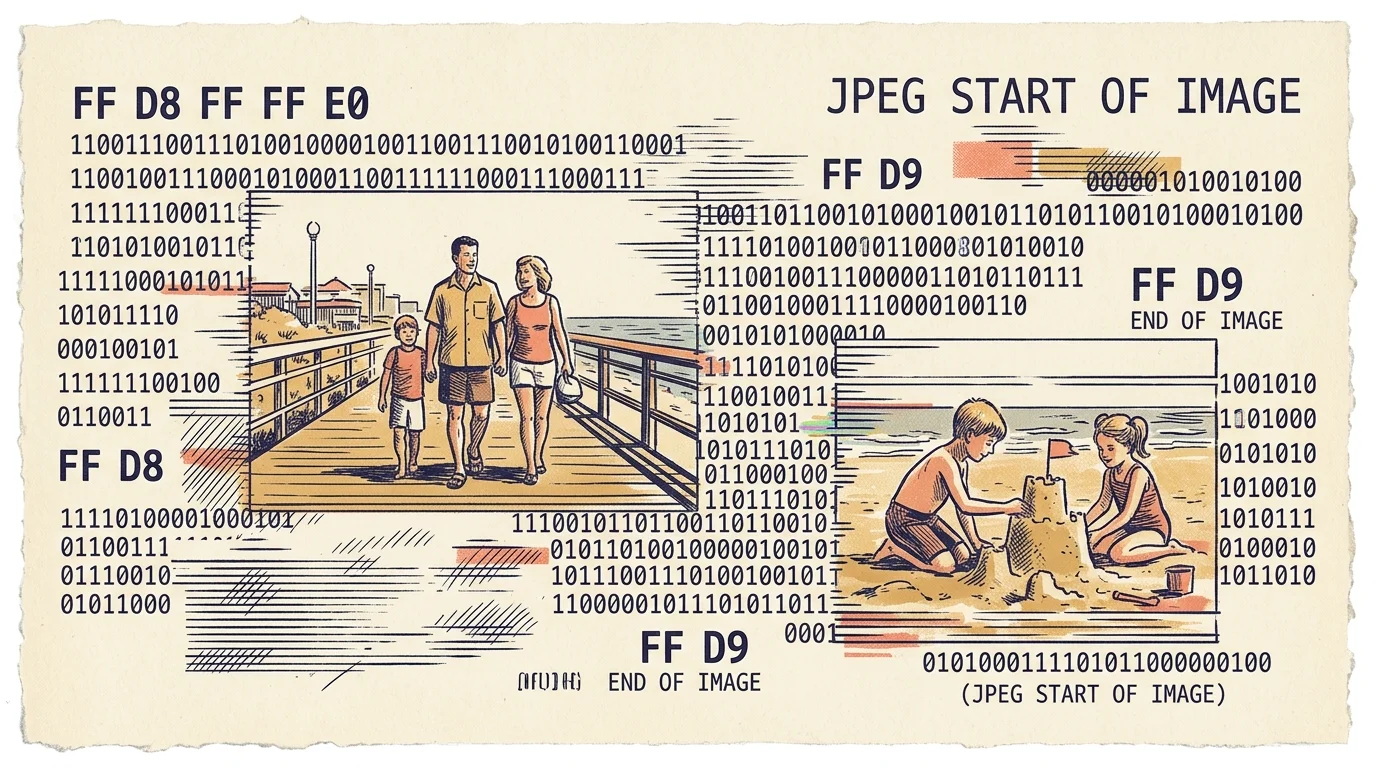
Even if the filesystem index is gone, your photographic data remains intact within the cloned binary image. File carving scans the binary data directly for standardized image byte markers.
Every valid JPEG file begins with the hexadecimal Start of Image marker FF D8 FF. Similarly, every complete JPEG concludes with the hexadecimal End of Image marker FF D9.
Open-source tools like PhotoRec parse the extracted disc image to locate these specific headers and footers. The program carves out every byte sequence between those markers, restoring individual photo files without directory structures.
Mount your target storage drive and launch PhotoRec from your terminal, pointing it directly at the disk image:
photorec vacation_2002.iso
Select the raw disk image when prompted, and configure the file format filter exclusively to identify JPEG images. PhotoRec will scan the binary structure and reconstruct your family photographs automatically.
When disc rot destroys sectors inside a JPEG data stream, the resulting image displays a solid grey band or shifted horizontal scanlines. This occurs because JPEGs rely on discrete cosine transform blocks and restart markers.
You can repair partially corrupted JPEGs using open-source utilities such as Jpeg-repair or hex editors. Rebuilding the JPEG header using an intact header from the same camera model often restores the entire image canvas.
Worked Example: Extracting 428 Vacation JPEGs from a Bronzed 2002 Disc
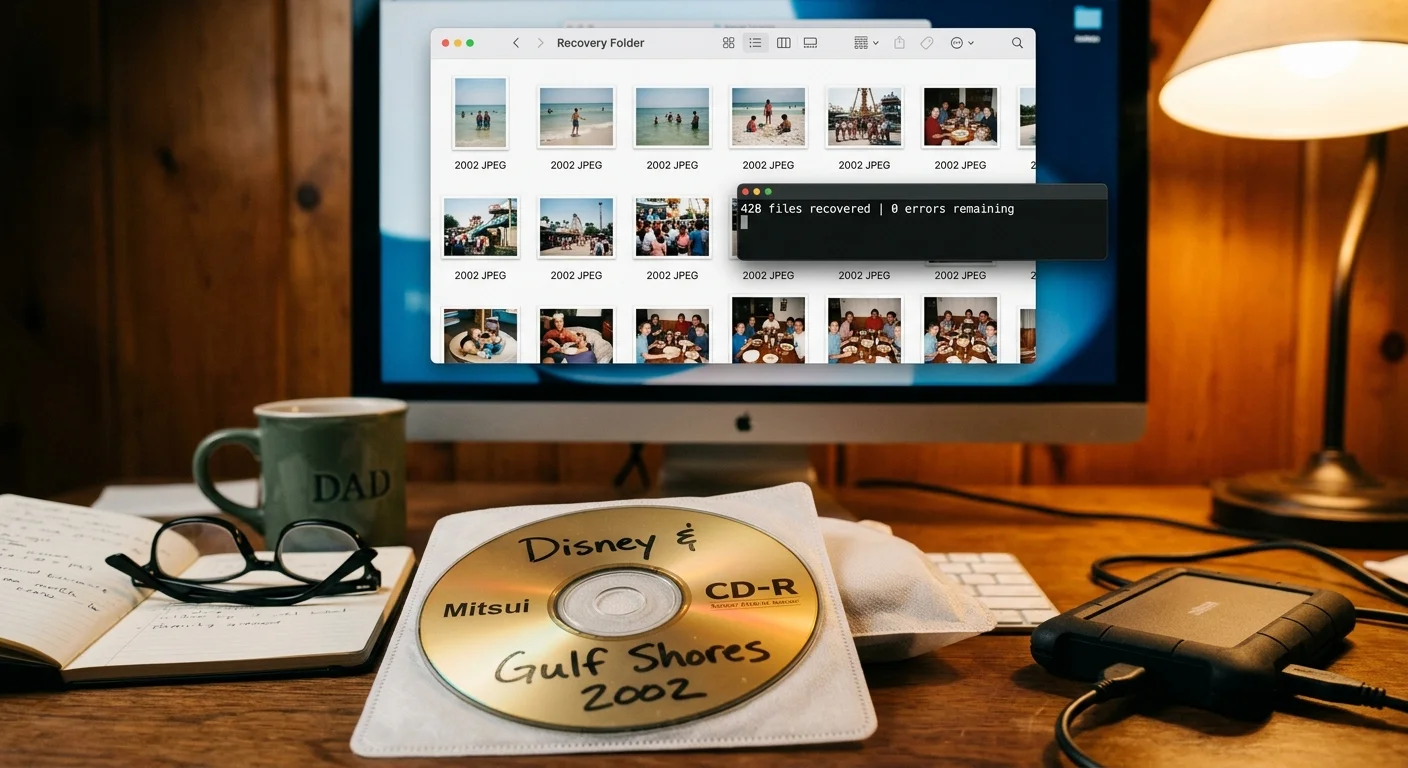
To demonstrate the extraction methodology, consider this real-world recovery scenario. A reader inherited a Memorex 700MB CD-R burned in July 2002 containing vacation photographs taken with an Olympus C-3000 Zoom camera.
The disc exhibited severe bronzing extending across the outer 15 millimeters of its diameter. When inserted into a Windows 11 workstation, the drive locked up and returned Error 0x8007045D at the 68% transfer mark.
The original collection contained 428 JPEGs at 2048×1536 resolution, occupying 612 megabytes of disc space. Standard file copying failed entirely, leaving 137 files stranded inside the oxidized outer rim sectors.
The disc was transferred to an LG WH16NS40 desktop drive mounted in an external enclosure ($49.99). The drive speed was locked to 4x using optical utility commands to maintain tracking stability.
We executed GNU ddrescue v1.27 across the 313,344 total sectors on the disc. The initial non-scraping pass completed in 41 minutes, securing 308,330 sectors successfully while flagging 5,014 marginal sectors.
A second targeted pass with two retries recovered an additional 3,810 sectors over 43 minutes. The final mapfile indicated only 1,204 sectors remained permanently unreadable, representing a data recovery rate of 99.6%.
Because the Joliet directory allocation table had suffered partial sector loss, Windows still refused to mount the cloned image file. We directed PhotoRec 7.2 to carve photographic formats directly from the saved image.
The carving procedure completed in 3 minutes and 18 seconds, yielding 428 total image files. Of those, 412 JPEGs were 100% structurally intact with verified cryptographic checksums.
The remaining 16 JPEGs exhibited minor grey banding across their bottom scanlines due to missing blocks. Not a single photograph was lost completely, avoiding a commercial laboratory quote of $300.
Physical Stabilisation and Safe Handling of Peeling Media
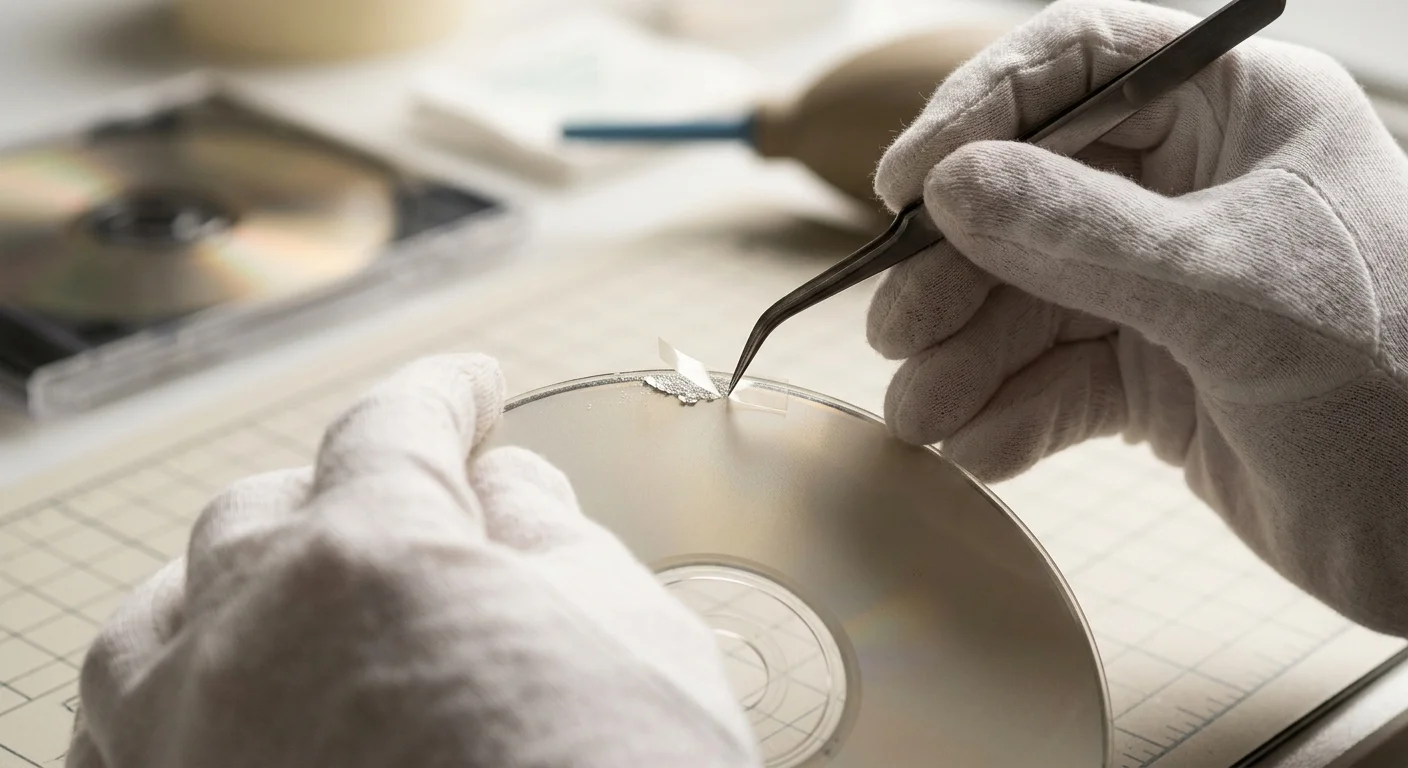
Improper physical handling can destroy a degrading disc before you finish a single read pass. If your disc shows flaking lacquer, follow strict conservation guidelines before loading it into a tray.
The National Archives preservation guidelines for optical formats warn that top-surface mechanical stress is the leading cause of immediate data destruction. Never apply adhesive tape or peel-off paper labels to stabilize a flaking disc.
Adhesive tape bonds to the acrylic lacquer with higher peel strength than the lacquer bonds to the polycarbonate. Removing tape or spinning a taped disc strips the metallic data layer off instantly.
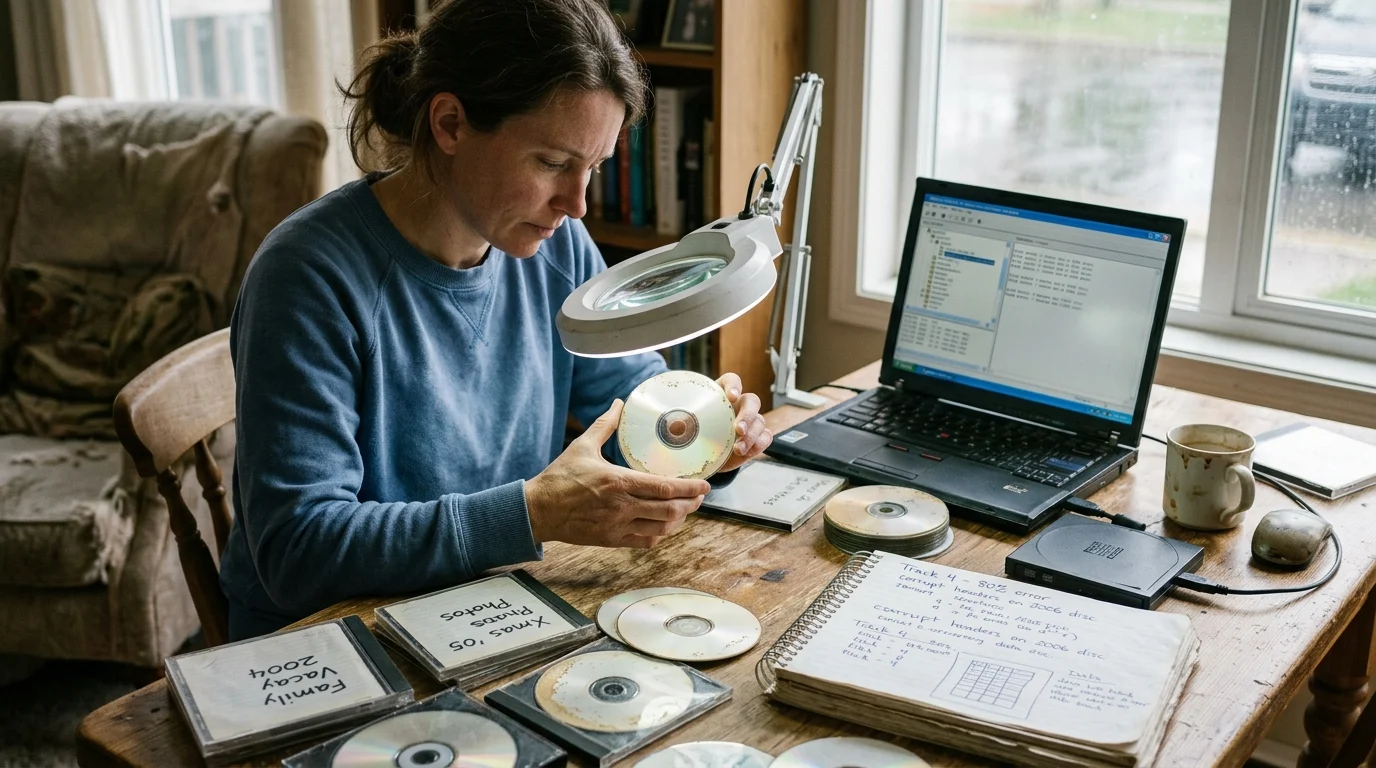
Handle decaying discs exclusively by their outer edge and the inner center hole. Wear powder-free nitrile gloves to prevent skin oils and acidic perspiration from accelerating oxidation on exposed silver layers.
Clean dust or debris from the clear polycarbonate underside using dry, compressed air held upright. Never wipe a decaying disc in circular paths around the tracks.
If you must wipe the read surface, use an optical-grade microfiber cloth dampened with distilled water. Wipe strictly in radial lines from the center hub straight out to the perimeter edge.
Radial wiping ensures that any accidental fine micro-abrasions cross perpendicular to the data spiral. Drive error correction codes can rebuild perpendicular scratches easily, but circular scratches destroy continuous data streams permanently.
Once you extract your images, transfer them immediately to a redundant 3-2-1 backup system. Store your digital images on two different physical media types, with at least one copy housed in offsite cloud storage.
Frequently Asked Questions
Can I polish the top label surface of a CD-R to fix disc rot?
Never polish the top surface of a CD-R. The reflective metal and dye layers sit mere micrometers beneath the top lacquer, so abrasive polishing permanently strips away your photograph data.
Why does Windows freeze when copying photos from a degrading CD-R?
Standard operating systems enforce hardwired 30-second I/O read timeouts per damaged sector. When a drive encounters corrupted sectors, Windows retries indefinitely, locking the operating system file explorer.
What is the difference between disc bronzing and disc rot?
Disc bronzing is a specific chemical reaction where environmental pollutants oxidize silver reflective layers into an amber or bronze hue. Disc rot is an umbrella term covering bronzing, dye degradation, and physical delamination.
Can PhotoRec recover JPEGs without a file system?
PhotoRec identifies raw JPEG data by scanning for Start of Image and End of Image byte signatures. It reconstructs individual images even if the disc directory structure or ISO file system is completely destroyed.
Disclaimer: This article is for informational purposes only. When handling valuable or irreplaceable photographs, consider consulting a professional conservator. Always test preservation methods on non-valuable items first.