In a 650-square-foot concrete apartment, radiant baseboard heaters and exterior walls create extreme environmental swings that ruin photographic prints. Preserving your family archive requires identifying hidden microclimates across your limited floor plan.
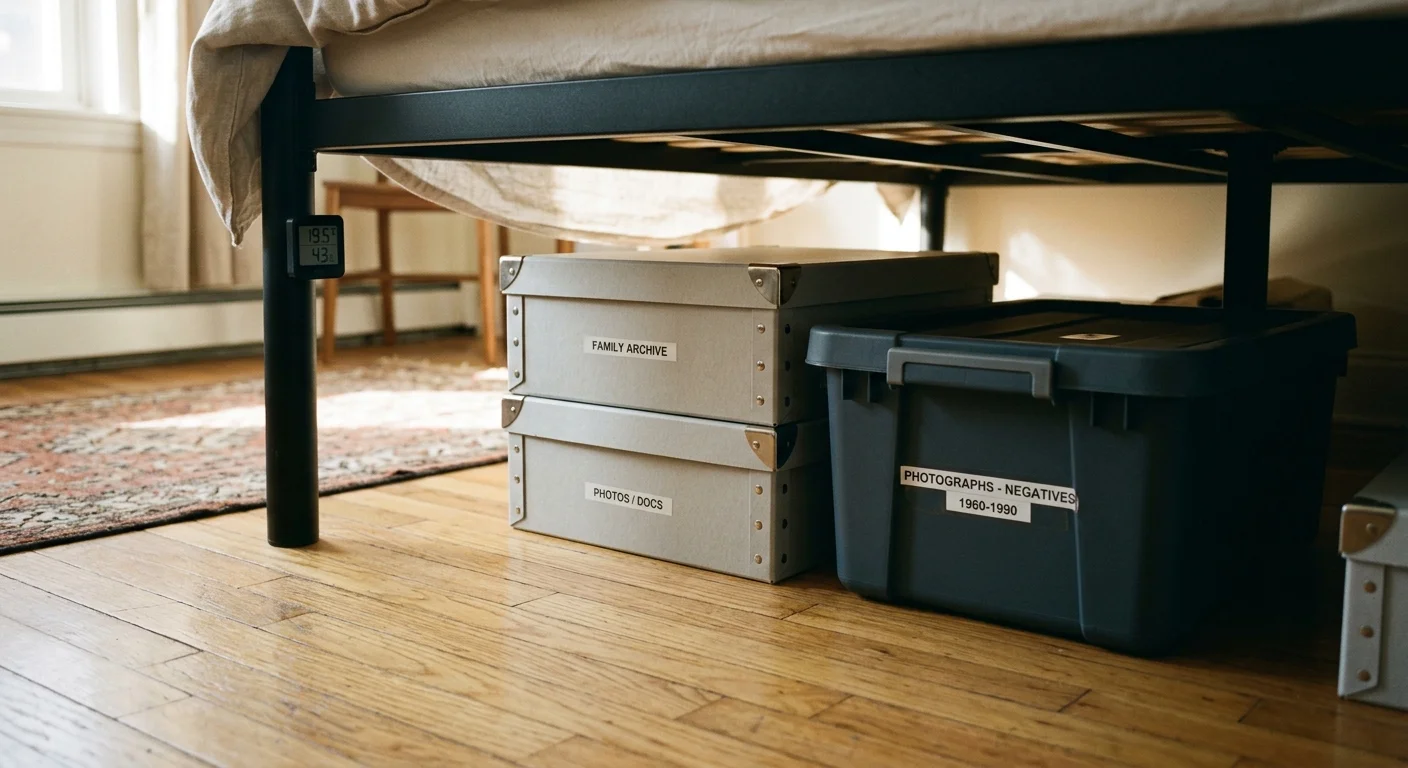
When you lack interior closets, conventional preservation advice fails. Your safest archival zone is not an enclosed wardrobe against an uninsulated wall, but the elevated, thermally stable footprint under a raised steel bed frame.
By deploying targeted thermal mapping, you can monitor indoor microclimates for photos and build a high-density, off-floor archival vault that safeguards irreplaceable memories from moisture and heat.
The Concrete Envelope: Microclimates in a 650-Square-Foot Rental
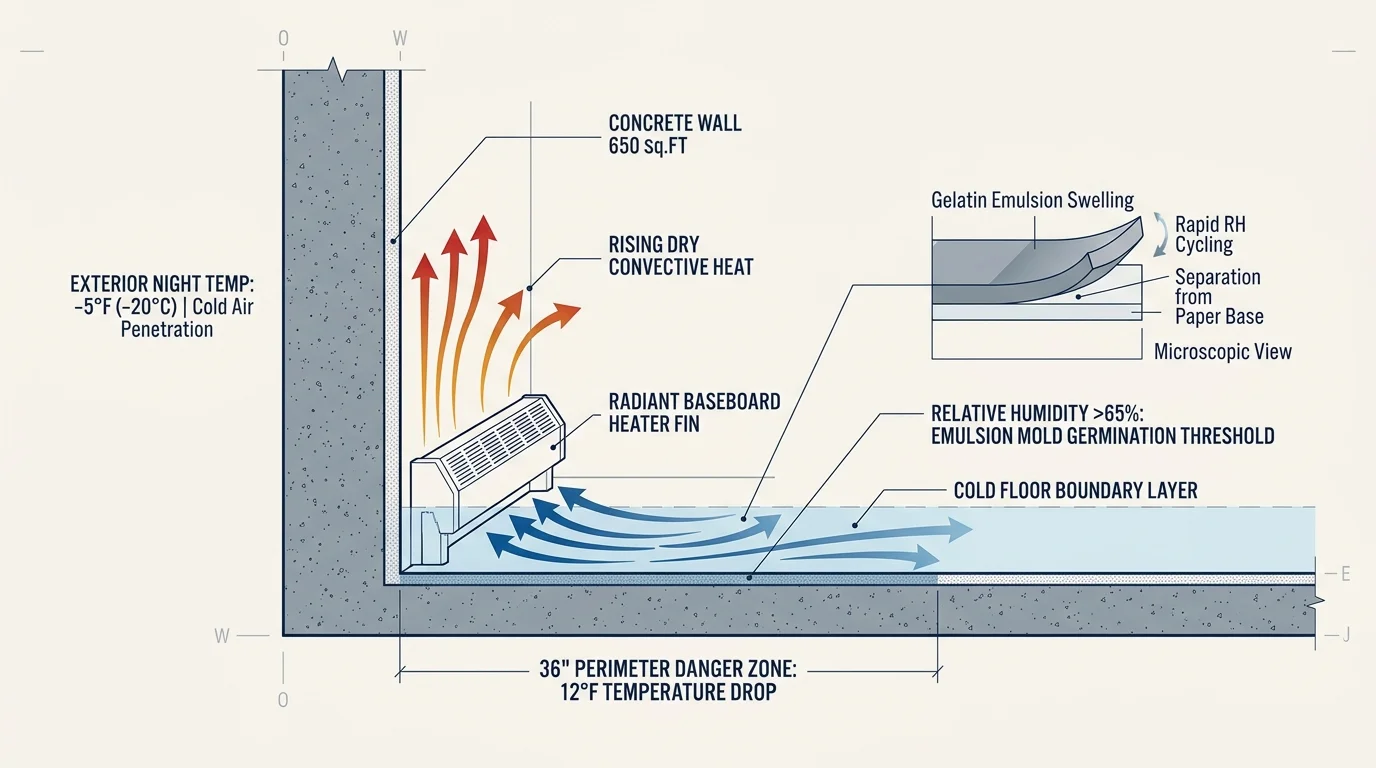
Reinforced concrete multi-family buildings create distinct environmental challenges for print longevity. Concrete acts as a massive thermal sponge; it absorbs outdoor cold during winter nights and slowly radiates it indoors.
Radiant perimeter baseboard heaters battle this thermal mass directly. Because landlords position baseboard fins along exterior perimeters, they blast dry, buoyant heat upward while leaving cold air pooling at floor level.
This dynamic produces violent microclimates within small footprints. Within 36 inches of an uninsulated exterior wall, ambient temperatures can drop by 12°F compared to the center of the room.
When moist indoor air hits cold perimeter surfaces, relative humidity spikes sharply. Archival research from the Image Permanence Institute confirms that relative humidity above 65% triggers catastrophic mold germination on gelatin emulsions.
Gelatin photographic emulsions behave hygroscopically, absorbing and releasing moisture as surroundings shift. Rapid relative humidity cycling causes binder layers to swell, crack, and separate from paper base supports.
Modern studio and one-bedroom layouts compound the problem by eliminating interior closets. Without centralized closets insulated by surrounding rooms, your prints remain fully exposed to perimeter thermal swings.
You cannot rely on the central wall thermostat to gauge archive safety. That sensor measures ambient air at eye level, ignoring volatile microclimates near baseboards and concrete masonry.
Thermal Mapping: Deploying Sensor Arrays Without Interior Closets
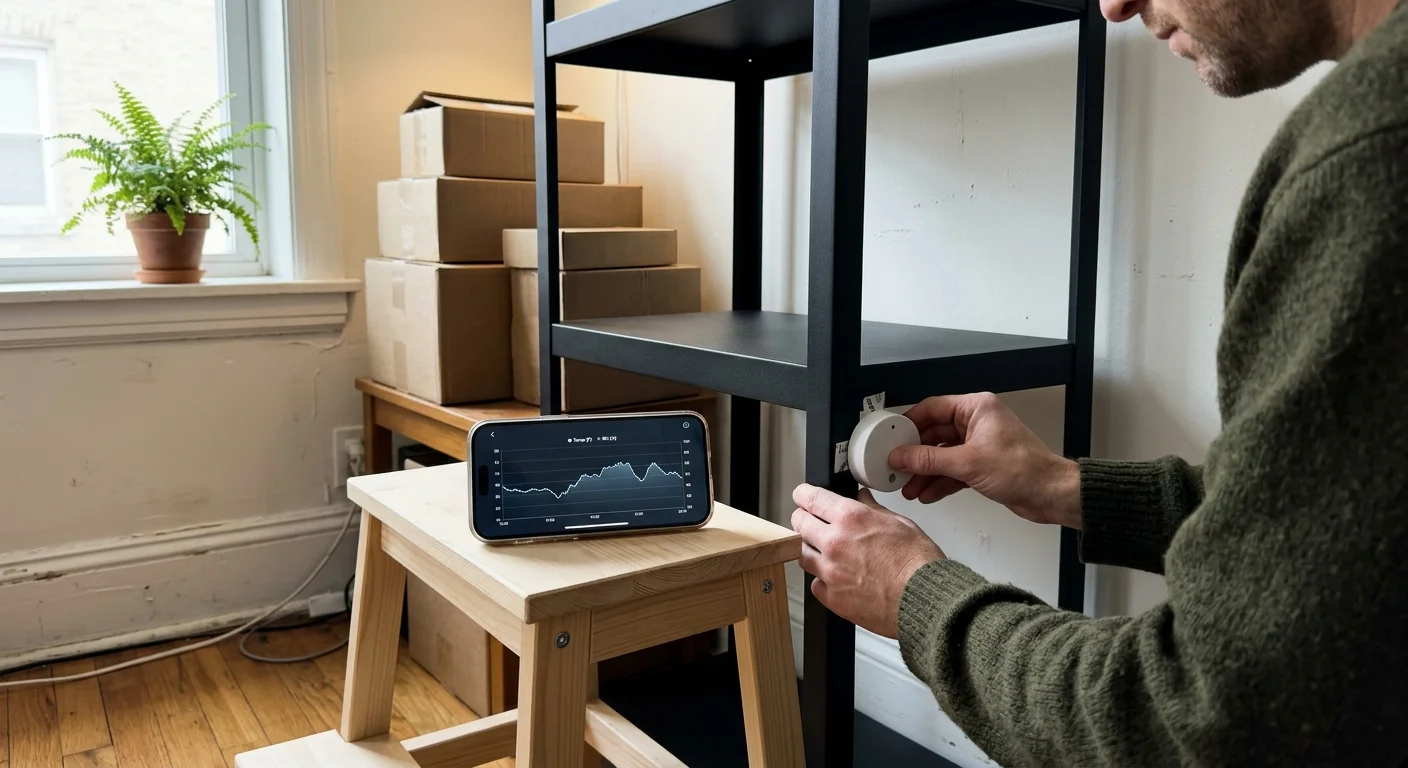
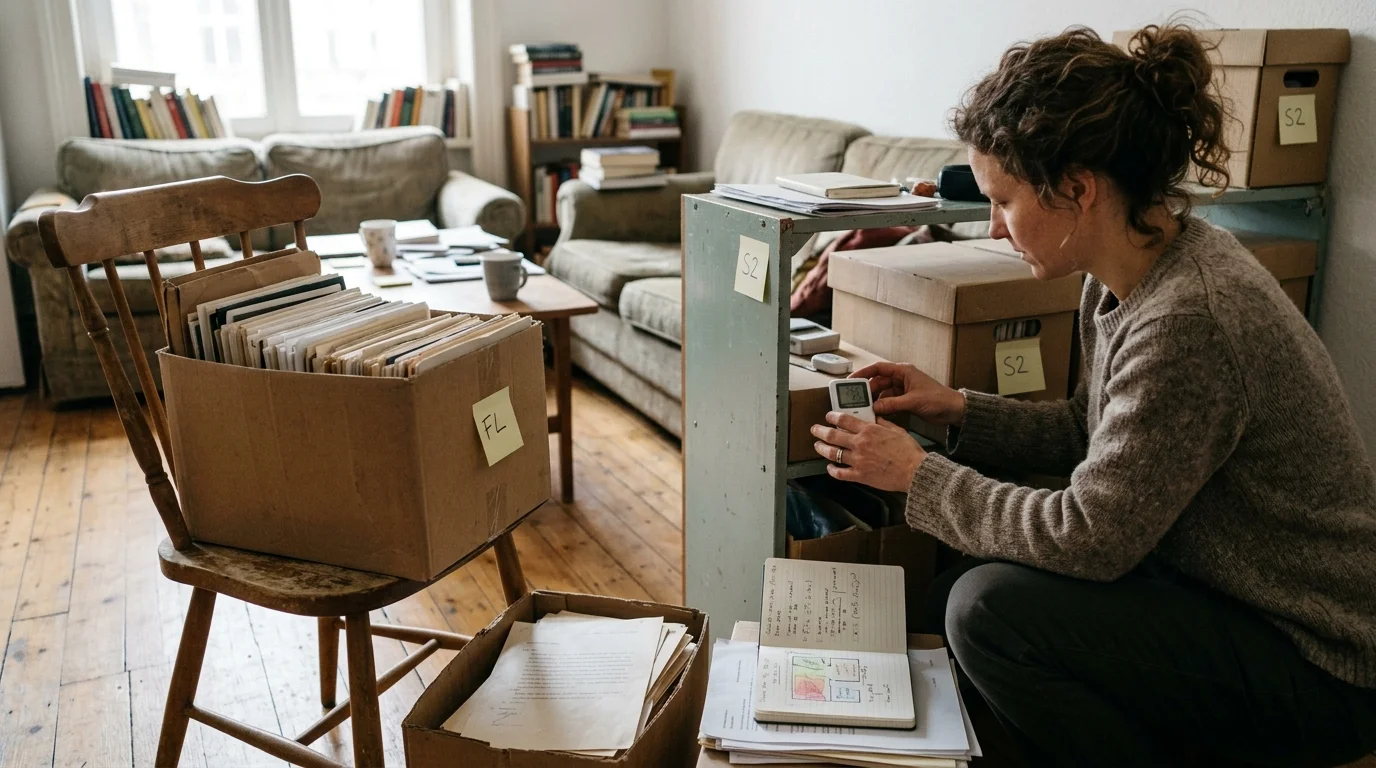
Thermal mapping reveals safe apartment photo storage zones by continuously tracking temperature and moisture differentials. You can complete an accurate diagnostic survey using inexpensive, consumer-grade digital data loggers.
Modern Bluetooth and Wi-Fi hygrometer sensors retail between $10 and $40 per unit. Compact models like the Govee H5075 or SensorPush HT1 log conditions every minute for granular environmental analysis.
To map a 650-square-foot space effectively, deploy three sensors simultaneously over a minimum 72-hour test window. Program each sensor to record readings at ten-minute intervals to capture heating and cooling cycles.
Position Sensor A at floor level within 18 inches of your primary exterior wall. This logging point captures extreme baseline cold drafts and localized spikes in relative humidity.
Mount Sensor B precisely 6 inches above an active radiant baseboard heater. This sensor records convective heat spikes that accelerate chemical dye degradation and curl vintage fiber prints.
Place Sensor C at the geometric center of your floor plan, elevated 12 inches beneath your bed. This protected zone represents your candidate microclimate for long-term print preservation.
Export the compiled data to identify your apartment’s stability index. Stable archival conditions require holding ambient temperatures between 60°F and 70°F while maintaining relative humidity between 30% and 50%.
Locating zones that prevent photo mold apartment threats requires tracking sustained relative humidity plateaus. Avoid any candidate storage footprint that sustains humidity above 60% for more than four consecutive hours.
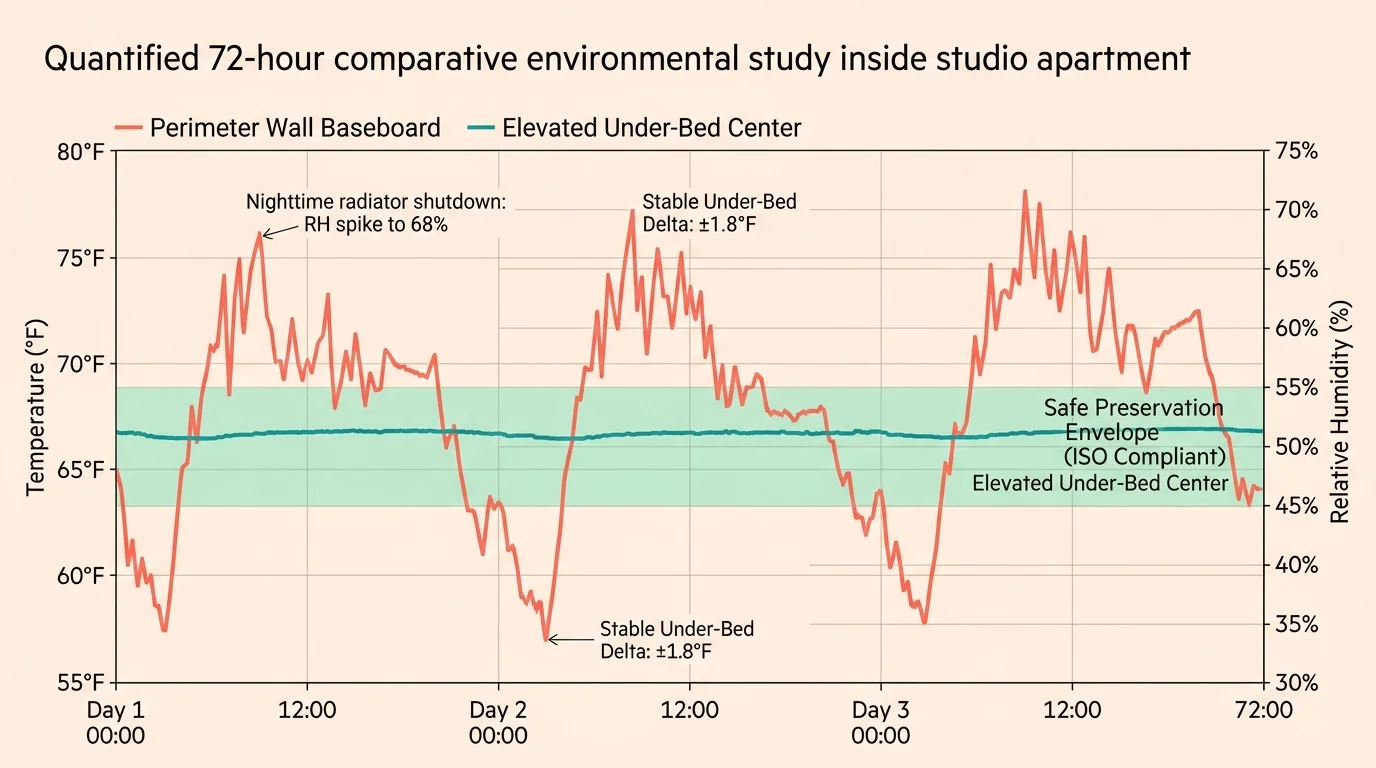
Worked Example: Quantifying a 72-Hour Apartment Thermal Log
Consider a practical thermal mapping scenario conducted across a 650-square-foot concrete corner unit in Chicago. The testing window ran from Friday at 6:00 PM to Monday at 6:00 PM in mid-November.
The equipment deployment utilized two Govee H5075 sensors at $14.99 each and one SensorPush HT1 data logger priced at $49.99. Total instrumentation investment equaled $79.97.
Sensor 1 sat on the concrete subfloor, tucked 12 inches from the north-facing concrete exterior wall. Sensor 2 rested atop an open bookcase, 24 inches directly above a hydronic radiant heater.
Sensor 3 sat on an inverted plastic riser, 8 inches off the floor beneath a central queen-size bed. All three devices logged environmental metrics simultaneously across 4,320 operational minutes.
Sensor 1 recorded an average temperature of 57.4°F, dropping to a low of 51.8°F at 4:30 AM on Sunday. Corresponding relative humidity surged to 68.2%, crossing the dangerous mold germination threshold.
Sensor 2 recorded wild cyclical heat spikes as the building’s boiler pulsed hot water. Temperatures swung from 63.1°F up to 83.7°F, driving relative humidity down to an emulsion-desiccating 19.4%.
Sensor 3 delivered remarkable environmental stability beneath the bed frame. Across the entire 72-hour logging period, temperature remained between 66.2°F and 68.9°F, while relative humidity held steady between 41.5% and 44.8%.
This empirical test proved that the central under-bed footprint buffered against both convective baseboard heat plumes and exterior masonry chill. The center floor plan serves as your apartment’s natural preservation vault.
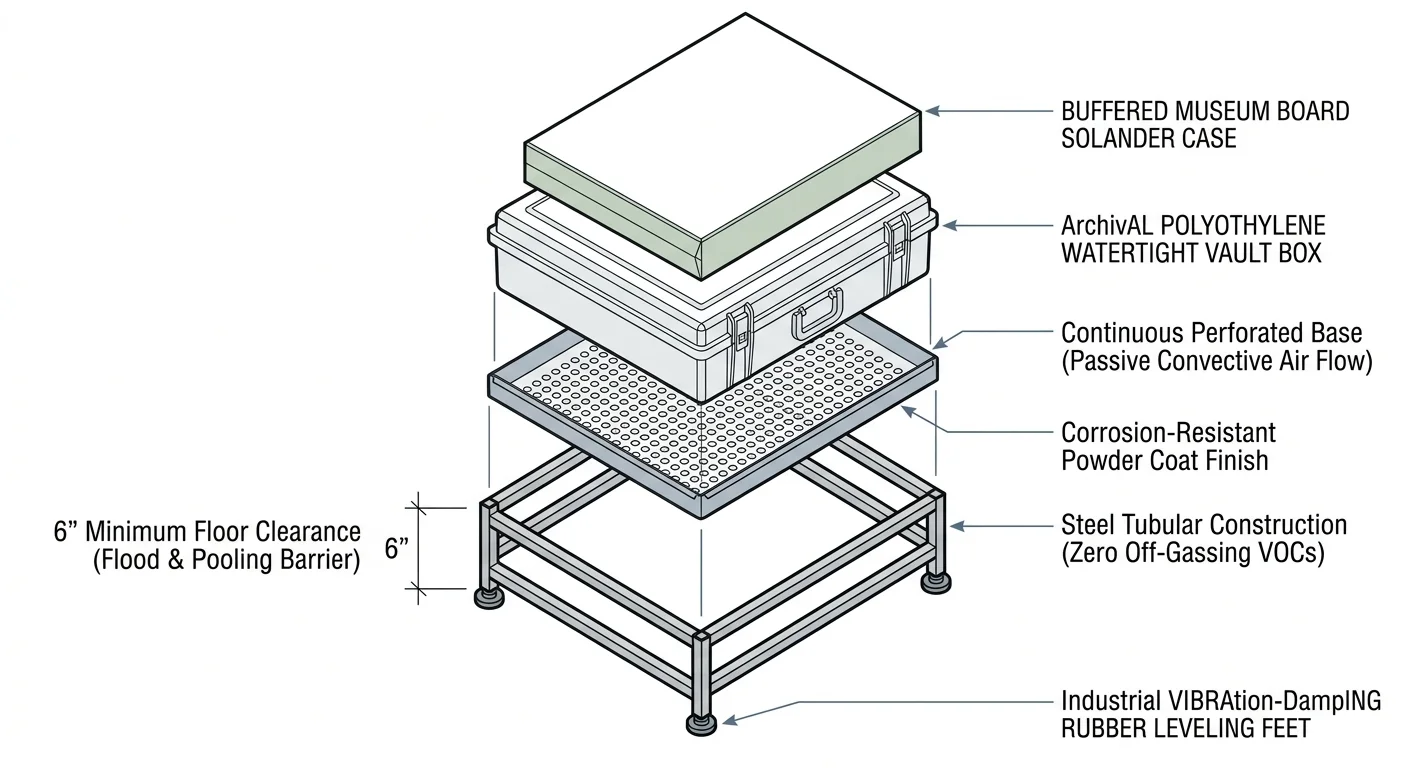
Off-Floor Storage Specifications: The Ventilated Steel Sump Setup
Never store print archives directly on an apartment floor. Plumbing failures, radiator valve leaks, and concrete moisture seepage make ground-level placement an existential hazard for paper collections.
Archival protocols mandate that collections remain elevated above floor plates to survive domestic plumbing failures and allow passive thermal circulation.
The preservation standard established by National Archives Preservation directives requires elevating permanent records at least 3 inches off finished floors. In rental apartments, aim for 6 to 14 inches of clearance.
Achieving this clearance requires a structural platform that avoids trapping stagnant air. Standard wooden bed frames or solid particleboard drawers off-gas volatile organic compounds and inhibit airflow.
Instead, install a 14-inch to 16-inch high tubular steel platform bed frame featuring welded wire mesh decking. Models such as the Zinus Van 16-inch metal platform provide robust structural support without off-gassing.
The open-grid wire deck permits natural air movement, preventing stagnant humidity pockets beneath your mattress. Convective ambient air currents continually circulate around the storage perimeter.
Position your archival boxes exclusively within the central footprint of the bed frame. Maintain a minimum perimeter buffer of 18 inches between your storage enclosures and the edge of the mattress.
This 18-inch setback ensures that perimeter drafts and domestic cleaning activities never disturb your boxes. It also creates a dedicated thermal dead zone that resists ambient room fluctuations.
Place a secondary raised perforated steel tray or metal rack beneath the boxes for double containment. This secondary elevation guarantees that your boxes remain dry even if domestic gray water floods the floor.
Comparing Apartment Archival Storage Locations
Selecting small space archival storage requires evaluating measurable physical properties rather than convenience. Every potential apartment storage nook presents a distinct balance of thermal stability and physical risk.
The following comparison table demonstrates how four common domestic locations perform against museum-grade preservation baselines. The metrics assume a standard mid-winter concrete building environment.
| Storage Location | Mean 24h Temp Swing | Relative Humidity Range | Floor Clearance | Mold & Flood Risk |
|---|---|---|---|---|
| Ventilated Steel Bed Deck (Center) | 2.7°F | 41% – 45% RH | 14 inches | Extremely Low |
| Exterior Wall Bookcase Shelf | 11.4°F | 35% – 58% RH | 36 inches | Moderate (Wall Chill) |
| Kitchen Base Cabinet Interior | 8.9°F | 48% – 72% RH | 4 inches | Critical (Pipe Leaks) |
| Concrete Floor Under Perimeter Window | 16.2°F | 30% – 69% RH | 0 inches | Severe (Condensation) |
As the data illustrates, kitchen cabinets present unacceptable moisture risks due to pressurized domestic plumbing lines. Sink supply hoses fail without warning, saturating nearby cabinets within seconds.
Exterior wall bookcases avoid floor flooding but suffer from dramatic radiant thermal swings. Cold radiant masonry chills the backs of shelving units, creating hidden condensation zones behind tightly packed books.
The central under-bed steel deck remains the clear structural winner across every measurable parameter. It elevates delicate photographic artifacts above flood planes while leveraging the thermal mass of surrounding indoor air.
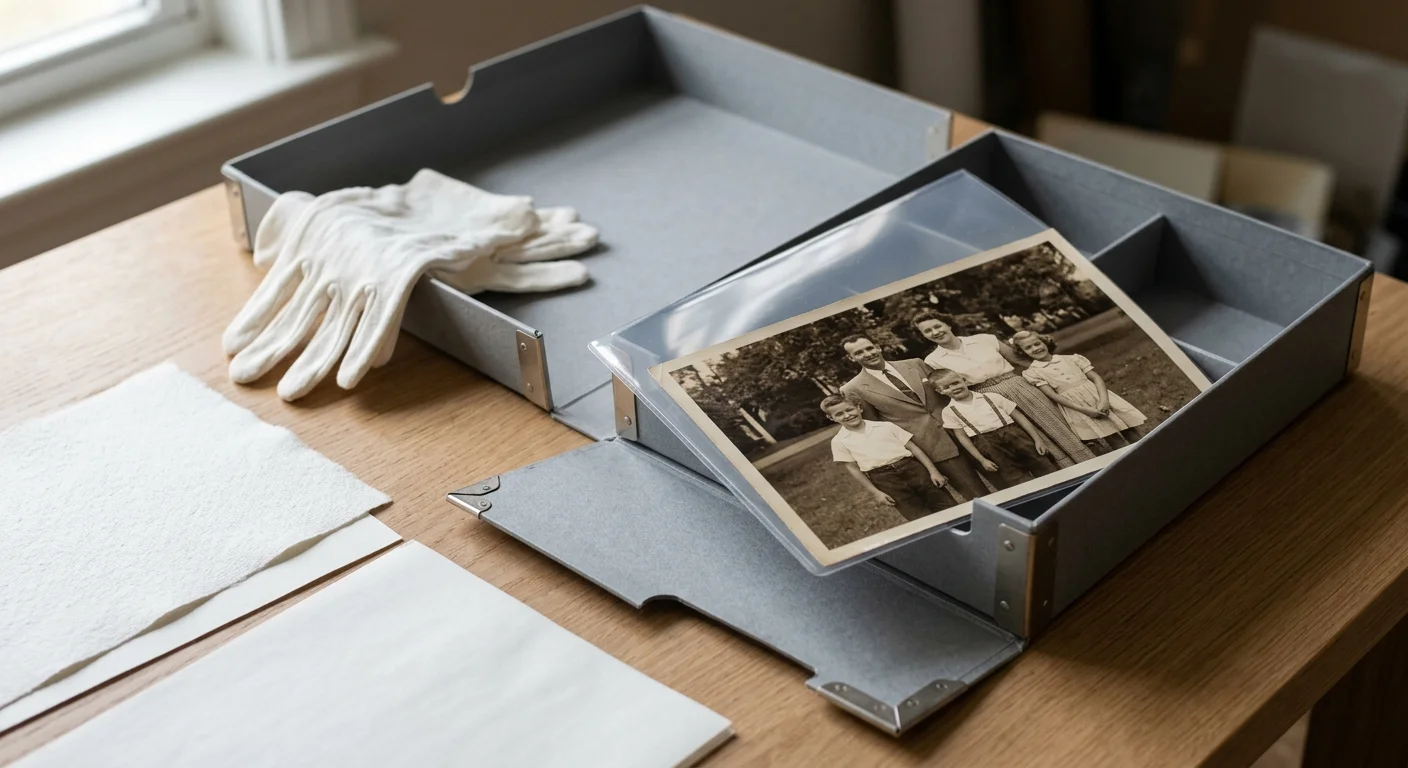
ISO 18916 Enclosures: Layering Buffered Protection in Compact Spaces
Physical elevation protects against liquid water, but microclimate air quality demands rigorous enclosure standards. Never store family photographs inside commercial cardboard boxes, shoe boxes, or unverified plastic containers.
Every enclosure housing your print collection must pass the Photographic Activity Test defined by ISO 18916:2025. This international standard verifies that storage materials will not cause chemical staining, silver mirroring, or dye fading.
Consult technical resources from the Library of Congress Preservation directorate when selecting materials. They recommend housing vintage gelatin prints within buffered, acid-free, and lignin-free paper enclosures.
Calcium carbonate buffering agents neutralize migrating acids from nearby apartment pollutants and cooking grease. For cyanotypes or dye transfer prints, however, utilize unbuffered neutral enclosures to prevent alkaline degradation.
Implement a layered defense system inside your under-bed setup using standardized archival containers. Begin by sliding individual photographic prints into inert 3-mil polyester sleeves, such as archival Melinex 516.
Polyester sleeves shield delicate photographic emulsions from abrasion, fingerprint oils, and sudden atmospheric changes. Transparent sleeves also allow family members to view prints without touching fragile paper surfaces.
Group sleeved prints vertically inside heavy-duty, metal-edge archival document storage boxes. Products like Gaylord Archival barrier board boxes feature reinforced corners and tight lids that block particulate matter.
Avoid cheap non-woven fabric under-bed storage bags sold by big-box home retailers. These synthetic textiles break down quickly, shedding synthetic microfibers and offering zero barrier against humidity surges.
Active Defense: Managing Moisture and Radiators in Tight Quarters
Small apartments require active management to maintain an optimal 30% to 50% relative humidity baseline. Cooking steam, hot showers, and unvented laundry dryers elevate indoor moisture levels in compact rental spaces.
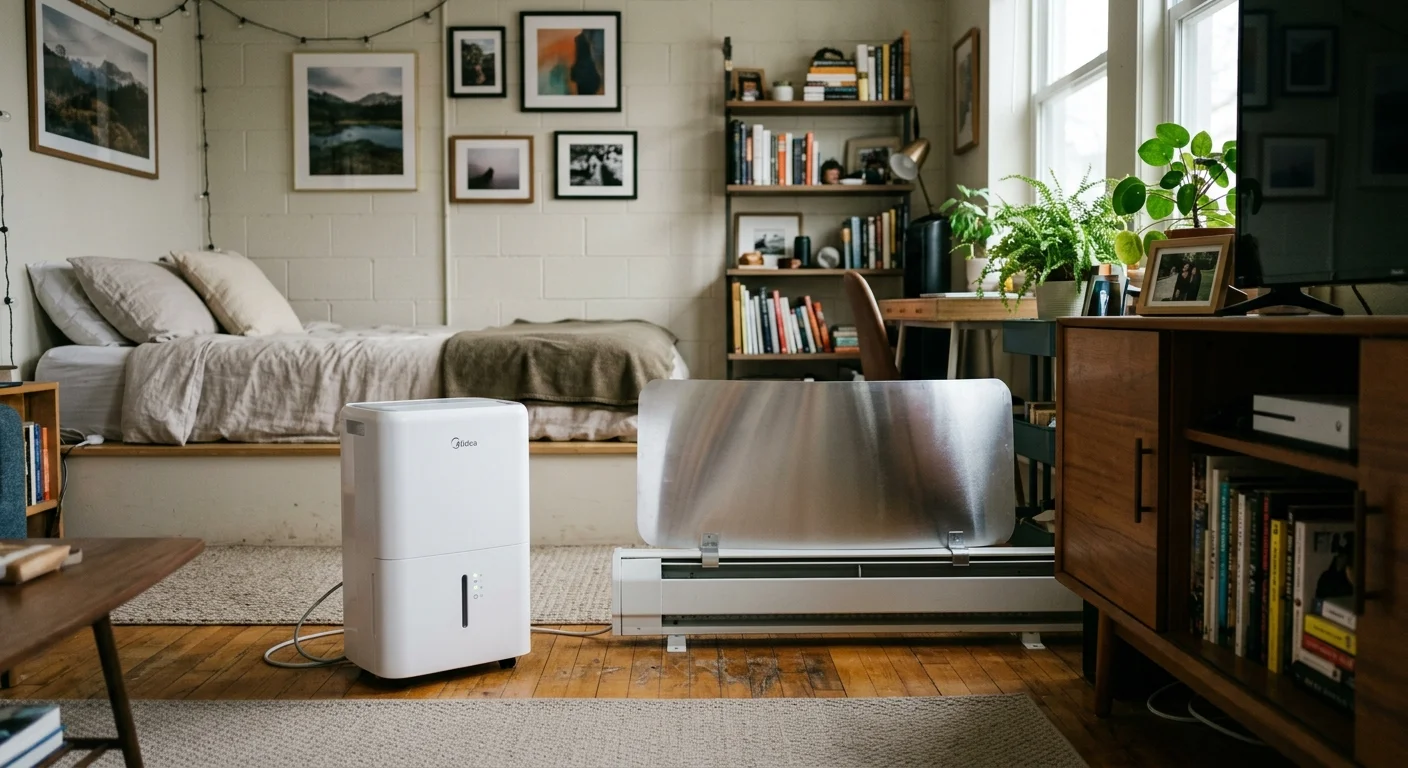
Standard household compressor dehumidifiers often prove too bulky and loud for a 650-square-foot footprint. Compact desiccant dehumidifiers or targeted chemical absorption systems offer quiet, space-efficient protection.
Place indicating silica gel canisters inside your primary archival storage boxes to buffer internal microenvironments. Compact 40-gram aluminum canisters with color-changing silica beads absorb excess moisture vapor directly from enclosure air.
These indicating beads shift color from bright orange to dark green when saturated with water vapor. You can recharge these canisters in a conventional kitchen oven at 300°F for two hours to restore absorption capacity.
Radiant baseboard heaters also demand direct mechanical mitigation if positioned near your sleeping and storage area. Uncontrolled convective heat plumes cause localized archival dry-out and accelerate paper embrittlement.
Install heavy-duty galvanized steel magnetic radiator deflectors along the top discharge vents of your baseboard units. These simple baffles redirect rising thermal plumes laterally across the floor, away from your bed footprint.
Maintain consistent mechanical airflow across the room using an energy-efficient brushless DC circulating fan. Running a small circulation fan on its lowest setting prevents air stratification and eliminates cold, damp boundary layers.
Inspect your data loggers weekly to confirm that your active microclimate defenses remain stable. Consistent vigilance ensures that your photographic heritage survives even the most volatile apartment heating seasons.
Frequently Asked Questions
Can I store my photo archive inside plastic storage tubs under my bed?
Standard plastic storage tubs made of polypropylene or polyethylene seal out liquid water, but they create hazardous microenvironments. If ambient temperatures drop, trapped interior moisture condenses along inside walls, causing mold growth.
If you must use plastic for flood protection, verify that containers are certified acid-free and insert silica gel canisters. Otherwise, use breathable ISO 18916:2025 metal-edge archival boxes that allow natural vapor equalization.
How far away from radiant baseboard heaters must my storage setup sit?
Maintain a minimum clearance of at least 36 inches between any radiant heater and your photo storage containers. Direct convective heat plumes accelerate chemical dye fade and cause print curling.
If spatial constraints force closer placement, install magnetic steel heat deflectors over the heater louvers. These deflectors push hot convective air horizontally toward the room center instead of baking your storage furniture.
What should I do if my apartment lacks any central space under the bed?
If an under-bed setup is structurally impossible, install an interior wire shelving unit against an interior partition drywall. Never position storage shelving against an exterior concrete wall exposed to outdoor winter temperatures.
Elevate your archival boxes at least 12 inches above the floor using ventilated chrome wire wire shelving units. Keep your boxes enclosed inside heavy-duty, acid-free barrier board containers fitted with internal silica desiccant packs.
How often should I recalibrate or check my thermal mapping data loggers?
Review your digital hygrometer data logs weekly during seasonal weather transitions, especially when building management activates autumn heating systems. Seasonal transitions cause radical humidity shifts inside concrete apartment envelopes.
Recalibrate consumer-grade data loggers annually using an airtight salt calibration kit or cross-reference them against a certified reference hygrometer. Replace sensor batteries every twelve months to prevent unlogged environmental monitoring gaps.
Disclaimer: This article is for informational purposes only. When handling valuable or irreplaceable photographs, consider consulting a professional conservator. Always test preservation methods on non-valuable items first.