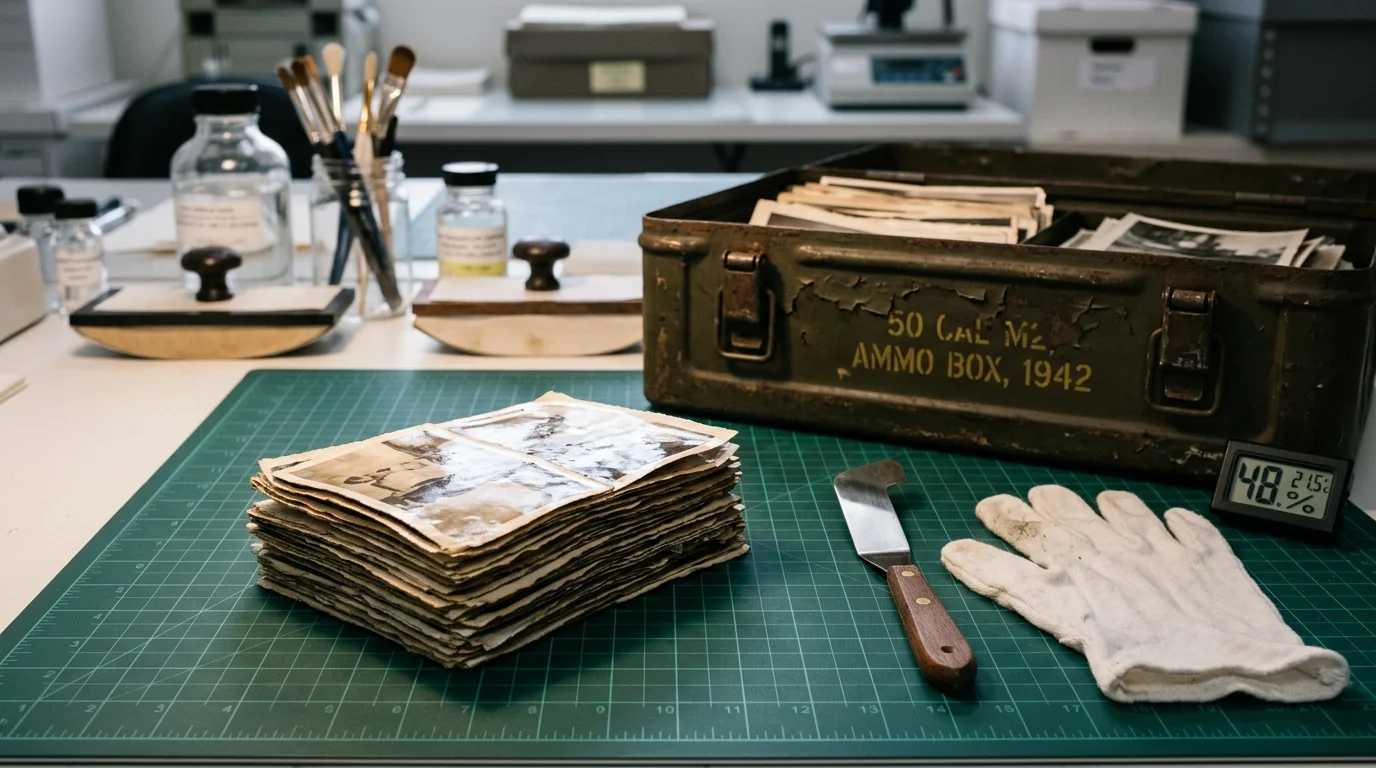
You just opened a corroded 1942 surplus steel ammo can and found a fused brick of wartime snapshots. Moisture and storage pressure bonded the gelatin emulsions together into a single, brittle block.
Dumping this photographic block into a water bath causes rapid emulsion sloughing, destroying facial details forever. Instead, you can unstick photo block without water through gradual vapor-phase rehydration.
This guide details the exact chamber construction and humidity schedule required to release fragile gelatin emulsion layers cleanly without fiber tear-out.
The Chemistry Behind Fused 1940s Gelatin Silver Prints
Gelatin silver prints consist of a paper base, a baryta coating of barium sulfate, and an animal-protein binder suspending image silver. When relative humidity exceeds 70%, gelatin absorbs ambient moisture and reaches its glass transition temperature.
Above this threshold, the rigid protein matrix softens into a pliable, tacky gel. Trapped inside a sealed metal container like an ammo can, expanding moisture cannot escape.
Capillary forces pull adjacent prints together under atmospheric compression. As humidity fluctuates, the softened protein chains migrate across paper boundaries and intertwine with the adjacent photograph’s fiber base.
When the environment dries, these intertwined proteins harden into fused crystalline bonds. The resulting adhesion equals or exceeds the internal structural strength of the paper substrate itself.
Research published by the Image Permanence Institute confirms that gelatin emulsion degradation accelerates under fluctuating humidity, cementing stacked paper layers together permanently.
Why Liquid Immersion Destroys Historical Prints
Many collectors assume soaking a stuck brick in a tray of tepid water will dissolve the bond. That instinct destroys historical photographs within minutes.
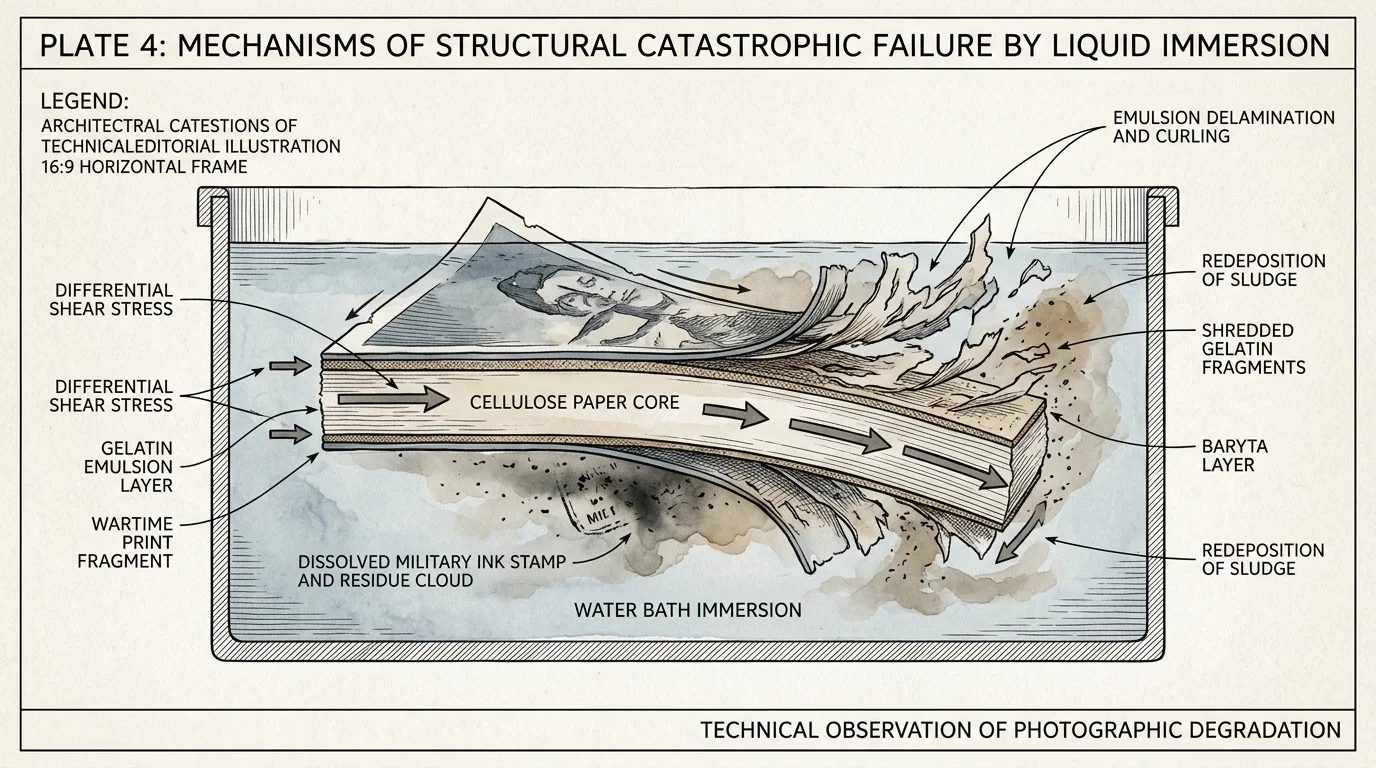
Liquid water triggers differential expansion between the paper support and the baryta layer. The cellulose core expands rapidly while the softened gelatin emulsion swells at a completely different rate.
This unequal expansion generates severe shear stress across the delicate interface. The emulsion tears away from the paper backing, leaving your historical image floating in shredded fragments.
Furthermore, vintage snapshots often contain water-soluble processing residues, adhesive residues, or wartime stamp inks. Direct immersion liquefies these compounds, redepositing black sludge across faces and historical hand markings.
Controlled vapor transfer avoids this devastation entirely. Gaseous water molecules penetrate the hardened protein matrix incrementally without creating liquid shear forces or dissolving adjacent image layers.
Essential Tools and Enclosure Specifications
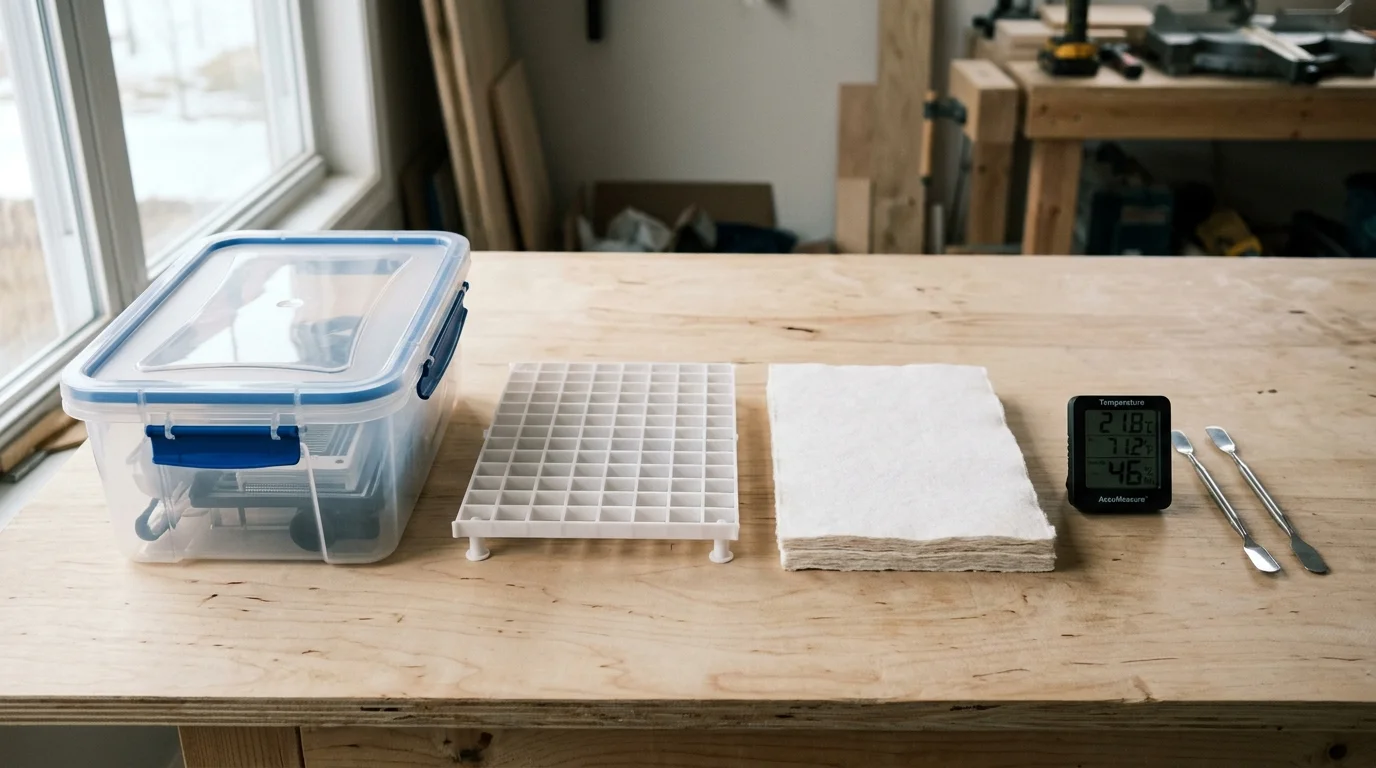
Building an effective rehydration chamber requires rigid, chemically inert materials that will not off-gas volatile organic compounds. You can construct an archival-grade unit using standard laboratory and preservation supplies.
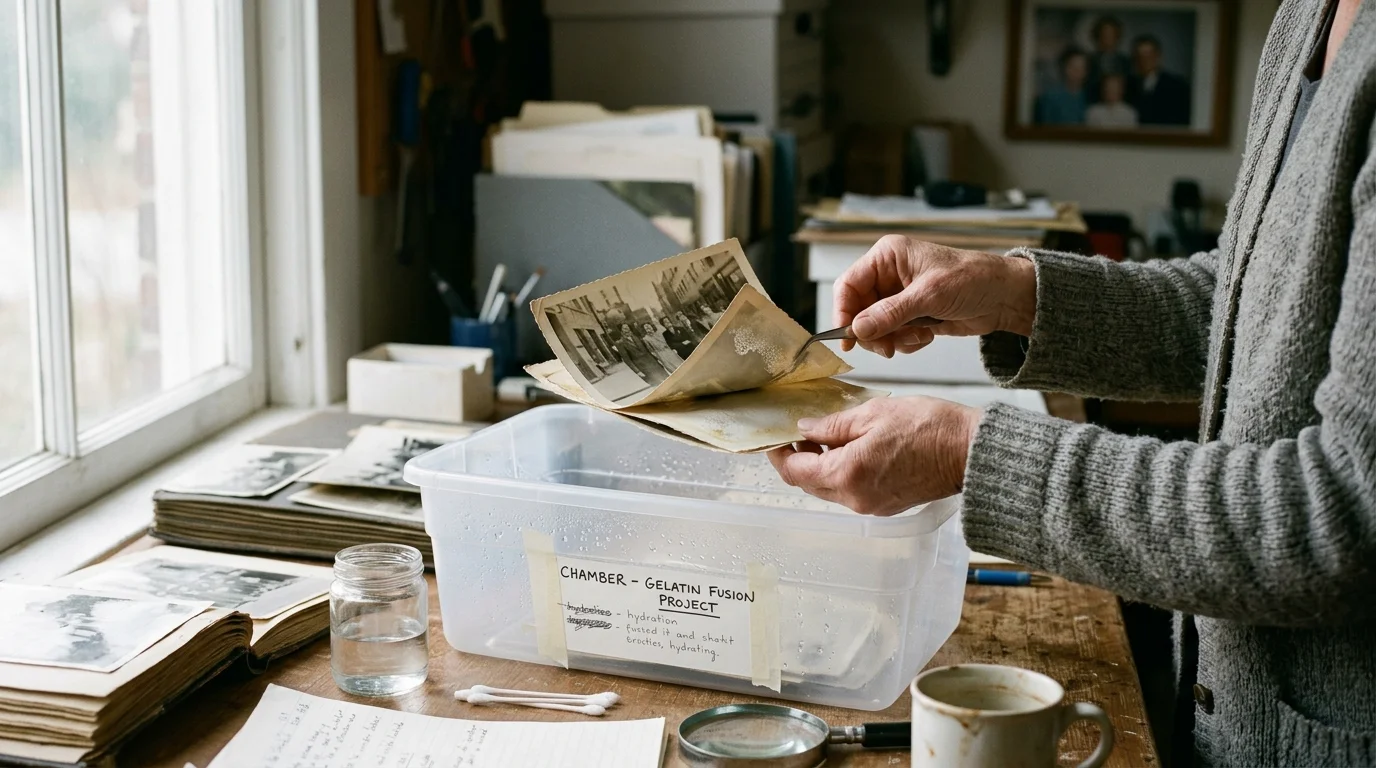
Start with a 12-quart airtight storage container made of clear polypropylene (plastic recycling code 5). Ensure the lid features a closed-cell silicone gasket with four locking cam latches.
Inside the box, you must suspend the prints above the moisture source on an inert platform. Use an acrylic egg-crate fluorescent light louver cut to fit the chamber’s interior footprint.
Elevate this grid 1.5 inches above the floor using four inert polytetrafluoroethylene (PTFE) or food-grade polypropylene spacers. Never use galvanized metal or untreated wood risers inside the humid enclosure.
Place a sheet of non-woven spunbonded polyester, such as 0.5-ounce Hollytex, directly over the acrylic grid. This hydrophobic membrane allows water vapor to pass freely while preventing prints from absorbing liquid droplets.
Track atmospheric shifts using a calibrated digital hygrometer. Choose a sensor with external Bluetooth monitoring so you can track conditions without unsealing the chamber lid.
For manipulation, acquire a 0.05-millimeter flexible PTFE-coated micro-spatula and rolls of 2-mil archival polyester film (Melinex 516). The American Institute for Conservation recommends inert polyester films for mechanical print isolation during delicate paper treatments.
Chemical Salt Slurries vs. Passive Vapor Blotters
Achieving successful gelatin emulsion rehydration requires precise relative humidity (RH) regulation. An accidental spike to 100% RH produces liquid condensation that will dissolve your emulsion instantaneously.
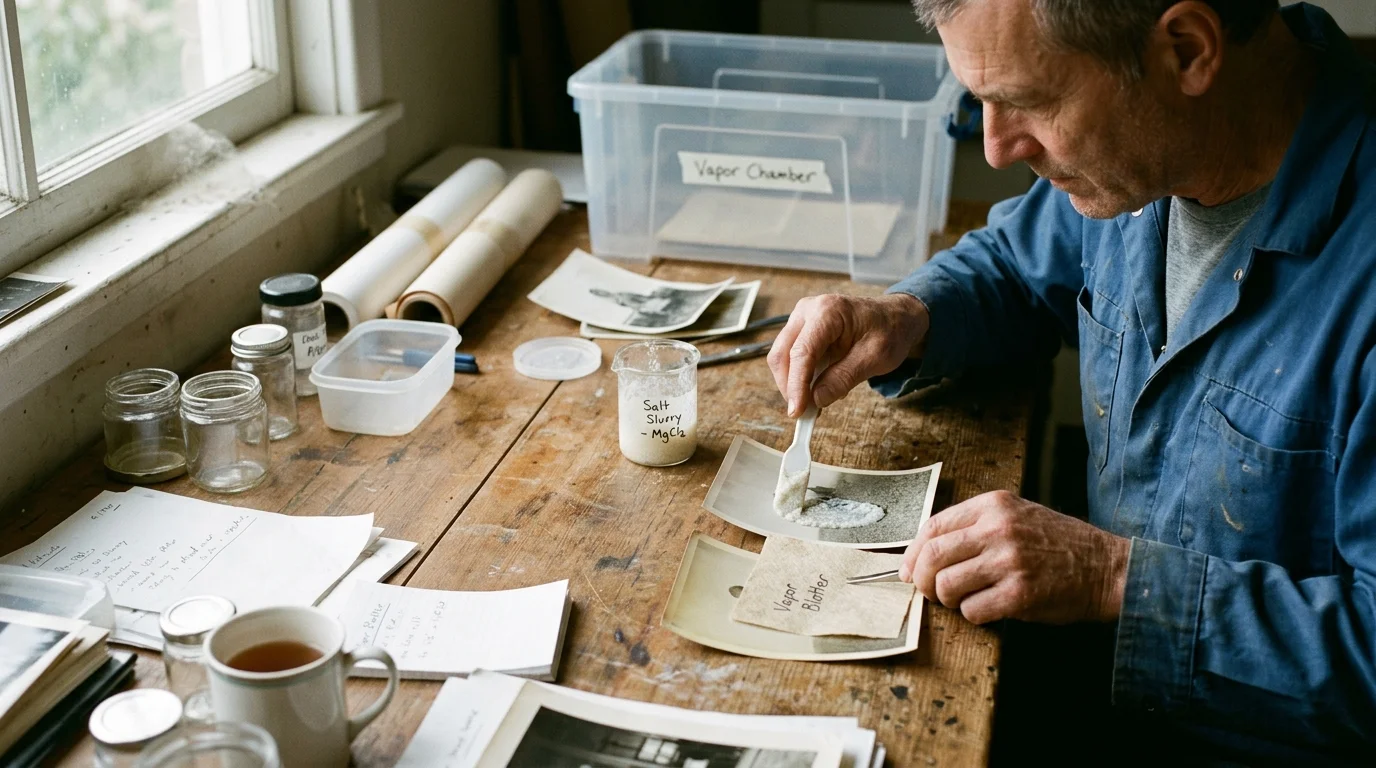
Conservators use saturated chemical salt solutions to maintain constant equilibrium vapor pressure inside sealed spaces. Each salt compound regulates humidity at a specific thermodynamic plateau.
The table below compares standard vapor sources across vital preservation metrics at 68°F (20°C).
| Vapor Generation Source | Equilibrium RH at 68°F | Buffer Mechanism | Condensation Risk | Suitability for Fused Emulsions |
|---|---|---|---|---|
| Saturated Sodium Chloride (NaCl) Slurry | 75.3% RH | Thermodynamic phase balance | Very Low | Optimal for primary snapshot separation |
| Saturated Potassium Nitrate (KNO3) Slurry | 93.6% RH | Thermodynamic phase balance | Moderate to High | Restricted to stubborn terminal layers only |
| Saturated Magnesium Nitrate (Mg(NO3)2) Slurry | 52.9% RH | Thermodynamic phase balance | None | Ideal for initial pre-conditioning stage |
| Distilled Water Wet Blotter Sheet | 98.0% to 100% RH | Passive unregulated evaporation | Critical / Severe | Unacceptable; causes rapid liquid pooling |
Never rely on wet paper towels or damp sponges for historical print salvage. Saturated blotters push interior humidity to complete saturation, creating airborne dew that coats the paper in damaging liquid droplets.
A sodium chloride slurry provides the safest working plateau for 1940s snapshot blocks. It maintains 75% relative humidity steadily, providing sufficient moisture to relax gelatin without crossing into the dangerous condensation zone.
Worked Case Study: Unsticking a 1944 Military Snapshot Brick
Let us examine an authentic salvage scenario involving eighteen fused gelatin silver prints recovered from a damp Pacific-theater ammo can. The prints date to November 1944 and measure 2.5 by 3.5 inches each.
The entire brick measures 22 millimeters thick. Rust particles line the outer paper edges, and the top photograph shows silver mirroring along its perimeter margins.
Begin by preparing your sodium chloride slurry inside an 8-by-6-inch Pyrex glass dish. Measure 350 grams of non-iodized, laboratory-grade pure sodium chloride into the dish.
Pour 120 milliliters of room-temperature distilled water over the salt. Stir the mixture using a glass rod until you achieve an even slush; visible, undissolved salt crystals must remain resting on the bottom.
Position the glass dish on the bottom floor of your 12-quart polypropylene chamber. Set the acrylic support grid on its 1.5-inch risers directly above the salt dish.
Cover the grid with a single layer of Hollytex spun polyester. Place your digital hygrometer probe next to the Hollytex surface, then position the fused print brick in the center.
Clamp the chamber lid shut with its four perimeter latches. Within 90 minutes at 68°F, your Bluetooth sensor should indicate that the interior atmosphere has stabilized at 75% relative humidity.
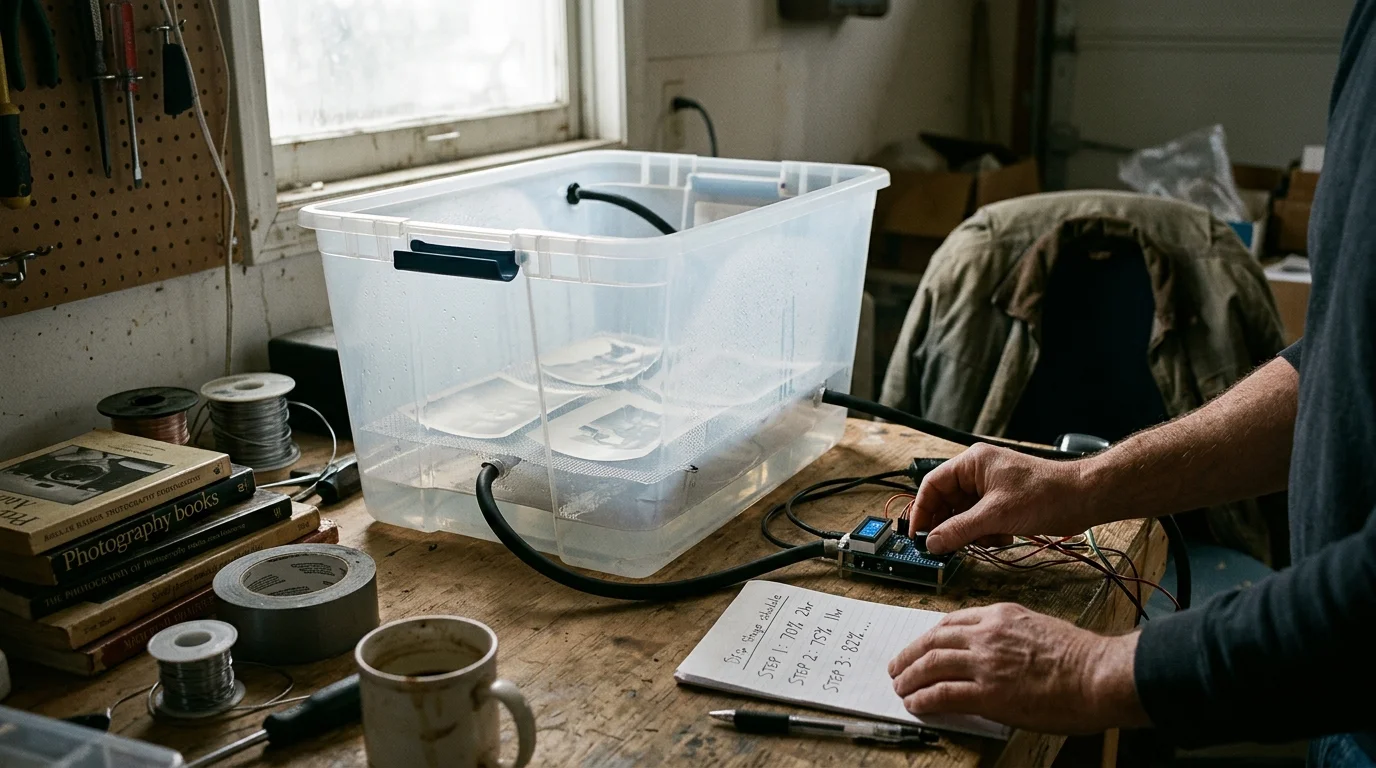
Multi-Stage Humidity Ramp Schedule
Shocking historical prints with sudden moisture shifts causes fiber curl and uneven surface expansion. Follow this three-phase rehydration schedule to unstick photo block without water damage.
Phase One involves initial pre-conditioning. If the print brick feels bone-dry and brittle, place it in a chamber regulated to 53% RH using a magnesium nitrate slurry for four hours.
This gentle pre-conditioning step relaxes stiff cellulose paper fibers before the emulsion layer absorbs significant moisture. Skipping this step often causes the brittle paper backing to fracture during later handling.
Phase Two delivers active gelatin rehydration. Move the brick into your 75% RH sodium chloride chamber for an uninterrupted six-hour exposure window.
At the four-hour mark, monitor the print edges through the transparent chamber wall. You will observe the curled print corners relaxing downward against the Hollytex support.
Phase Three involves mechanical testing and layer harvesting. Open the chamber inside a room held between 45% and 50% relative humidity, working swiftly within fifteen-minute intervals.
Controlled vapor rehydration relaxes cross-linked protein networks without dissolving them. The conservator must let atmospheric equilibrium do the heavy lifting before attempting mechanical separation.
Never leave fused photographs inside a high-humidity chamber for more than twelve continuous hours. Extended humidity cycles above 70% RH wake dormant mold spores that consume historical paper sizes.
Review the biological preservation guidelines provided by the National Archives Preservation division if your snapshots exhibit powdery white or black mold outbreaks.
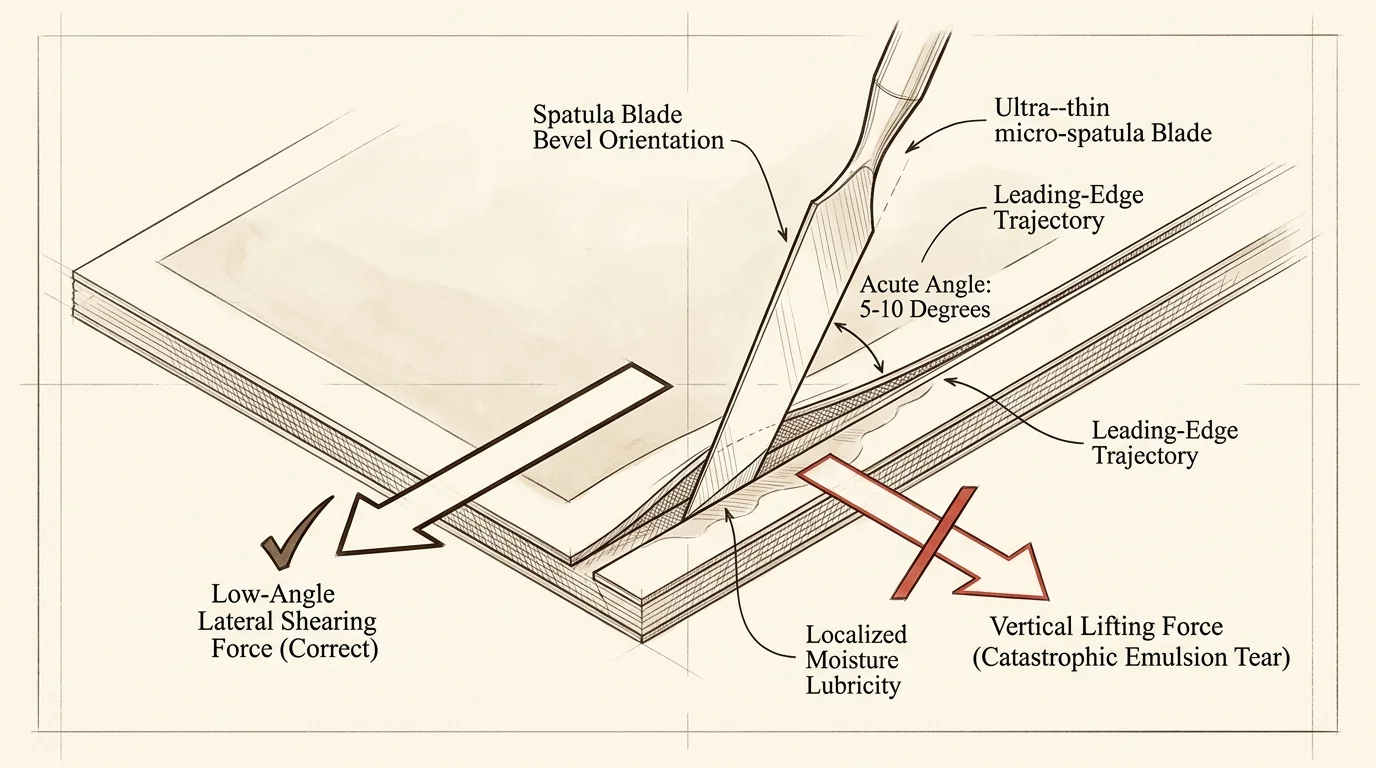
Precision Micro-Spatula Separation Mechanics
Rehydration softens the adhesive gelatin bond, but rarely causes prints to slide apart automatically. You must guide the separation using micro-mechanical tools under controlled lighting.
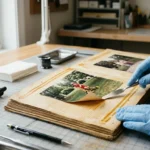
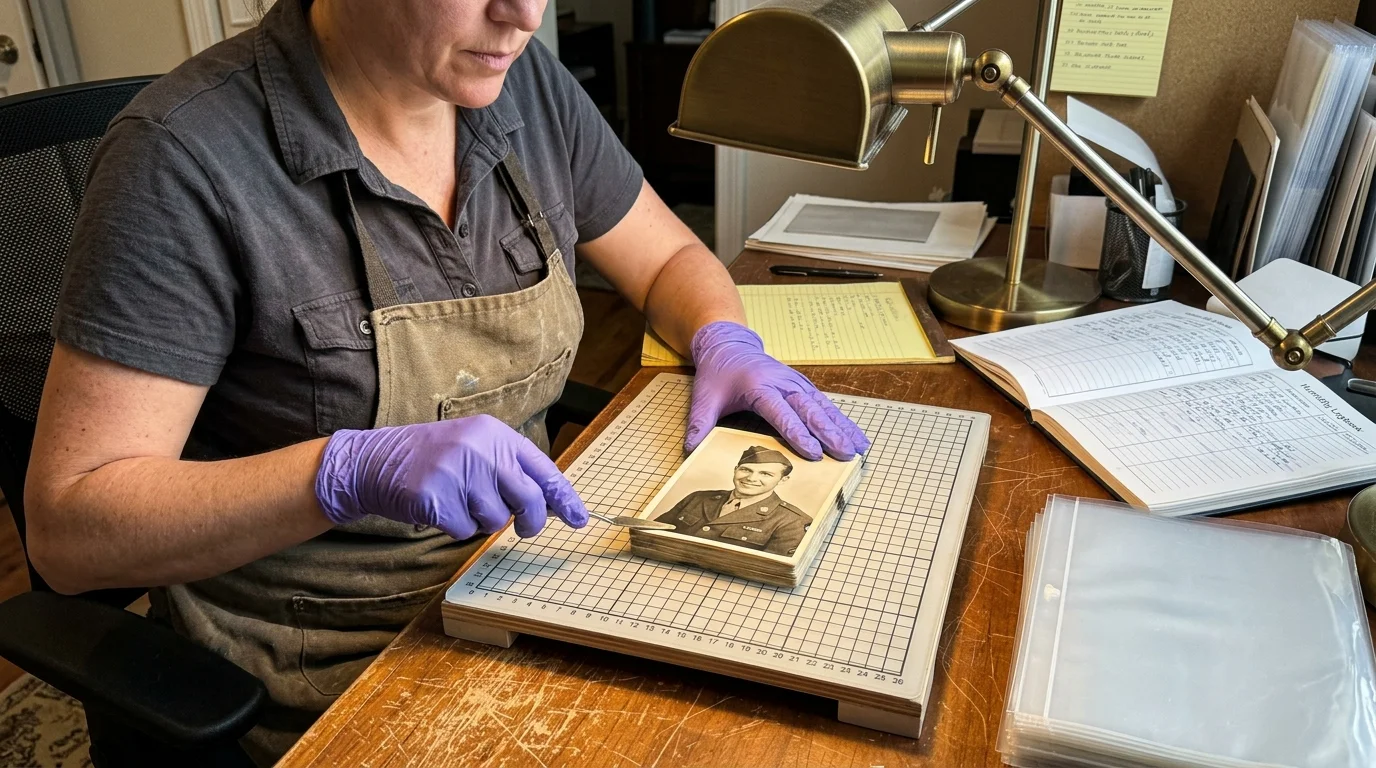
Place the rehydrated brick flat on a clean self-healing cutting mat under an adjustable task lamp. Keep your fingers protected with lint-free cotton or nitrile gloves to avoid transferring hand oils.
Examine the four corners of the top snapshot using a 5x jeweler’s loupe. Look for areas where the paper base has lifted naturally from the emulsion beneath it.
Hold your PTFE-coated micro-spatula at a flat, ten-degree angle relative to the print surface. Never insert the blade at a steep angle, or you will puncture the swollen paper base.
Gently slide the micro-spatula blade into the lifted margin. Move the blade in a horizontal sawing motion across the width of the bond, advancing no more than two millimeters per pass.
As the blade advances, slip a pre-cut strip of 2-mil Melinex polyester film into the newly opened gap. This barrier film prevents the tacky, rehydrated gelatin from sealing itself back down while you work.
If you encounter rigid resistance at any point, stop immediately. Never force the tool through a dry bridge, as forcing the spatula guarantees emulsion tear-out.
Return the remaining fused block to the 75% RH chamber for another two-hour hydration interval. The stubborn adhesive junction will yield once ambient moisture penetrates the deeper paper core.
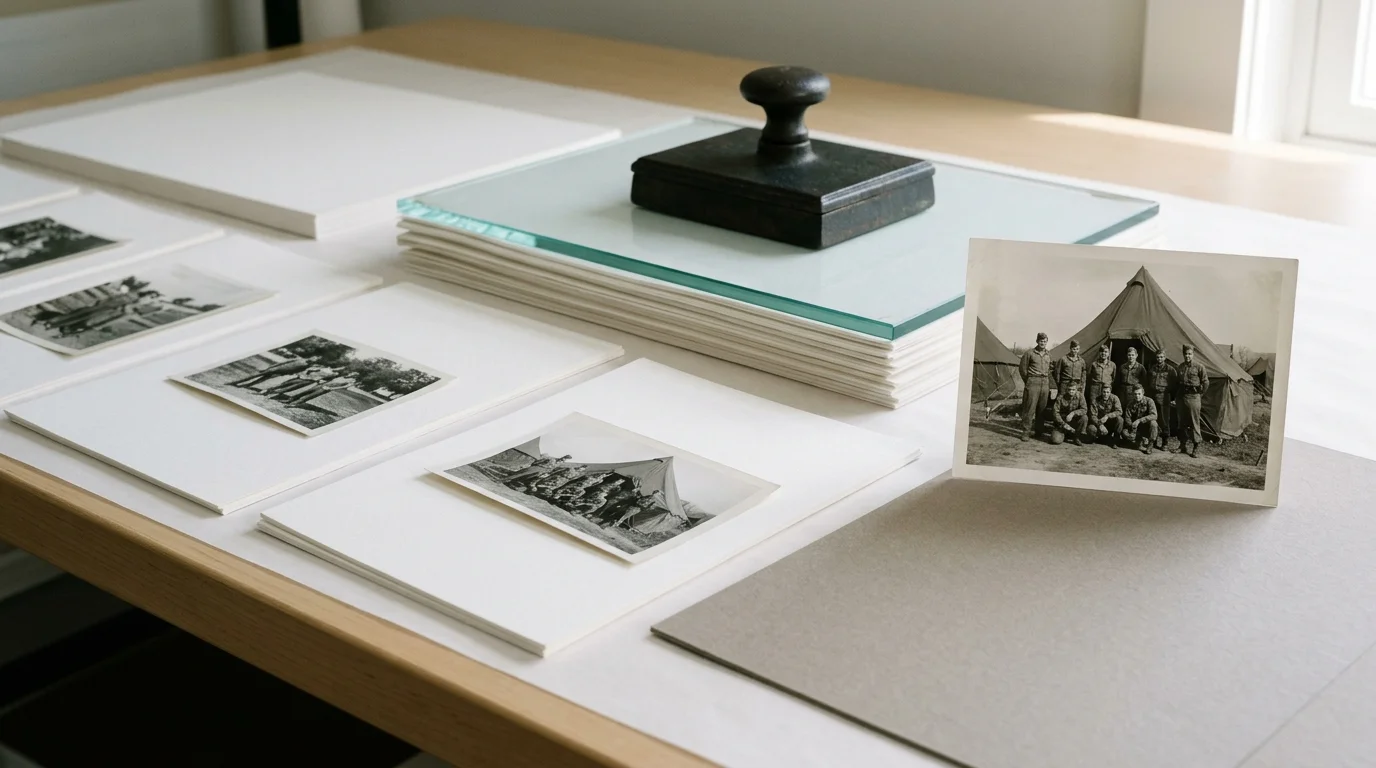
Archival Drying, Flattening, and Long-Term Curing
A separated print is not a saved print until you dry and stabilize it under controlled pressure. Freshly detached photographs hold excess moisture, making their emulsion layers hypersensitive to friction.
Set each separated snapshot face up on a clean support sheet of Hollytex. Never place wet emulsion directly against standard blotter paper, because drying gelatin will bond permanently to the blotter fibers.
Assemble an archival drying stack using alternating layers. Place an acid-free cotton rag blotter on a flat table, lay your Hollytex-supported print on top, cover it with a second sheet of Hollytex, and cap it with another blotter.
Rest a 0.25-inch sheet of flat cast acrylic over the blotter sandwich. Place a balanced three-pound weight on top of the acrylic board to distribute flat, uniform downward pressure.
Allow the print to dry under compression for two hours. Open the stack, remove the slightly damp blotters, and substitute fresh, bone-dry cotton blotters while keeping the Hollytex contact layers intact.
Leave the assembly under pressure for forty-eight hours in a room maintained at 45% relative humidity. This slow, weighted desorption cycle forces paper fibers to dry flat while curing the softened gelatin binder permanently.
Once dried, house your preserved snapshots in archival polyester sleeves or acid-free paper envelopes to prevent future moisture damage.
Frequently Asked Questions
Can I use an ordinary food dehydrator to speed up the drying process?
No, you should never use a heated dehydrator on historic photographs. Forced heat causes rapid, uneven shrinkage that cracks fragile emulsion and curls paper mounts irreversibly.
What should I do if the prints develop an active mold bloom inside the chamber?
Remove the photographs from the enclosure immediately and seal them in an airtight bag. Place the bagged prints in a dark freezer at 0°F to arrest fungal growth before consulting a conservator.
Can this vapor chamber technique separate color photographs from the 1970s?
Color chromogenic prints feature multiple dye layers that behave differently than gelatin silver prints. While the physical chamber functions identically, color emulsions swell faster and require lower humidity thresholds.
Is distilled water necessary for the chemical salt slurry?
Yes, you must always use distilled water rather than municipal tap water. Tap water contains chlorine, fluoride, and minerals that vaporize or foster biological contamination inside the humid chamber.
Disclaimer: This article is for informational purposes only. When handling valuable or irreplaceable photographs, consider consulting a professional conservator. Always test preservation methods on non-valuable items first.