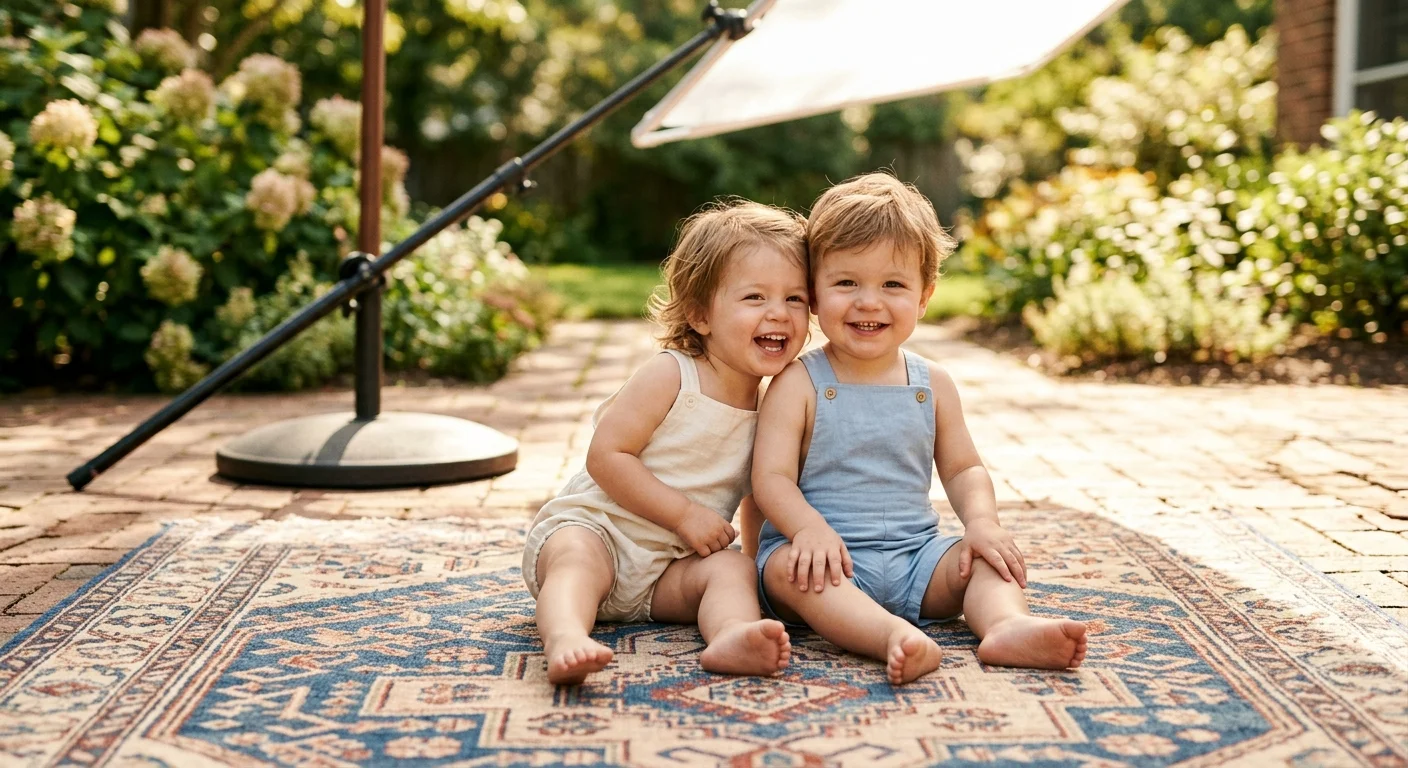
Capturing sharp, even portraits of active twin toddlers in direct noon sunlight feels impossible when you work alone on an open patio. Harsh midday light casts severe raccoon-eye shadows into their eye sockets and blows out delicate skin highlights.
You do not need an assistant, sandbagged C-stands, or complex off-camera flash units to fix this lighting nightmare. A single cast-iron patio umbrella base combined with a 43-inch collapsible diffuser transforms overhead glare into soft portrait illumination.
This guide shows you how to assemble an untippable, solo-friendly overhead scrim rig so you can diffuse harsh sunlight DIY style and preserve milestone portraits safely.
The Physics of Overhead Noon Sun on Toddler Faces
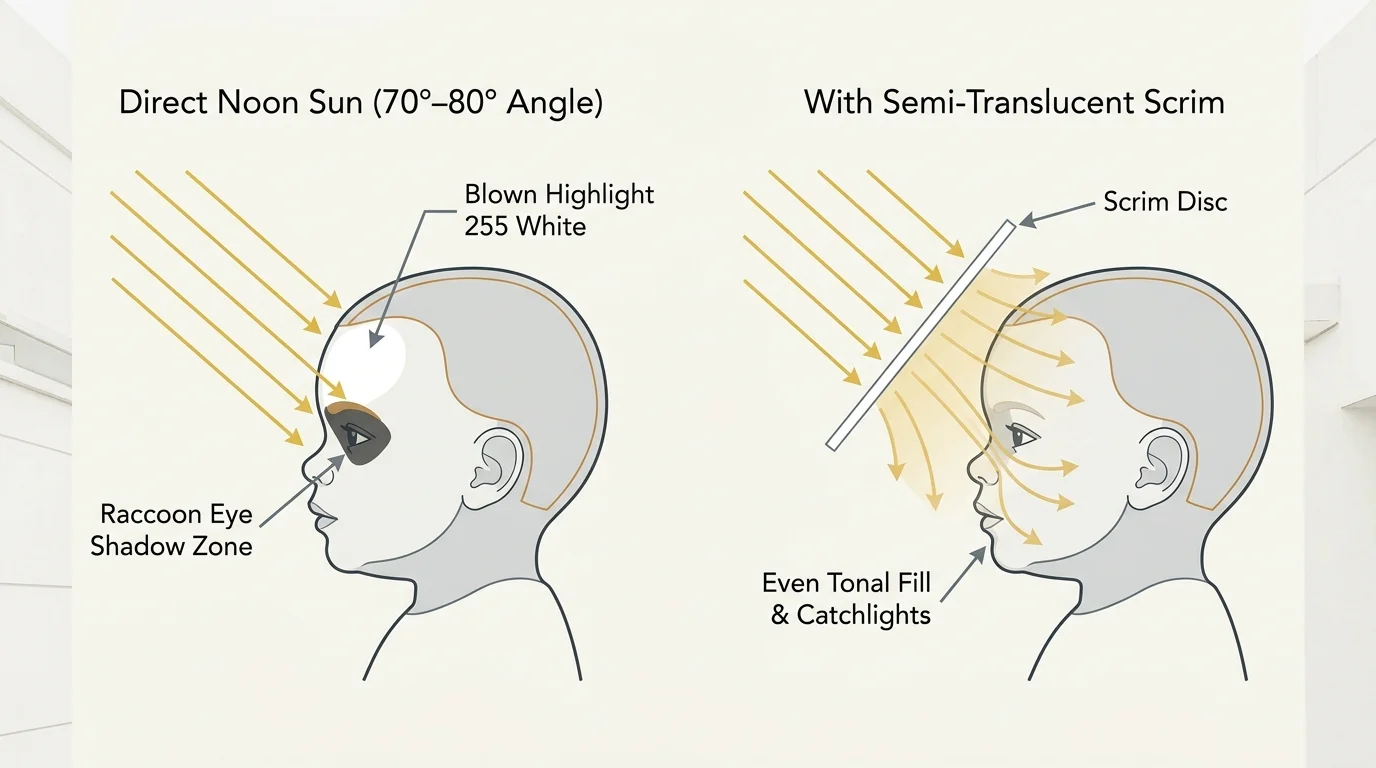
Between 11:00 AM and 2:00 PM, summer solar elevation approaches 70 to 80 degrees across most temperate latitudes. This near-vertical angle strikes the top of the head first, casting harsh downward shadows across facial features.
Toddler anatomy makes these lighting angles uniquely problematic. Their developing facial structures feature deep eye sockets, button noses, and prominent upper cheeks that trap heavy drop shadows.
The resulting shadow pattern—often called raccoon eyes—plunges the eyes into total darkness while blinding the camera sensor. Meanwhile, unshaded foreheads and shoulders reflect intense white hot spots that lose all skin texture.
Understanding dynamic range limitations helps explain why digital cameras struggle in noon sunlight. As explained in tutorials on dynamic range by Cambridge in Colour, modern camera sensors capture far less tonal range than human vision.
When shooting harsh midday family photos without diffusion, the camera sensor cannot record both dark eye sockets and sunlit skin. If you expose for the eyes, skin highlights wash out completely into pure white.
If you expose to preserve skin highlights, their eyes become pitch-black voids devoid of warmth or expression. Solving this physical contrast problem requires altering the light source before it strikes your toddlers.
A semi-translucent scrim acts as a secondary light source positioned immediately above your subjects. It scatters direct, parallel solar rays into multidirectional, diffused illumination that fills facial shadows naturally.
Rig Safety: The Anchored Umbrella Stand Foundation
Safety takes absolute priority when photographing mobile twins under age two without adult assistance. If you take your eye off your equipment for a single second, unstable gear can collapse onto your children.
Standard aluminum light stands represent an extreme tipping hazard on urban patios. Their featherweight tubes and narrow leg spreads cannot withstand the sail-like wind resistance generated by a large diffusion panel.
Even with ten-pound saddle sandbags draped over the legs, a sudden five-mile-per-hour breeze can twist and topple an aluminum stand. On concrete pavers, that impact can cause severe physical injury to a curious toddler.
Heavy-duty steel C-stands provide improved rigidity, but their protruding staggered legs introduce major tripping hazards on tight patios. Furthermore, moving a thirty-pound C-stand while supervising two walking toddlers creates an unmanageable solo workload.
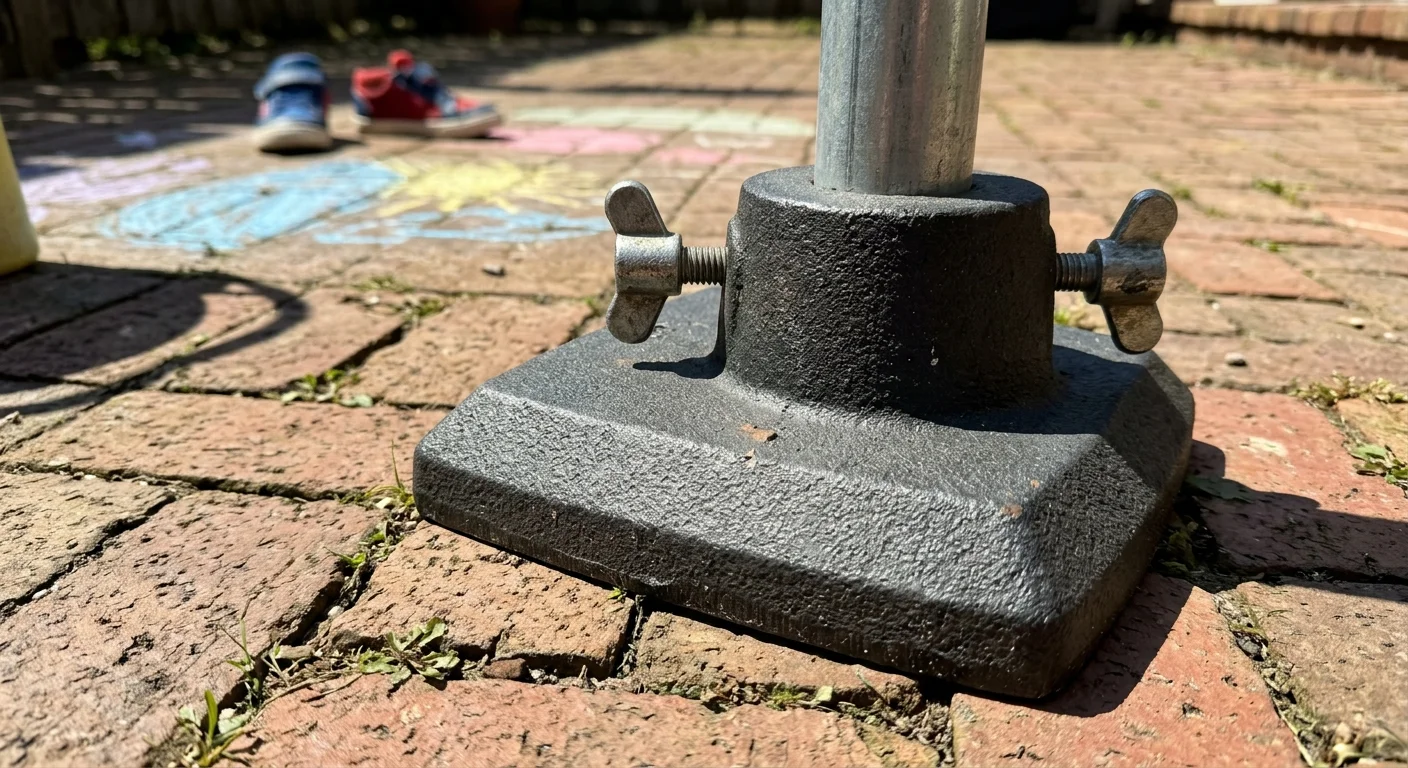
A heavy patio umbrella base solves these stability problems with simple physics. Its dense cast-iron or concrete construction places 45 to 55 pounds of mass directly on the patio floor.
The circular, low-profile footprint eliminates protruding legs that snag running toddler feet. Even if an energetic toddler stumbles into the base, the low center of gravity prevents the rig from tipping over.
A low center of gravity combined with a wide, flat footprint provides far greater tip resistance on outdoor hardscaping than weighted tripod legs.
By anchoring your overhead diffusion setup into an umbrella base, you build an immovable lighting station. You can focus entirely on managing your twins instead of worrying about falling hardware.
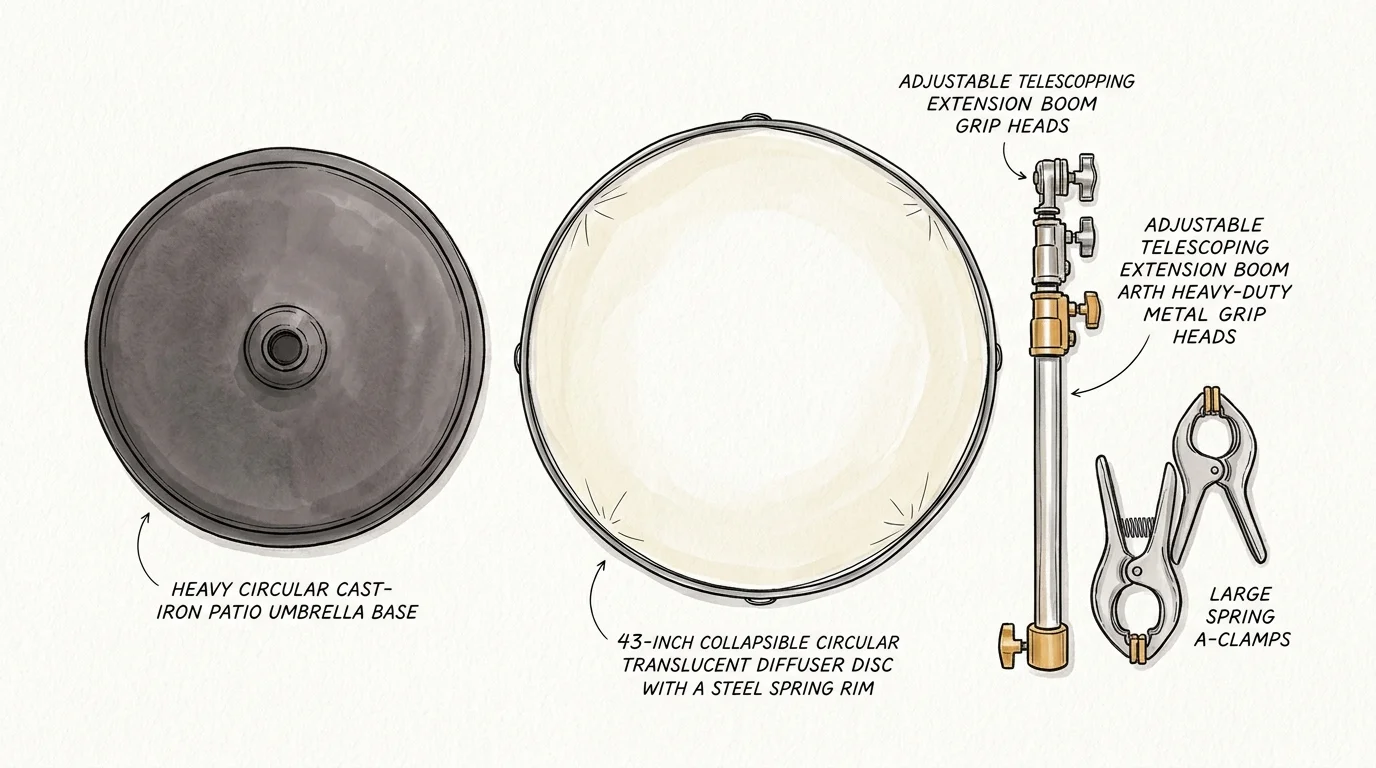
Materials and Hardware Breakdown for Solo Assembly
Building this outdoor lighting rig requires modular equipment engineered for high mechanical strength and rapid solo assembly. You do not need specialized tools or custom fabrication to build a reliable setup.
Every component should disassemble into manageable pieces that fit through standard patio sliding doors in a single trip. The following hardware list provides the exact dimensions and specifications required for maximum stability.
- Cast-Iron Patio Umbrella Base (45–55 lbs): Select a flat circular model, such as the US Weight 50-pound base, featuring dual collar locking knobs for 1.5-inch poles.
- Rigid Steel Riser Tube (6 feet): Use an Impact 1.5-inch diameter umbrella extension pole or heavy-gauge galvanized conduit pipe capable of supporting cantilevered loads without flexing.
- Heavy-Duty Clamp with 5/8-inch Stud: Choose a genuine Manfrotto 035 Super Clamp equipped with a standard brass 5/8-inch baby pin to lock onto the vertical pipe.
- Telescoping Reflector Holder Arm: Use an Impact or Neewer multi-angle boom arm with dual spring-loaded rim clips to grip collapsible panel borders firmly.
- 43-Inch 5-in-1 Collapsible Disc: Unzip and remove the reversible silver/gold/black cover, exposing the core white translucent diffusion scrim panel.
- Spring Clamps (Optional Safety Backup): Keep two two-inch rubberized Pony spring clamps on hand to reinforce the grip between the panel frame and the holder arm.
The 43-inch circular panel size represents the ideal balance between coverage area and wind resistance. A smaller 32-inch disc cannot shade two toddlers simultaneously, while a 60-inch oval disc catches excessive wind on open patios.
Investing in solid aluminum clamps with positive locking teeth prevents the horizontal arm from creeping downward during shooting. Plastic mounting hardware will slip under sustained outdoor heat and solar exposure.
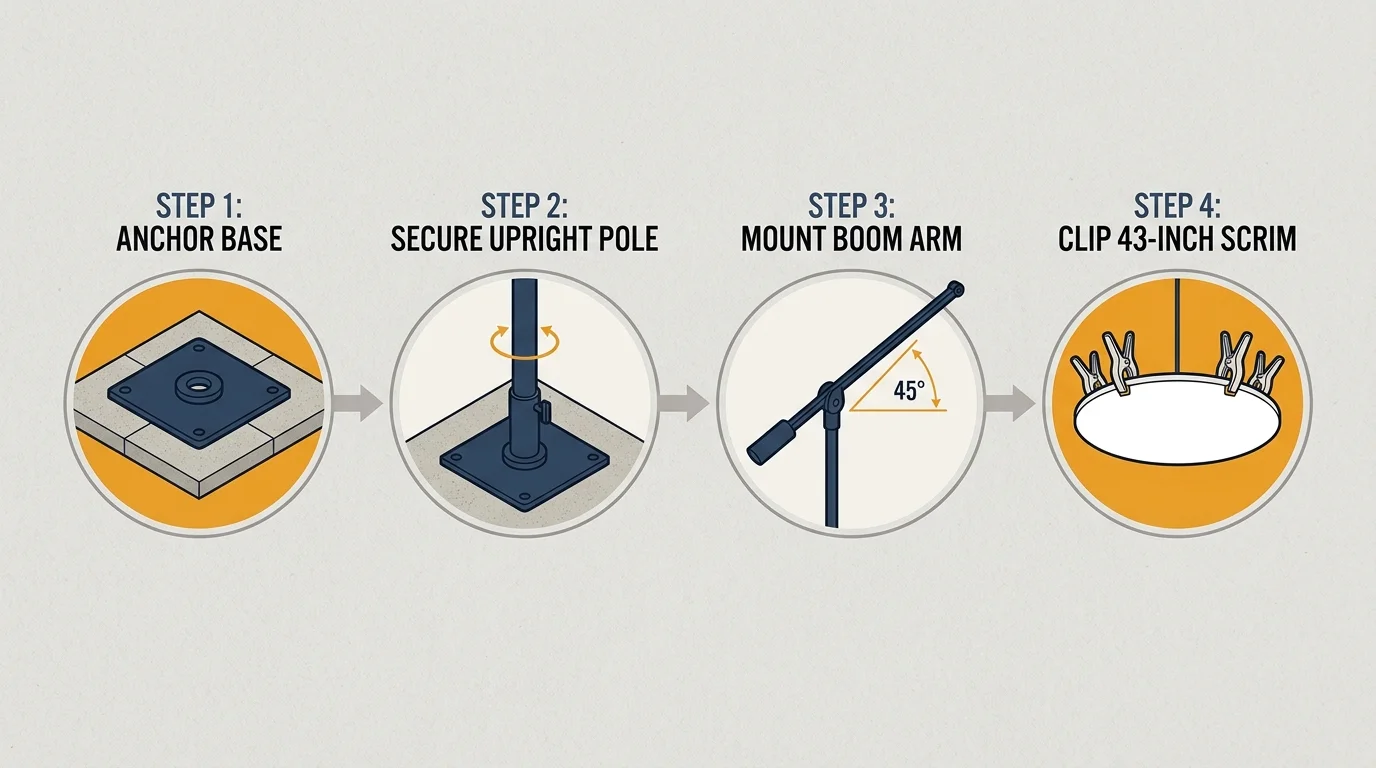
Step-by-Step Rig Assembly on an Urban Patio
Complete your entire mechanical assembly before bringing your twin toddlers outside onto the patio. Setting up equipment while toddlers roam unattended on concrete hardscaping invites accidents and divided attention.
First, position your 50-pound umbrella base on a level section of patio pavers. Test for wobbling by stepping on the perimeter; shim beneath the base with rubber furniture pads if pavers are uneven.
Slide the vertical steel riser pole into the base receiver tube until it seats fully against the bottom stop. Tighten both collar hand-screws firmly with your fingers, then verify the pipe resists twisting.
Attach the Manfrotto 035 Super Clamp to the riser pole at roughly five feet from the ground. Position the clamp jaw so the attached 5/8-inch stud points directly toward your planned seating zone.
Mount your telescoping reflector holder arm onto the stud and tighten the locking collar screw until rigid. Extend the horizontal telescoping shaft outward approximately 26 inches from the vertical riser pole.
Unspring the 43-inch translucent diffusion disc from its zippered storage pouch. Snap the spring-steel hoop into the holder clips, positioning the disc directly above your portrait bench.
This reliable configuration allows you to diffuse harsh sunlight DIY style without risking sudden mechanical slippage. Tilt the circular disc at a twenty-degree angle toward the noon sun to maximize diffused light throughput.
Perform a final stability pull test by grasping the horizontal arm and applying moderate downward pressure. The heavy base should remain completely flat against the patio stones without rocking or shifting.
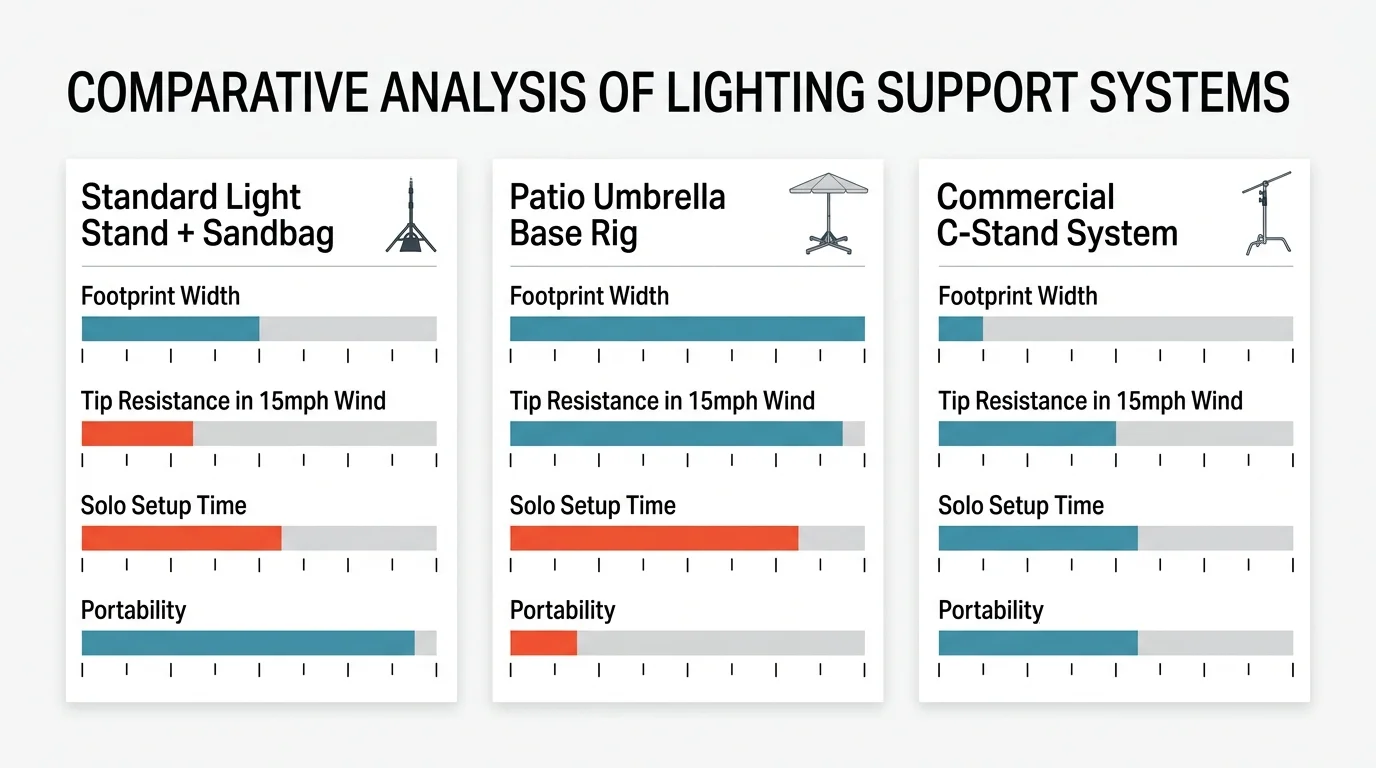
Diffusion Rig Options: Measurable Stability and Setup Metrics
Choosing the right rig design requires evaluating physical stability, footprint clearance, and assembly logistics. When working unassisted with young toddlers, gear failure is not an option.
The table below compares four practical overhead diffusion setups using quantifiable field metrics gathered across hard patio surfaces.
| Rig Configuration | Base Mass | Patio Footprint | Wind Survival | Solo Setup Time | Est. Cost |
|---|---|---|---|---|---|
| Lightweight Aluminum Stand + 10-lb Sandbag | 13 lbs | 38 in tripod spread | 6 mph gust | 4 minutes | $45 |
| Heavy-Duty C-Stand + 25-lb Sandbag | 36 lbs | 42 in staggered legs | 14 mph gust | 8 minutes | $190 |
| DIY 50-lb Patio Base + Extension Pole | 53 lbs | 20 in flat disc | 22 mph gust | 5 minutes | $115 |
| Commercial Heavy-Duty Studio Boom Rig | 68 lbs | 48 in rolling base | 18 mph gust | 15 minutes | $340 |
As the comparison highlights, the 50-pound umbrella base setup yields the highest wind resistance while demanding the smallest patio footprint. Its compact circular profile eliminates sprawling tripod legs that trip energetic toddlers.
In contrast, lightweight stands fail dangerously in modest wind, while commercial studio booms prove far too cumbersome to move through residential doorways alone. The umbrella base strikes the perfect compromise.
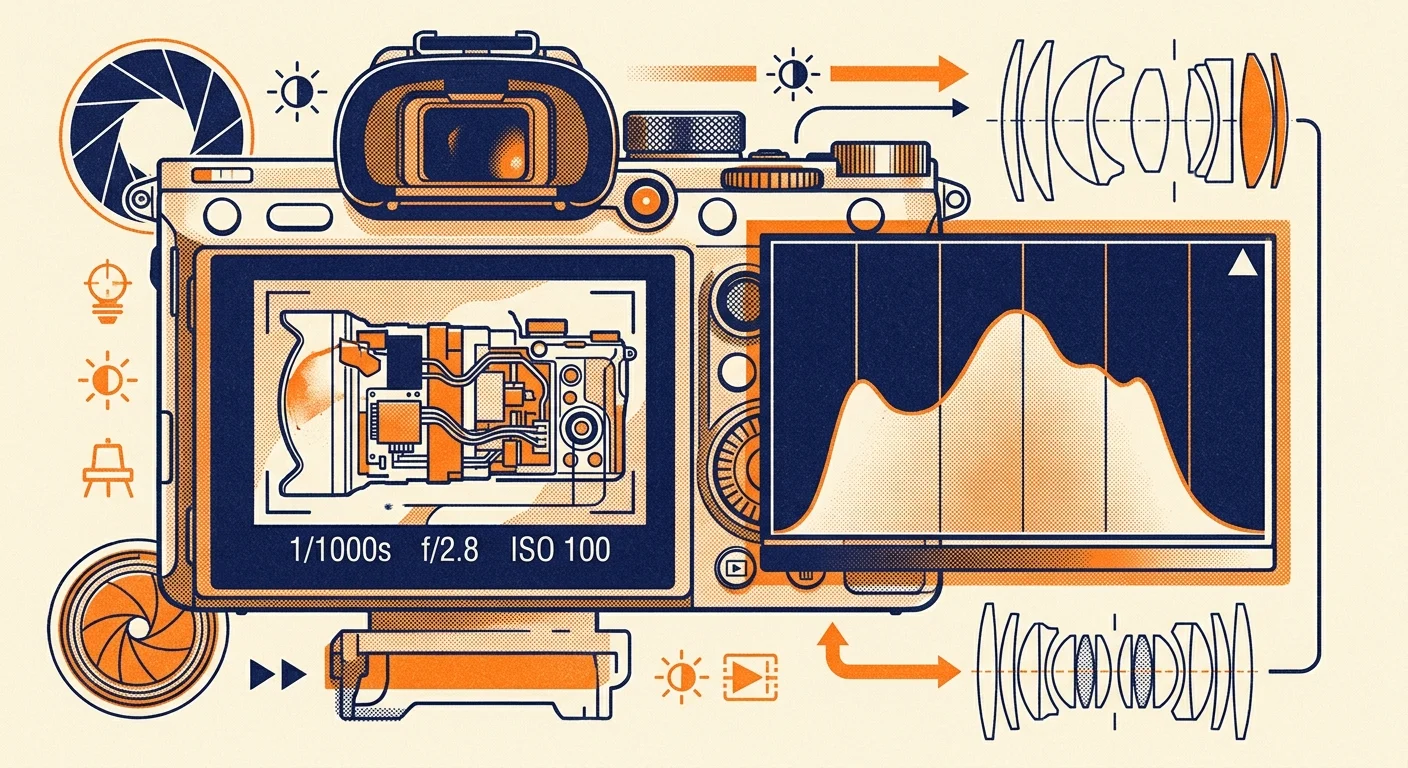
Camera Settings and Exposure: A Real-World Worked Scenario
Let us examine an actual portrait scenario conducted on a flagstone urban patio at 12:20 PM on July 18. Ambient sunlight registered at a blinding EV 15 under a cloudless midsummer sky.
The subjects were 22-month-old twin girls dressed in light linen rompers, seated together on a low wooden cedar crate. The 43-inch translucent diffuser was anchored 22 inches directly above their heads.
An incident light meter reading revealed that the diffusion disc reduced overhead light intensity by 1.6 stops. This converted the harsh EV 15 glare into a gentle, highly workable EV 13.4 exposure value.
The camera was equipped with an 85mm portrait prime lens set to an aperture of f/2.2. This wide aperture isolated both toddlers against a softly blurred patio garden background while maintaining critical focal depth.
The shutter speed was set to 1/1600 of a second to eliminate motion blur from rapid toddler gestures. The sensor sensitivity was locked at base ISO 100 to maximize dynamic range and color rendition.
Metering mode was switched to highlight-weighted metering to protect pale skin tones and linen highlights from digital clipping. As documented in camera sensor evaluations on Digital Photography Review, modern digital sensors recover clean shadow detail with ease when highlights remain unclipped.
This precise combination of camera settings and overhead diffusion softened eye socket shadows completely. Catchlights appeared naturally across their irises, and delicate skin tones remained fully preserved across the digital frame.
Executing direct sun portrait toddlers solo shoots successfully depends on mastering these repeatable exposure values. Once you dial in the math, you eliminate guessing and capture consistent milestone images every time.
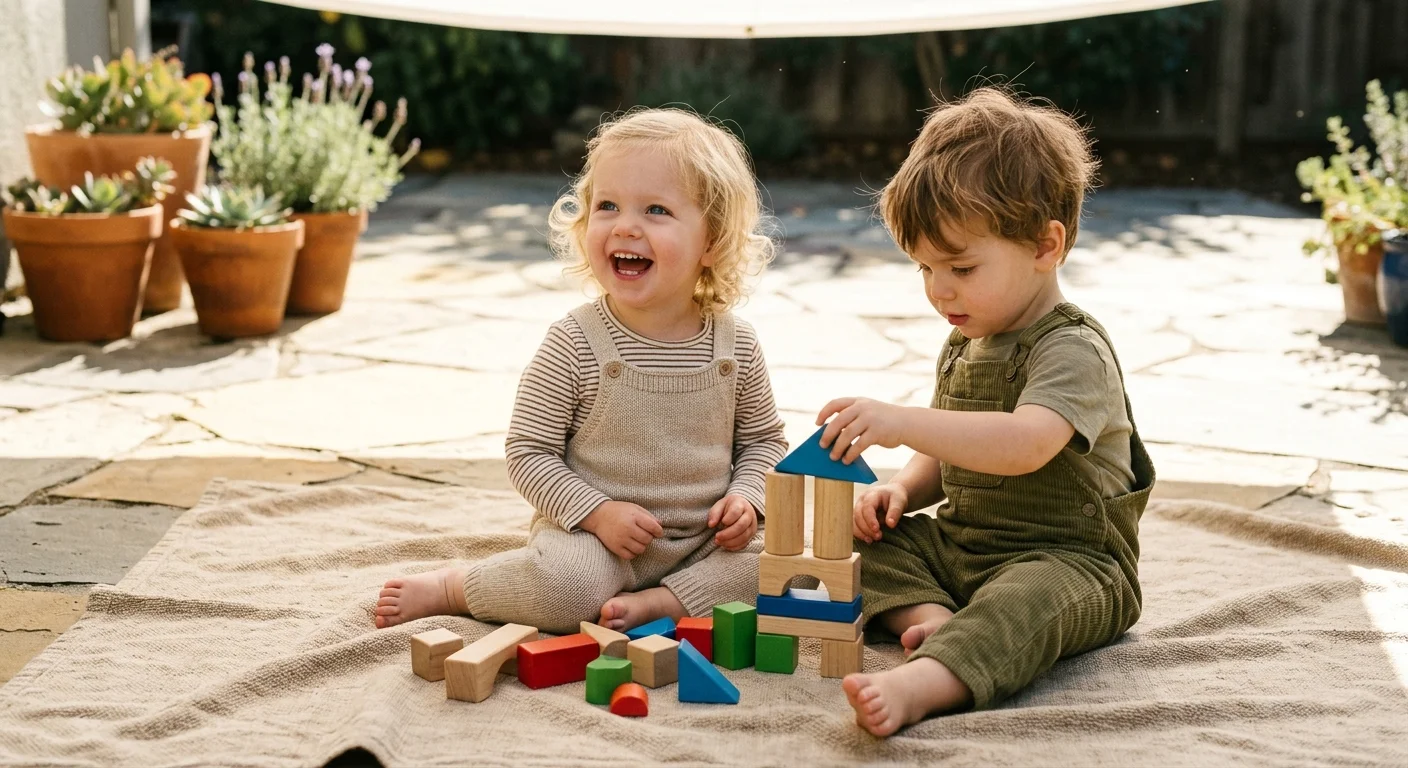
Managing Active Twins Under a Four-Foot Light Zone
A 43-inch circular scrim casts an optimal diffusion pool roughly 48 inches in diameter onto the ground. Keeping two independent 20-month-old toddlers positioned inside this lighting zone requires smart environmental staging.
Forcing toddlers to remain still or directing them with verbal commands invariably causes tears or rapid retreats. Instead, arrange a comfortable physical anchor that naturally invites them to sit together voluntarily.
A wide, low wooden bench or vintage wooden step stool raised four to six inches off the ground works wonders. The elevation provides a distinct physical boundary that toddlers instinctively understand and enjoy climbing onto.
Place a single, high-interest tactile prop between them, such as an unvarnished wooden stacking puzzle or an open picture book. Focusing their attention on an engaging object keeps their hands busy and bodies aligned under the scrim.
Position yourself kneeling approximately eight feet away to match their eye height with your camera lens. Shooting from adult eye level looking down reinforces unflattering head angles and emphasizes receding patio pavement.
Configure your camera autofocus to continuous mode (AF-C) paired with automatic animal or human eye-detection tracking. This automation allows you to compose frames and interact verbally while the camera locks focus continuously.
Capture short, rapid bursts of three to four frames when the twins make eye contact or laugh together. This shooting technique ensures you freeze joyful expressions without waiting for unpredictable poses.
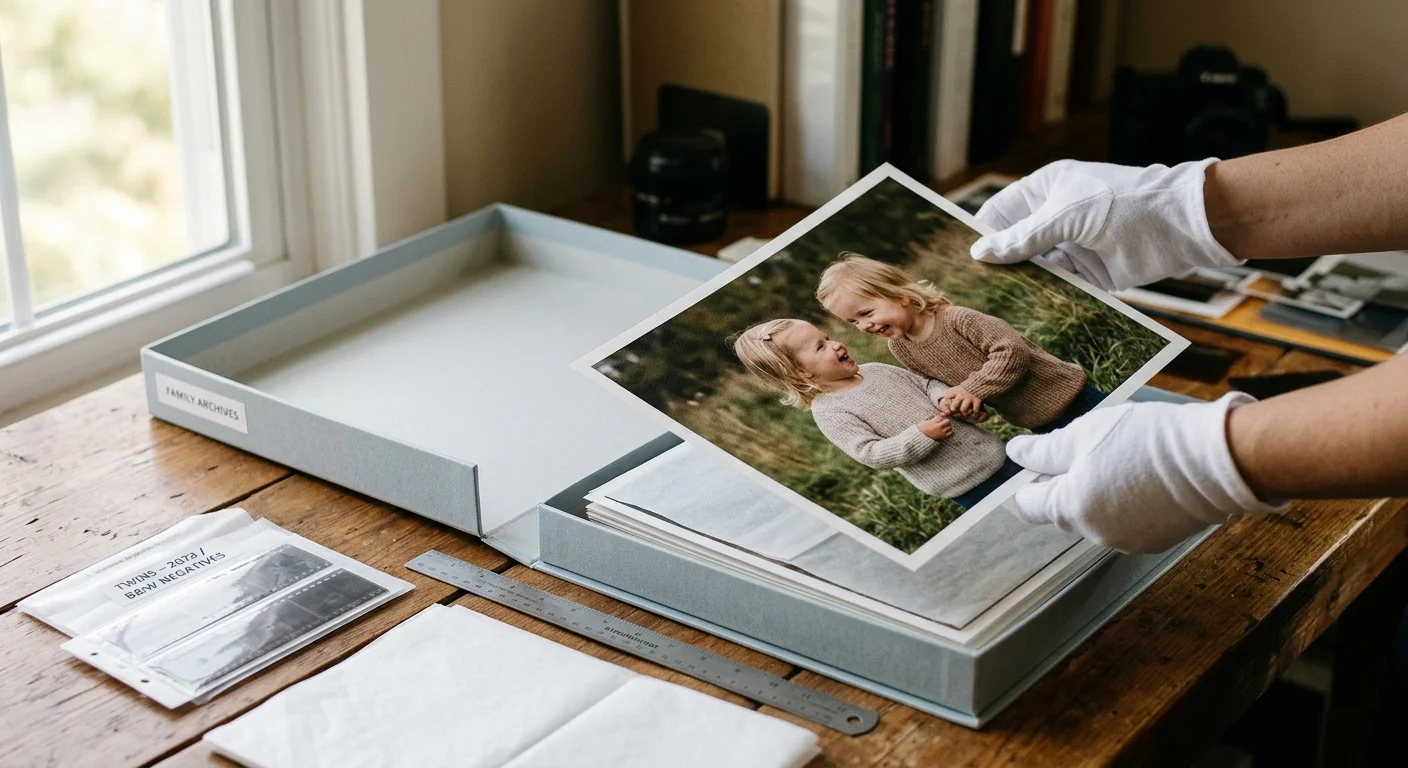
Preserving and Archiving Your Milestone Digital Prints
Producing gorgeous milestone portraits under midday sunlight is only the first step in creating lasting family keepsakes. Taking thoughtful preservation measures guarantees that these precious photographs endure for future generations.
Always shoot in uncompressed RAW format to retain all the color data and dynamic range recorded by your sensor. Export finished edits into 16-bit TIFF files for permanent digital archiving alongside your original RAW masters.
Store digital image files using the standard 3-2-1 backup strategy across multiple physical storage mediums. Maintain three copies of each milestone session across two distinct physical drives, with one copy stored off-site.
When creating physical prints for family albums, avoid standard commercial drug store photo kiosks. Cheap dye-sublimation and low-tier chromogenic prints degrade rapidly, exhibiting noticeable yellowing and fading within ten to fifteen years.
Order fine art pigment prints produced on 100% cotton rag paper with neutral pH and no optical brightening agents. Pigment-based mineral inks bonded to cotton fibers resist light-induced fading for over two hundred years.
Photographic prints must be sheltered from volatile organic compounds, unstable humidity, and direct UV radiation to maintain image density over generations.
For physical album assembly, consult the archival guidelines published by the Library of Congress Preservation team. Store individual prints inside chemically inert, uncoated polyester sleeves such as archival Melinex or high-density polyethylene.
Never use vintage self-adhesive magnetic photo albums, which contain acidic glues and polyvinyl chloride films that ruin emulsions. Instead, use archival paper photo corners that allow physical prints to be removed without damage.
Place your finished albums inside acid-free, lignin-free drop-front archival boxes buffered with a two-percent calcium carbonate reserve. Store the storage boxes in an interior living space where temperature and relative humidity remain stable year-round.
Frequently Asked Questions
Can I use a translucent white photography umbrella instead of a circular 5-in-1 diffusion hoop?
A shoot-through umbrella can diffuse sunlight, but its curved bowl shape catches significantly more wind than a flat disc. The flat profile of a 43-inch 5-in-1 panel minimizes aerodynamic lift and provides superior stability on breezy urban patios.
How do I adjust the rig as the midday sun moves across the patio sky?
Between 11:30 AM and 1:30 PM, solar movement shifts the overhead angle by roughly fifteen degrees per hour. Simply loosen the super clamp hand-screw slightly and rotate the horizontal boom arm to keep the diffusion disc aligned over your subjects.
What if one of my twin toddlers tries to climb or pull on the vertical pole?
A 50-pound cast-iron umbrella base resists tipping from typical toddler pulling forces due to its broad, low-profile center of mass. Nevertheless, always position your seating bench twelve to eighteen inches away from the vertical mast to discourage climbing attempts.
Can I use a cheap bedsheet or curtain sheer as a DIY overhead diffuser?
Household bedsheets and drapery sheer fabrics introduce unpredictable optical color casts, often tinting toddler skin greenish or yellow. Standard photographic nylon scrim panels provide neutral optical density, ensuring pure white highlights and accurate, life-like skin tones.
Disclaimer: This article is for informational purposes only. When handling valuable or irreplaceable photographs, consider consulting a professional conservator. Always test preservation methods on non-valuable items first.